Related Topics
Cloud Recovery in UEFI BIOS - Introduction
Applicable Products: Notebook, Desktop, All-in-One PC, Gaming Handheld
The Cloud Recovery function allows you to restore your computer's operating system in just a few steps without installing drivers.
To provide you more detailed instruction, you can also click ASUS YouTube video link below to know more about How to use Cloud Recovery in UEFI:
https://www.youtube.com/watch?v=QDtthnHv4ik
- System Requirement
- How to enter the UEFI BIOS
2.1 Consumer Notebook
2.2 Commercial Notebook\Desktops\All-in-One PCs
2.3 Gaming Notebook\Gaming Desktops\ROG Ally - Execute the Cloud Recovery
- Cloud Recovery is not accessible
4.1 This project does not support Cloud Recovery
4.2 Device information is missing
4.3 No WiFi icon - Q&A
- You can click here to find out if your Asus laptop supports Cloud Recovery within UEFI BIOS
- If the initial system is Windows 11 Home S mode, this feature is not supported
- Local backup requires an external storage device
- Cloud Recovery require LAN or Wi-Fi network
- Power supply
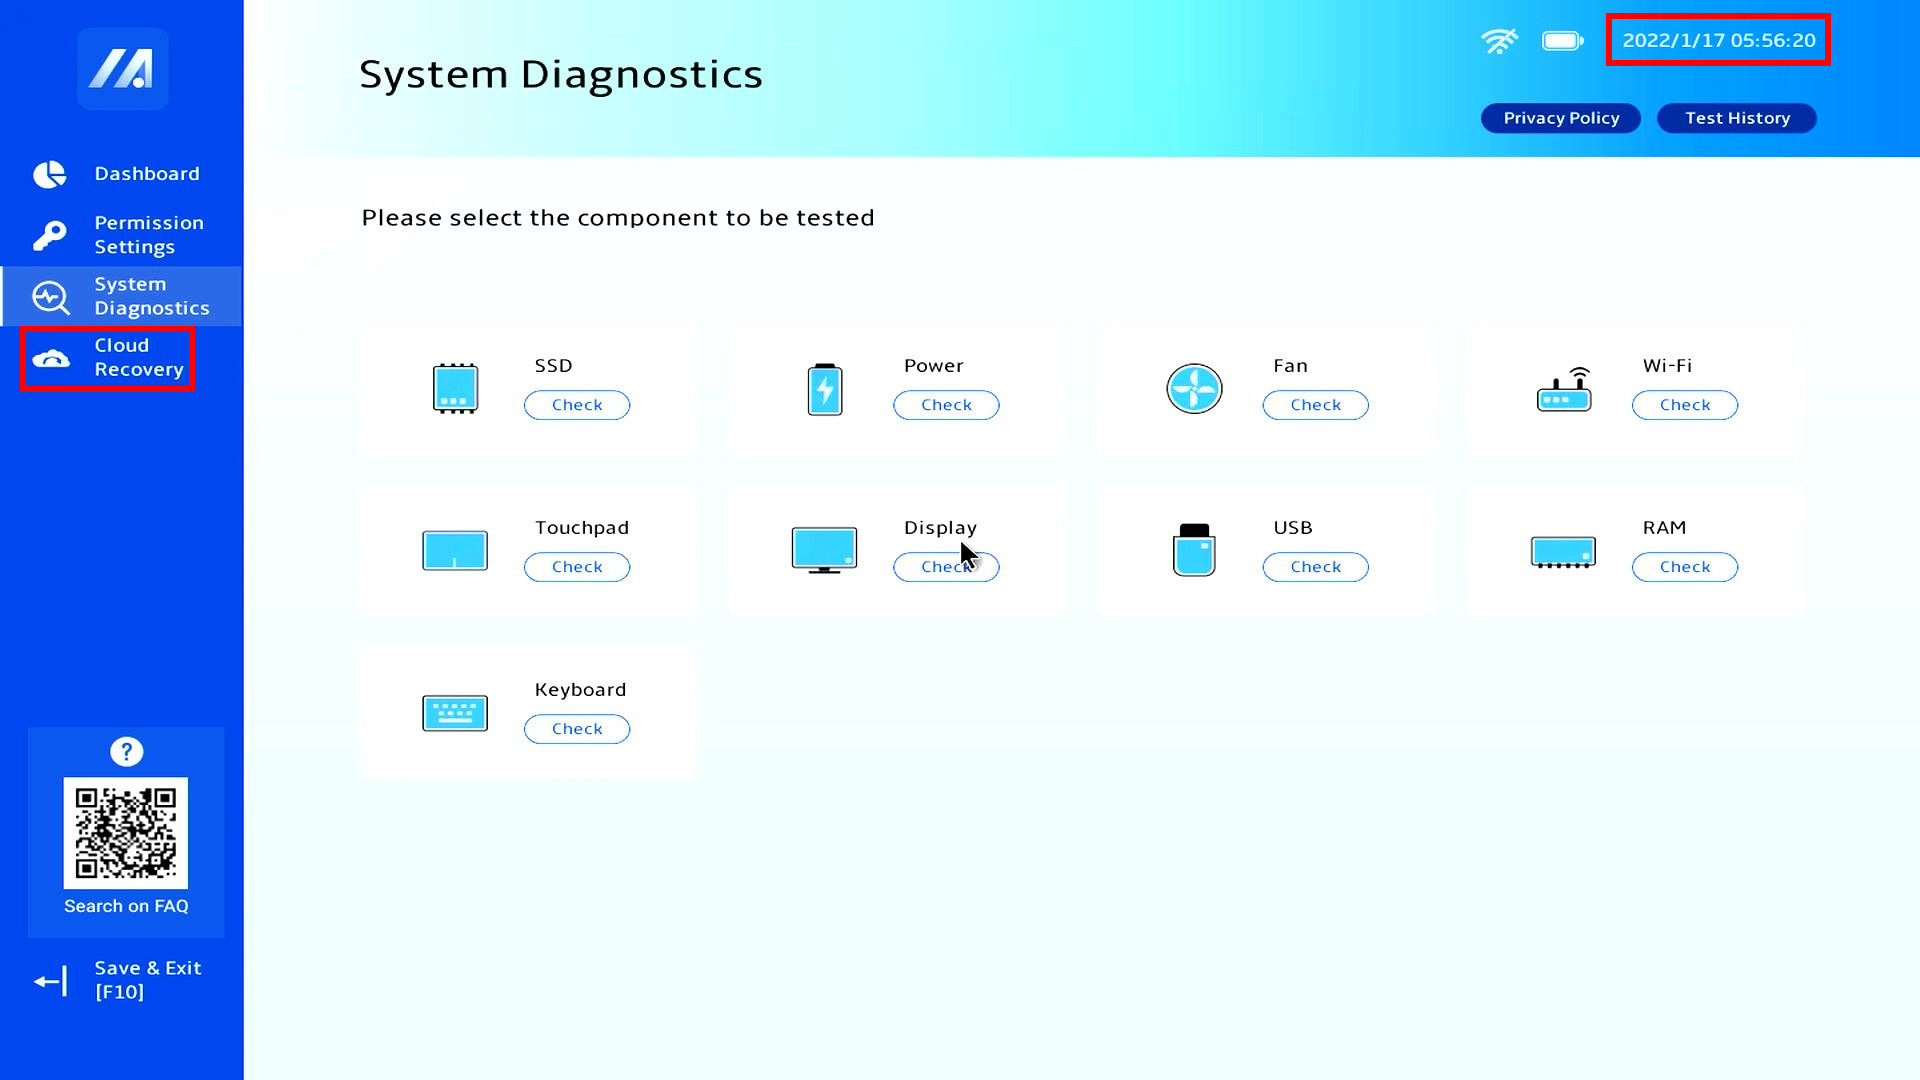
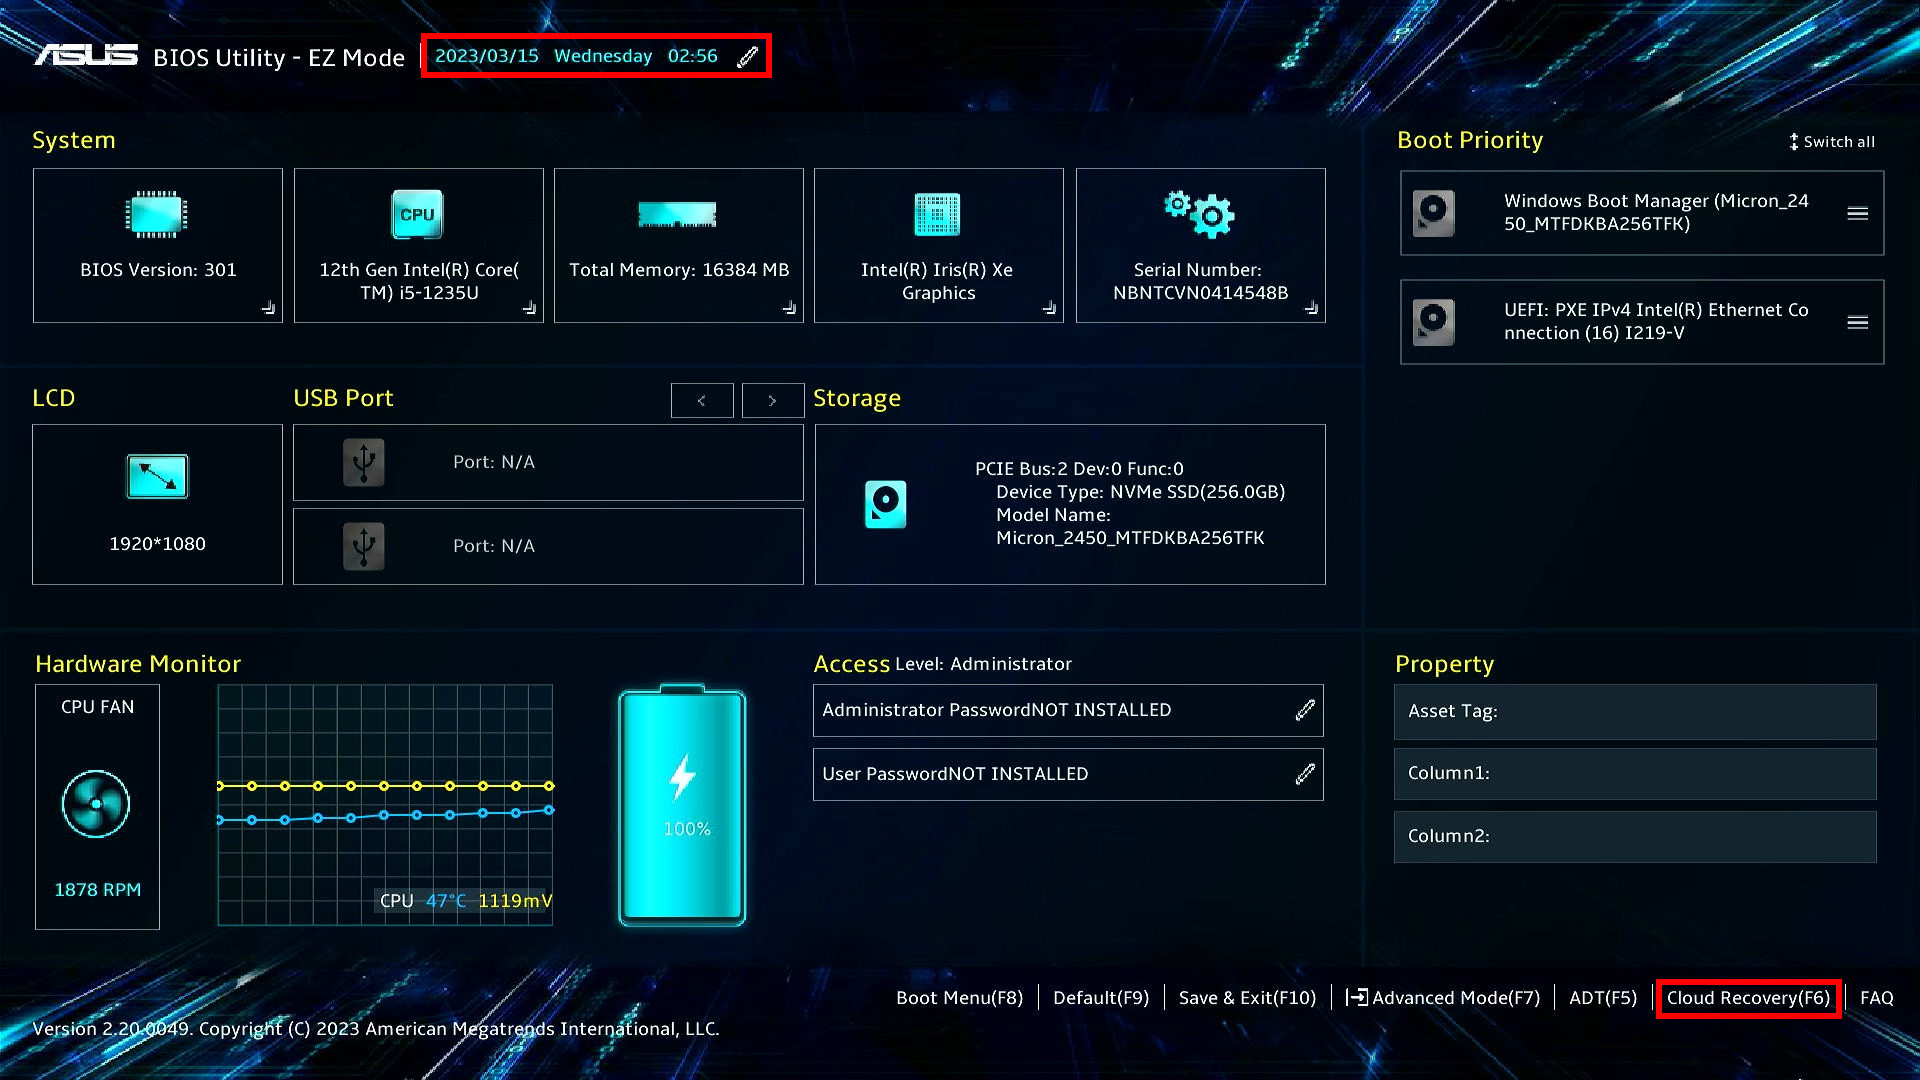
※ Before you start using the Cloud Recovery, please fix the UEFI BIOS time. If UEFI BIOS time is not the current time, Cloud Recovery may not be available.
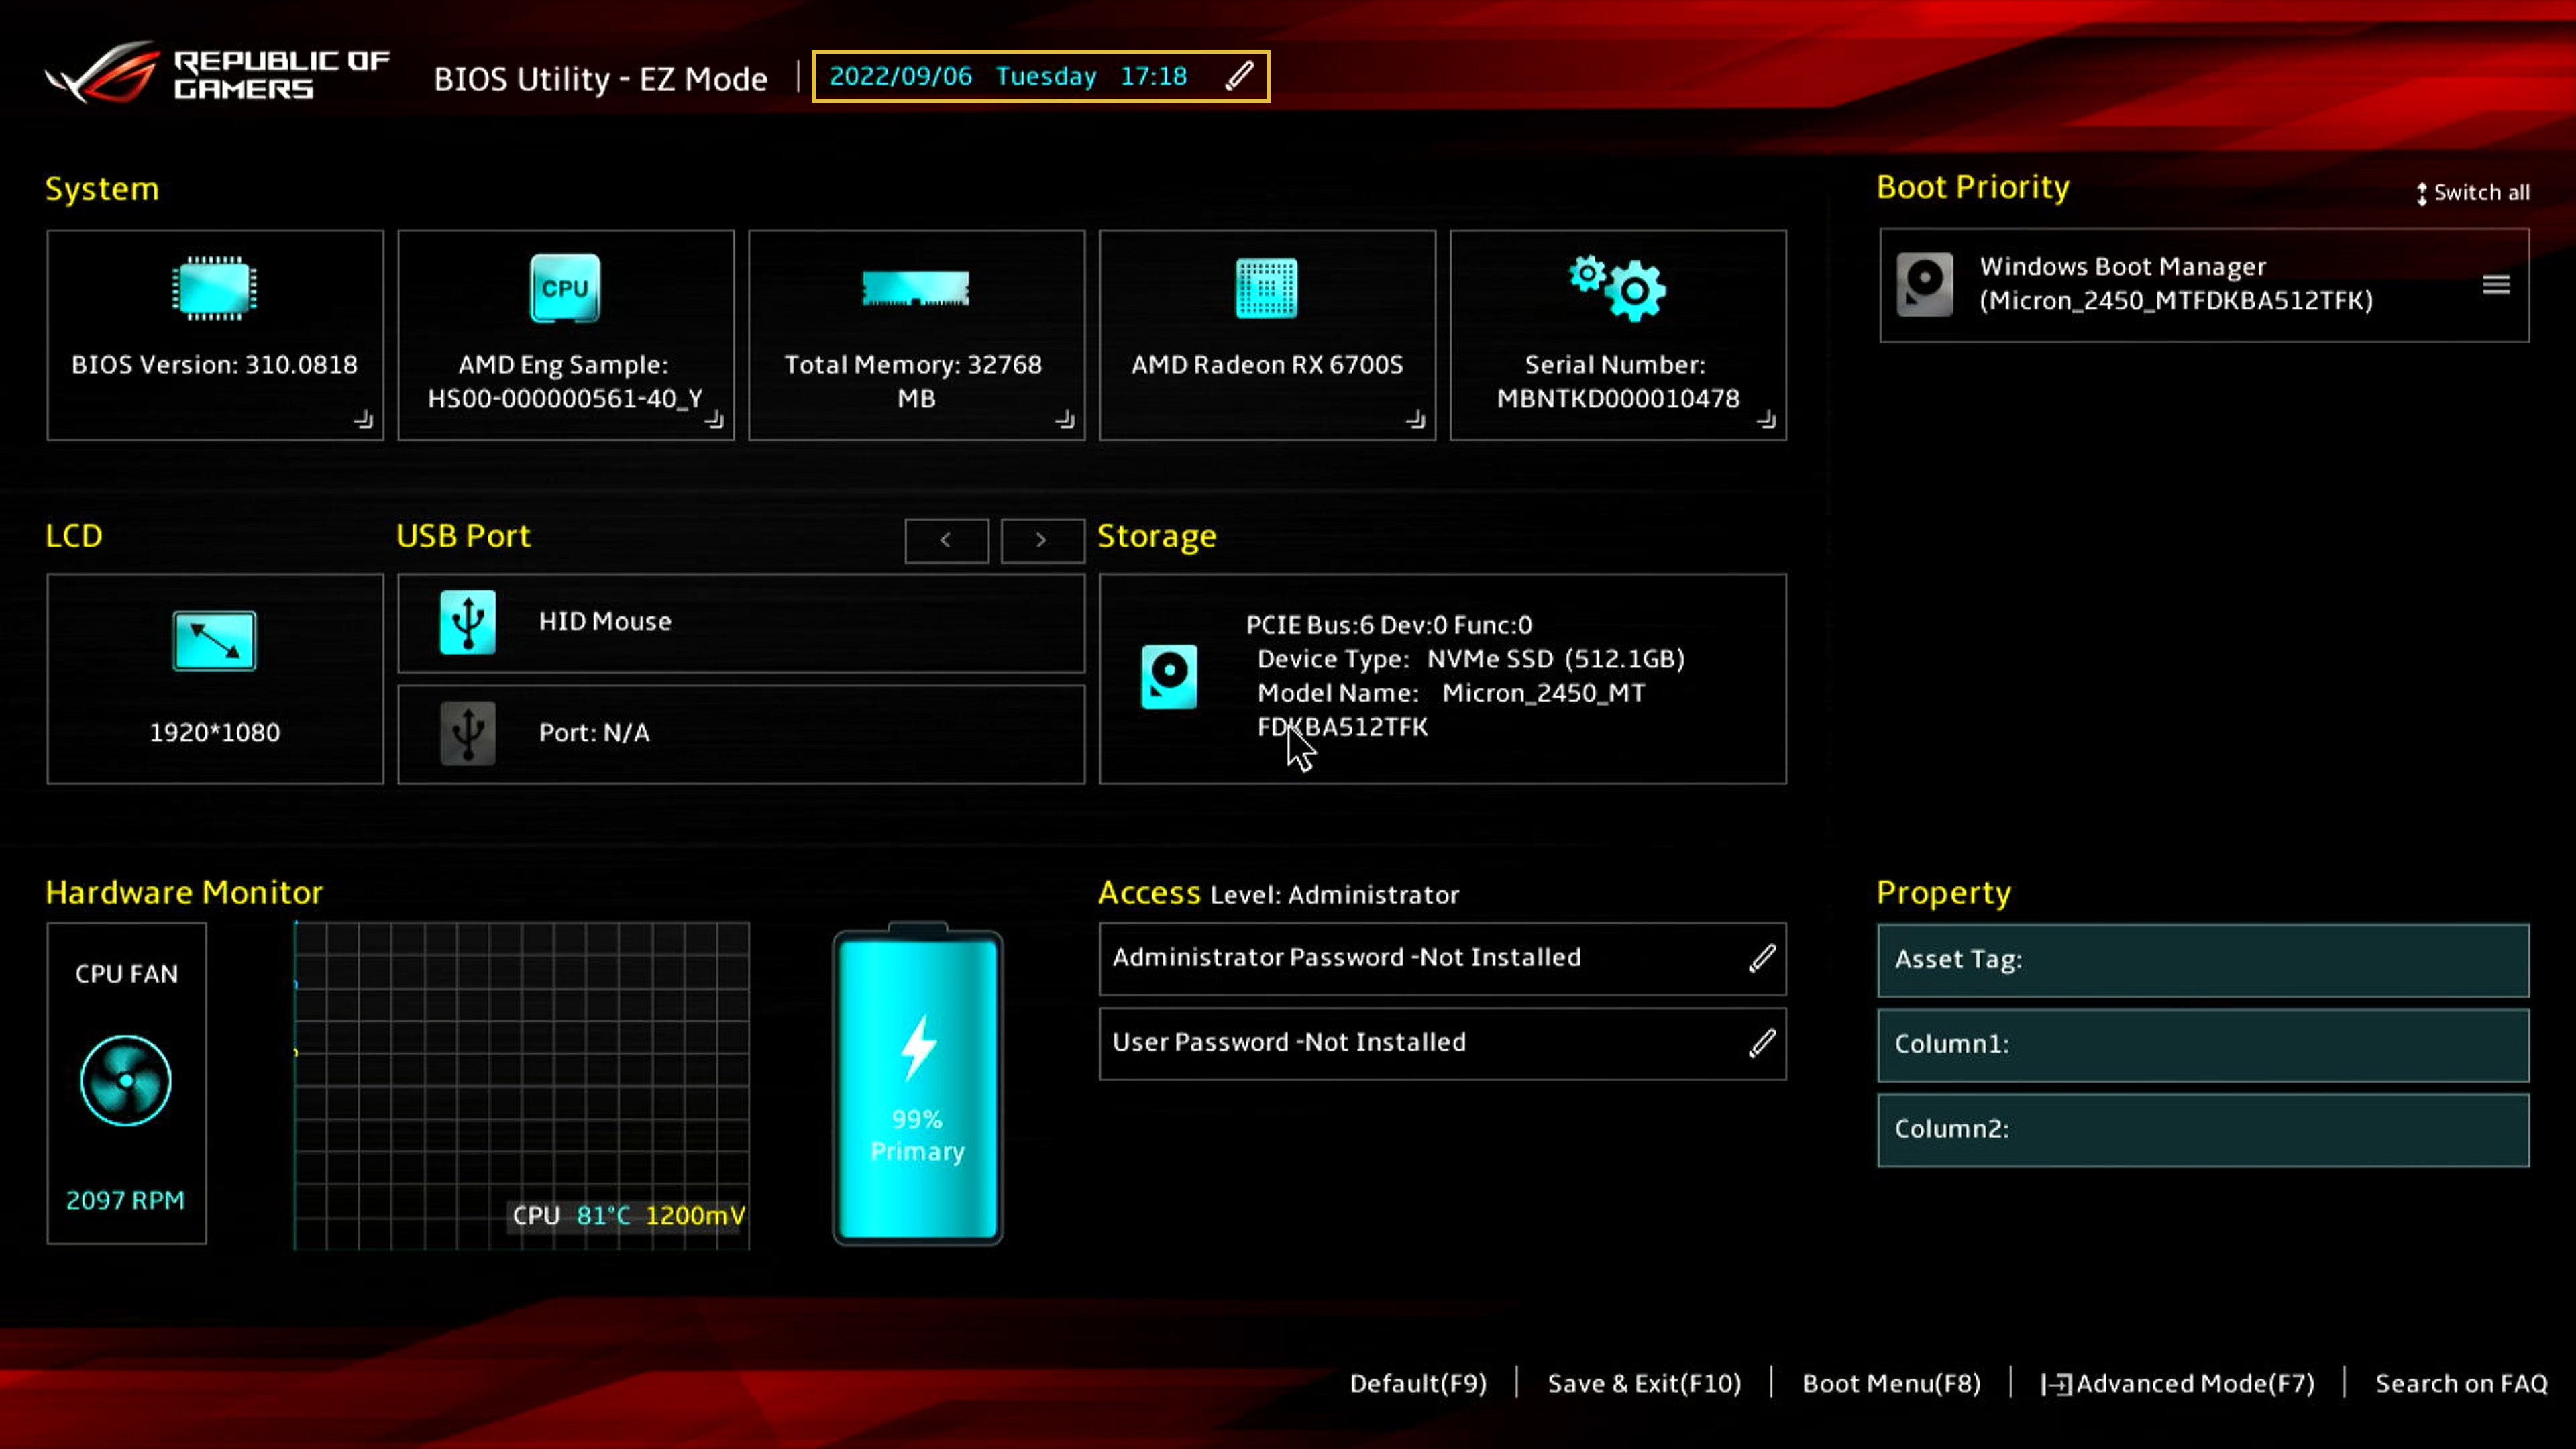
When booting, please press the keyboard key [F2] to enter the UEFI BIOS configuration screen, please first confirm whether the time of UEFI BIOS is correct, if the time is not the current time, please modify the time of UEFI BIOS first, and then click [Cloud Recovery], and enter the Cloud Recovery page.
2.2 Commercial Notebook\Desktops\All-in-One PCs
When booting, please press the keyboard key [F2] to enter the UEFI BIOS configuration screen, please first confirm whether the time of UEFI BIOS is correct, if the time is not the current time, please modify the time of UEFI BIOS first, and then click [Cloud Recovery], and enter the Cloud Recovery page.
2.3 Gaming Notebook\Gaming Desktops\ROG Ally
※ For more information on how to access the UEFI BIOS page for ROG Ally, please refer to ROG Ally Frequently Asked Questions | Official Support | ASUS Global, then press the ROG Ally "Y" button to enter the Cloud Recovery
(1) When booting, please press the keyboard key [F2] to enter the UEFI BIOS configuration screen, please first confirm whether the time of UEFI BIOS is correct, if the time is not the current time, please modify the time of UEFI BIOS first.
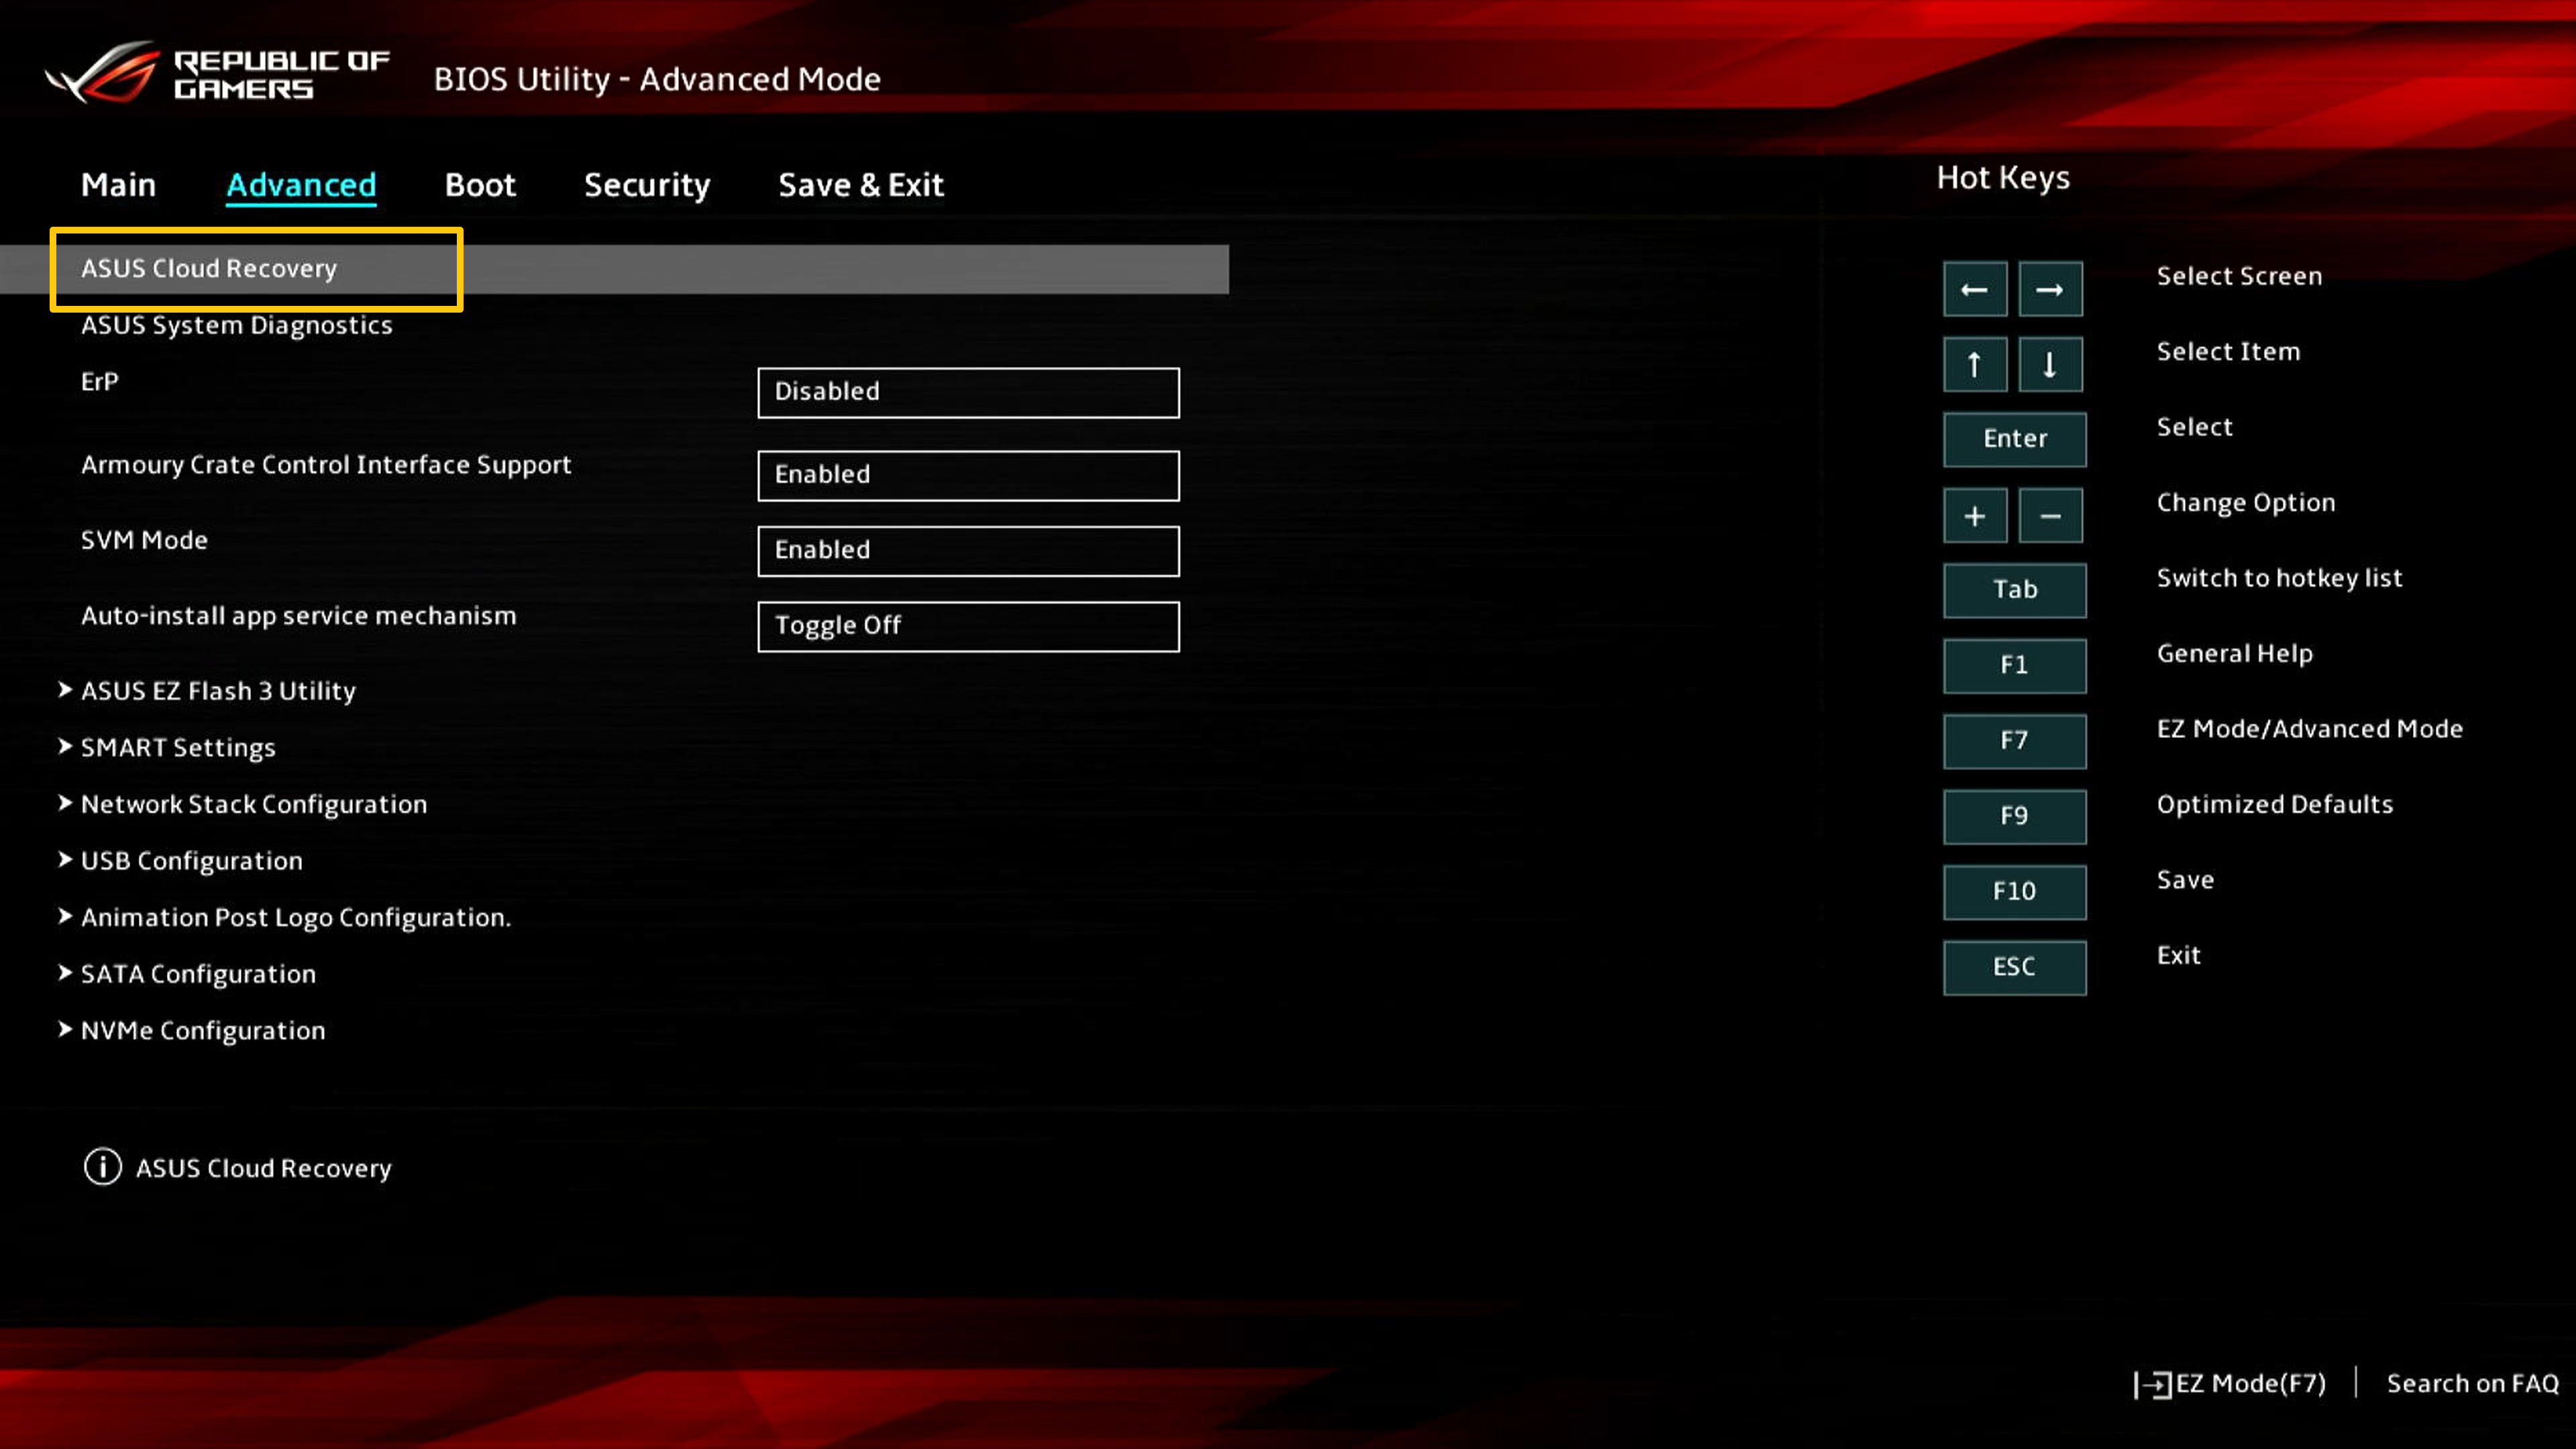
(2) Please press [F7] key to access [Advanced], then select [ASUS Cloud Recovery] to access Cloud Recovery Homepage.
Before you perform Cloud Recovery, read the following note items:
Cloud Recovery will restore the storage device where the OS is stored to its original state, which means that all data on the storage device will be erased, regardless of whether you partition the storage device or not.
If you need to perform Cloud Recovery on a computer with two or more storage devices (such as a combination of SSD + HDD), please go to Chapter 5-Q4 of this article.
If a screen similar to Chapter 4-4 of this article appears after clicking the [Cloud Recovery] function, it means that your computer no longer supports this function because the warranty has expired.
- If your computer can still access Windows, use an external storage device to back up your data or reference [Notebook] MyASUS - Switch and Recovery,or use Windows built-in backup tools [Windows 11/10] Backup and Restore your files (File History) or use cloud storage to back up your data or reference [Windows 11/10] OneDrive or go to ASUS WebStorage to get a cloud backup.
- If your computer won't be able to access Windows and you have important data that hasn't been backed up yet, please contact the ASUS Service Center for help.
(1) Click ①[Cloud Recovery], click ②[View Policy].
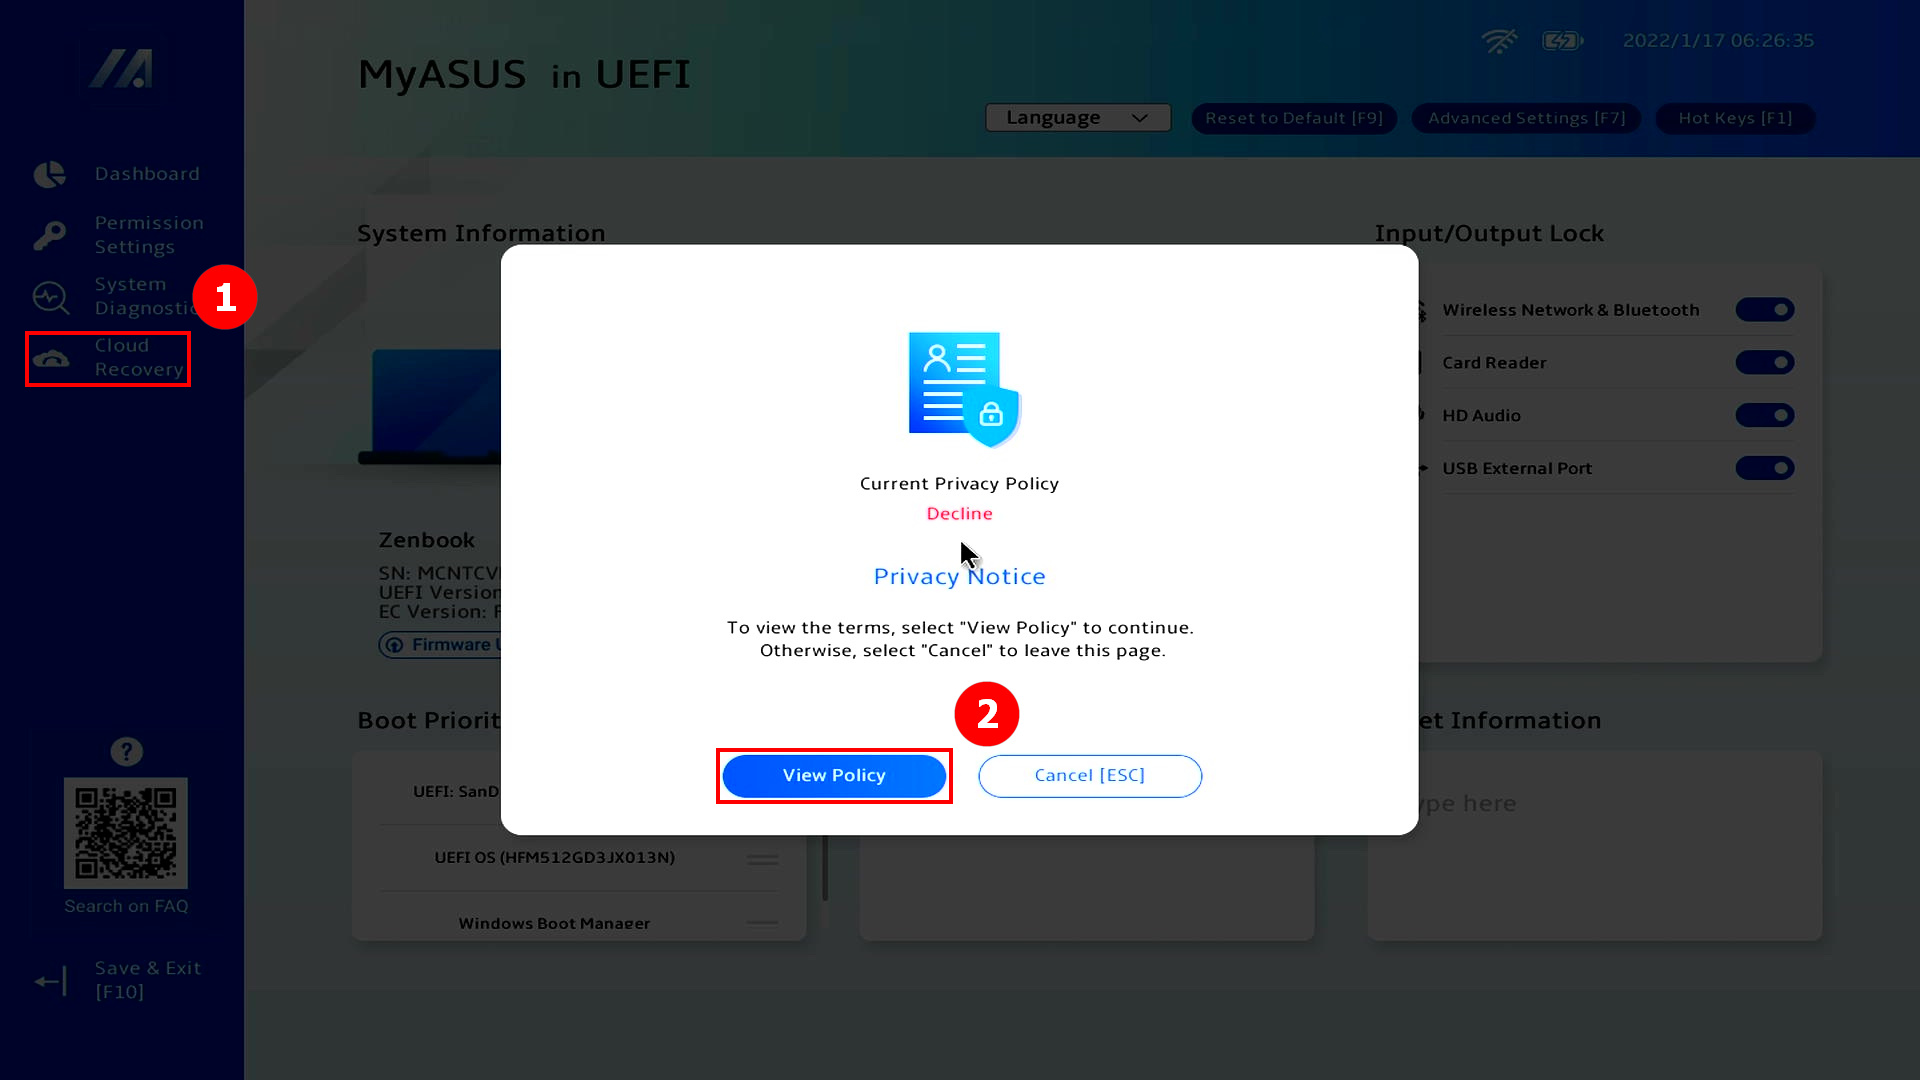
※ If you see the following picture, this computer does not support this function
(2) Click ③[I am above the age of 20 years], click ④[Agree].
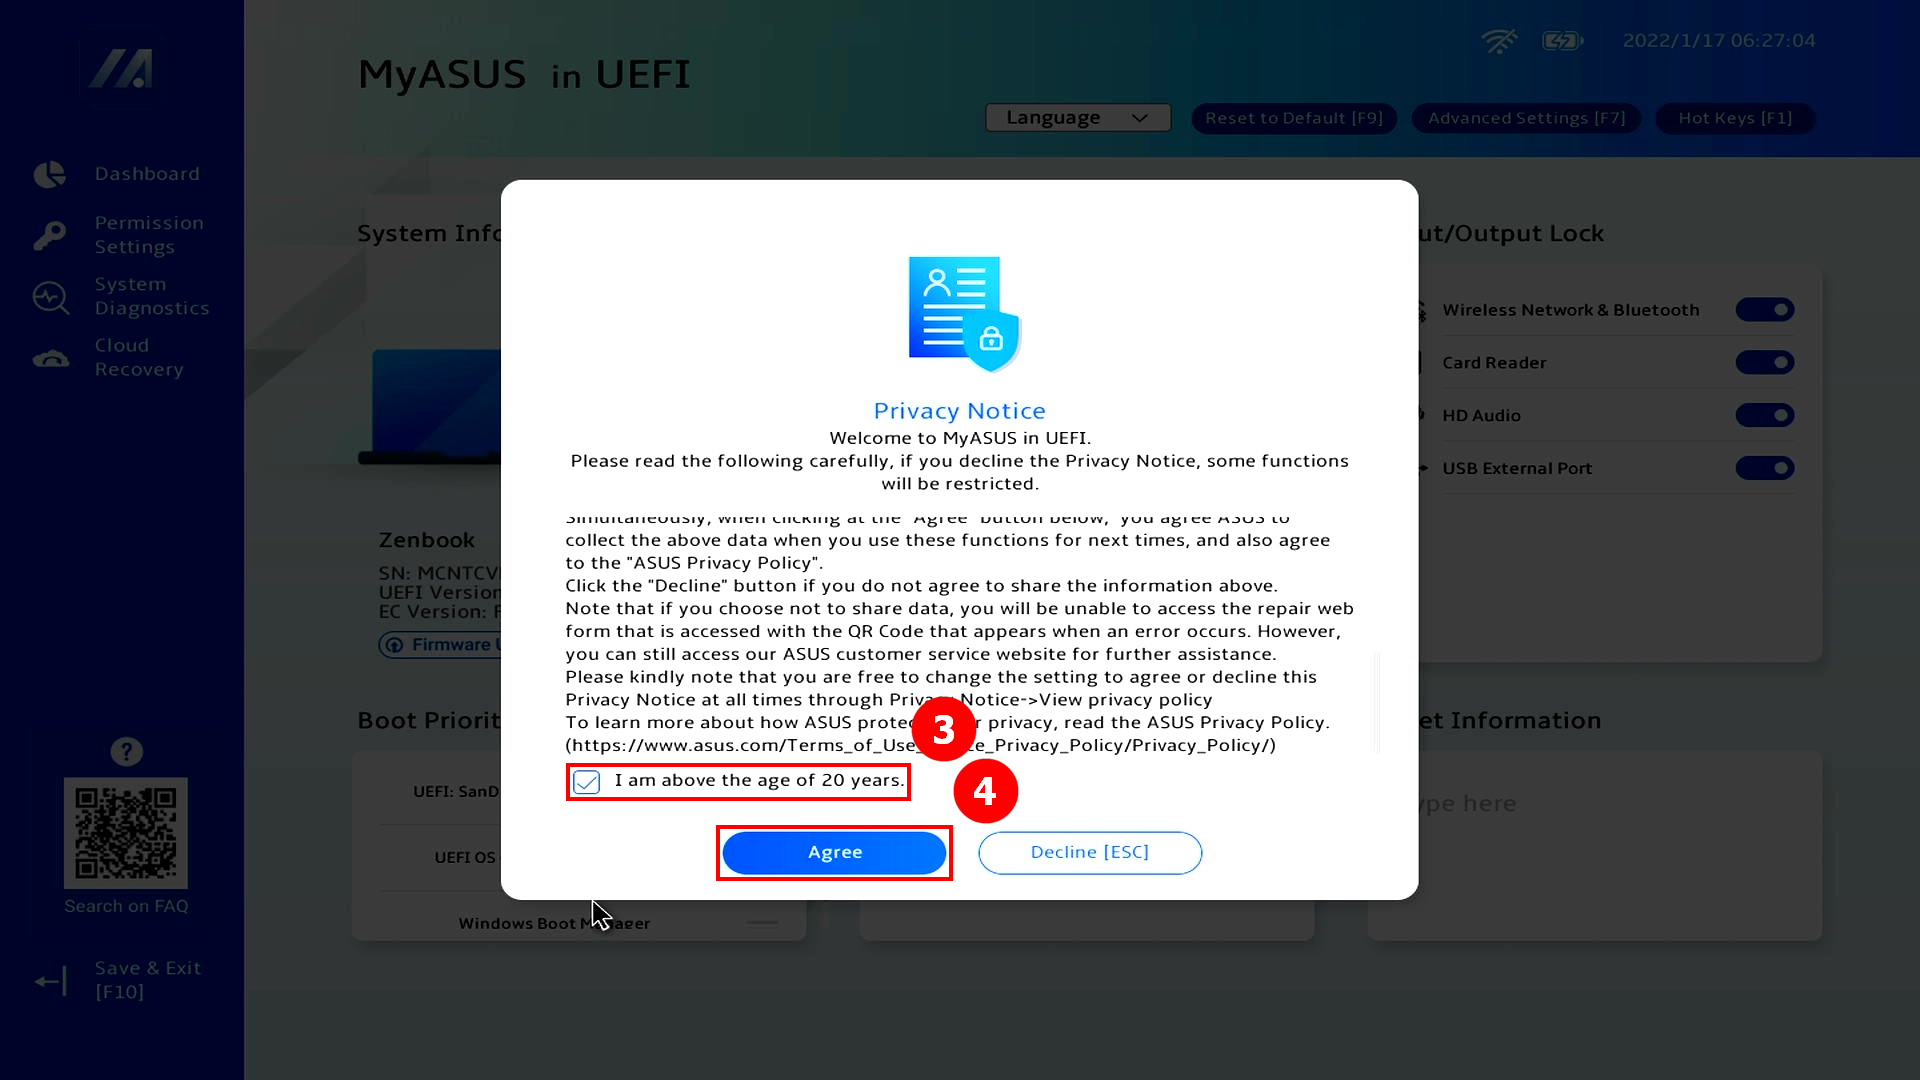
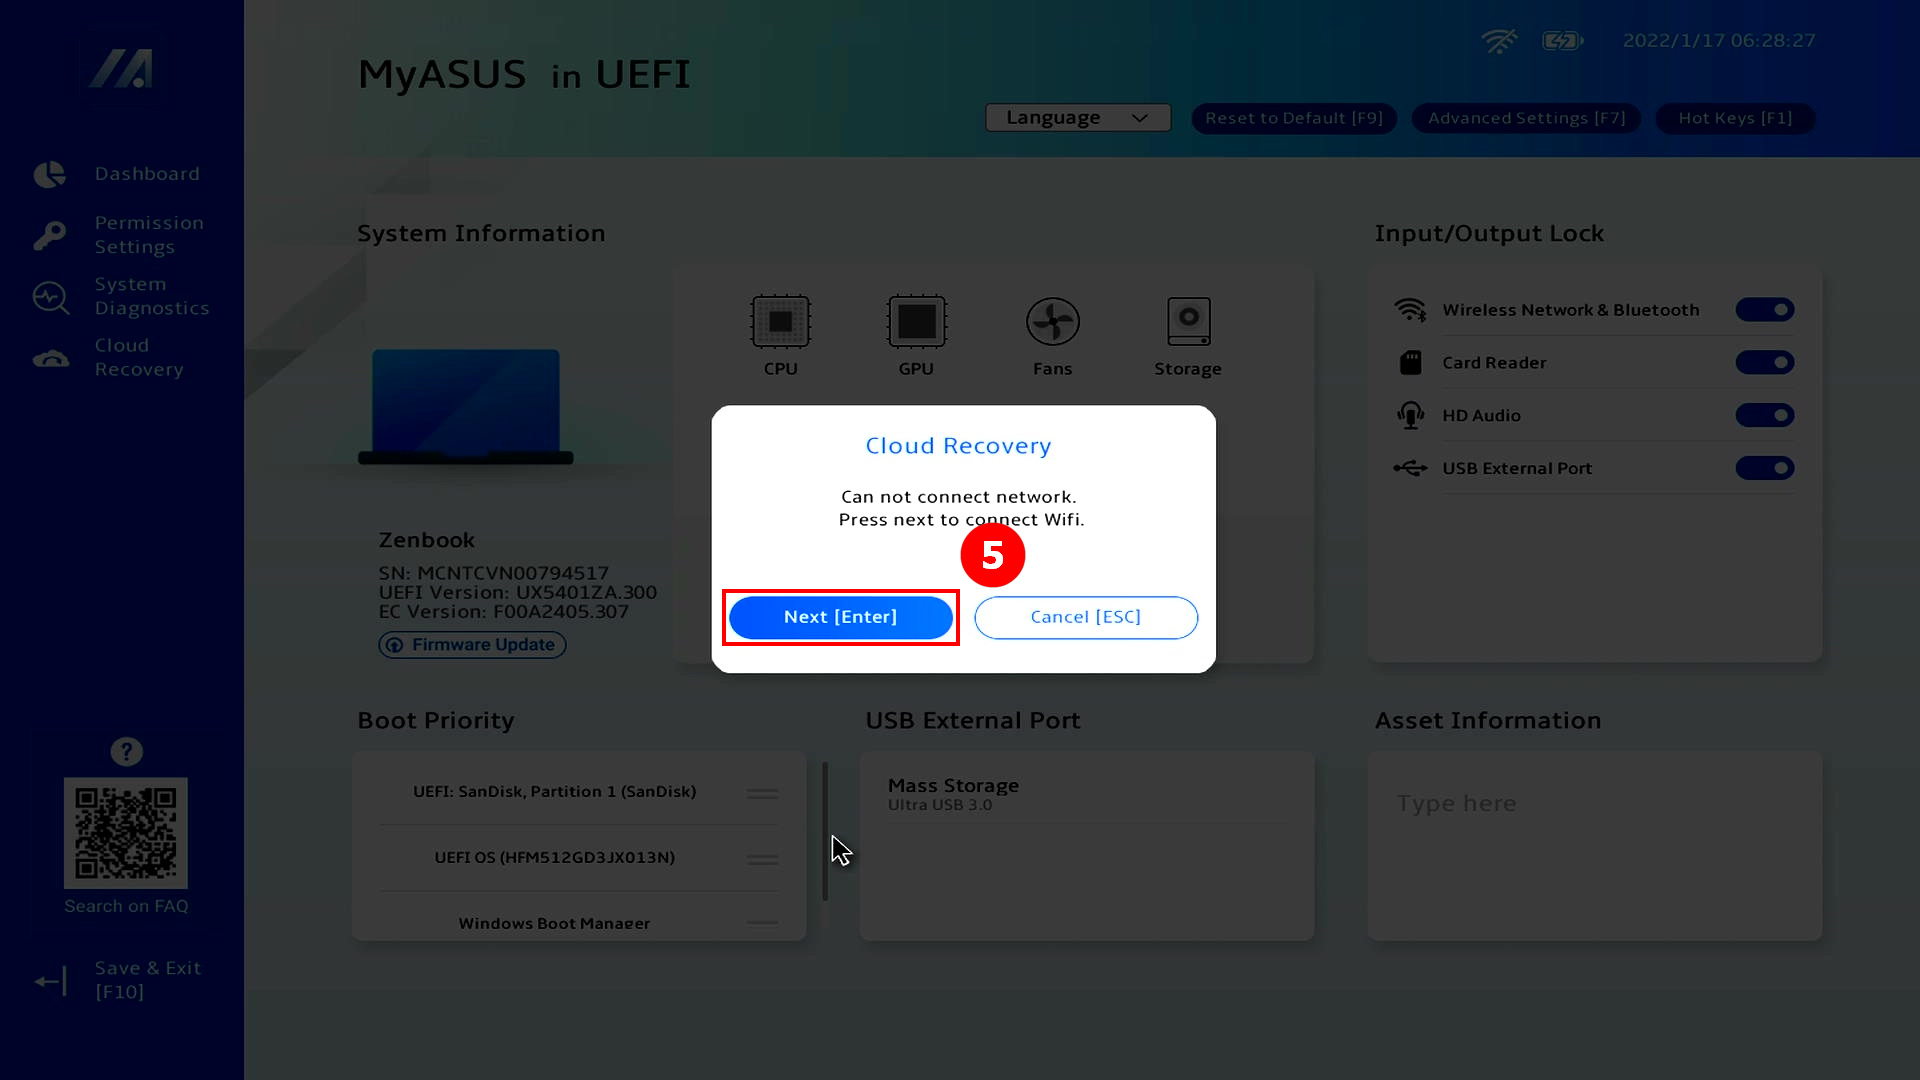
(3) Click ⑤[Next]. (Cloud Recovery supports LAN network connections. If your computer does not have an RJ45 interface, you will need to use ASUS's RJ45 to USB Dongle. Currently non-ASUS RJ45 to USB Dongle may not be supported because of compatibility)
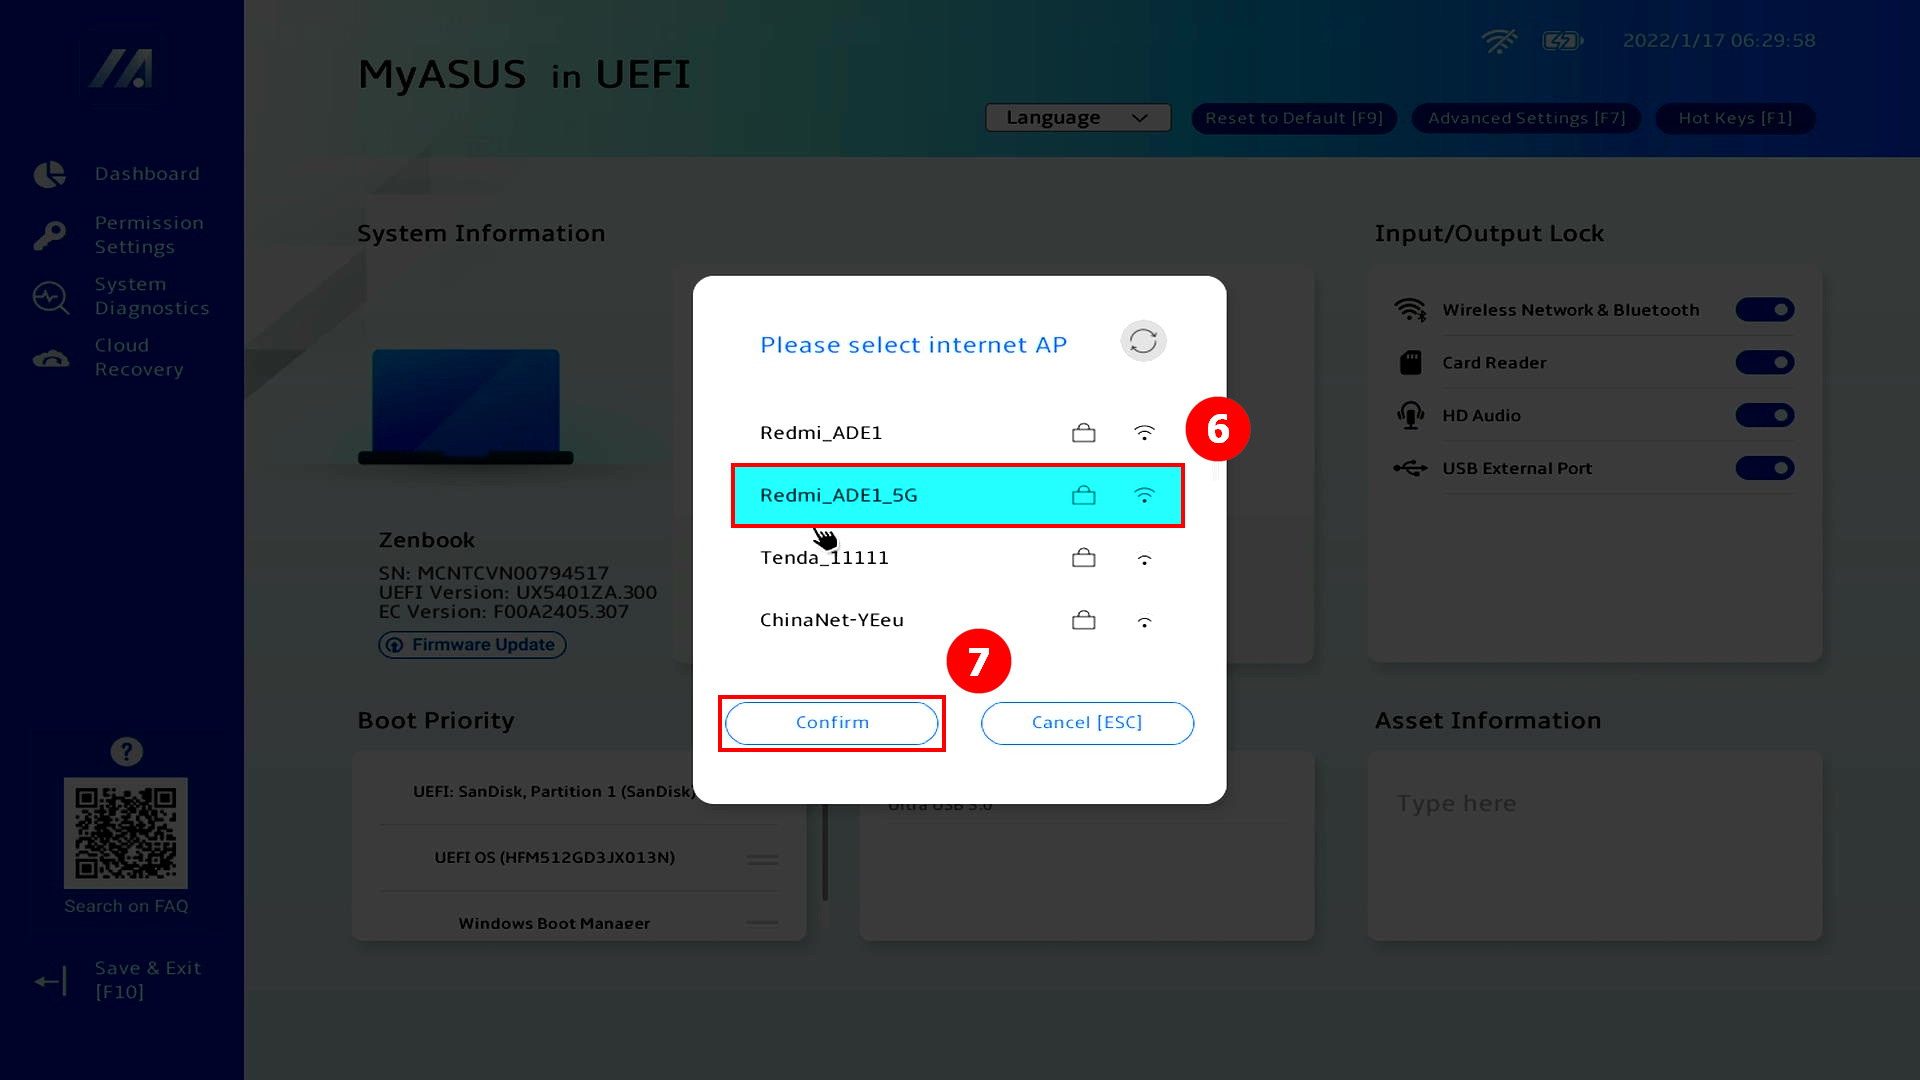
(4) Click ⑥[WiFi], click ⑦[Confirm].
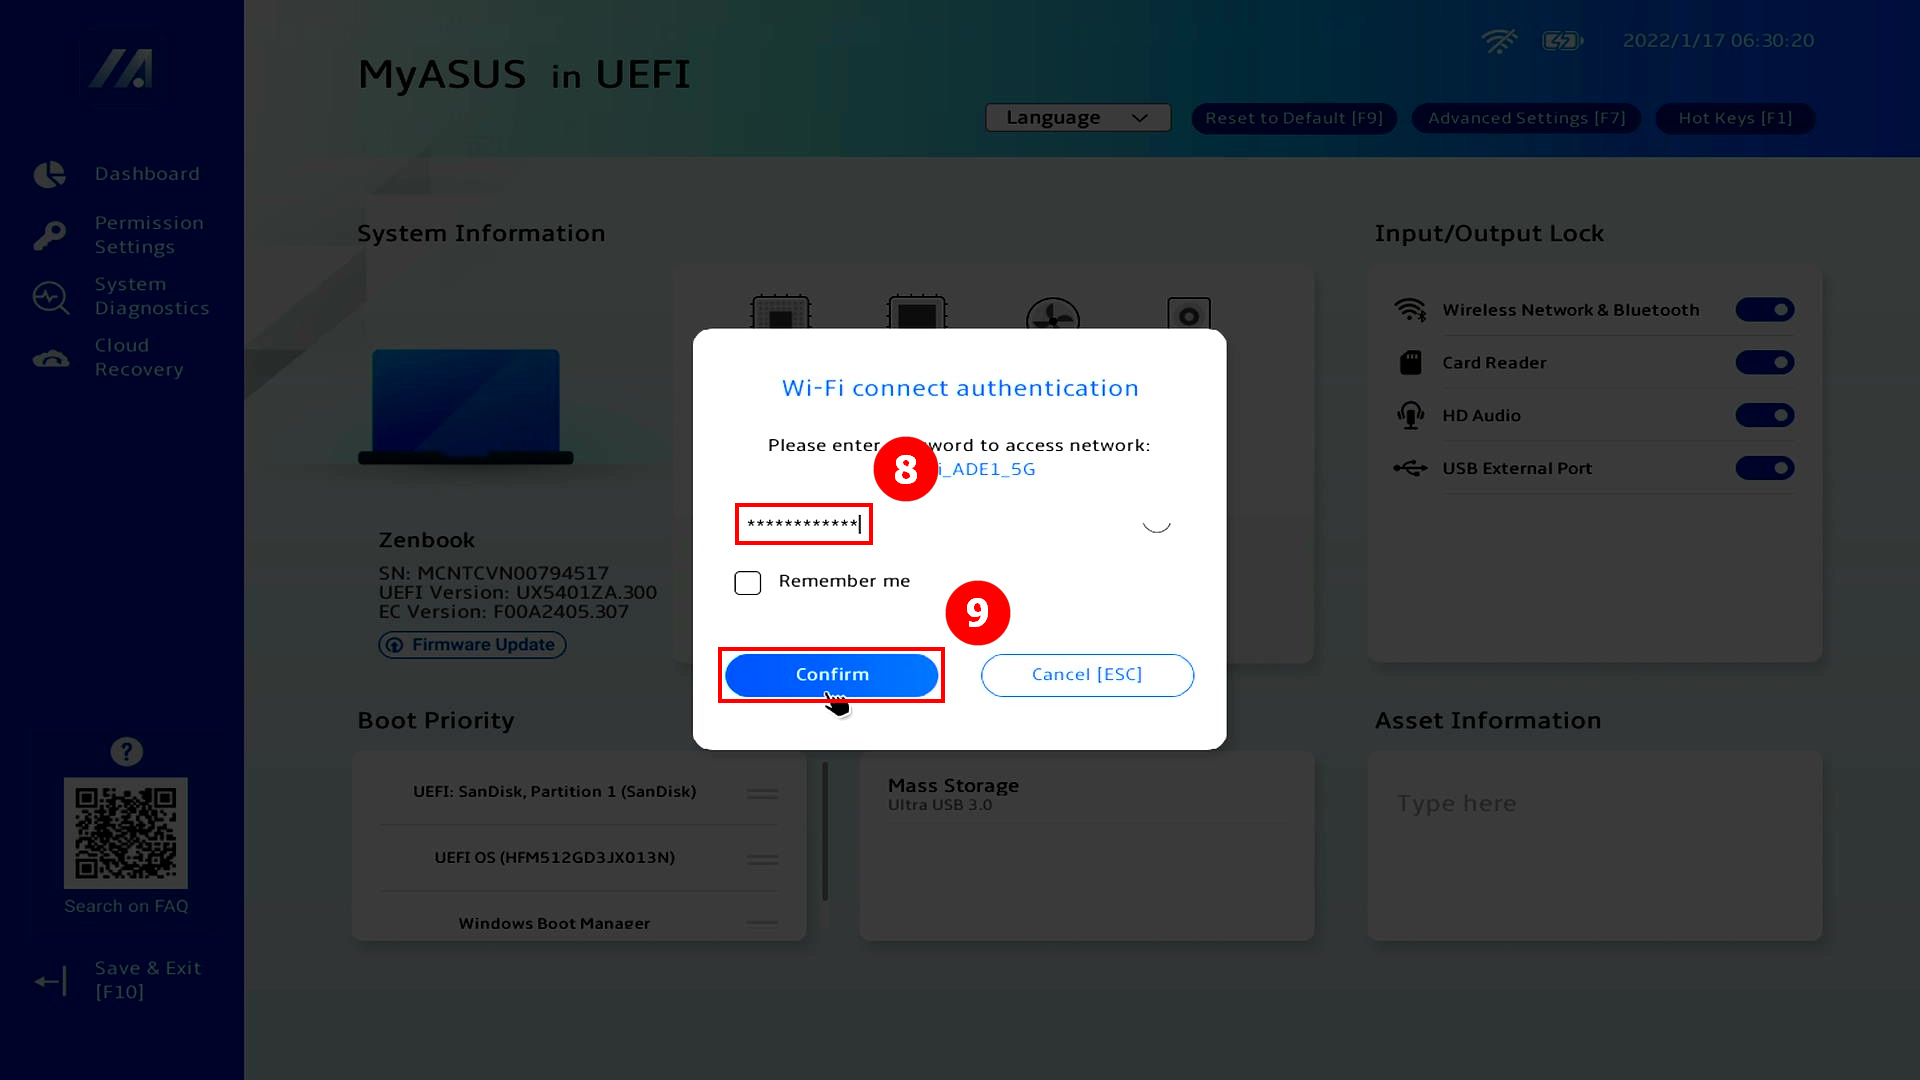
(5) Enter ⑧[WiFi Password] and click ⑨[Confirm].
(6) The connection is successful, click ⑩[OK].

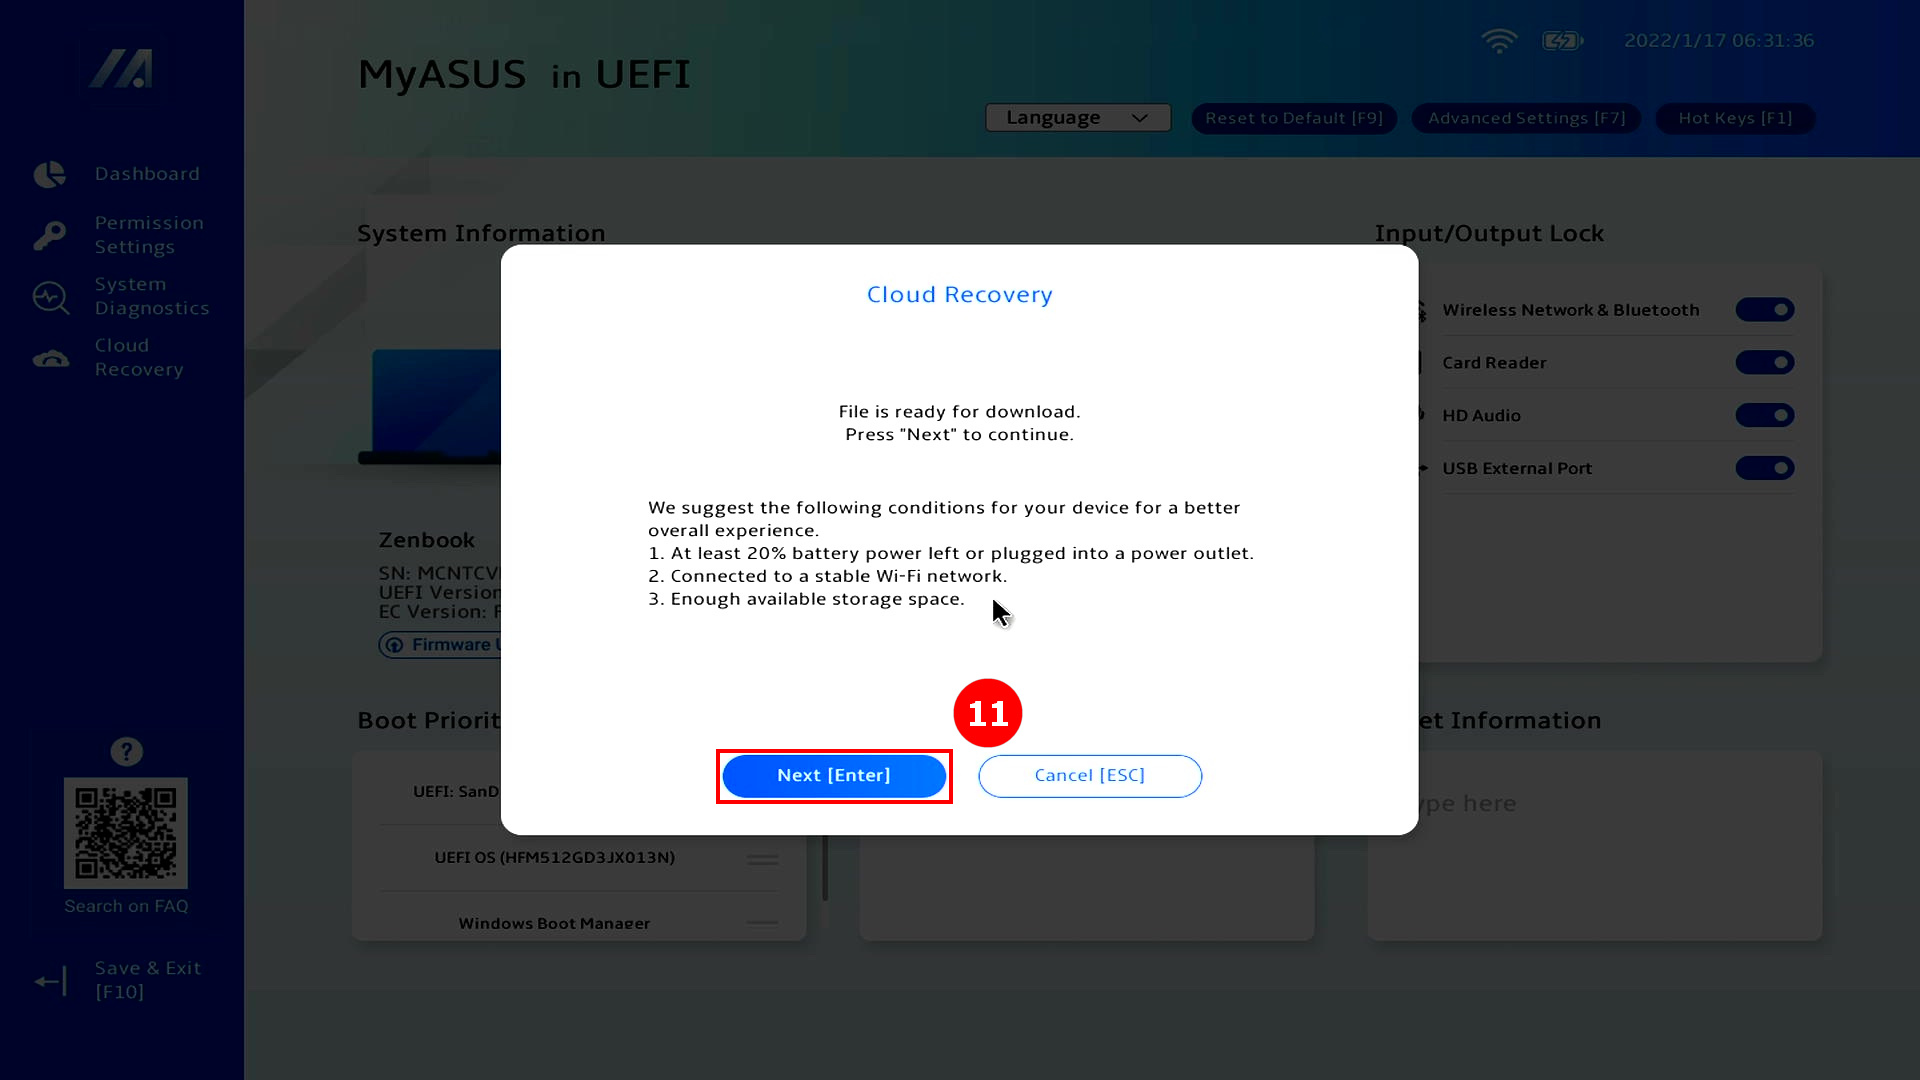
(7) Read the Cloud Recovery Notice content carefully, then click ⑪[Next].
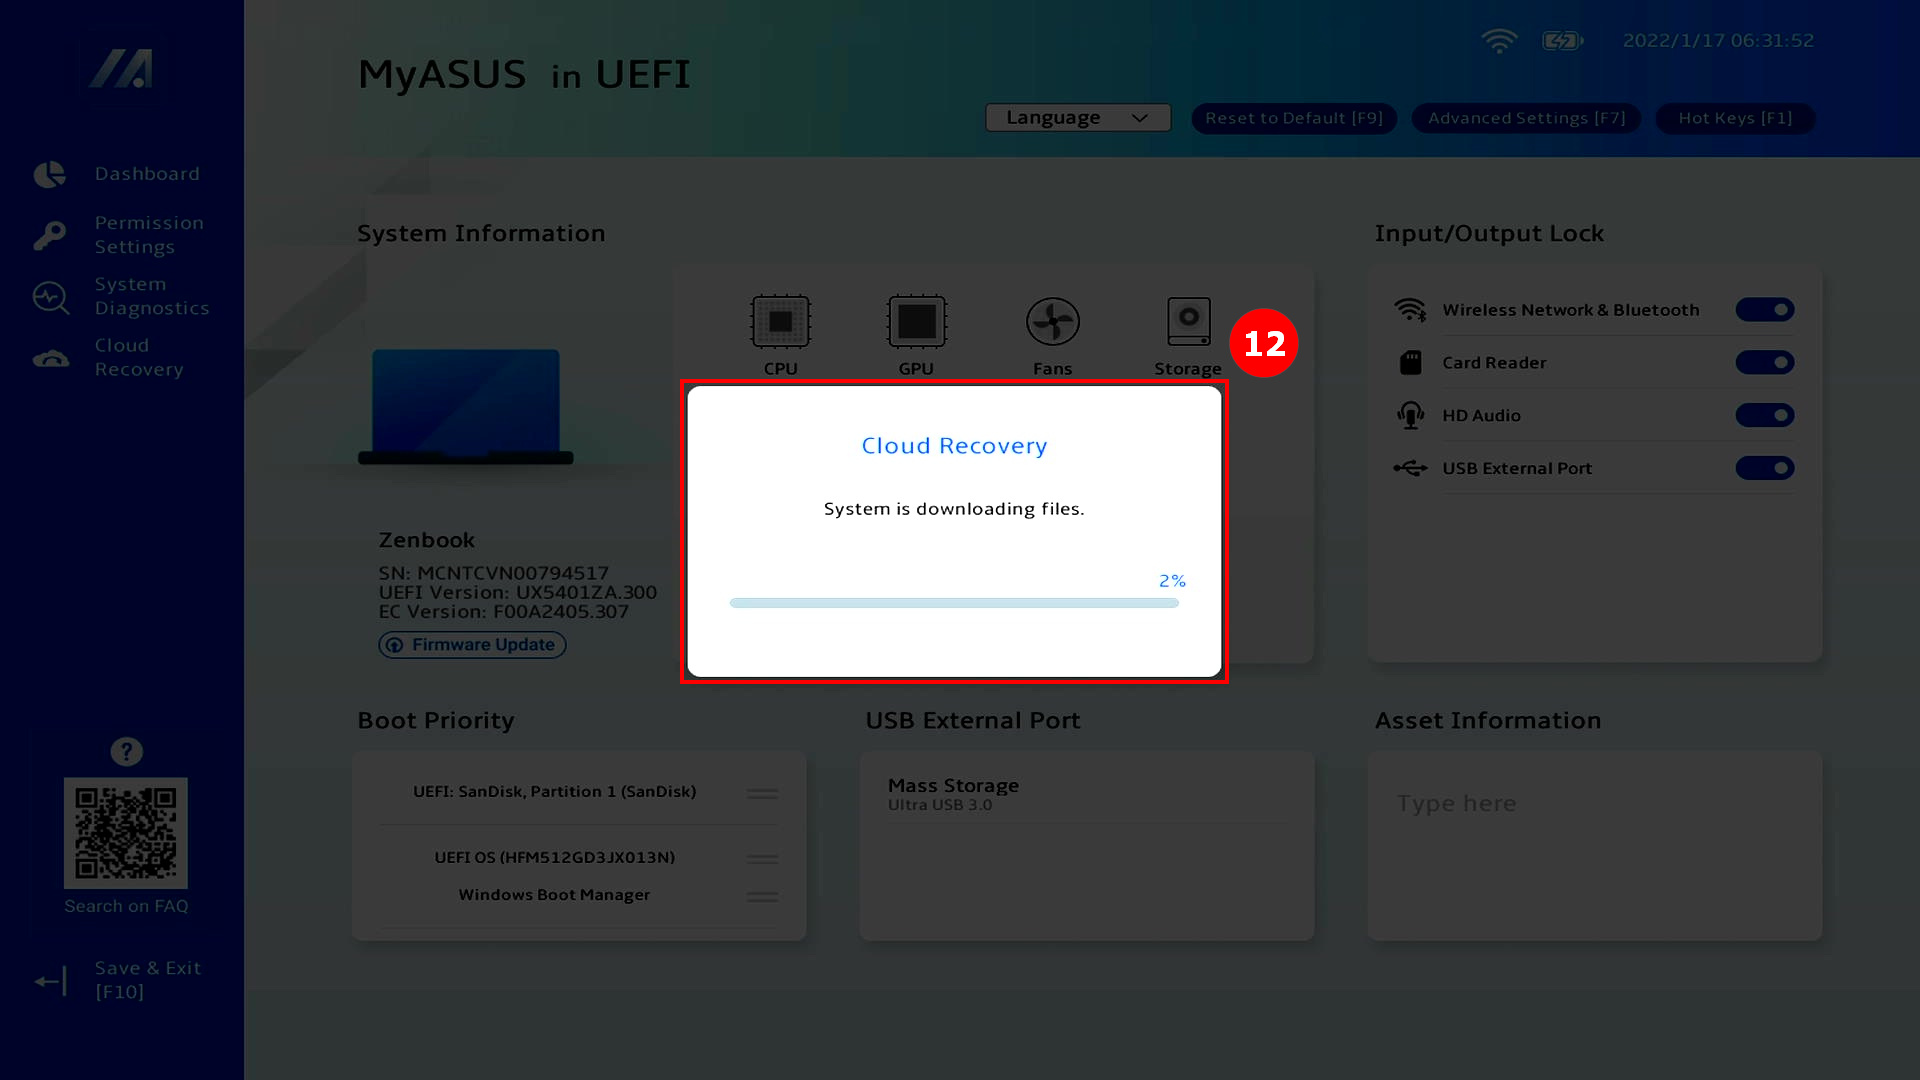
(8) Cloud Recovery will download ⑫[file] from the cloud, please keep the network and power connected, and be patient.
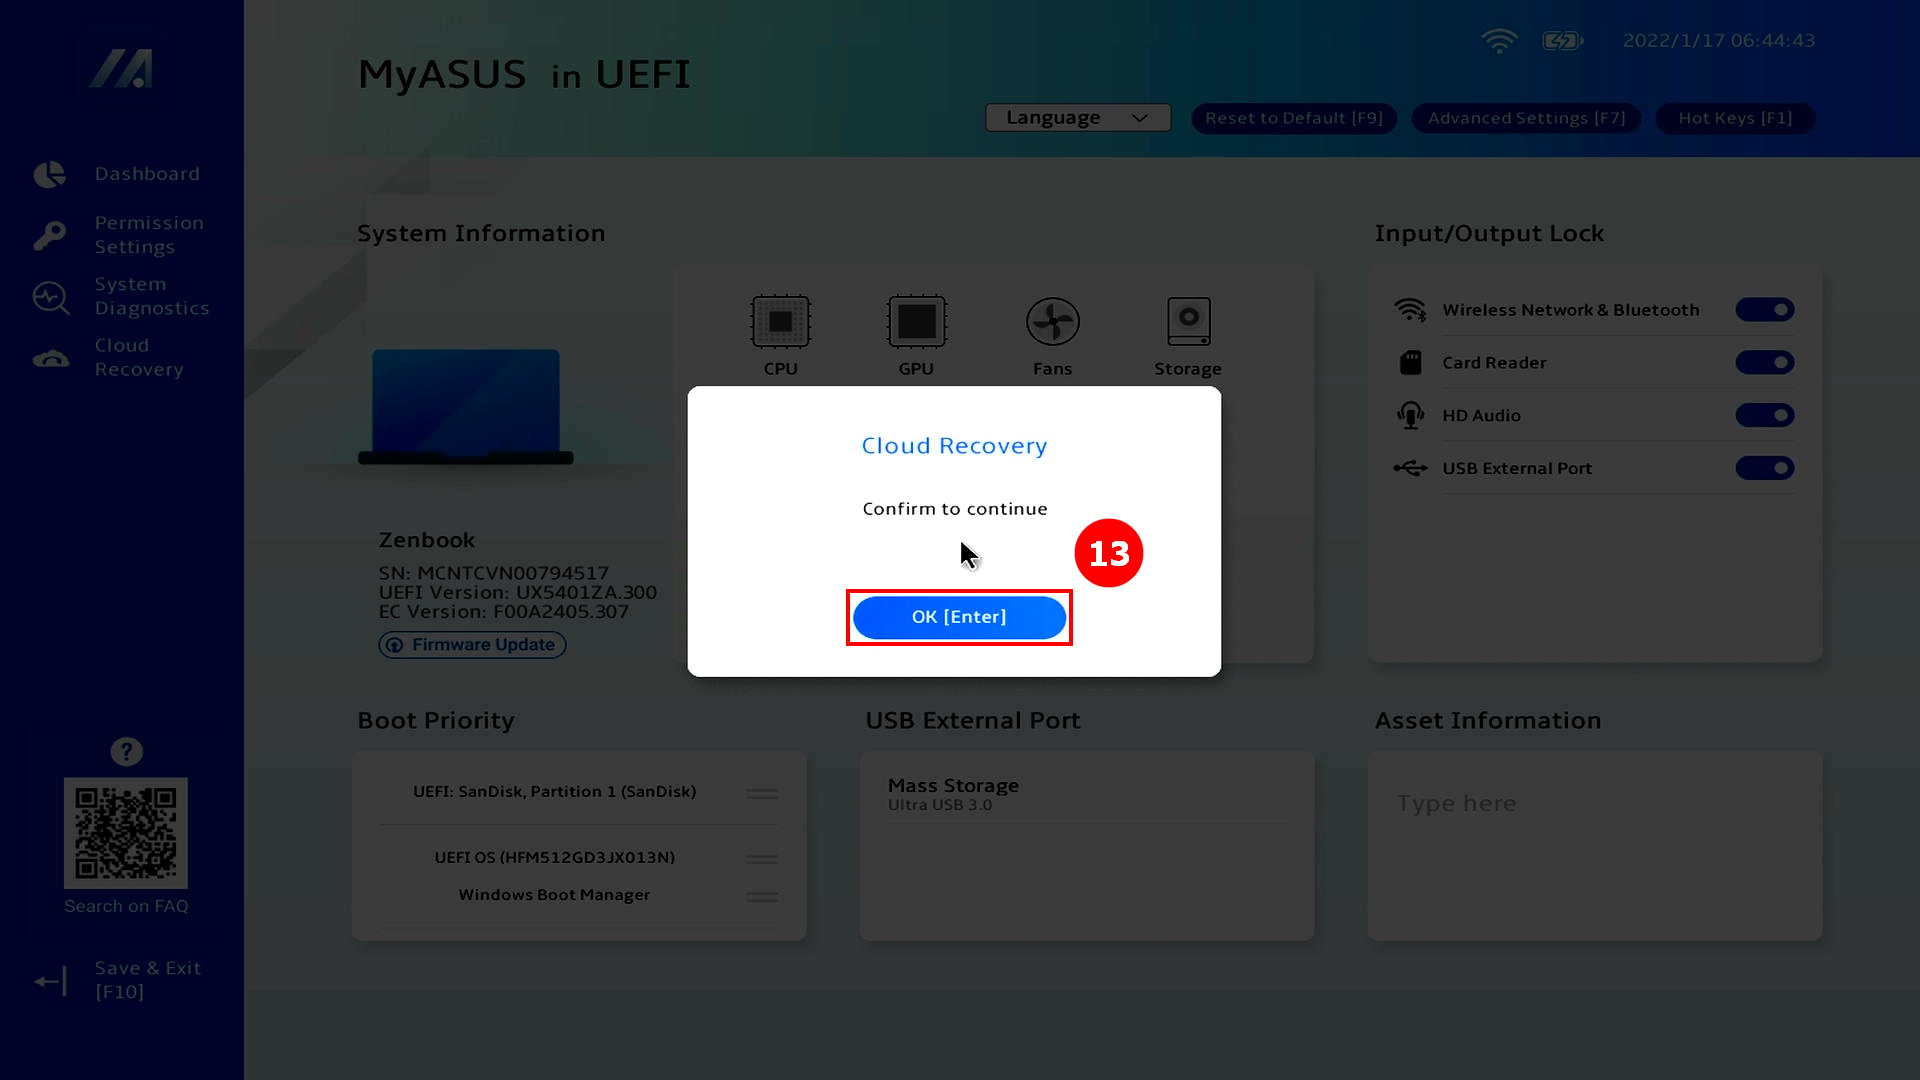
(9) When the cloud download is complete, click ⑬[OK].
(10) You will be asked if you need to back up your files first, click ⑭[OK]. If you don't need to back up your data, click Cancel and go to 3-(14) article to continue reading.
※ If you have enabled the Bitlocker function, please go to this article [Q&A-Q8] to continue reading.

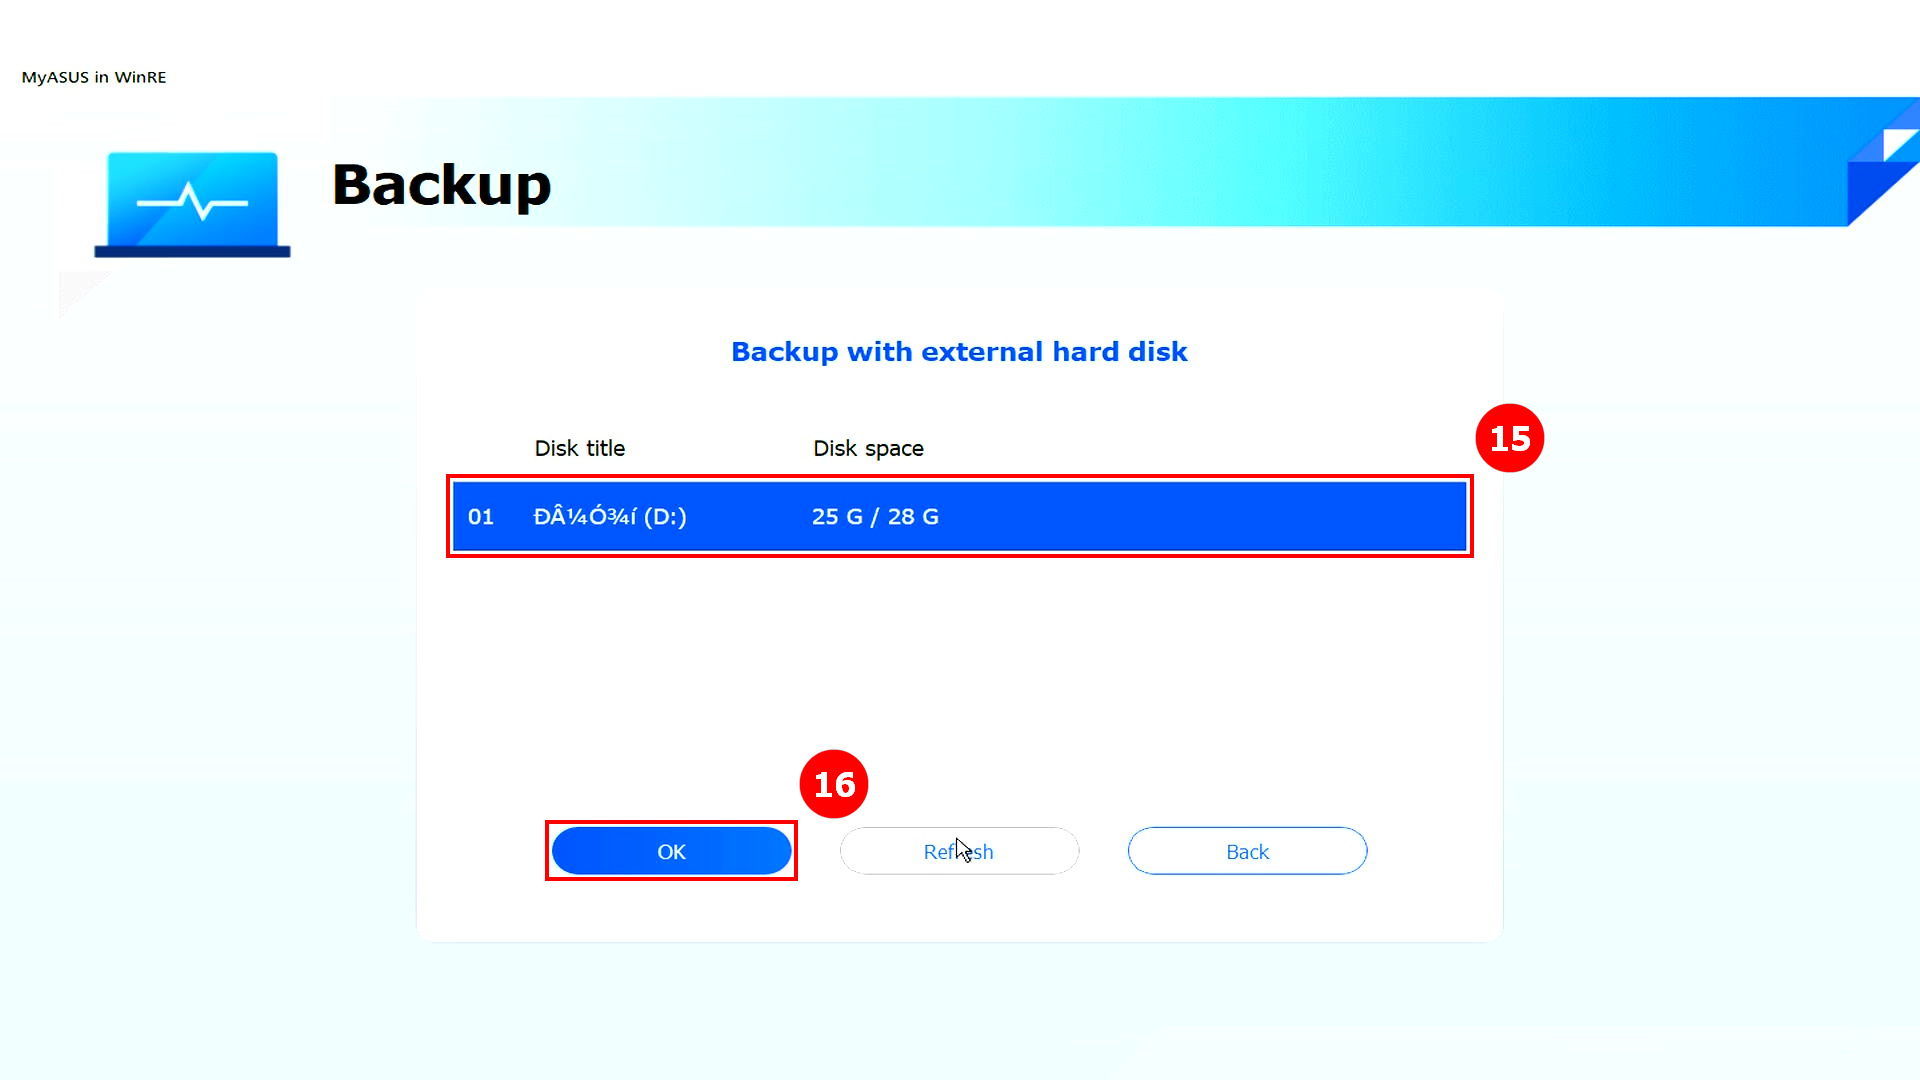
(11) Click your ⑮[External Storage Device], and then click ⑯[OK].
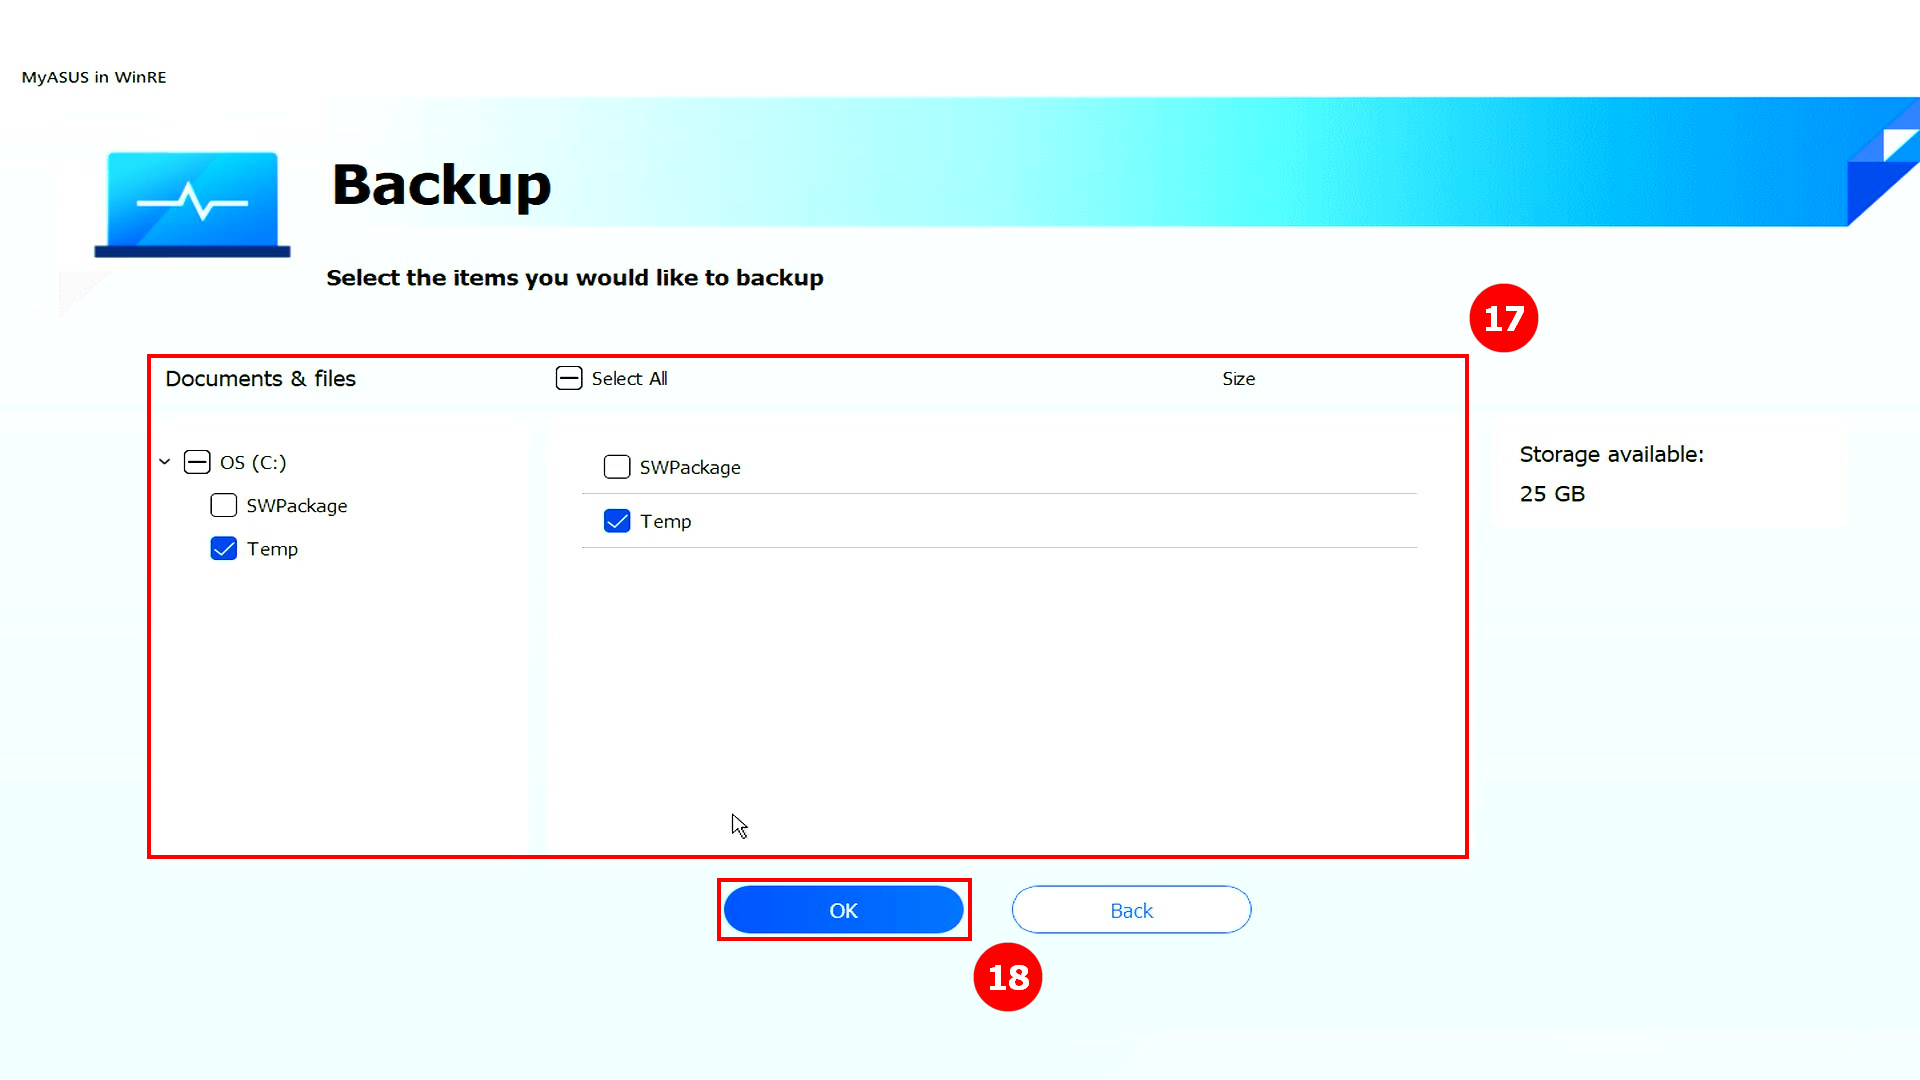
(12) Click ⑰[File] that you want to back up, and then click ⑱[OK].
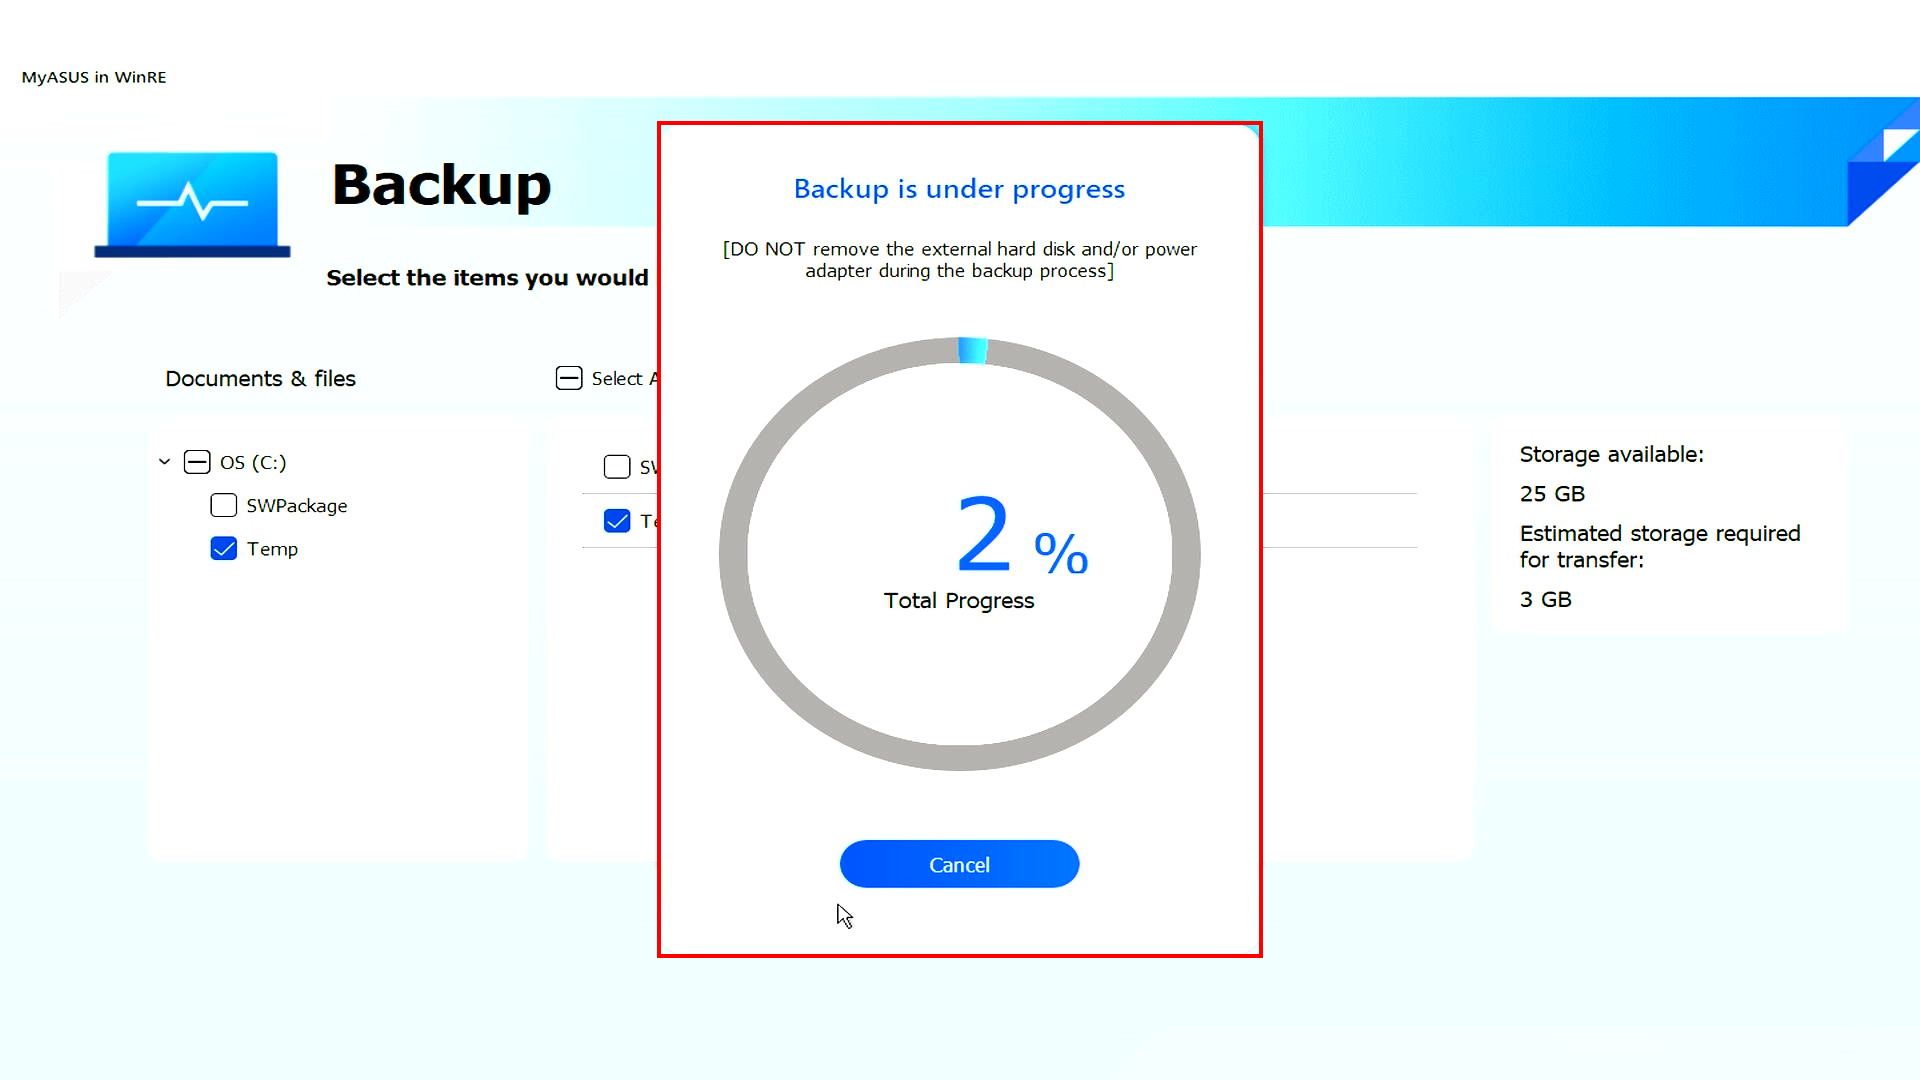
(13) Backing up data. Do not remove external storage devices or remove power sources while backing up data.
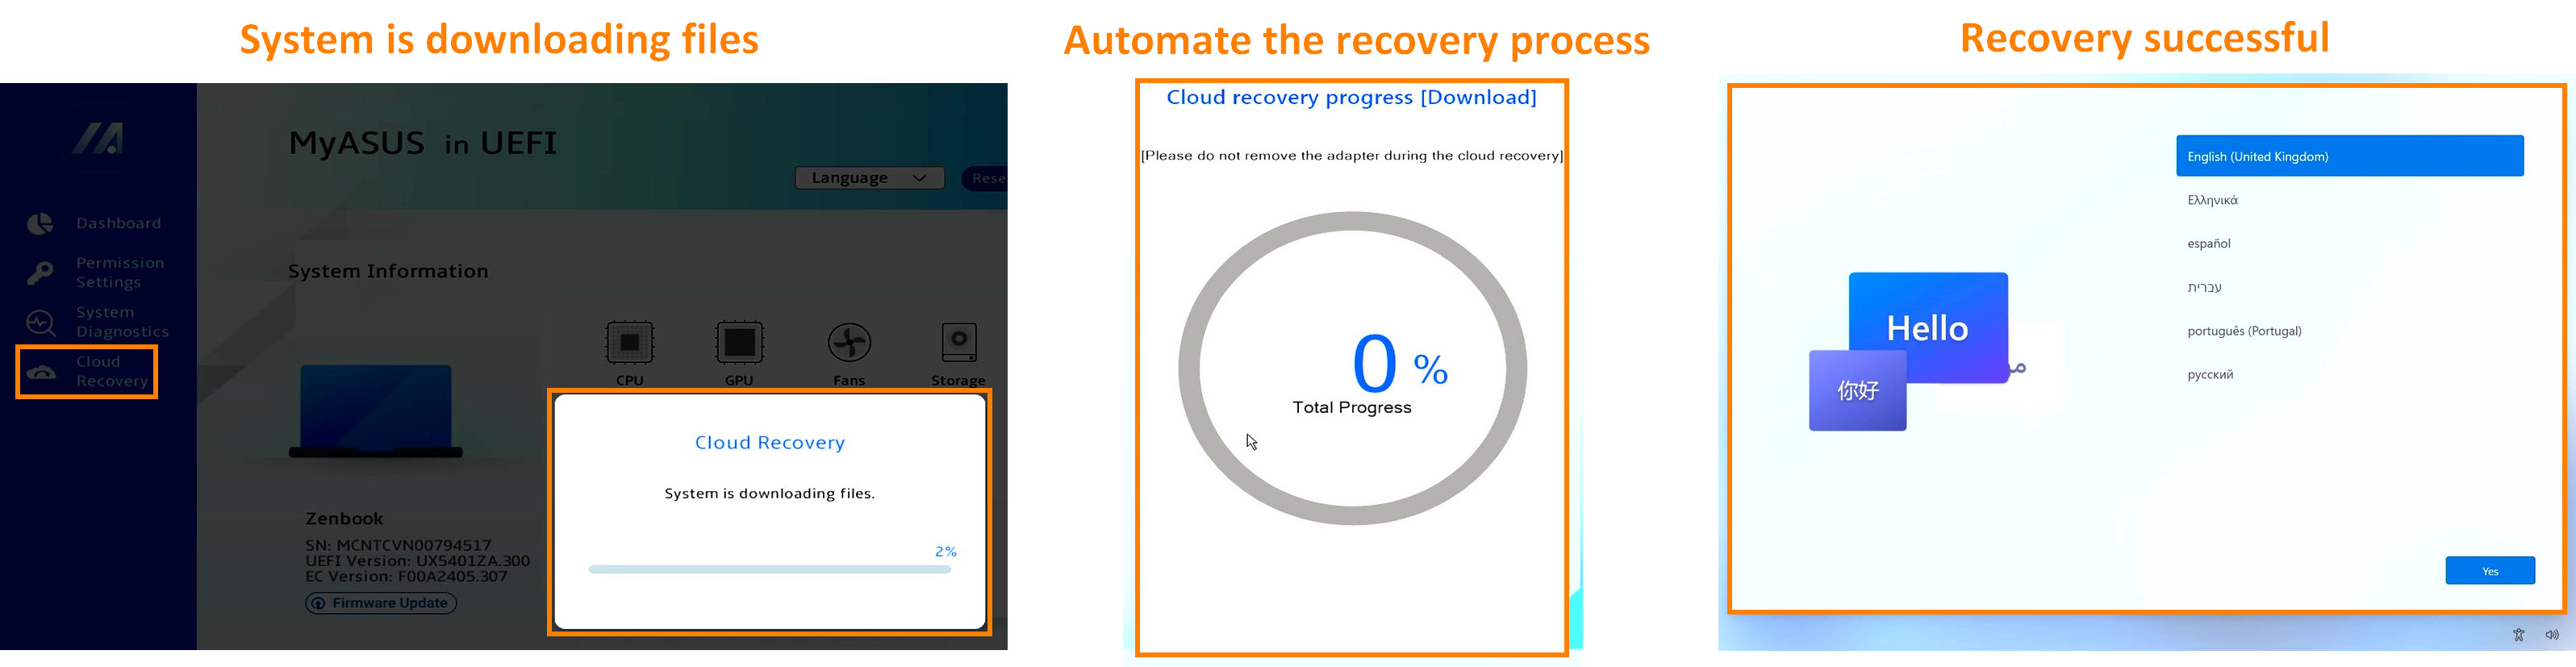
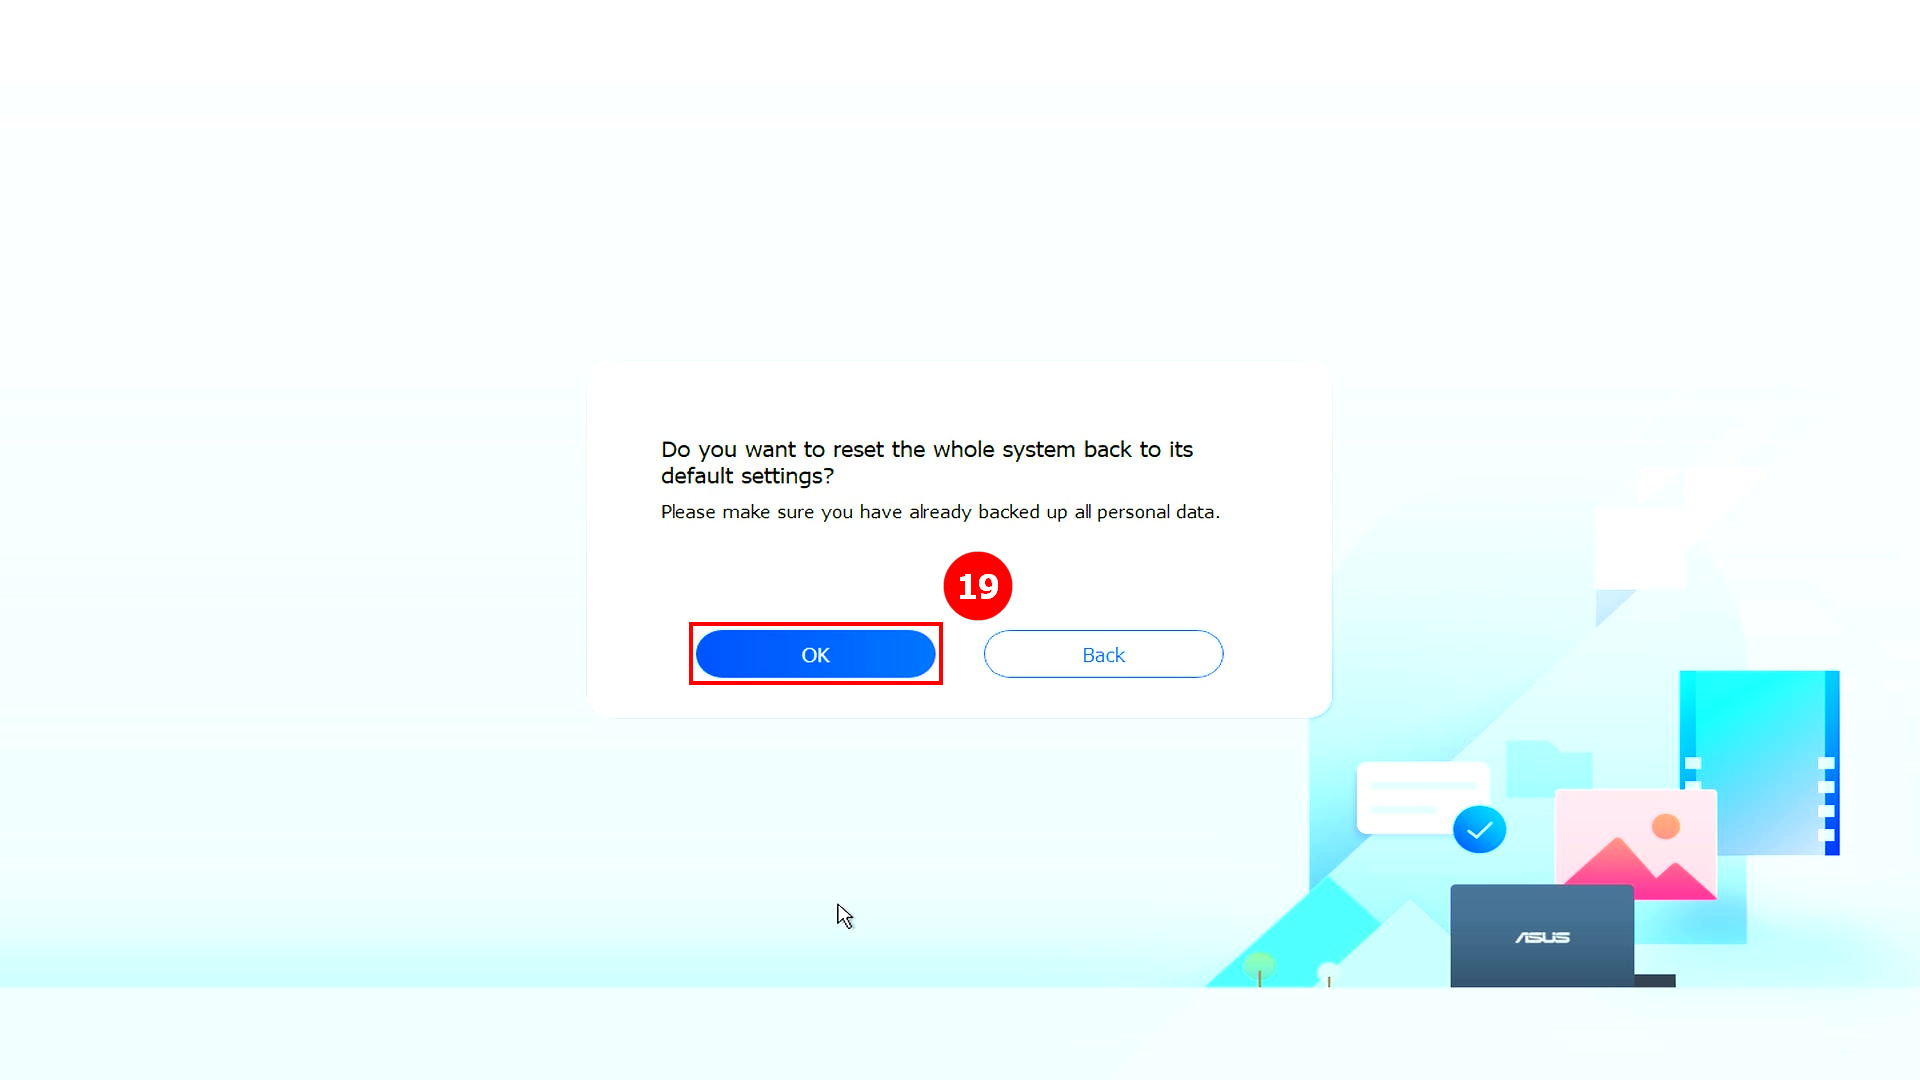
(14) Backup complete. Do you want to reset the whole system back to its default settings? Click ⑲[OK] and the system will automatically download the files that the computer needs to install from the cloud.
Please note: When you click OK, Cloud Recovery will restore the storage device where the OS is stored to its original state, which means that all data on the storage device will be erased, regardless of whether you partition the storage device or not.
If you need to perform Cloud Recovery on a computer with two or more storage devices (such as a combination of SSD + HDD), please go to Chapter 5-Q4 of this article.
- If your computer can still access Windows, use an external storage device to back up your data or reference [Notebook] MyASUS - Switch and Recovery, or use Windows built-in backup features [Windows 11/10] Backup and Restore your files (File History), or use cloud storage to back up your data or reference [Windows 11/10] OneDrive or go to ASUS WebStorage to get a cloud backup.
- If your computer won't be able to access Windows and you have important data that hasn't been backed up yet, please contact the ASUS Service Center for help.
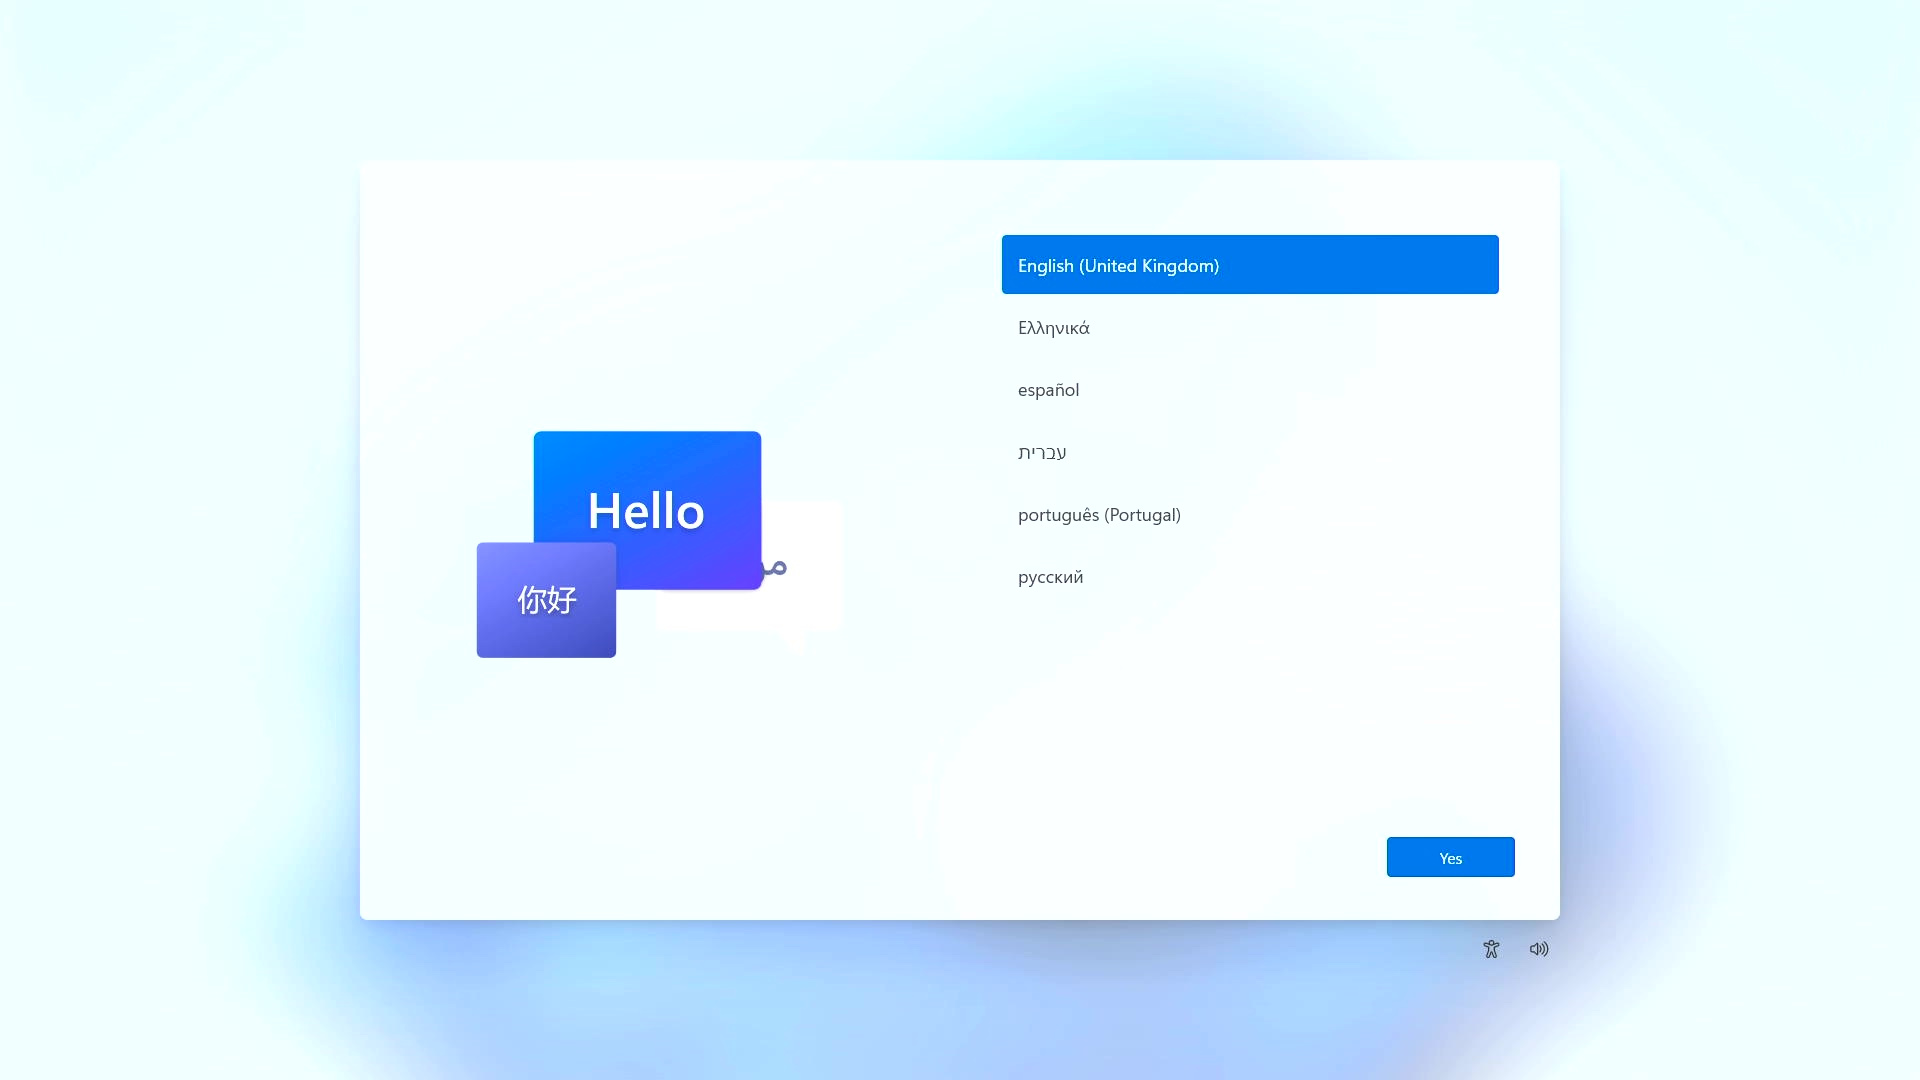
(15) The Cloud Recovery program starts, please keep the network connected and do not remove the power, this process will take about 1~3 hours, depending on your network quality and computer configuration.
During this time, it is normal that the computer may restart several times or have a black screen. Please do not operate the computer, be patient.

(16) Cloud Recovery succeeds and your computer has been restored to factory condition.
If your computer is unable to complete Cloud Recovery, please contact the ASUS Service Center for help.
4. Cloud Recovery is not accessible
4.1 This project does not support Cloud Recovery
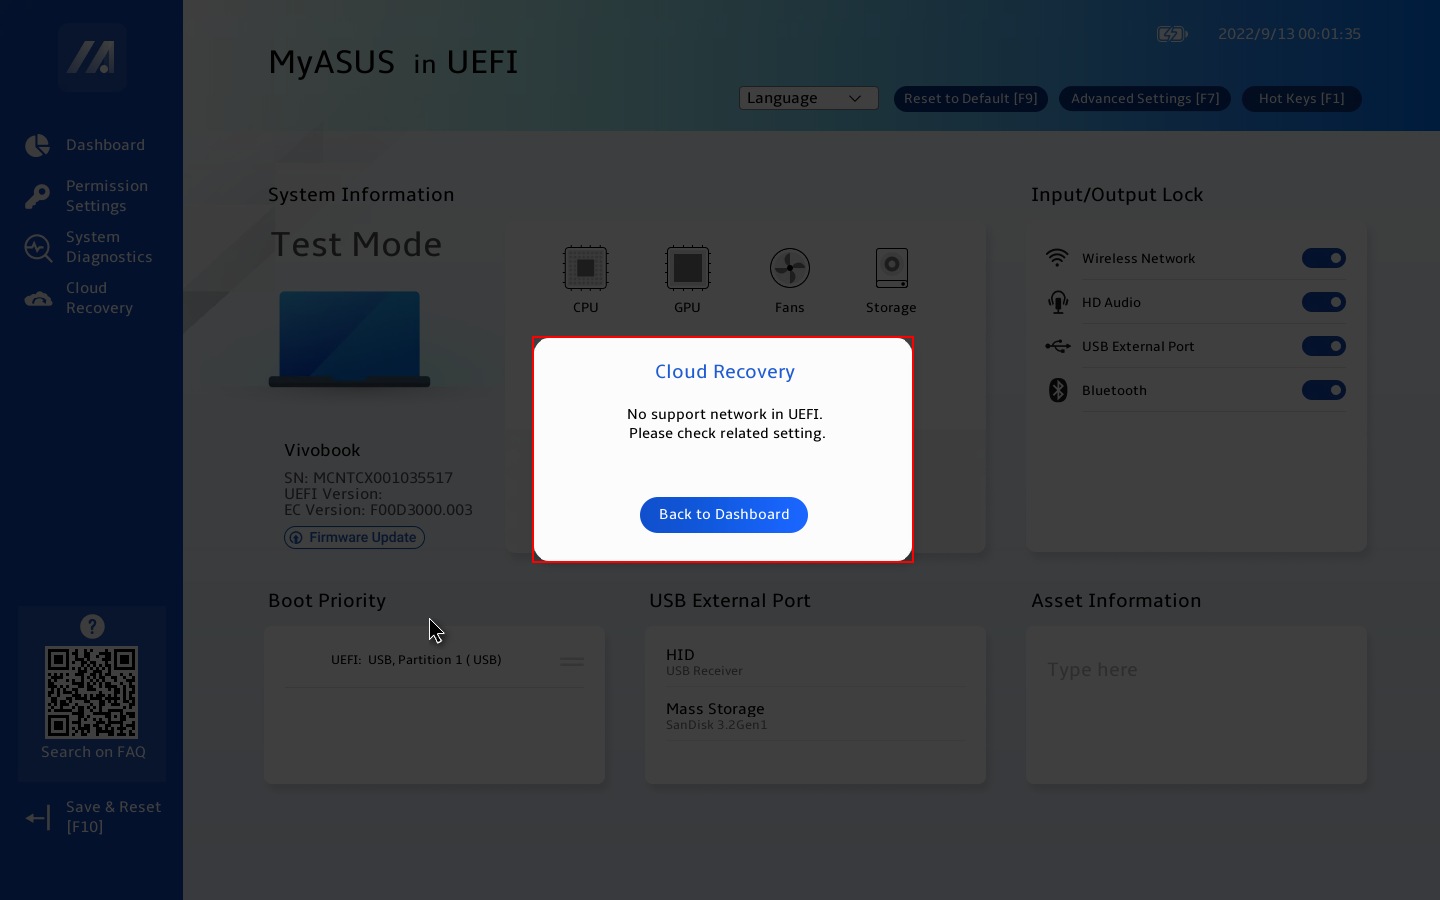
The following screen will be displayed, if this project does not support Cloud Recovery.
- Initial system is Windows S mode
- Your computer is Non-OS in default
If you have any questions, please contact ASUS Service Center.

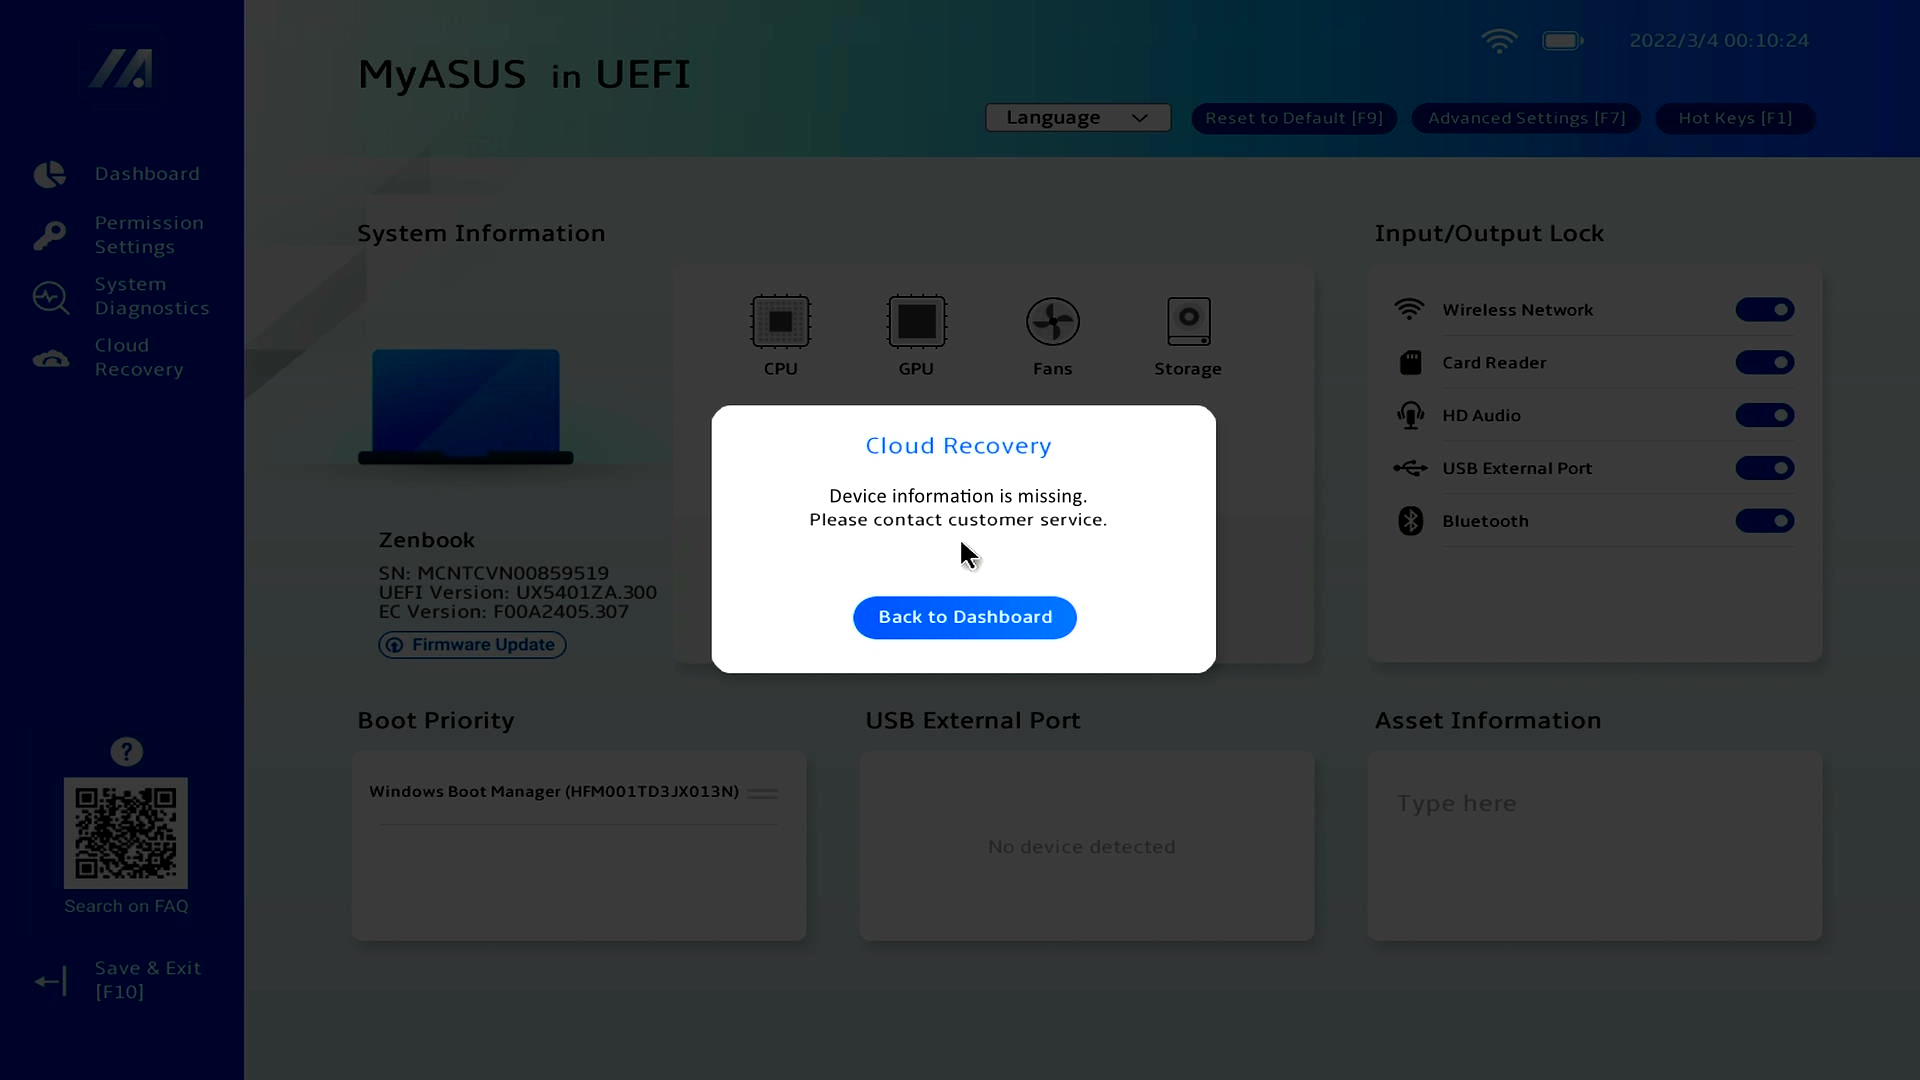
4.2 Device information is missing
If you see Device information is missing, please contact the ASUS Service Center.
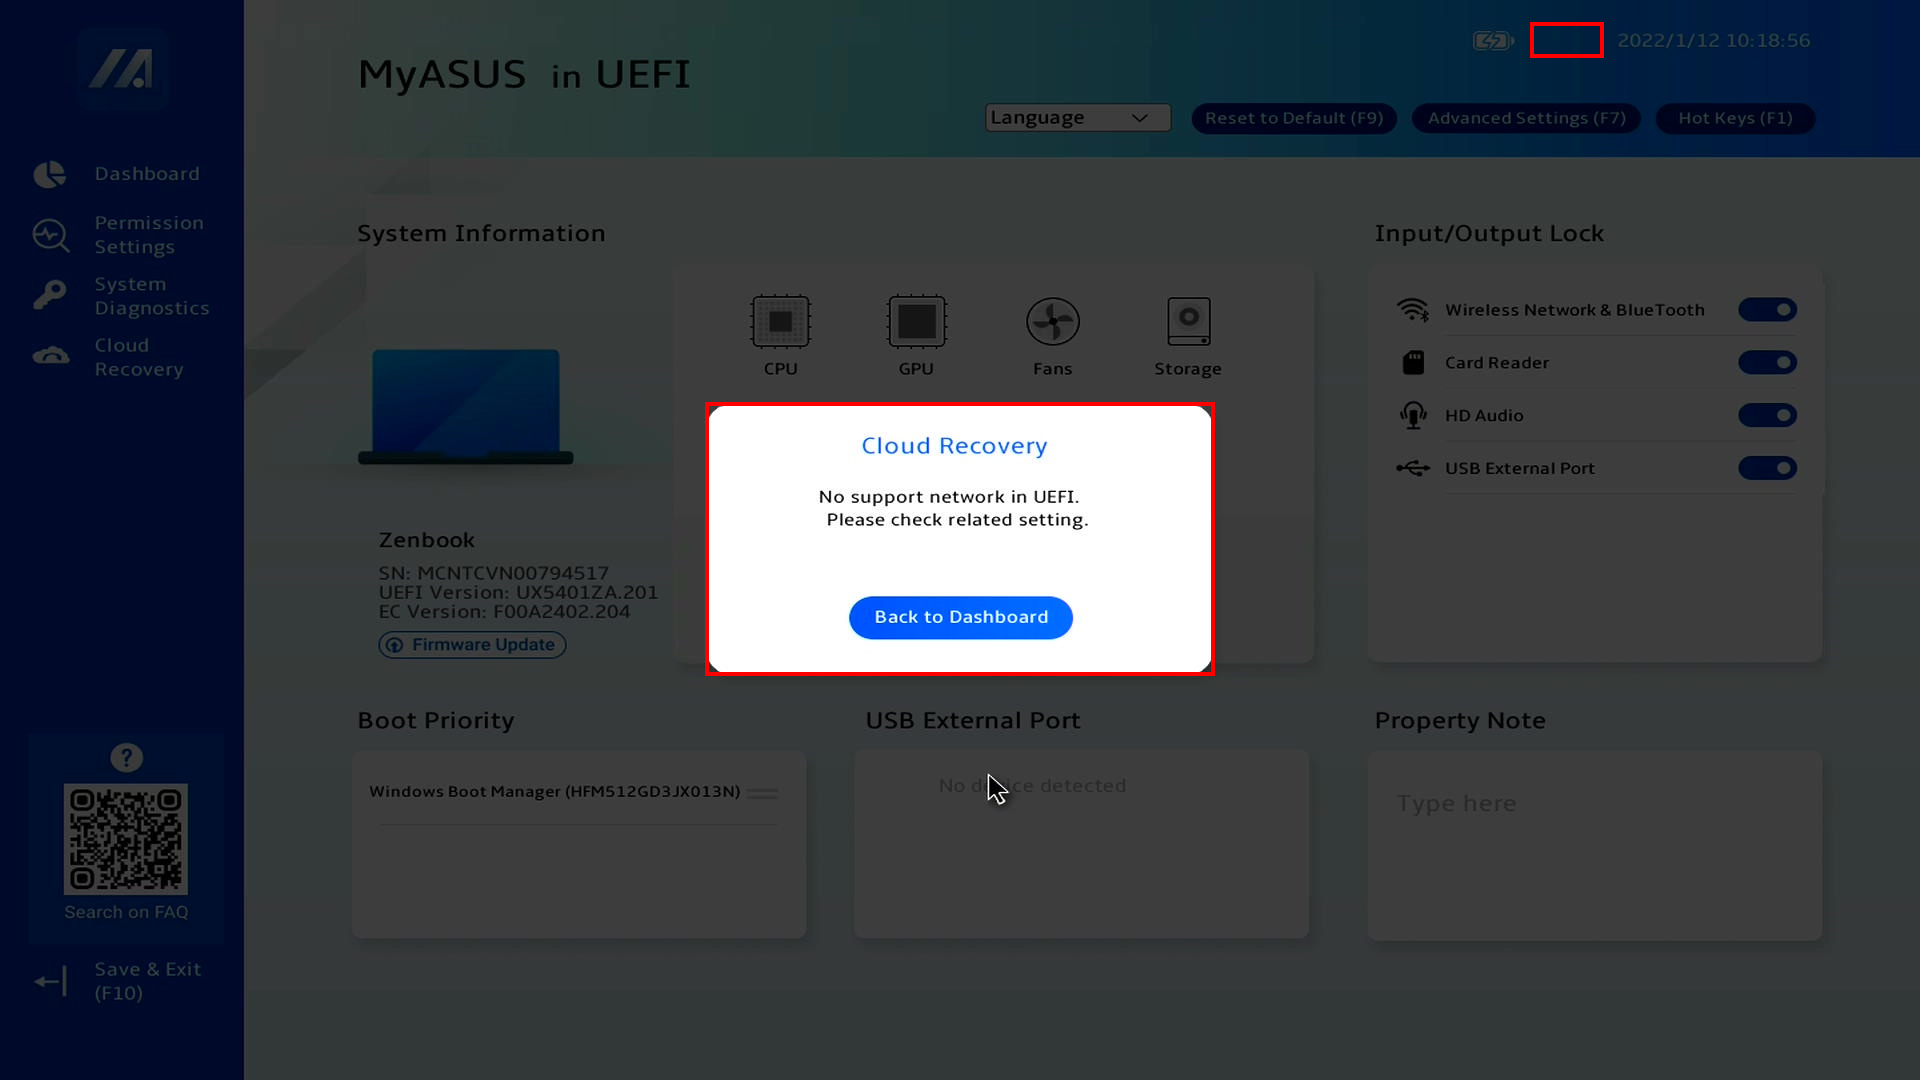
If you can't access Cloud Recovery and the following screen is displayed, the WiFi icon is also not displayed in the upper left corner. Please install the WiFi Firmware upgrade file.
Download the WiFi Firmware upgrade file. Go to the ASUS website, click ①[Search], enter ②[Computer Name], click ③[Support], click ④[Driver & Utility], click ⑤[BIOS & Firmware], find the UEFI WIFI Firmware Installer and click ⑥[Download]. After the download is complete, execute the exe file to complete the upgrade, please return to the MyASUS in UEFI BIOS interface.

Q1: What happen if Cloud Recovery stops due to slow or unstable internet connection?
A1: When your computer loses its internet connection, you will be returned to the initial page of Cloud Recovery and you will need to re-execute Cloud Recovery.
If your Internet connection is unstable and you can't perform Cloud Recovery, it is recommended that you send your computer to repair center.
Q2: The process for recovery will be totally unattended from start to end?
A2: Yes, you can take care of other things when the Cloud Recovery progress starts, so be patient and wait for the Cloud Recovery to end.
Q3: Will Cloud Recovery change the HDD or SSD partition?
A3: Yes, Cloud Recovery restores your storage device to its original state, regardless of whether the storage device has partitions or not. So before you start Cloud Recovery, back up your storage device data first.
Q4: If my computer has two or more storage devices, will the data in these storage devices be deleted?
A4: Yes, no matter how many storage devices there are, their data will be deleted. If your computer has two or more storage devices, please use the Cloud Recovery function in MyASUS in WinRE, perform Cloud Recovery in this environment, only the device storing Windows will be deleted, please click here for how to use this function.
Q5: Can I install the OS on a storage device I bought? (non-ASUS HDD/SSD)
A5: If you have replaced your storage device, you can use Cloud Recovery to restore your OS.
Q6: Under what circumstances is it recommended to perform the Cloud Recovery function?
A6: You can use Cloud recovery to restore your computer to default settings:
- When you can't enter Windows and there's no way to fix it.
- When replacing a Windows storage device.
- When you want to completely restore your computer to Default Settings.
Q7: What should I do if my computer has two or more storage devices?
A7: It is recommended that you use the Cloud Recovery function in MyASUS in WinRE, perform Cloud Recovery in this environment, only the device where Windows is stored will be deleted, click: [Notebook] Cloud Recovery within MyASUS in WinRE - Introduction
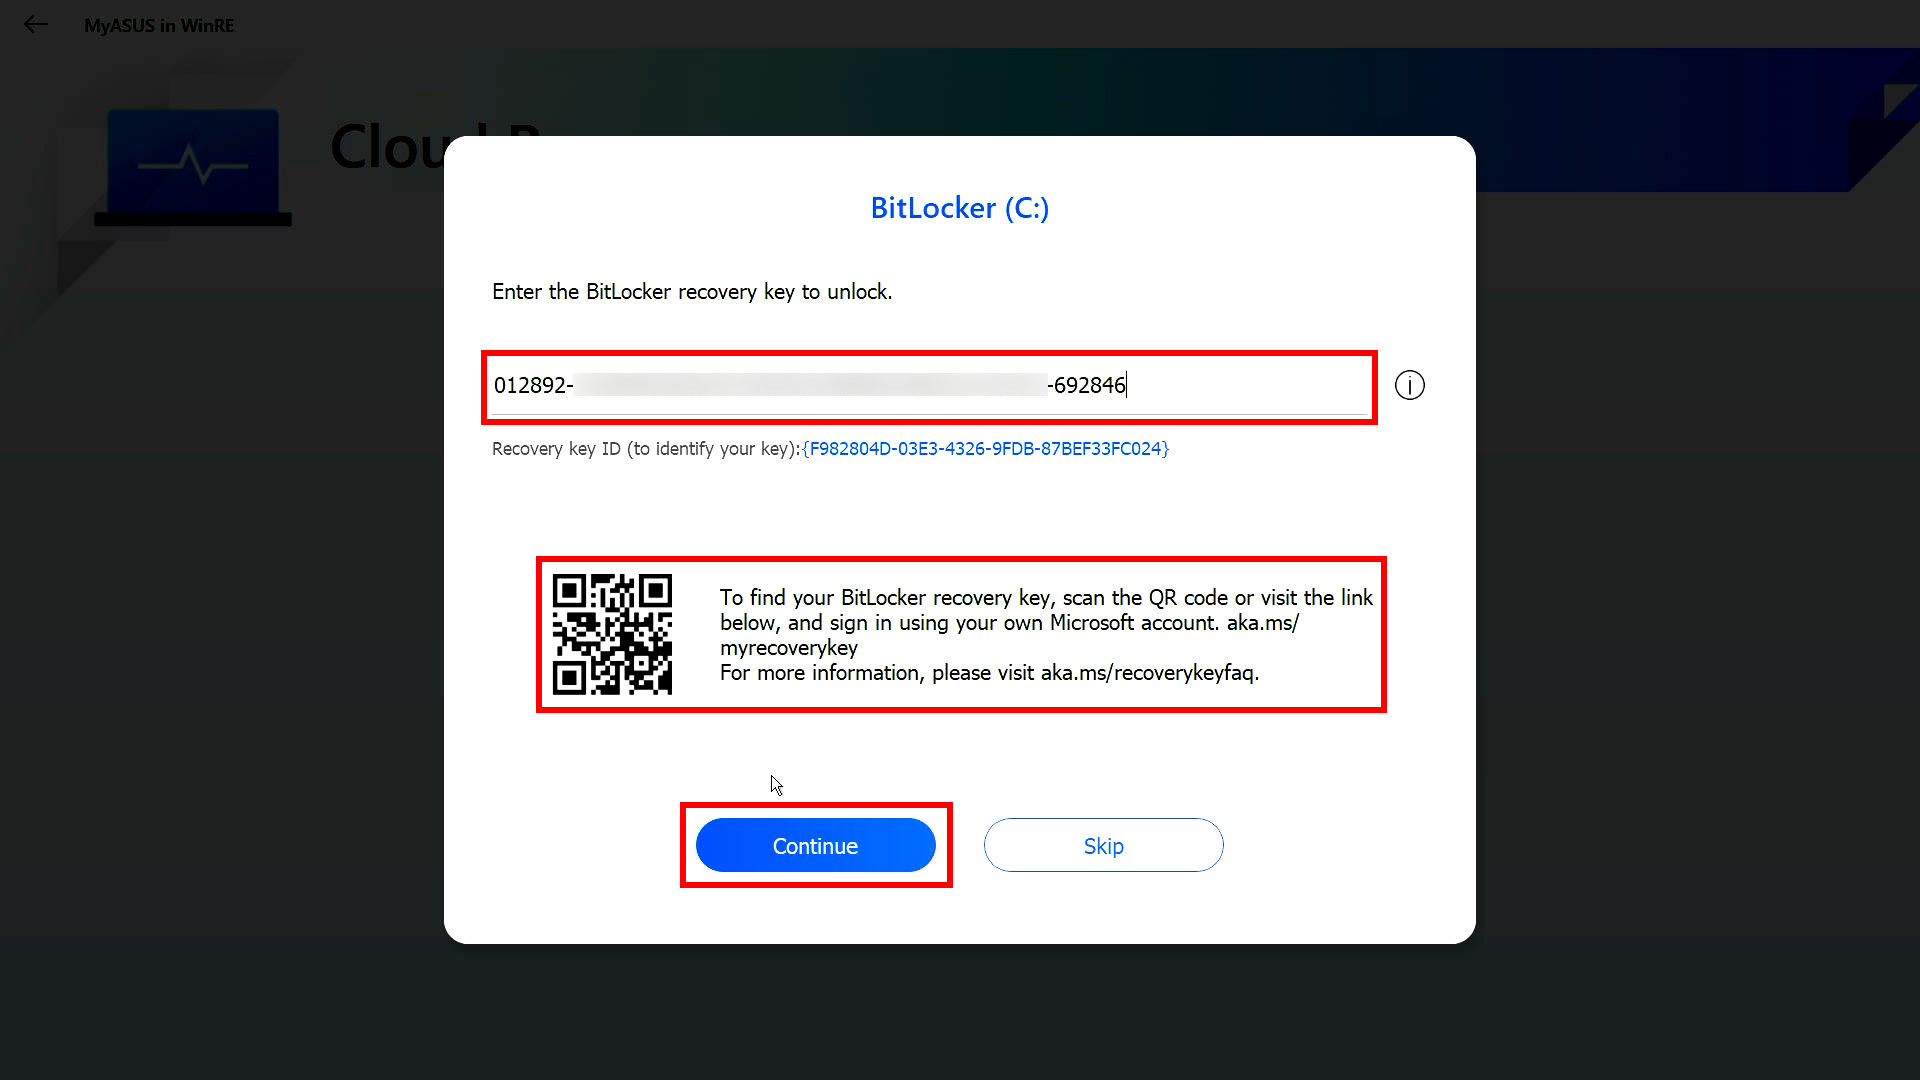
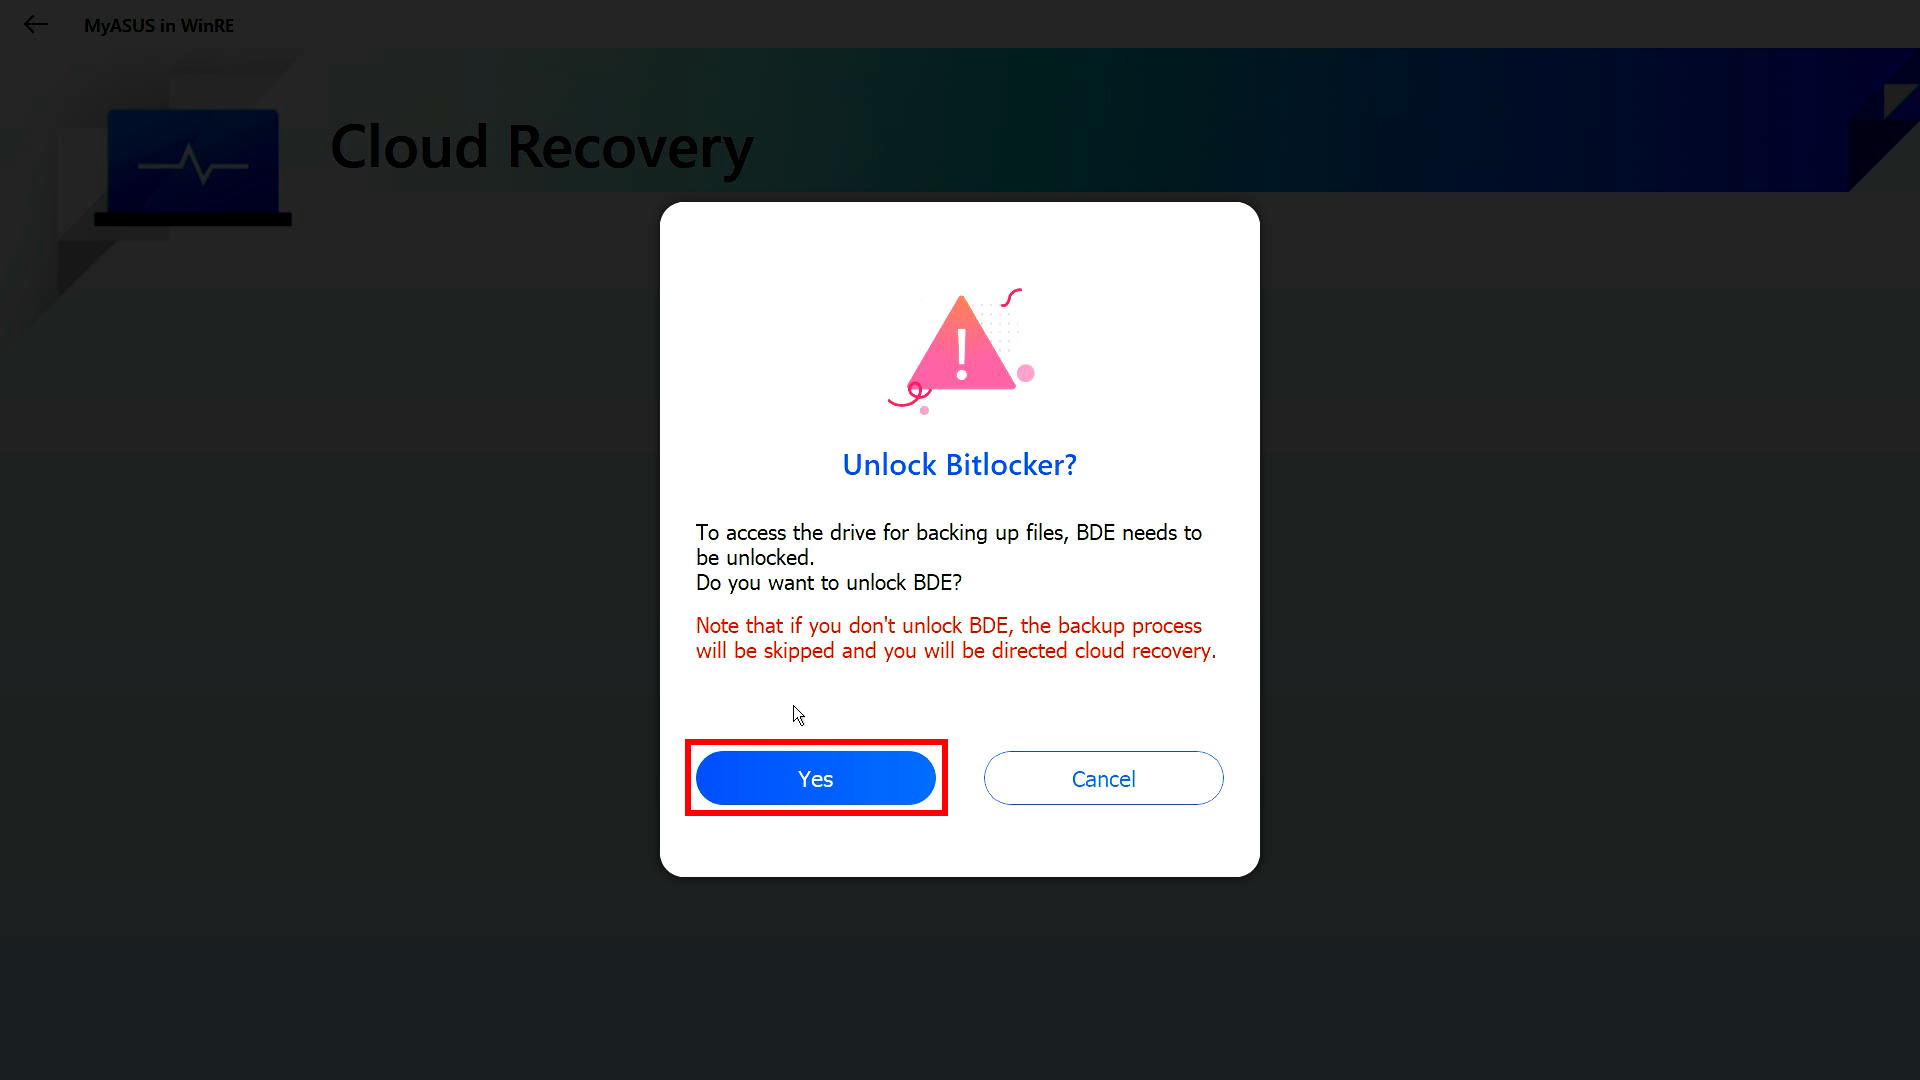
Q8: What should I do if I have enabled Bitlocker and want to back up my files?
A8: You need to unlock it with a Bitlocker recovery key.
(1) Before backing up the file, the following screen will be displayed, click [YES].
※ If you do not need to back up, click [Cancel] to skip.
(2) Please scan the QR Code with your device, or click https://aka.ms/myrecoverykey to log in to your Microsoft account to get the Bitlocker recovery key, and then unlock it for backup.
※ If you are not sure how to get the Bitlocker recovery key, please refer to the following: [Notebook/Desktop/AIO] Troubleshooting - How to fix it shows BitLocker recovery screen after power on/Find BitLocker recovery key | Official Support | ASUS Global