[Gaming NB] AniMe Matrix™ Display - Introduction
Contents:
4. AniMe Matrix™ - Application System Settings
5. AniMe Matrix™ - Animation Mode
6. AniMe Matrix™ - System Mode
8. Q & A
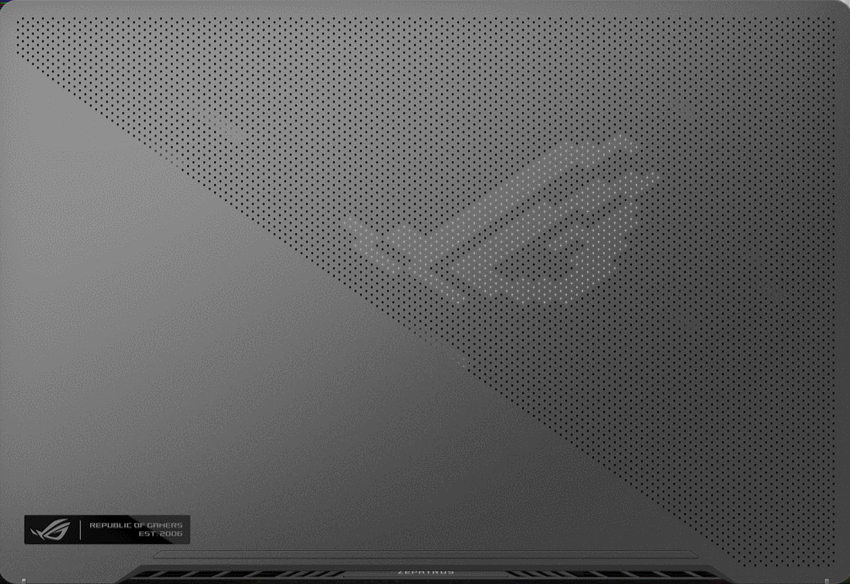
Featuring a first-of-its-kind AniMe Matrix™ display which offers deep personalization in a truly unique way.
The groundbreaking display is made up of thousand individual mini-LEDs that can be used to display customized images, animations ,and expresses your creativity, audio visualizations that match the music playback. The status notifications keeps you in the loop on new messages, battery life, and more.
| Animation Mode | System Mode | Audio Mode |
 |  |  |
2. Models Supported: ROG Zephyrus G14 (GA401 and GA402 series with AniMe Matrix™ Display supported) and ROG Zephyrus M16 (2023 GU604V with AniMe Matrix™ Display supported)
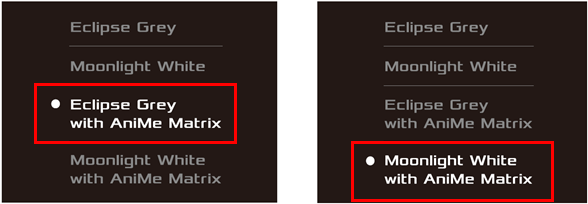
※ Note: Not all GA401、GA402 and GU604V series products come with AniMe Matrix™ Display supported. You can check the label on the giftbox. If it shows as [Eclipse Grey with AniMe Matrix] or [Moonlight White with Anime Matrix], it means the AniMe Matrix Display is supported on your laptop.
AniMe Matrix™ Display application has been integrated into the Armoury Crate application. The custom settings of AniMe Matrix™ Display need to be adjusted via Armoury Crate.
Version supported: Armoury Crate application V2.6.14 or above

(If AniMe Matrix™ Display is not supported on your laptop, the settings of AniMe Matrix™ Display will not show up even if you have updated Armoury Crate up to V2.6.14 or above.)
Please refer to the introduction of Armoury Crate. Learn more at How to install and update Armoury Crate.
4. AniMe Matrix™ - Application System Settings
4-1. How to run AniMe Matrix ?
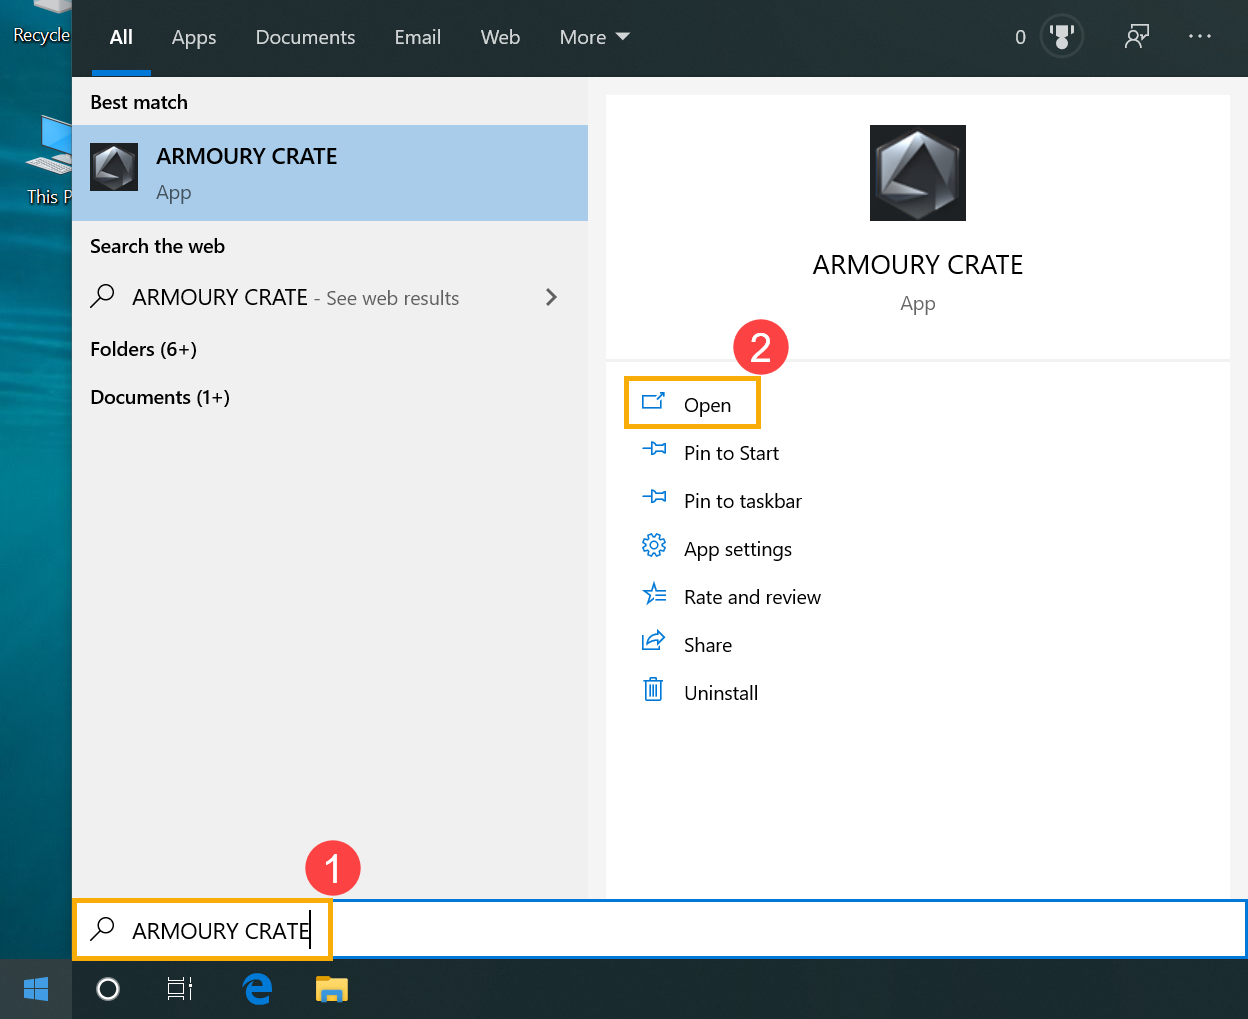
4-1-1. Type and search [ARMOURY CRATE] in the Windows search bar(1), then click on [Open](2).
4-1-2. Method 1: Select [Device](3), then select [AniMe Matrix](4) to get into the main page of AniMe Matrix Display application.

4-1-3. Method 2: Click the [Quick link of AniMe Matrix](5) from the main page of Armoury Crate, which will take you to the main page of AniMe Matrix Display application.
4-2. AniMe Matrix™ - Introduction of Preference Settings
※ Note: Power will drop rapidly if lighting is always on.
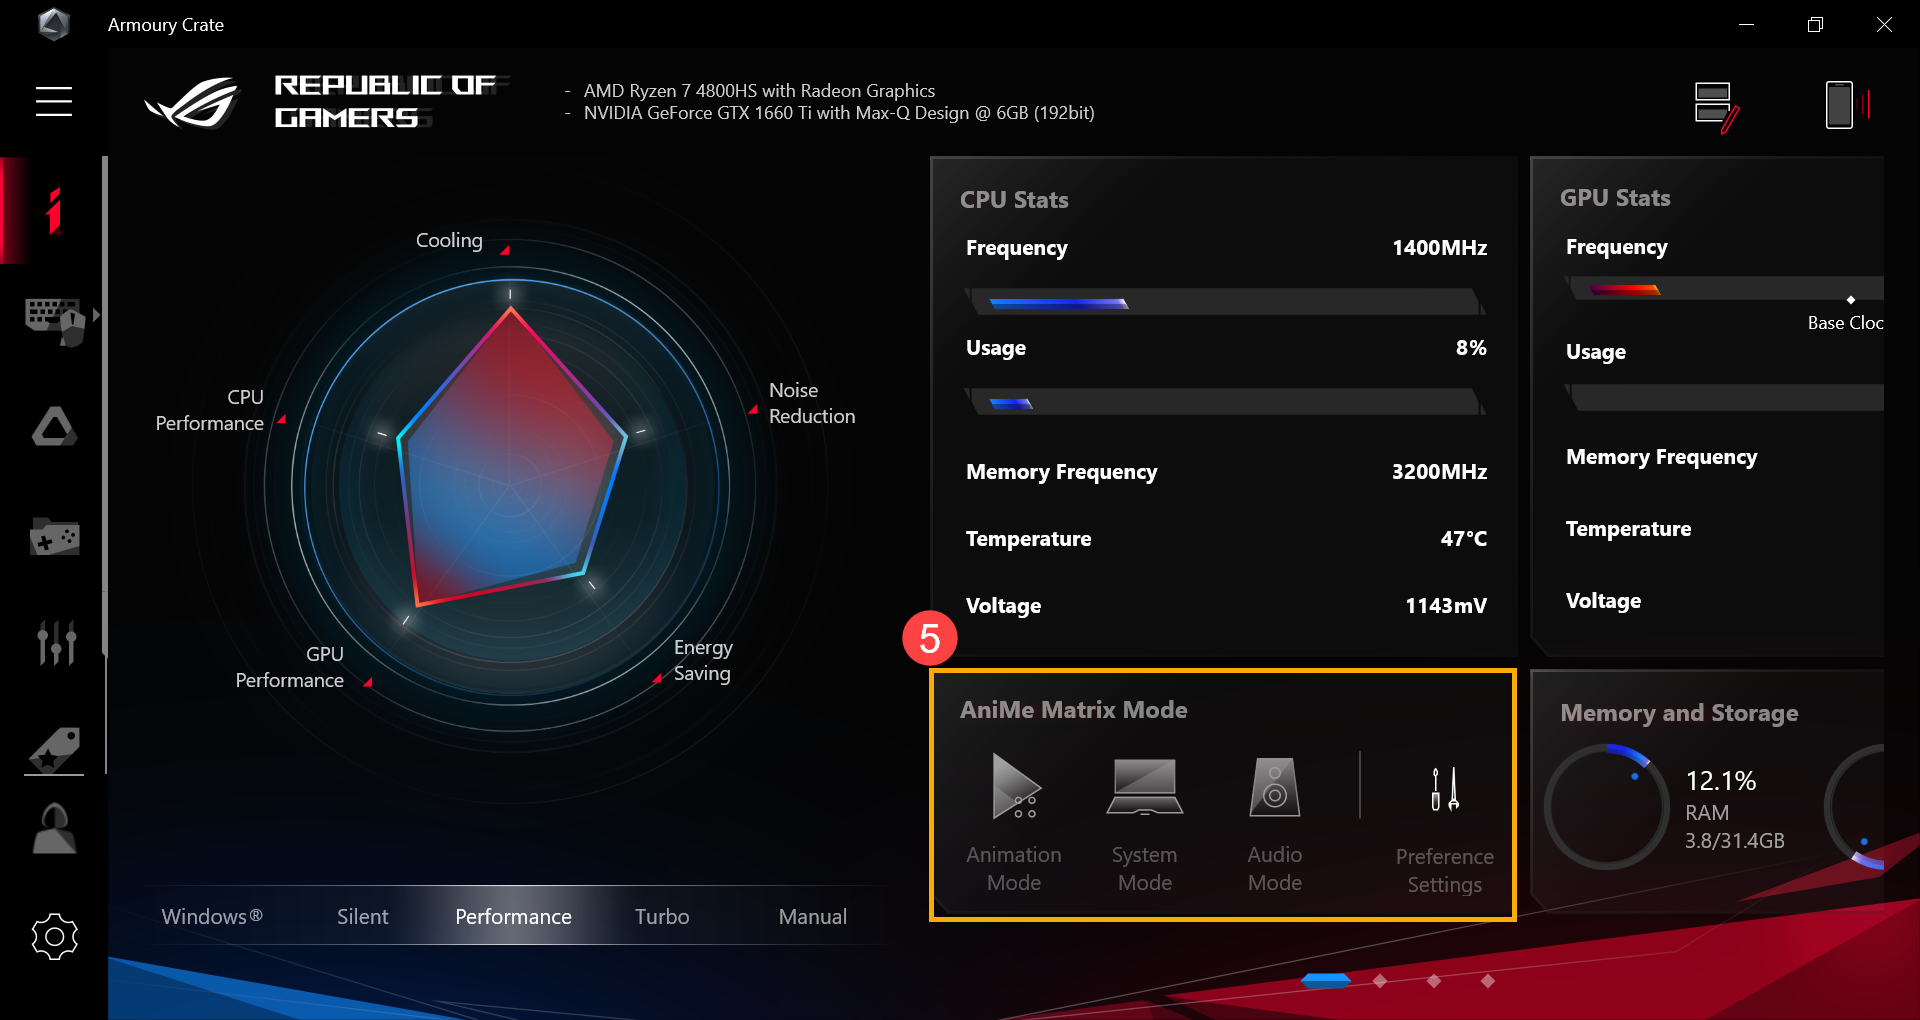
4-2-1. Select [Preference Settings]  (1) on the Main page of AniMe Matrix, and you will enter the Preference Settings page.
4-2-2. After you enter the Preference Settings page, you will be able to start the scenario settings.
For details of (2) (3) (4) icons, please refer to the detailed description from 4-2-3 to 4-2-5 items.

4-2-3. [AniMe Matrix Lighting](2): When the switch is set to [on], the AniMe Matrix Lighting will turn on.

4-2-4. [Power and Sleep Settings](3): You can adjust the lighting status of the AniMe Matrix depending on the following three system functions:
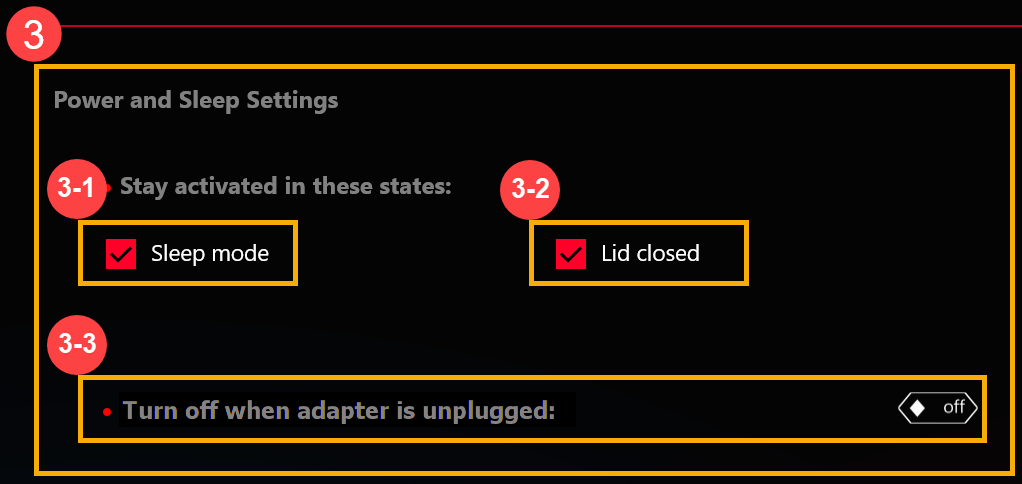
● [Sleep mode](3-1): [Tick] this switch, AniMe Matrix Lighting will display the customized lighting settings after the system goes to Sleep mode.
If this switch is unticked, AniMe Matrix Lighting will display the default lighting effect (shooting star) after the system goes to Sleep mode (when the computer is connected to AC adapter).
● [Lid closed](3-2): [Tick] this switch, AniMe Matrix Lighting will display the customized lighting settings after the Lid is closed.
If this switch is unticked, AniMe Matrix Lighting will display the default lighting effect (shooting star) after the Lid is closed (when the computer is connected to AC adapter).
● [Turn off when adapter is unplugged](3-3):
When this switch sets to [off], AniMe Matrix Lighting will stay activated after the device is unplugged (the coumputer uses battery power). (If [Sleep Mode] or [Lid closed] switch is unticked, AniMe Matrix Lighting will not stay activated after adapter is unplugged.)
When this switch sets to [on], AniMe Matrix Lighting will not stay activated after adapter is unplugged (the coumputer uses battery power). (Even [Sleep Mode] or [Lid closed] switch sets LEDs to stay activated, AniMe Matrix Lighting will not stay activated after adapter is unplugged.)
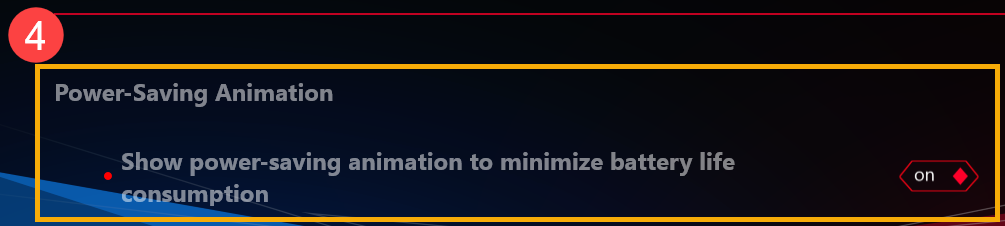
4-2-5. [Power-Saving Animation](4): When this switch is set to [on], it will turn off the customized lighting settings and change to power-saving animation to minimize the battery consumption. This switch will automatically turn [off] after you adjust the custom lighting settings. .
5. AniMe Matrix™ - Animation Mode
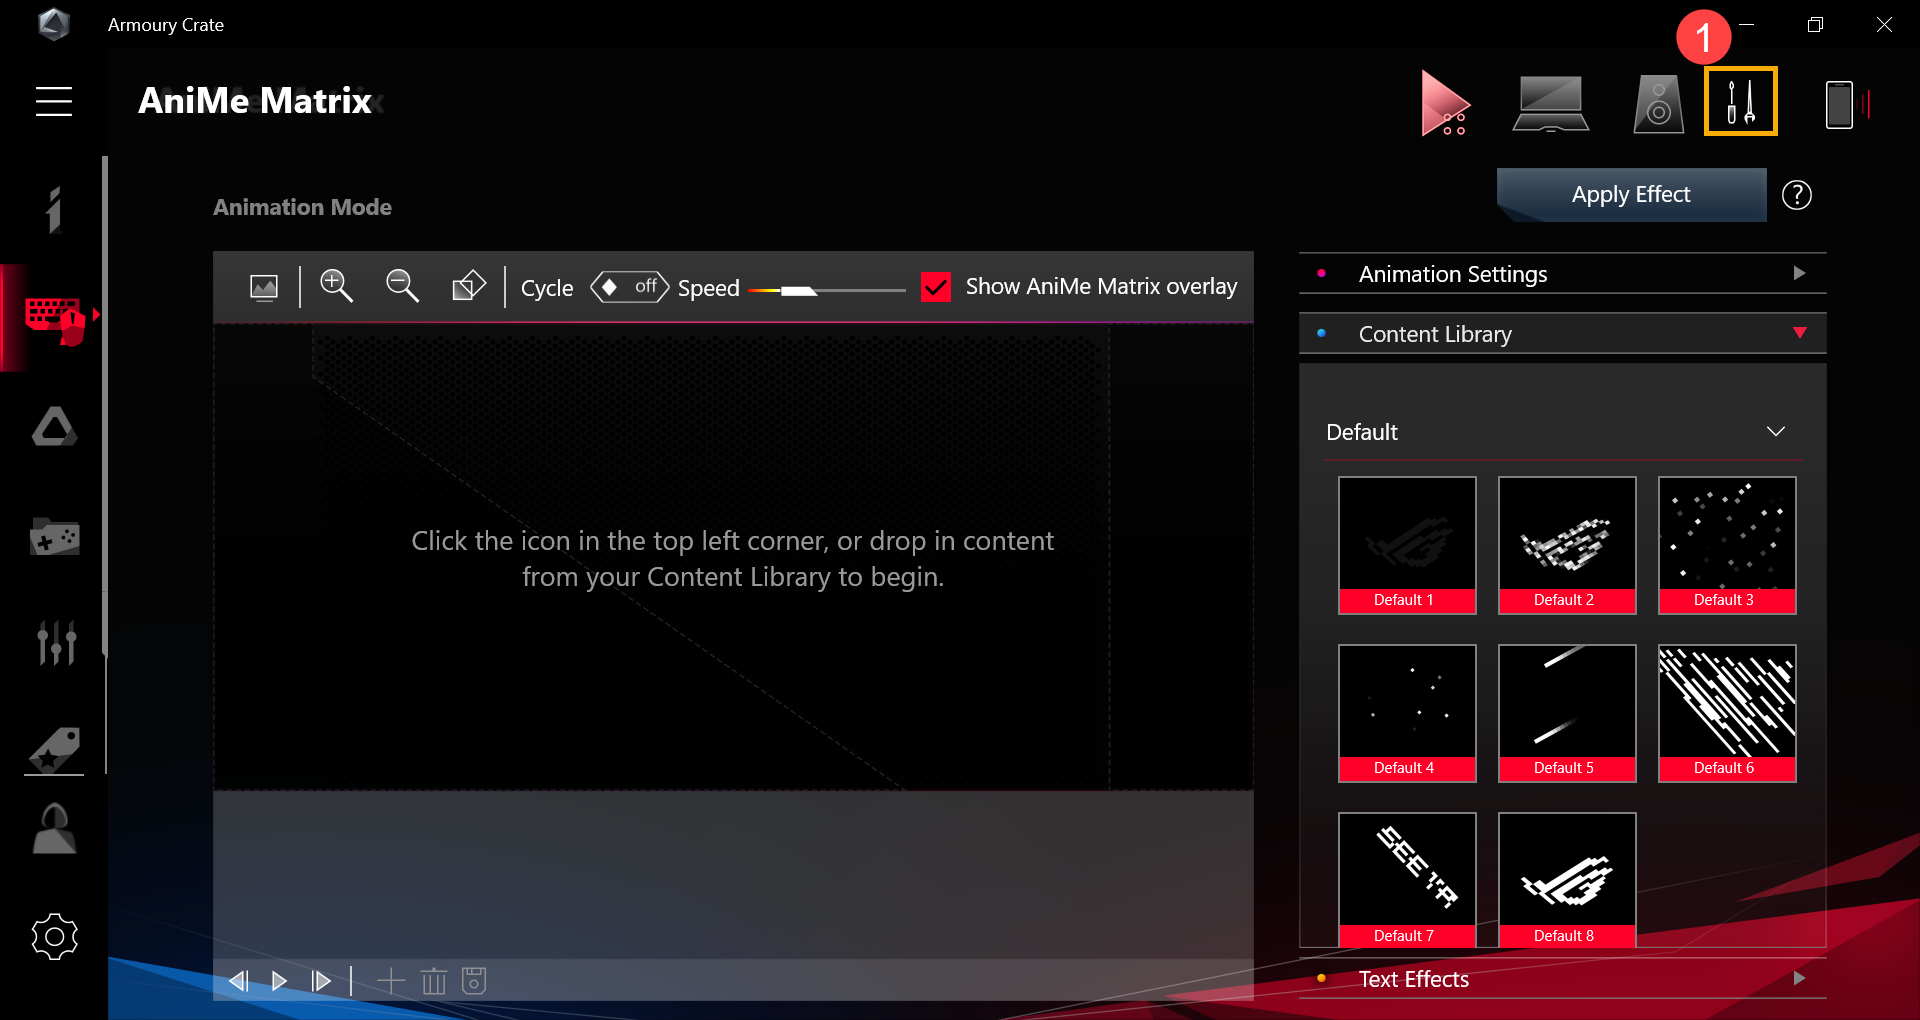
5-1. Select [Animation Mode]  (1) on the main page of AniMe Matrix, you will enter the Animation Mode page. For (2) to (5) icons, please refer to the detailed description from item 5-2 to 5-5.

5-2. Canvas & Preview & Edit Toolbar(2) – User Interface introduction
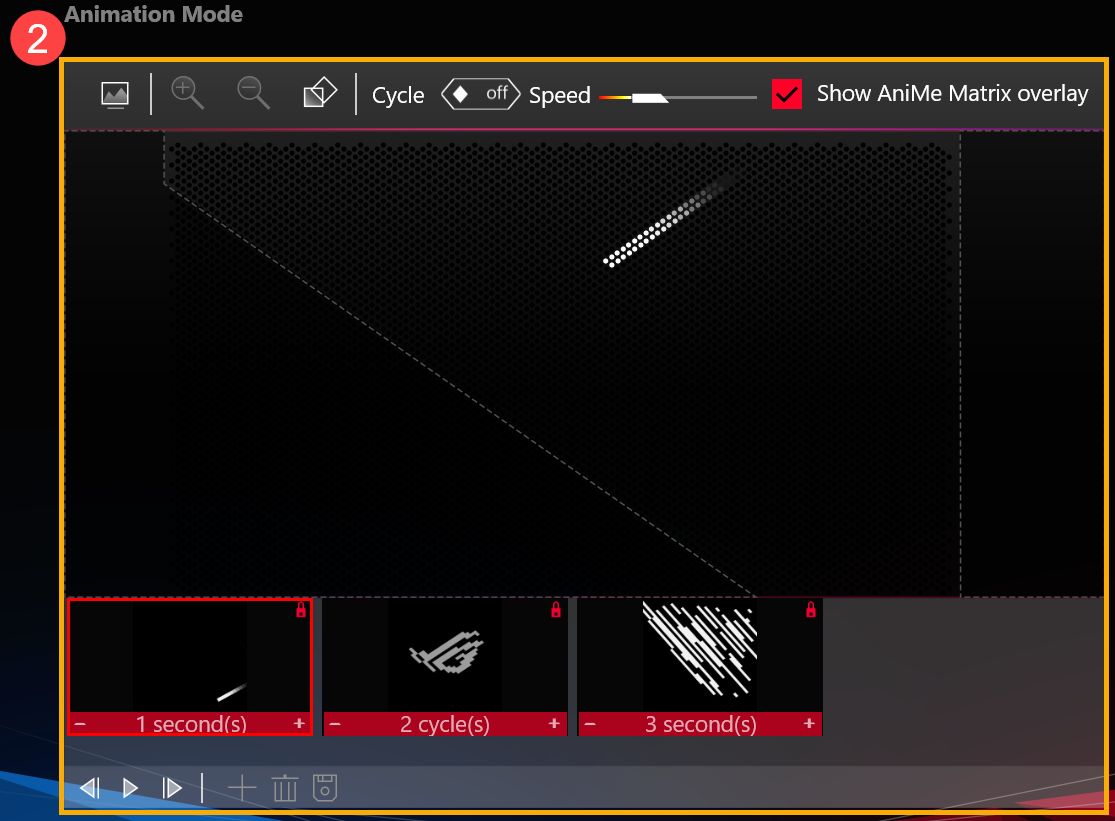
5-2-1. [Insert Image]  : You can insert a customized image. (It only supports one image at a time. Supported image formats: JPEG, PNG, BMP, GIF.)
5-2-2. [Scale up / down]  : Image scaling only supports proportional scaling. If you scale the image beyond the canvas edges, the LEDs will only display the portion of the image within the canvas edges.
5-2-3. [Rotation]  : Switch image angle. (It only supports 45-degree rotation.)
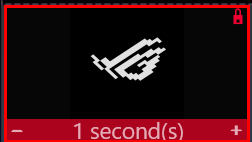
5-2-4. [Cycle] 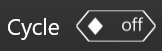 :
:
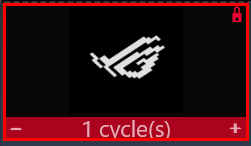
When this switch sets to [on], it will change the GIF runtime unit of current slot as cycle time. (Use + - keys to adjust.)
When this switch is set to [off], it will change the GIF runtime unit of the current slot as seconds time. (Use + - keys to adjust.)
5-2-5. [Speed]  : Change the GIF runtime speed of the current slot. (Use the slider bar to adjust.)
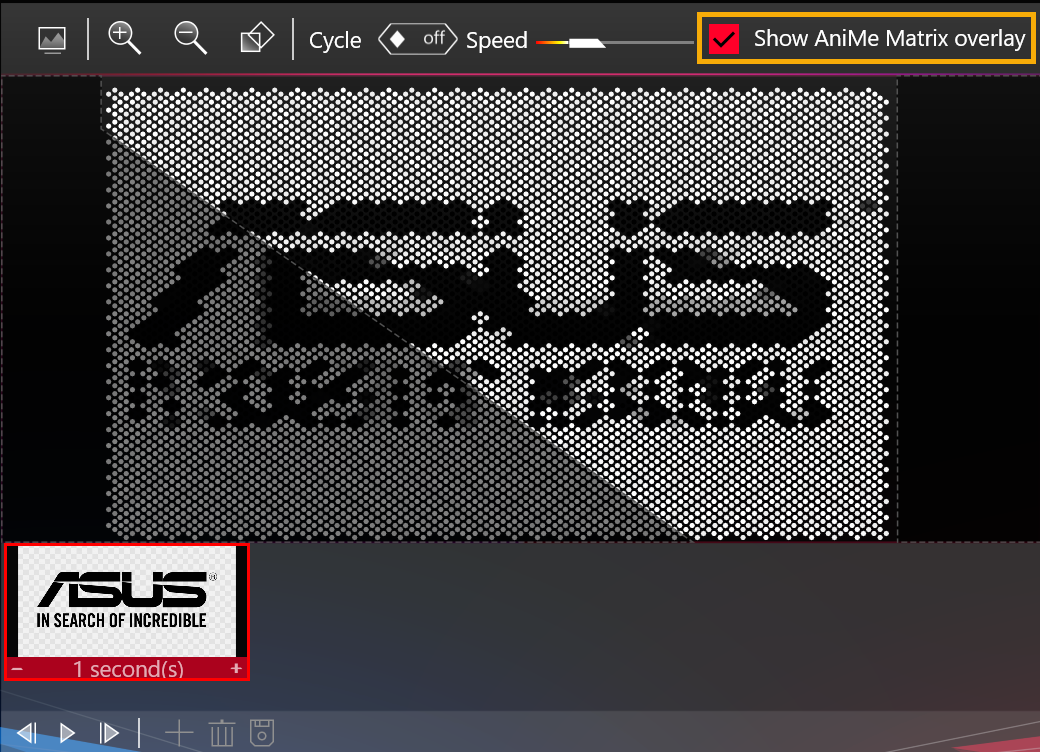
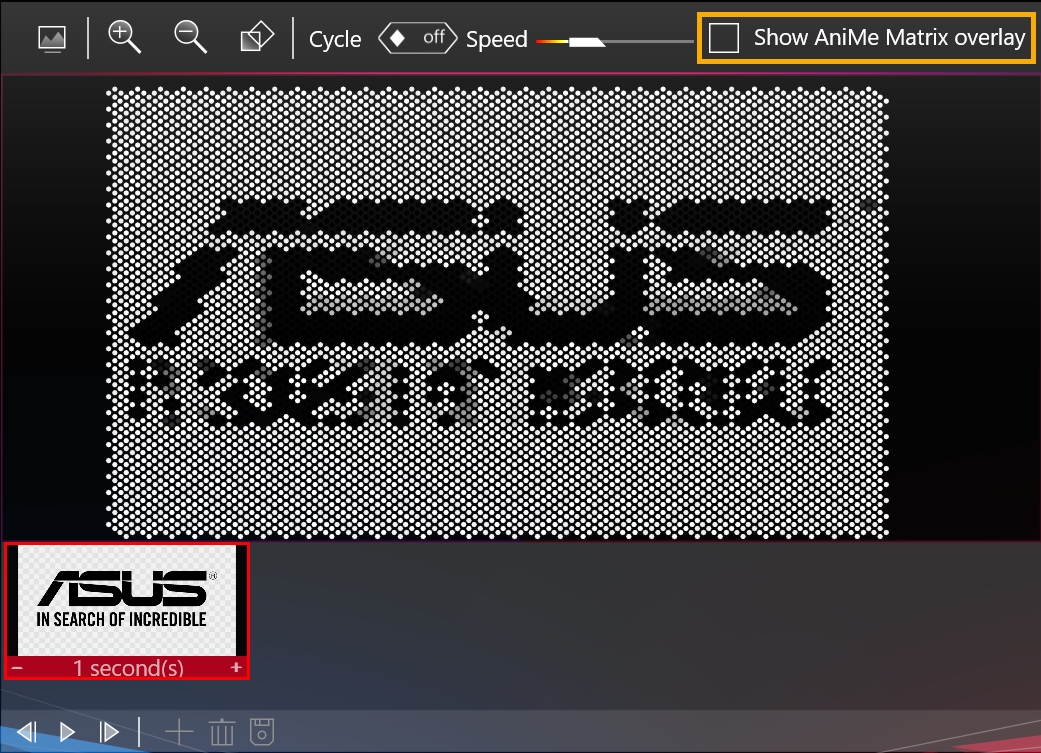
5-2-6. [Show AniMe Matrix overlay]  : Enable / Disable AniMe Matrix overlay and let you know where the actual LEDs on the canvas is. (The gray highlighted area is out of the actual LEDs area.)
5-2-7. [Canvas]:
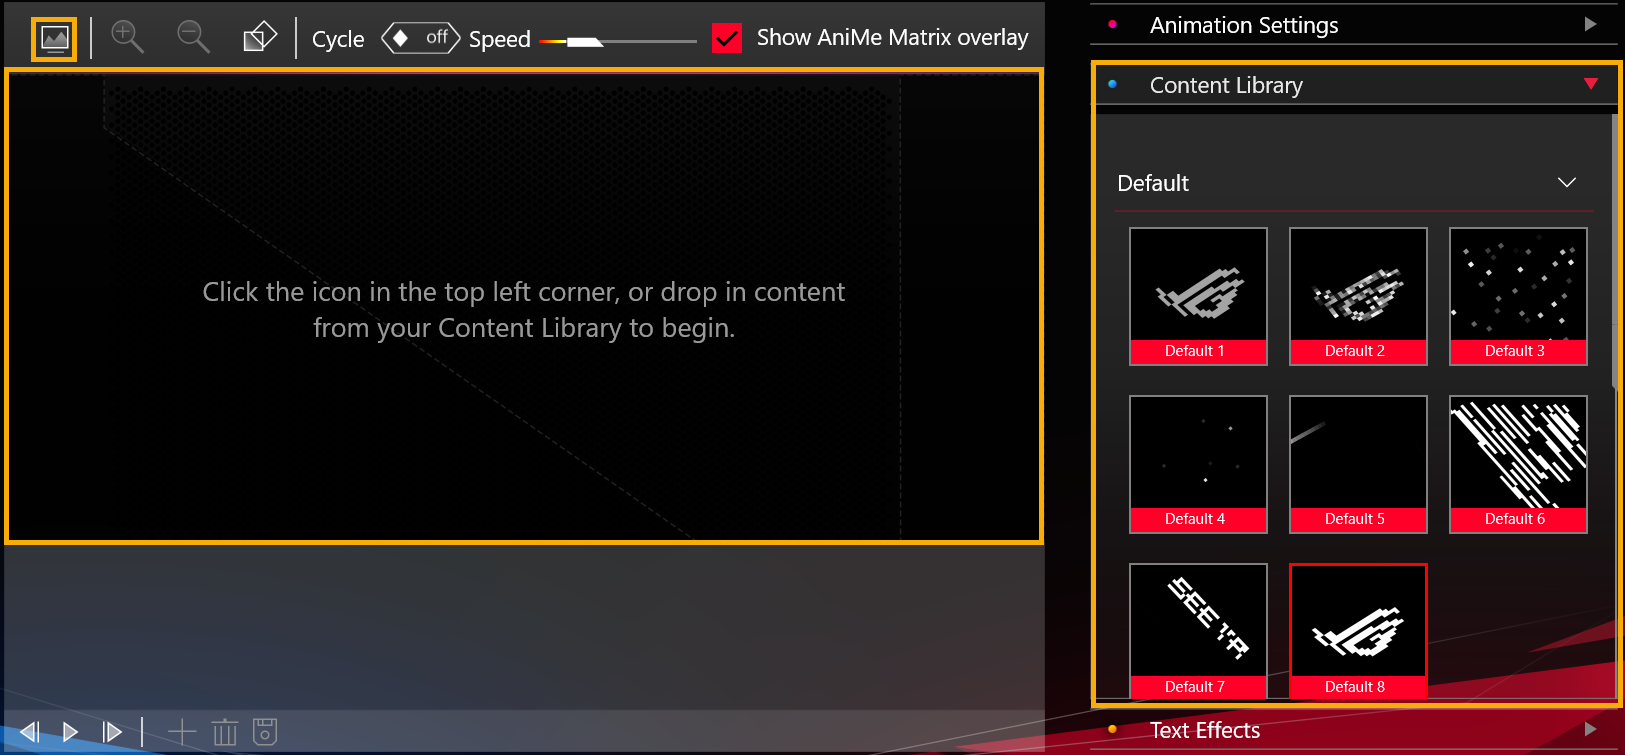
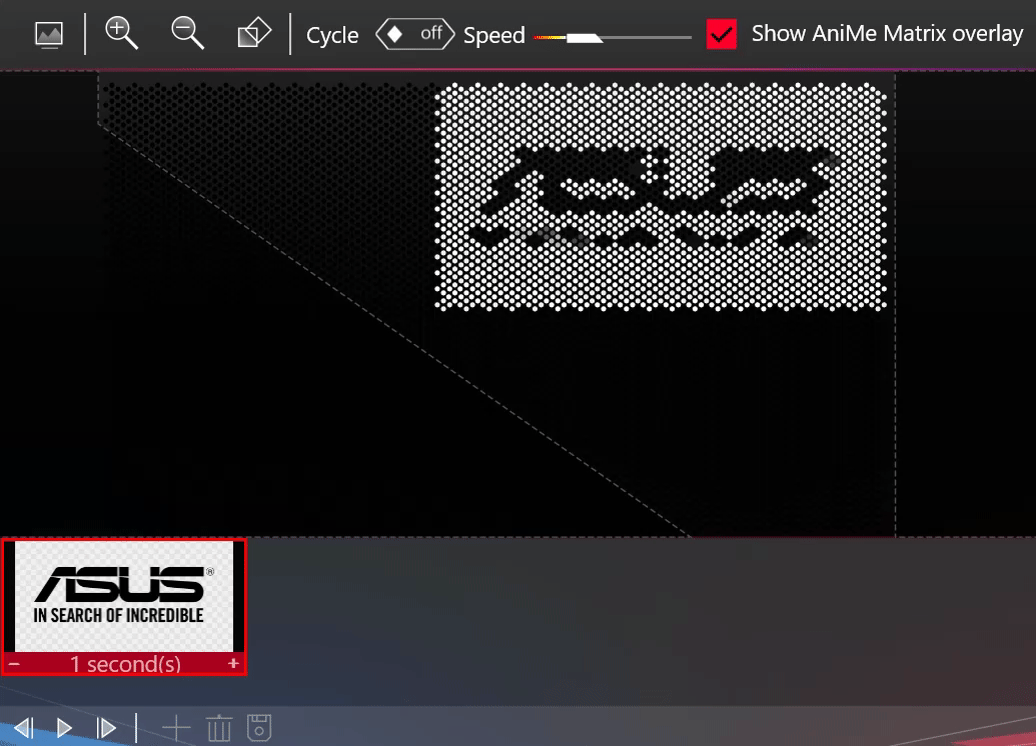
Click the [Insert Image] icon in the top left corner or drop in content from [Content Library] to the canvas.
For the customized image, you can click the mouse and press and hold the image to change its position. (For the Default Content, you cannot change the position.)
5-2-8. Preview Toolbar:
● [Jump to first slot]  : Move focus to the first slot.
● [Play preview]  : Play the animation that you have set.
● [Jump to last slot]  : Move focus to the last slot.
5-2-9. Animation Toolbar:
● [Add Empty Slot]  : Add an empty slot.
● [Delete Selected Slot]  : Delete the current focused slot.
● [Save to Content Library]  : Save the customized content to Saved Library. (For Saved Library, please refer to the detailed description at item 5-4-2.)
5-3. Animation Settings(3) – User Interface introduction
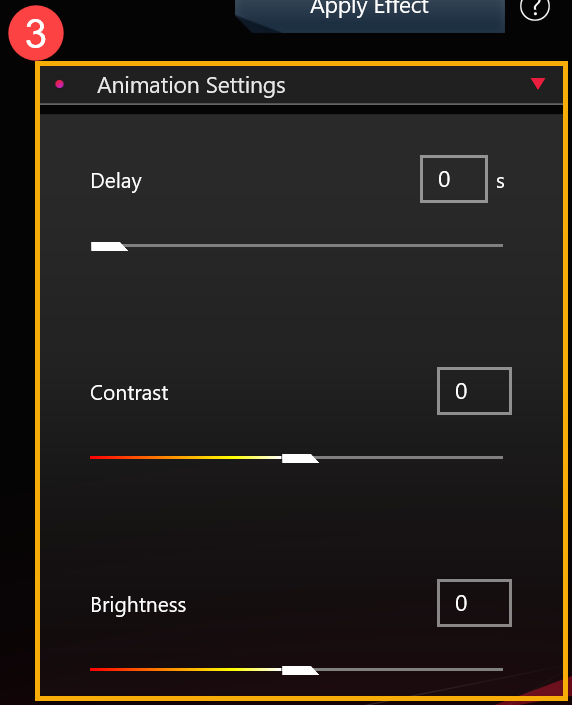
5-3-1. [Delay]: Change the delay time between every slot (All delay time is fixed between each slot.). The default delay time is 0 second.
5-3-2. [Contrast]: Change the contrast on the canvas. Use the slider bar or enter the values to adjust, and the default contrast value is 0. (The contrast can be adjusted as positive or negative values.)
5-3-3. [Brightness]: Change the brightness on the canvas. Use the slider bar or enter the values to adjust, and the default brightness value is 0. (The brightness can be adjusted as positive or negative values.)
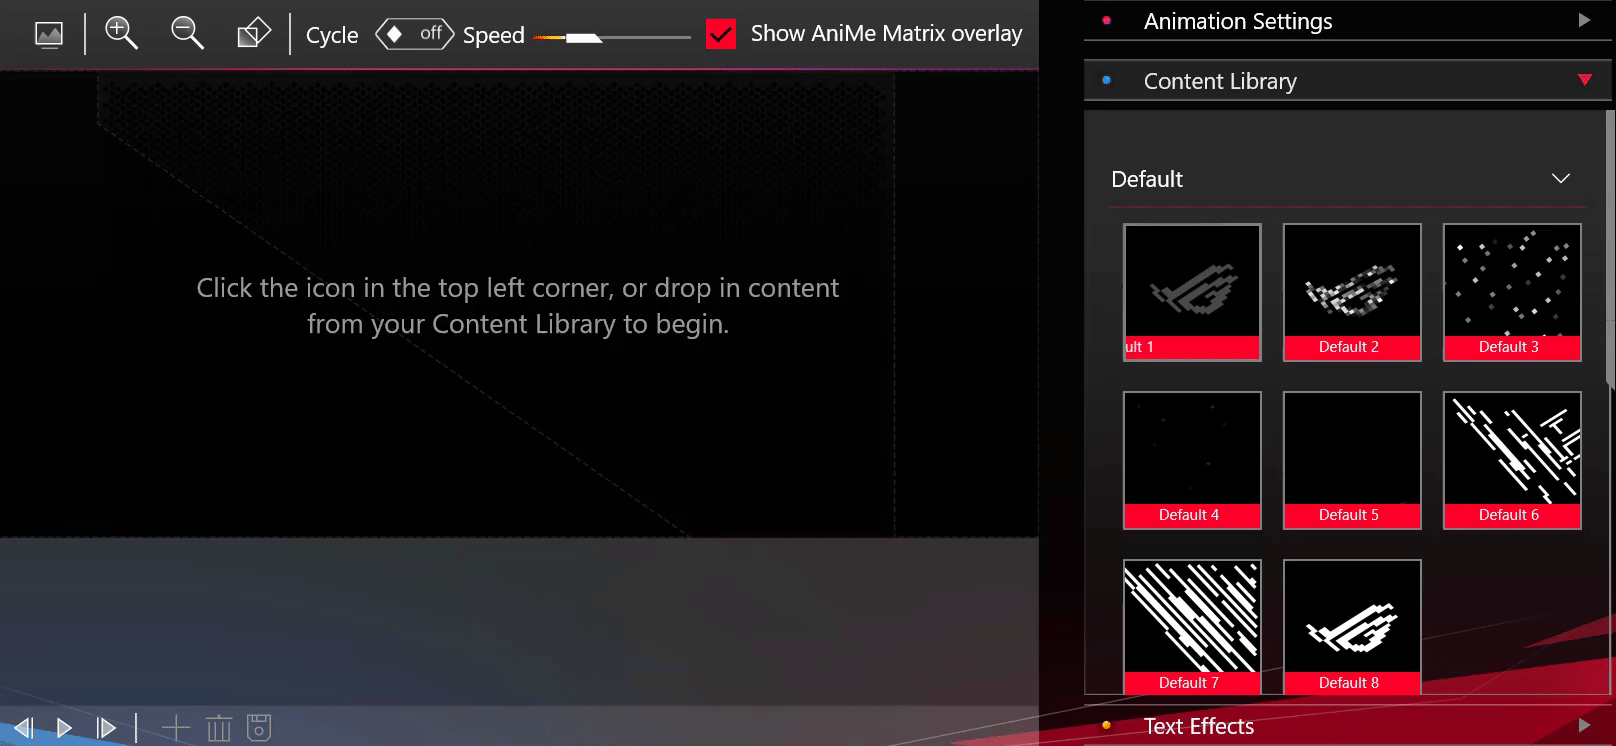
5-4. Content Library(4) – User Interface introduction

5-4-1. [Default]: The default animation contents ASUS provided. (Select and drop in content from the library to activate the animation on the canvas.)
5-4-2. [Saved]: The contents saved by yourself. (Select and drop in content from the library to activate the animation on the canvas.)
[Delete]  : Delete the selected file permanently from Saved Library.
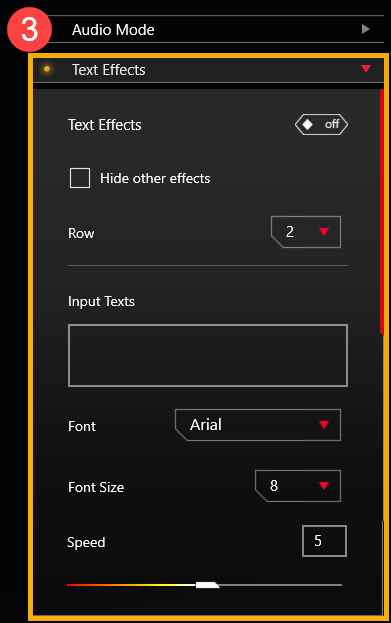
5-5. Text Effects(5) – User Interface introduction
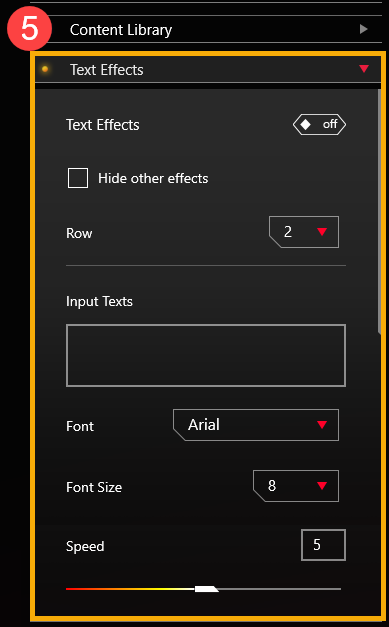
5-5-1. [Text Effects]: When you set this switch to [on], it will turn on the text effect.
5-5-2. [Hide other effects]: With this switch [Selected], other effects will be invisible and it only displays the text effect on the LEDs.
5-5-3. [Row]: Select how many text rows you would like to display on the LEDs. The default amount is 2 rows. (You can select between 2, 3, 5, and 6 rows.)
5-5-4. [Input Texts]: Input the texts you would like to display on the LEDs.
5-5-5. [Font]: Select the type of fonts you would like to display on the LEDs.
5-5-6. [Font Size]: Select the font sizes you would like to display on the LEDs. The default font size is 8. (There is a fixed row size for each row, the text will be cut-off if the font size is higher than row size.)
5-5-7. [Speed]: Set the speed of scrolling text. You can use the slider bar or enter the values to adjust, and the default speed value is 5.
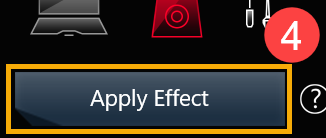
※ After all of the settings are completed, please click [Apply Effect](6) button so that your customized lighting effects will appear on the LEDs properly.

6. AniMe Matrix™ - System Mode
6-1. Select [System Mode] (1) on the main page of AniMe Matrix, and you will enter the System Mode page.
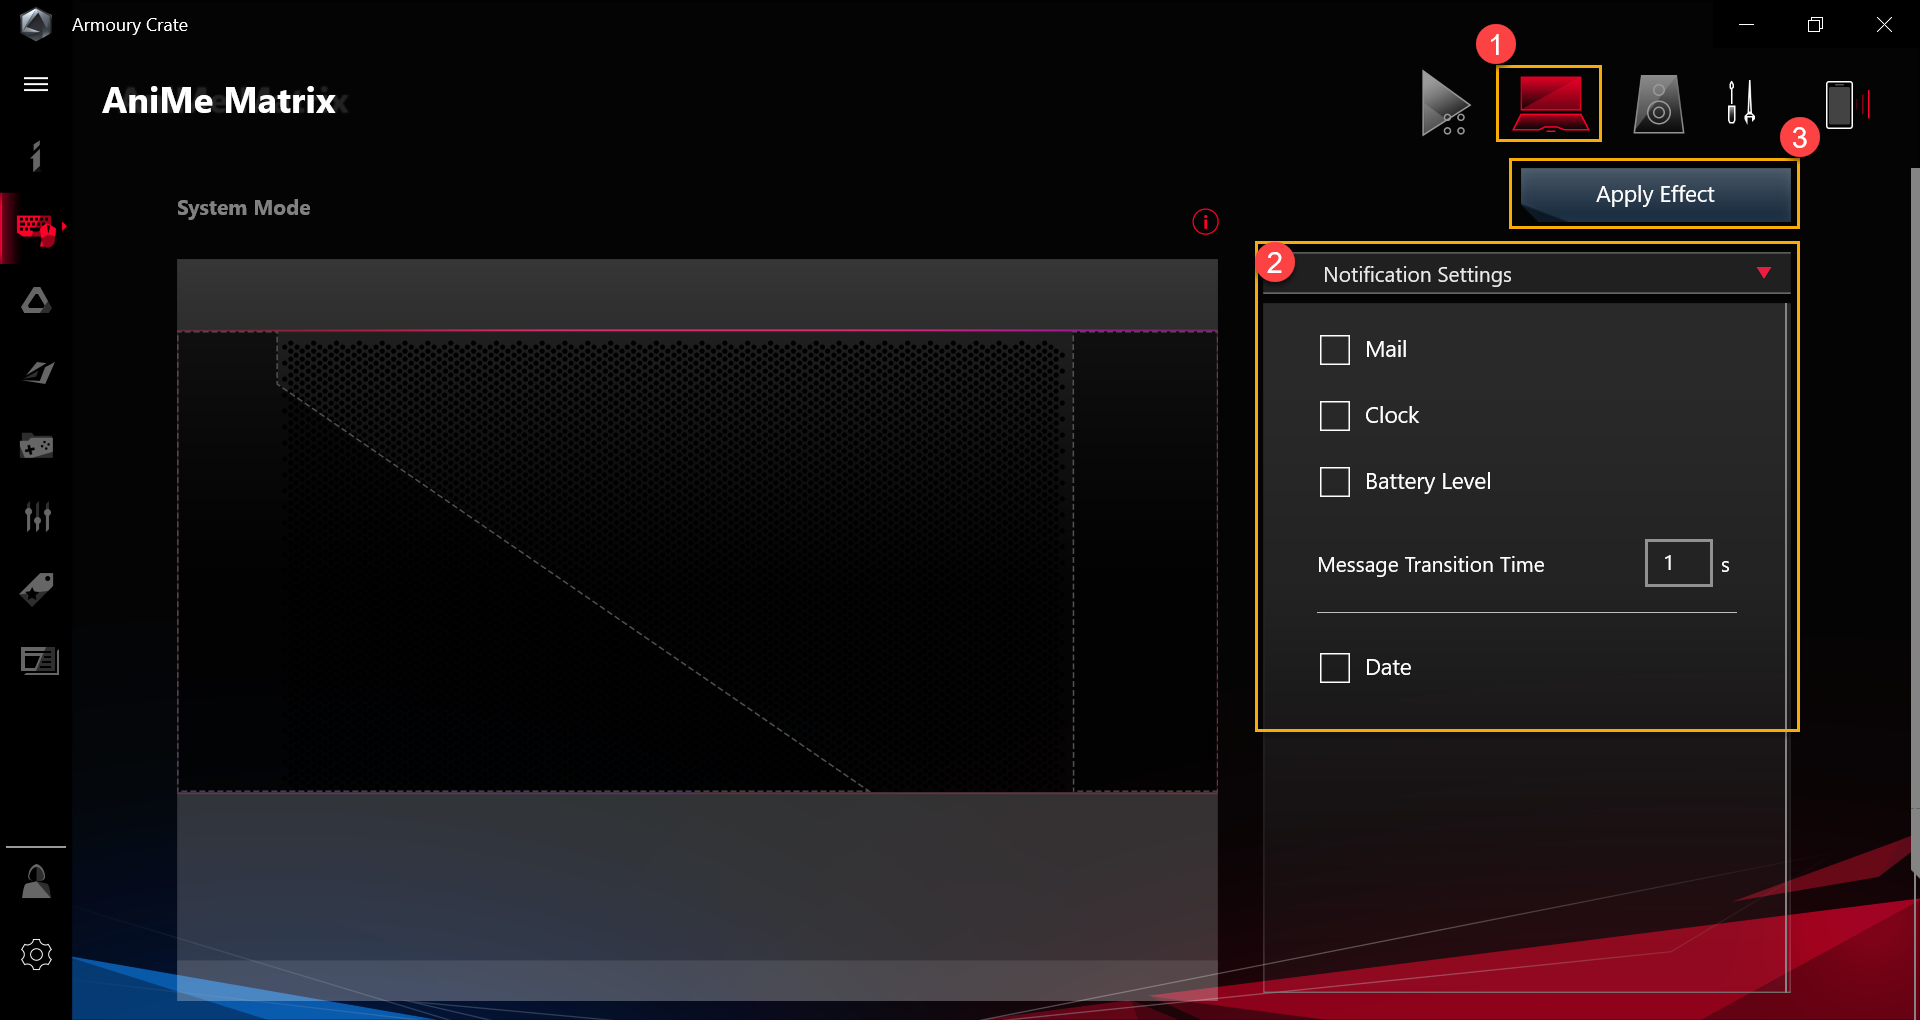
6-2. Notification Settings(2) – User Interface Introduction
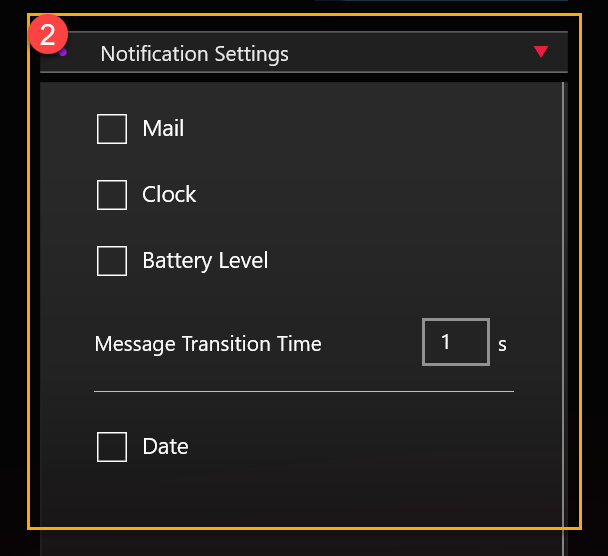
6-2-1. [Mail]: [Select] With this switch, and select mail notification to display on the LEDs.
6-2-2. [Clock]: [Select] this switch, it will display the system time on the LEDs.
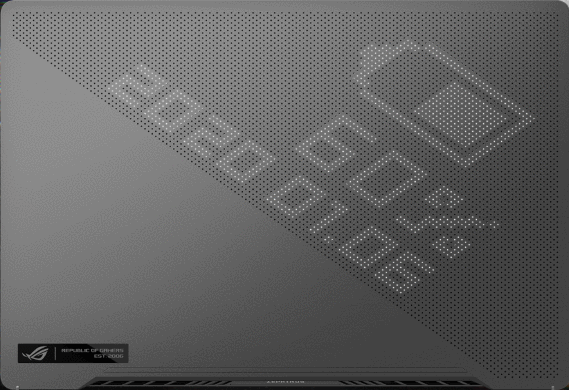
6-2-3. [Battery Level]: [Select] this switch, it will display the battery level on the LEDs.
6-2-4. [Message Transition Time]: Set the length of display period for each app notification. (It can only display one app notification at a time.)
6-2-5. [Date]: [Select] this switch, it will display the system date on the LEDs.
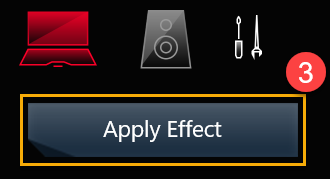
※ After all of the settings are completed, please click [Apply Effect](3) button so that your customized lighting effects will be performed on the LEDs properly.
You can choose any application to play the audio file, and make sure there is sound output. After that, select the [Device] with the sound output, then it will preview Audio Mode effect on the canvas.
7-1. Select [Audio Mode]  (1) on the main page of AniMe Matrix, then you will enter the Audio Mode page. For (2) and (3) icons, please refer to the detailed description on item 7-2 and 7-3.
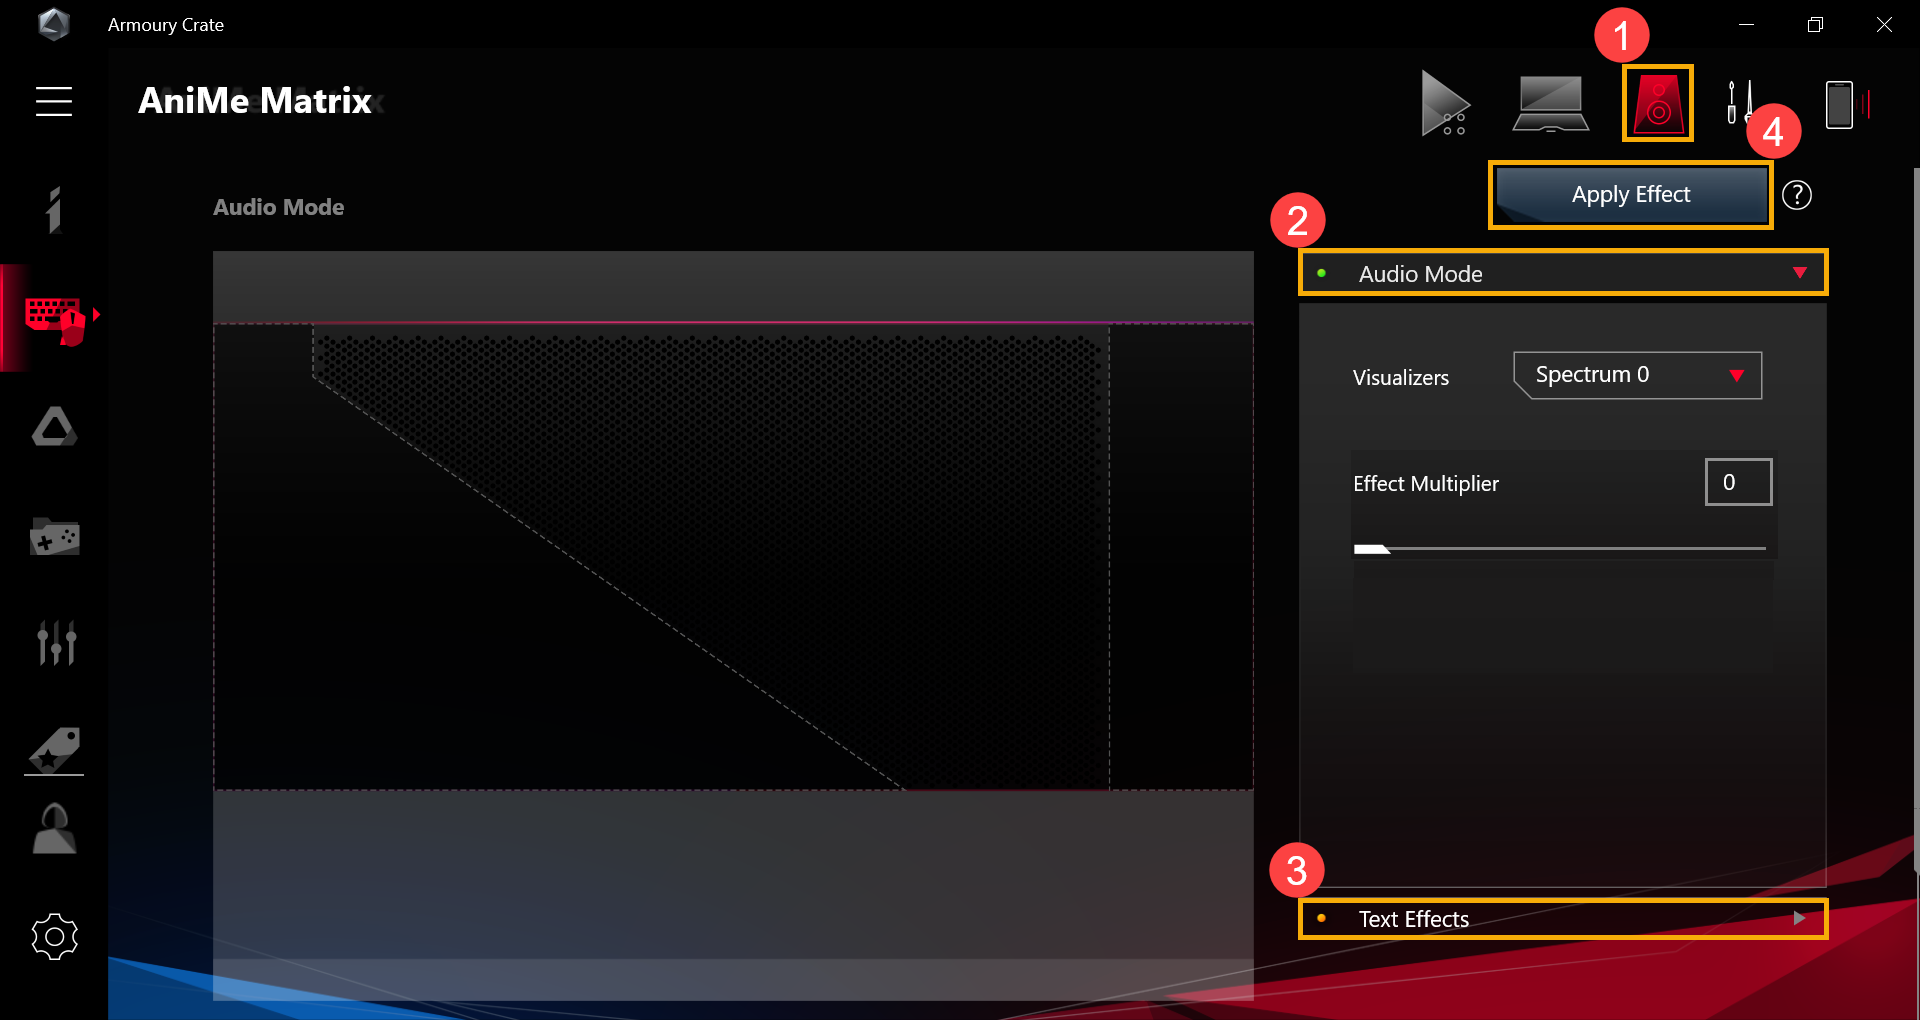
7-2. Audio Mode(2) – User Interface introduction
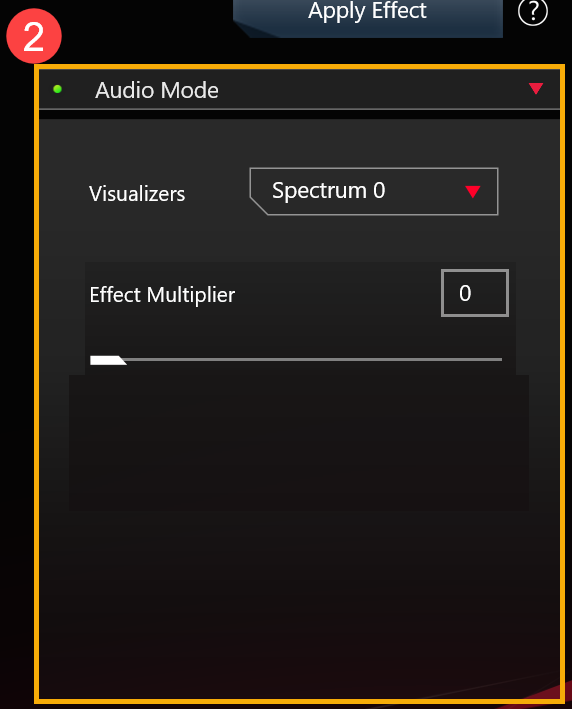
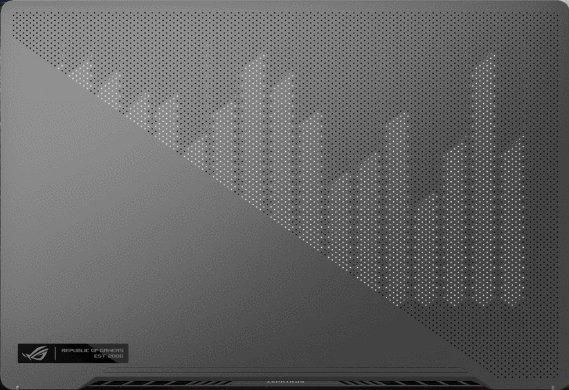
7-2-1. [Visualizers]: There are 6 spectrums for you to select the audio effect.
7-2-2. [Effect Multiplier]: Set the effect multiples of LED animation. Use the slider bar or enter the values to adjust, the default effect multiplier value is 0.
7-3. Text Effects(3) – User Interface introduction
7-3-1. [Text Effects]: When this switch sets to [on], it will turn on the text effect.
7-3-2. [Hide other effects]: With this switch [Selected] , other effects will be invisible and it only displays the text effect on the LEDs.
7-3-3. [Row]: Select how many text rows you would like to display on the LEDs. The default amount is 2 rows. (You can select between 2, 3, 5, and 6 rows.)
7-3-4. [Input Texts]: Input the texts you would like to display on the LEDs.
7-3-5. [Font]: Select the type of fonts you would like to display on the LEDs.
7-3-6. [Font Size]: Select the font size you would like to display on the LEDs. The default font size value is 8. (There is a fixed row size for each row. The text will be cut-off if the font size is bigger than row size.)
7-3-7. [Speed]: Set the speed of scrolling text. Use the slider bar or enter the values to adjust, and the default speed value is 5.
※ After all of the settings are completed, please click [Apply Effect](4) button so that your customized lighting effects will appear on the LEDs properly.
8. Q & A
Question 1: Why the lighting doesn't work after it goes to Sleep mode even though I've set the lighting to stay activated in Sleep mode ?
Answer 1: In the following scenarios, the lighting effects are not supported in sleep mode.
Scenario 1: The lighting effect is not supported when the system enters Sleep mode via pressing the power button.
Scenario 2: The lighting effect is not supported when connecting your device to the AC adapter after the system enters Sleep mode. (Even when the switch [Turn off LEDs when device is unplugged] has been set to [on].)
Question 2: How to get more information about operation steps in AniMe Matrix?
Answer 2: While operating, you can click  "Quick Tips" for more information about operation steps.
Question 3: Why AniMe Matrix Lighting will stay activated or is not like the customized settings I set up after the system goes to Sleep/Hibernate mode or the Lid is closed?
Answer 3: You can refer to 4-2-4. [Power and Sleep Settings] for more detailed lighting settings in the system state.
Connecting to AC adapter: AniMe Matrix Lighting will display your customized lighting settings or the default lighting effect (shooting star) after the system goes to Sleep/Hibernate mode or the Lid is closed mode.
Using Battery power: AniMe Matrix Lighting will display your customized lighting settings or not stay activated (if the switch is unticked) after the system goes to Sleep/Hibernate mode or the Lid is closed mode.