[Windows 11/10] System Restore Point
Applicable Products: Notebook, Desktop, All-in-One PC, Gaming Handheld, MiniPC
Restore point takes your device back to an earlier point in time. Restore points are auto-generated when you install a new application or driver, and also you can create a restore point manually. Restoring won’t affect your personal files, but it will remove applications, drivers, and updates installed after the restore point was made.
Note: It will take some time to restore system from a restore point, so please make sure that the AC adapter is connected during the restore process. Also, please do not force to shut down to prevent any issue.
To provide you more detailed instruction, you can also click ASUS YouTube video link below to know more about How to use System Restore Points:
https://www.youtube.com/watch?v=pPMosd3oFmM
Please go to the corresponding instruction based on the current Windows operating system on your device:
Enable System Restore Point
In general, the system restoration is enabled by default. You can also confirm whether the system restore is enabled by the following steps.
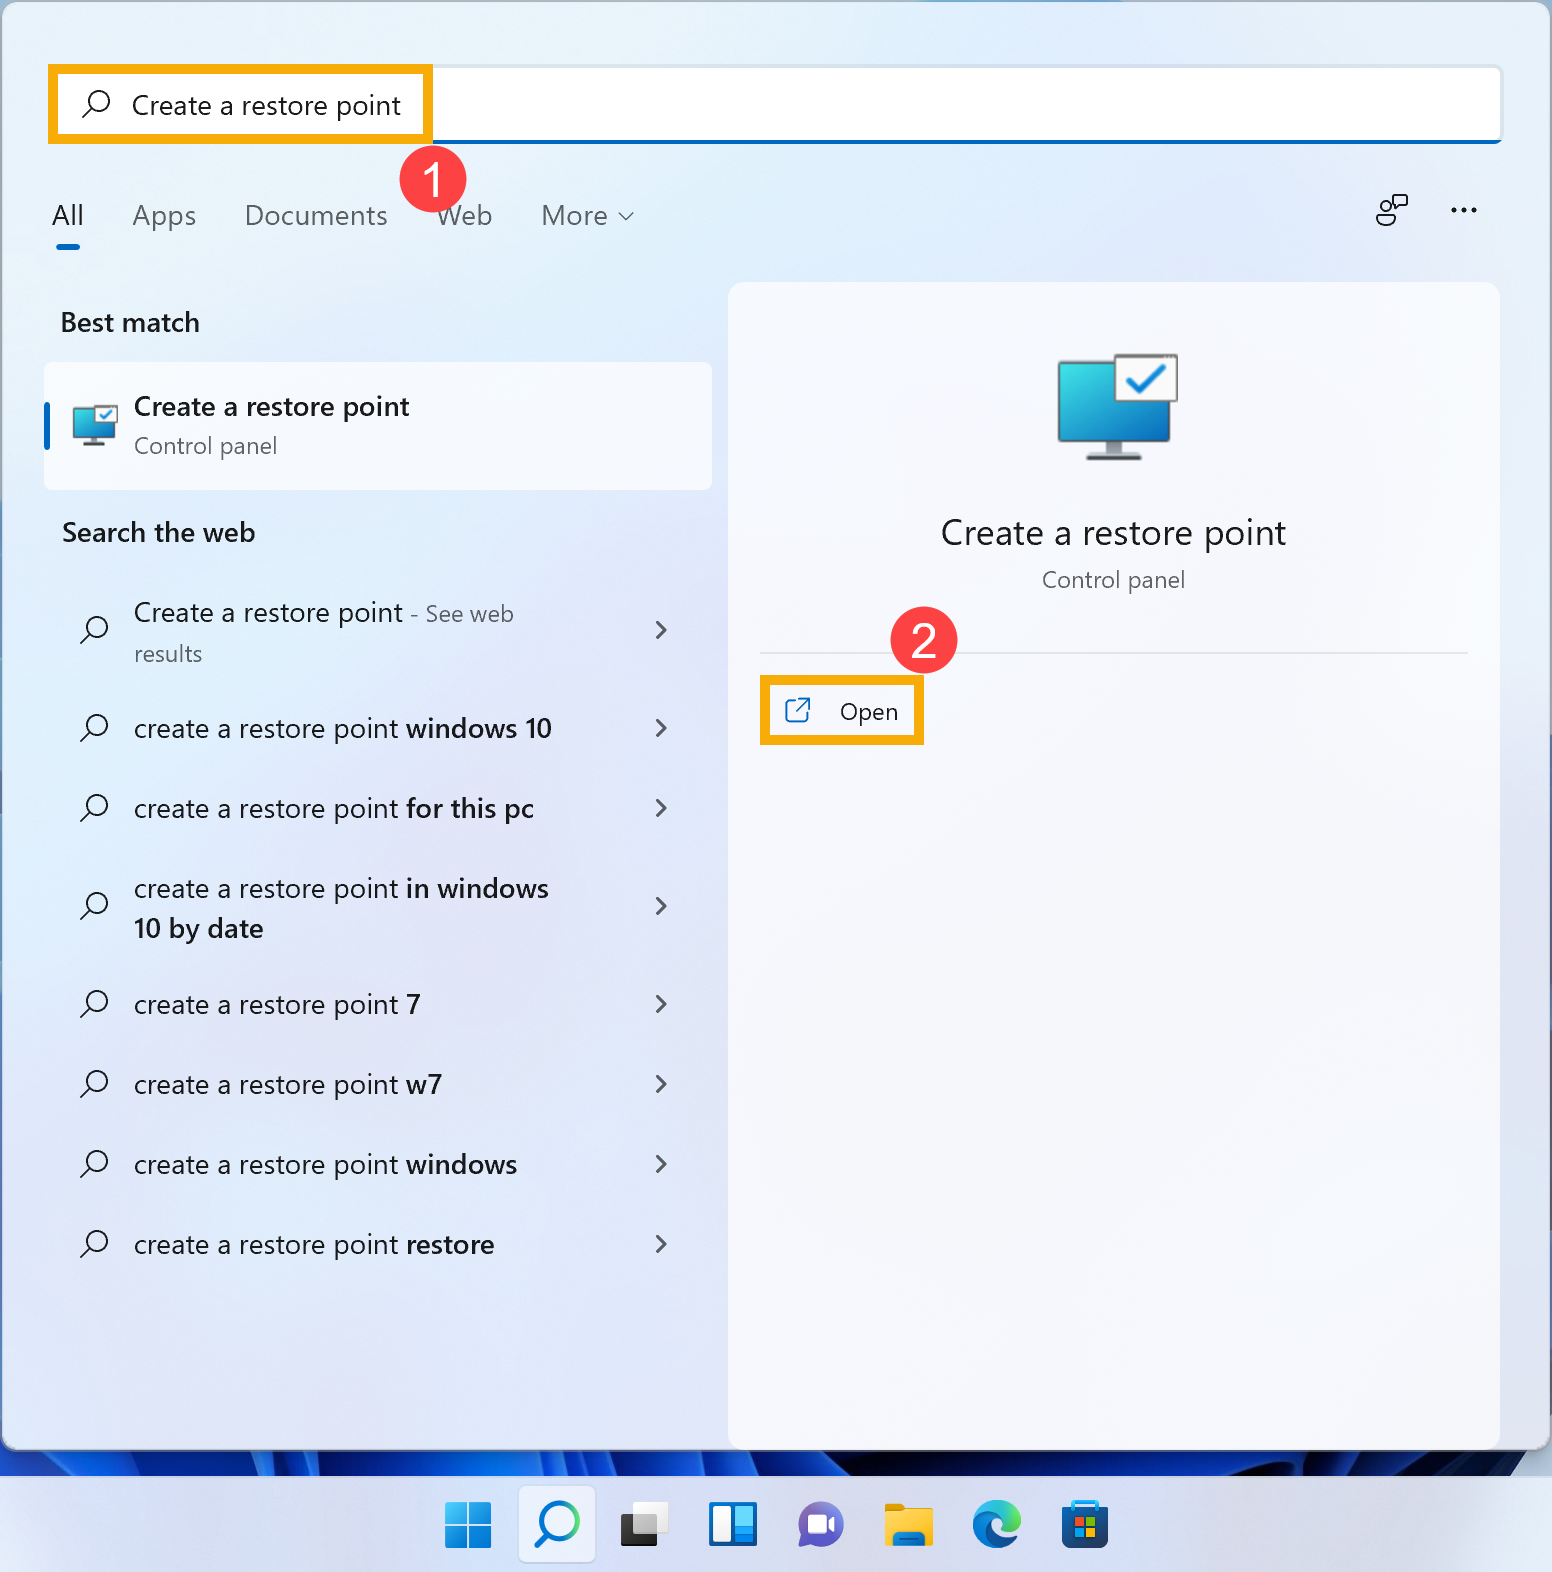
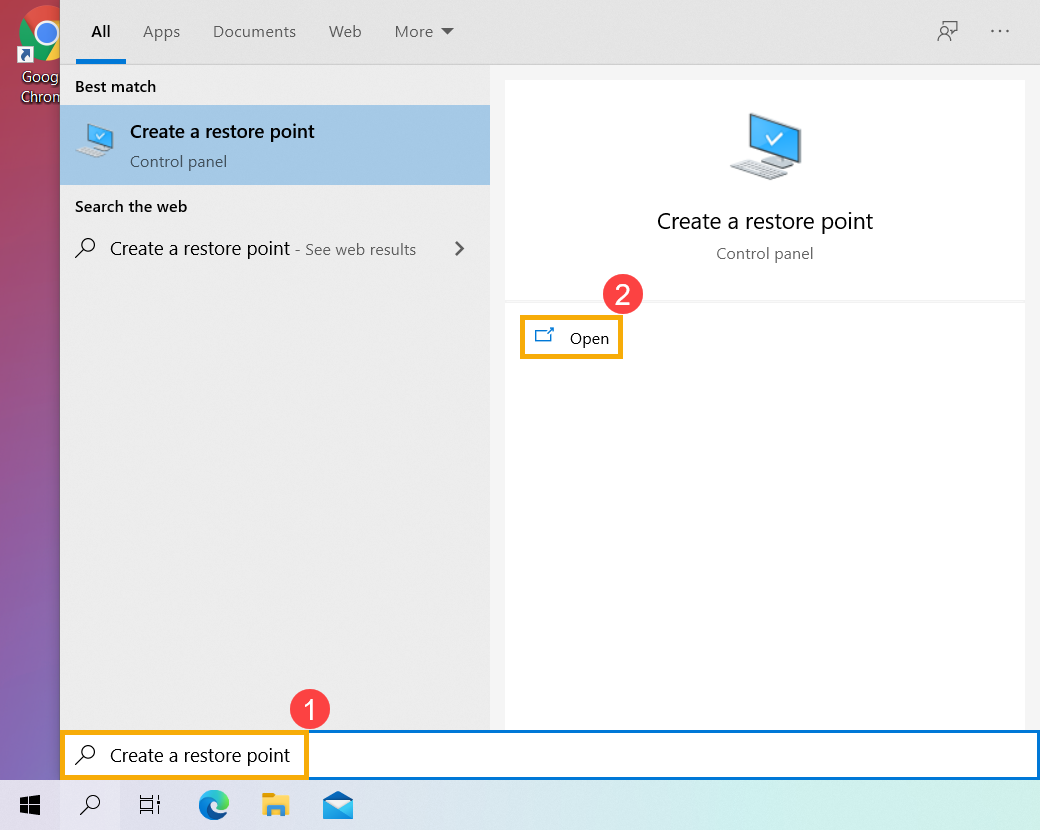
- Type and search [Create a restore point] in the Windows search bar①, then click [Open]②.

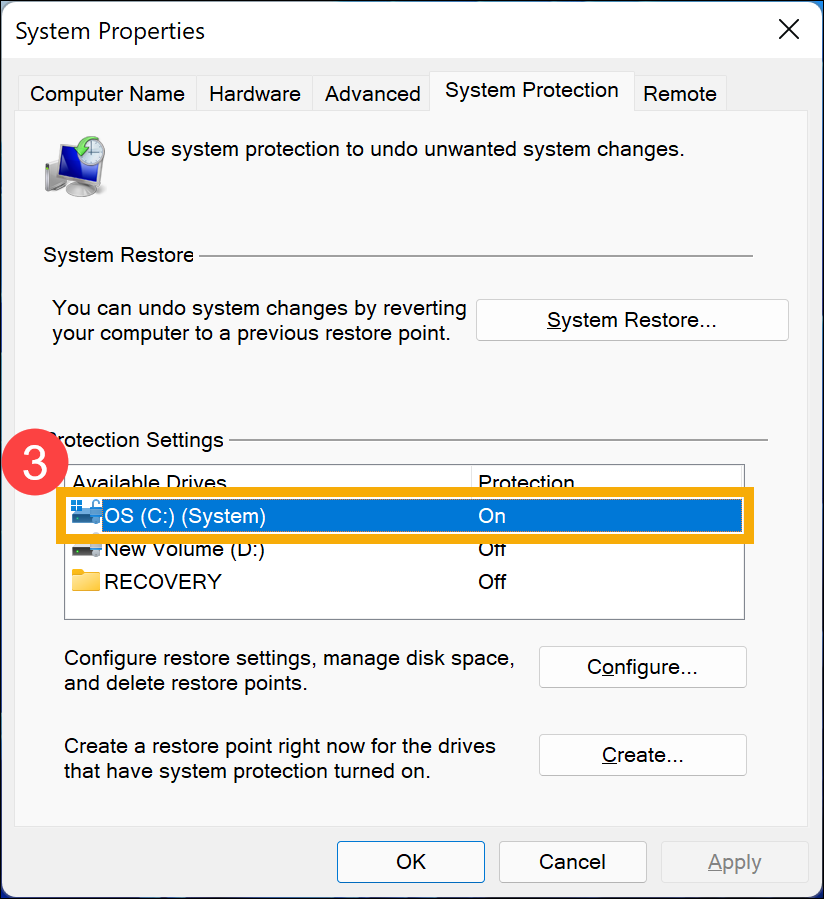
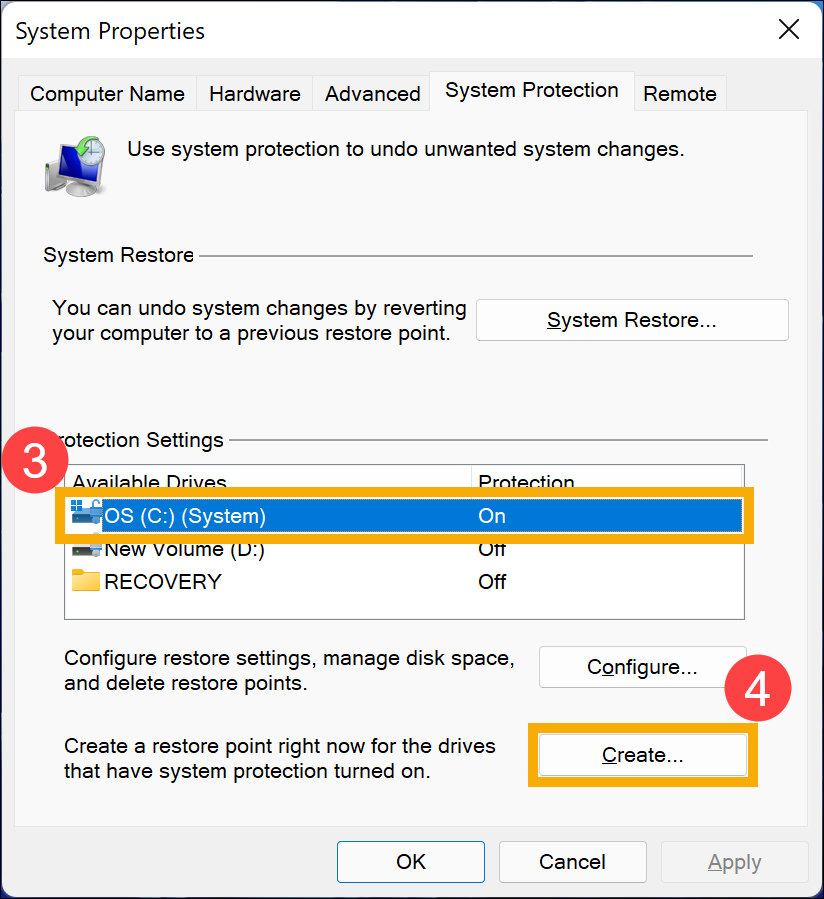
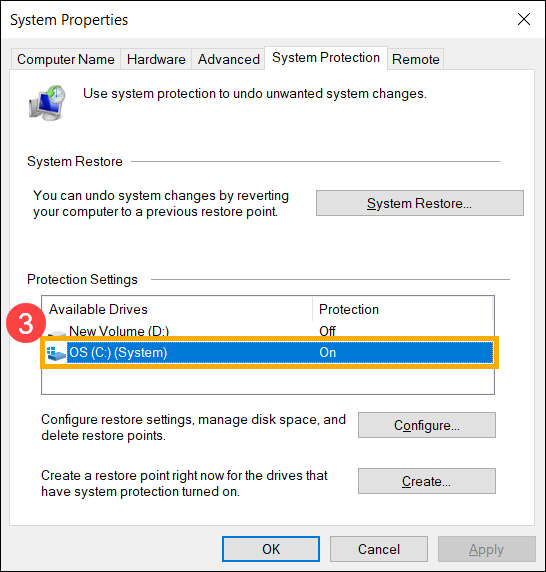
- If the Protection of system drive shows as On③, it means the system restore point is enabled.
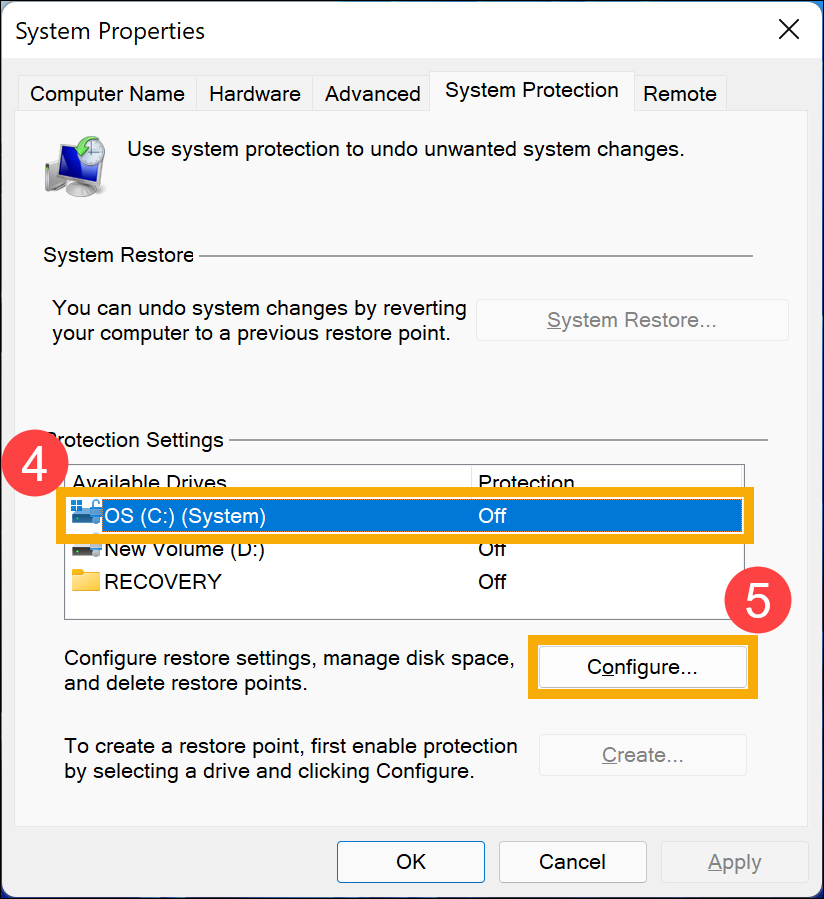
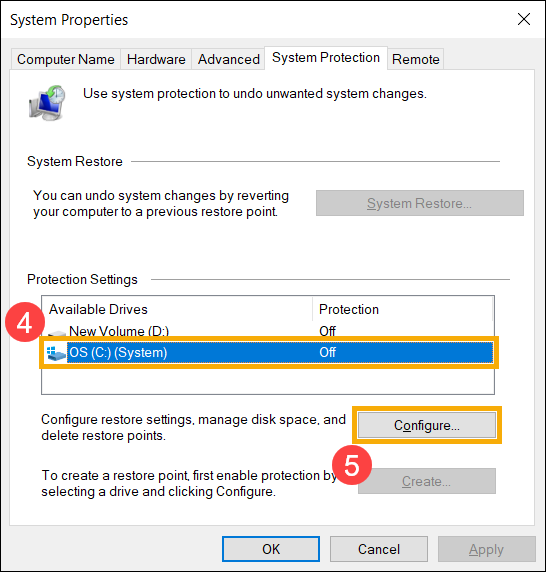
- If the Protection of system drive shows as Off, please choose the [system drive]④ and then click [Configure]⑤.
- Select [Turn on system protection]⑥ and set up the Max Usage of disk space (We suggest you set the Disk Space Usage ranging from 5% to 10%.)⑦, then select [OK]⑧. System Restore Point will be enabled.
The Max Usage will remain the disk space you set, and is used for System Restore Point. As space fills up, older restore points will be deleted to make room for new ones.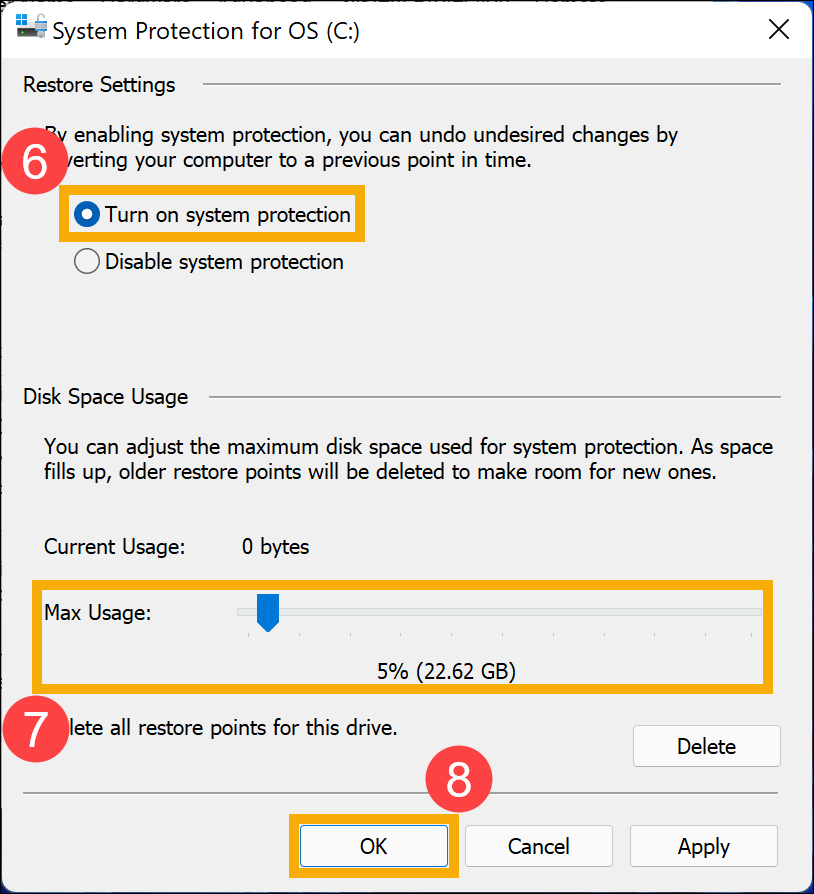
Manually create a System Restore Point
- Type and search [Create a restore point] in the Windows search bar①, then click [Open]②.
- Select a drive that have system protection turned on③, and then click [Create]④.
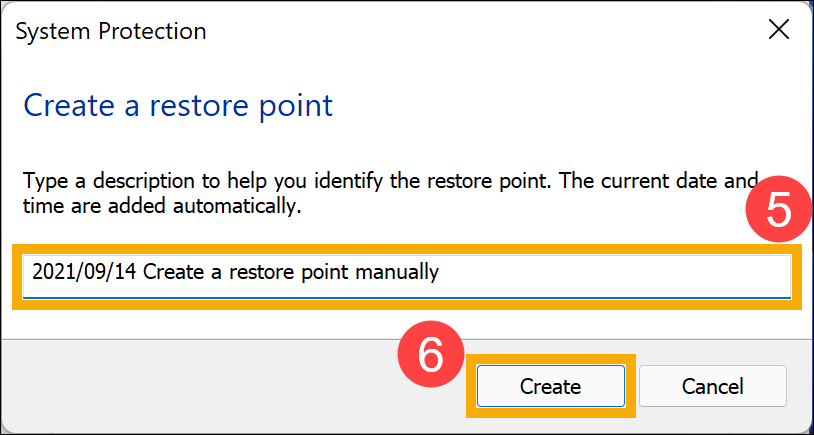
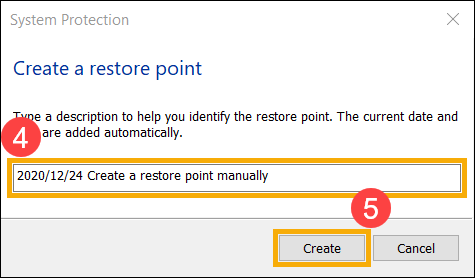
- Type a description to help you identify the restore point⑤, then click [Create]⑥.
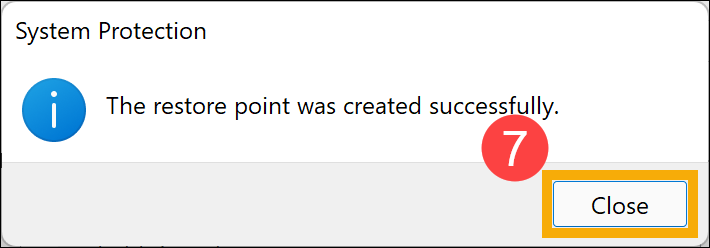
- After the below notice displays, it means the restore point is successfully created, then please click [Close]⑦.
Restore your system from a Restore Point
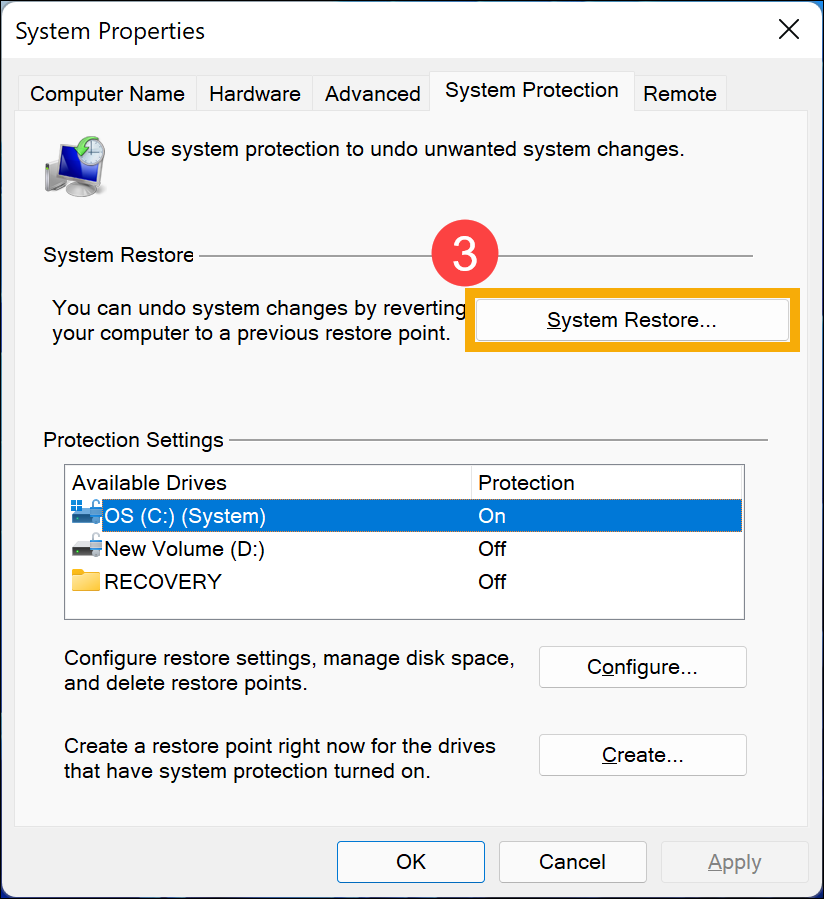
- Type and search [Create a restore point] in the Windows search bar①, then click [Open]②.

- Select [System Restore]③.
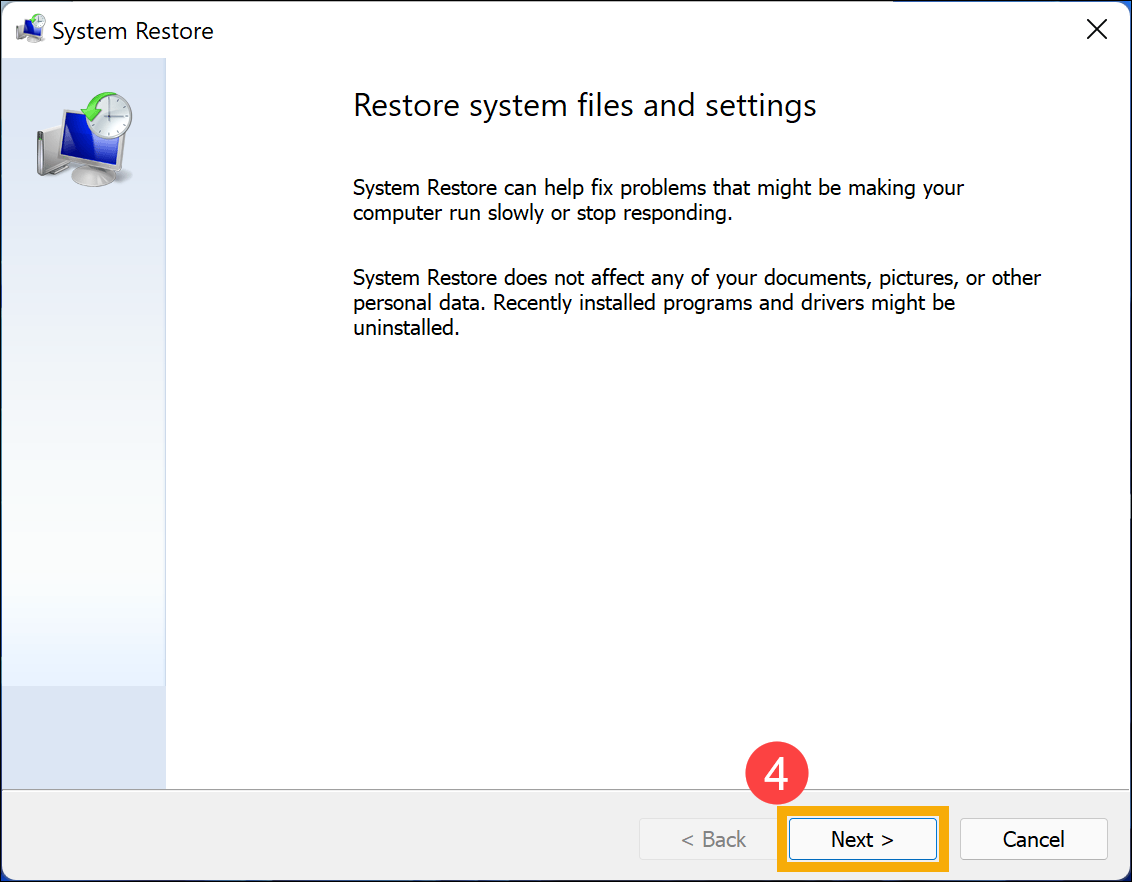
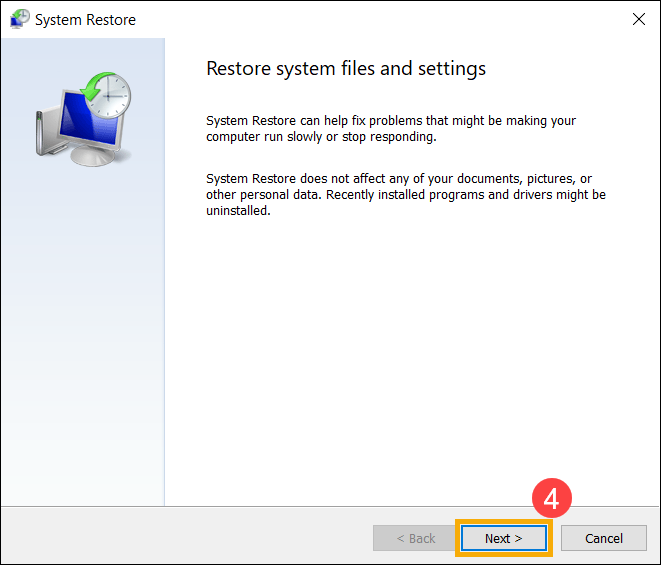
- Select [Next]④.
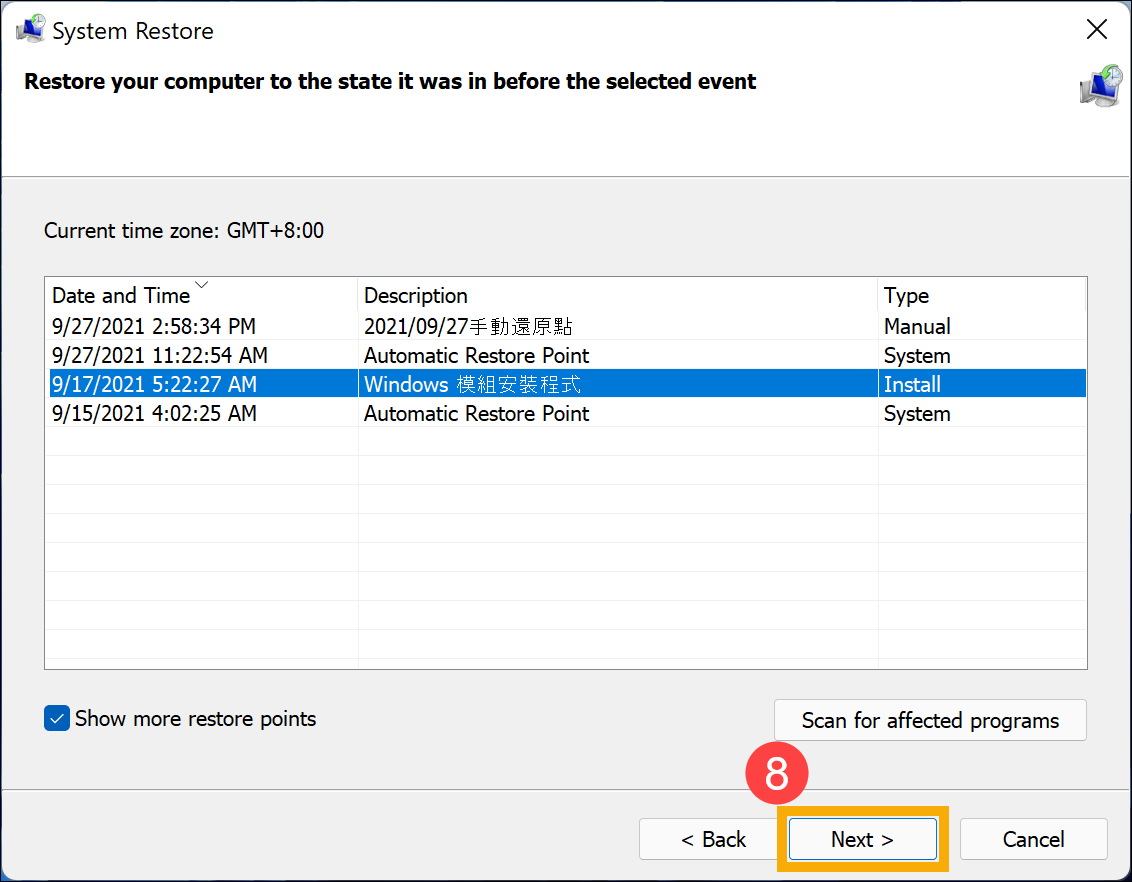
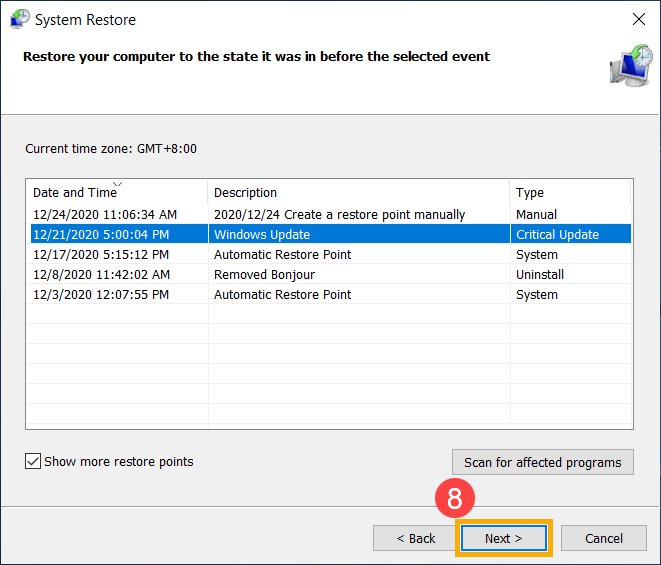
- Select the restore point that you want to use in the list of results⑤, then select [Scan for affected programs]⑥.
If you don’t see the restore point that you want to use, select the Show more restore points check box to see more restore points.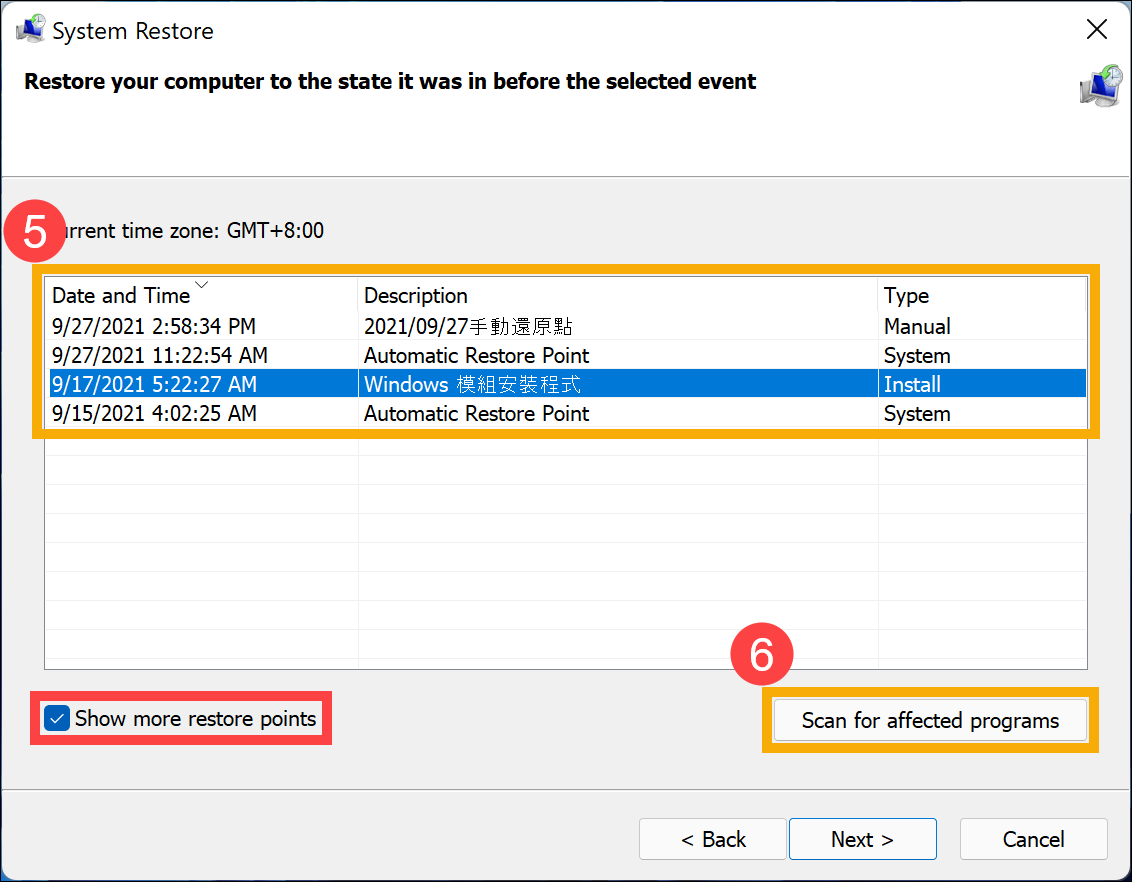
- You will see a list of items that will be deleted if you restore to this restore point. If you’re OK with the deletions, please select [Close]⑦ to continue the next step.
If this restore point doesn’t meet your requirement, please go back to the previous step and select another restore point.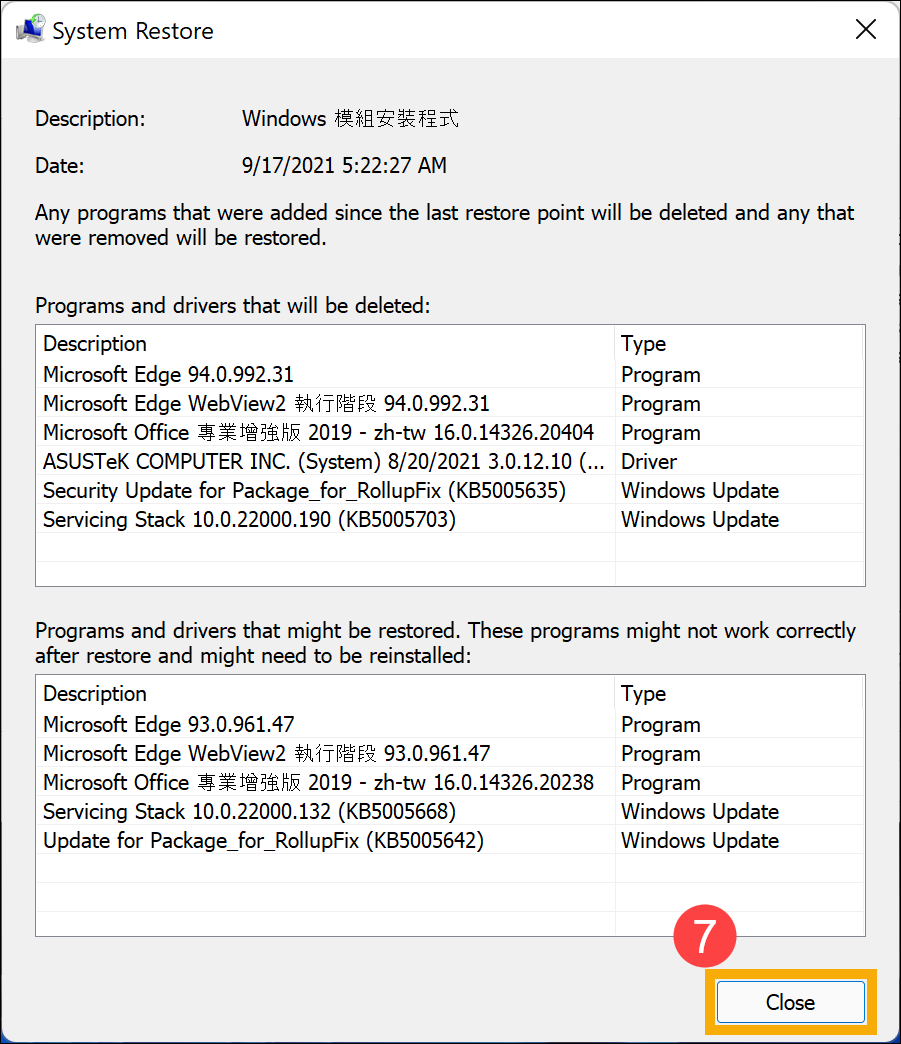
- Select [Next]⑧.
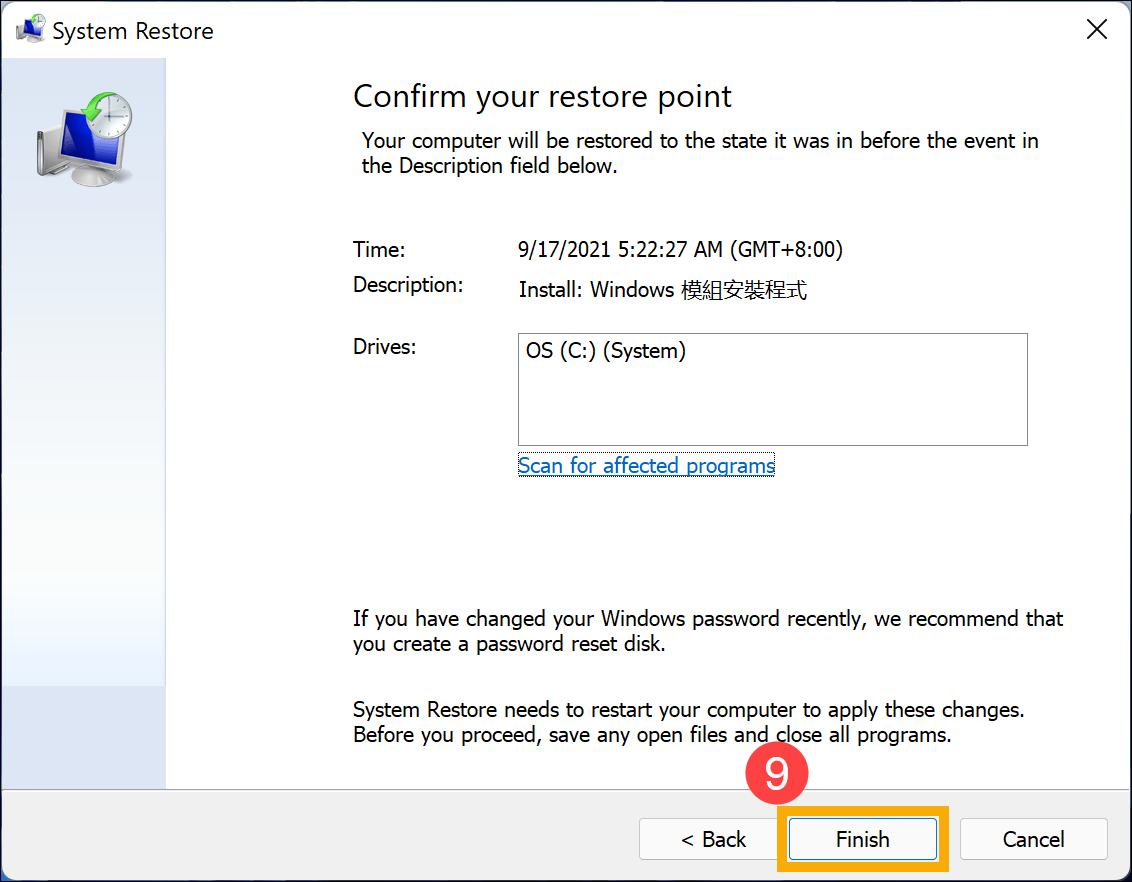
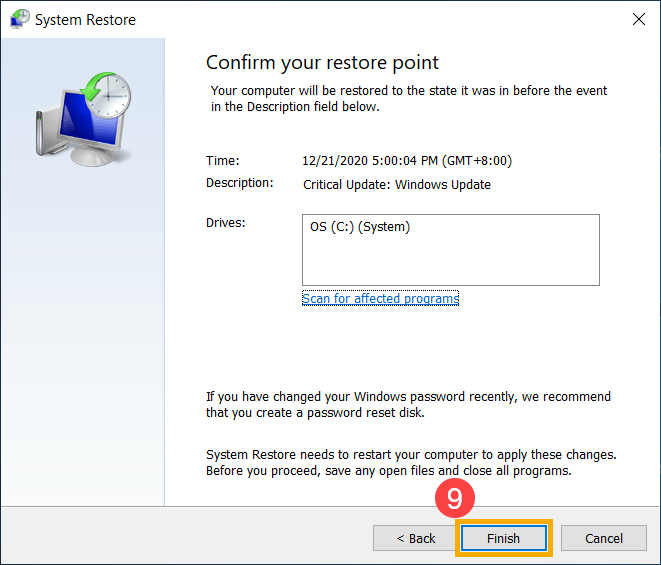
- Confirm your restore point information is correct or not, then please select [Finish]⑨.
- Select [Yes]⑩ to start restoring system from the restore point and then your device will restart.
Note: It will take some time to restore system from a restore point, so please make sure that the AC adapter is connected during the restore process. Also, please do not force to shut down to prevent any issue.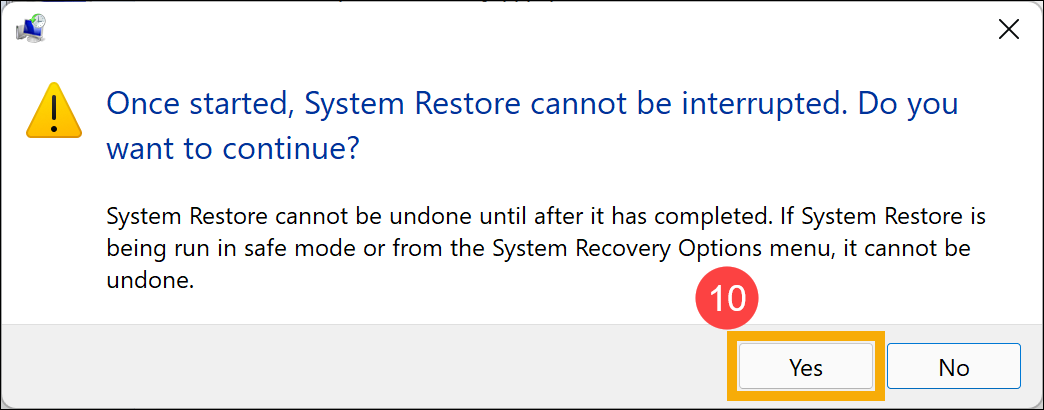
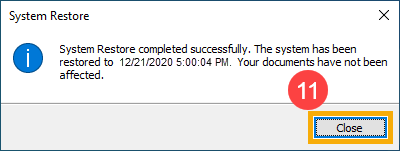
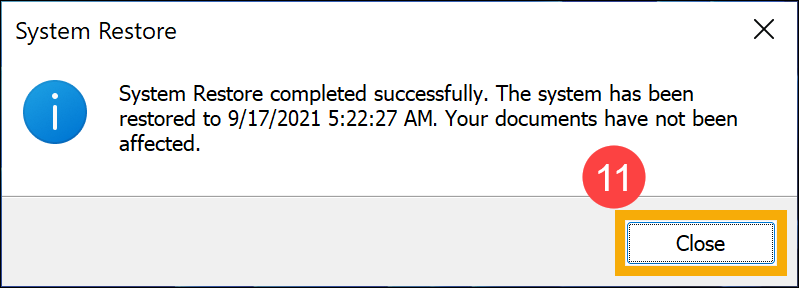
- After the device restarts, System Restore is completed. Please click [Close]⑪.
Enable System Restore Point
In general, the system restoration is enabled by default. You can also confirm whether the system restore is enabled by the following steps.
- Type and search [Create a restore point] in the Windows search bar①, then click [Open]②.

- If the Protection of system drive shows as On③, it means the system restore point is enabled.
- If the Protection of system drive shows as Off, please choose the [System drive]④ and then click [Configure]⑤.
- Select [Turn on system protection]⑥ and set up the Max Usage of disk space (We suggest you set the Disk Space Usage ranging from 5% to 10%.)⑦, then select [OK]⑧. System Restore Point will be enabled.
The Max Usage will remain the disk space you set, and is used for System Restore Point. As space fills up, older restore points will be deleted to make room for new ones.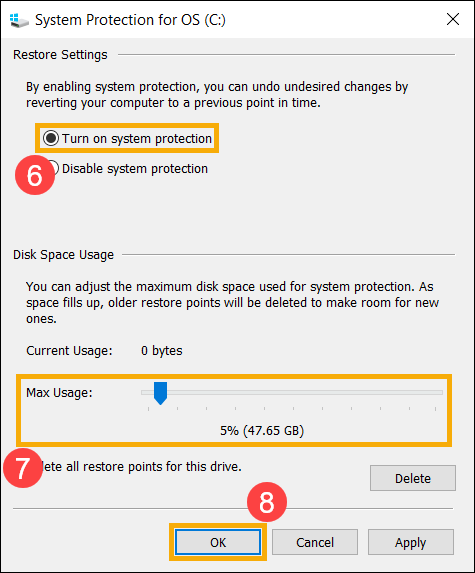
Manually create a System Restore Point
- Type and search [Create a restore point] in the Windows search bar①, then click [Open]②.

- Select [Create]③.

- Type a description to help you identify the restore point④, then click [Create]⑤.
- After the below notice displays, it means the restore point is successfully created, then please click [Close]⑥.

Restore your system from a Restore Point
- Type and search [Create a restore point] in the Windows search bar①, then click [Open]②.
- Select [System Restore]③.

- Select [Next]④.
- Select the restore point that you want to use in the list of results⑤, then select [Scan for affected programs]⑥.
If you don’t see the restore point that you want to use, tick the Show more restore points check box to see more restore points.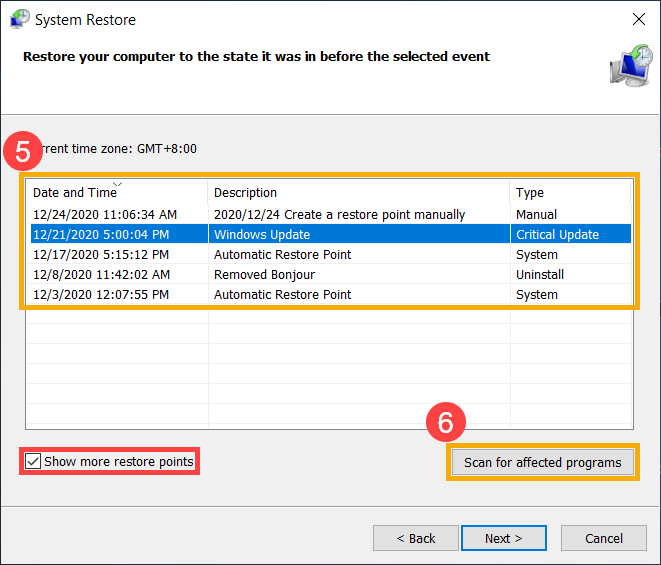
- You will see a list of items that will be deleted if you restore to this restore point. If you’re OK with the deletions, please select [Close]⑦ to continue the next step.
If this restore point doesn’t meet your requirement, please go back to the previous step and select aother restore point.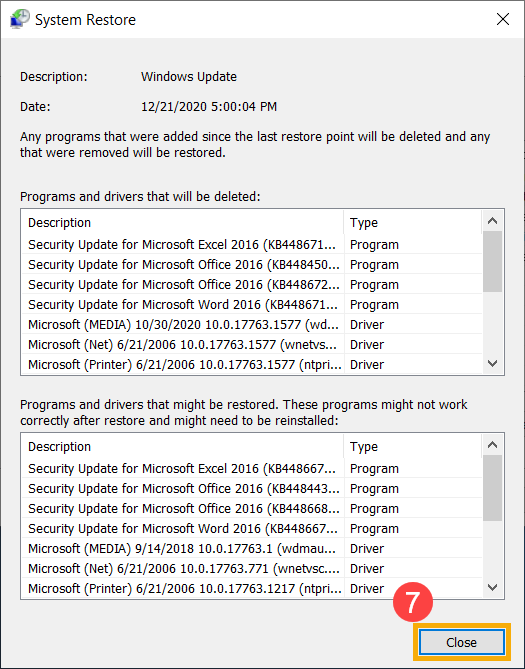
- Select [Next]⑧.
- Confirm whether your restore point information is correct or not, then please select [Finish]⑨.
- Select [Yes]⑩ to start restoring system from the restore point and then your device will restart.
Note: It will take some time to restore system from a restore point, so please make sure that the AC adapter is connected during the restore process. Also, please do not force to shut down to prevent any issue.
- After the device restarts, System Restore is completed. Please click [Close]⑪.