المواضيع ذات الصلة
[ASUS Aura Creator] Aura Creator (Armoury Crate )FAQ
Index
How to install Aura Creator?
Check the Windows Edition
Install Aura Creator via Armoury Crate & Aura Creator Installer
Uninstall Aura Creator
Users with Armoury Crate installed
Users without Armoury Crate installed
How to disable Aura Creator auto-updates
Troubleshooting
I can’t use Aura Creator. It keeps showing “Error” on the screen
I can’t find my device(s) in Aura Creator
How to use Aura Creator?
Create a lighting profile
Use hotkey for quick editing
Share the lighting profile
Can I apply a lighting profile on partial devices?
Can I apply a lighting profile on different devices?
Quick-apply the lighting profiles from Armoury Crate > Aura Sync
New Effect - Sync with Music
How to add a Music effect?
Why does the Music effect not work when there’s music playing?
The effect does not change with the adjustment of the system volume
New Effect - Sync with Adaptive Color
How to make “Adaptive Color” work?
How to add an Adaptive Color effect?
- Check the Windows Edition
Check the Windows Edition of your PC or laptop and make sure your system is compatible with Aura Creator - Windows 10 (Creators Update/1903 or later) or Windows 11
- Install Aura Creator via Armoury Crate & Aura Creator Installer
Install Armoury Crate App first before using Aura Creator is recommended for seamless user experience and to reach various features including Aura Sync, device configuration, ASUS account management, and much more up-to-date ASUS services. You can also use Aura Creator on its own.
Please follow the steps below to download Aura Creator and Armoury Crate:
1. Go to the Aura Creator website and click the Download button.
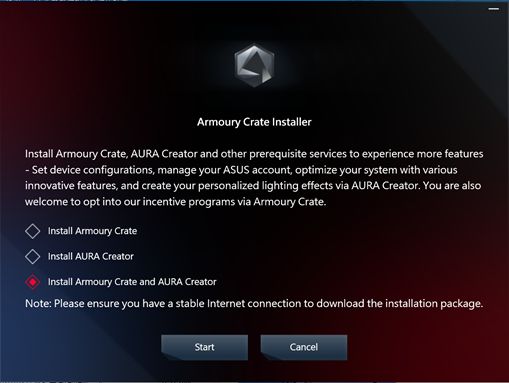
2. Unzip “ArmouryCrateInstallTool.zip” and double-click “ArmouryCrateInstaller.exe” to start the installation.
3. Select to install a single App (Aura Creator or Armoury Crate), or to install both. Click the “Start” button to run the installation process.
- System with Armoury Crate installed
If you want to uninstall Aura Creator, but still keep using Armoury Crate for device configuration, Aura Sync and more ASUS services, follow the steps below:
1. Click the “Windows” button  on your Desktop and go to Windows System Settings
 .
.
2. Go to “Apps” and search the “Aura Creator” App to uninstall it.
- System without Armoury Crate installed
If you do not have Armoury Crate and want to uninstall all Aura Creator related apps and services, follow the steps below:
1. Click the link to go to the Armoury Crate support website
2. Find the “Driver & Utility” tab and select the OS as “Windows 10 64-bit” to download “Armoury Crate Uninstall Tool”
3. Unzip “Armoury_Crate_Uninstall_Tool.zip” and double-click “Armoury Crate Uninstall Tool.exe” to start the uninstall process.
4. Restart the system to complete the uninstallation.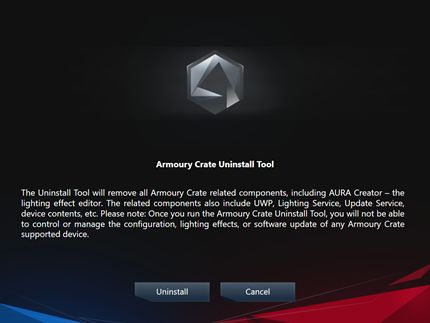
How to disable Aura Creator auto-updates
To stop the Armoury Crate UWP and the Aura Creator UWP apps from updating automatically, please follow below steps.
*Note: When auto-update is disabled, this setting applies to all installed apps from the Microsoft Store (not exclusively to Armoury Crate and Aura Creator).
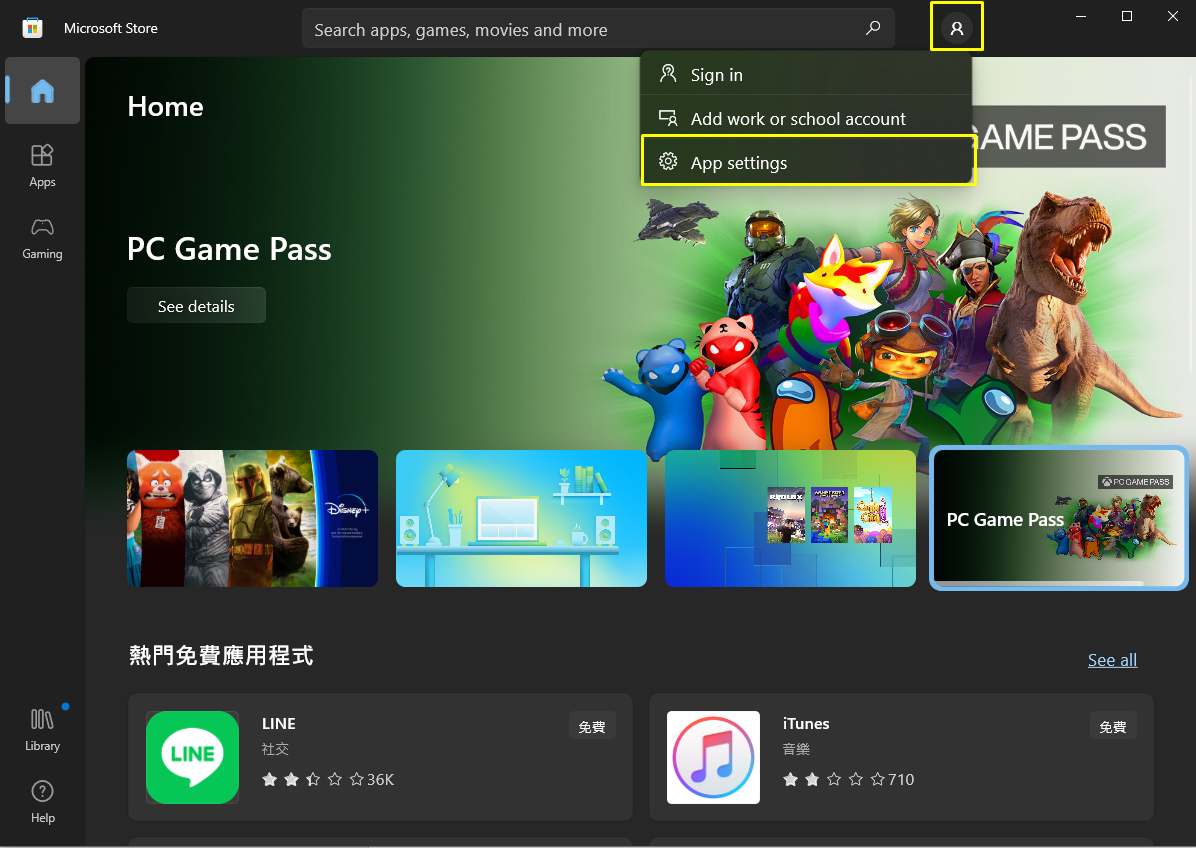
1. Go to Microsoft Store
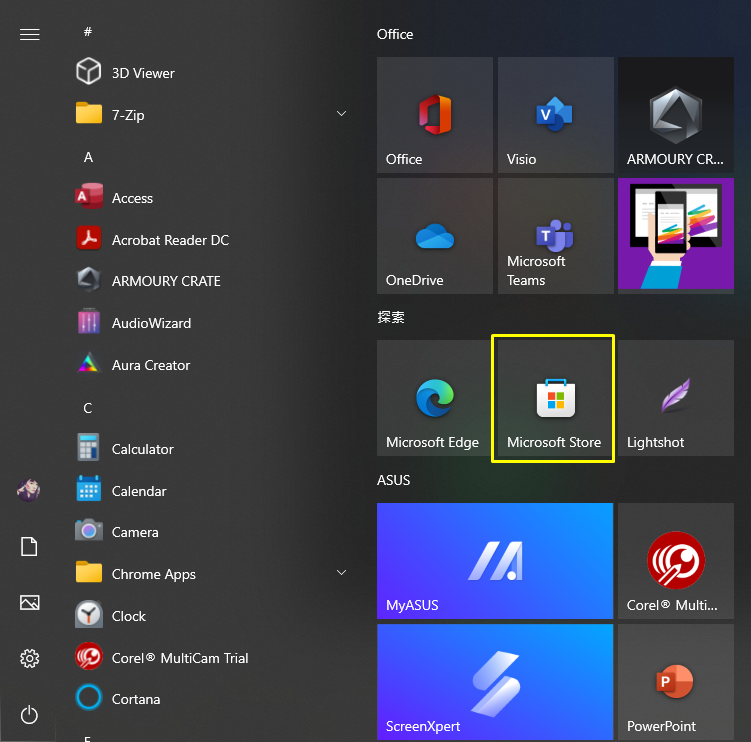
2. Click the “Sign in” icon on the right of the title bar, and then click on “App settings”
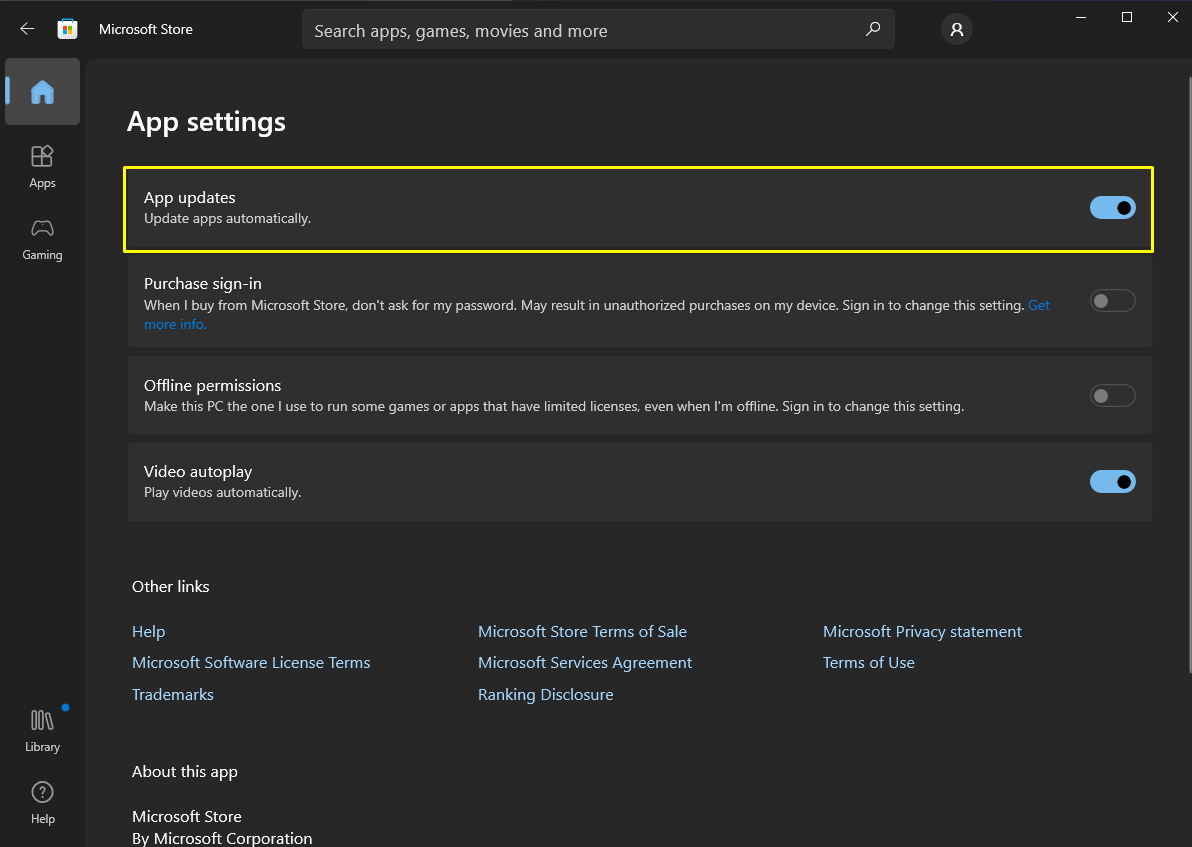
3. Disable “App updates” to turn off the automatic update.
*Note: When auto-update is disabled, this setting applies to all installed apps from the Microsoft Store (not exclusively to Armoury Crate and Aura Creator).
- I can’t use Aura Creator. It keeps showing “Error” on the screen
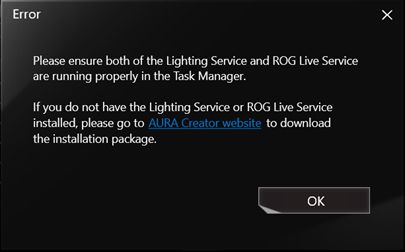
Follow the steps below for troubleshooting:
1. Restart your system and check if the service resume.
2. Download the installer from the Aura Creator website .
3. Right-click on “ArmouryCrateInstallTool.zip” and choose Extract All.
4. Double left-click on the ‘ArmouryCrateInstaller.exe’ file, select to install “Aura Creator” and it will automatically complete the re-installation process.
- I can’t find my device(s) in Aura Creator
Follow the steps below for troubleshooting:
1. Please make sure your device(s) is listed in the Aura Creator compatible list on Aura Creator website.
2. Double check the device(s) are well-connected to your PC or laptop.
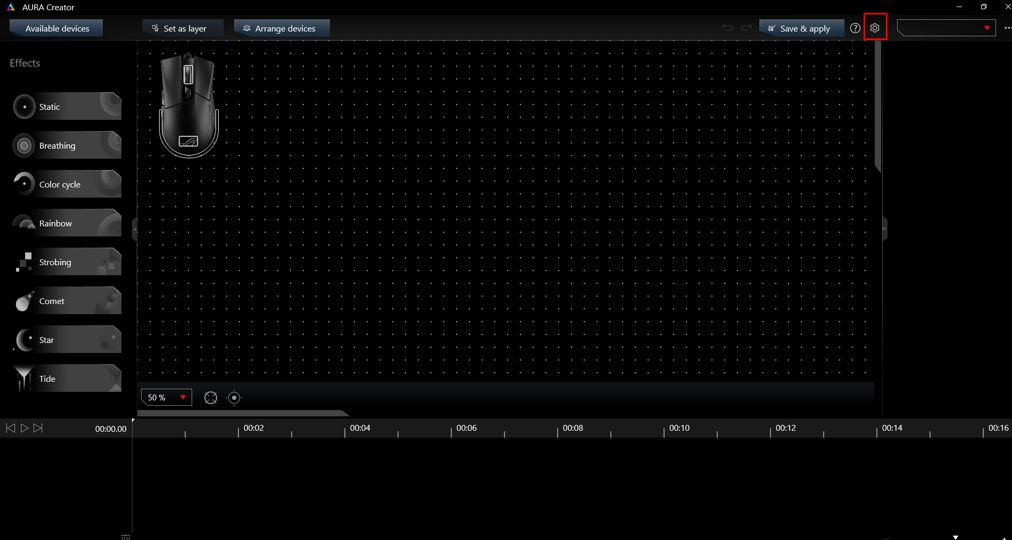
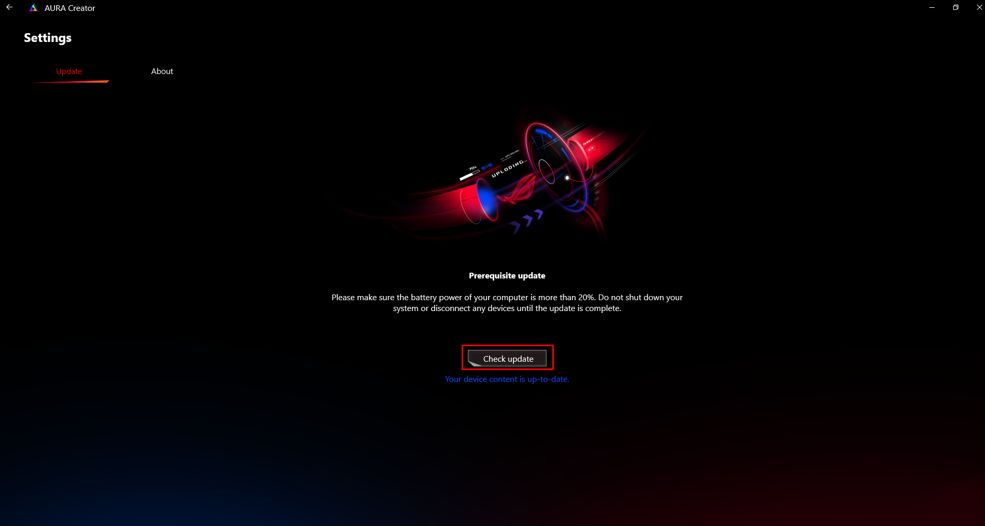
3. Check updates for the prerequisite updates of your device(s) in Aura Creator > Settings
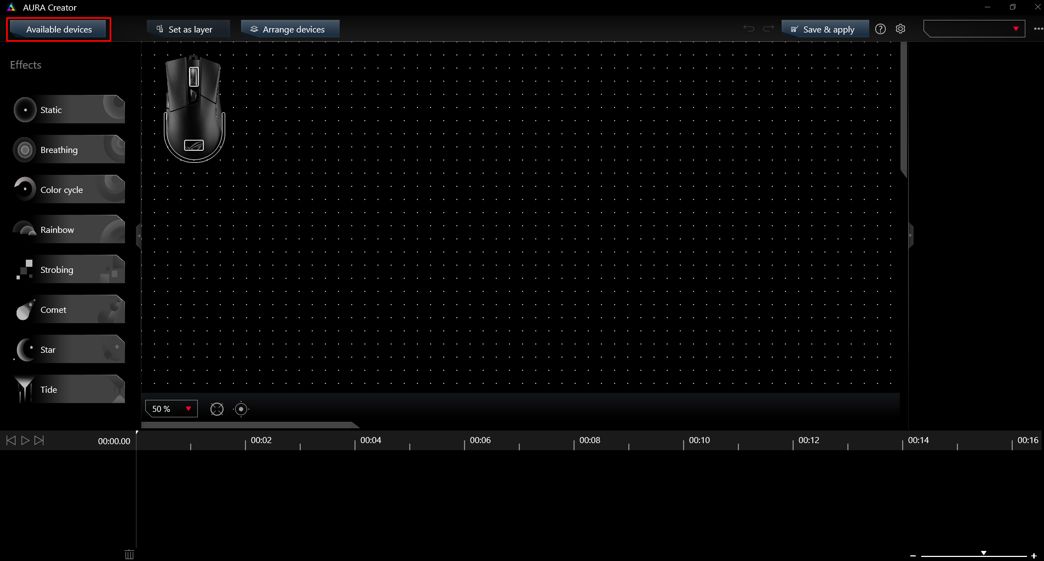
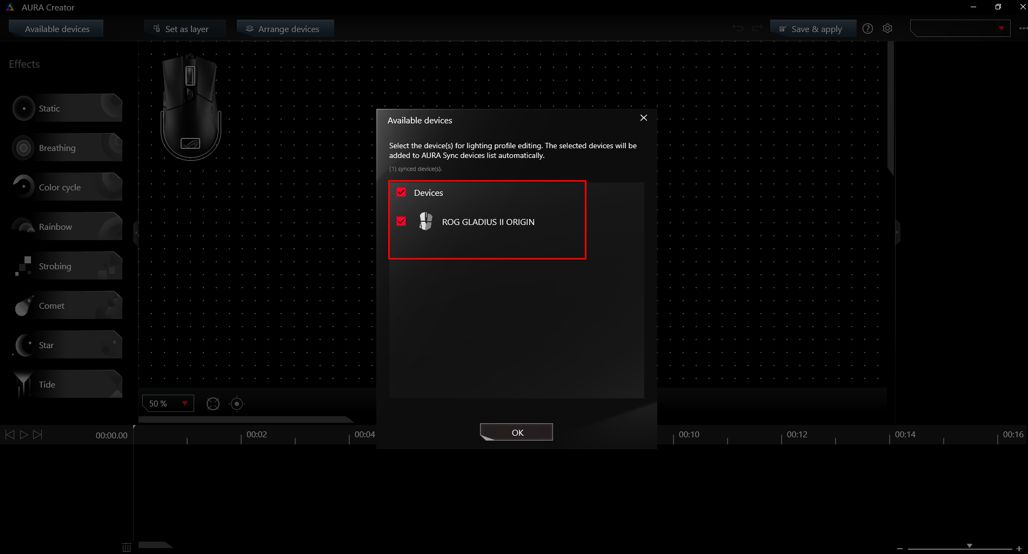
4. Sync the device(s) from the “Available devices” and the device(s) will show on the device display area.
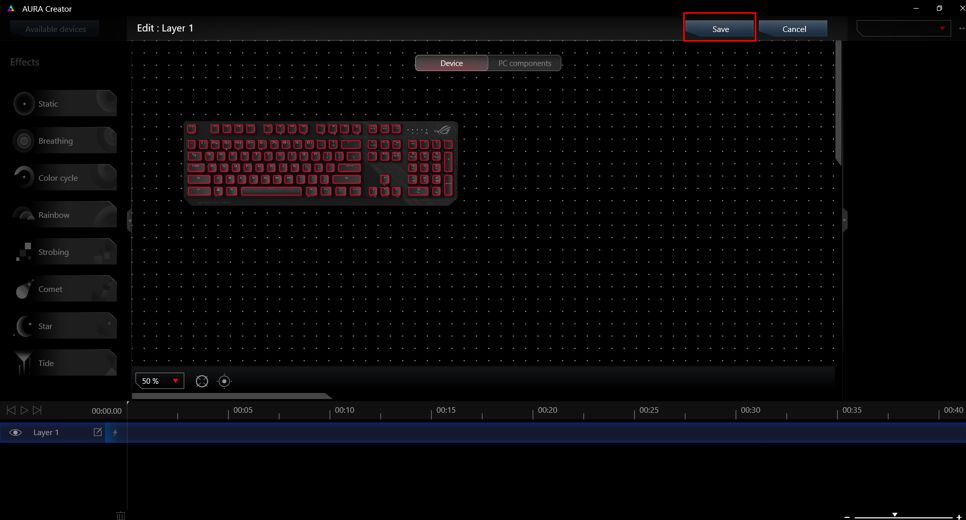
- Create a lighting profile
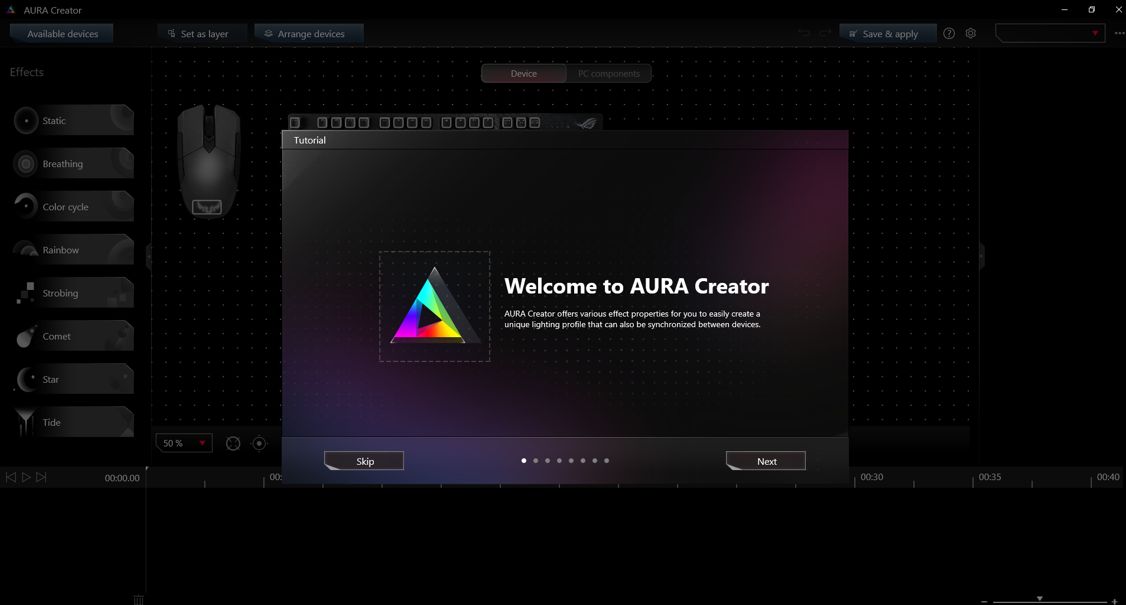
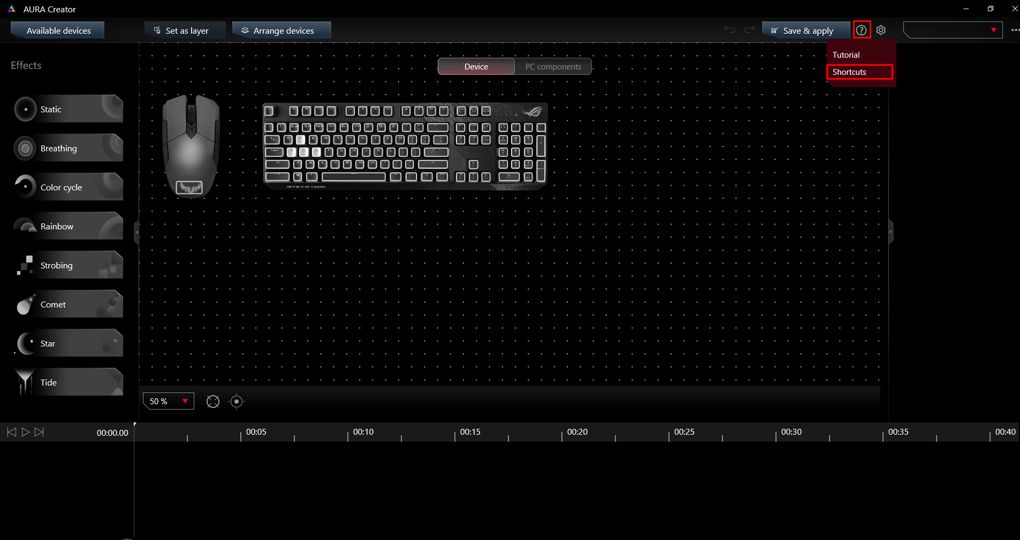
To create a simple lighting profile, you can follow the steps in the tutorial, which will appear on the first-time launch of Aura Creator. You can always review the tutorial from Help > Tutorial as in the screenshots below.
- Use hotkeys for quick editing
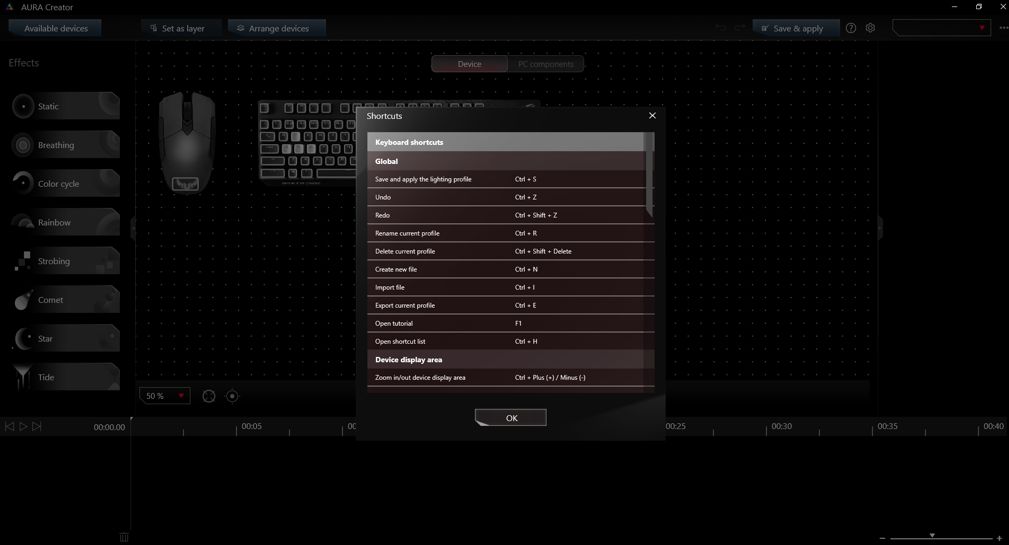
Aura Creator supports some common hotkeys to make your lighting profiles creation efficient, for example, Ctrl + C, Ctrl + V to copy/paste the lighting blocks, and Ctrl + mouse scroll wheel to zoom in/out of the device display area. You can find the hotkey support list from Help > Shortcuts.
- Share the lighting profile
To share your innovative lighting profile, you can follow these steps:
1. After editing, click Options > Export to export current lighting profile.
2. Send the lighting profile in any way, including via email or USB.
3. To import the lighting profile, click Options > Import in Aura Creator.
4. After finishing the import process, you can select the imported lighting profile and apply or edit with Aura Creator.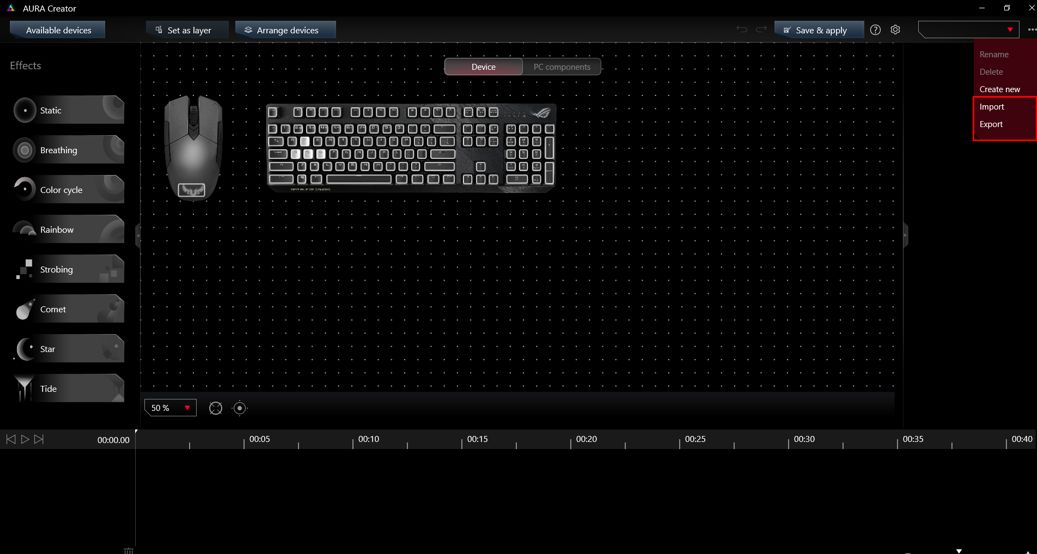
- Can I apply a lighting profile on partial devices?
Even if your PC or laptop is not connected to all listed devices of the lighting profile, you can still apply the lighting profile partially with your connected devices.
- Can I apply a lighting profile on different devices?
Aura Creator supports rich layers editing. If you have a lighting profile at hand with various layers created already but without all matched devices, or with same device type but different model (for example, Keyboard A in lighting profile, but connected with Keyboard B), you can still import the lighting profile and re-select the lighting area and mapping with existing layers.
- Quick-apply the lighting profiles from Armoury Crate > Aura Sync
The saved Aura Creator lighting profiles will be automatically listed in Armoury Crate > Aura Sync and will be listed as the advanced Aura Sync lighting effects. When you apply the advanced effects, the profile will be applied to the selected sync devices which also belongs to the lighting profile.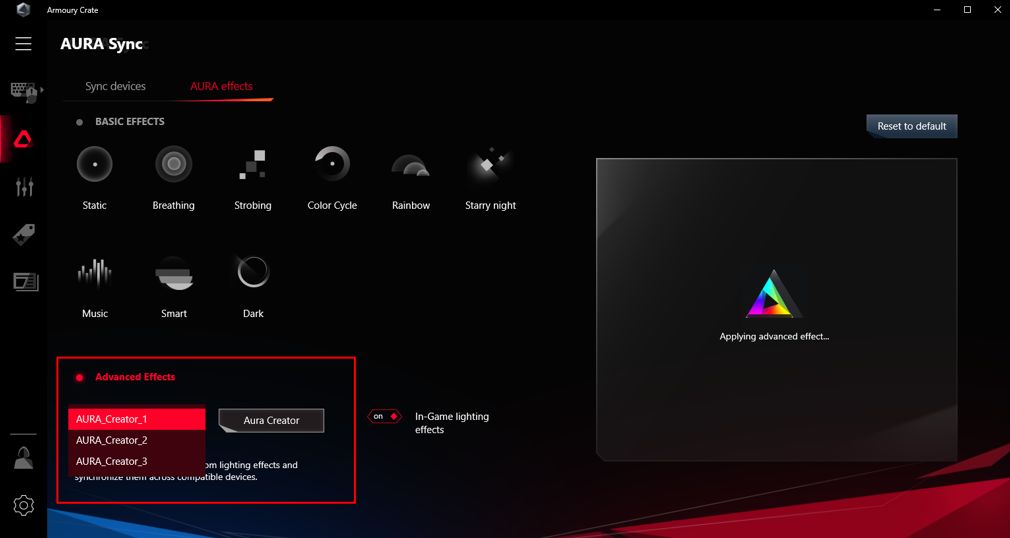
Aura Creator’s new effect “Sync with Music” allows you to easily reflect the audio output on the LEDs of selected Aura Sync compatible devices.
- How to add a Music effect?
Follow the steps below to add a Music effect:
1. Select the lighting areas, and create a new layer for the selected areas.
2. Drag the “Music” effect block from the effect pool on the left-hand side and drop to the layer track.
3. Adjust the properties in the panel on the right-hand side to match your preference.
4. Click “Play” or “Save & Apply” to display the effect.
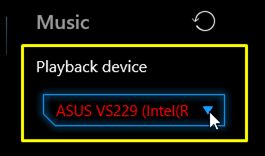
- Why does the Music effect not work when there’s music playing?
Please check if the playback device was selected to the layer with the “Music” effect. Remember to re-select a playback device and apply the profile again if you unplug the selected device.
- The effect does not change with the adjustment of the system volume
Depending on the playback device, the software’s ability to get the change of system volume may be different. We recommend you to change the audio volume by the media player to reflect the lighting effect. Also, you can adjust the sensitivity to increase or decrease the effect.
Aura Creator’s new effect “Sync with Adaptive Color” allows you to reflect the screen color on the LEDs of selected Aura Sync compatible devices.
- How to make “Adaptive Color” work?
Aura Creator will get one color from the selected area as the “Adaptive Color” - you can decide to show the average color or the most conspicuous color in the region and display on devices.
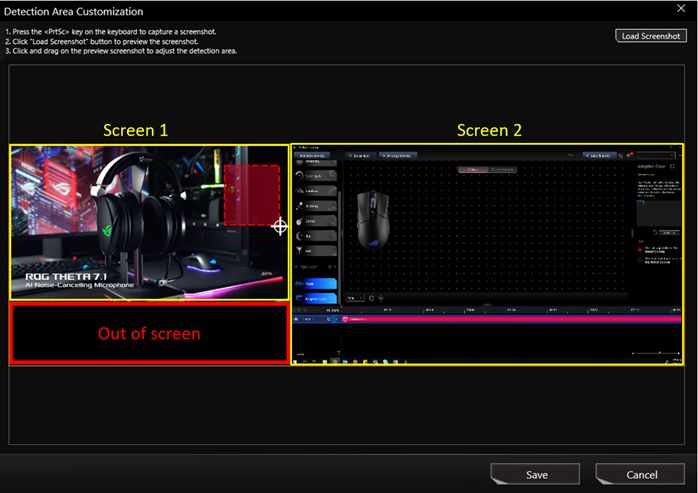
- How to add an Adaptive Color effect?
Follow the steps below to add an Adaptive Color effect:
1. Select the lighting areas and create a new layer for the selected areas.
2. Drag the “Adaptive Color” effect block from the effect pool on the left-hand side effect and drop to the layer track.
3. Use the keyboard “PrtSc” key to get a screenshot.
4. Load the screenshot in Aura Creator
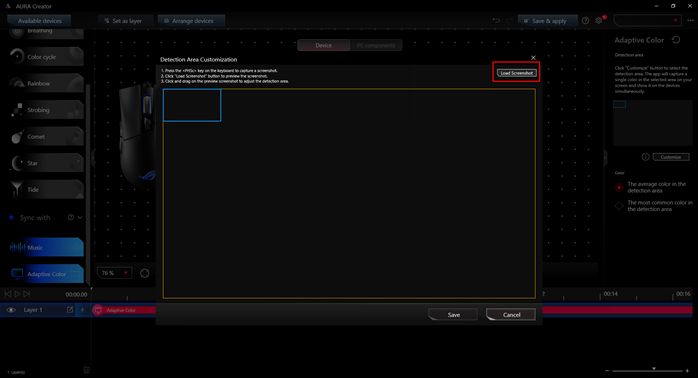
5. Drag to select the region you want to get the “Adaptive color” and click the “Save” button to finish the customized detection region.
Note: Ensure the selected region that is correctly from the screenshot (on the screen). Or the device will always show in black color. And if you select a region from an external screen and the screen has been un-plug from the PC or laptop, please reselect the customized region again before applying the lighting effect profile with “Adaptive Color”.