[Desktop Chassis] ProArt PA602 SSD/HDD trays and brackets disassembly and assembly instructions
Notice
1. Please wear gloves to protect your hands before disassembling and assembling, and pay attention to the corners of the parts to avoid scratches.
2. When the side panel is made of glass, please handle it with care when disassembling the side panel of the case to avoid collision/fall/stress.
3. When disassembling, please lay the casing flat on a flat surface to prevent the side panel from falling during disassembly and assembly.
Preparation
Phillips screwdriver PH2
Step1. Open the both side panel and remove them.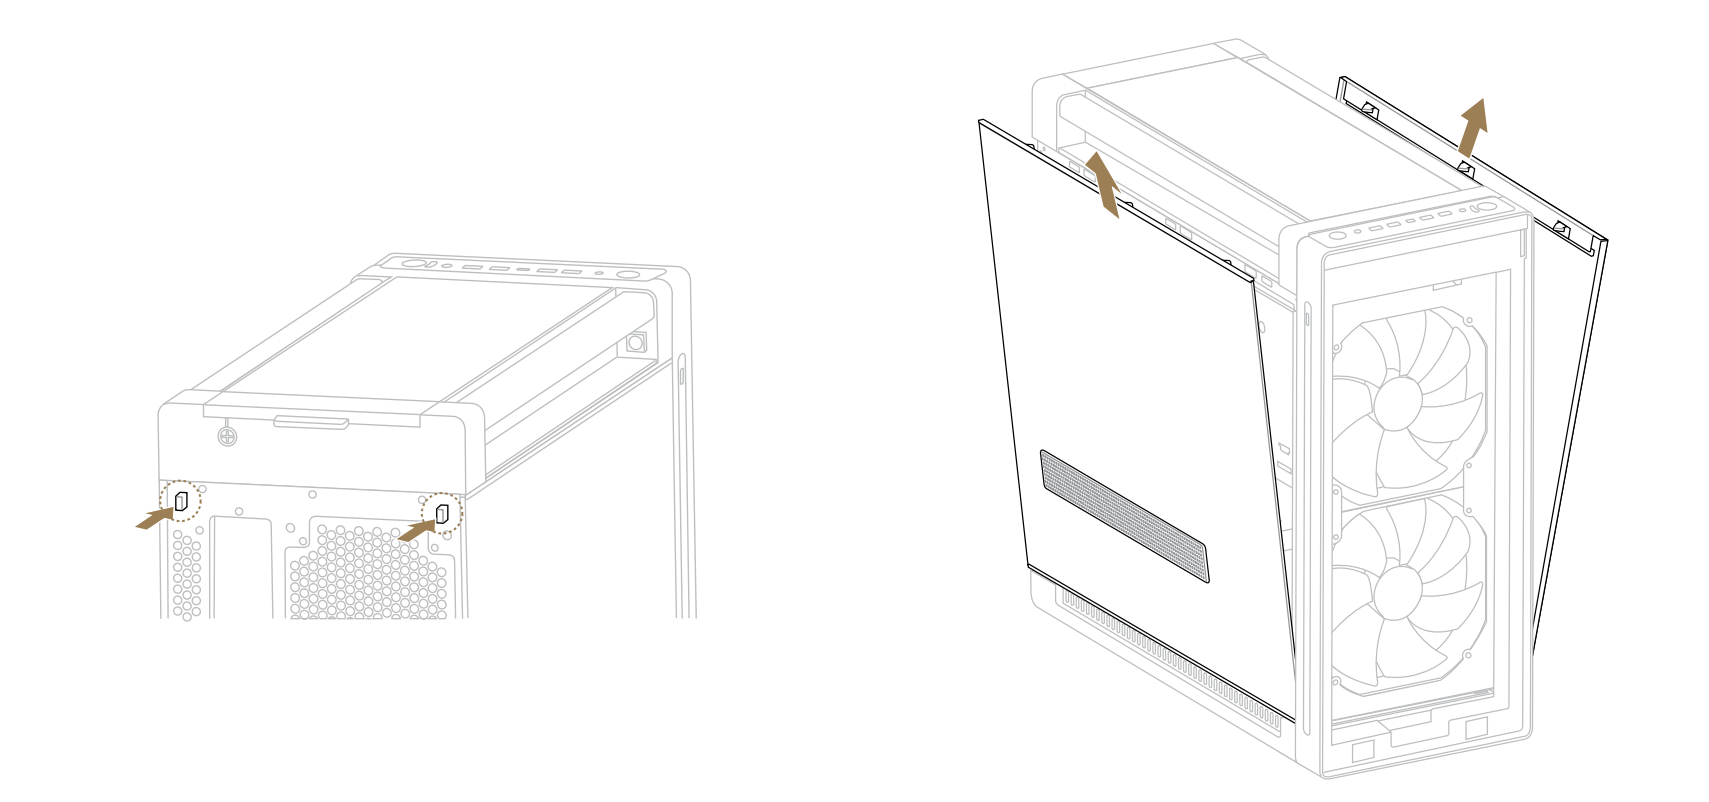
Step2. Unscrew the single screw at the bottom left side of PA602 to remove the air deflector.
Step3. Unscrew the three screws on both sides of PA602 to remove the PSU cover.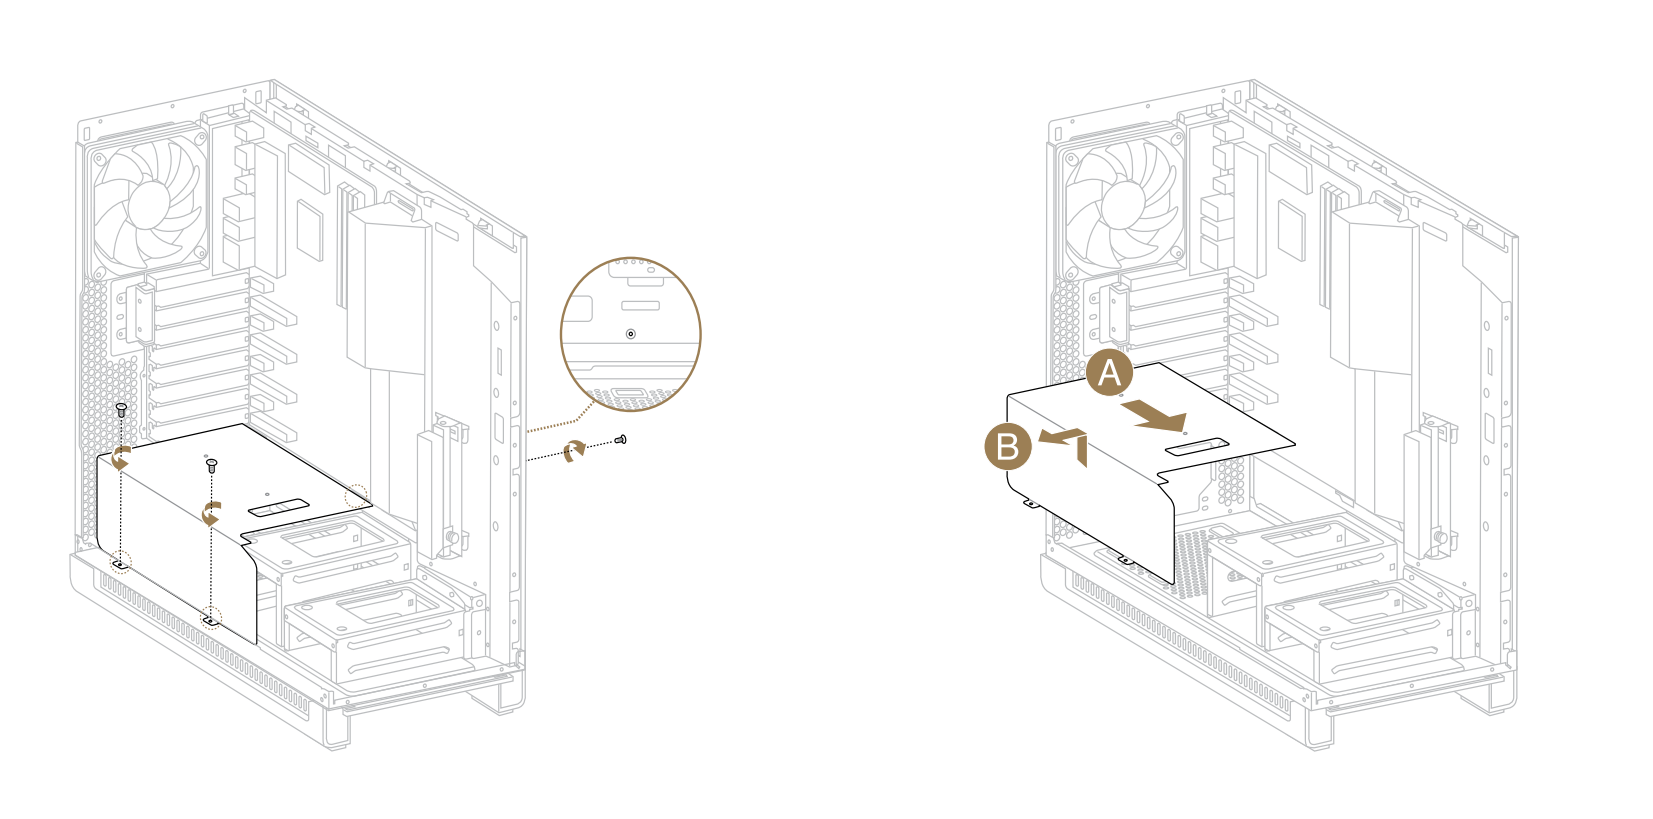
Step4. Pull out the three trays.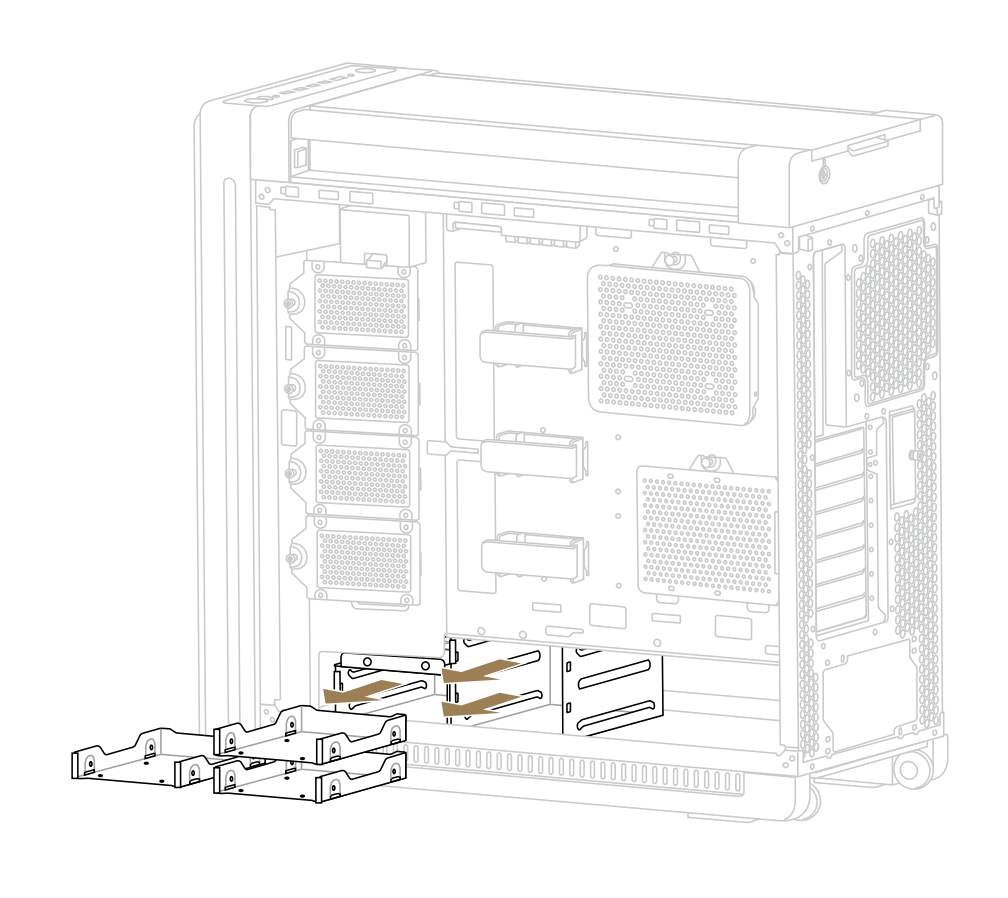
Step5. Unscrew the top two screws on each of the tray brackets, totaling four screws.
Step6. Pass through the two circular holes on each of the tray brackets on the left side of PA602, then unscrew a total of four screws to remove the tray brackets.

Visit ASUS official website to learn more about ProArt PA602 https://www.asus.com/motherboards-components/gaming-cases/proart/proart-pa602/