[Cooling] How to assemble the ProArt LC 420 liquid cooler fan in the PA602 case?
The liquid cooler fan assembly method provided in the ProArt LC 420 user manual is slightly different from the liquid cooler fan assembly method provided by ProArt PA602. Please assemble ProArt LC 420 according to the liquid cooler fan assembly method of ProArt PA602. Please see the following instructions for details:
The liquid cooler fan assembly method provided by ProArt LC 420 is explained on page 16 of the user manual on how to assemble it on the case:
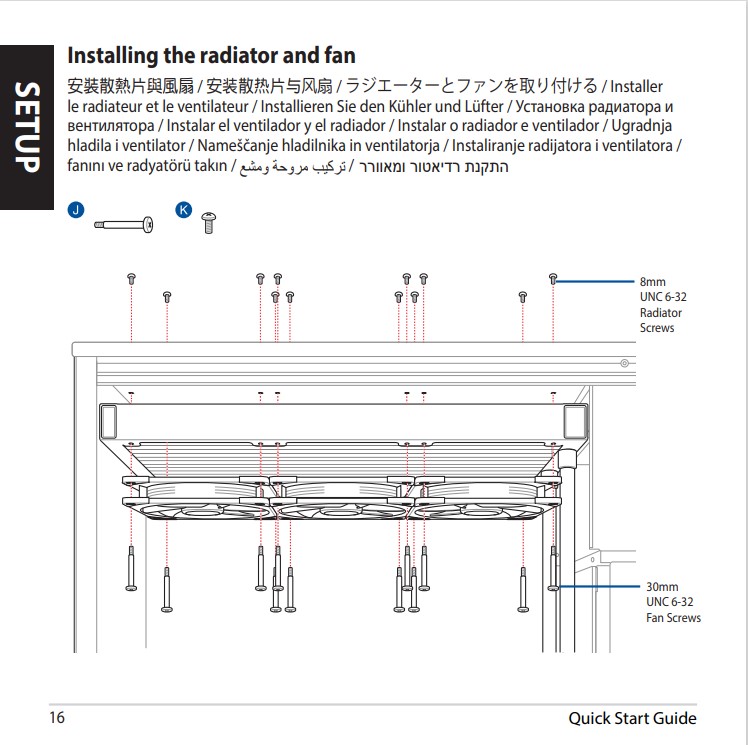
The above installation method is to install the fan and cooling directly on the casing. This installation method is suitable for most commercially available cases.
However, if you want to match the ProArt PA602 case, the assembly method of the liquid cooler fan is slightly different. For details, please refer to page 32 of the ProArt PA602 user manual as follows:
https://dlcdnets.asus.com/pub/ASUS/ODD/DC/PA602/Q22980_ProArt_PA602_WW_UM_V4_WEB.pdf?model=PA602
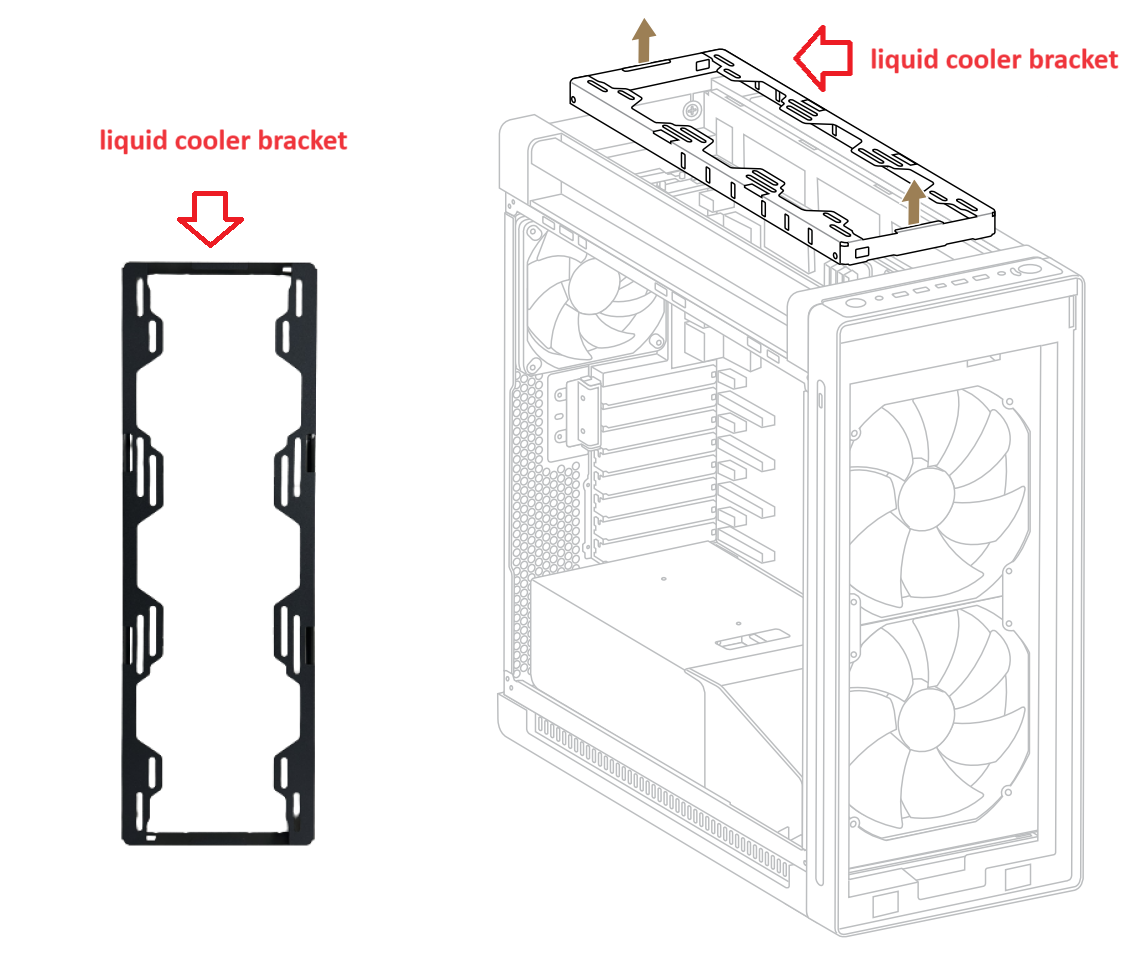
1. ProArt PA602 has a set of liquid cooler bracket.
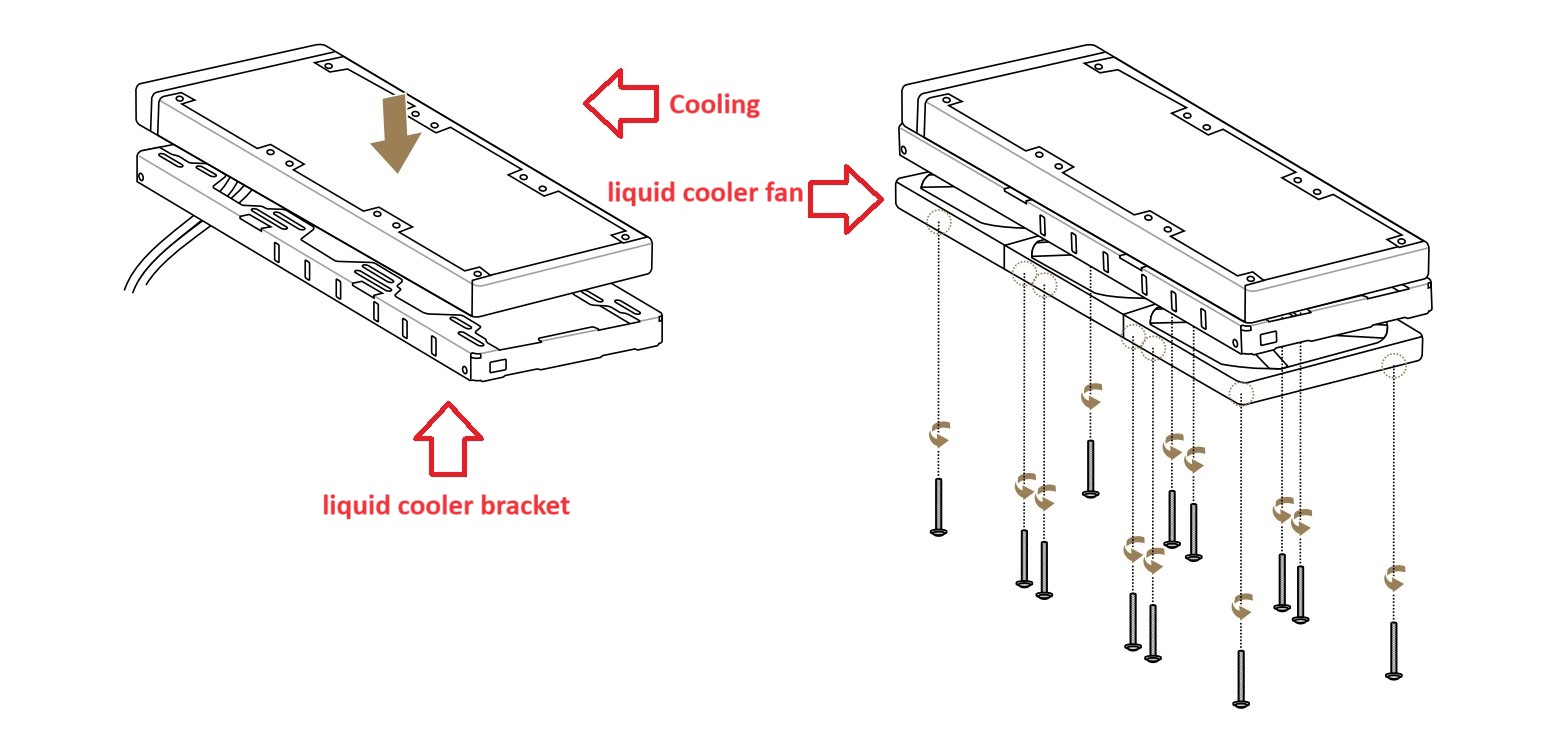
2. The liquid cooler fan and Cooling need to be installed on the upper and lower layers of the liquid cooler bracket respectively (Cooling>>liquid cooler bracket>>liquid cooler fan).
3. Finally, install the entire set of brackets back to the chassis.

For more details about ProArt LC 420, please see the link below
https://www.asus.com/motherboards-components/cooling/proart/proart-lc-420/
For more details about ProArt PA602, please see the link below
https://www.asus.com/motherboards-components/gaming-cases/proart/proart-pa602/