Customer Self-Repair (CSR) - Hard Drive Disk backup and restore SOP
Contents
1. (Please sign in as an administrator)
Connected to an external Hard Drive that preparing to backup system image
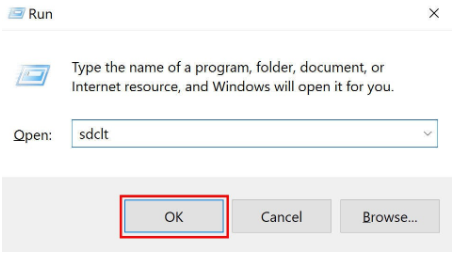
2. Press “Windows logo key + R” and key in “sdclt” .Click “OK”
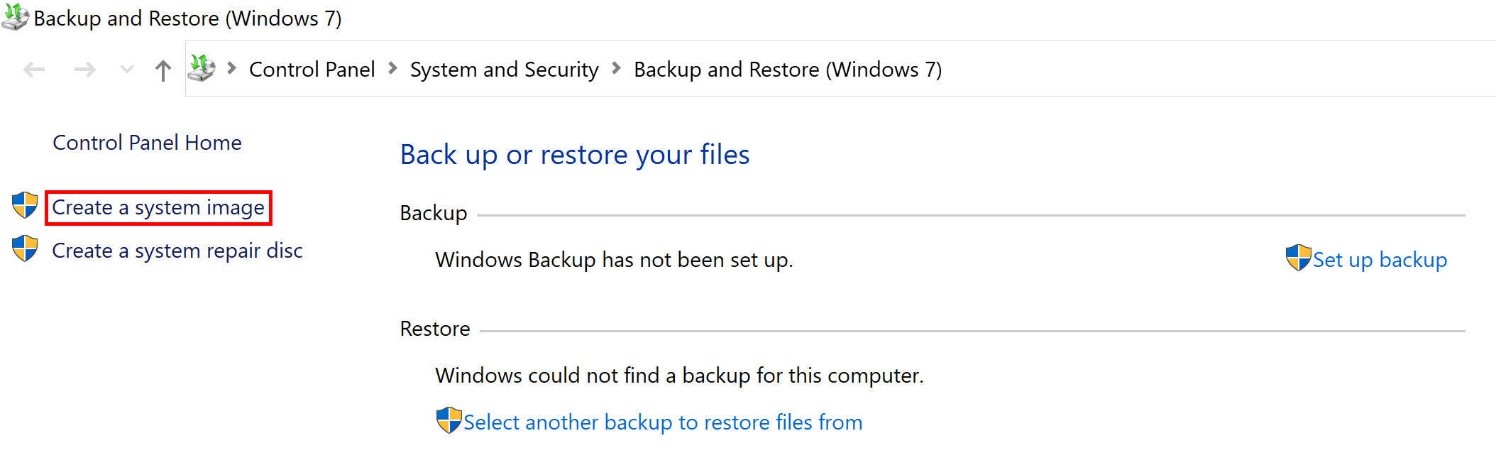
3. Click “Create a system image”
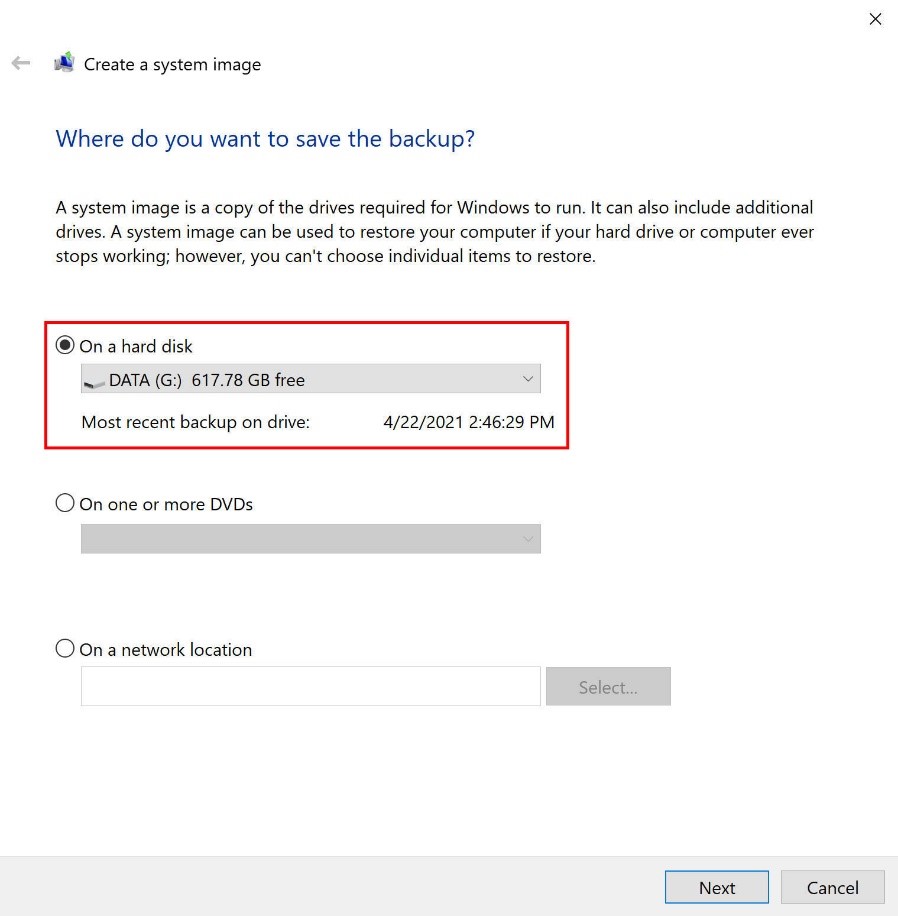
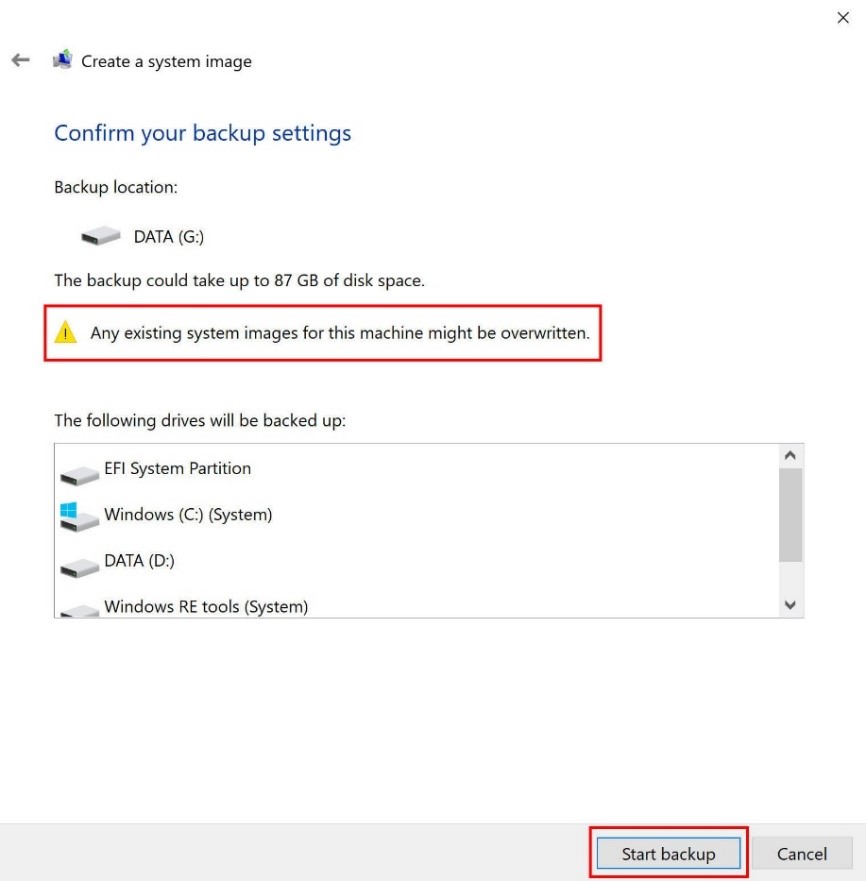
4.Select the path of Backup Hard Drive
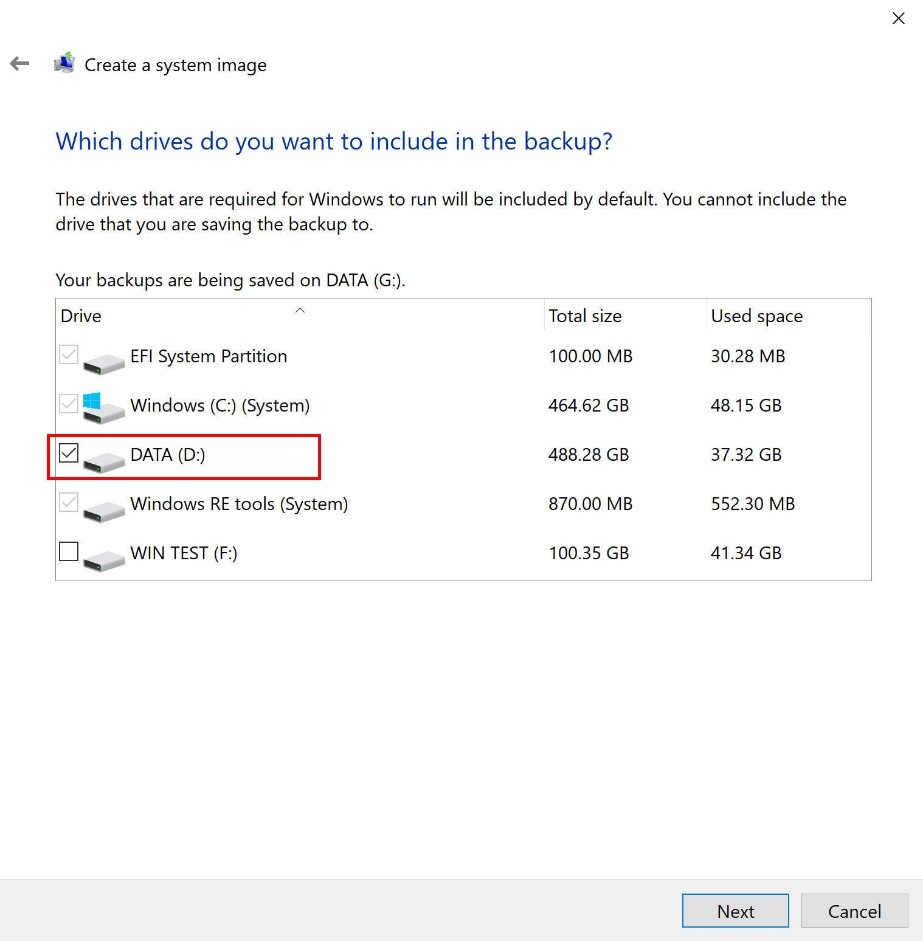
5.Select partitions that needs to backup (EFI, WinRE and C are default)
6. Finally confirmed. Press ”Start backup” (Any existing files will be overwritten)
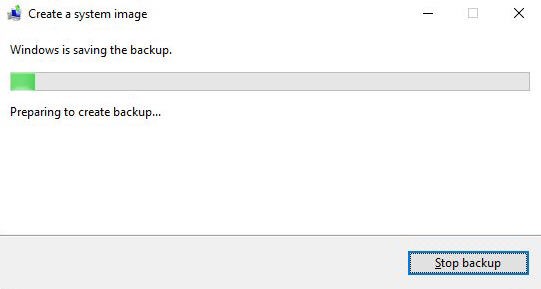
7. Creating system backup
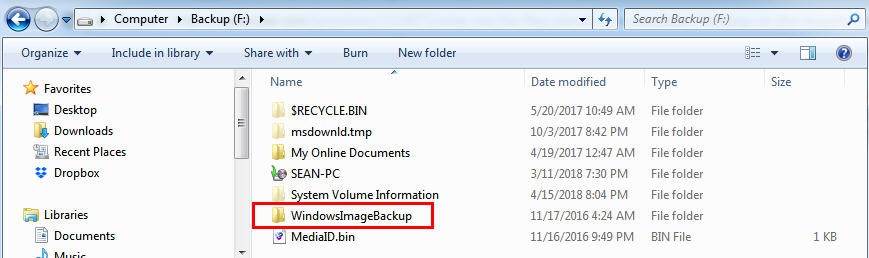
8. Finished. You can see “WindowsImageBackup” folder.
1. Connected to an USB drive (capacity at least 16GB)
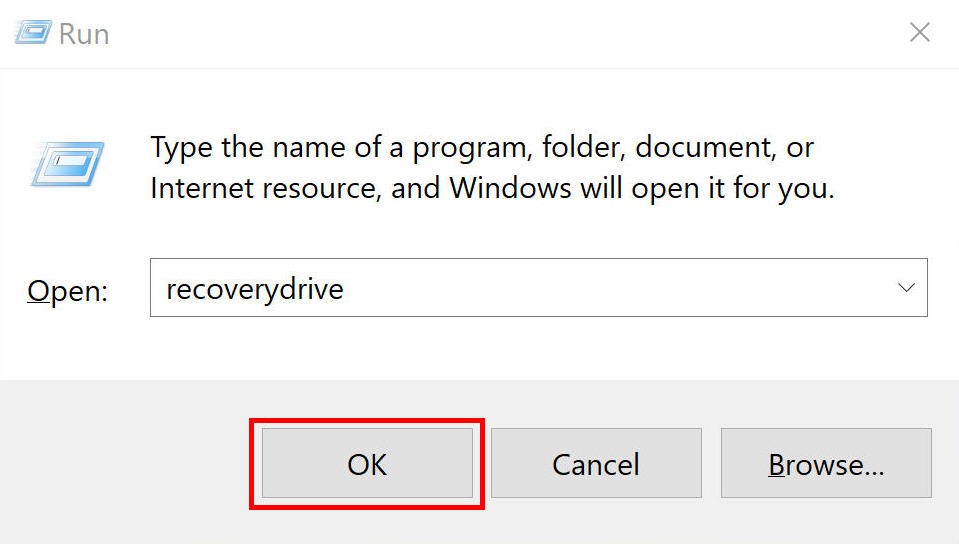
2. Press ”Windows logo key + R”and then key in“recoverydrive”. Click “OK”
3. Click “Next” to detect USB device
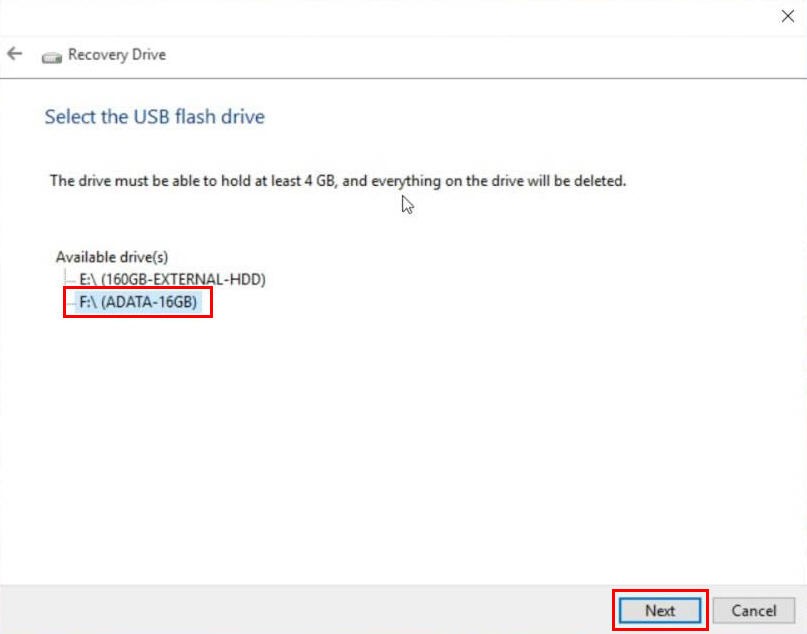
4. Select the path of USB drive and click “Next”
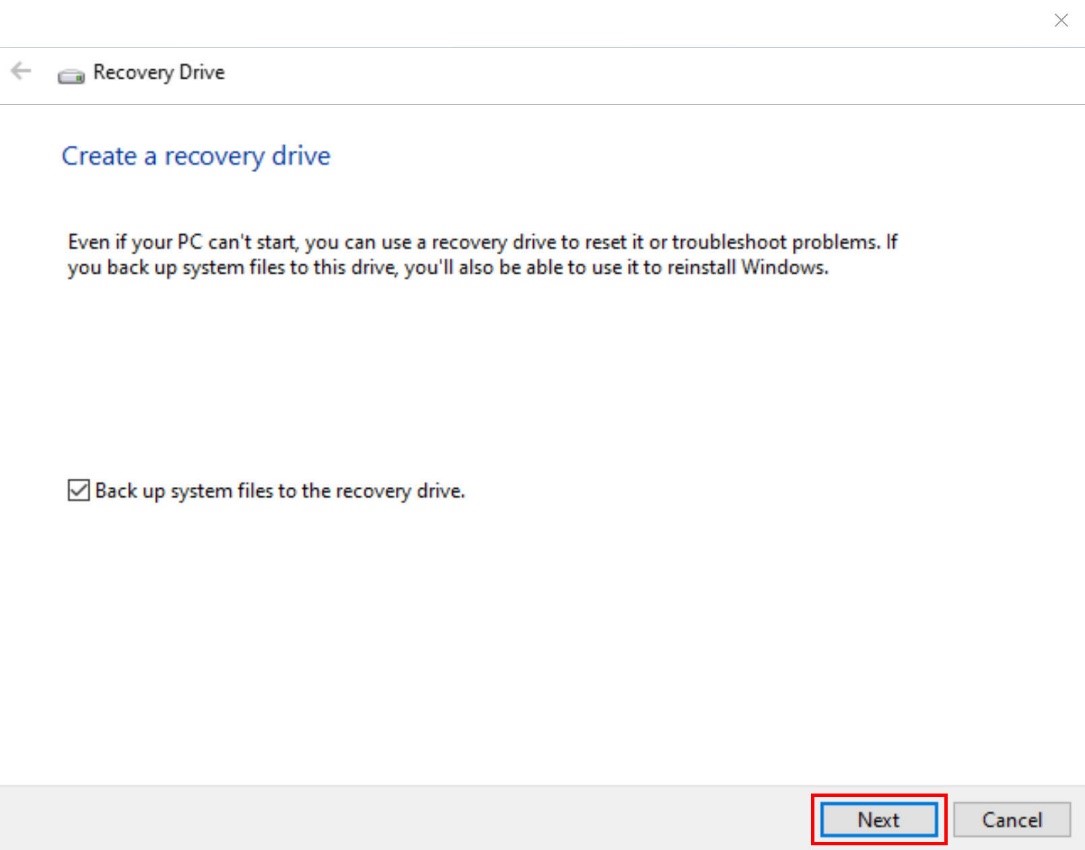
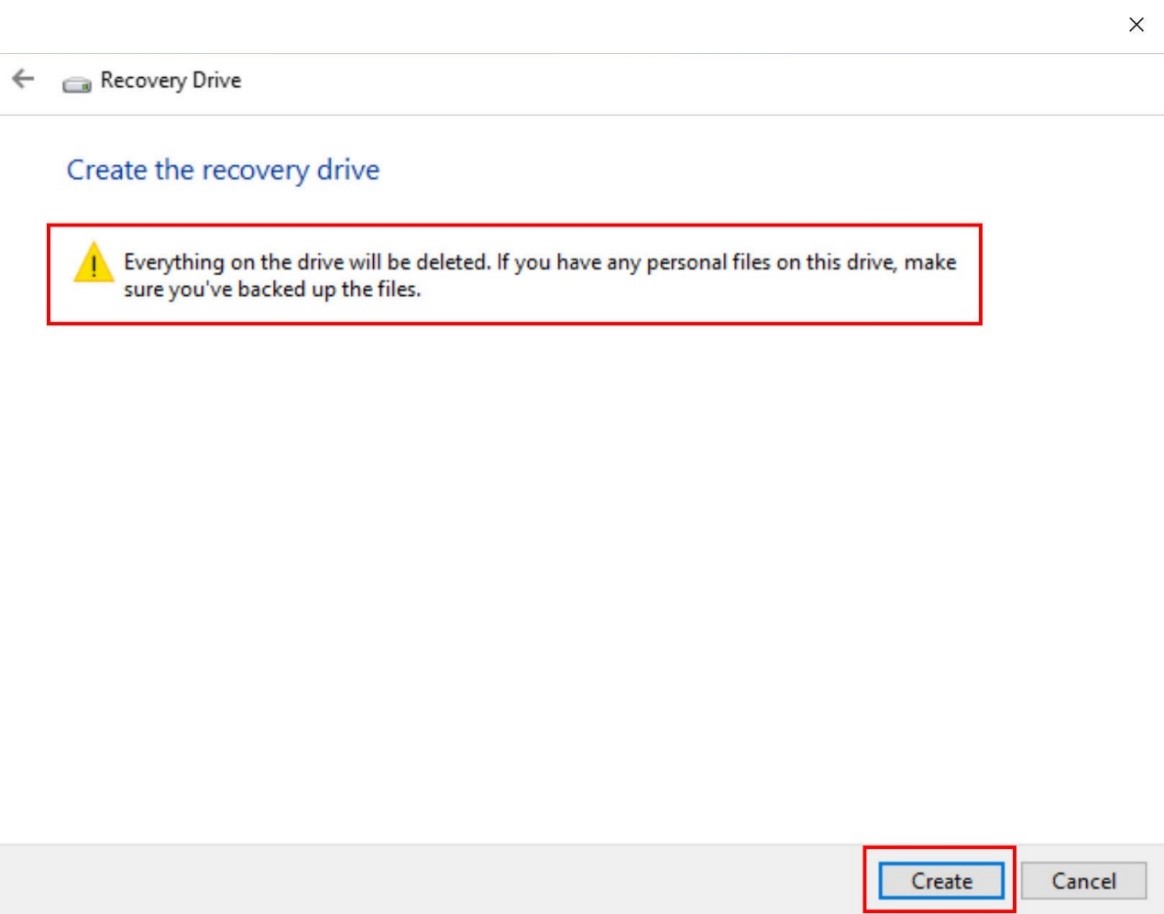
5. Click “Create” to start
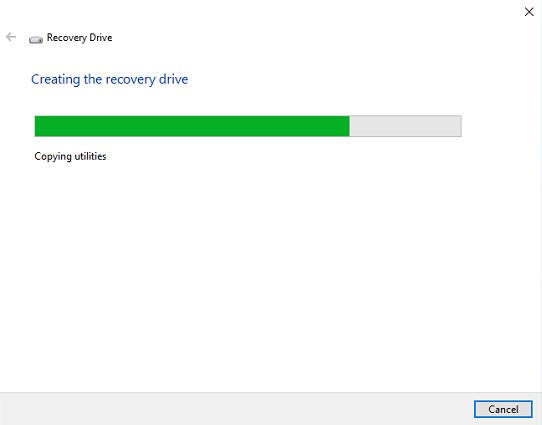
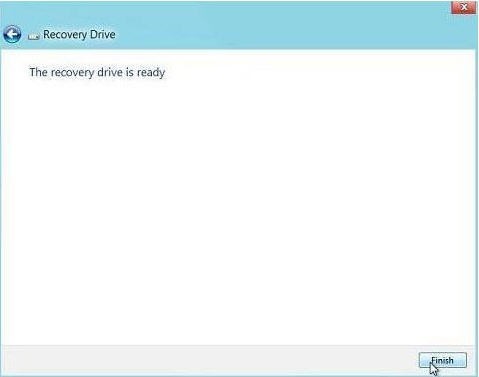
6. Creating the USB recovery drive
7. Finished
1. Connected to the USB recovery drive and the Back up Hard Drive
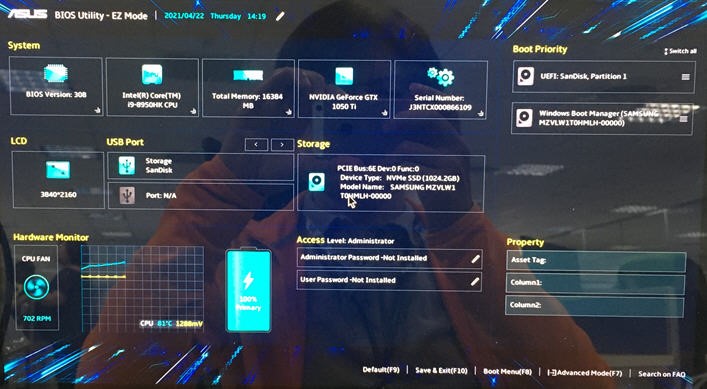
2. Boot up the unit and Press ”F2” to enter BIOS menu
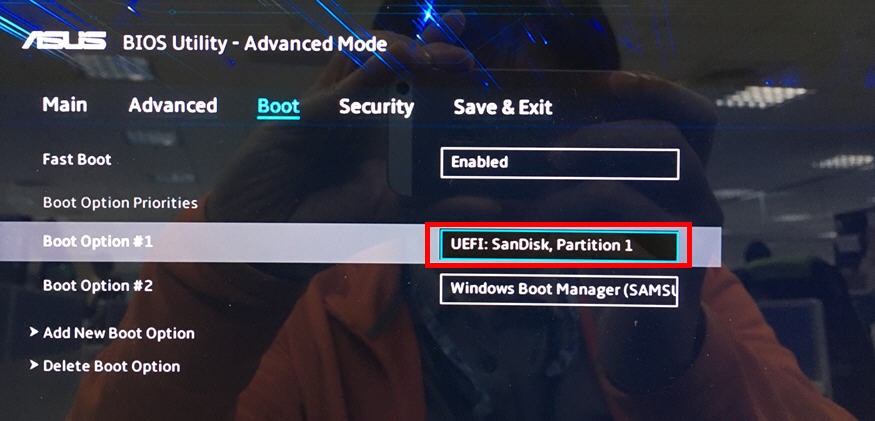
3. Press “F7” to enter “Advanced Mode”. Select “Boot” option and set Boot Option #1 is the USB recovery drive. Press “F10” to save and exit.
4. Boot up via the USB recovery drive. Choose the keyboard layout

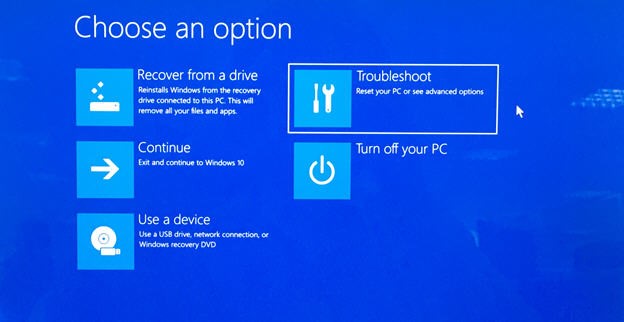
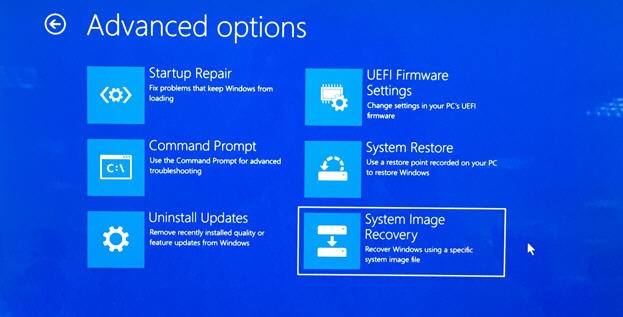
5. Select “Troubleshoot”
6. Select “System Image Recovery”
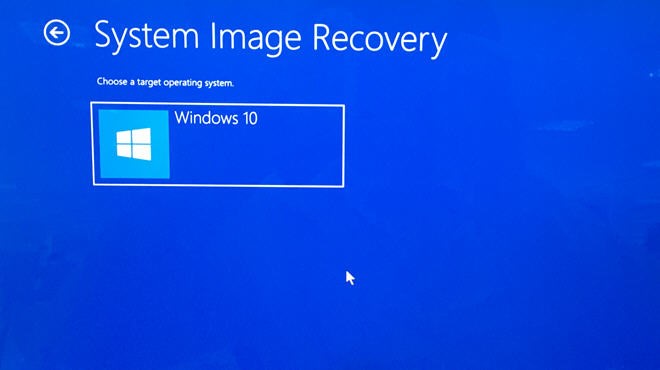
7. Select the target operating system “Windows 10”
8. Confirmed the path of the system image backup. Press“Next

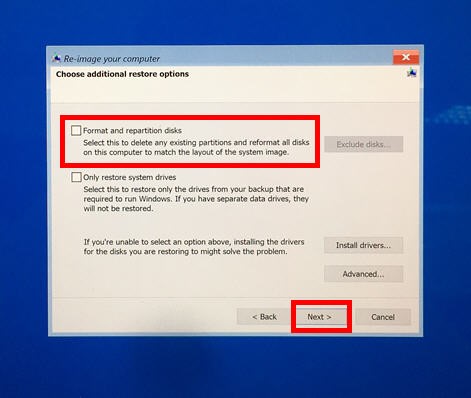
9. Tick ”Format and repartition disks”option and click ”Next”
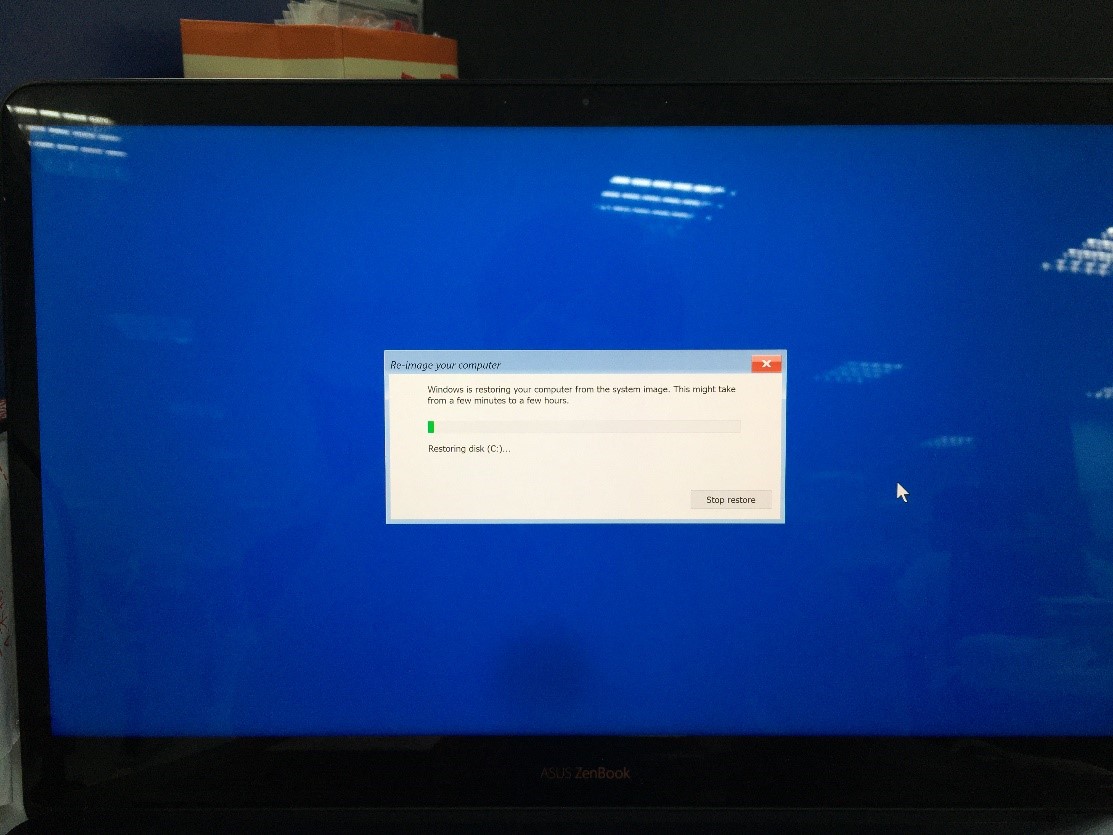
10. Recovering system
Additional Instruction
If the end-user has backed up the personal data by himself, he can run system recovery via the USB recovery drive. (No need to run the whole hard drive backup)
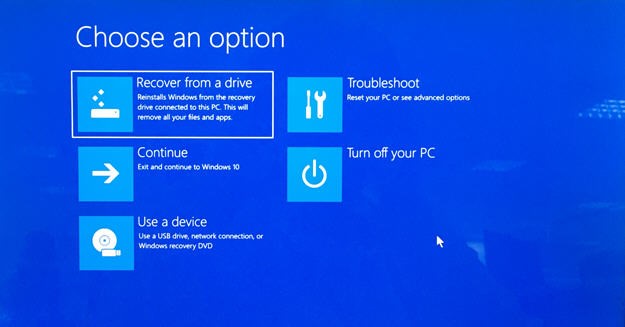
1. Boot up via the USB recovery drive. Choose the keyboard layout

2. Select “Recover from a drive”
3-1. If needs to keep personal profile, select”Just remove my files”

3-2. No need to keep personal profile, select“Fully clean the drive”

4. Start to recover system