[Notebook] Troubleshooting - Connection failure of Notebook and Projector
Please follow the below steps for troubleshooting:
- Update and confirm BIOS / Windows packages / drivers with the latest version in your laptop
Updating software usually helps the system stability and optimization, so we recommend you check and often update to the latest version in your laptop. Here you can learn more about:
How to update the BIOS version in Windows system
How to use EZ Flash to update the Notebook BIOS version
For executing Windows update and drivers update, here you can learn more about How to execute Windows Update.
If the problem persists after BIOS and Windows Update both have been updated to date, please continue the next troubleshooting step.
Disconnect all accessories from your PC. Connected docks, dongles, adapters and other hardware can cause conflicts.
Be sure the projector normally turns on. For models that include a battery, please turn the device on with the power cable connected.
Check the connecting cable from the projector to Notebook is secured. Or, try changing the cable connecting the external monitor. If the new one works, you know the previous cable was faulty.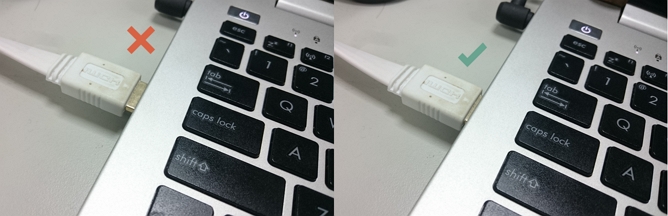
Press  on the projector and select the connection port that you're using. (HDMI or VGA). The projector will usually detect this automatically.
Press Windows button+P and select the desired projection choice.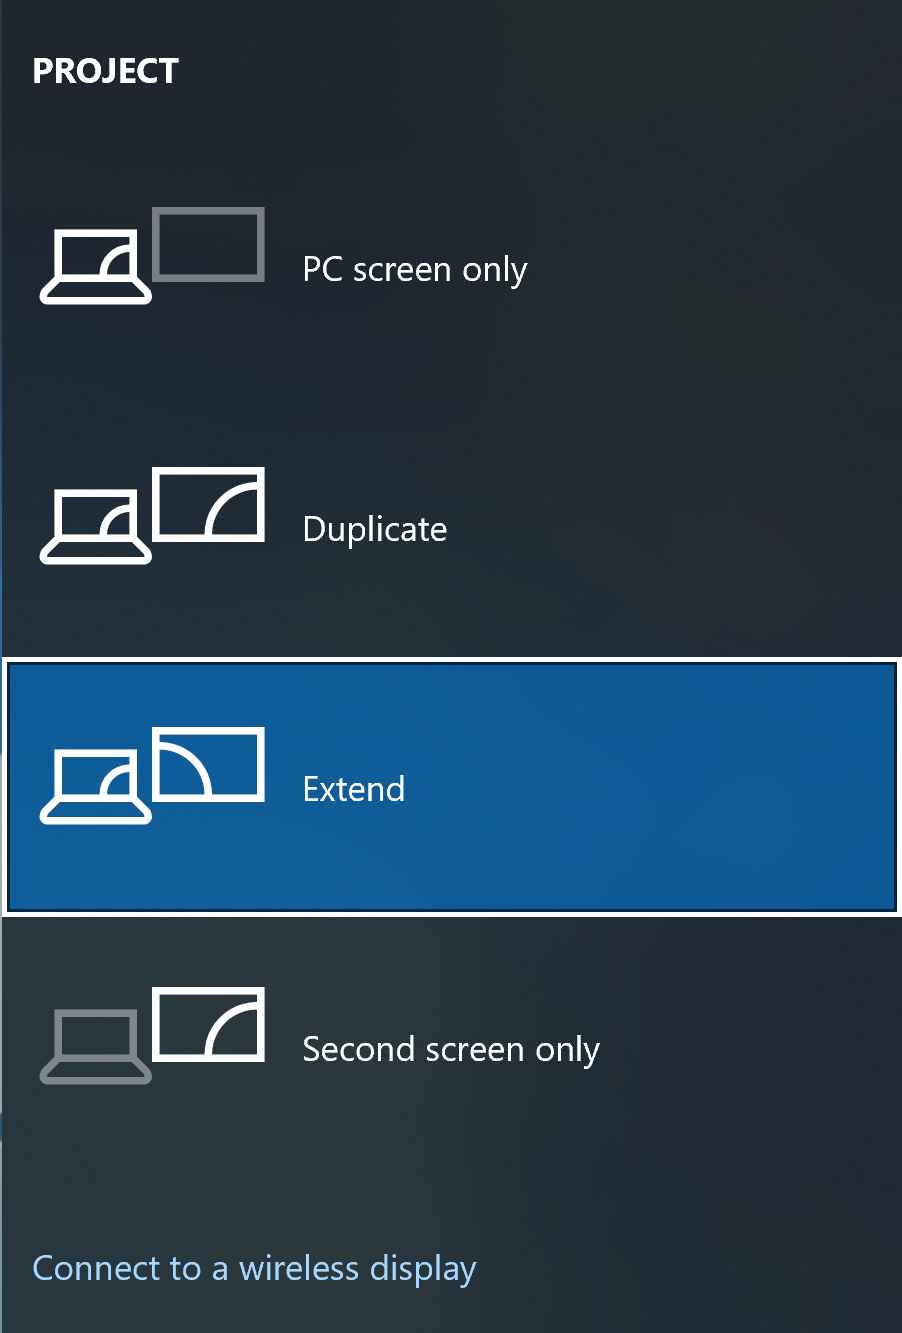
Enter Windows Settings → System → Display → Display resolution. Adjust the resolution to the one which projector supports (If you cannot confirm the resolution that projector can support, please try 800x600 in the beginning. Once there is projection, you can gradually increase the resolution.)
If the projector cannot normally project the image with the above methods introduced, please try to restart the projector or to resume all settings. Please refer to How to reset the unit to default setting