Related Topics
[Chromebook] Connecting to Wi-Fi on Your Chromebook
This guide illuminates the process of connecting your Chromebook to Wi-Fi networks, configuring auto-connection preferences, setting preferred networks, and obtaining MAC or IP addresses.
Connecting Your Chromebook to Wi-Fi Networks
By default, your Chromebook uses the Wi-Fi network selected during the initial setup process. If you wish to connect to a new network, follow these steps.
Ensure the network you're connecting to is supported by Chromebook:
- Open networks that don’t require a password
- Secure networks that use WEP, Dynamic WEP, WPA-PSK, WPA-Enterprise, or WPA2-Enterprise settings
- Standards: 802.11 a/b/g/n and 802.11ac for AC-equipped Chromebooks
- Click the [Status bar]① at the lower right of the screen and select the [Wi-Fi Networks] icon②.
Note: If you see your Wi-Fi network name and signal strength, your Chromebook is already connected to Wi-Fi.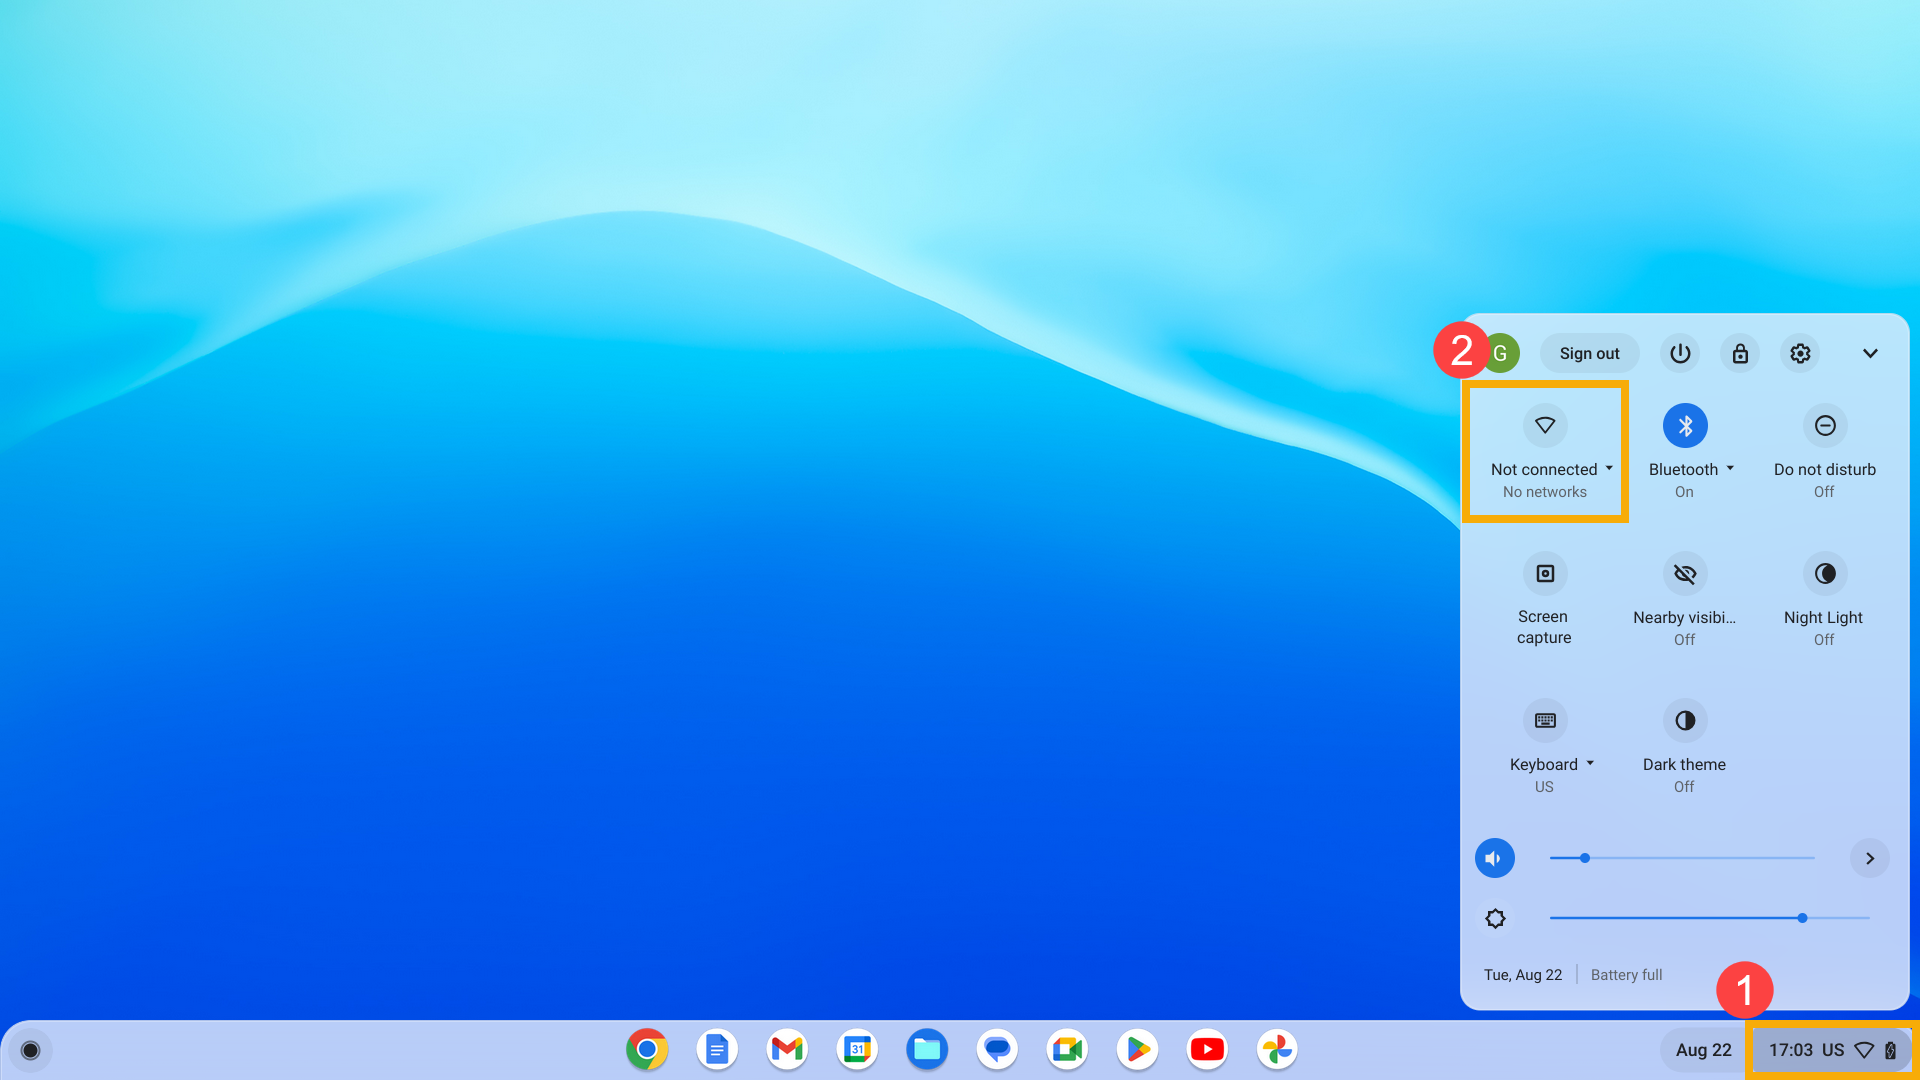
- Turn on Wi-Fi③. Your Chromebook will automatically search for available networks and list them.
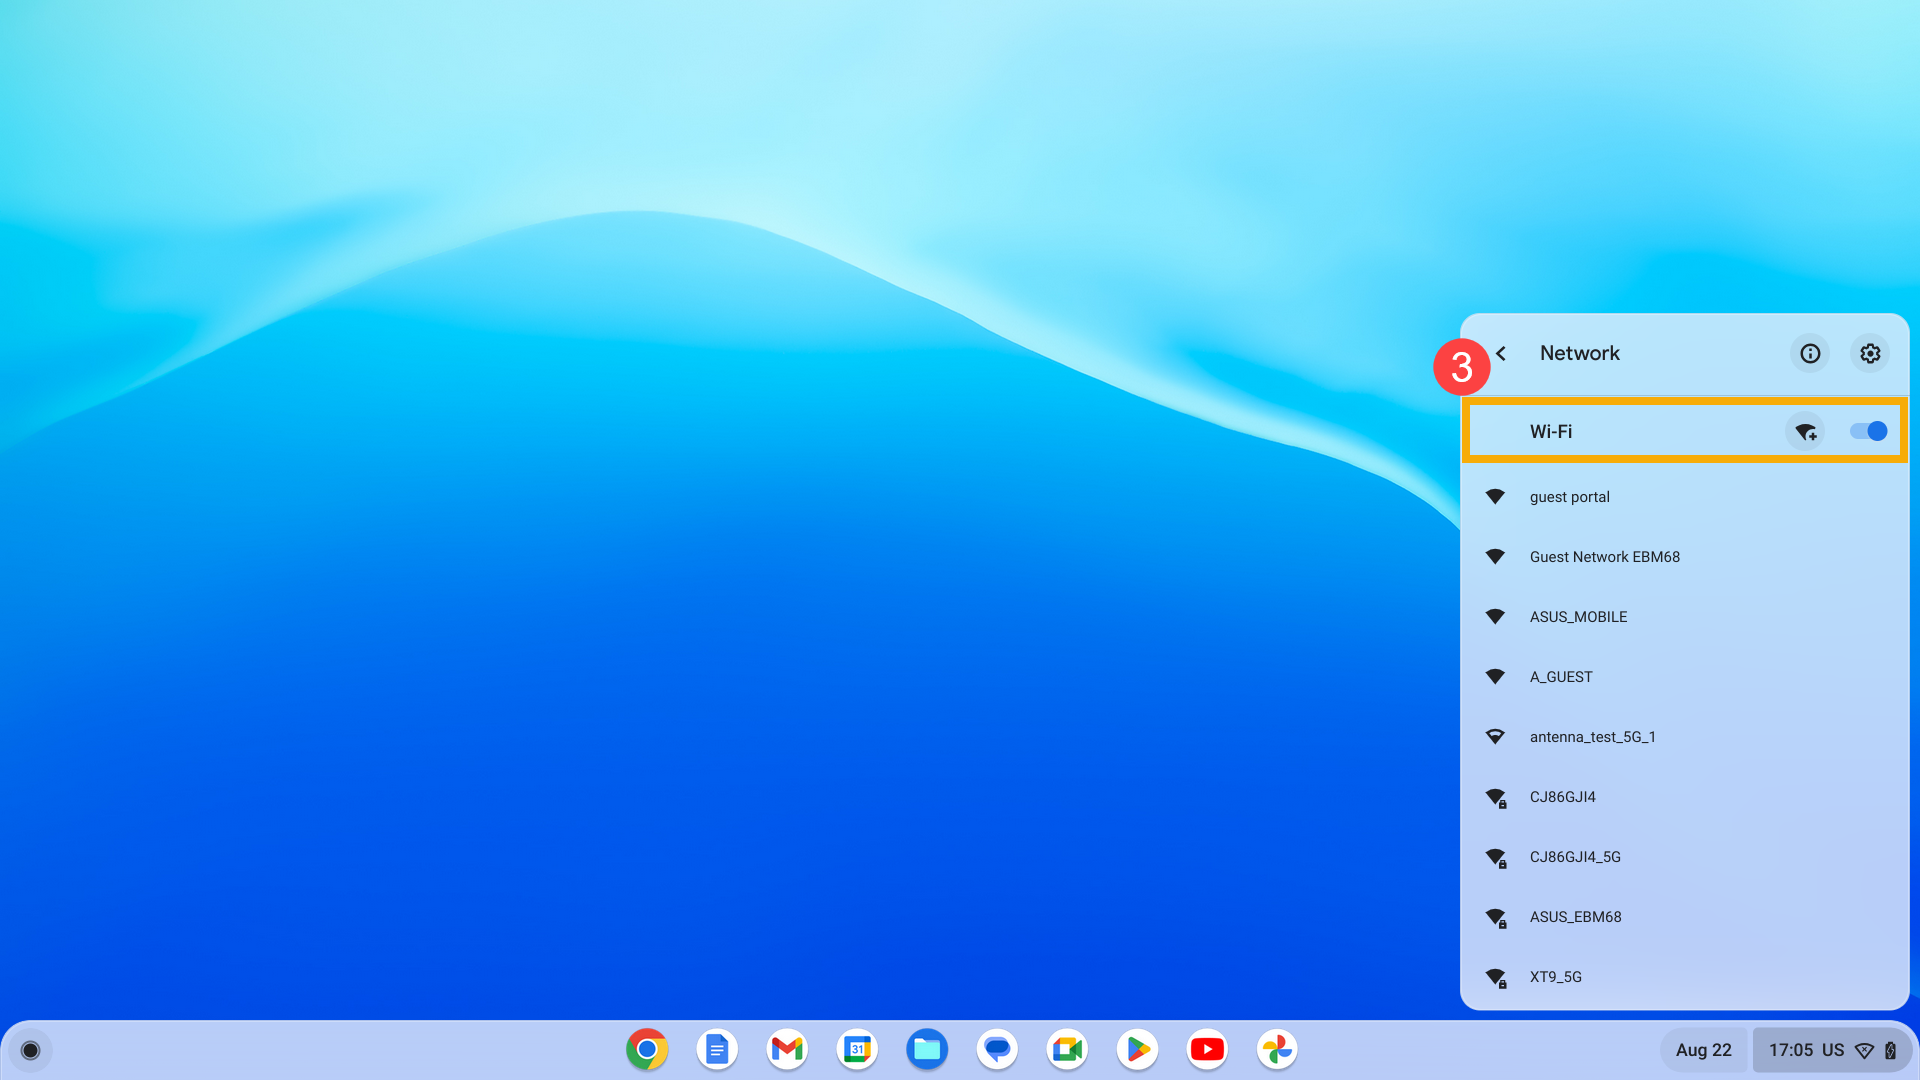
- In the list, select the Wi-Fi network you want to connect to④.
( : Open network.
  : Secure network.)
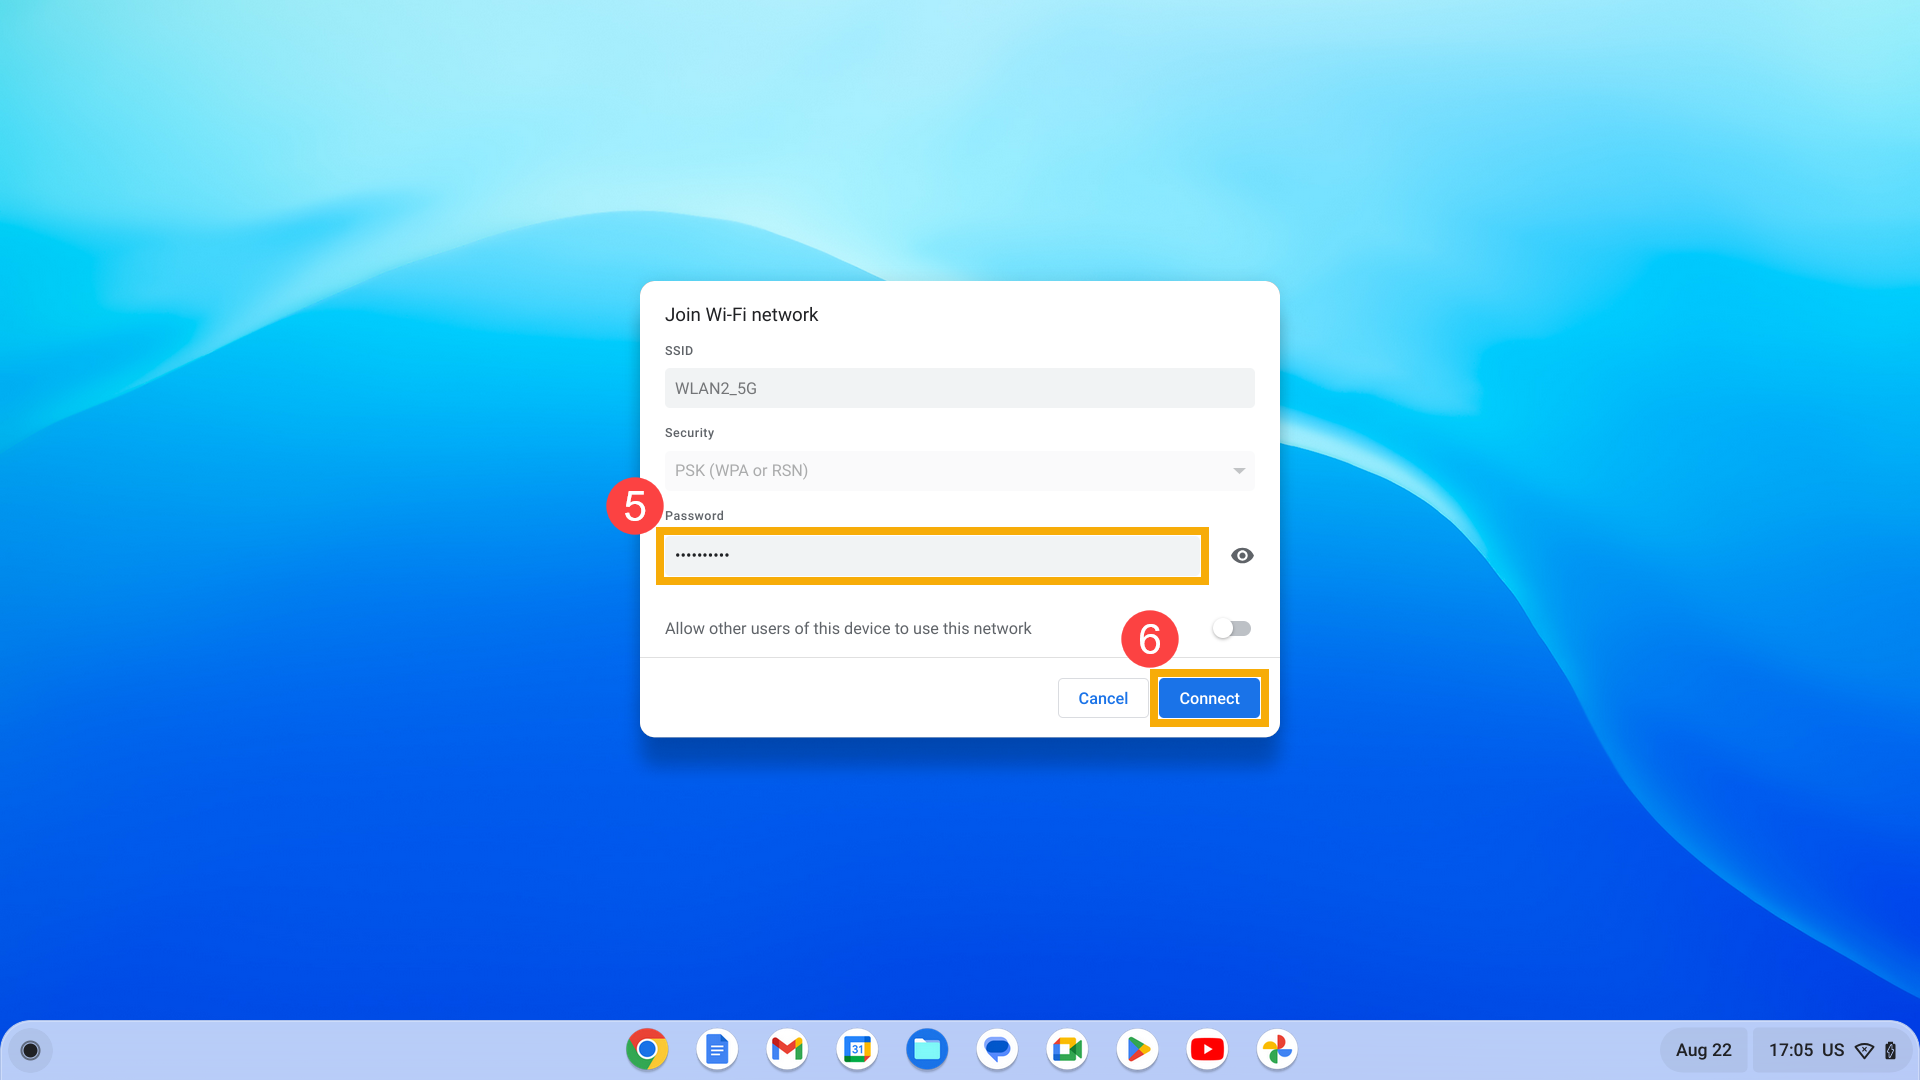
- If connecting to an secure network, input the network password⑤ and click [Connect]⑥.
Managing Wi-Fi Networks
If you have stored multiple networks on your Chromebook, you can select the default wireless network for your device to connect to.
By default, Chromebook will attempt network connection in the following sequence:
- Wired local area network
- Secure wireless network
- Unsecure wireless network
- Mobile data network (only used if your Chromebook has a data plan)
Automatically Connecting to a Network
If your area has multiple Wi-Fi networks, you can choose to auto-connect to a specific one.
- Make sure you're connected to a Wi-Fi network.
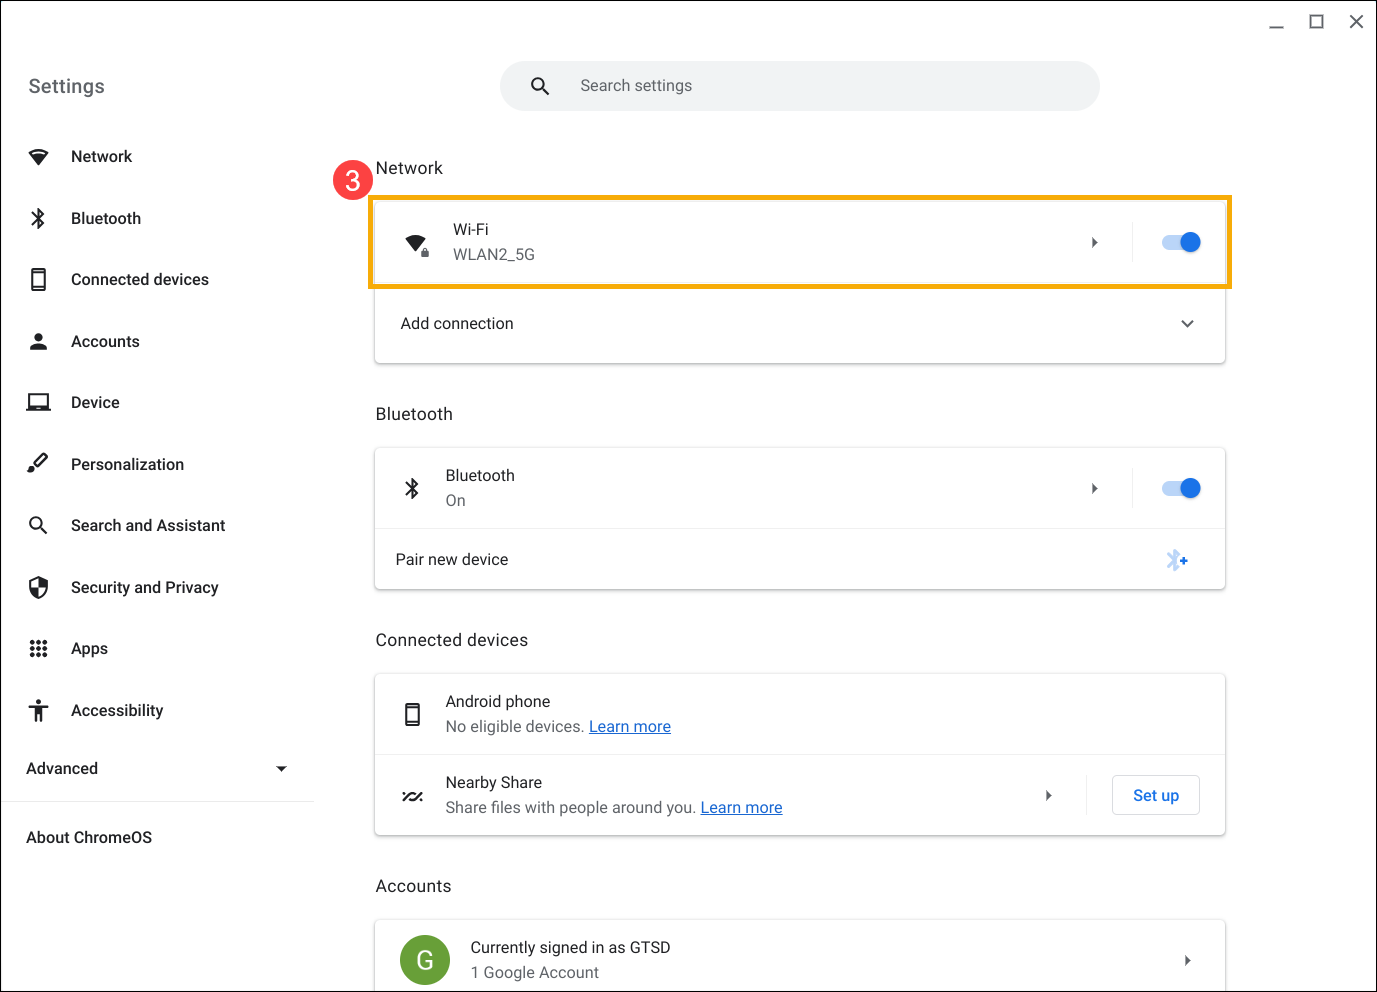
- Click the [Status bar]① at the lower right of the screen and select [Settings]
 ②.
②. 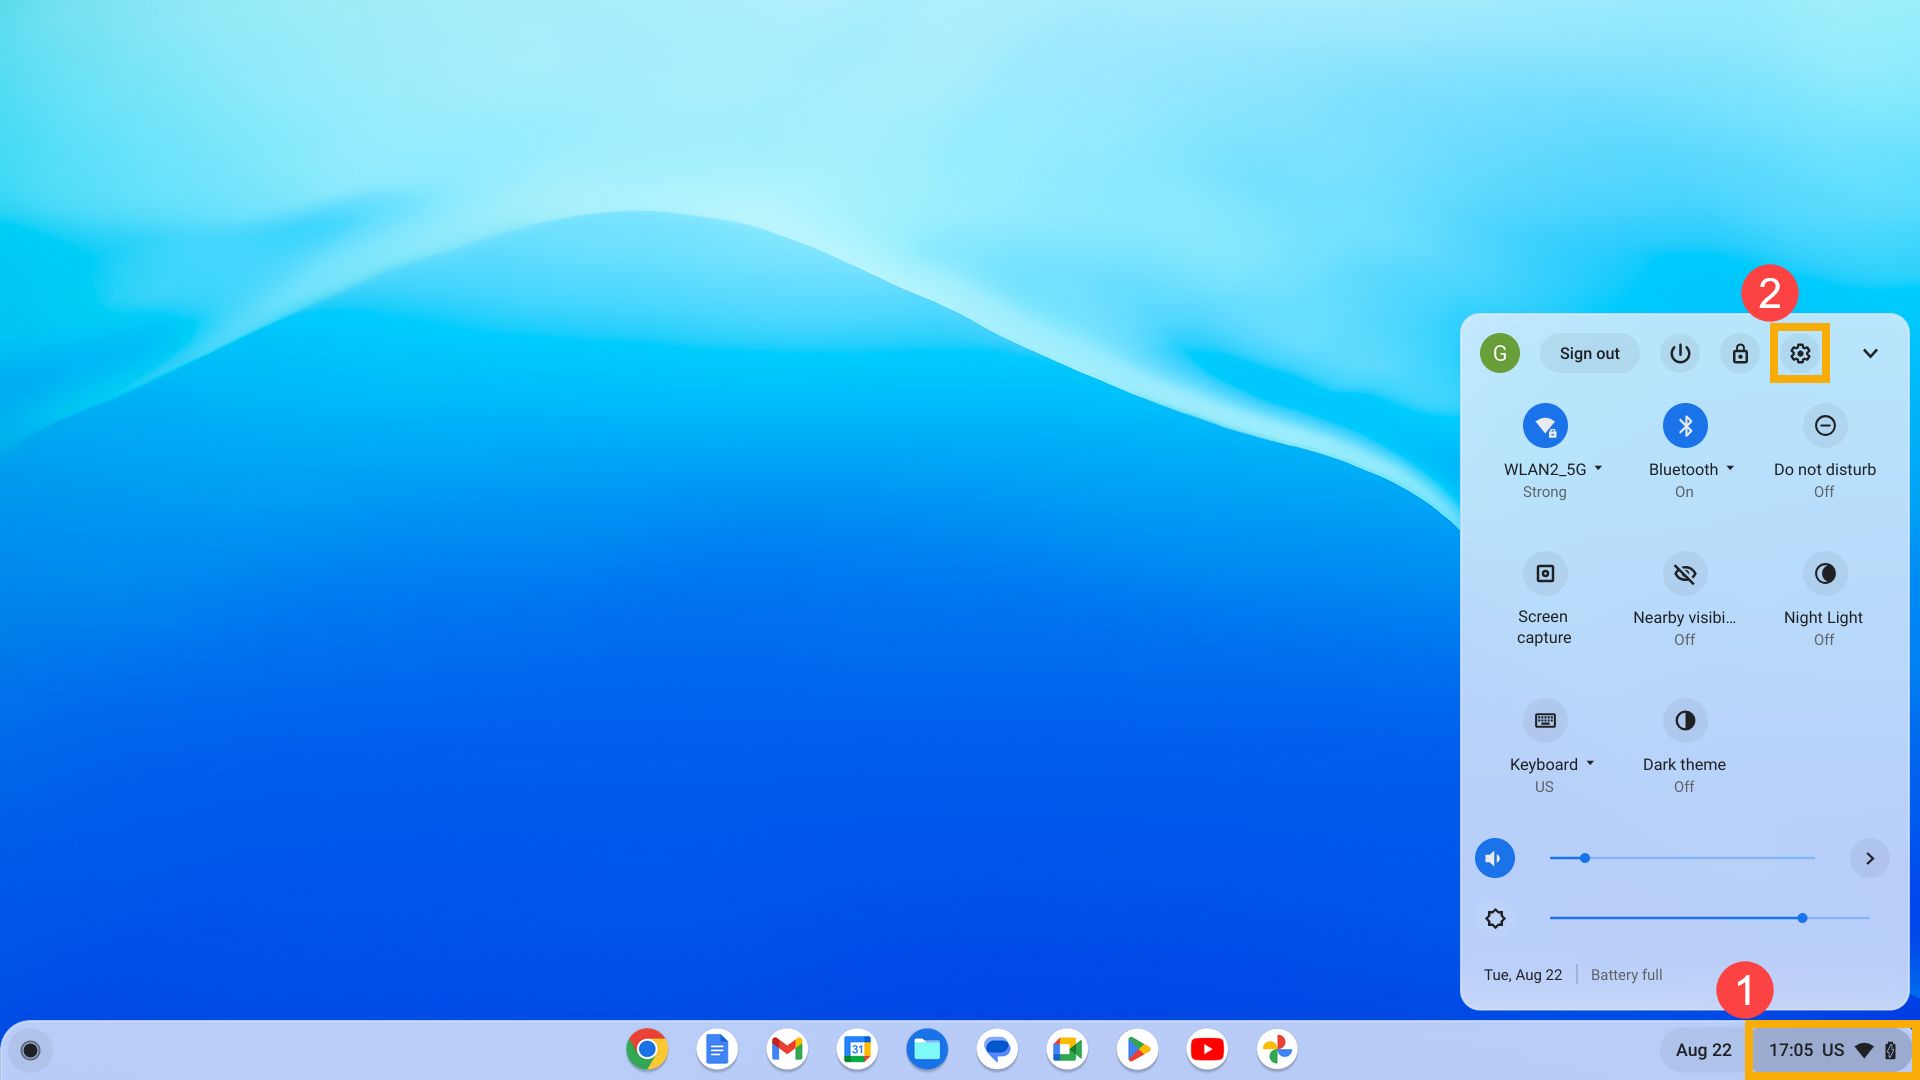
- In the Network settings, click [Wi-Fi]③.
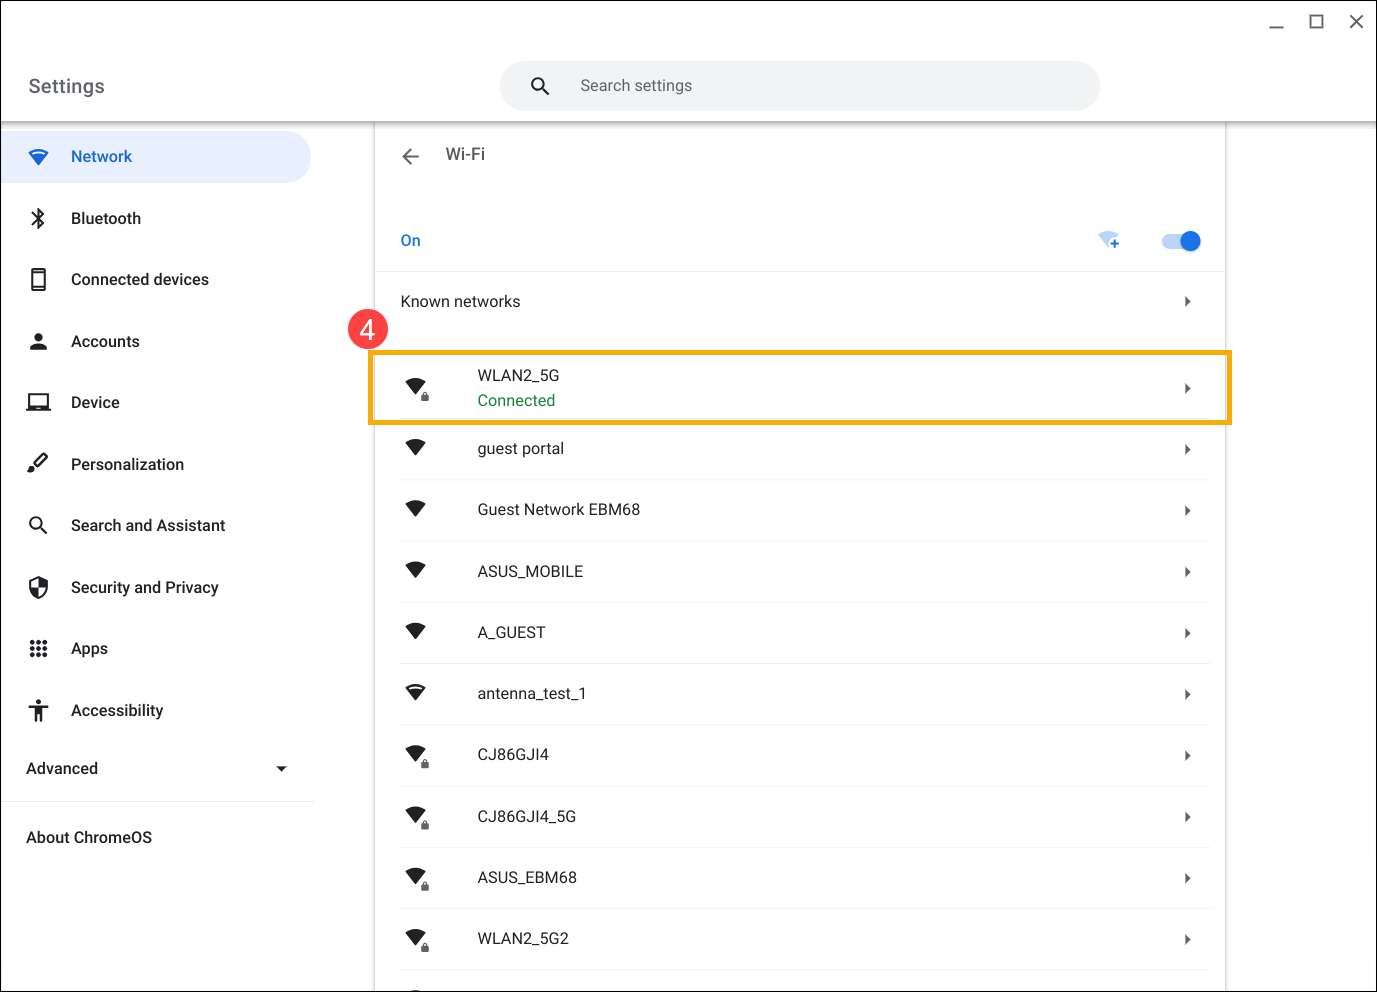
- Select your network④.
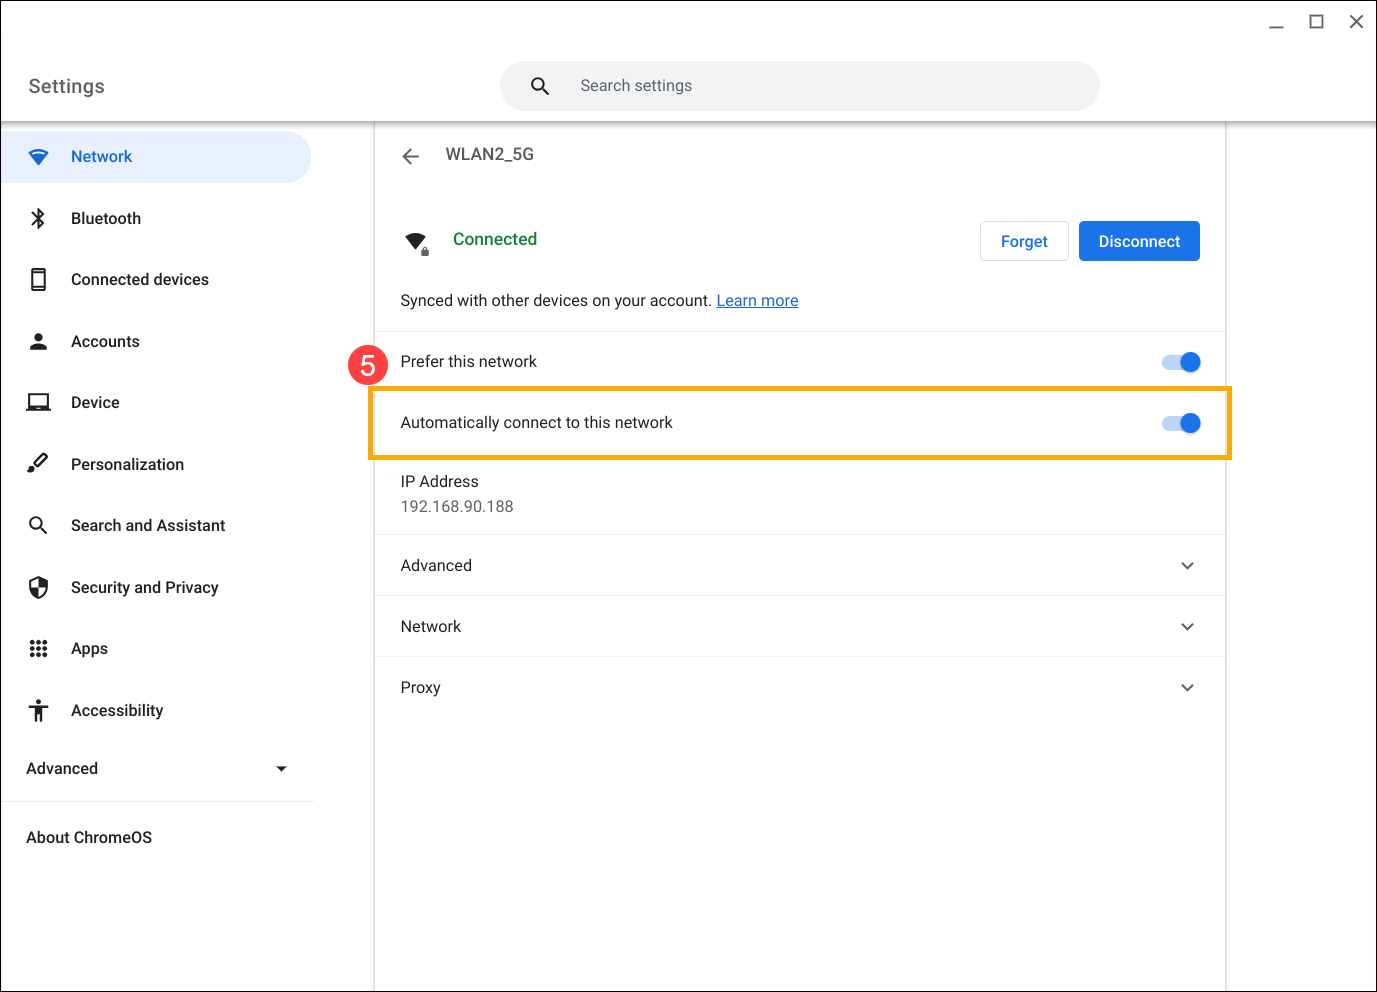
- Turn on [Automatically connect to this network]⑤.
Configuring Preferred Networks
If you have multiple Wi-Fi networks in your area, you can tell your Chromebook to prefer one network over another.
- Make sure you're connected to a Wi-Fi network.
- Click the [Status bar]① at the lower right of the screen and select [Settings]②.
- In the Network settings, click [Wi-Fi]③.
- Select your network④.
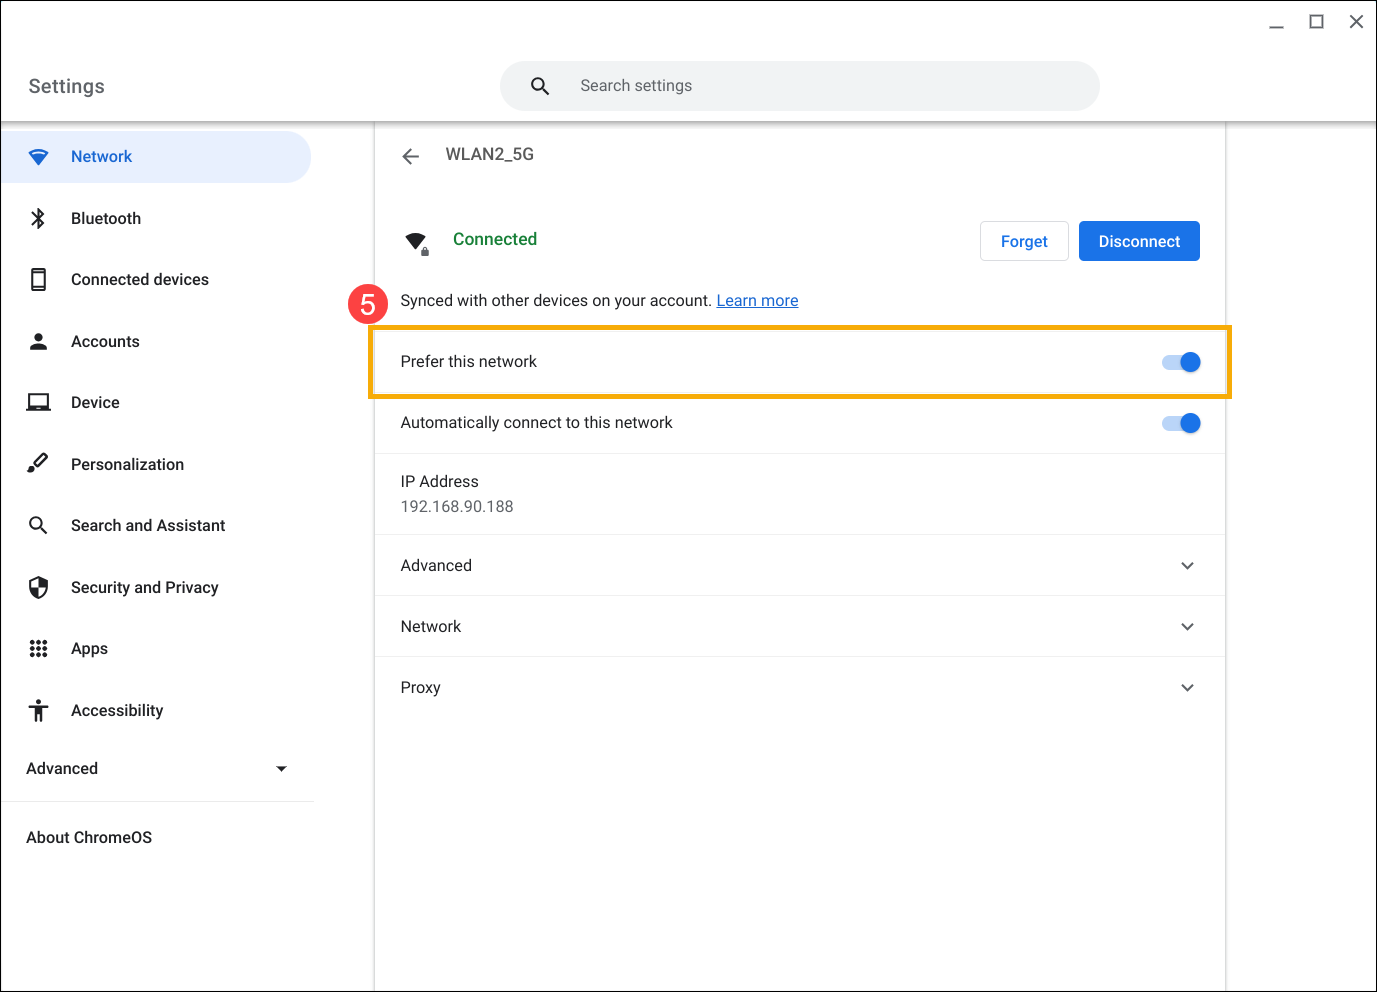
- Turn on [Prefer this network]⑤.
Find your MAC address or IP address
If you need to view the MAC or IP addresses, follow these steps.
- Click the [Status bar]① at the lower right of the screen and select the [Wi-Fi Networks] icon②.

- Click the [Information] icon
 ③ at the top of the box to view the Chromebook's IP and IPv6 addresses.
Note: Your MAC address is labeled "Wi-Fi."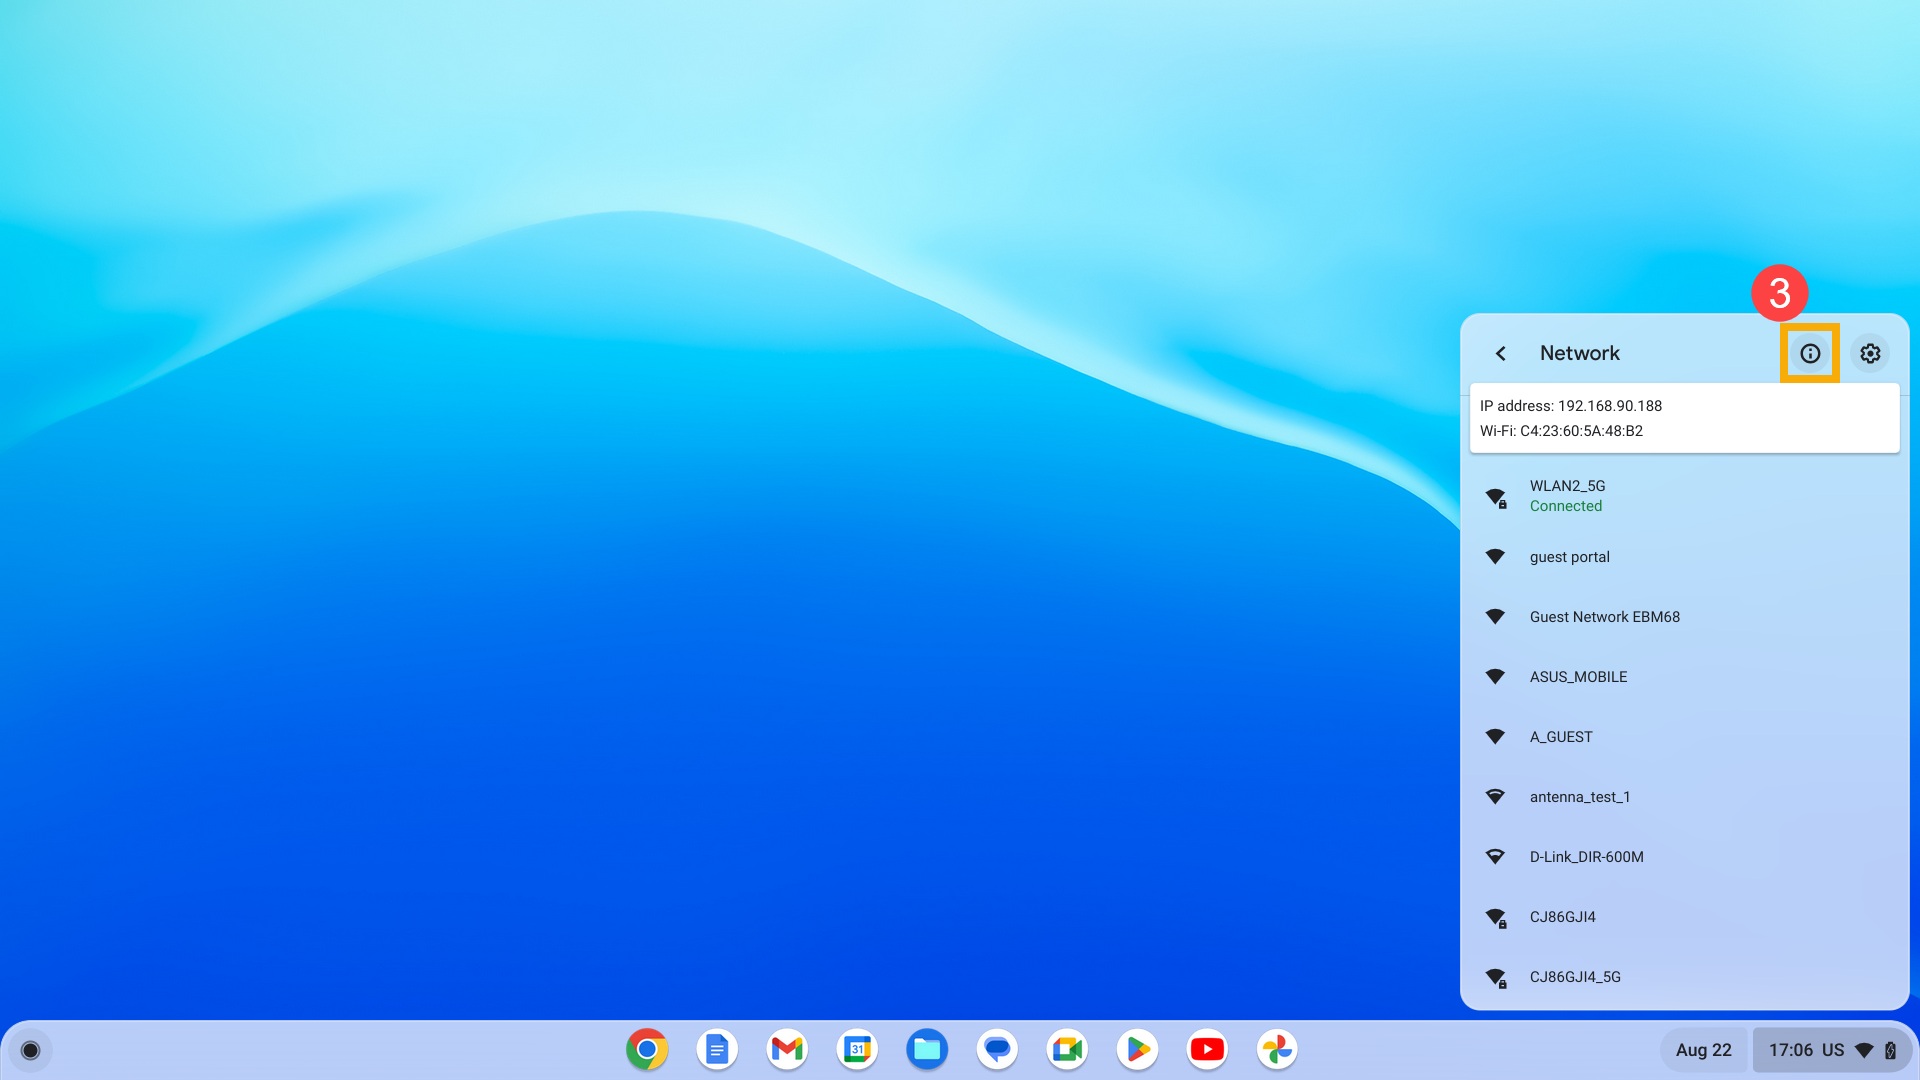
You can also refer to the Google Chromebook Help on the official website for more detailed information: