Related Topics
[Chromebook] Troubleshooting - Wireless Network Problems on Chromebook
We first have to check whether the problems are caused either by the computer or by Internet equipment (modem/Internet cable/wireless router) or the Internet service provider before we look to solve the Internet problem.
This troubleshooting only offers solutions to Internet dysfunction caused by a computer. (The common symptoms, such as Wi-Fi fails, no Wi-Fi signal, etc.)
For other inquiries about Internet equipment/service, please contact the Internet service provider for further information.
Assume that you use both Computer (A) & Smart Phone (B), and connect them to the Internet network by Wi-Fi:
Both (A) & (B) cannot connect to the internet -> problems usually are caused by Internet facilities or Internet service providers.
(A) cannot connect to internet but (B) is able to -> Please refer to the solutions below:
Make sure the wireless function is activated
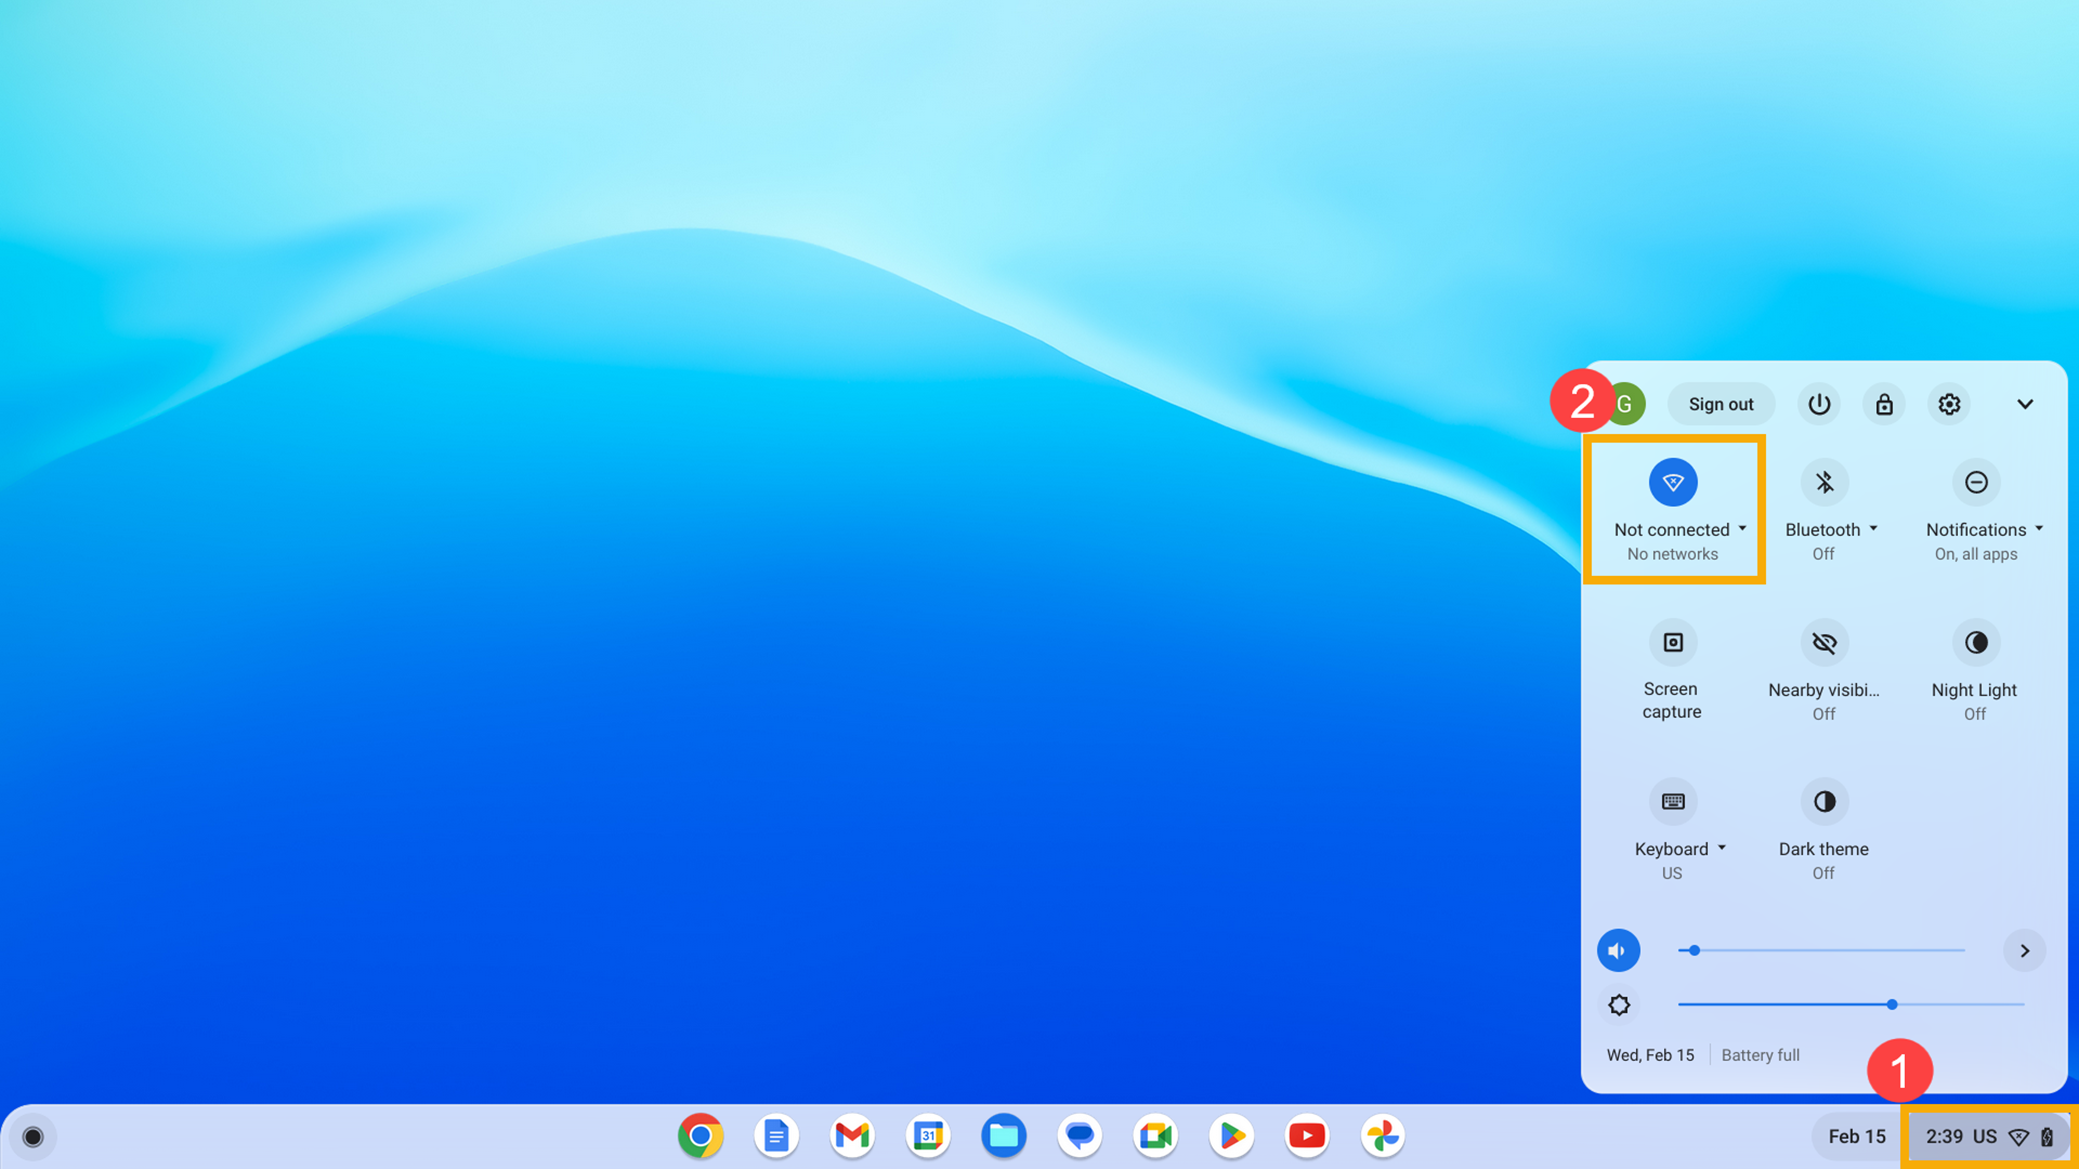
Click [Status Bar]① at the bottom-right of the screen, then ensure Wi-Fi is [Turn on]②.
Note: When the Wi-Fi icon is displayed as blue , it means the function is enabled.
Check that the network you want to connect to works with your Chromebook
Please make sure the Wi-Fi networks that work with Chromebook:
- Open networks that don’t require a password.
- Secure networks that use WEP, Dynamic WEP, WPA-PSK, WPA-Enterprise, or WPA2-Enterprise settings
- Standards: 802.11 a/b/g/n and 802.11ac for AC-equipped Chromebooks
The above information is from Google’s official website, you also can refer to Chromebook Help for more details.
Enable or disable a wireless network or Wi-Fi
- Click [Status Bar]① at the bottom-right of the screen, then click the Wi-Fi icon to disable the wireless function②.
Note: When the Wi-Fi icon is displayed as gray , it means the function is disabled.
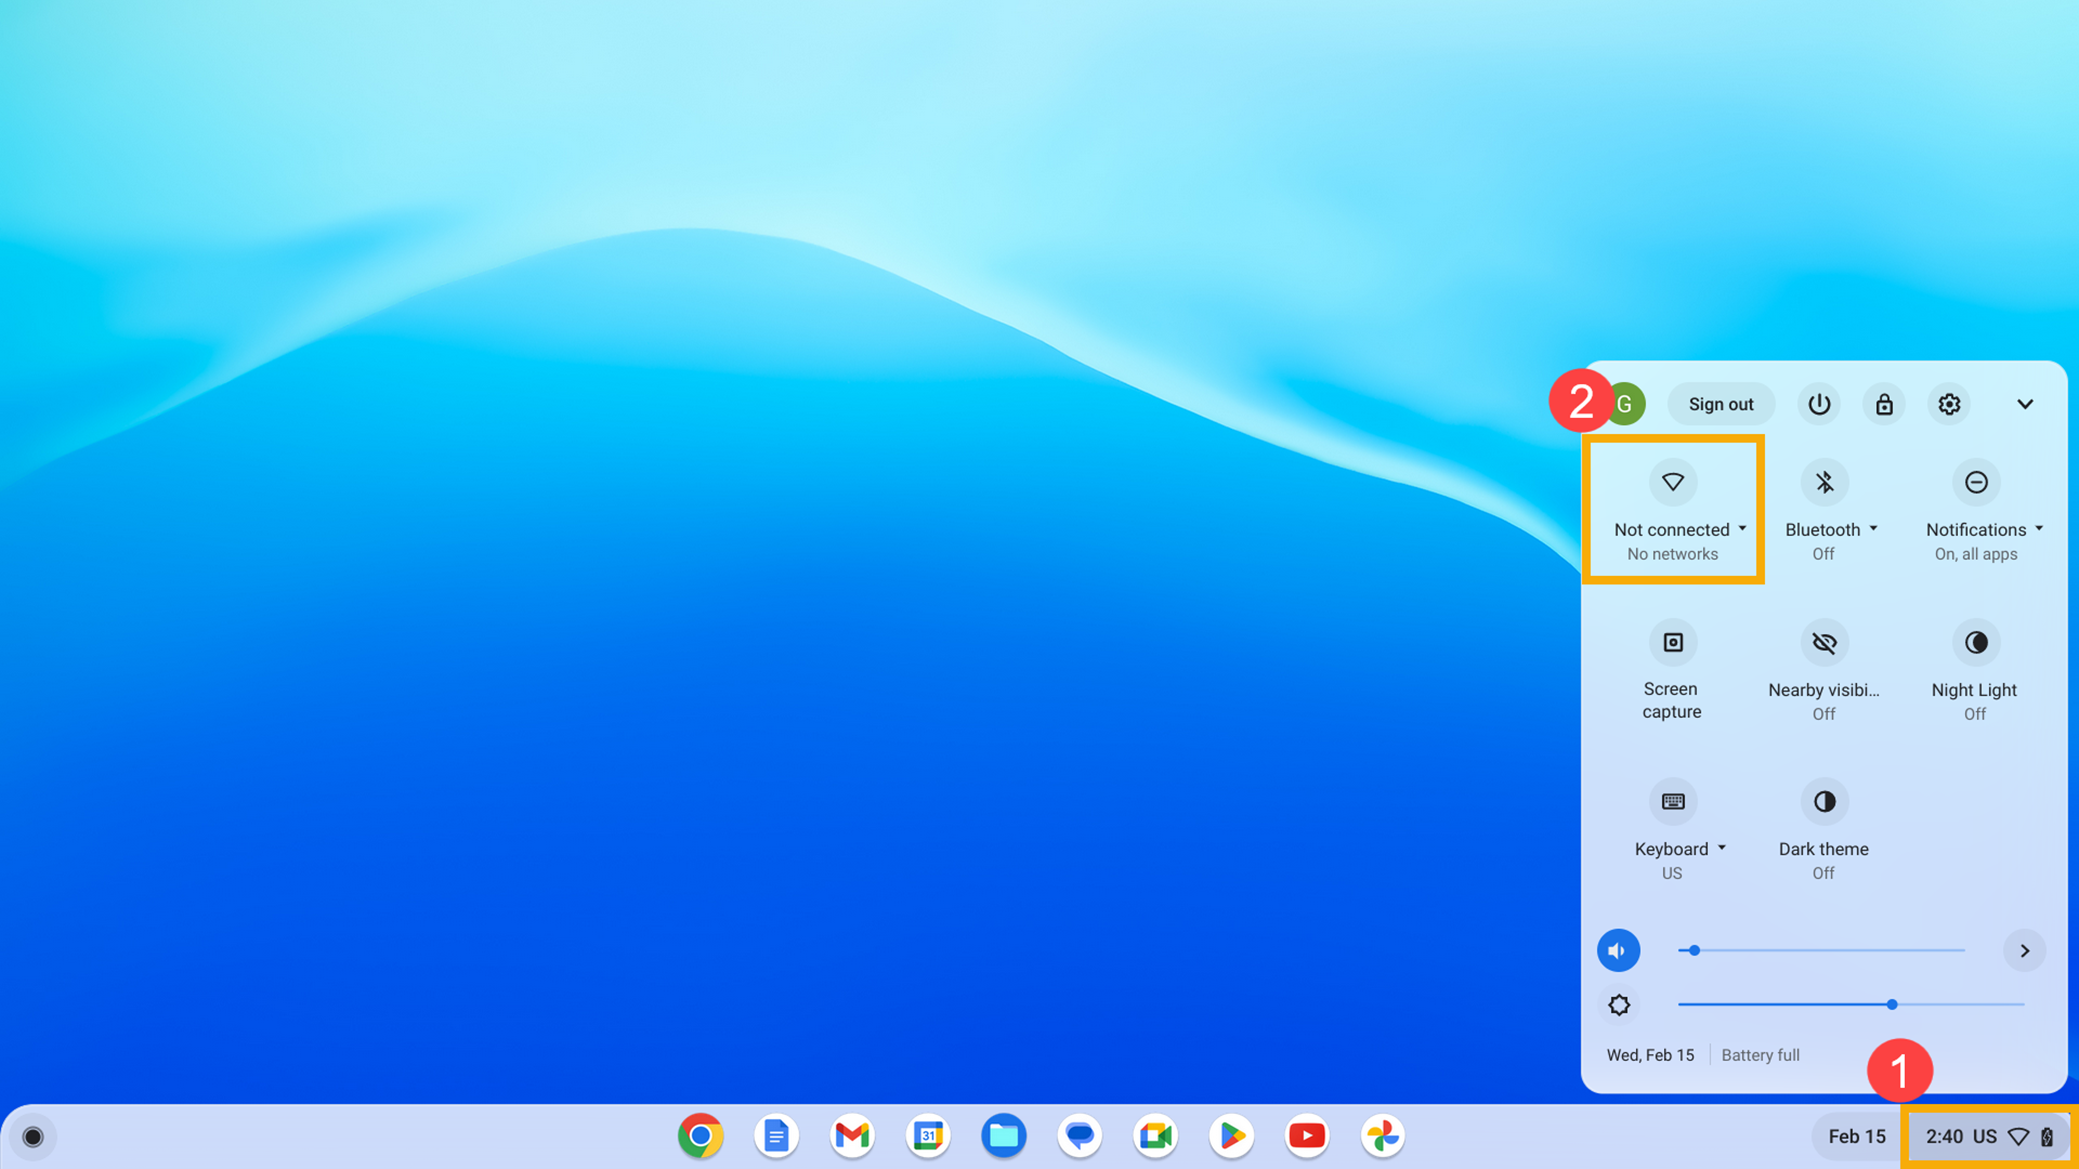
- Re-click the Wi-Fi icon to enable the wireless function and reconnect Wi-Fi③. If the Wi-Fi network doesn’t automatically connect, please continue to the next step.
Note: When the Wi-Fi icon is displayed as blue, it means the function is enabled.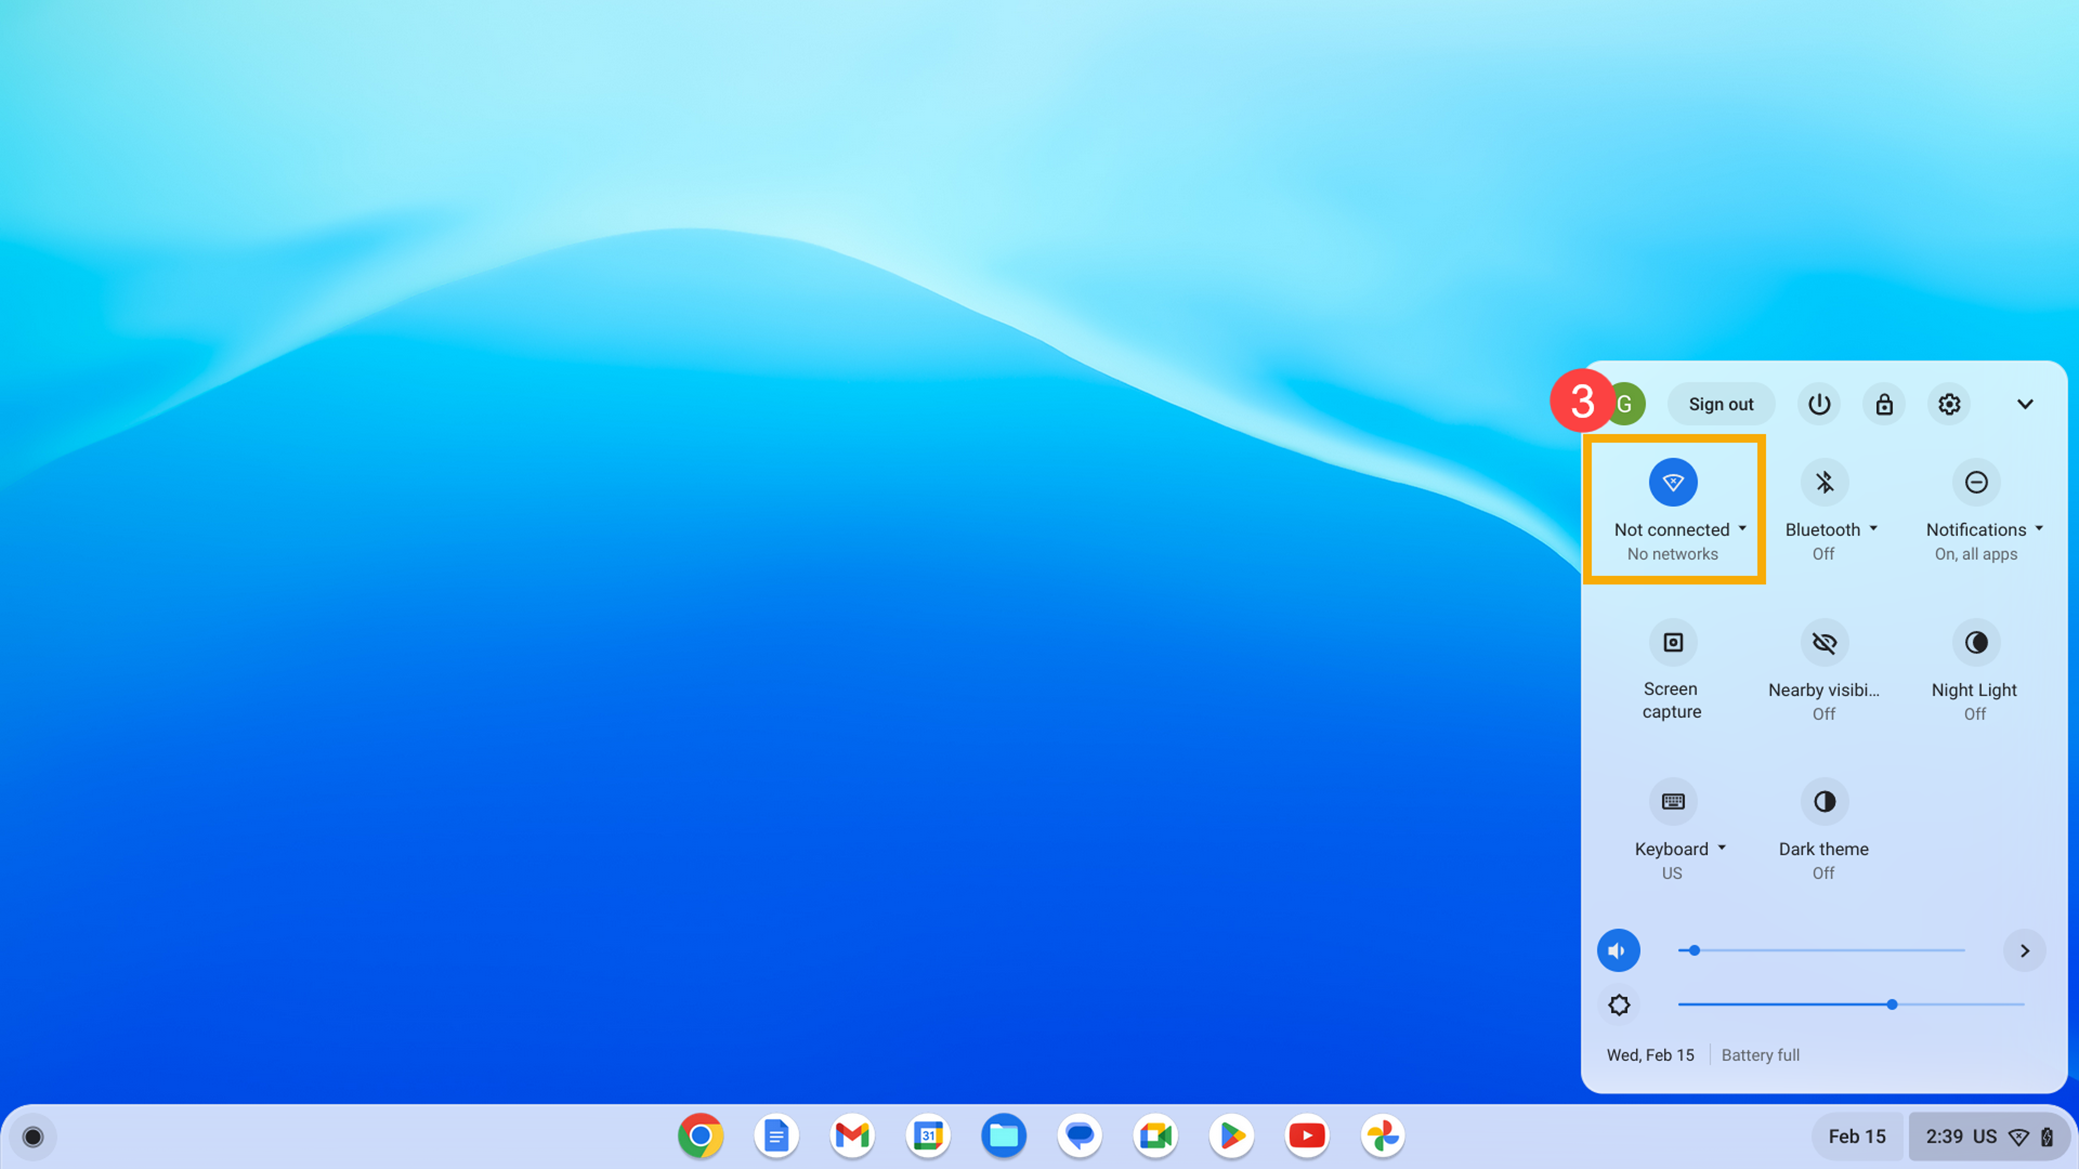
- Click [Settings]
 ④.
④.
- Select [Network]⑤, then click [Wi-Fi]⑥ to show a list of available networks.

- Find a Wi-Fi network you wish to connect to, then click the Arrow
 behind the Wi-Fi network⑦.
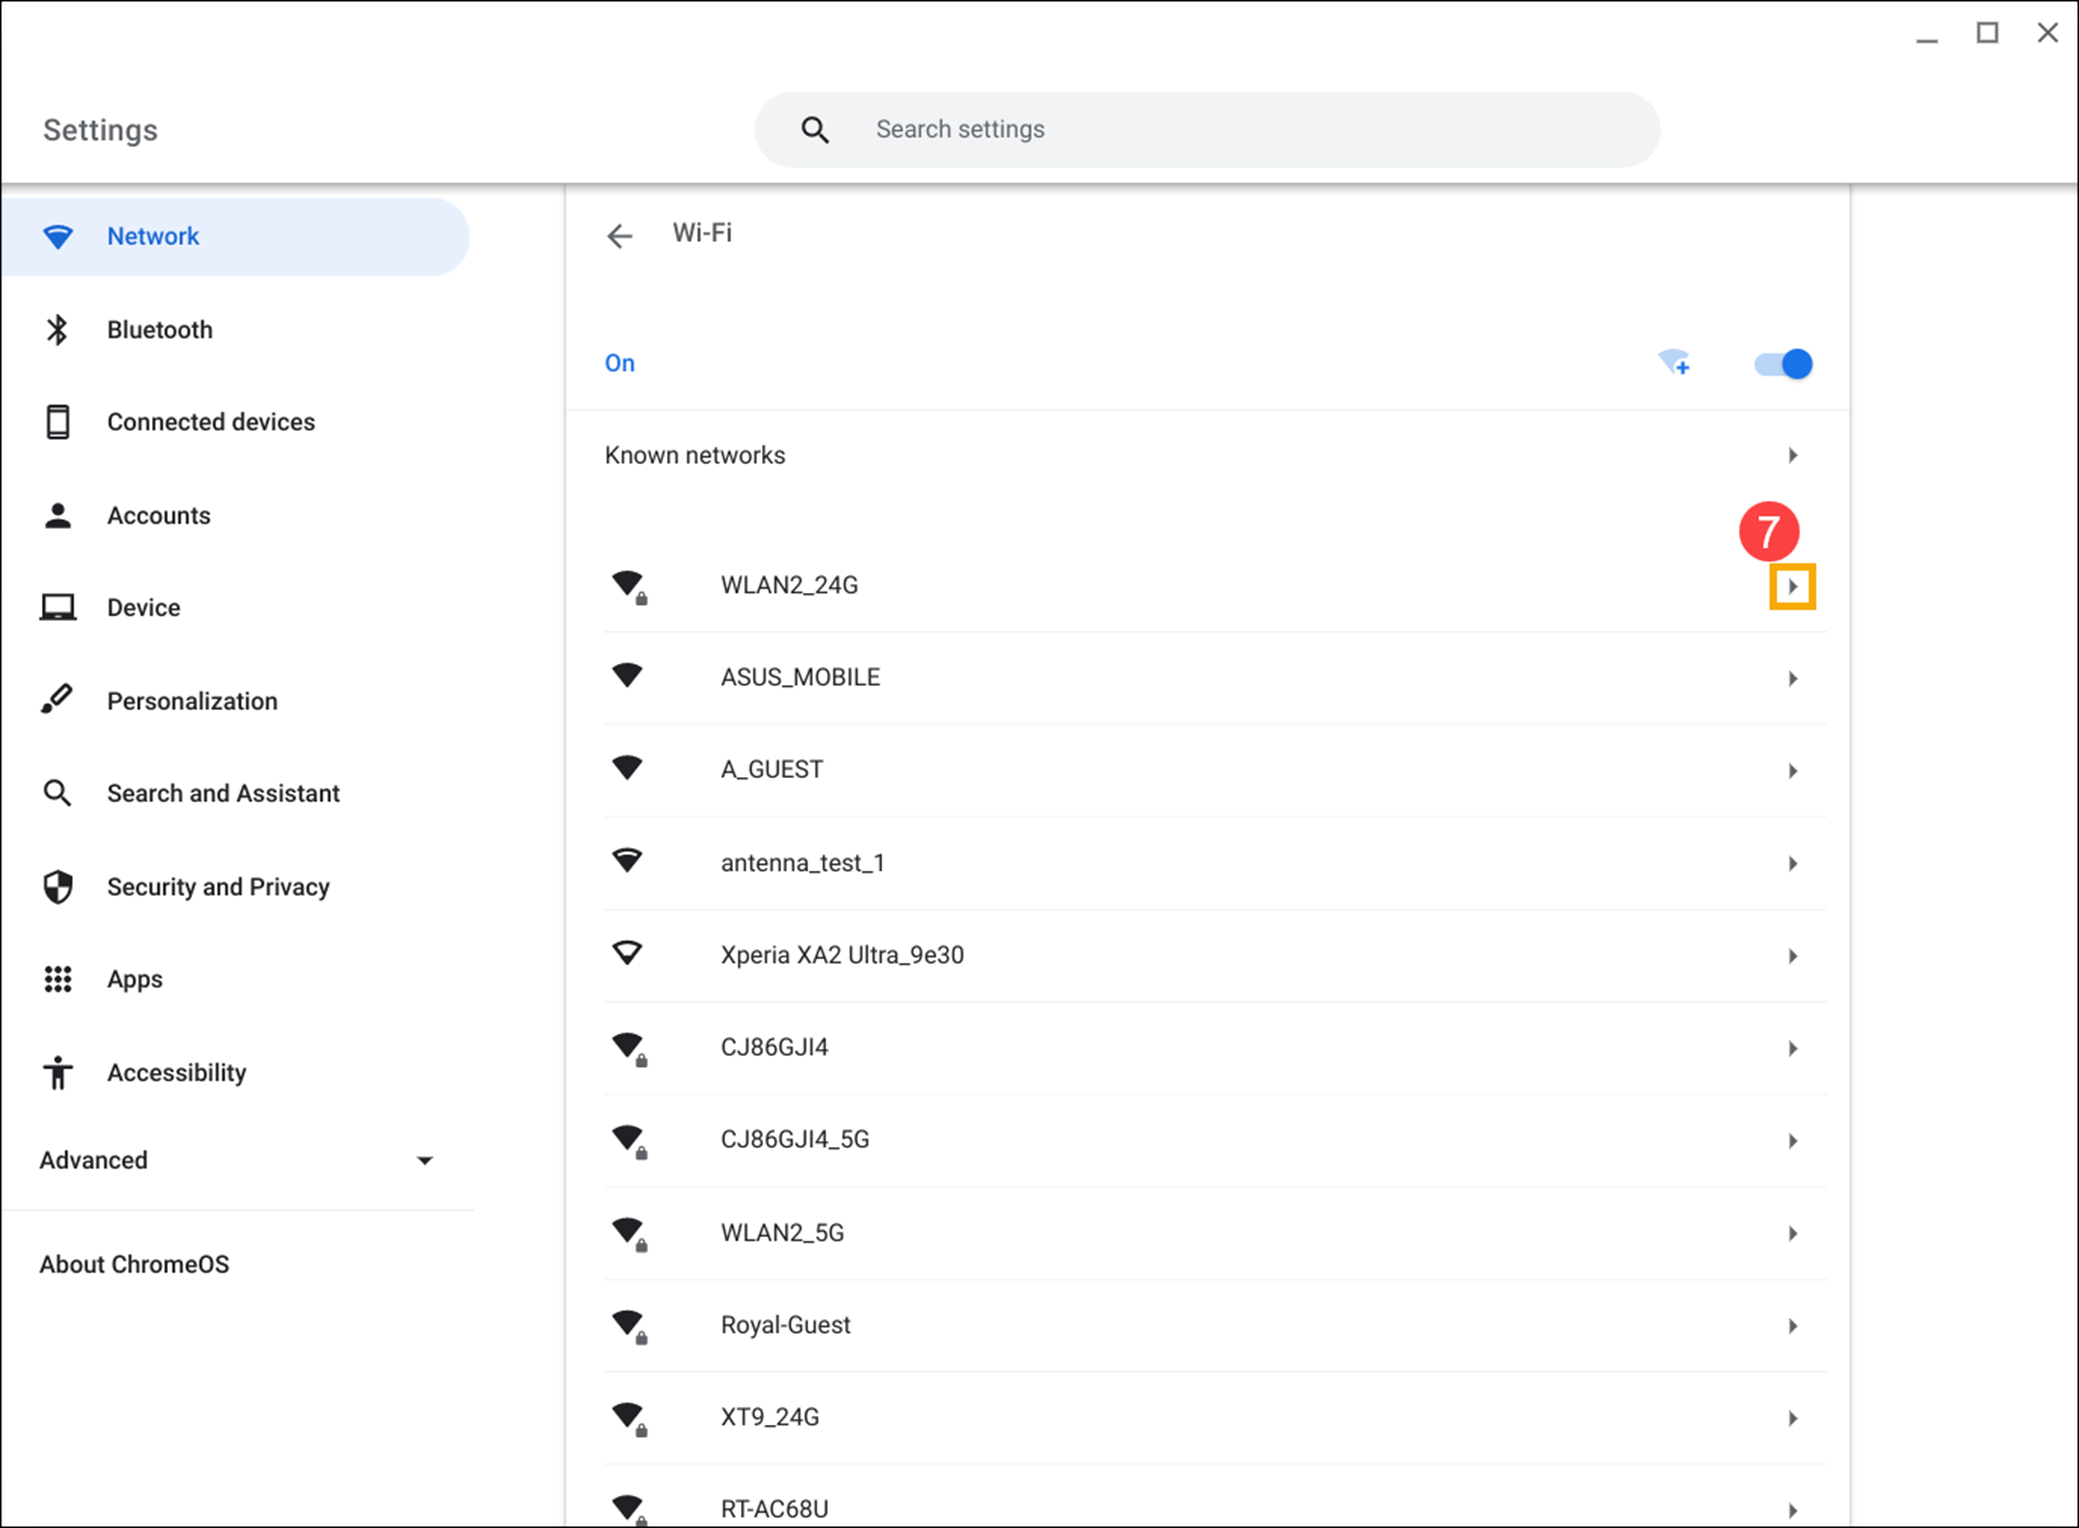
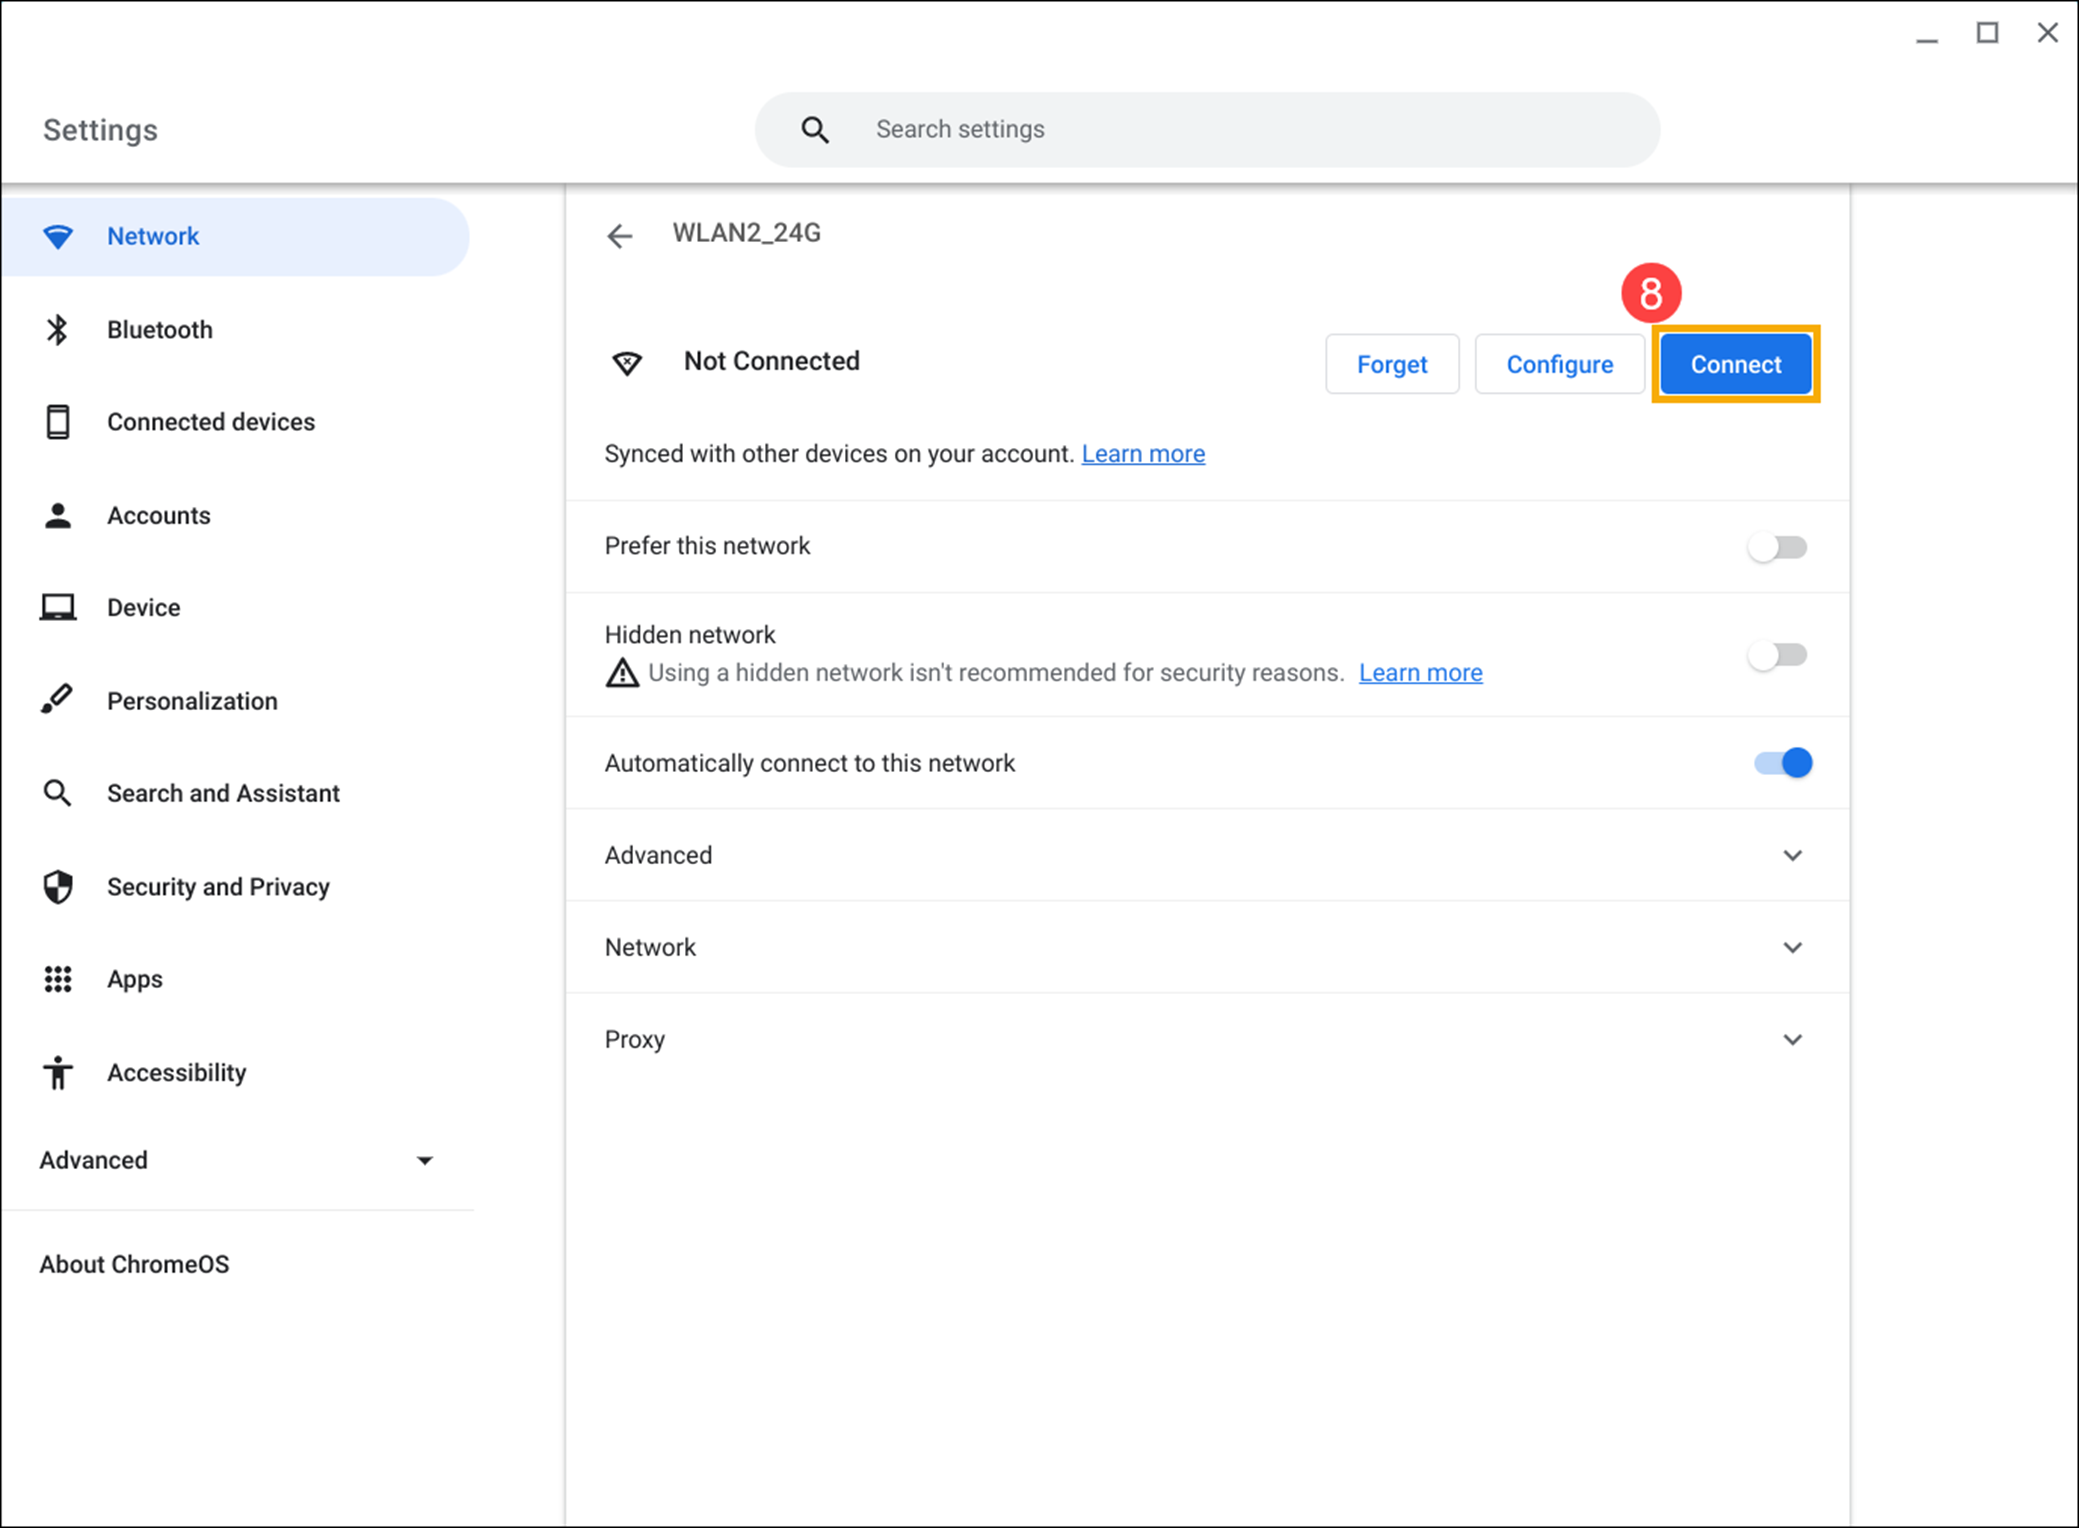
- Click [Connect]⑧.
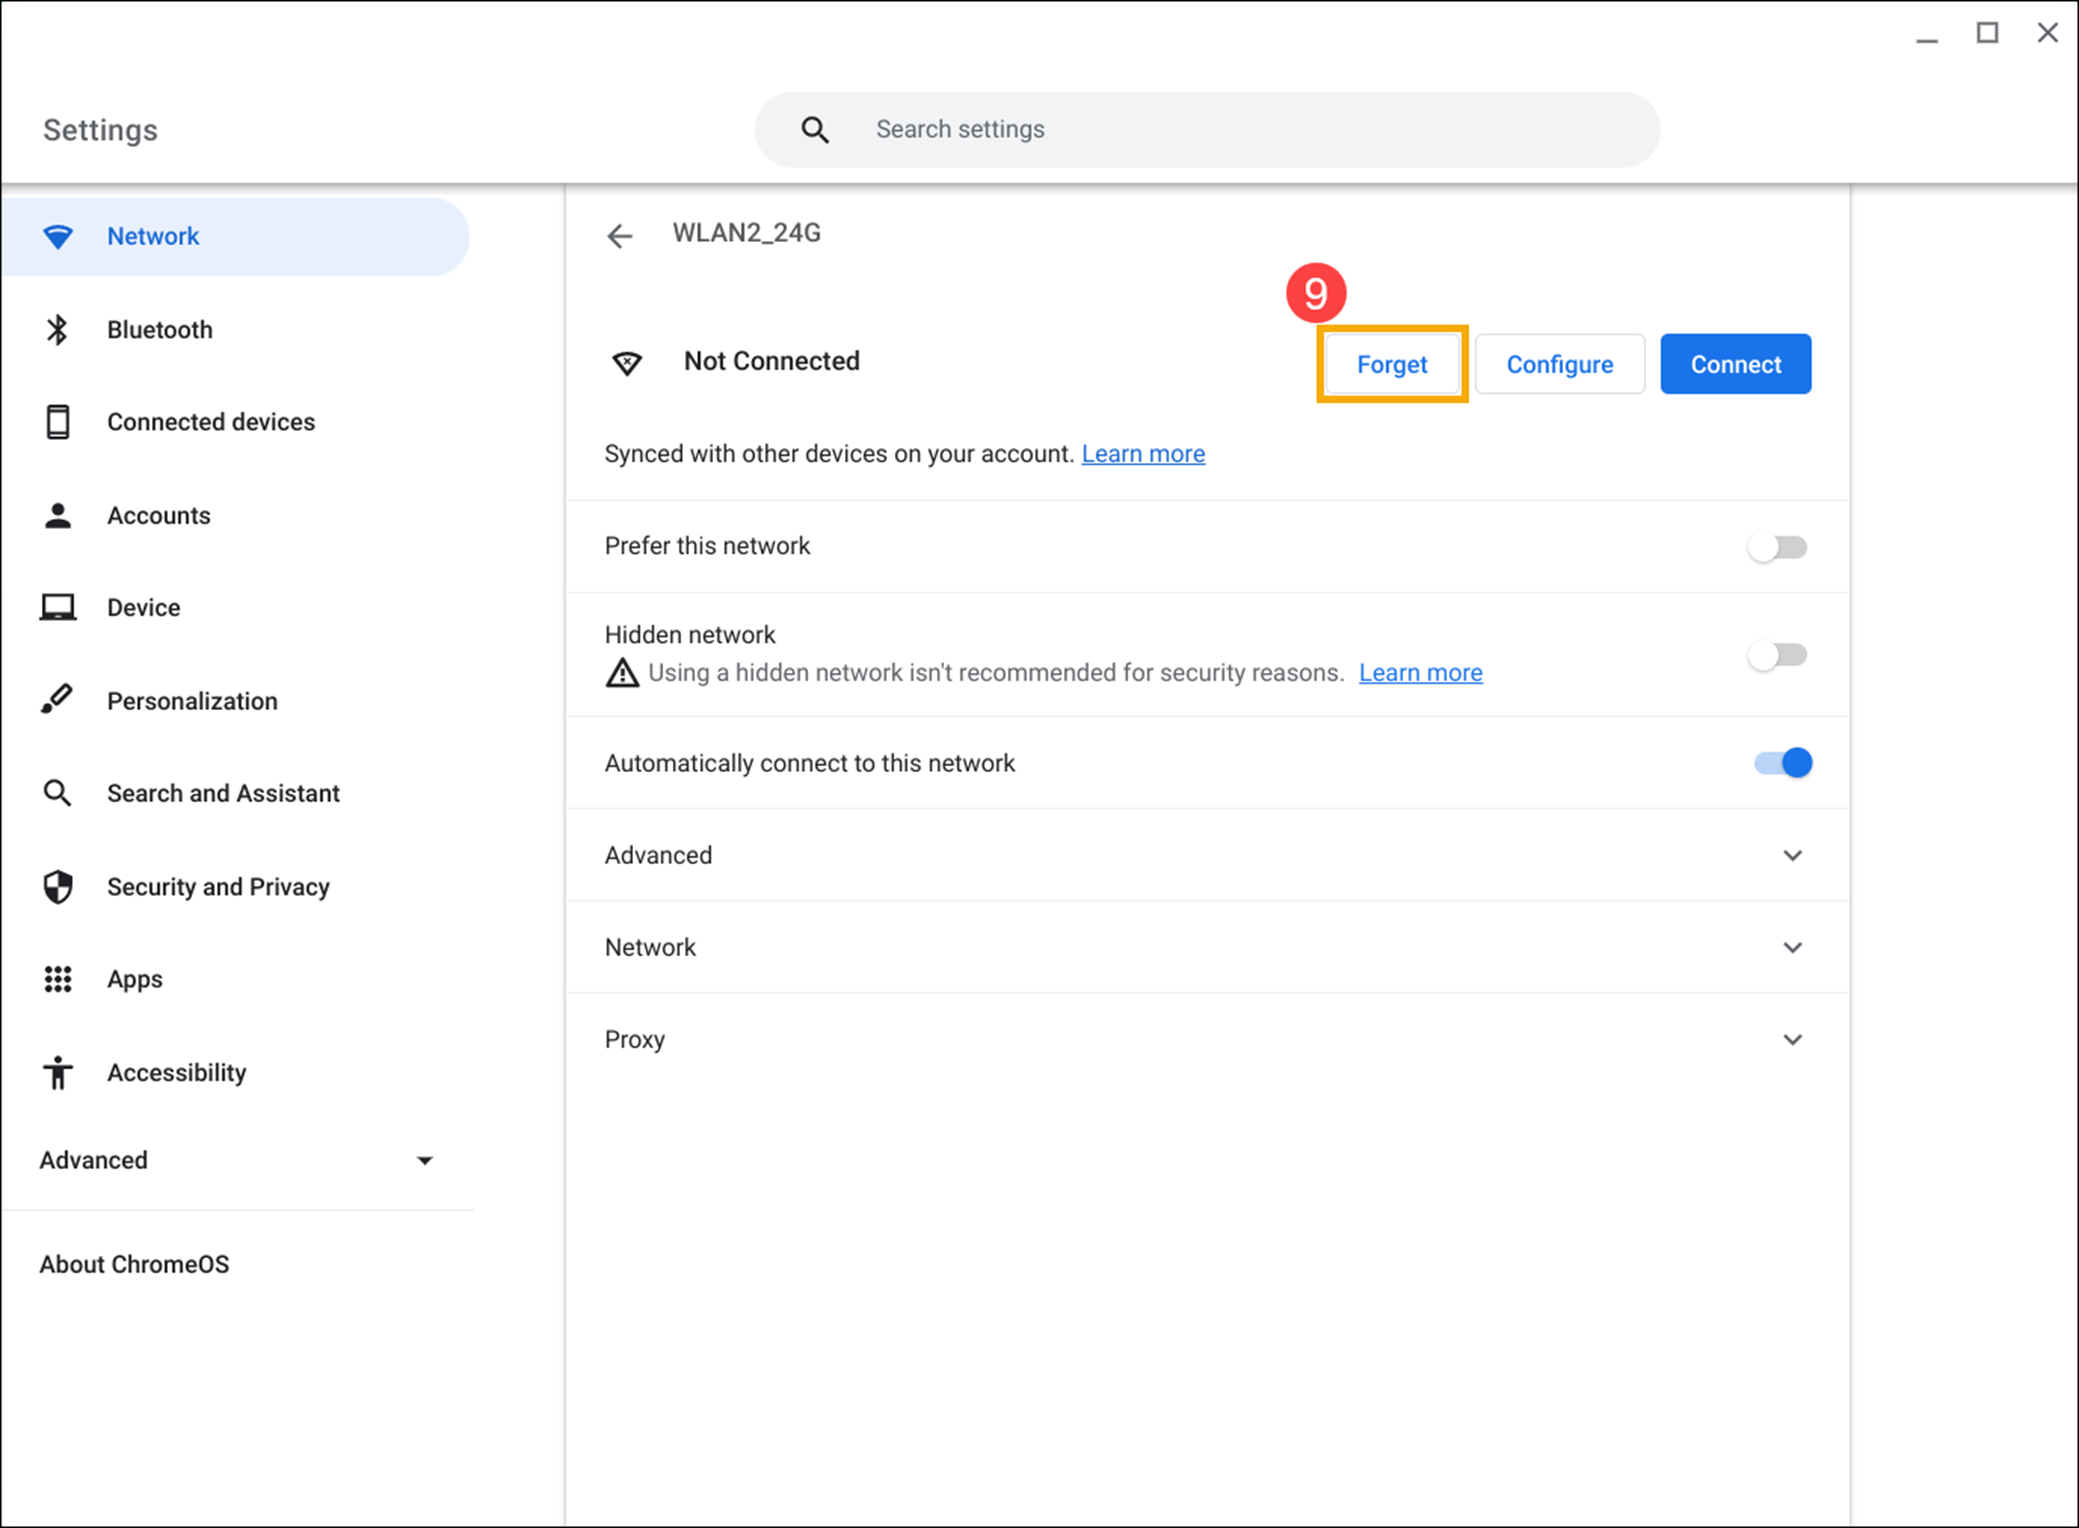
- If you fail to connect to the Wi-Fi network, please try to forget the network and then reconnect. Click [Forget]⑨.
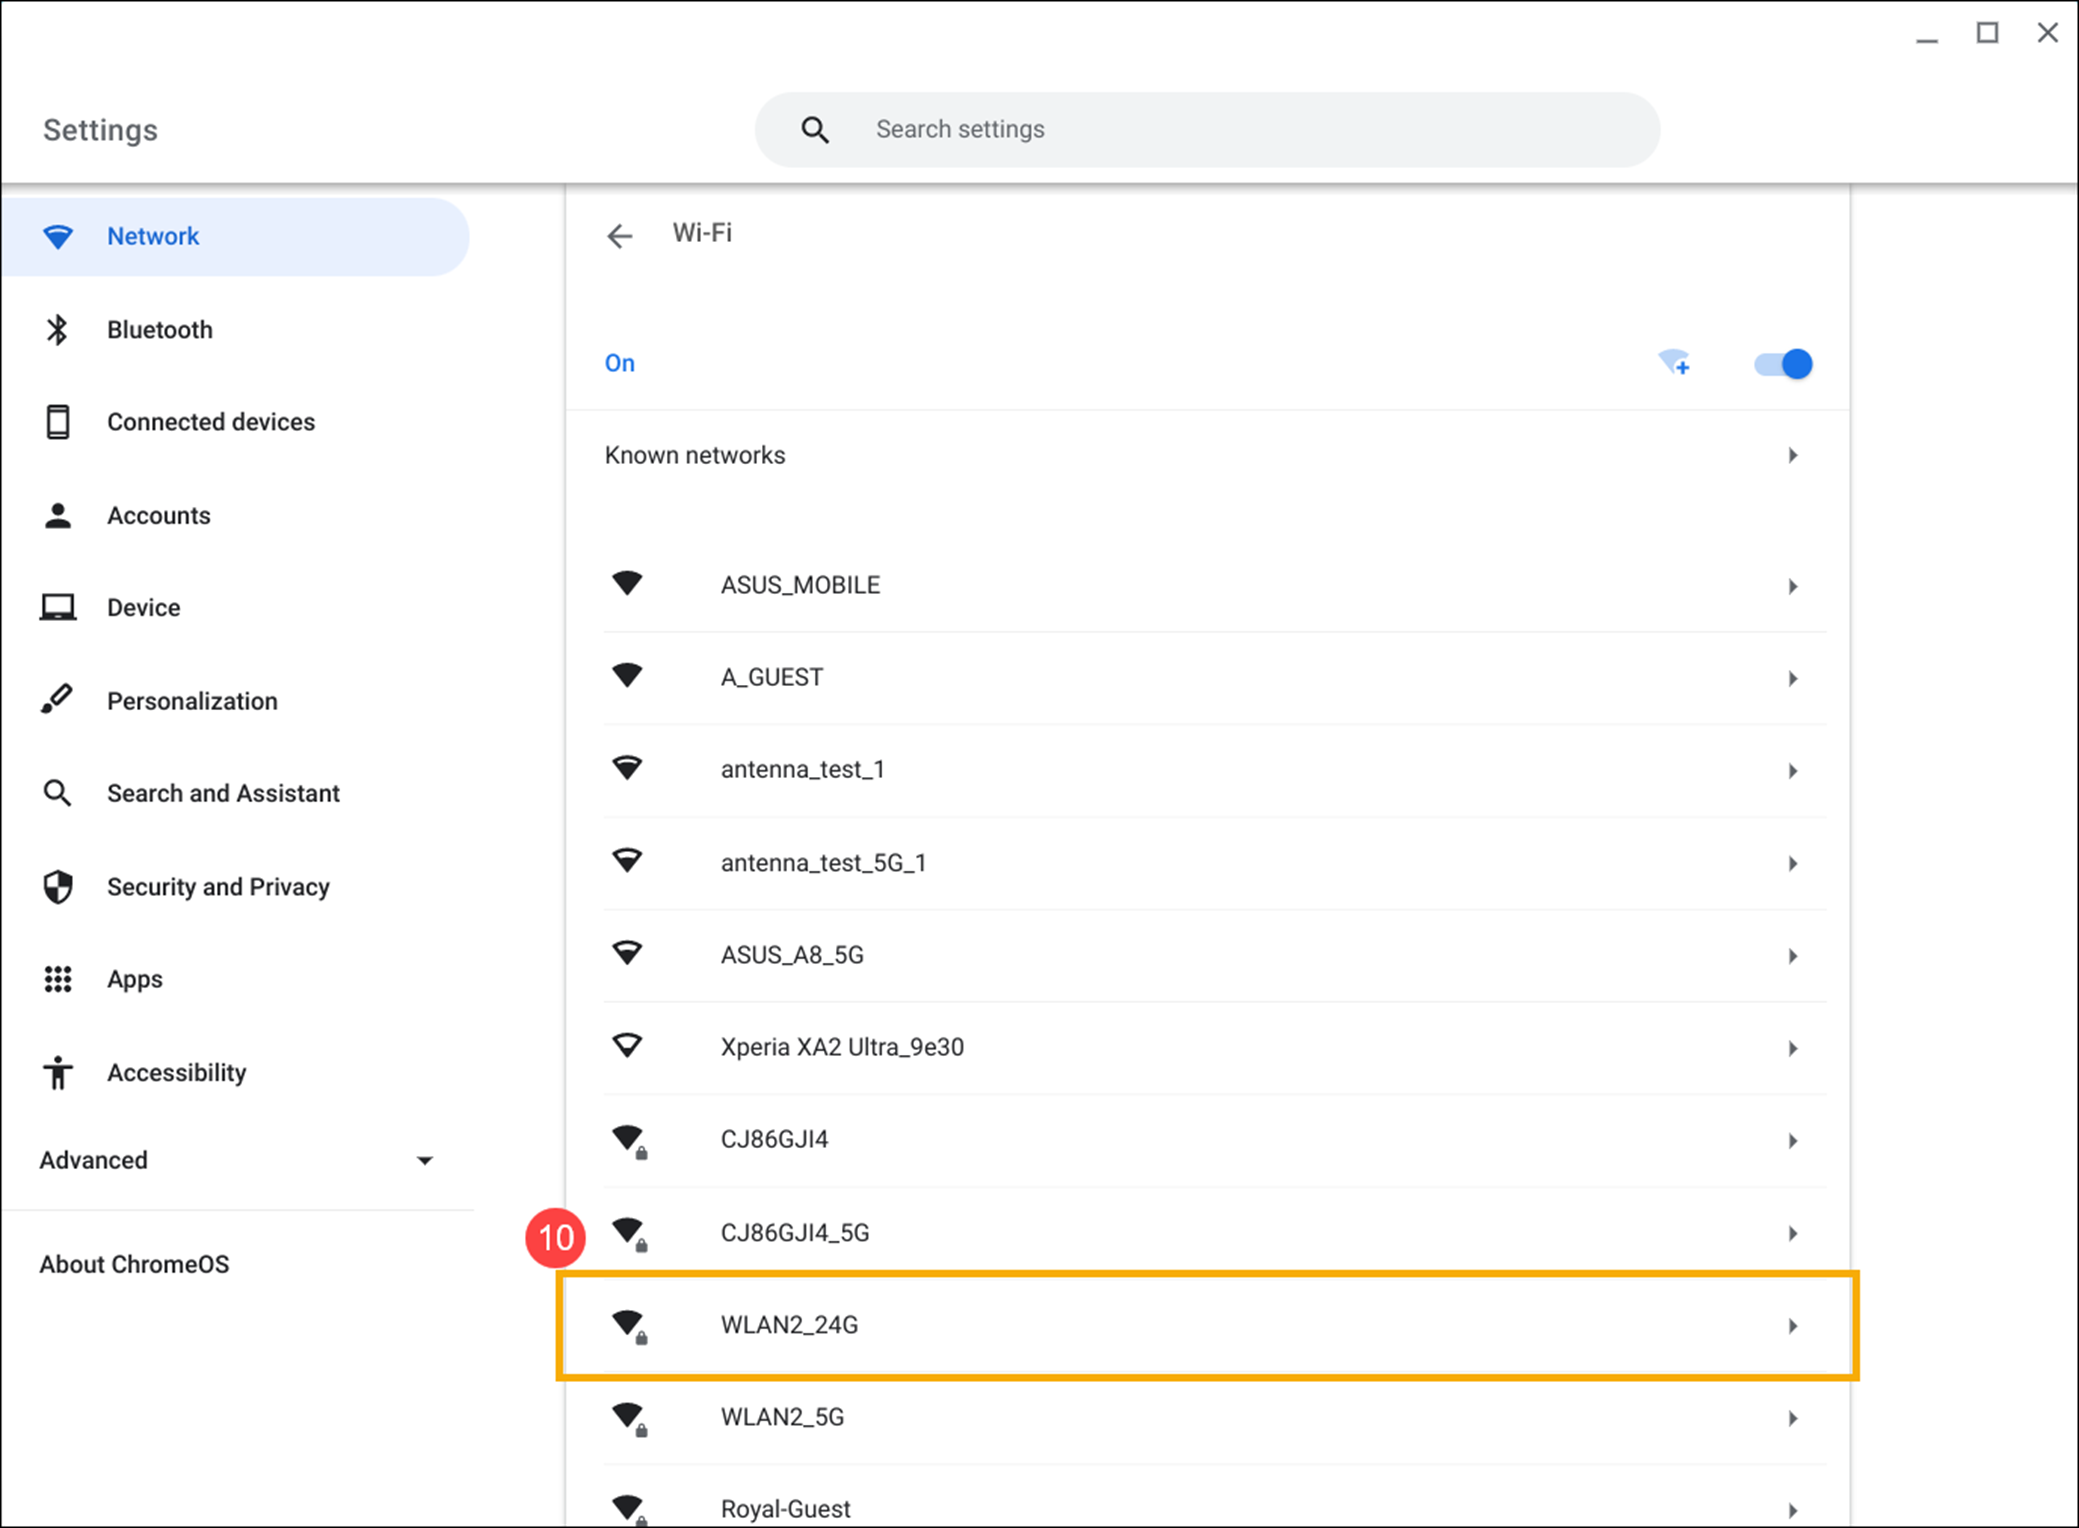
- Select a Wi-Fi network⑩.
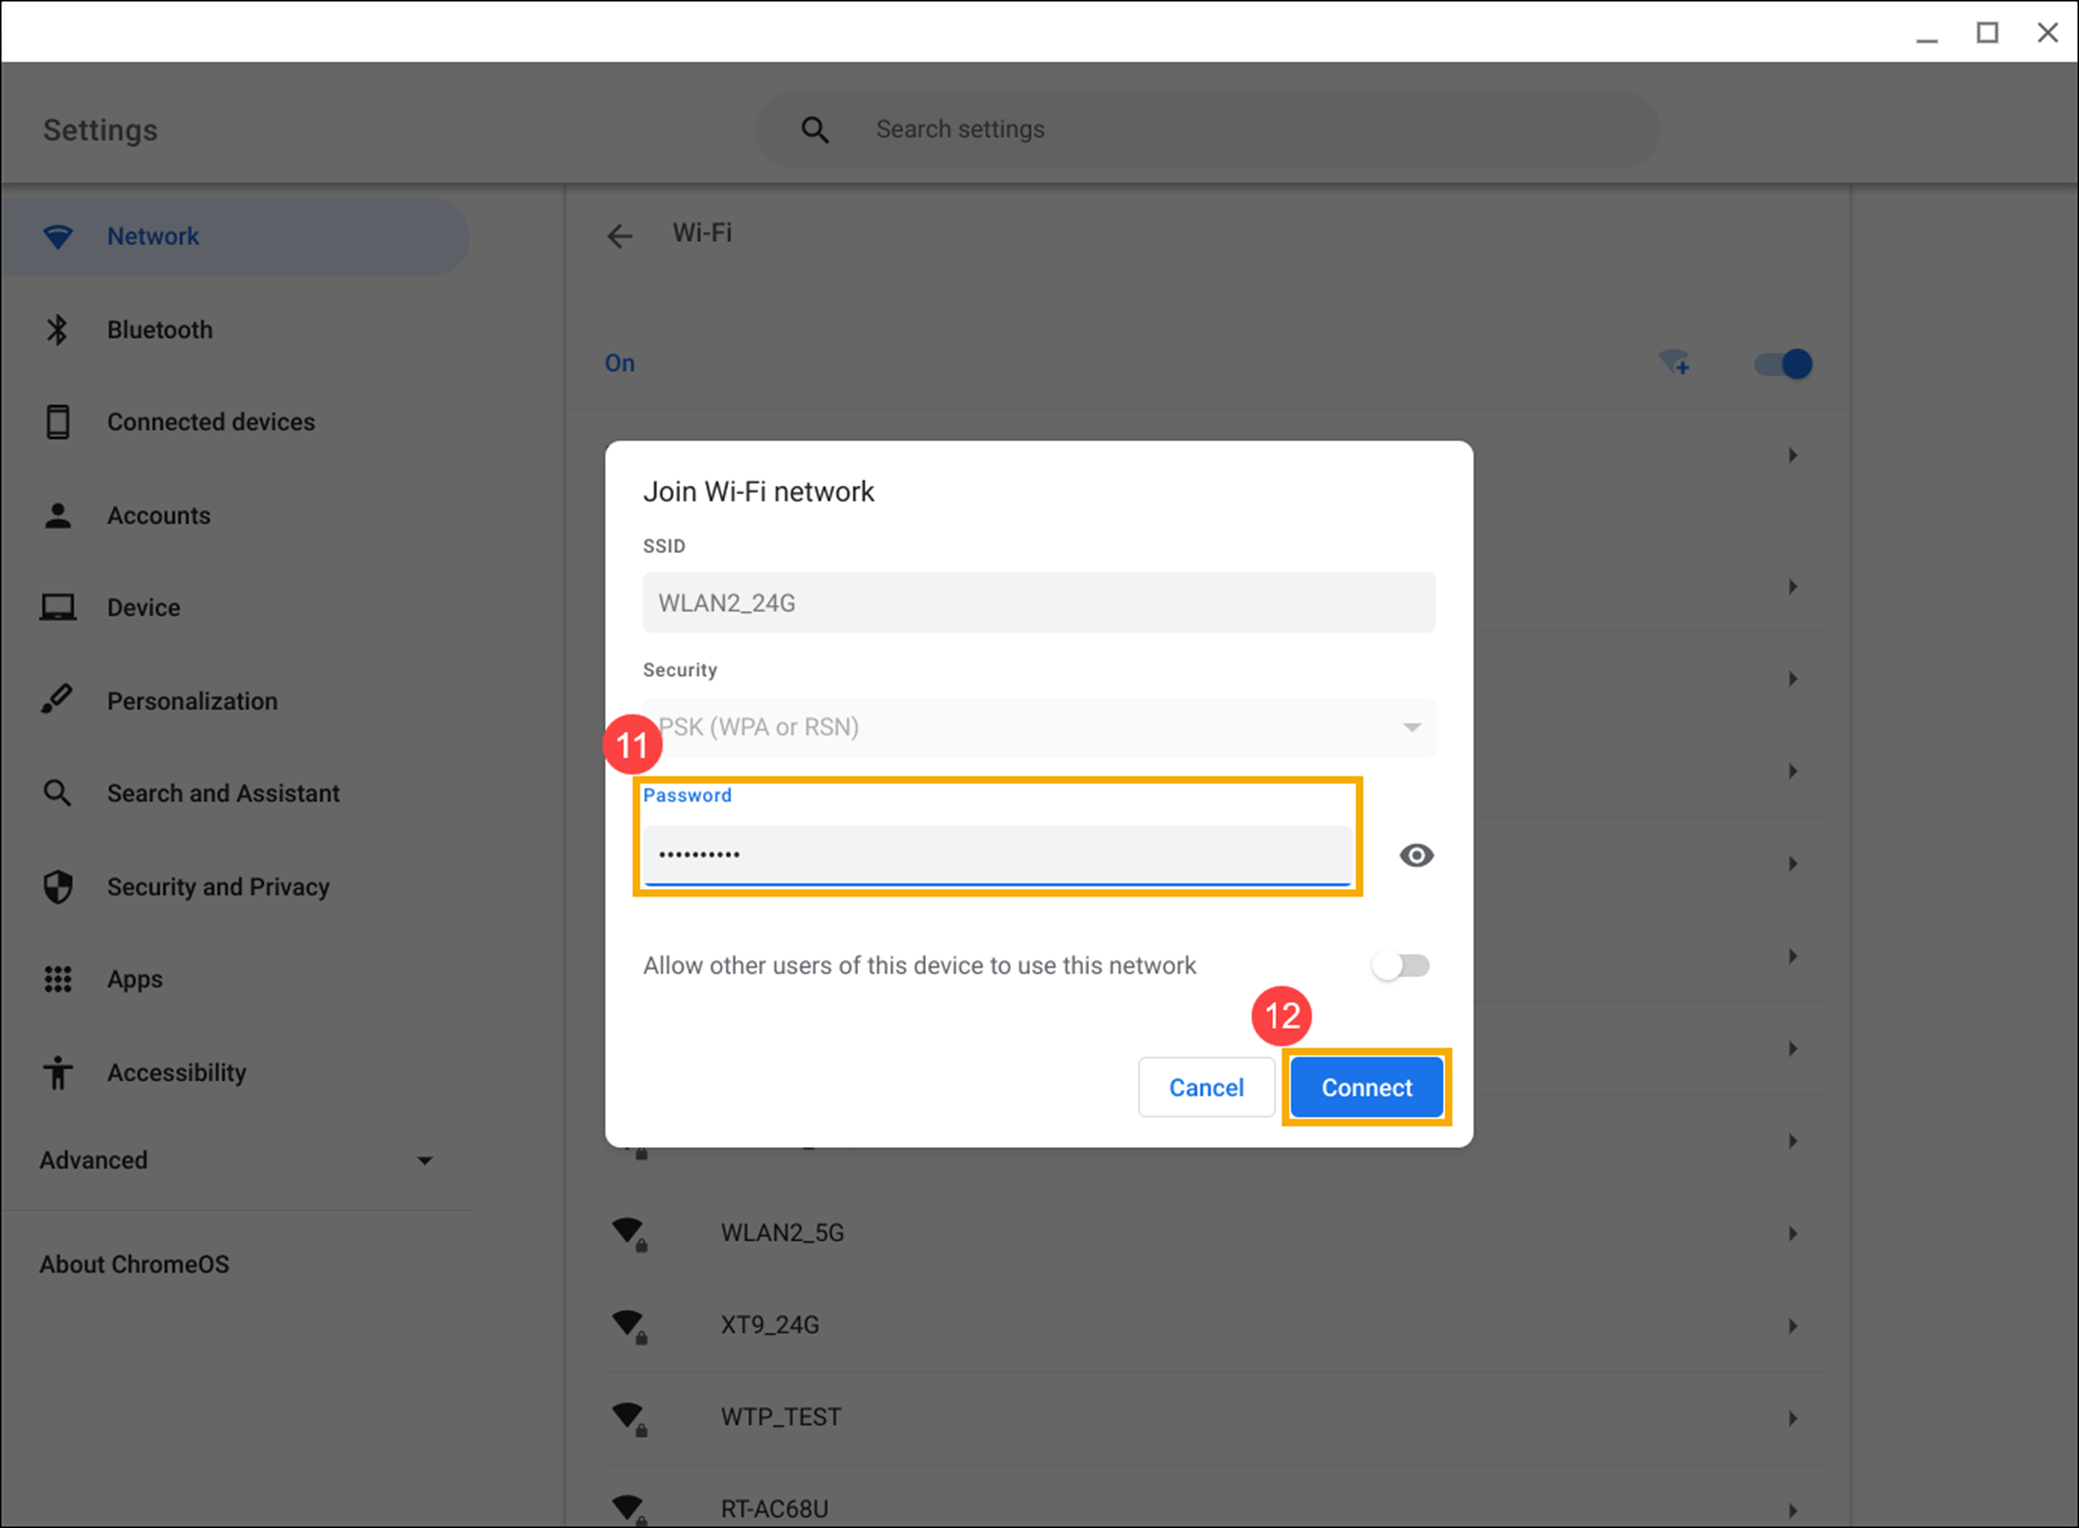
- Type in the Wi-Fi password if a password is needed⑪, then click [Connect]⑫.
Use “Diagnostics” to troubleshoot the connectivity issues
Read the following article to learn how to check connectivity issues via Google “Diagnostics” app: Diagnostics feature on Chrome OS.
Other troubleshooting
If the Wi-Fi problems persist after completing all troubleshooting steps listed above, please try the steps below:
- Restart the Chromebook. Press and hold the [Power button]
 until the device power off, then power it on again.
 - Perform a hard reset on your Chromebook hardware. Here you can learn more about How to reset your Chromebook hardware.
- If the Wi-Fi problems persist after completing all troubleshooting steps listed above, please try to Reset or Recover the Chromebook.
Reset (Powerwash) your Chromebook to factory settings. - Recovery Chromebook operating system.
For more details, please refer to Chromebook Help from Google:
https://support.google.com/chromebook/answer/6318213
If your problem is not worked out with above solution and information, please contact ASUS customer service center for further information.