[Notebook/Desktop PC] ASUS MuseTree - Introduction
MuseTree is an AI image inspiration generation application that helps spark your creative ideas. It changes the way you create and manage images and creative visual effects with AI, making it easier to explore new concepts. MuseTree uses offline, on-device generation, so you can enjoy the full experience even when you’re offline or on the go. By integrating AI into the creative workflow and providing a clean, easy-to-use visual interface, you can quickly generate inspirational images. Hand-drawn sketches can also be combined with AI generation to jump-start creation immediately.
1. System Requirements & Software Download
6. Inspiration Management Library
10. Platform & Feature Support
1. System Requirements & Software Download
※ MuseTree is currently pre-installed on the ProArt P16/PX13 and can also be installed on ASUS laptops equipped with ASUS GeForce RTX 50 or RTX 40 series graphics cards. >> Download Here <<
※ MuseTree is compatible with desktop computers equipped with ASUS GeForce RTX 50 or RTX 40 series graphics cards.
※ MuseTree is currently not available in Mainland China.

You can create the first file on this page, where you can enter any text or description①,and click "Create"②。
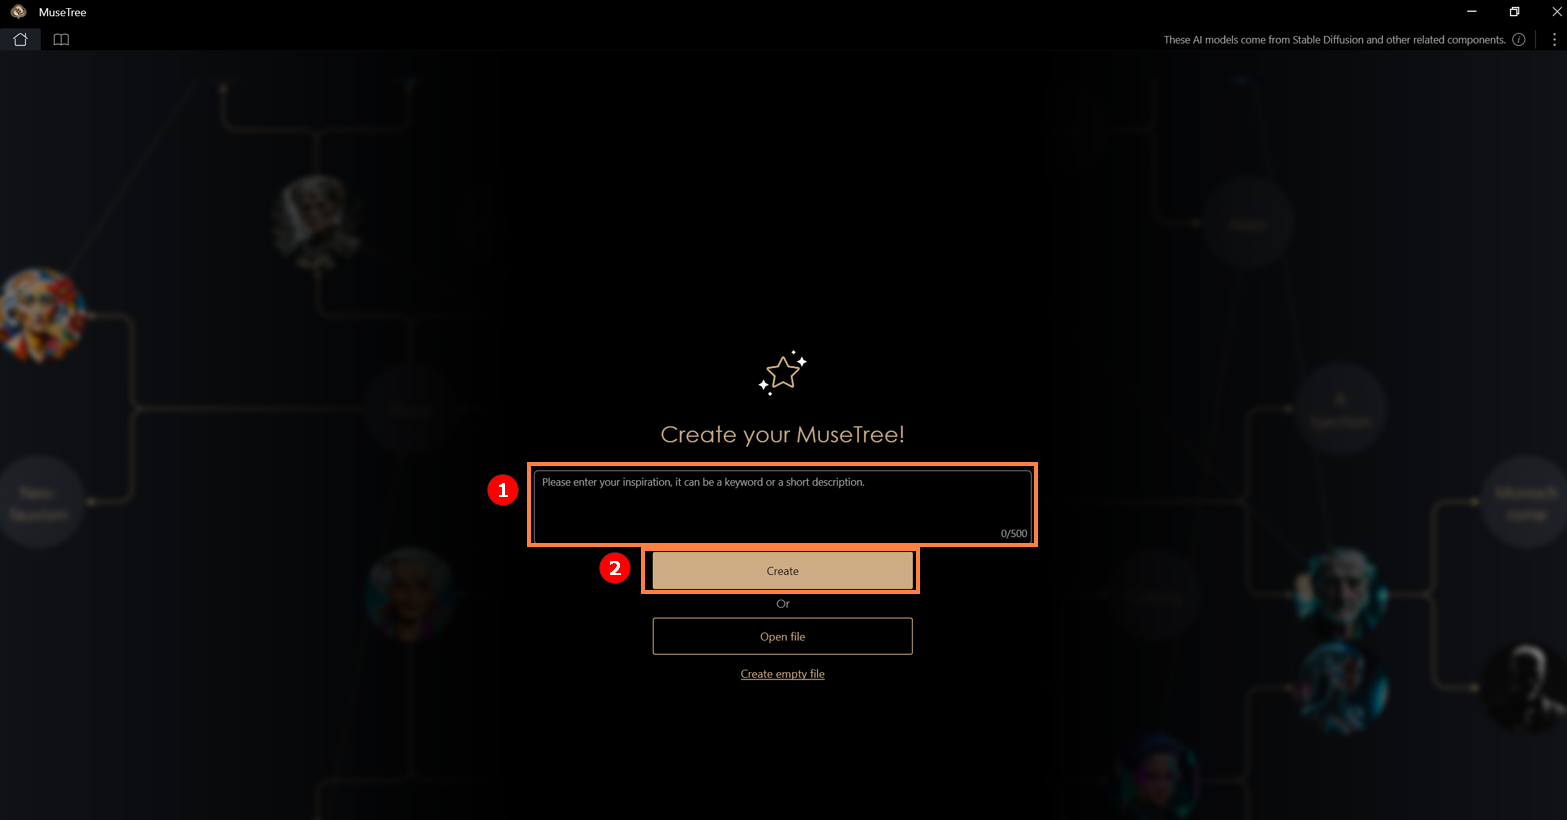
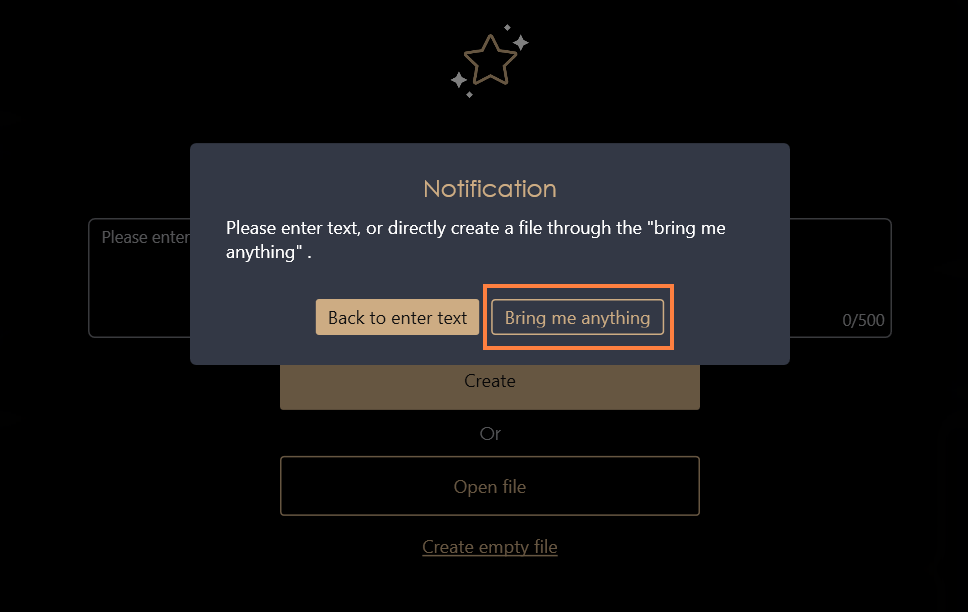
If you don't have any ideas yet, you can simply click “Create” or choose “Bring me anything” to generate random file content, or directly click "Create empty file".
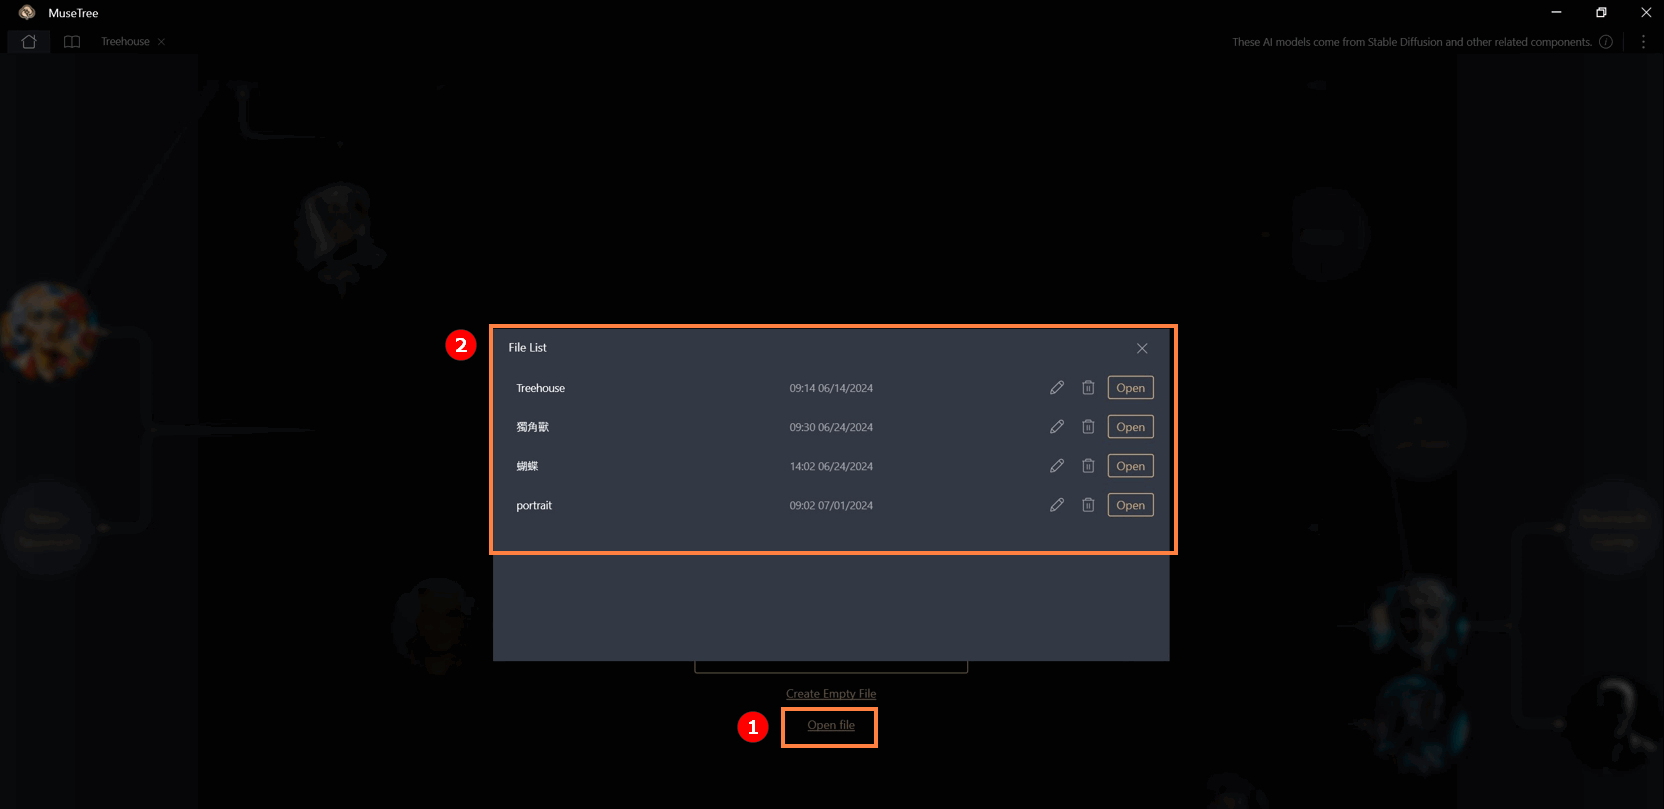
Clicking “Open file” allows you to see the contents of previously created files. You can rename, open, or delete them. When a file is deleted, all the content stored in it will also be removed.
This page is divided into three sections: the Collision Area①, the Search Area②, and the Storage Area③.
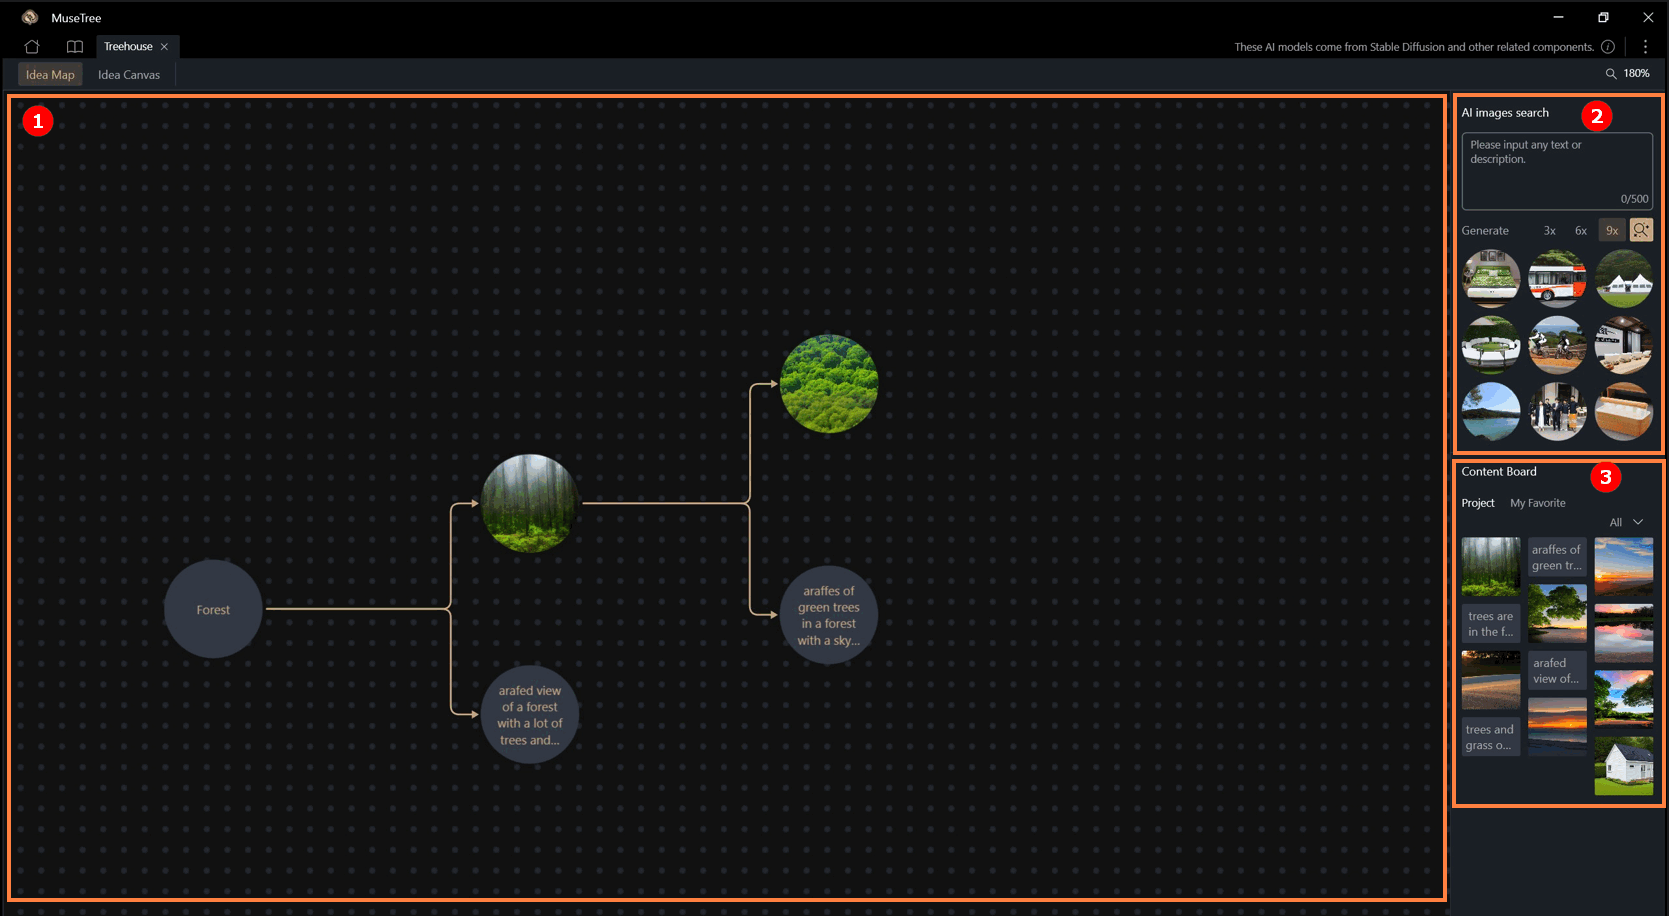
1. Collision Area
Users can freely drag any inspiration ball on the screen and collide it with other inspiration balls, without restrictions on text or images.
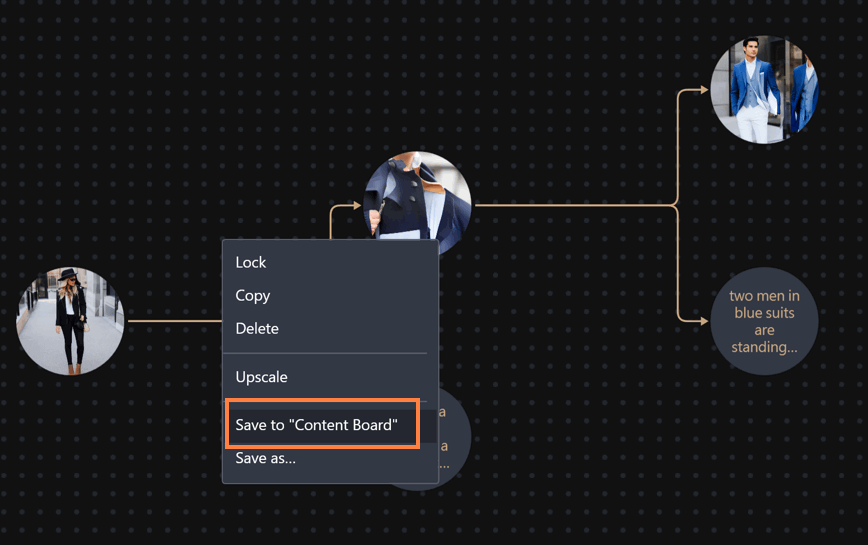
-By right-clicking on an inspiration ball, users can "lock," "copy," "delete," "upscale," and "save" it. Saving includes: "Save to Content Board" and "Save as...".
-"Upscale" increases the image size from 512x512 to 1024x1024.
2. Search Area (AI Images Search)
Users can search for AI content by entering keywords or descriptive sentences. The found inspiration balls can also be dragged to the center of the screen for collisions.
3. Storage Area (Content Board)
Users can save any text or image seen on the screen by right-clicking to bring up the function list and selecting [Save to "Content Board"]. The content will be saved into "Project".
After right-clicking on the content in the "Project" section of the "Content Board" to bring up the function list, select [Save to "My Favorite"], and the content will be saved to [My Favorite].

※"Project" are only stored within that specific project and cannot be seen or used by other projects. "My Favorite" exist across projects and can be used in other projects.
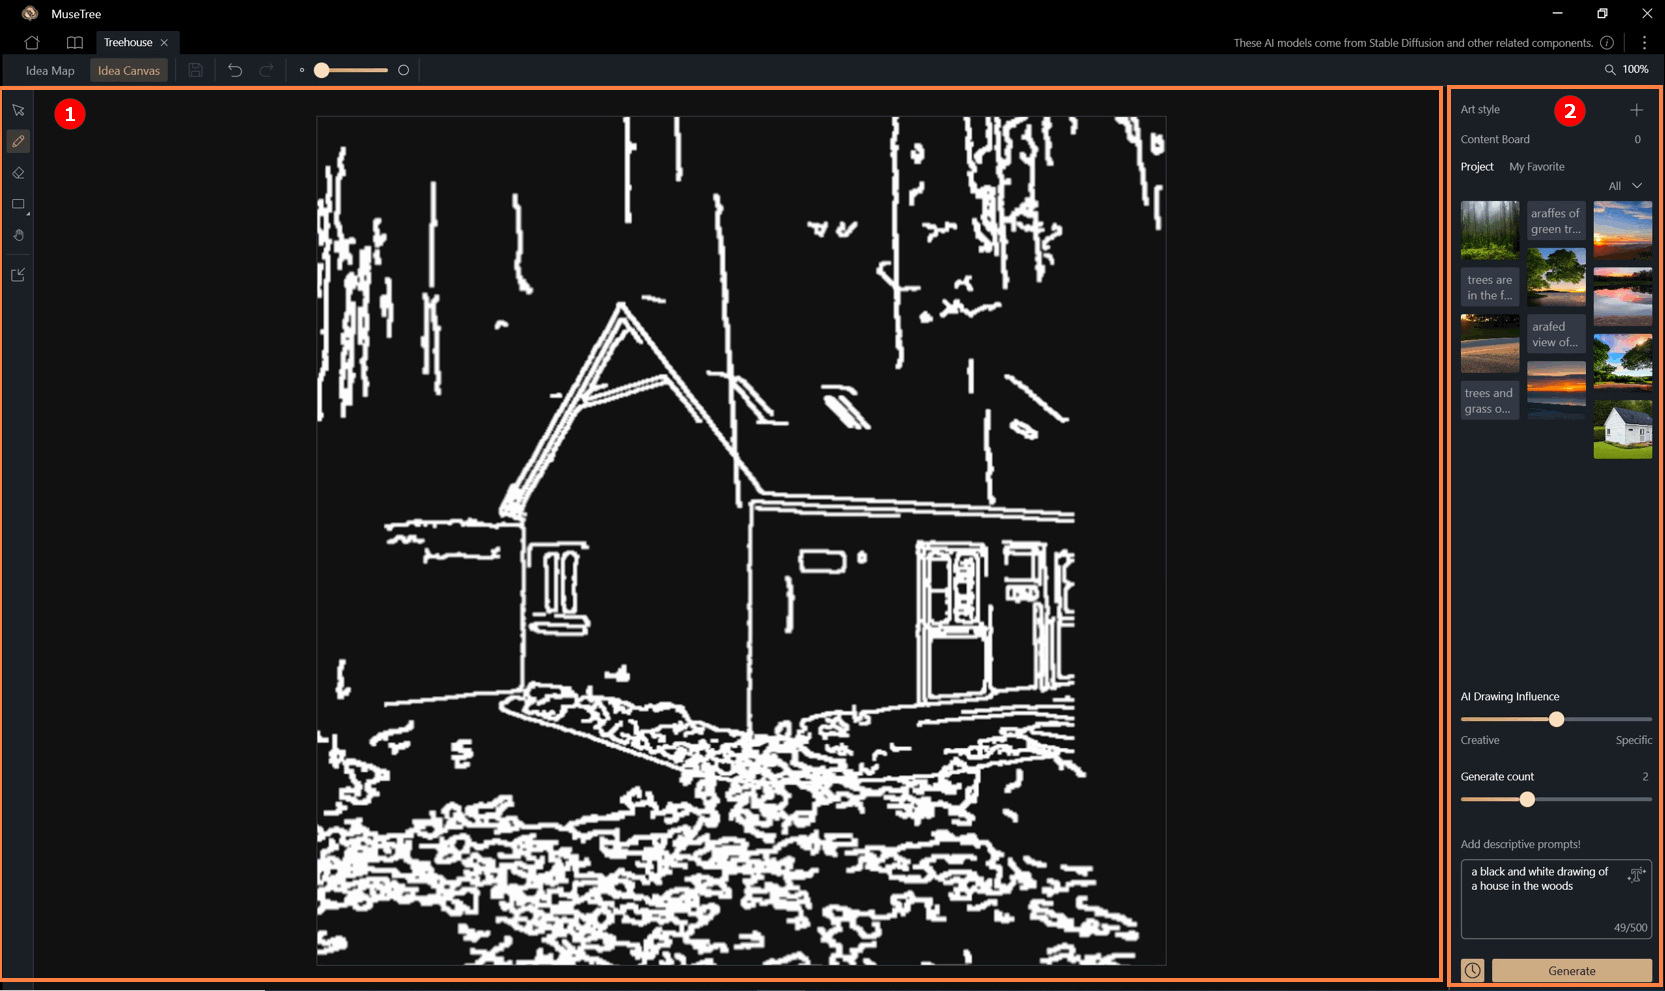
This page is divided into two areas: the Draft Drawing Area① and the Advanced Settings Area②.
1. Draft Drawing Area: Users can draft in this area using the toolbar on the left, which includes tools like brushes, erasers, and geometric shapes.
Images can also be imported directly, converted into draft form, and recreated.
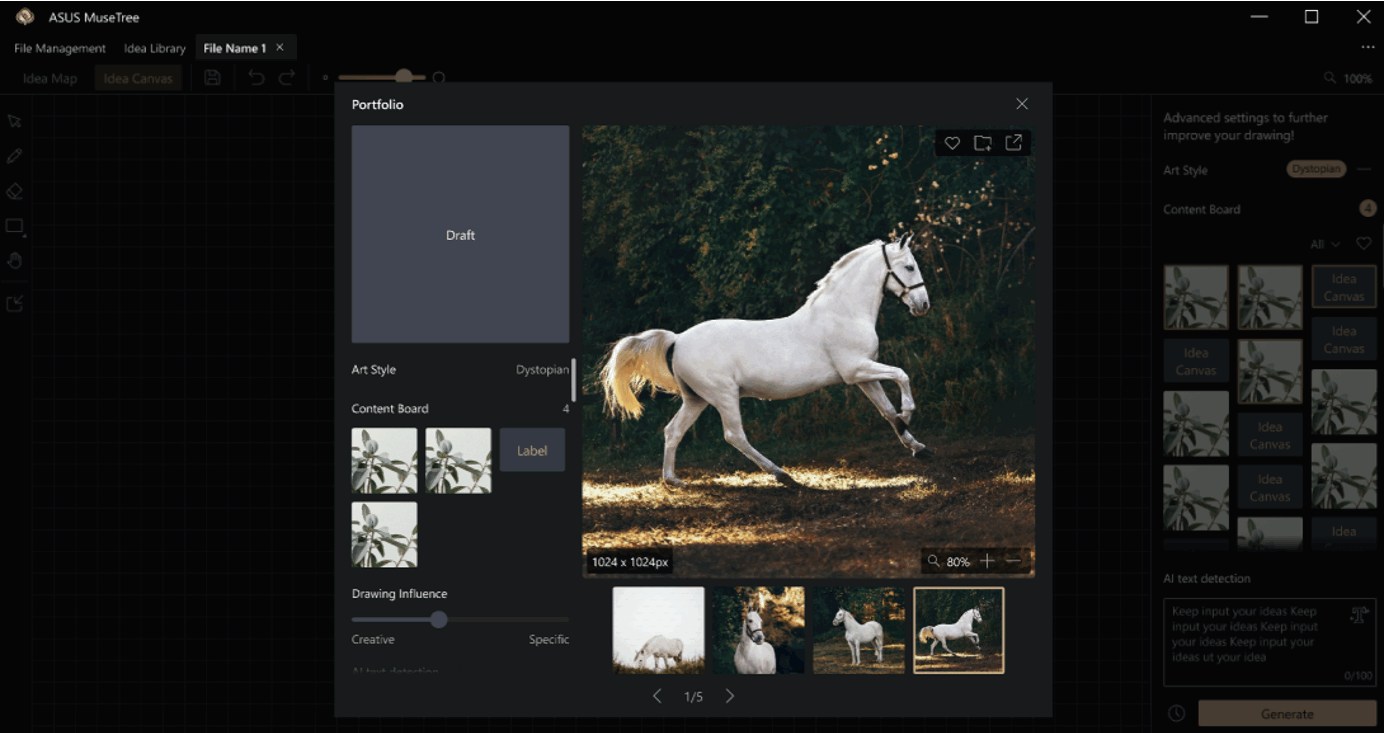
2. Advanced Settings Area: This area includes "Art Style," "Content Board," "Creativity (AI Drawing Influence)," "Generate Count" and "Generation Description."
These parameters, combined with the draft content, can be used to generate AI creations by clicking "Generate."
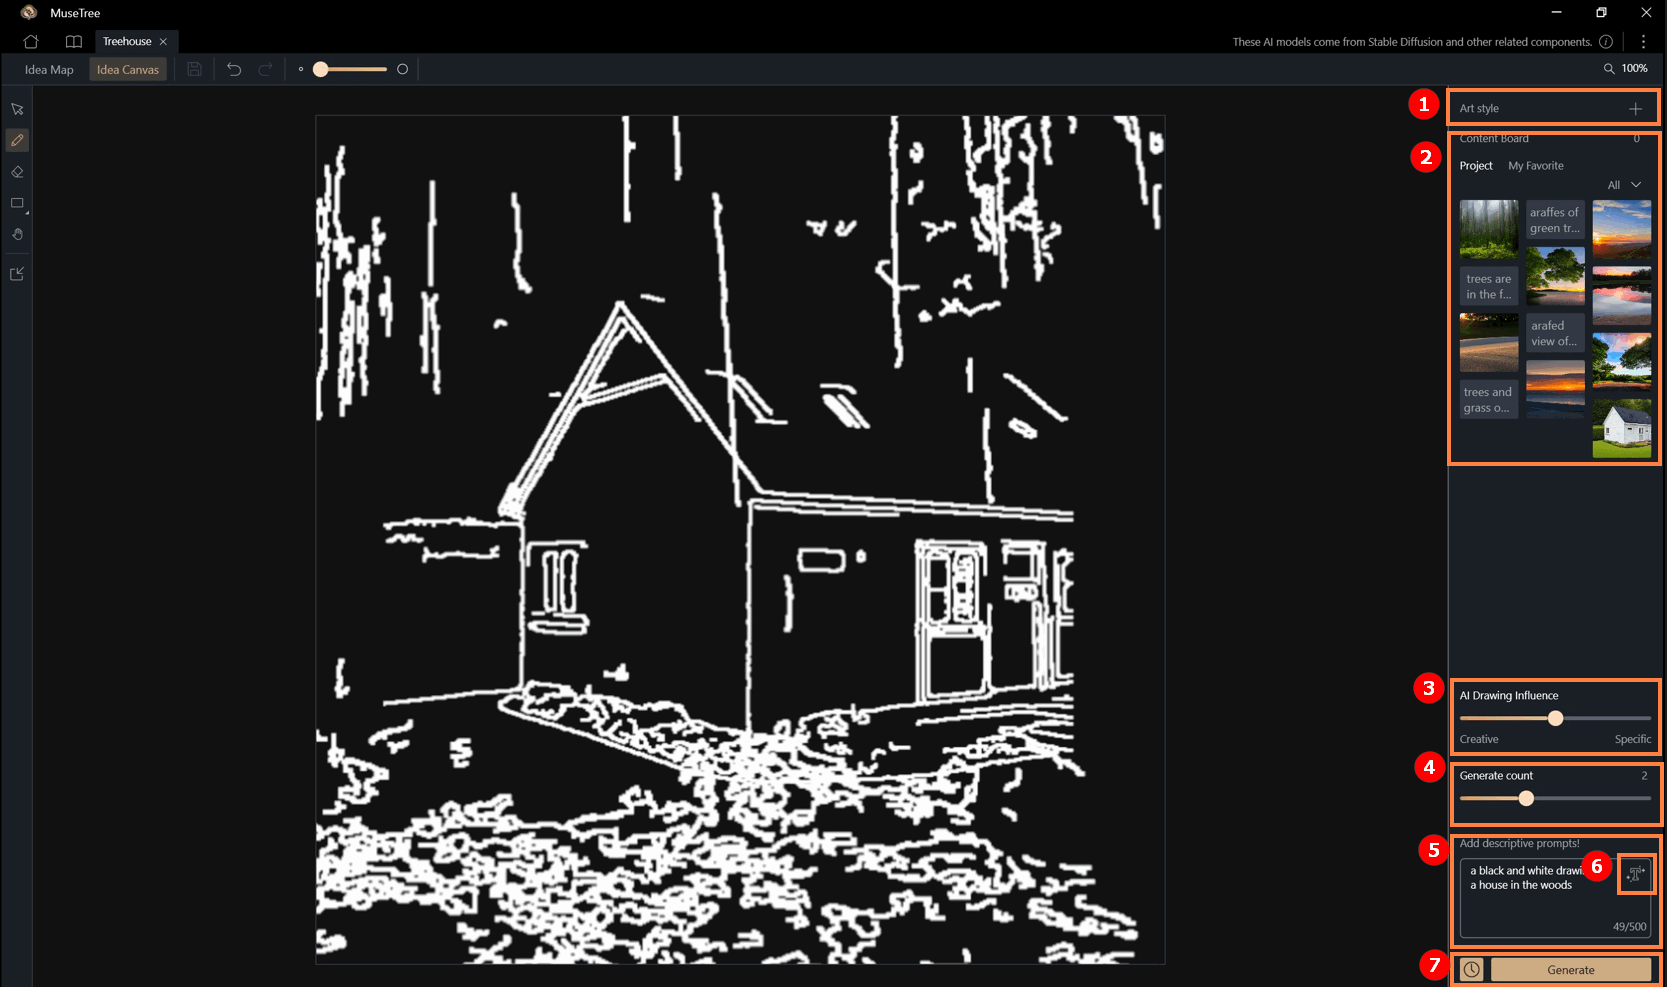
① Art Style: MuseTree provides preset styles for users to apply, enhancing design richness.
② Content Board: Images and texts stored in the content board can be clicked and used as one of the generation parameters.
This content board is the same as the one in the Idea Map.
③ Creativity (AI Drawing Influence): This feature affects the creativity of the generated results.
The closer to "Specific" the closer the result will be to the draft lines; selecting "Creative" will incorporate more AI imagination.
④ Generate Count: The number of generations can be selected for this round.
⑤ Generation Description (mandatory): This feature is mandatory. Users can describe in words the desired result to be generated.
The "AI Text Generation"⑥ function can also assist in generating descriptive text.
⑦ Generate Button and History: Clicking the "Generate" button will combine the advanced settings with the draft to generate AI content.
-The generated images can also be "saved to files," "saved to My Favorite," or saved to the computer.
The [History] button  can be clicked to view past generated content.
Idea Clips Clips can convert a still image into a dynamic video. Users can select an image from the Library or the device, and generate a video using a text description, then browse and manage generated content on a timeline.
(1) Create a Video
Click ①[Add Image] and select an image from the Library or your local device as the starting frame. Enter ②[Input] describing how you want the image to animate (e.g., subject movement, camera movement, or scene changes). Select ③[Video Aspect Ratio] to set the output frame size. Click ④[Generate] to convert the image into a video clip.

(2) Preview & Manage Videos
After generation, users can play and view the video in the preview area, and browse generated content via the timeline below.
① Preview area: Play, pause, or view the selected video in full screen.
② Timeline: Shows added images and generated video clips. Users can browse different clips and drag to reorder.
③ Add segment: Add a new video after a selected segment by describing text and selecting an image to continue generating.
④ Version library: Displays generated videos. Users can preview, rename, export, or delete.
⑤ Export: After arranging clips, click [Export] to merge the timeline into a complete video. After export, the system shows a preview where you can play it, save to the version library, or download it to the device.

6. Inspiration Management Library
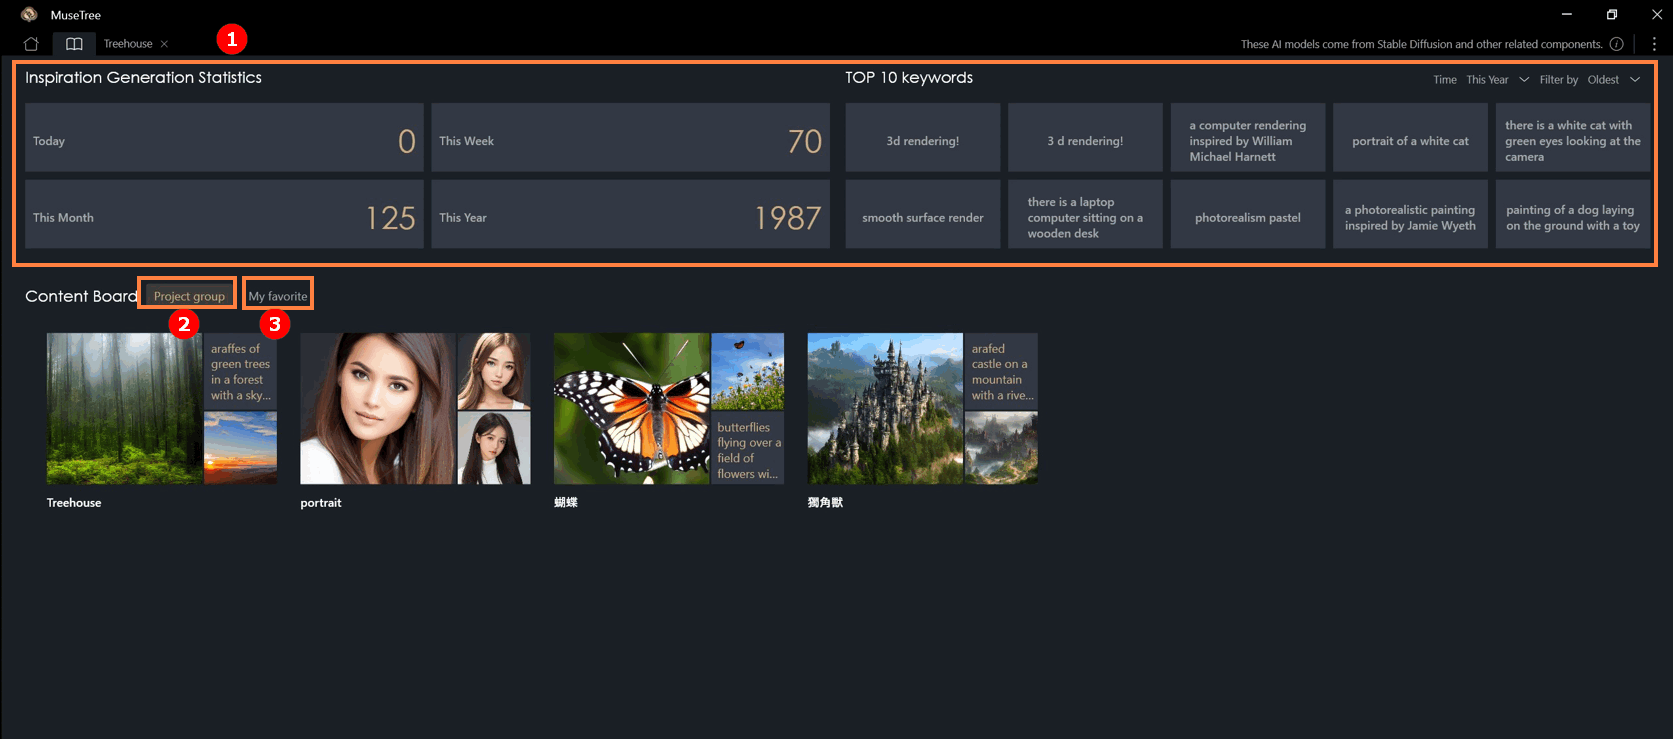
①This page shows the number of inspirations generated and the top ten keyword rankings.
②In "Content Board" > "Project Group," you can see the galleries created for each file. You can also view them all at once here, including text and images saved by users.
③"Content Board" > "My favorite" is a cross-file storage area where users can reuse content from "My favorite" in any created file.
(1) In the Inspiration Editor page, users can:
- ①[Upload their own images] or ②[choose existing materials from the content library] for editing.
- Use various selection tools to highlight specific areas and apply creative inpainting modes to modify or extend the image.


(2) After entering the editor, start by selecting the ③[selection tools] on the left panel to define your editing area.
Available tools include:
- Lasso: Freely outline any shape.
- Rectangle: Quickly select square or rectangular regions.
- Magic Pen: Automatically detects and selects similar regions.
Users can freely switch between tools and use the add/subtract area function for more precise selections.

(3) Once the area is selected, users can choose from ④[three inpainting modes] based on their needs:
- Blank Fill – After moving an object, automatically generate content to fill the empty space.
- Full Fill – Directly regenerate the selected area, ideal for small object removal or touch-ups.
- Advanced Fill – Combine text prompts (Prompts) with the selected area to generate specific content as instructed.

(4) Each generation produces ⑤[three output images]. Users can check their preferred results and click “Save” to store them in the History panel on the right, making it easy to review and compare past results anytime.

(5) To expand or reduce the canvas size, go to the ⑥[Work space] section on the left panel. Any newly ⑦[added blank areas] can also be selected and edited again using the selection tools — allowing for continuous creative exploration.

(1) The Style Mixer allows users to import an image as a reference for generation, capturing key visual elements such as objects, colors, and overall atmosphere.
After ①[uploading an image], you can ②[name your mixed style] and enter a text prompt to ③[preview the result]. Once the preview meets your expectations, click on the ④[Create New] to add the style to the ⑤[My Style Mixes] on the right panel.

(2) The mixed styles you create can also be applied to the ⑥[Idea Canvas], serving as stylistic reference elements during generation — helping your creations maintain a consistent tone and personal style.

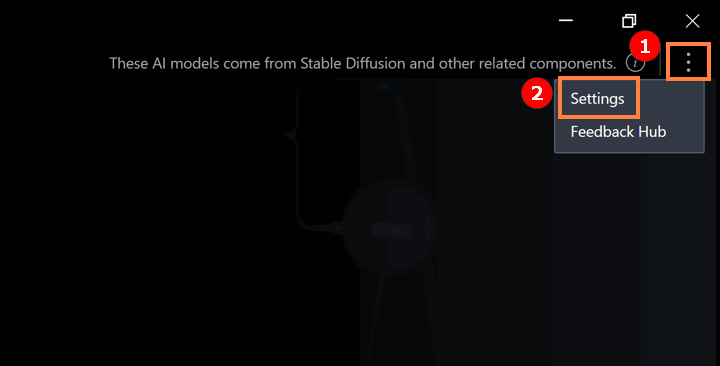
① Click the icon as shown below ② Click "Settings".
① AI Text Translation: By default, the input and generated display language is English. After enabling this feature, you can change the language of input and output content.
② System Language: Change the software UI language.
③ System Theme: Switch the software theme.
④ Contact ASUS: Click here to contact ASUS if you have any questions.
⑤ End User License Agreement: View software usage terms.
⑥ Responsible AI: Click for details to understand rights and obligations related to AI tools provided by this software.

Update: You can update MuseTree version here.
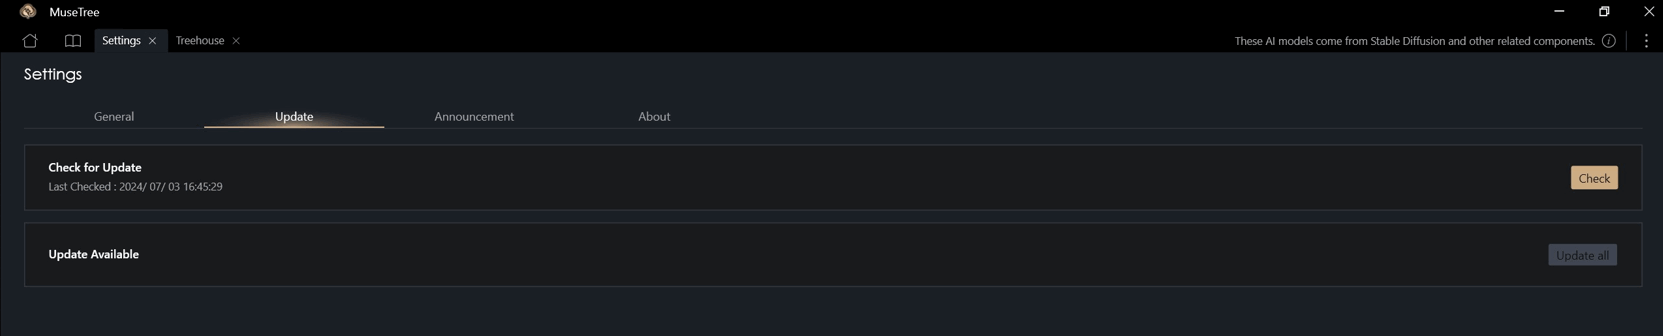
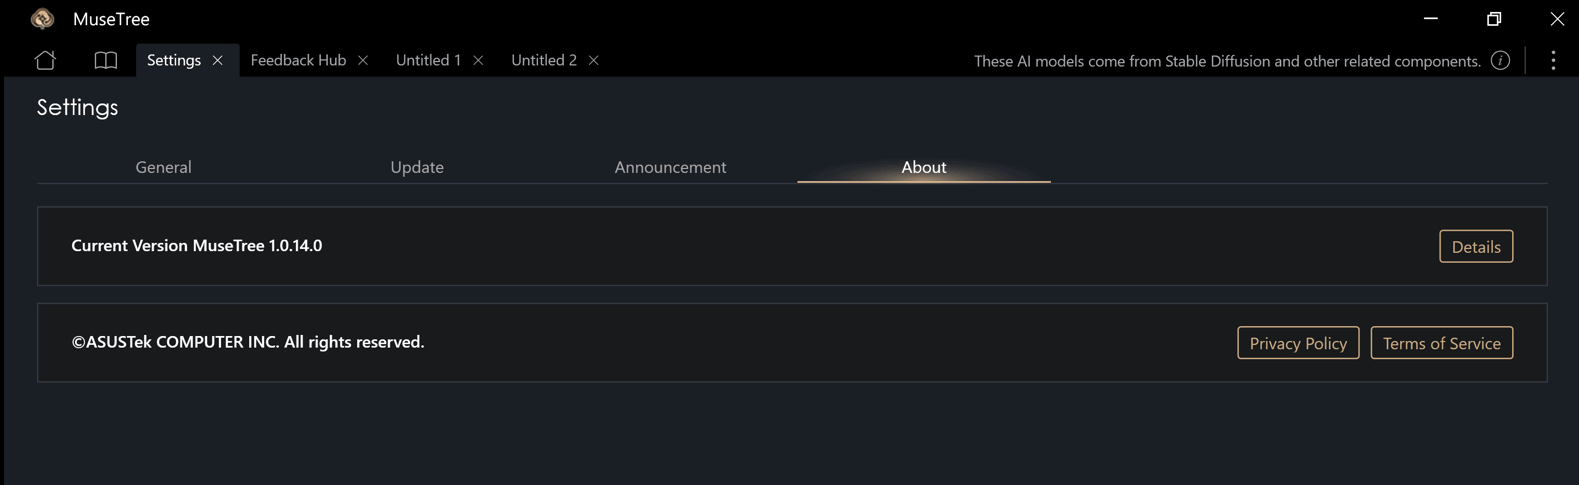
About: Here you can view the MuseTree version, privacy policy, and terms of service.
10. Platform & Feature Support
MuseTree provides different AI image and video generation functions depending on the hardware platform and specifications of the device. The AI models used may also differ. Available functions are automatically determined by the device specifications. If the device does not meet the hardware requirements for a specific feature, that feature will not appear in the software.

AI Video Generation Hardware Requirements 
※ Video generation time and memory usage may vary depending on the device hardware specs, AI model, generation settings, and content complexity.
※ Meeting the minimum hardware requirements does not mean all devices generate at the same speed; higher-spec devices usually deliver better performance.
※ MuseTree will continue optimizing performance and will support more hardware platforms, AI models, and features in future versions. Actual support is subject to the device specifications and the currently installed MuseTree software version.
Back to Table of Contents
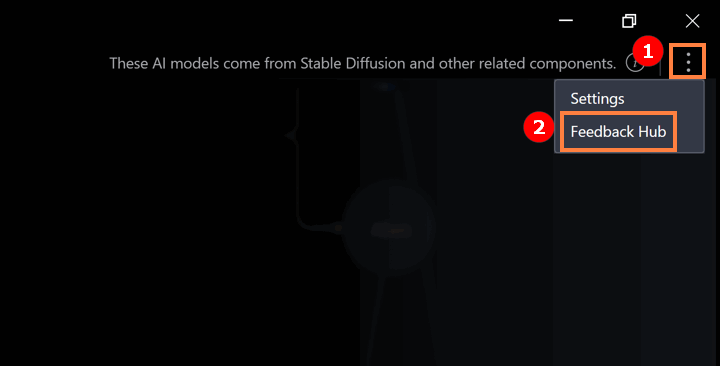
① Click the icon as shown below ② Click "Feedback Hub".
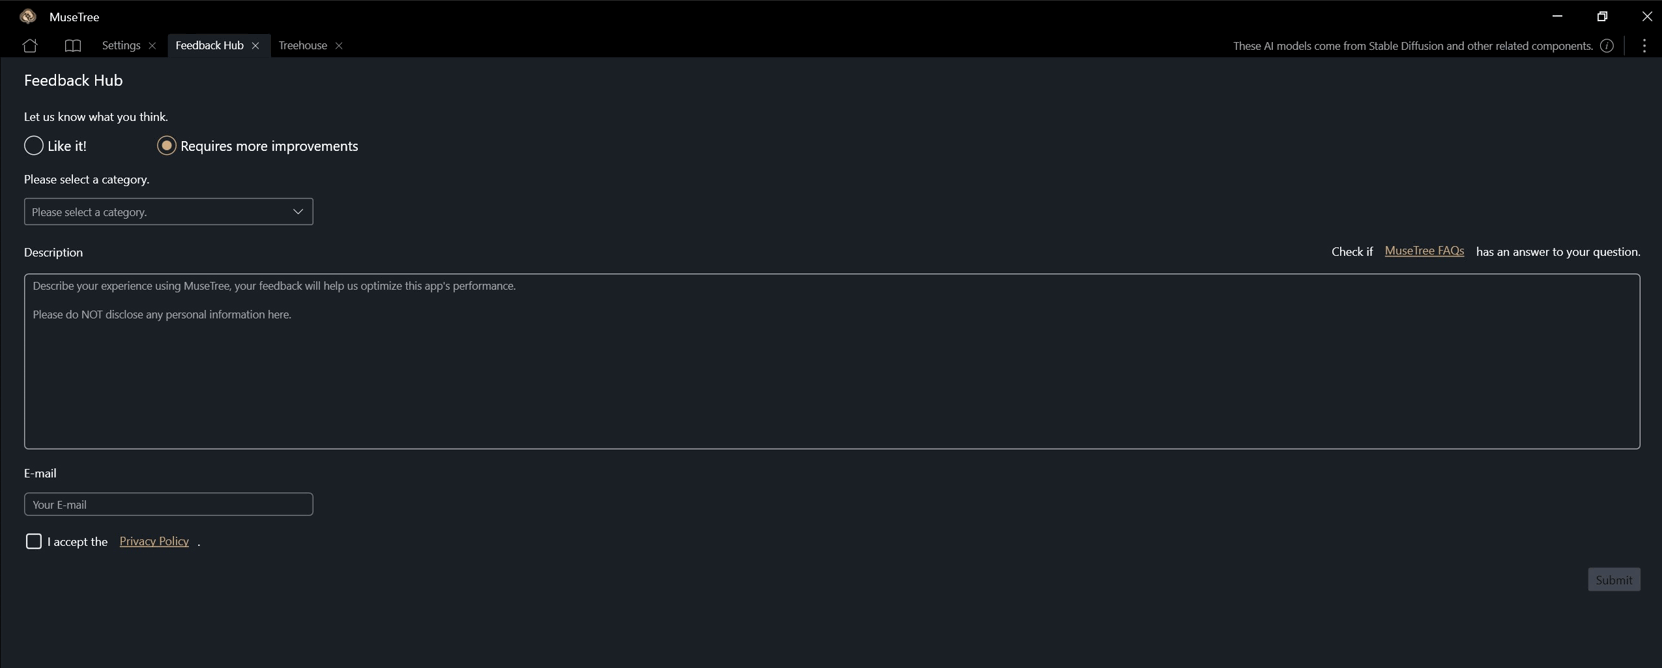
You can provide your feedback as follows.
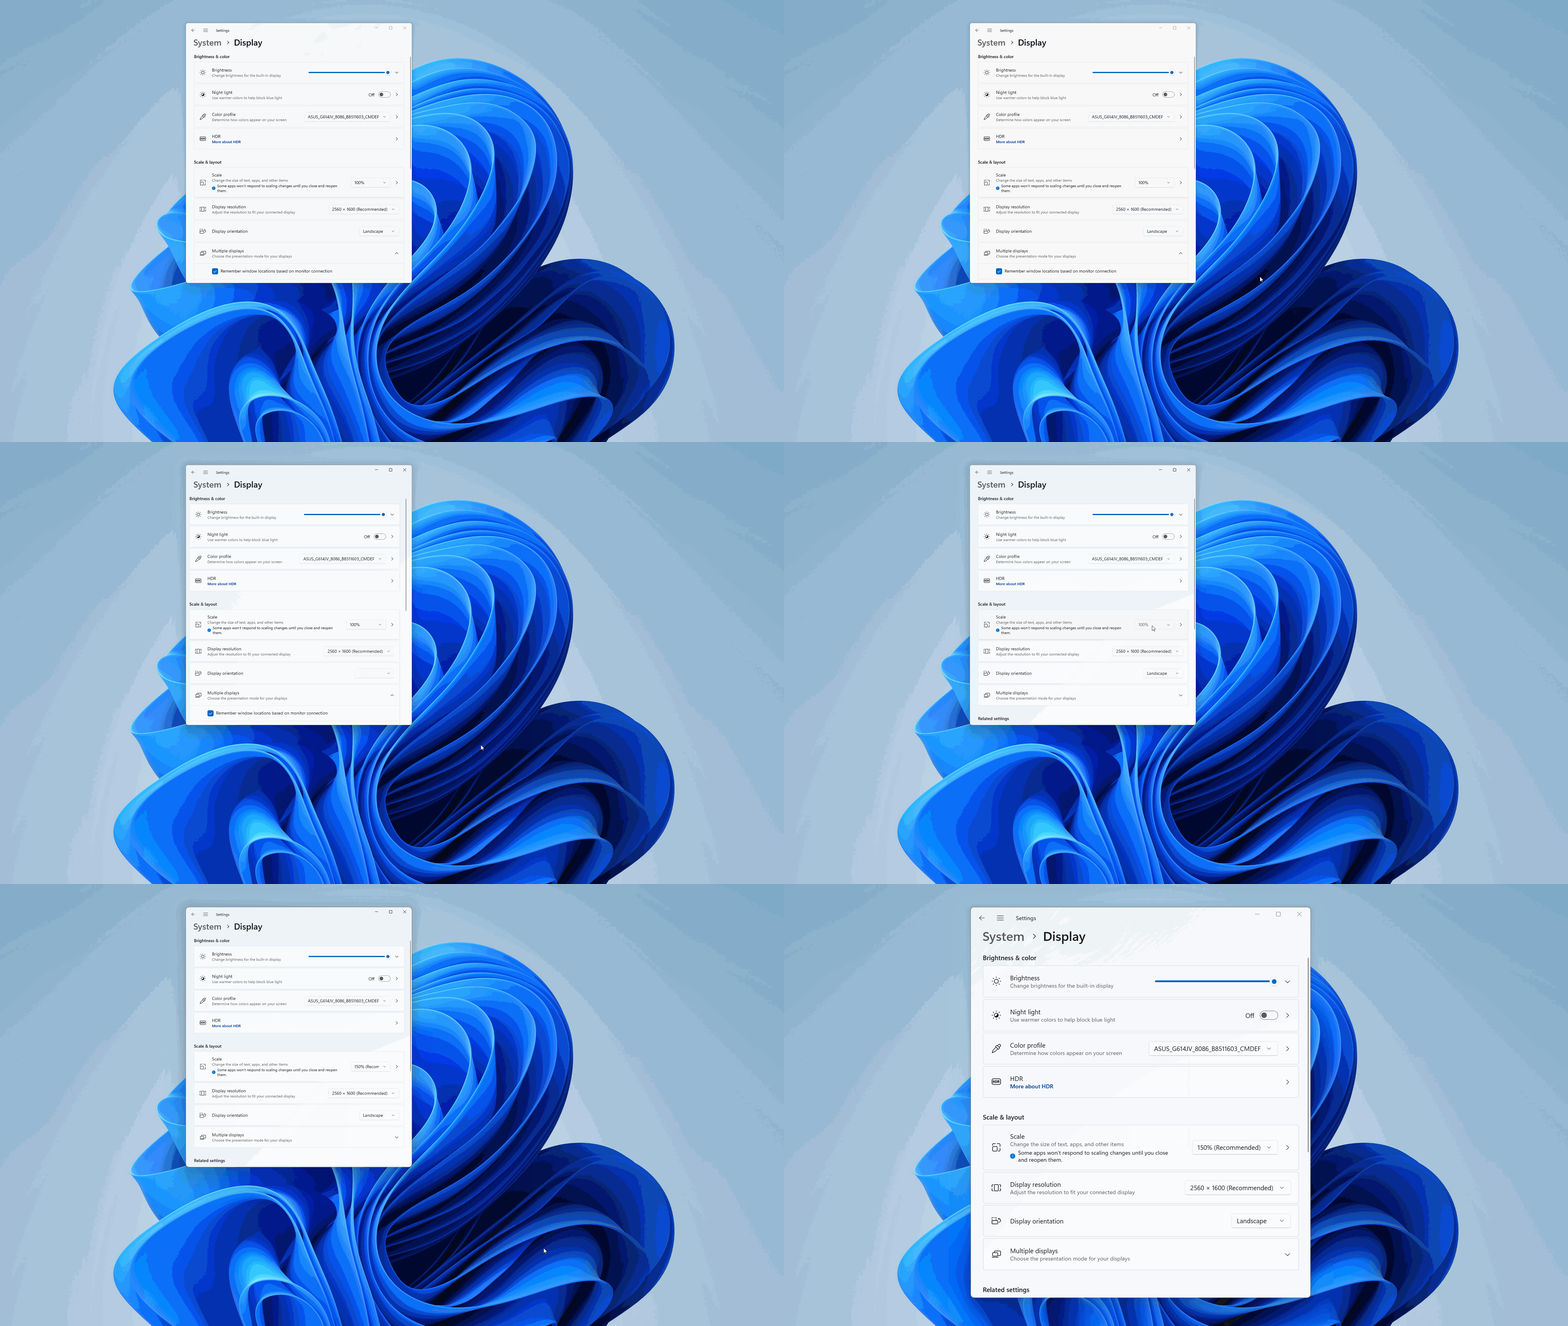
Question 1 : How to enlarge the font of MuseTree?
Answer 1 : Right-click the computer desktop, left-click [Display settings], and select the size you want in Scale & Layout.