[LCD Monitor] ASUS Display Widget - Introduction
ASUS DisplayWidget introduction
Through the ASUS DisplayWidget software, you can quickly adjust the scene mode and personalized settings, and you can set up various applications through the built-in [App Sync] function to achieve personal optimization adjustments.
And equipped with blue light filter and MultiFrame function settings, allowing users to manage multiple windows on the desktop by themselves, and display them on the screen or extended screen in an orderly and non-overlapping manner.
System requirement ::Windows 10 / Windows 8.1/ Windows 8/ Windows 7
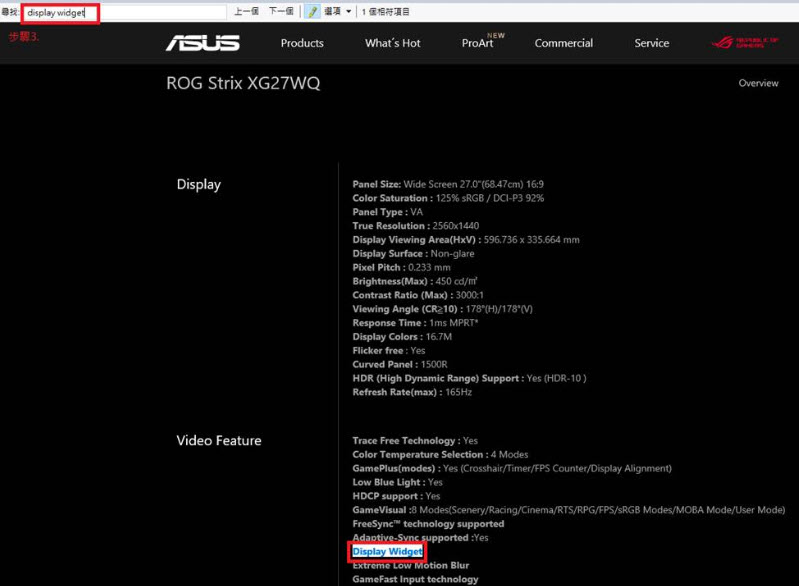
How to confirm the supported model? You can check the product specifications on the ASUS official website. ASUS official website.
(For example:ROG Srix XG27WQ)
A. Download ASUS DisplayWidget
-1. GameVisual
-2. App Sync
-4. MultiFrame
-5. Image
-6. System
A. How to download (ASUS DisplayWidget)?
You can get the latest software, manuals, drivers and firmware at the ASUS Download Center.
*How to check product model : https://www.asus.com/tw/support/Article/565/
Method::
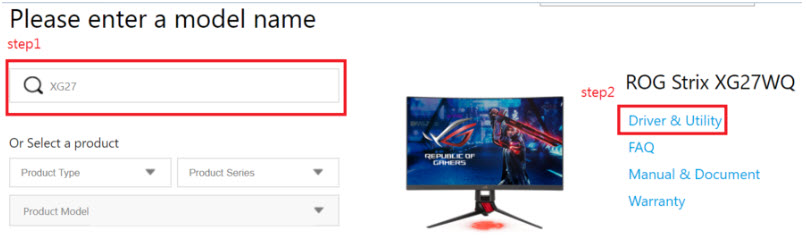
1. Download the latest Utility corresponding to your monitor model from ASUS Download Center, enter the model -> click on the driver and utility.
(Ex: XG27WQ)
2.Click on Drivers and Utilities -> Select Operating System
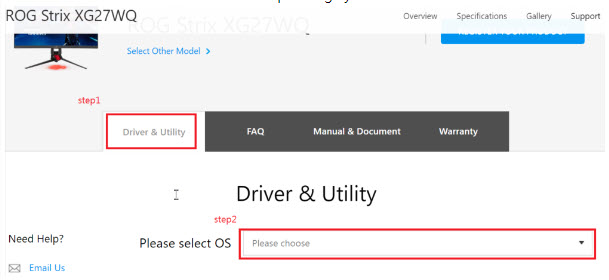
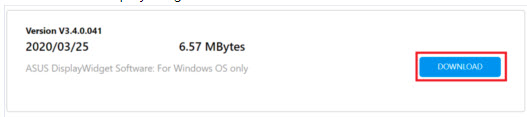
3. Find ASUS DisplayWidget and click to download.
4.Install ASUS DisplayWidget
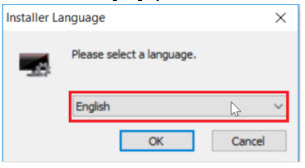
1.Double click the icon to start the installation
 。
。
2.Choose the language you want to use.
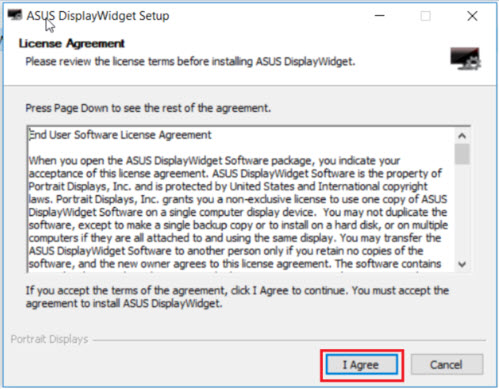
3.Read the license terms and select [I accept].
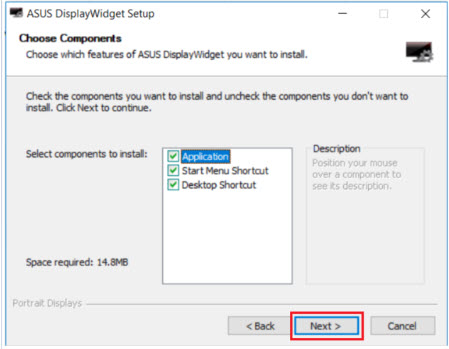
4.Check the components you want to install, and click [Next].
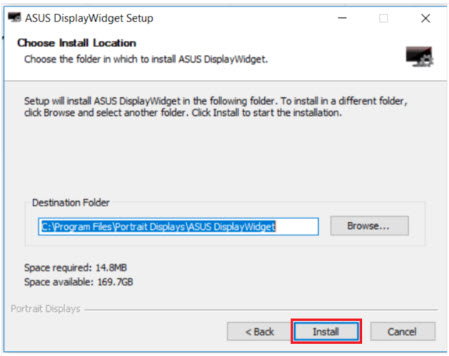
5.Select the folder location for installation, and click [Install].
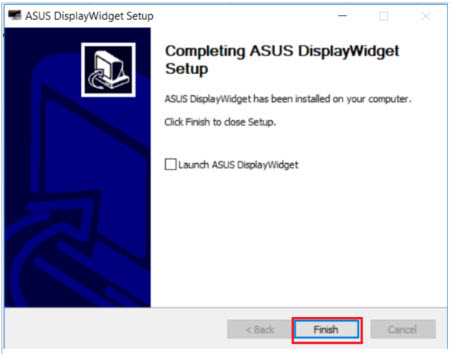
6.After the installation is complete, click Finish. Start ASUS DisplayWidget (check by the user)
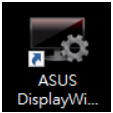
7.After the installation is complete, double-click the ASUS DisplayWidget icon on the desktop to start the program.
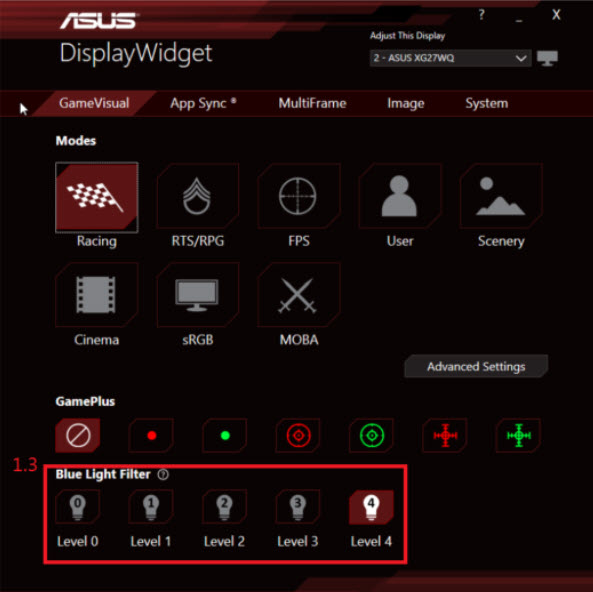
1. GameVisual
1.Modes
You can control the scene mode of the screen from the computer according to your needs (GameVisual)
a. Competition mode: a mode suitable for enjoying racing video games.
b. RTS/RPG mode: a mode suitable for playing real-time strategy games (RTS)/role-playing games (RPG).
c. FPS mode: a mode suitable for enjoying first-person shooter games.
d. User mode: Allows you to have more adjustable items in the "Color" menu.
e. Landscape mode: a mode suitable for displaying landscape photos.
f. Movie mode: a mode suitable for watching movies.
g. sRGB mode: a mode suitable for viewing photos and pictures on a computer.
h. MOBA mode: Multiplayer online battle arena (MOBA) game mode.

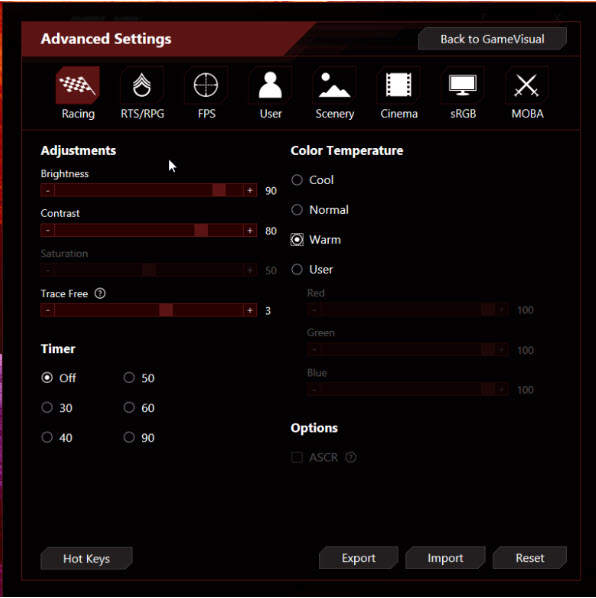
*Advanced settings: There are scene modes that can be changed, and color temperature, brightness, contrast, etc. can be used for more advanced settings
1.2 GamePlus
When playing different types of games, you can choose different crosshairs to create a better game environment for users.
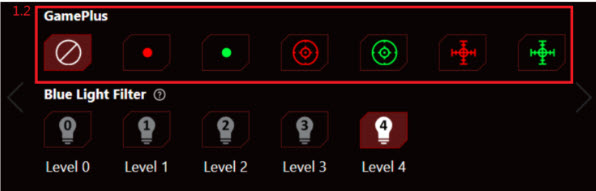
Example: The crosshair option allows you to choose the most suitable type to match the game.

1.3 Blue light filter: reduce the energy level of blue light emitted by _LED_ backlight. To turn off blue light filter, please set to 0 level
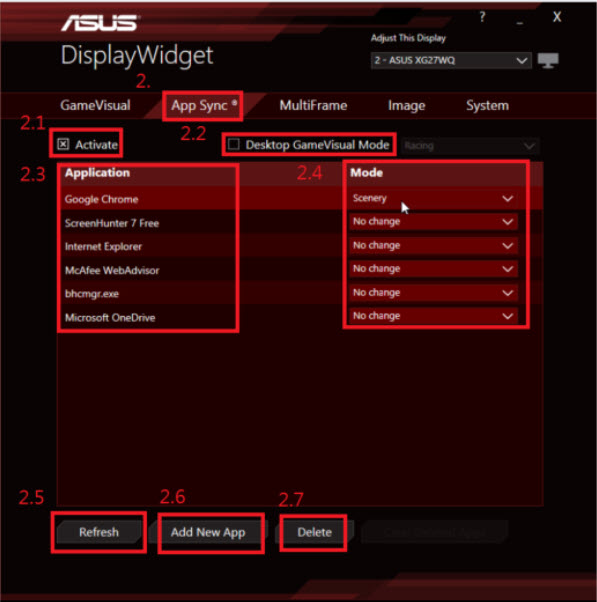
2. App Sync:
The App Sync function can be set to switch to a favorite mode when opening each application to adjust the panel and make the best visual adjustment to the service content.
The panel will automatically change and adjust according to the application you are using, so you can easily view different content with the correct color settings.
2.1. Turn on/off: App Sync function can be turned on/off through this option.
2.2. Desktop GameVisual scene mode menu: You can select the scene mode you want to set in the menu.
2.3. Application list: You can select the application you want to set from this list.
2.4. Color 3 menu: you can select the 8 scene modes you want to set in the menu.
2.5. [Refresh] option: You can re-identify the opened applications and add them to the application list.
2.6. [Browse] option: You can select the program you want to set from the folder and add it to the application list.
2.7. [Delete] option: You can delete unnecessary applications from the list.
App Sync Function example:
1. Set Chrome to Scenery mode

2. After setting, open Chrome and the display will switch to Scenery mode
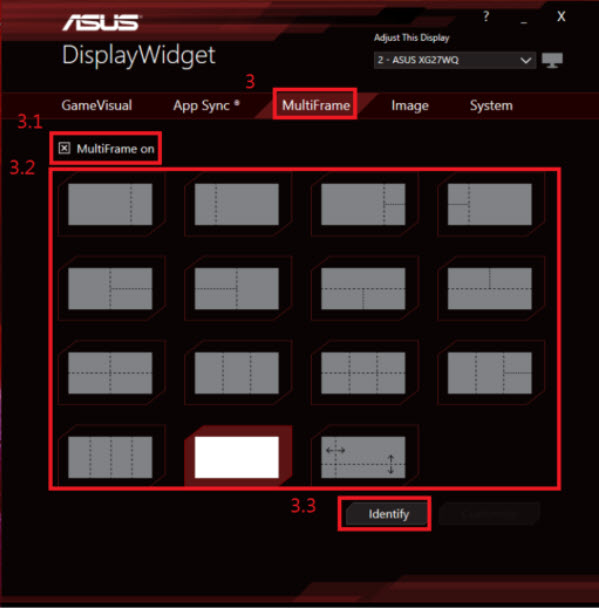
3. MultiFrame (allow users to manage multiple windows on the desktop, display them on the screen or extended screen in an orderly and non-overlapping manner)
3.1. Turn on/off: MultiFrame function can be turned on/off through this option.
3.2. You can select the window split mode you want to set in the menu, which can be effectively arranged to avoid overlapping windows.
3.3. After selecting, press Identify to confirm.
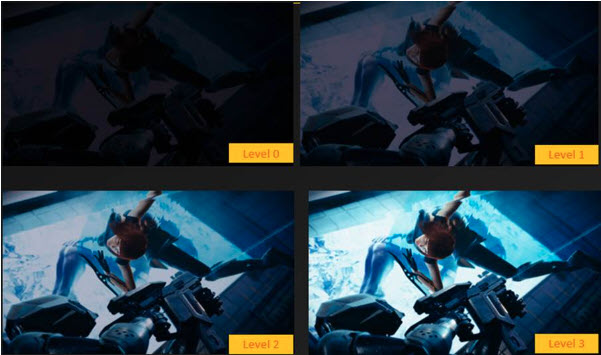
4. Image:
Shadow acceleration: There are four different levels of shadow acceleration, allowing you to see more details in dark scenes. In the game scene, this will help find your enemies more easily.
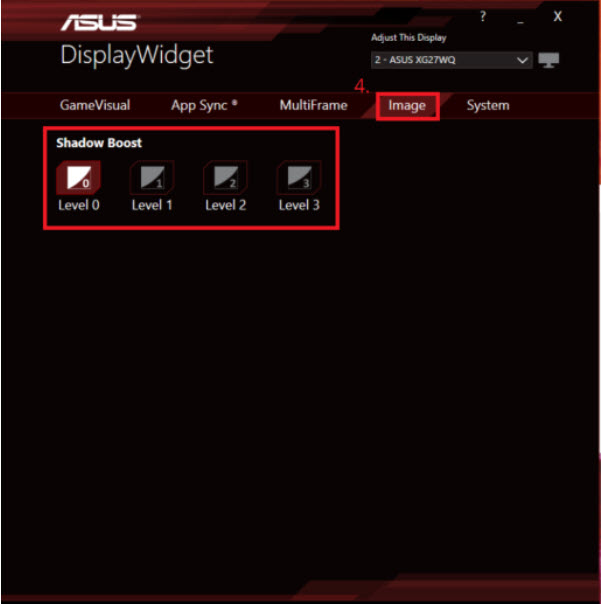
Example as shown below
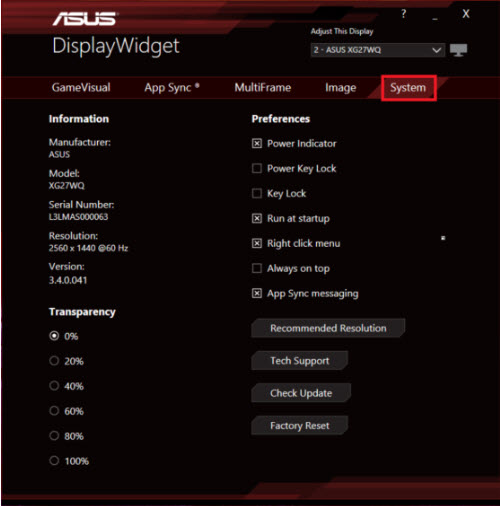
5. System
The system information and general settings are as follows, such as display information, version, preference settings, and reset factory settings
D.FAQ:
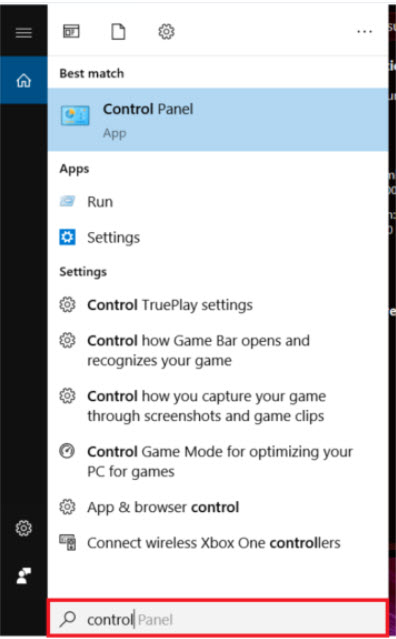
Q1. How to remove ASUS DisplayWidget?
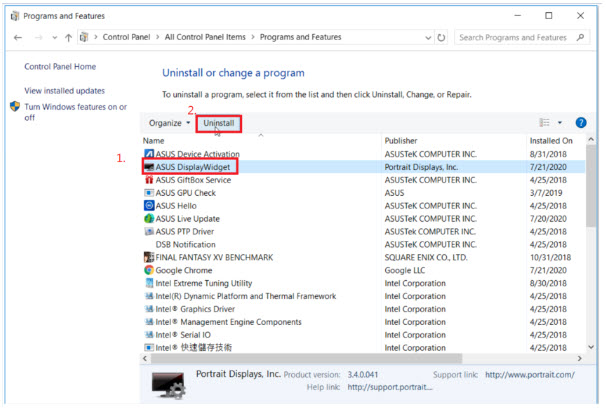
1. Search for [Control Panel] and open it.
2. Click [Uninstall Program].

3. Select [ASUS DisplayWidget] and click [Uninstall]
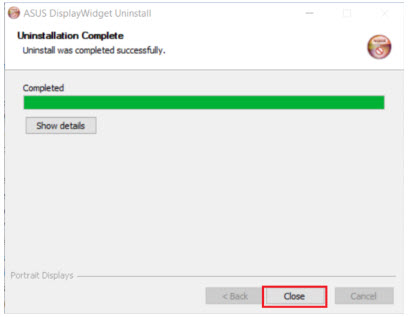
4. Click [Uninstall]
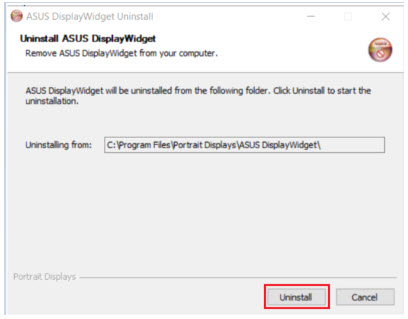
5. Wait for the uninstallation to complete,and click Close.