[VPN] How to set up a Net-to-Net Tunnel – BRT Series
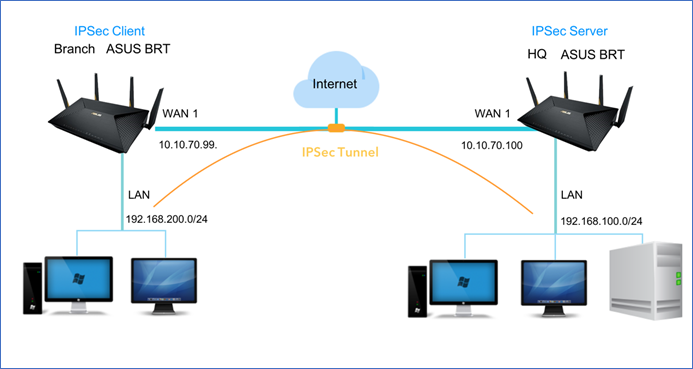
Network Diagram
Configure Net-to-Net VPN Server
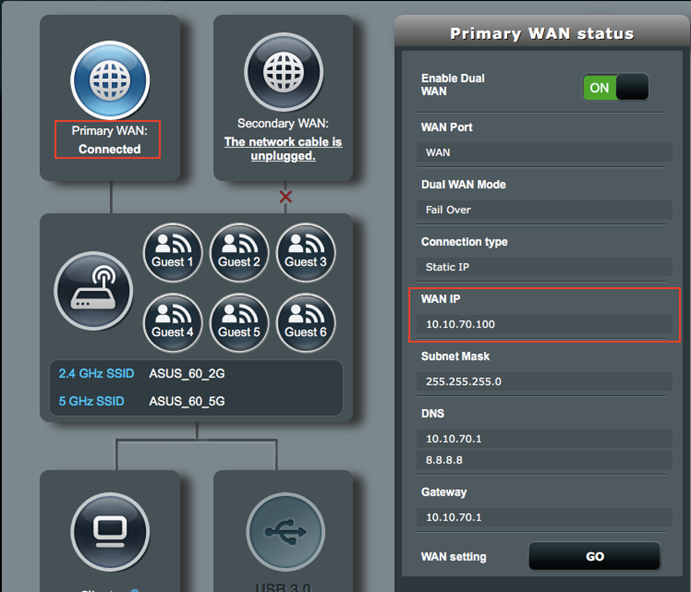
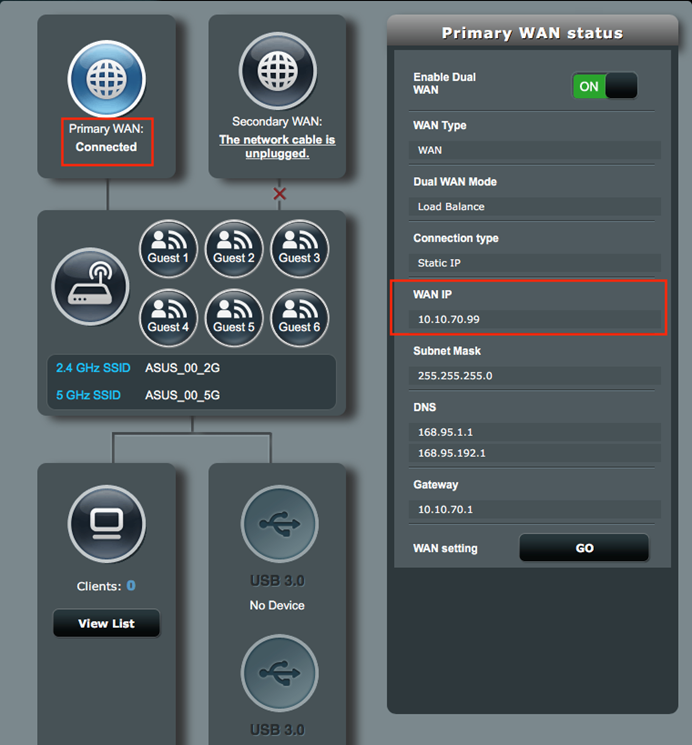
1. Make sure the WAN connection is working properly.
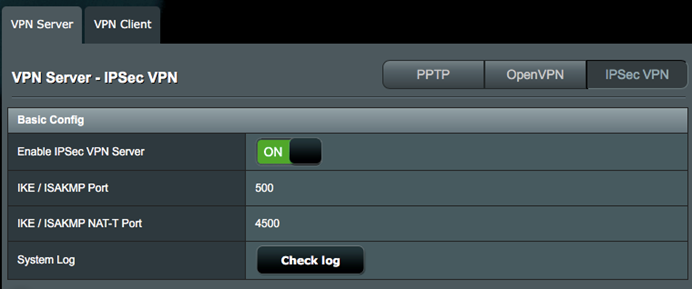
2. Go to VPN > VPN Server and click IPSec VPN tab.
3. Enable IPSec VPN Server.
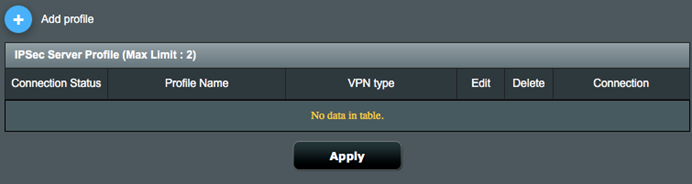
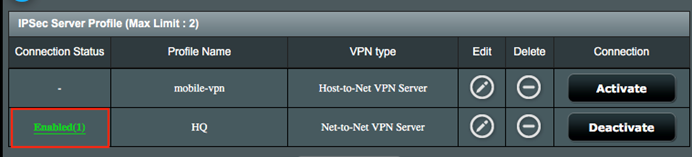
4. Click the Add Profile button to create a VPN profile.
5. Select Net-to-Net VPN Server on VPN Type and complete the following settings.
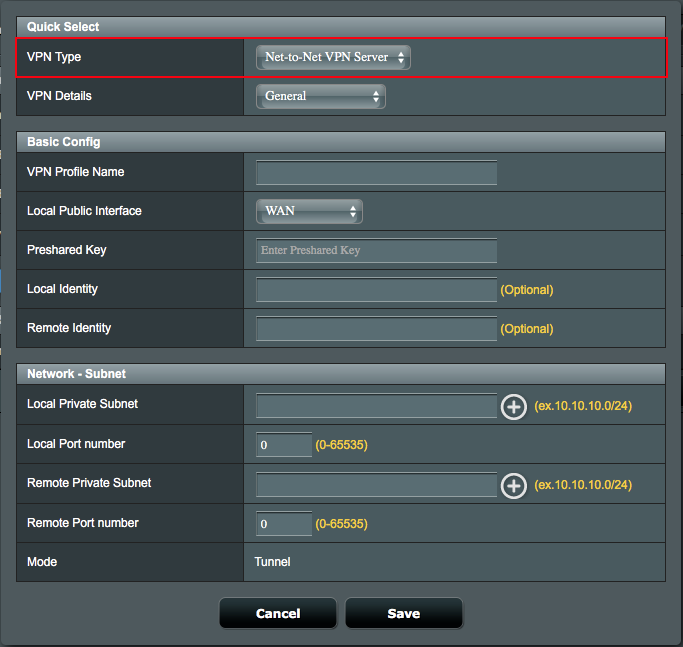
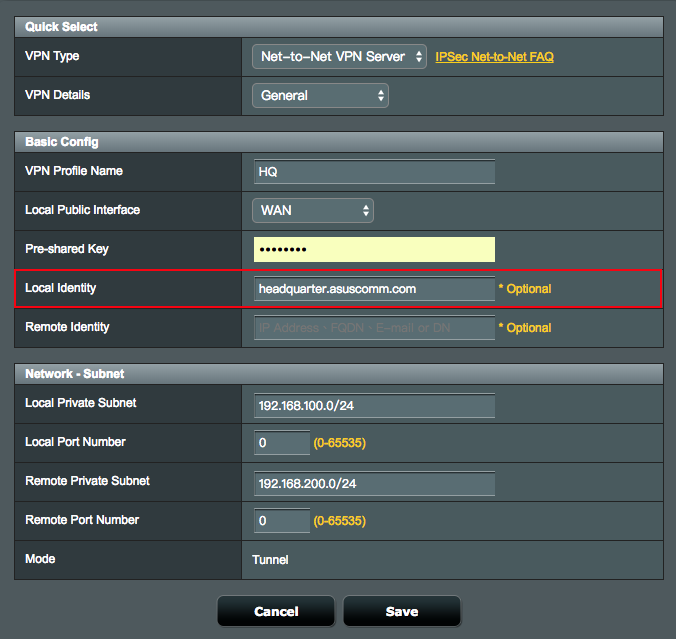
6. Configure General settings on Net-to-Net VPN Server profile.
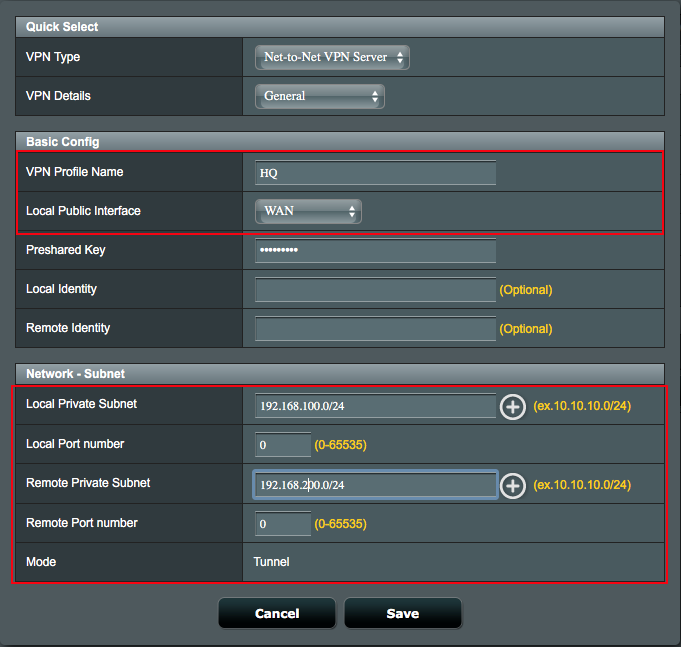
6.1 Define a VPN Profile Name.
6.2 Select the enabled WAN interface on Local Public Interface, which can be accessed from the Internet.
6.2.1 Note: If IP address of the selected WAN is behind of NAT gateway, please configure Port forwarding or DMZ setting for IP address.
6.3 Configure a Preshared Key to create a secure encrypted tunnel
6.3.1 For example, enter iloveasus as Preshared key.
6.4 Define Local Private Subnet that allowed to communicate with remote subnet.
6.4.1 Local Private Subnet: 192.168.100.0/24.
6.4.2 Remote VPN Client Subnet: 192.168.200.0/24.
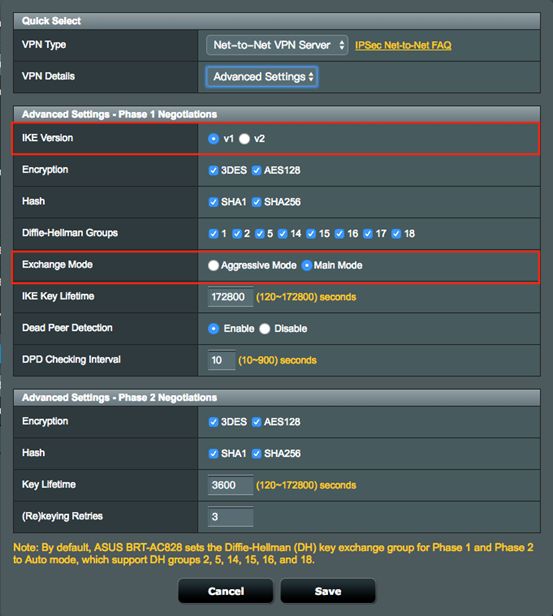
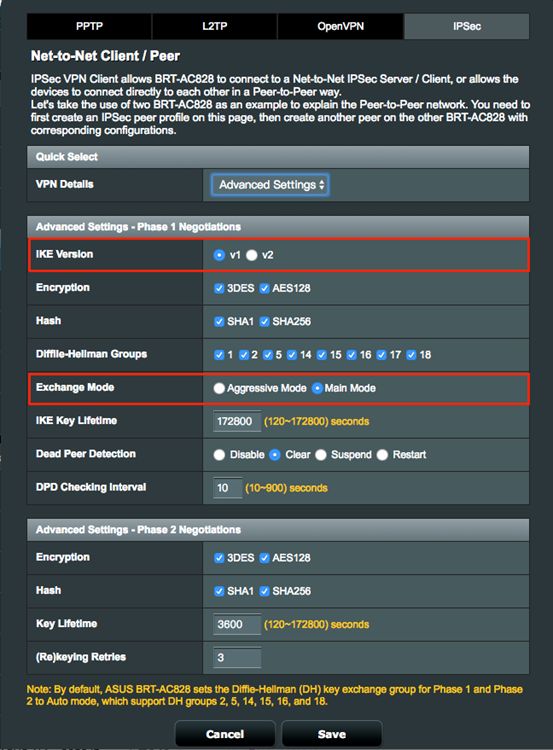
7. Configure Advanced settings on Net-to-Net VPN Server profile.
7.1 Select IKE version to create Net-to-Net VPN tunnel,
7.2 Select Exchange Mode for authentication information handshake.
7.2.1 Select Main Mode for multiple rounds encrypted information handshake.
7.2.2 Select Aggressive Mode for single round unencrypted information handshake.
7.2.3 Note: IKEv2 can only support Main Mode, check RFC 4306 for the details.
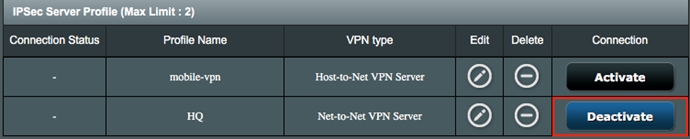
8. Click Save and go back to configuration page.
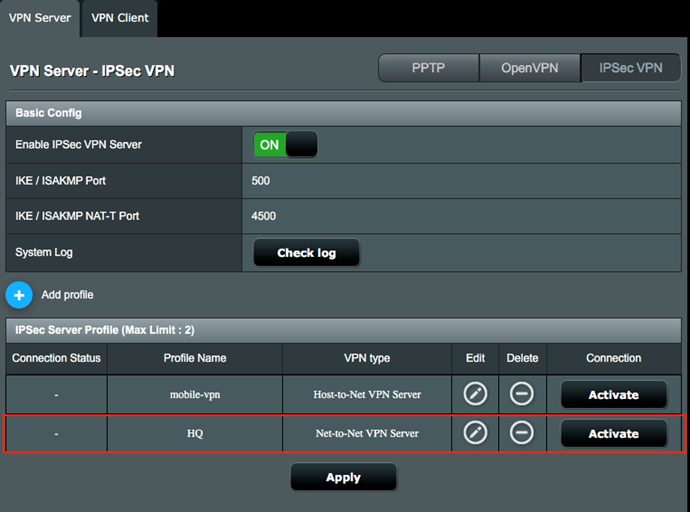
9. Click Activate to enable the VPN profile.
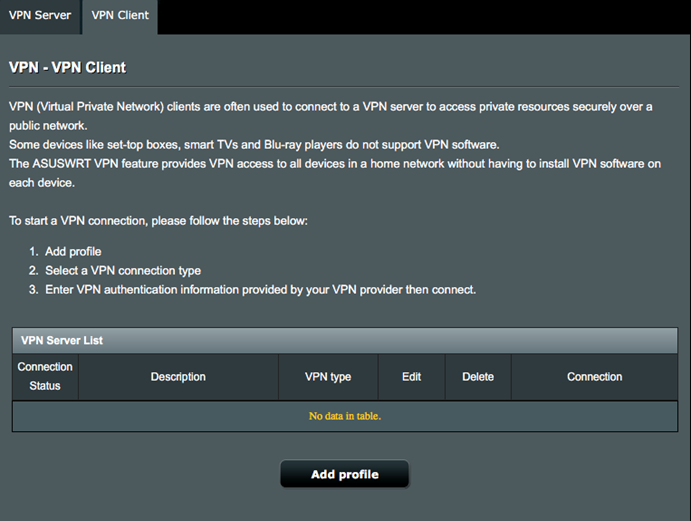
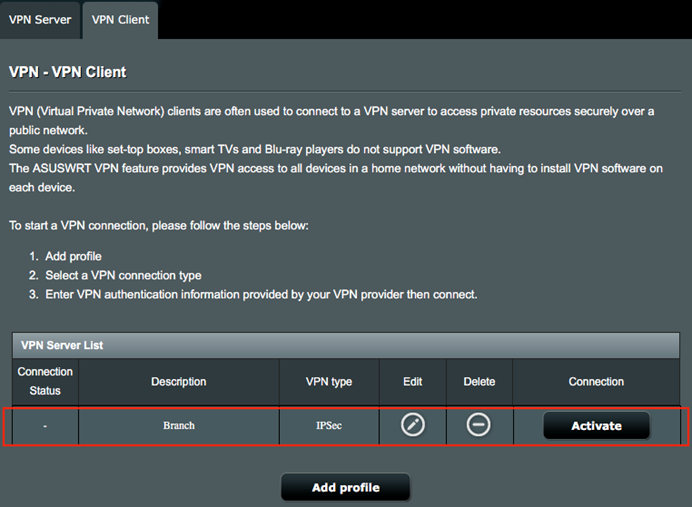
Configure Net-to-Net VPN Client
1. On VPN Client Gateway, make sure the WAN connection is working properly.
2. Go to VPN >> VPN Client and click Add Profile.
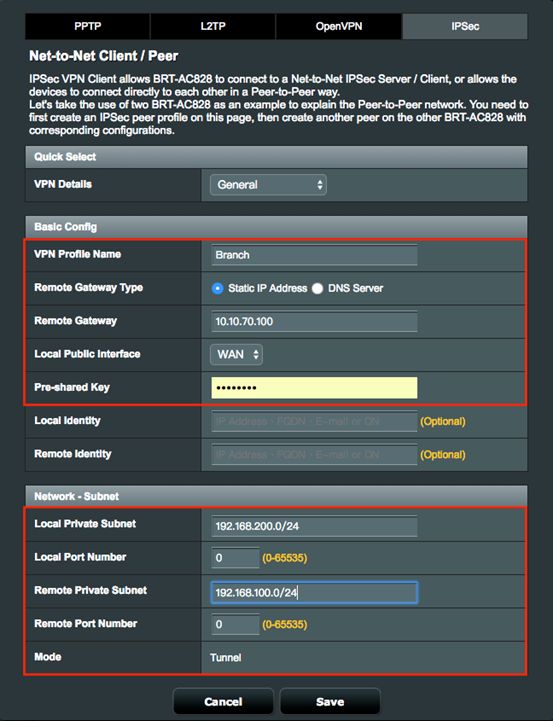
3. Click IPSec tab, and configure General settings below.
3.1 Define a VPN Profile Name.
3.2 Enter remote gateway IP address of IPSec VPN Server, 10.10.70.100.
3.2.1 Note: If DDNS is configured properly, you can enter FQDN (Fully Qualified Domain Name) instead of IP address.
3.3 Select the enabled WAN interface on Local Public Interface, which can be accessed from the Internet.
3.3.1 Note: If the IP address of the selected WAN is behind a NAT gateway, please configure Port forwarding or DMZ setting for the IP address.
3.4 Configure a Preshared Key to create a secure encrypted tunnel.
3.4.1 For example, enter iloveasus as Preshared key.
3.5 Define Local Private Subnet to communicate with Remote Subnet.
3.5.1 Local Private Subnet: 192.168.200.0/24
3.5.2 Remote VPN Client Subnet: 192.168.100.0/24
4. Configure Advanced settings on Net-to-Net VPN Client profile.
4.1 Select IKE version to create Net-to-Net VPN tunnel,
4.2 Select exchange mode for authentication information handshake.
4.2.1 Select Main Mode for multiple rounds encrypted information handshake.
4.2.2 Select Aggressive Mode for single round unencrypted information handshake.
4.2.3 Note: IKEv2 can only support Main Mode, check RFC 4306 for the details.
5. Click Save and go back to configuration page.
6. Click Activate button to enable the VPN profile

Connect to Net-to-Net VPN Server
1. Once the VPN Client is activated, the VPN connection should be connected successfully.
2. You are able to connect remote gateway from VPN client by entering the IP address of VPN gateway on browser and login to the administration web page.
3. Go to IPSec VPN Server, you can then check detailed connection status from Connection Status.
Extension Use Cases
Configure Net-to-Net VPN with a Domain Name
1. If DDNS or DNS is configured on a remote VPN gateway, you can use a FQDN (Fully Qualified Domain Name) instead of the IP address.
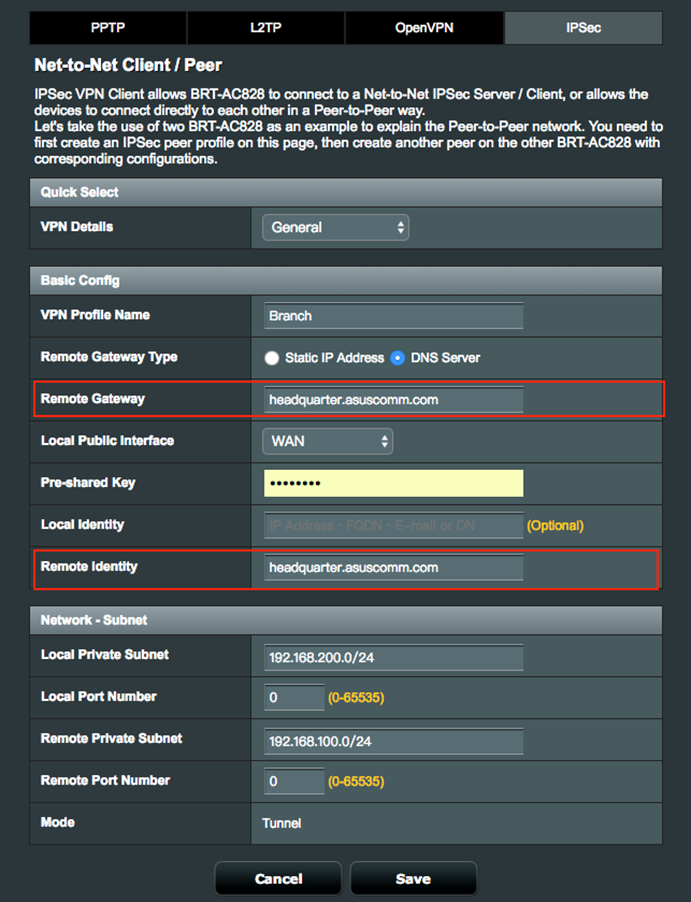
1.1 Enter your Domain Name (Example: headquarter.asuscomm.com), in the Local Identity field of IPSec VPN Server settings.
1.2 Enter your Domain Name (Example: headquarter.asuscomm.com), in the Remote Gateway and Remote Identity fields of IPSec VPN client settings.
Configure Multiple Net-to-Net VPN Clients
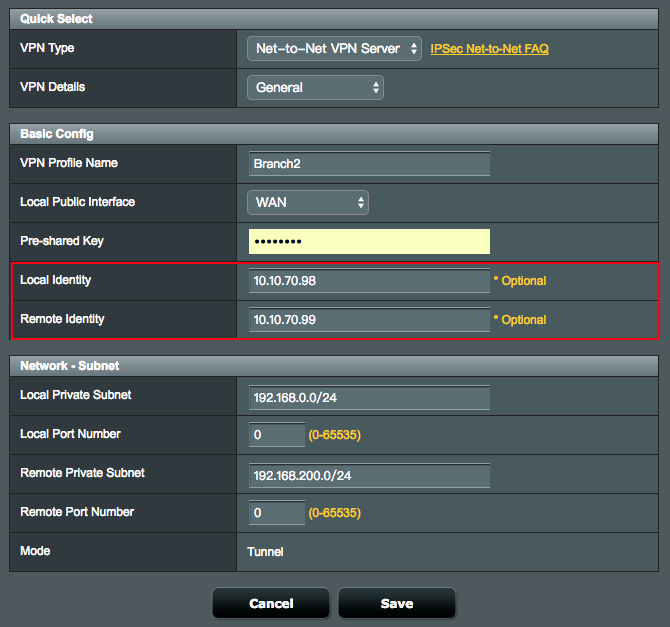
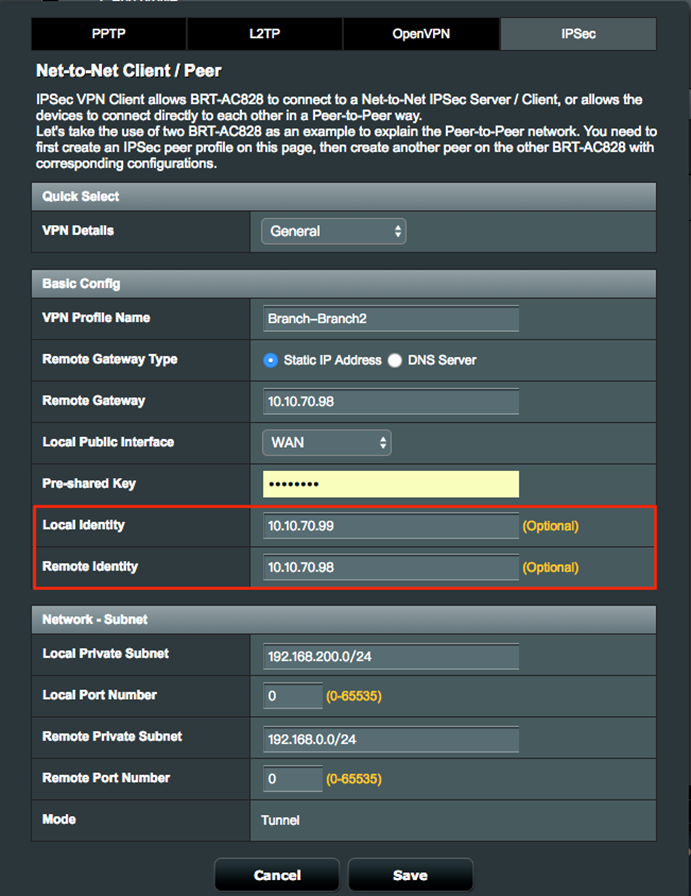
1. If more than one IPSec VPN tunnels need to be created on the Net-to-Net VPN Client. Enable remote site VPN connection to differentiate these VPN tunnels. The local identity and remote identity are required for this step.
2. For example, if you want to create new a VPN tunnel with Offices Branch and Branch2. The newly created connection settings need to have the Local Identity and Remote Identity fields filled-in on both sites. This Local Identity value must match the value given for the Remote Identity on the Client (Peer) site, and vice versa.
3. On your Net-to-Net VPN Server, you have to enter the Local Identity and Remote Identity for the new VPN connection.
3.1 Note: If the server is configured for multiple clients to connect, the Local and Remote ID's can be left blank.
4. On the Net-to-Net VPN Client, you also have to enter the Local Identity and Remote Identity for the new VPN connection.
4.1 Note: If the remote server is configured for multiple clients to connect, the Local Identify should be left empty on client configuration.
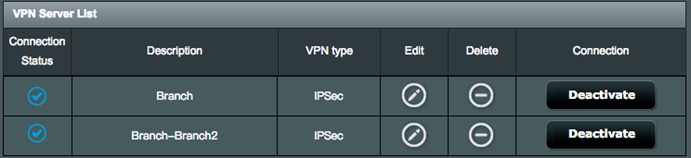
5. Click Save and Activate to enable the additional VPN connections
Configure Net-to-Net VPN with Multiple Internal Subnet
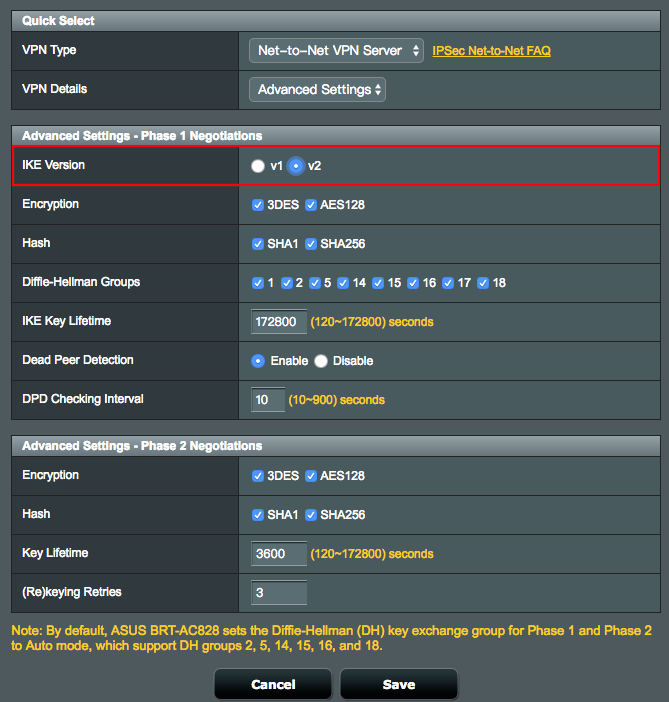
1. Multiple range networks over a site to site VPN are only available on IKEv2.
2. On the Net-to-Net VPN Server and Net-to-Net VPN Client, select IKEv2 under Advanced Settings
2.1 Net-to-Net VPN Server
2.2 Net-to-Net VPN Client

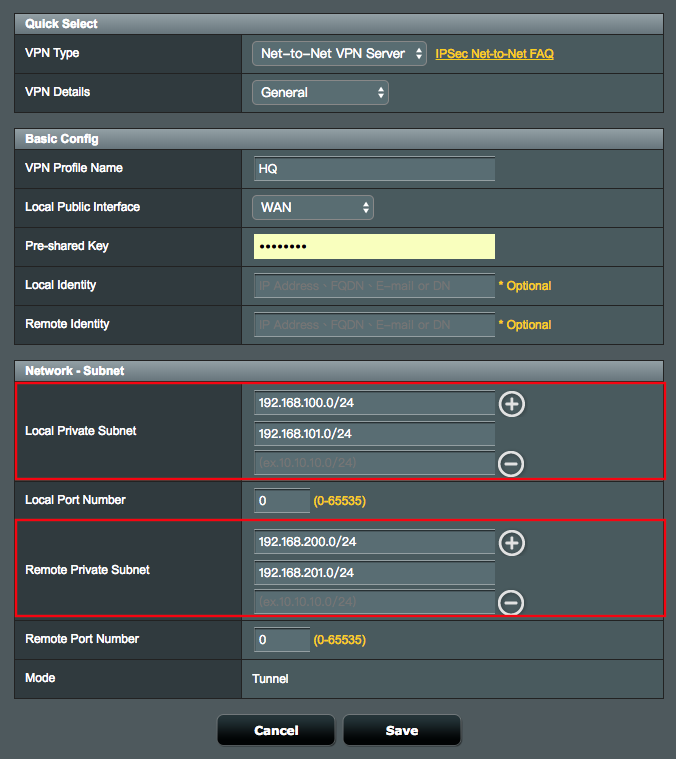
3. Go back to General, and then you can add multiple network ranges.
3.1 Net-to-Net VPN Server
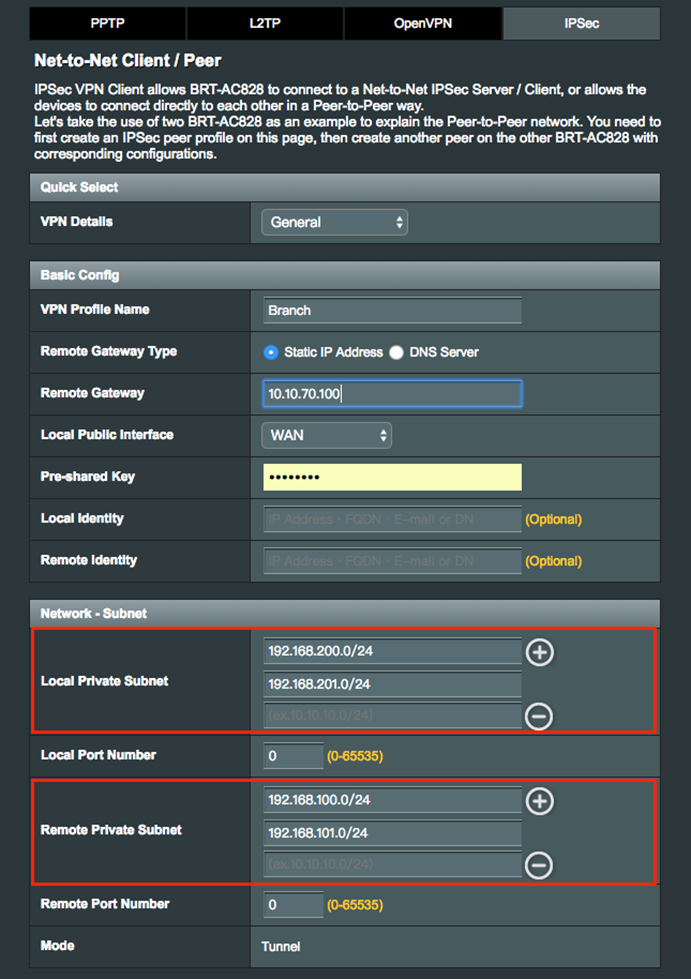
3.2 Net-to-Net IPSec VPN Client
Configure Net-to-Net VPN with split tunnel
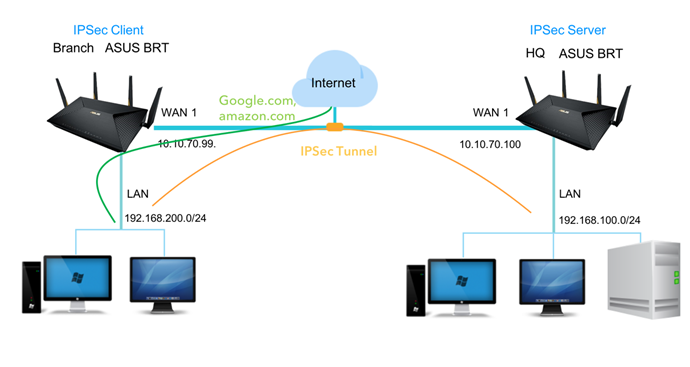
1. Net-to-Net IPSec VPN is a "split tunnel" natively, only the traffic defined on the Local Private Subnet and Remote Private Subnet would go into the tunnel. Other none-specified traffics (ex. Google.com, amazon.com) will send directly to the Internet from the branch ASUS BRT device.
How to get the (Utility / Firmware)?
You can download the latest drivers, software, firmware and user manuals in the ASUS Download Center.
If you need more information about the ASUS Download Center, please refer this link.