[Notebook] ScreenPad Plus with ScreenXpert 3 - Introduction
Designed to give you the ultimate edge in workflow efficiency, the unique full-width ASUS ScreenPad™ Plus secondary touchscreen works seamlessly with the main display. The interactive ScreenPad Plus enhances your productivity and allows for endless possibilities using an enhanced collection of handy quick controls for intuitive interactions between the main display and ScreenPad Plus. Now you can drag any discrete app or in-app toolbar onto your ScreenPad Plus to give you more room to work on the main display.
- System Requirement
- Main Screen and ScreenPad Plus
- Open ScreenPad Plus
- App Switcher
- Brightness
- App Navigator
- Task Swap
- Camera
- Microphone
- Keyboard Lock
- Show Desktop
- Phone Call
- TouchPad
- Launcher
- Settings
- Install & Uninstall ScreenXpert
1. ScreenPad Xpert required driver and App version requirements, and how to download and install.
- ScreenXpert UWP: v3.0.1.0 (Download or upgrade in the Microsoft store)
- ScreenXpert Driver: v2.0.30.0 (Download or upgrade in the MyASUS)
- ASUS Control Panel Toolkit: v1.0.14.0 (Download or upgrade in the MyASUS) (For Control Panel Setting)
- ASUS System Control interface V3: v3.0.24.0 (Download or upgrade in the MyASUS)
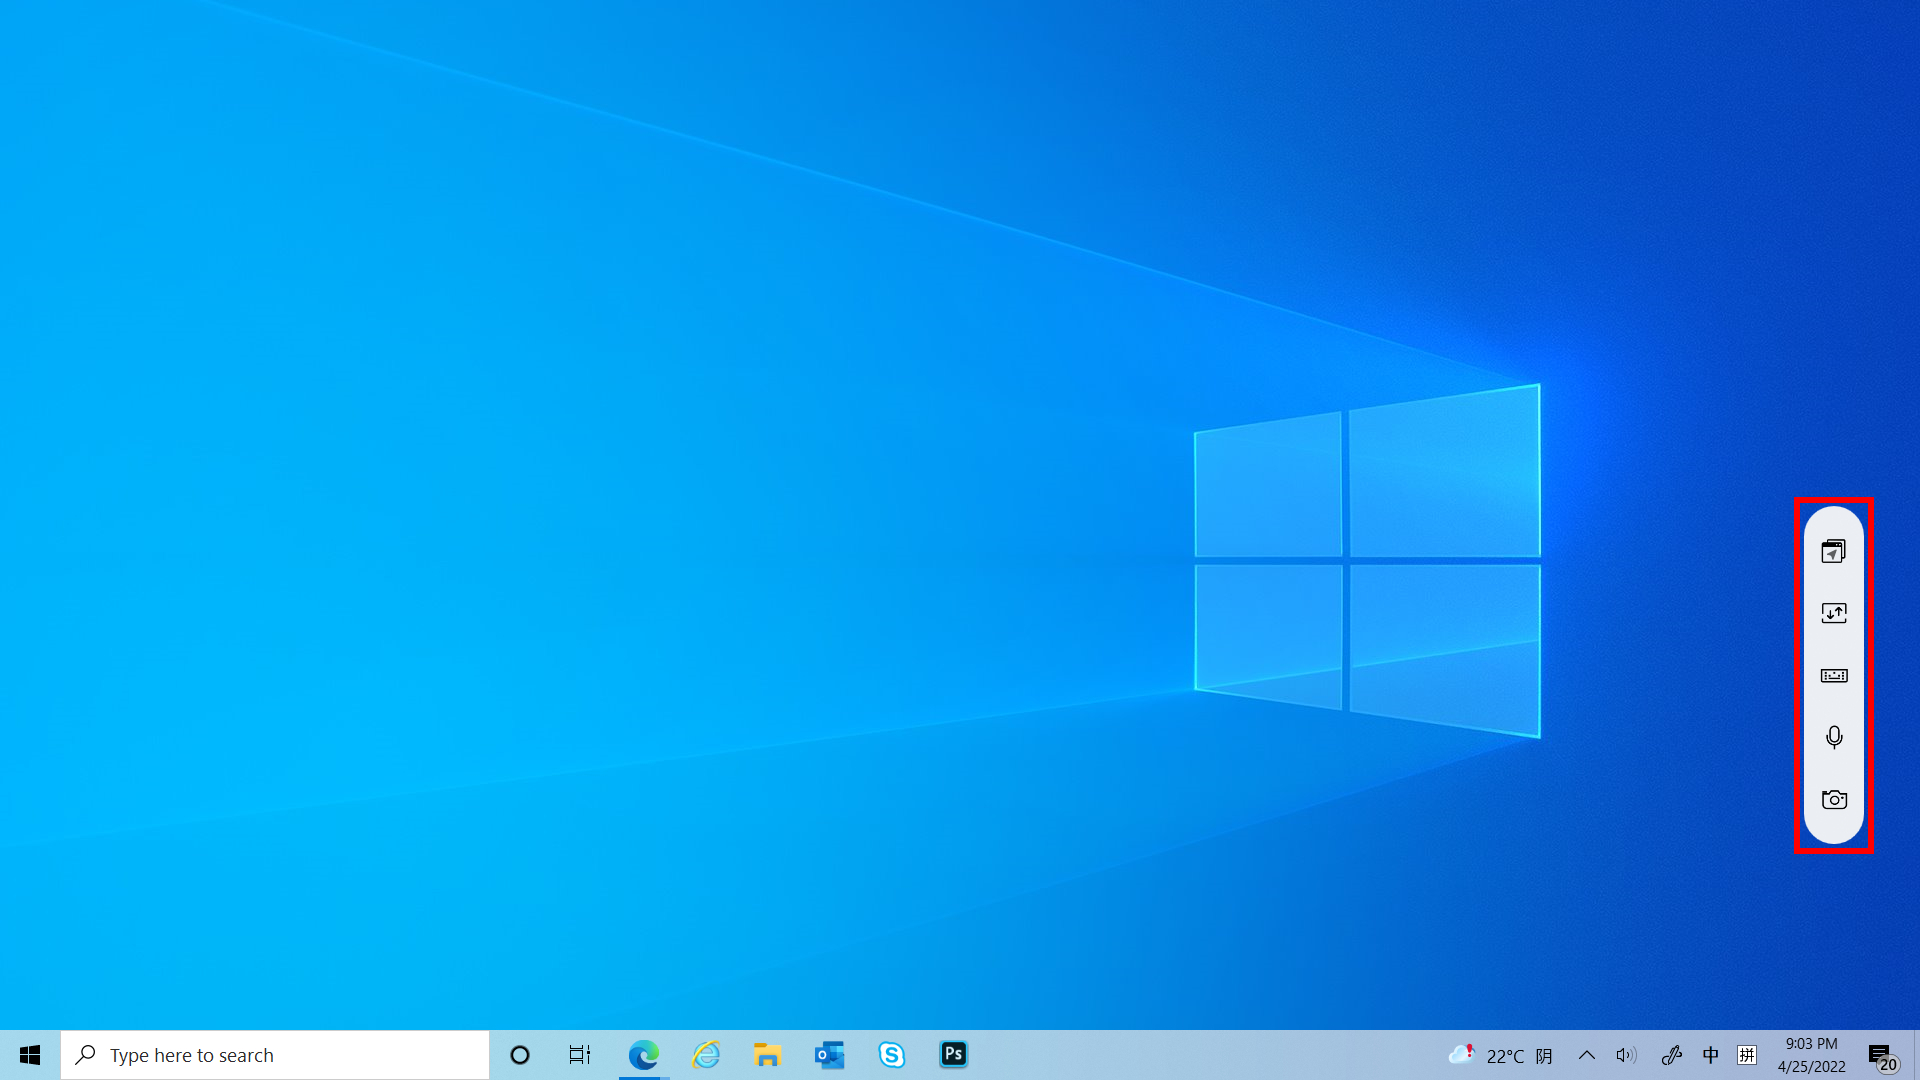
2. Main Screen and ScreenPad Plus
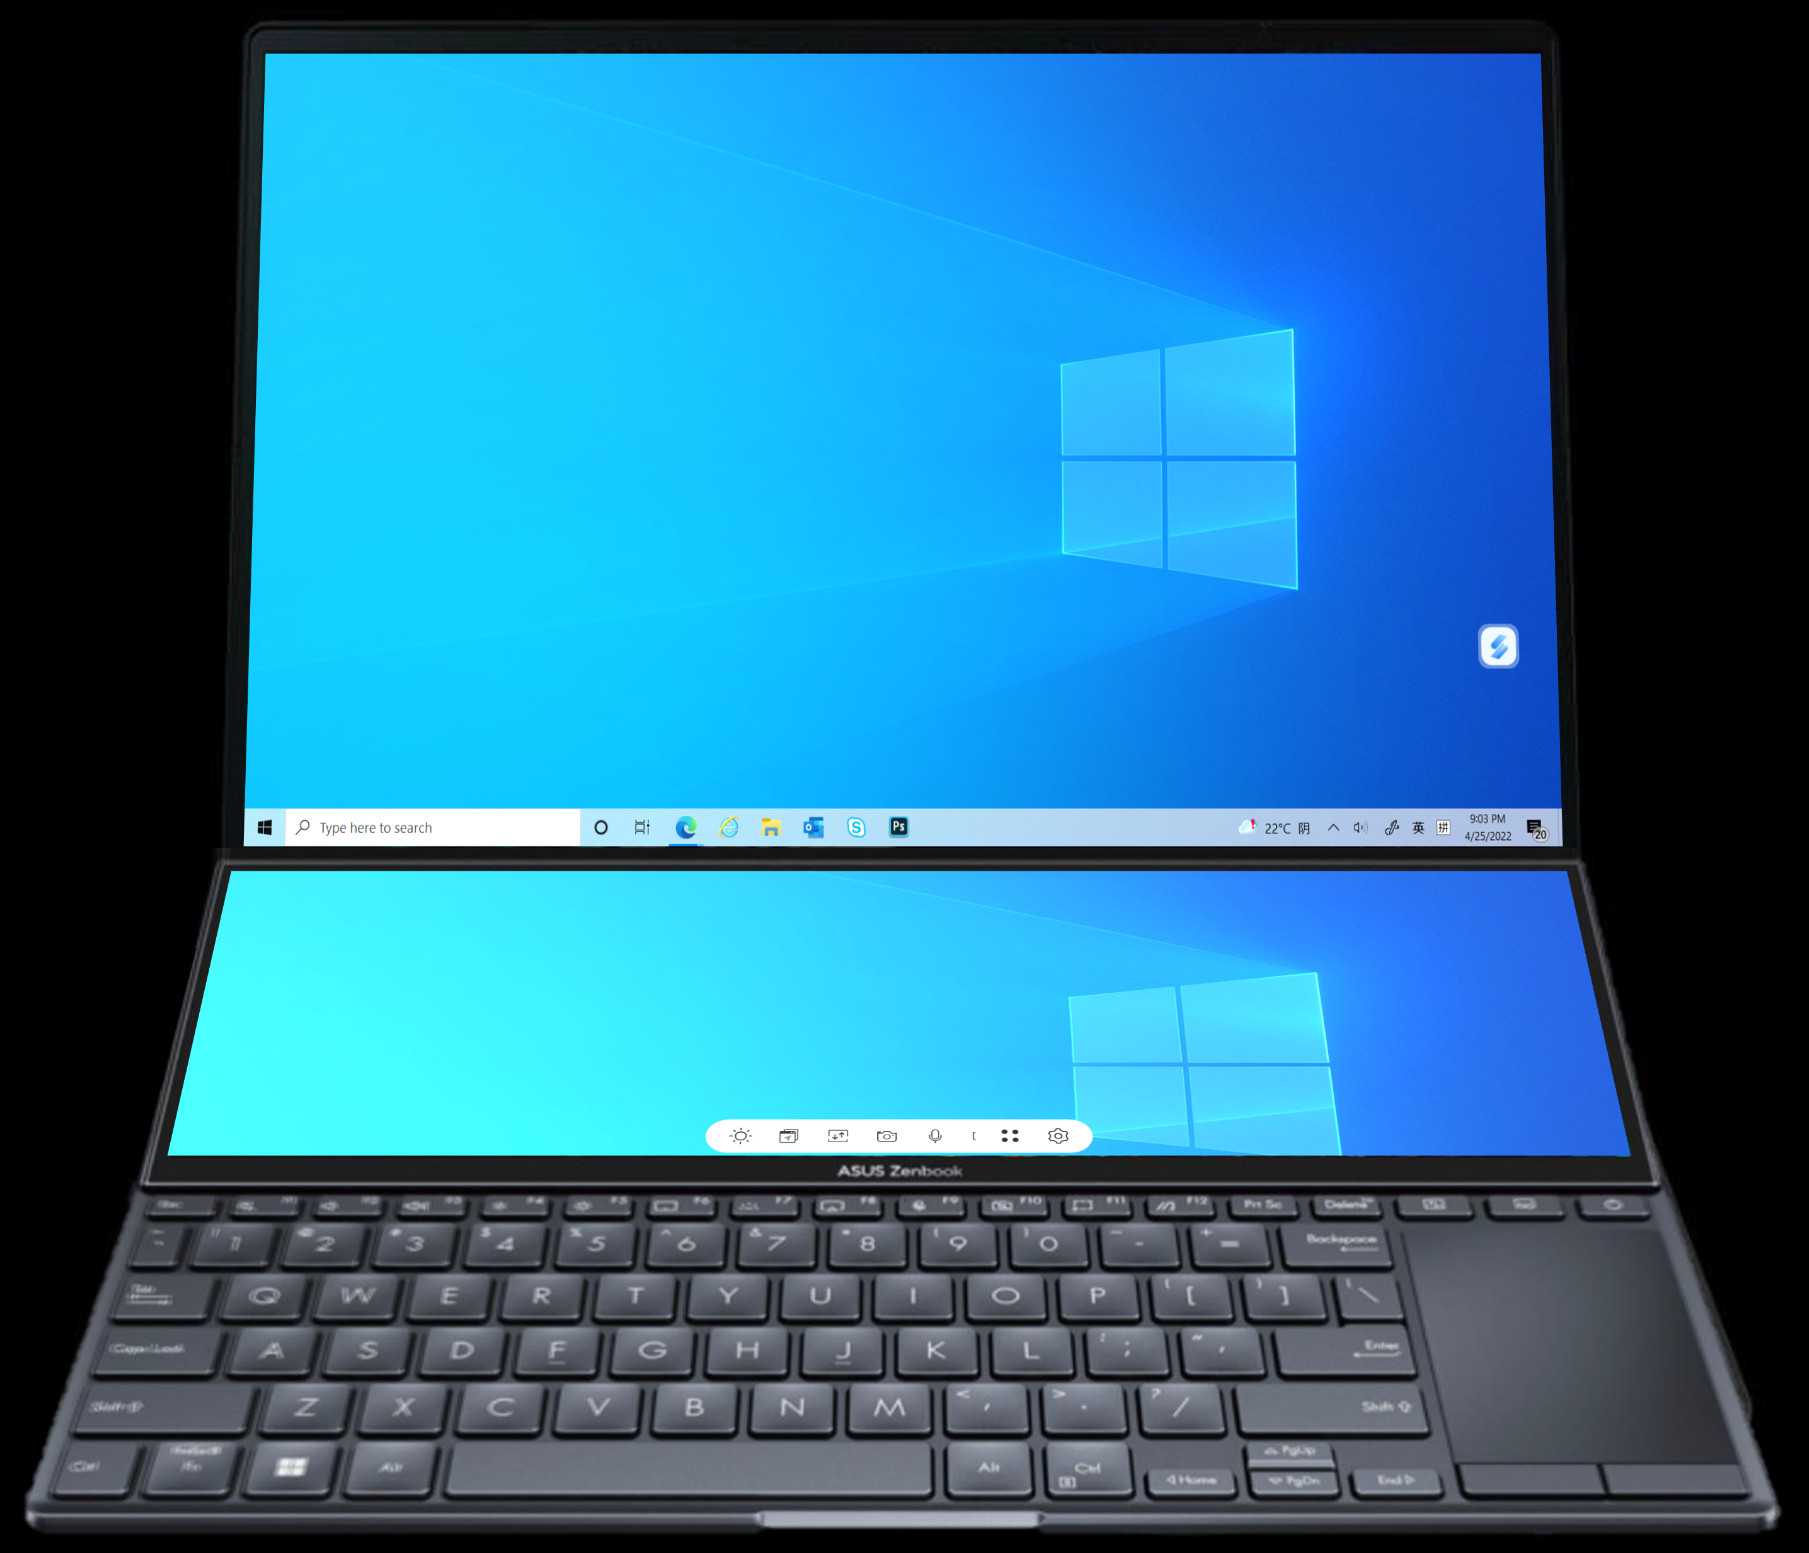
From left to right: Brightness, App Navigator, Task Swap, Camera, Microphone, Keyboard Lock, Show Desktop, Link to MyASUS, TouchPad, Utilities, Settings.

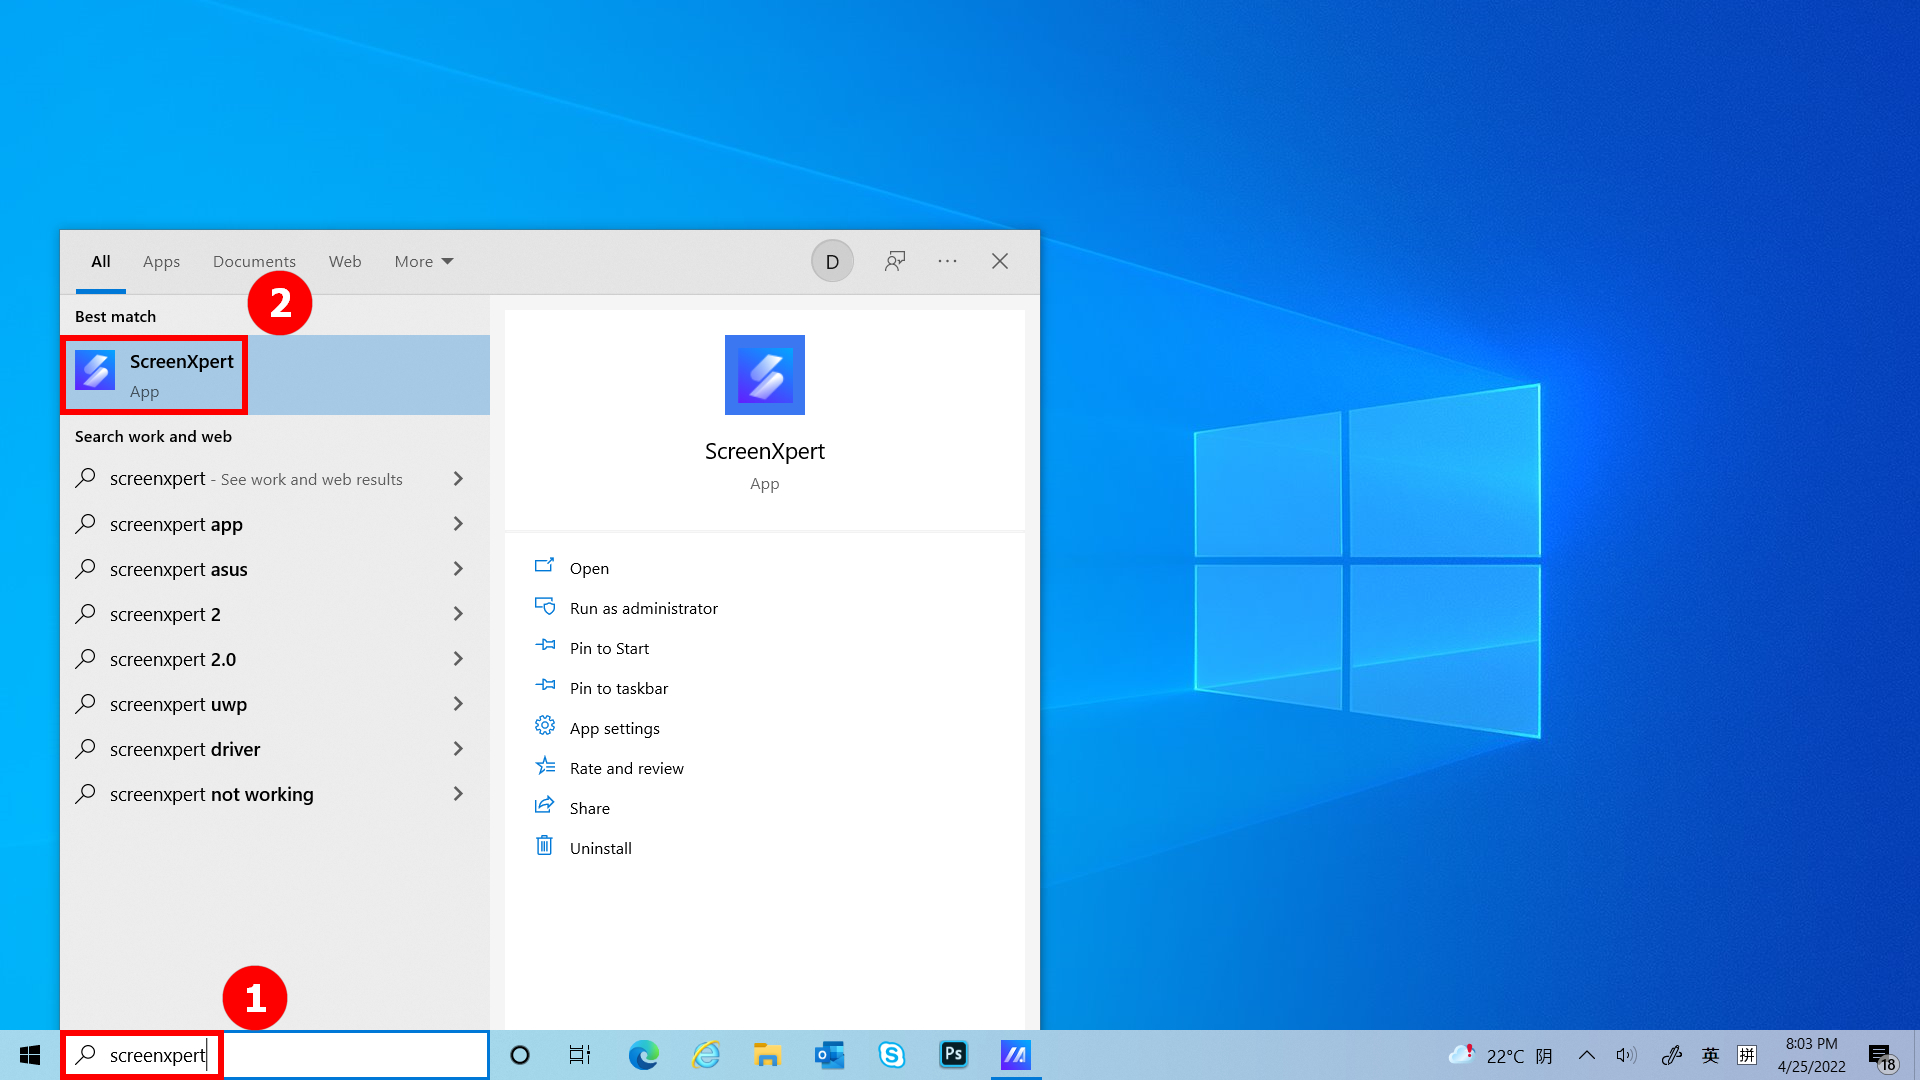
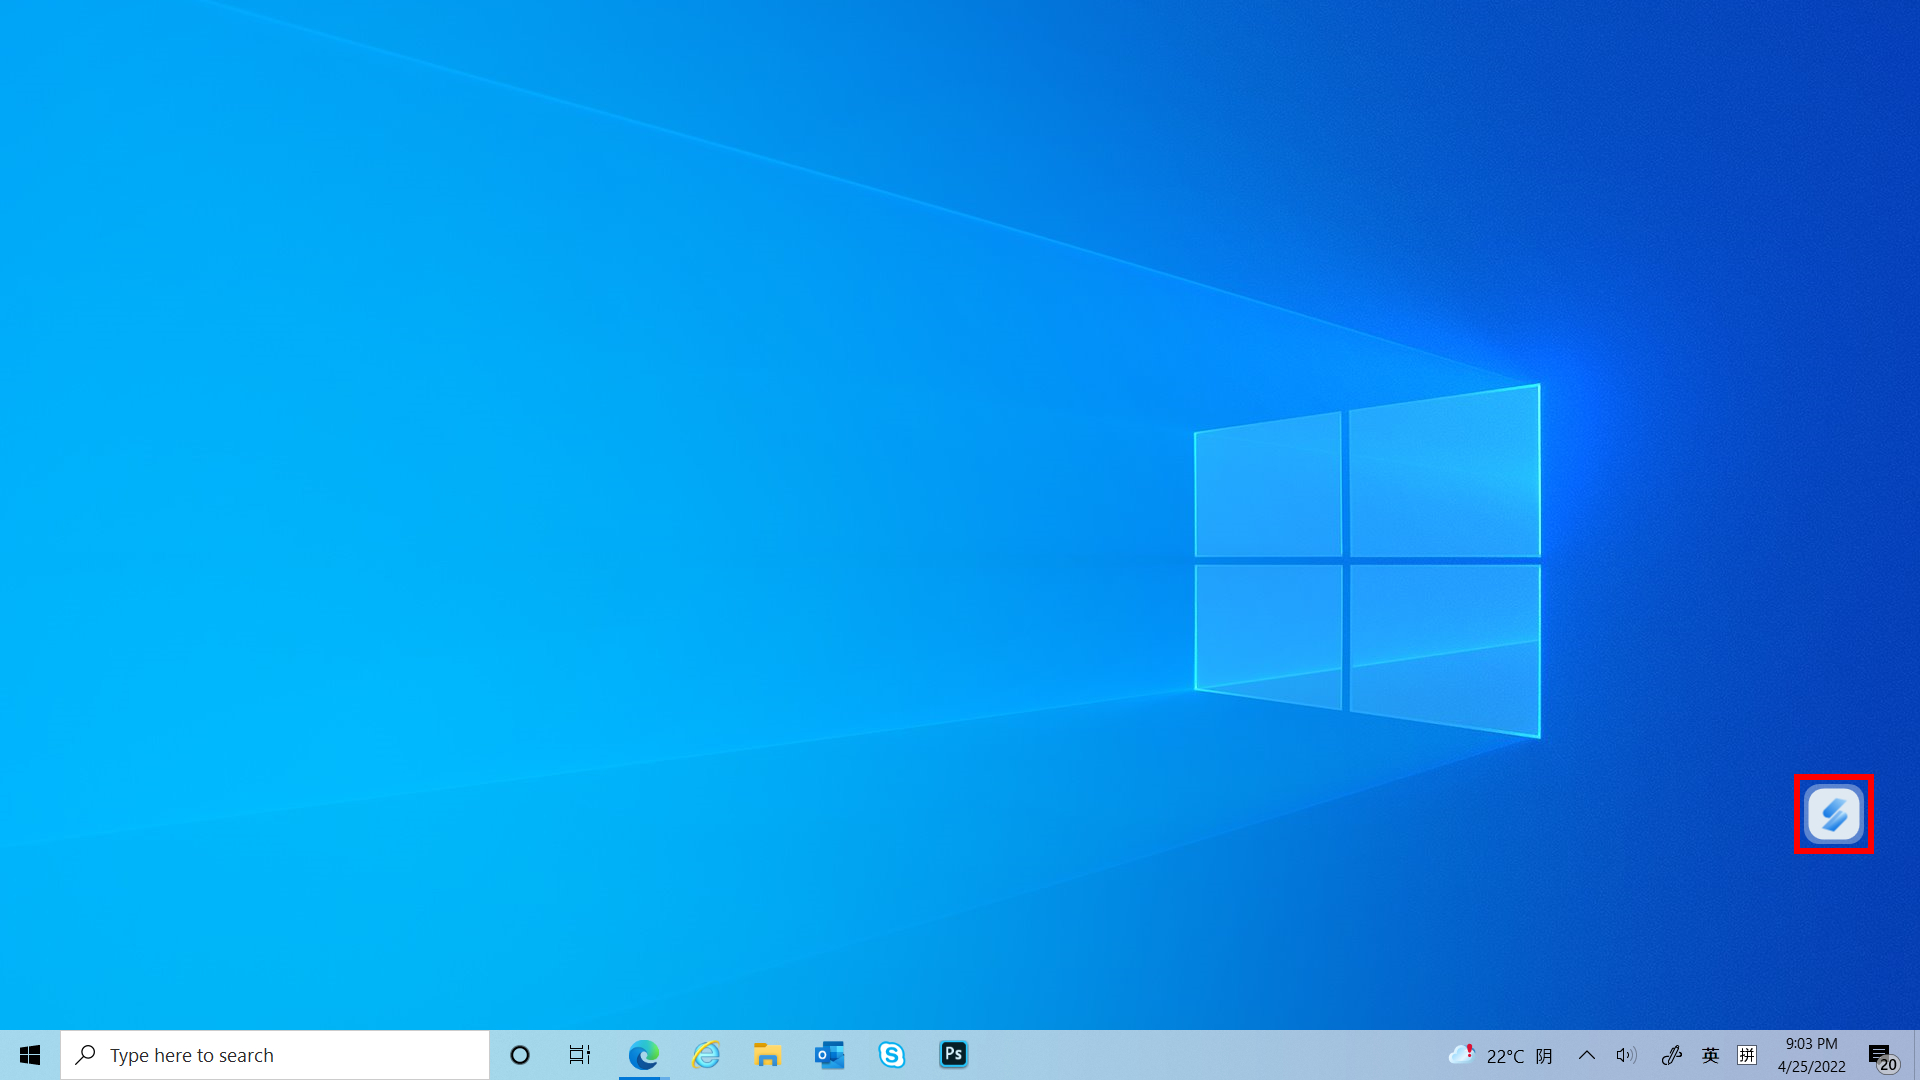
(1) Enter ①[ScreenXpert] in the search bar in the lower left corner of the desktop. Click ②[ScreenXpert], and ScreenPad Plus will activate.
(1) When you drag the App window on the Main screen, ①[Screen Markings] will display and allow you to confirm the location of the screen. The ②[App Switcher] menu function is also displayed, which contains Screen 1, Screen 2, Screen 3 and ViewMax icons. (In the example, the computer has an extend screen)
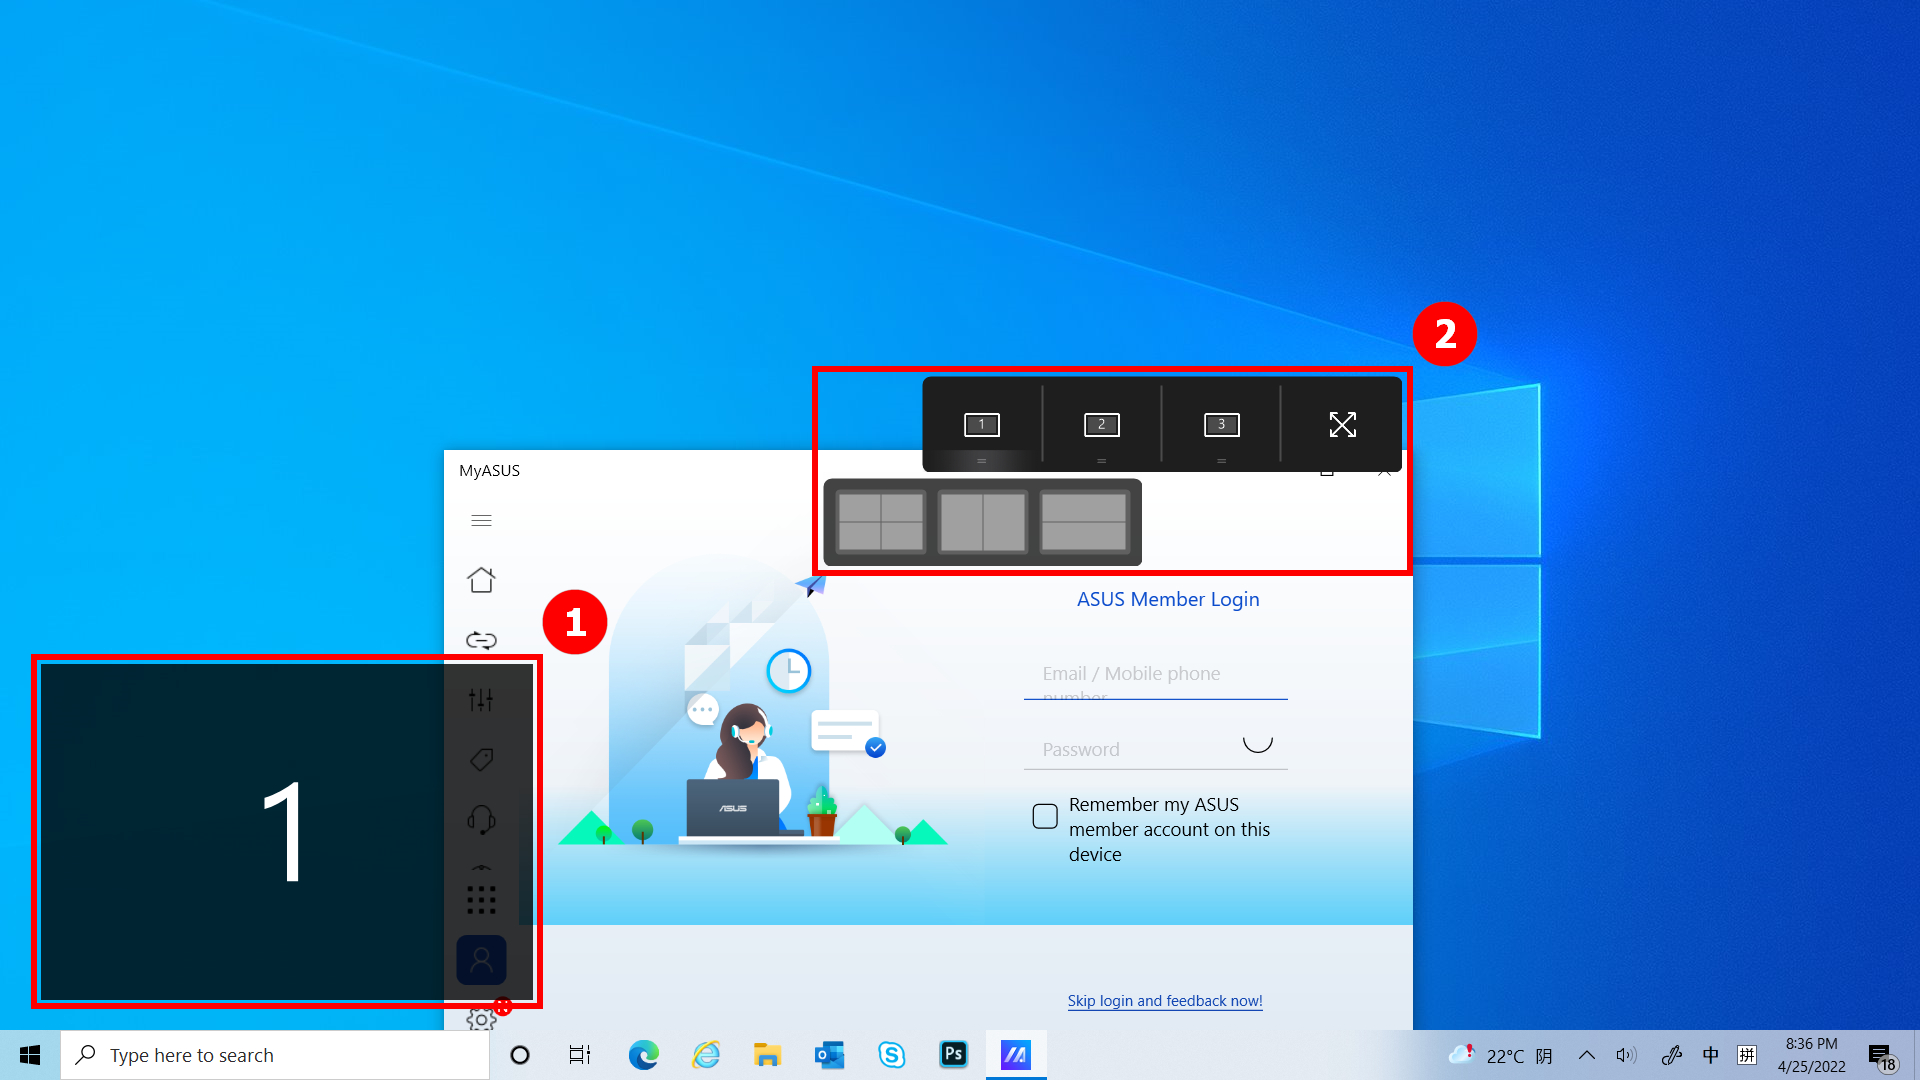
(2) ScreenXpert supports interaction between screens. When you drag a window on the desktop, the [App Switcher] icon appears. If you drag the window to ①[Screen], the window will be displayed in full screen in Screen. If you drag the window to ②[ViewMax], the window will be displayed in full screen on Main Screen and Screen Pad Plus.
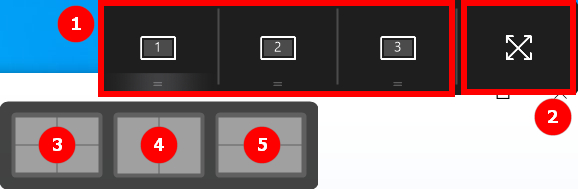
- Drag the mouse to the ③, and the App window will display within screen 1 to occupy a quarter of the screen.
- Drag the mouse to the ④, and the App window will display within screen 1 to occupy one-half of the left and right of the screen.
- Drag the mouse to the ⑤, and the App window will display within screen 1 to occupy one-half of the top and bottom of the screen.
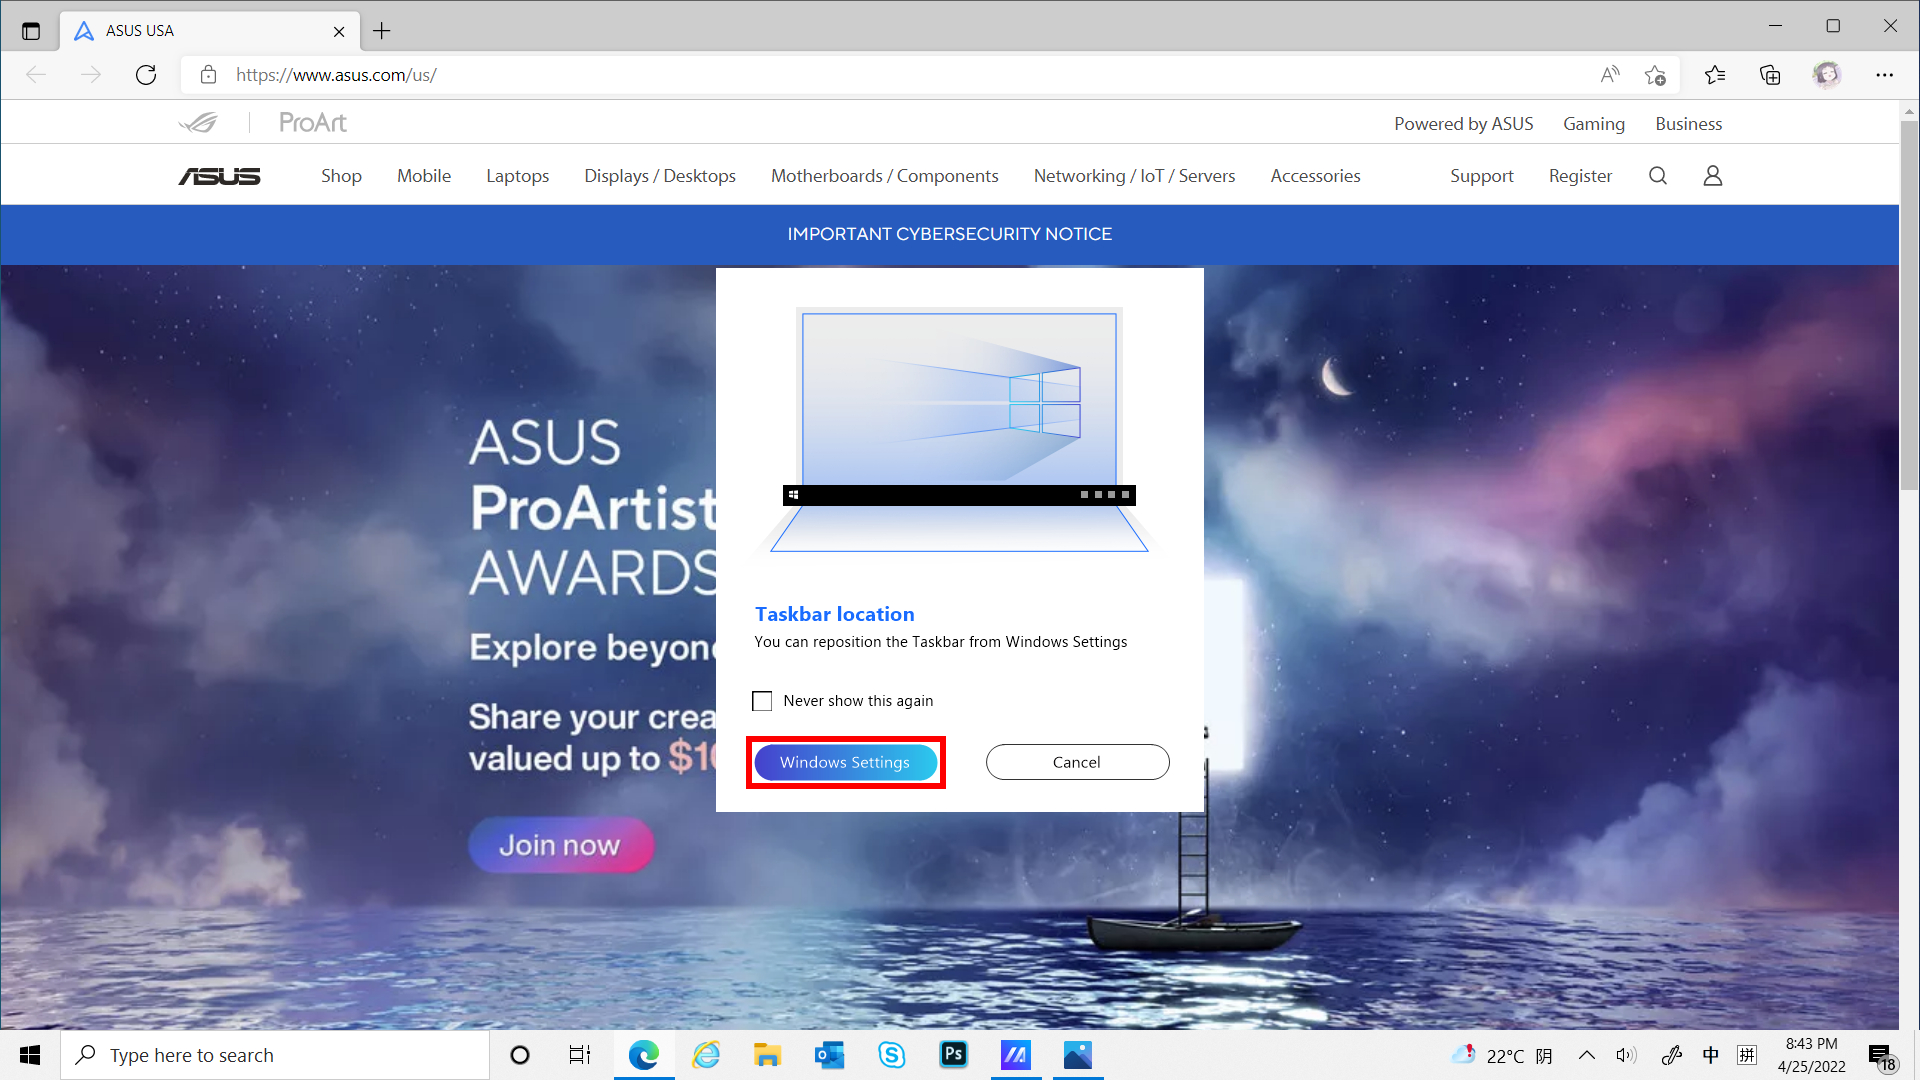
(3) Drag the window to [ViewMax], the window will be displayed in full screen on Main Screen and Screen Pad Plus. The Taskbar Location pop-up window will appear, click [Windows Settings] to quickly modify the Taskbar.
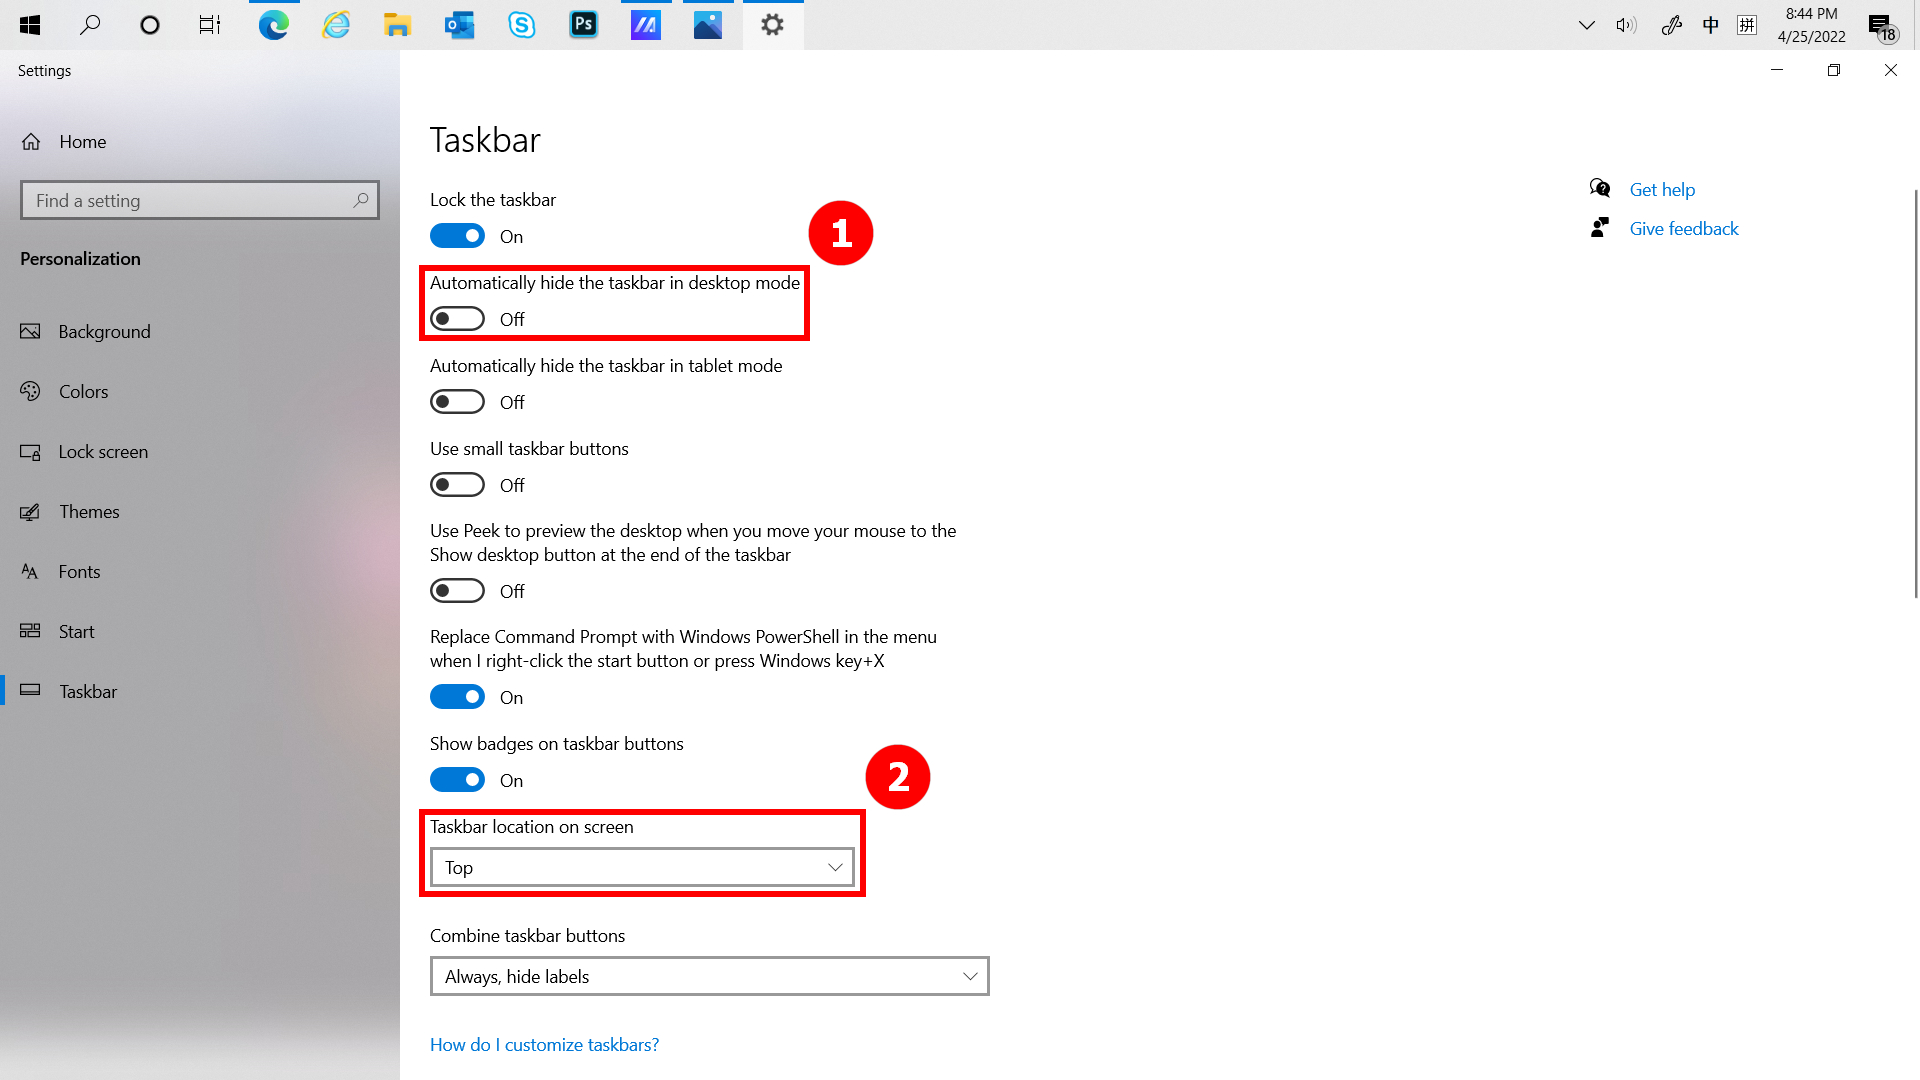
(4) You can modify the location of the Taskbar in ①[Automatically hide the taskbar in desktop mode] or ②[Taskbar location on screen] to improve your experience when using the ViewMax feature.
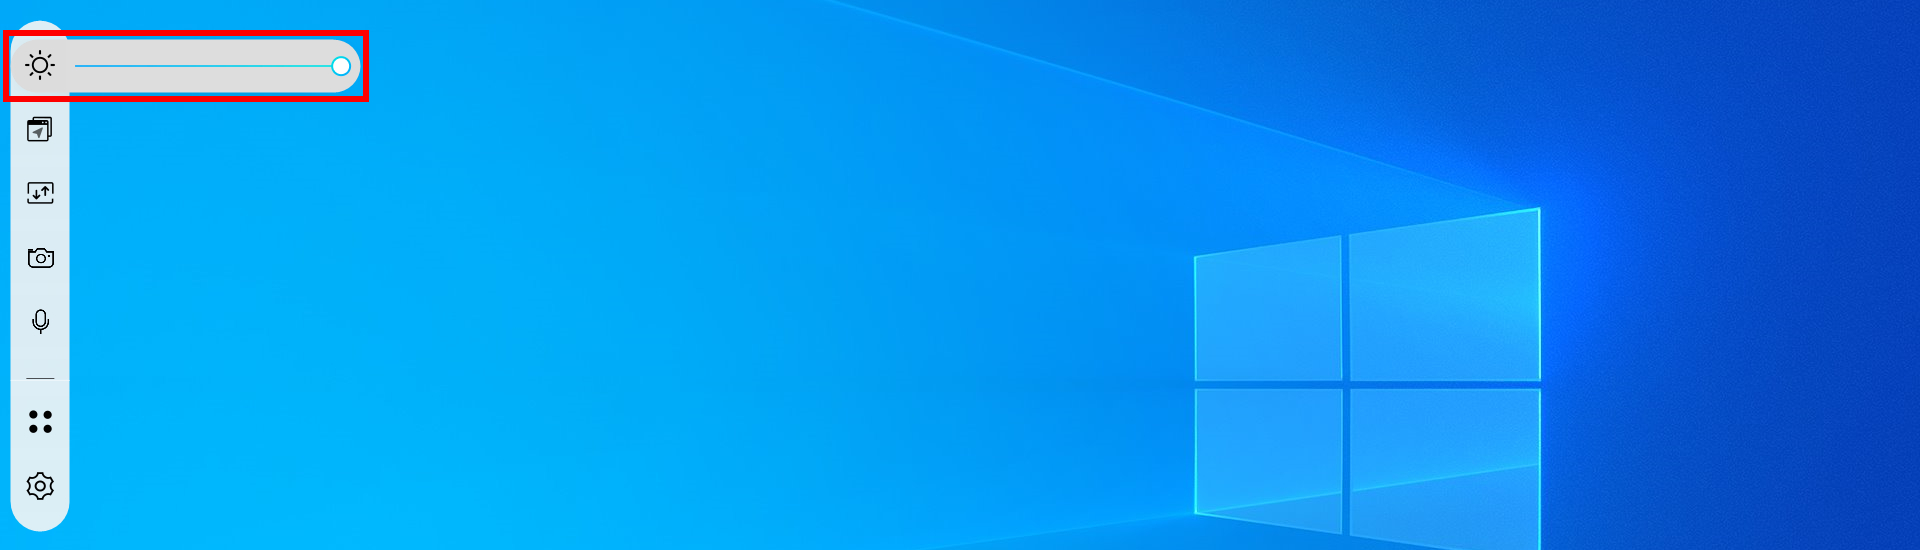
Click Brightness to quickly adjust the brightness of the Screenpad Plus.
(1) When you have multiple windows open on your computer and want to quickly switch windows between different screens, use App Navigator function and click  [App Navigator]. When App Navigator is opened, ①[Area] is the area marked by the screen in the computer, and ②[Area] is the window displayed on the screen.
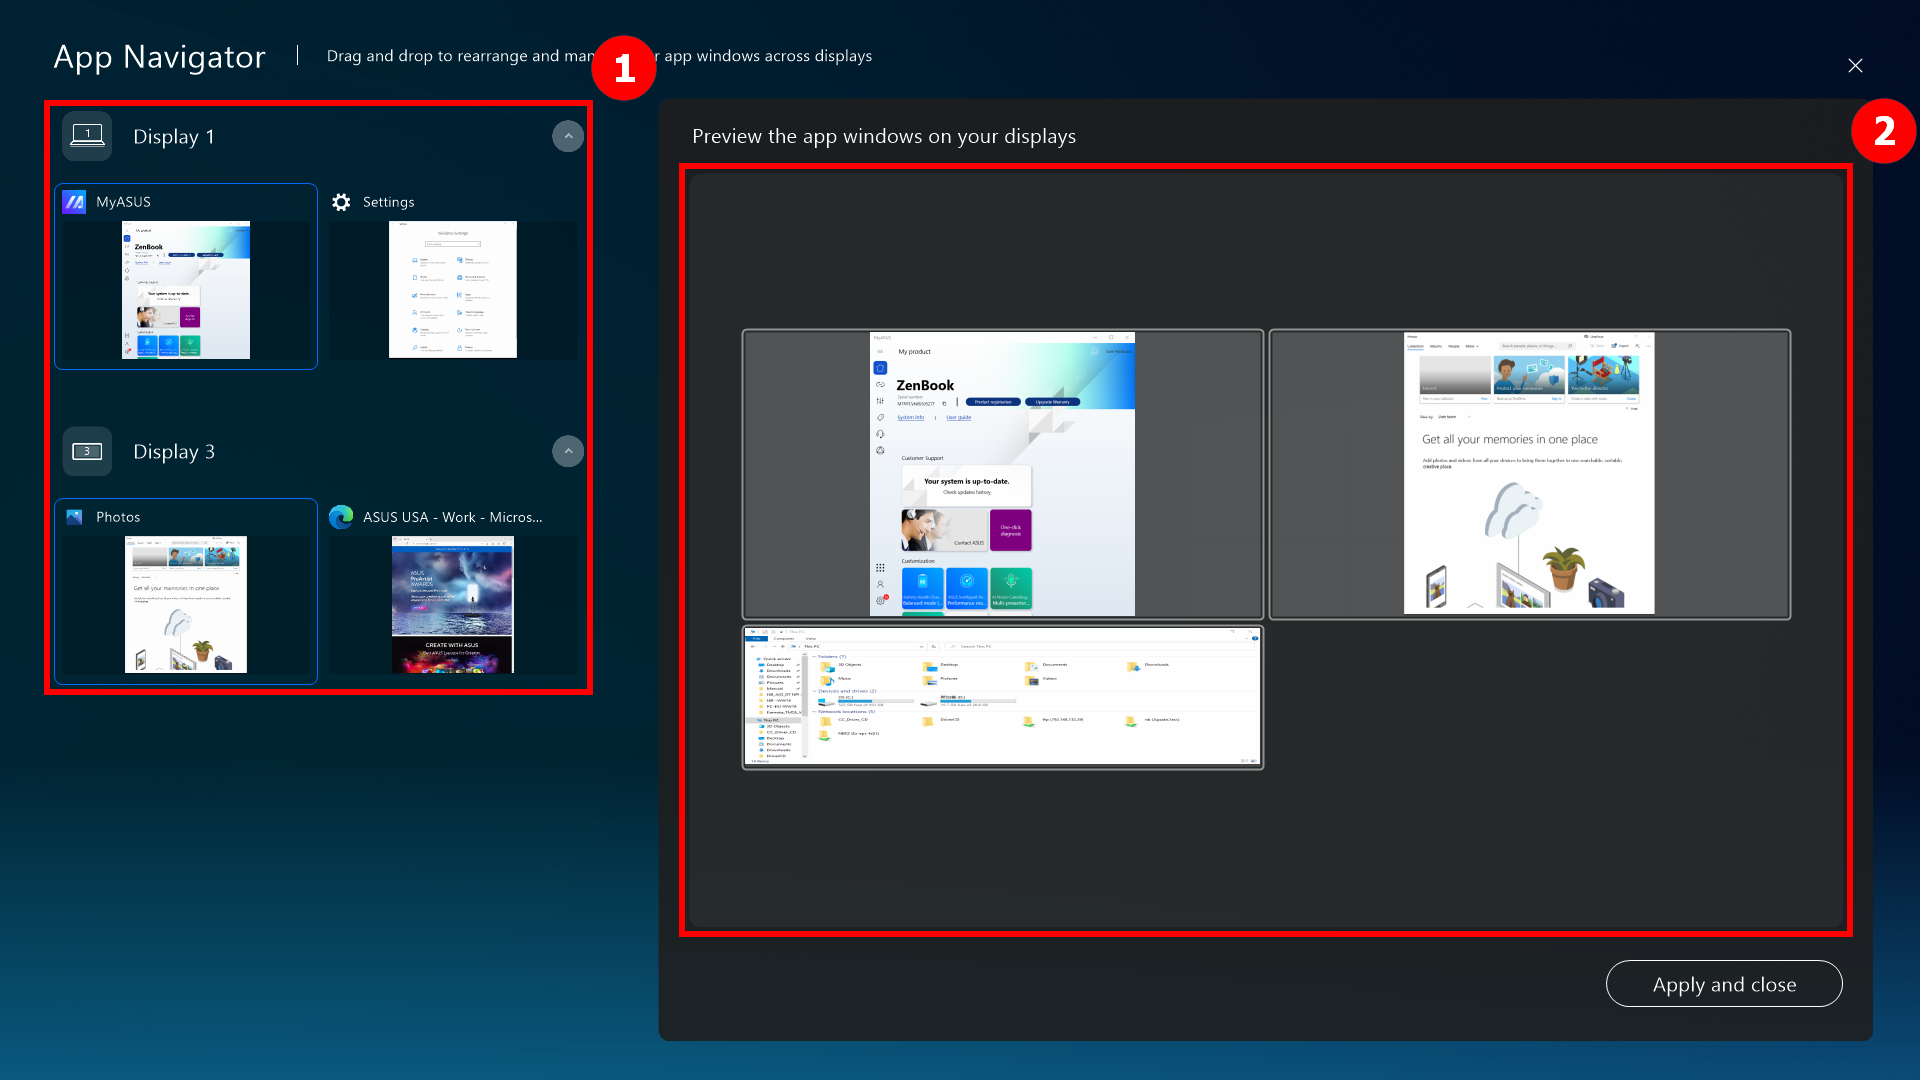
(2) Drag ③[Window] displayed in [Screen 2] to [Screen 1].
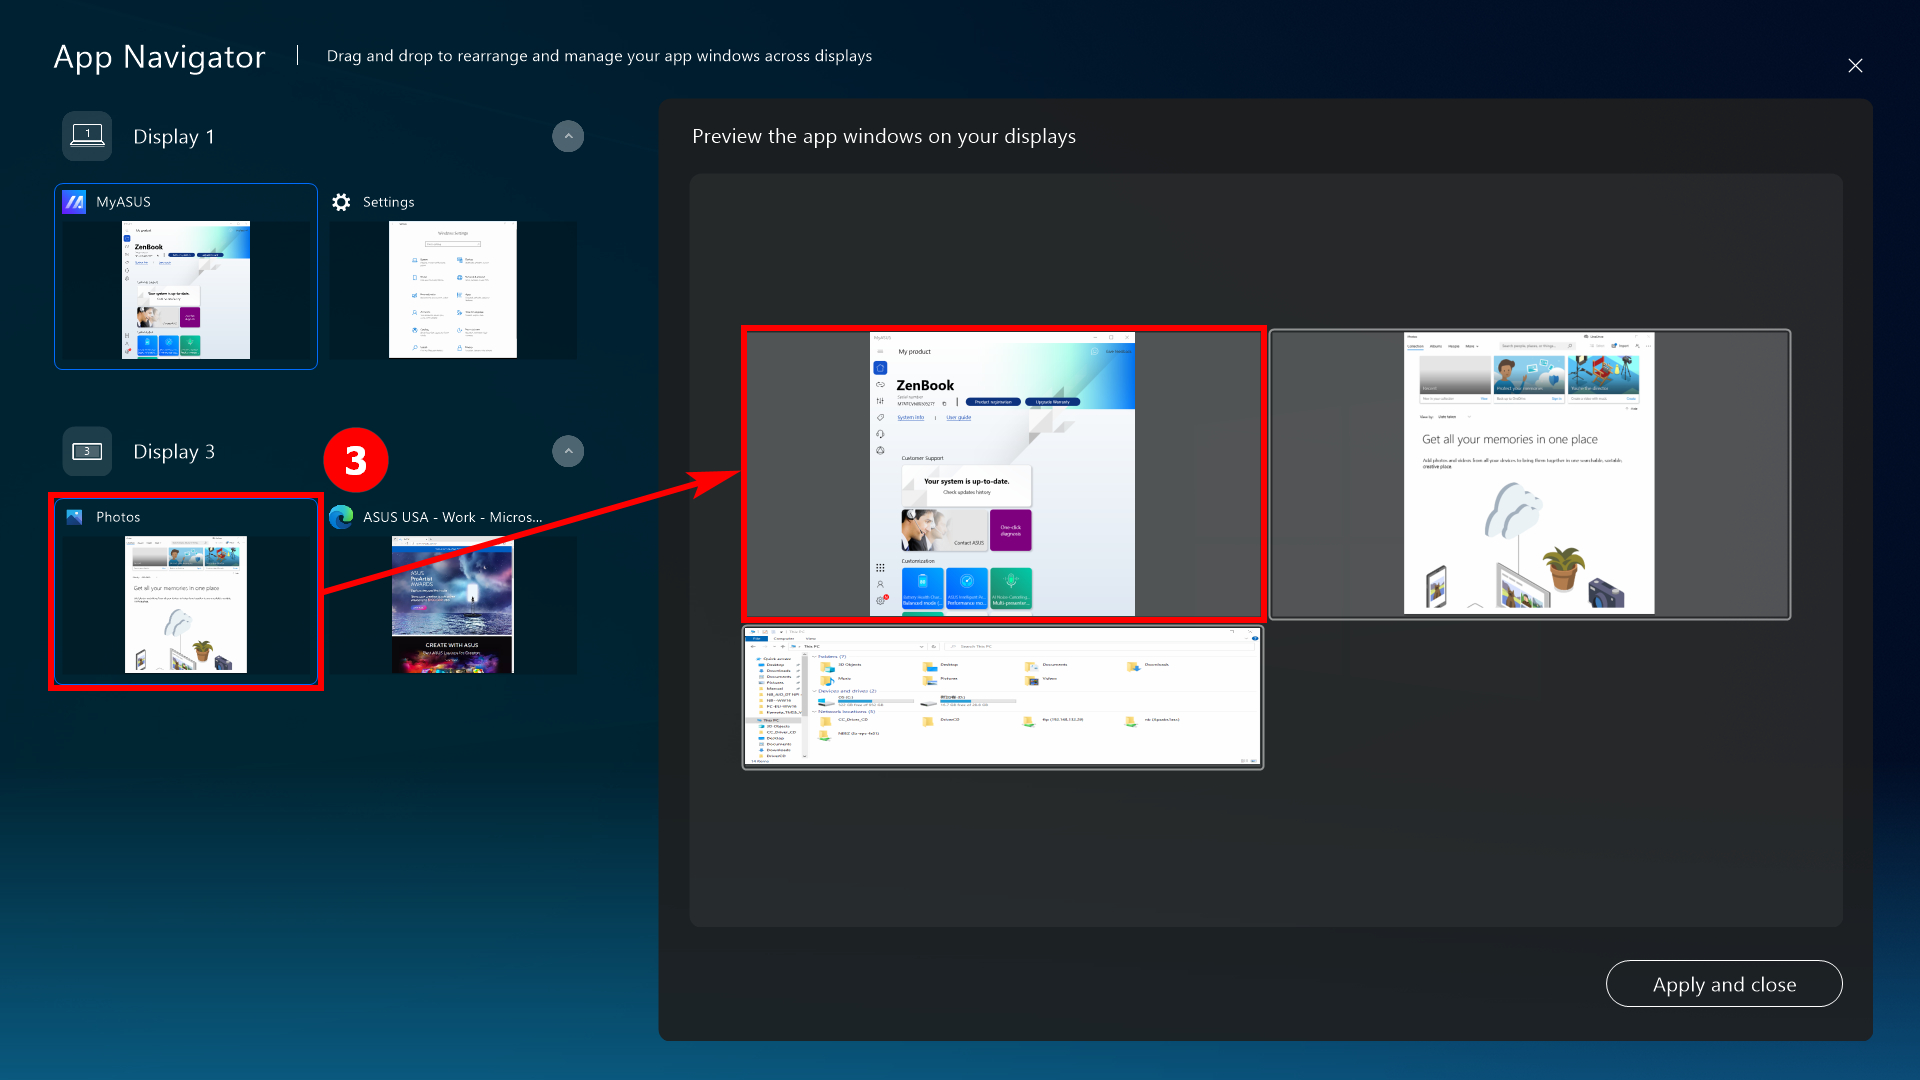
(3) The ⑤[window] is already displayed on the front of ④[Screen 1]. Click ⑤[Apply and close] to close App Navigator.
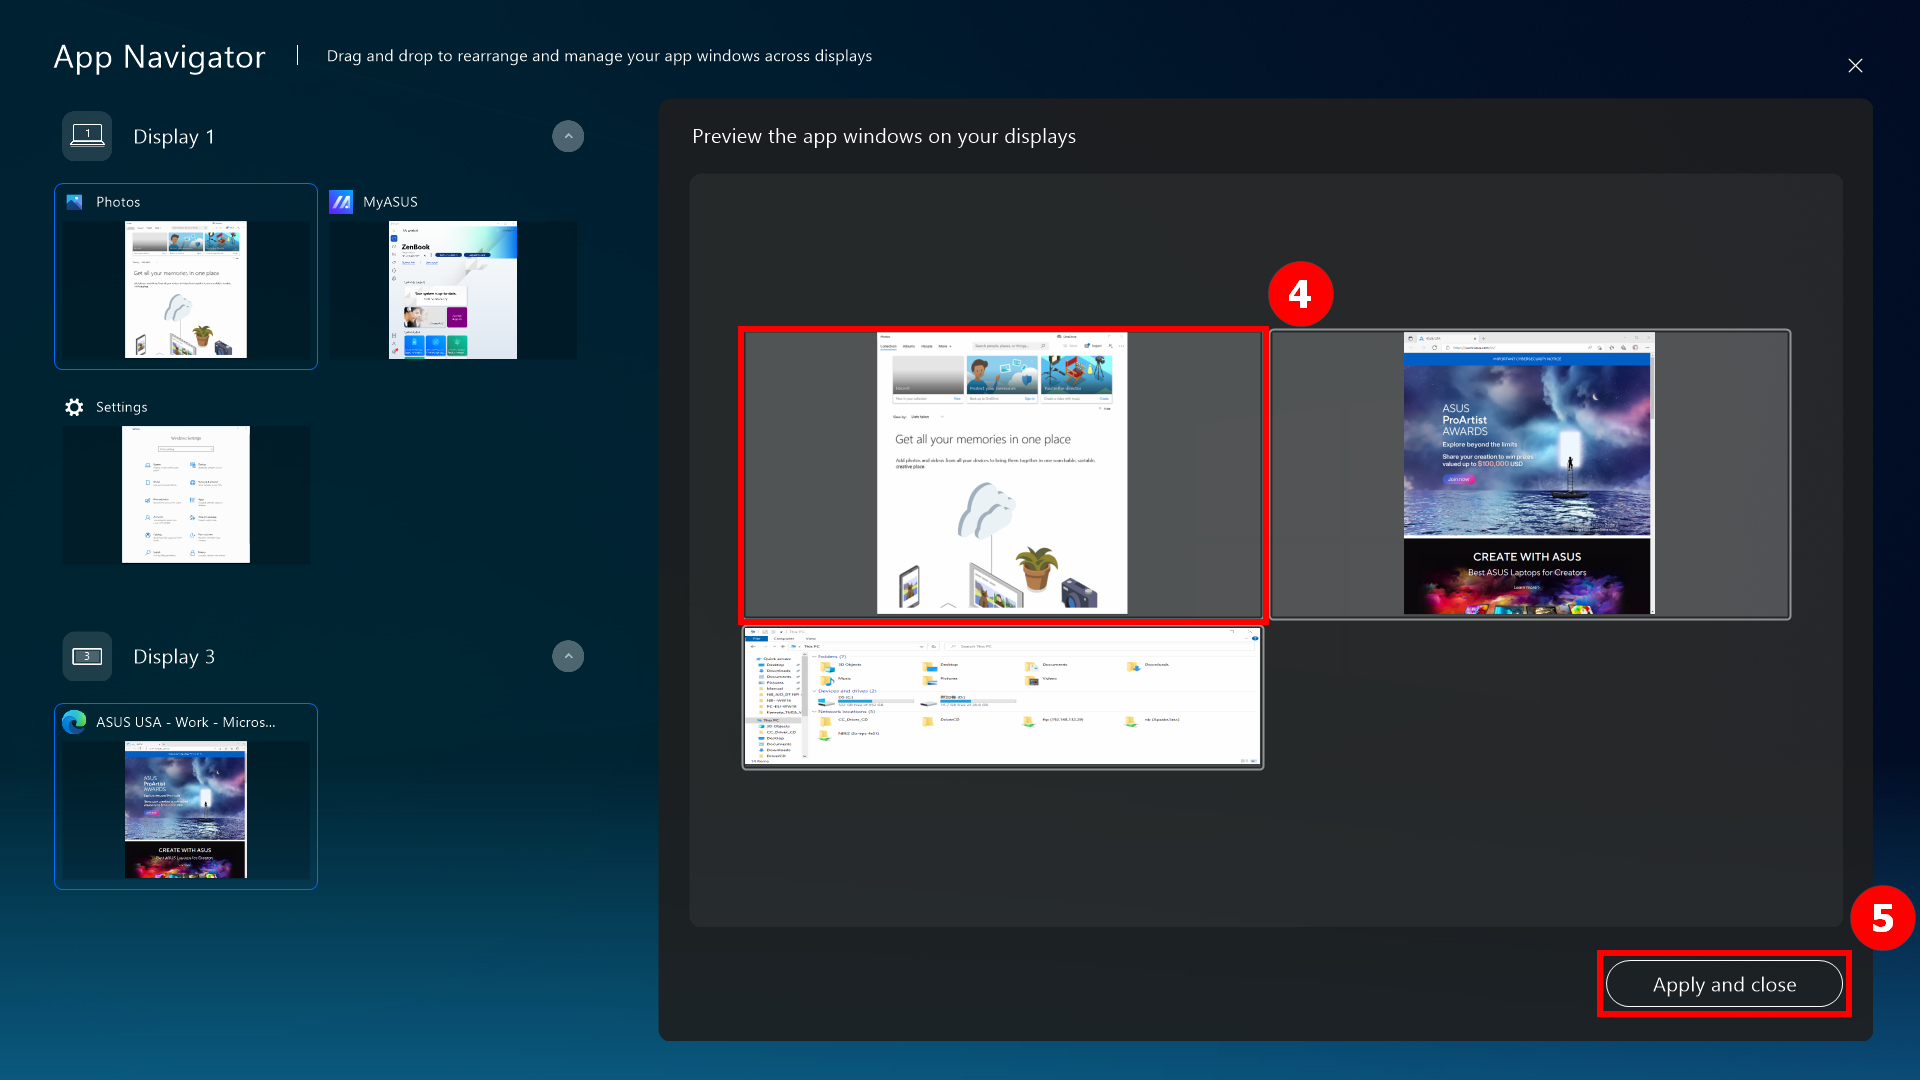
(4) This window is already centered in front of [Screen 1].
(1) Click ① [Task Swap] to move the window that is displayed on the ScreenPad Plus to be displayed in full screen on the Main Screen.
(2) The window is already displayed in full screen on the Main Screen.
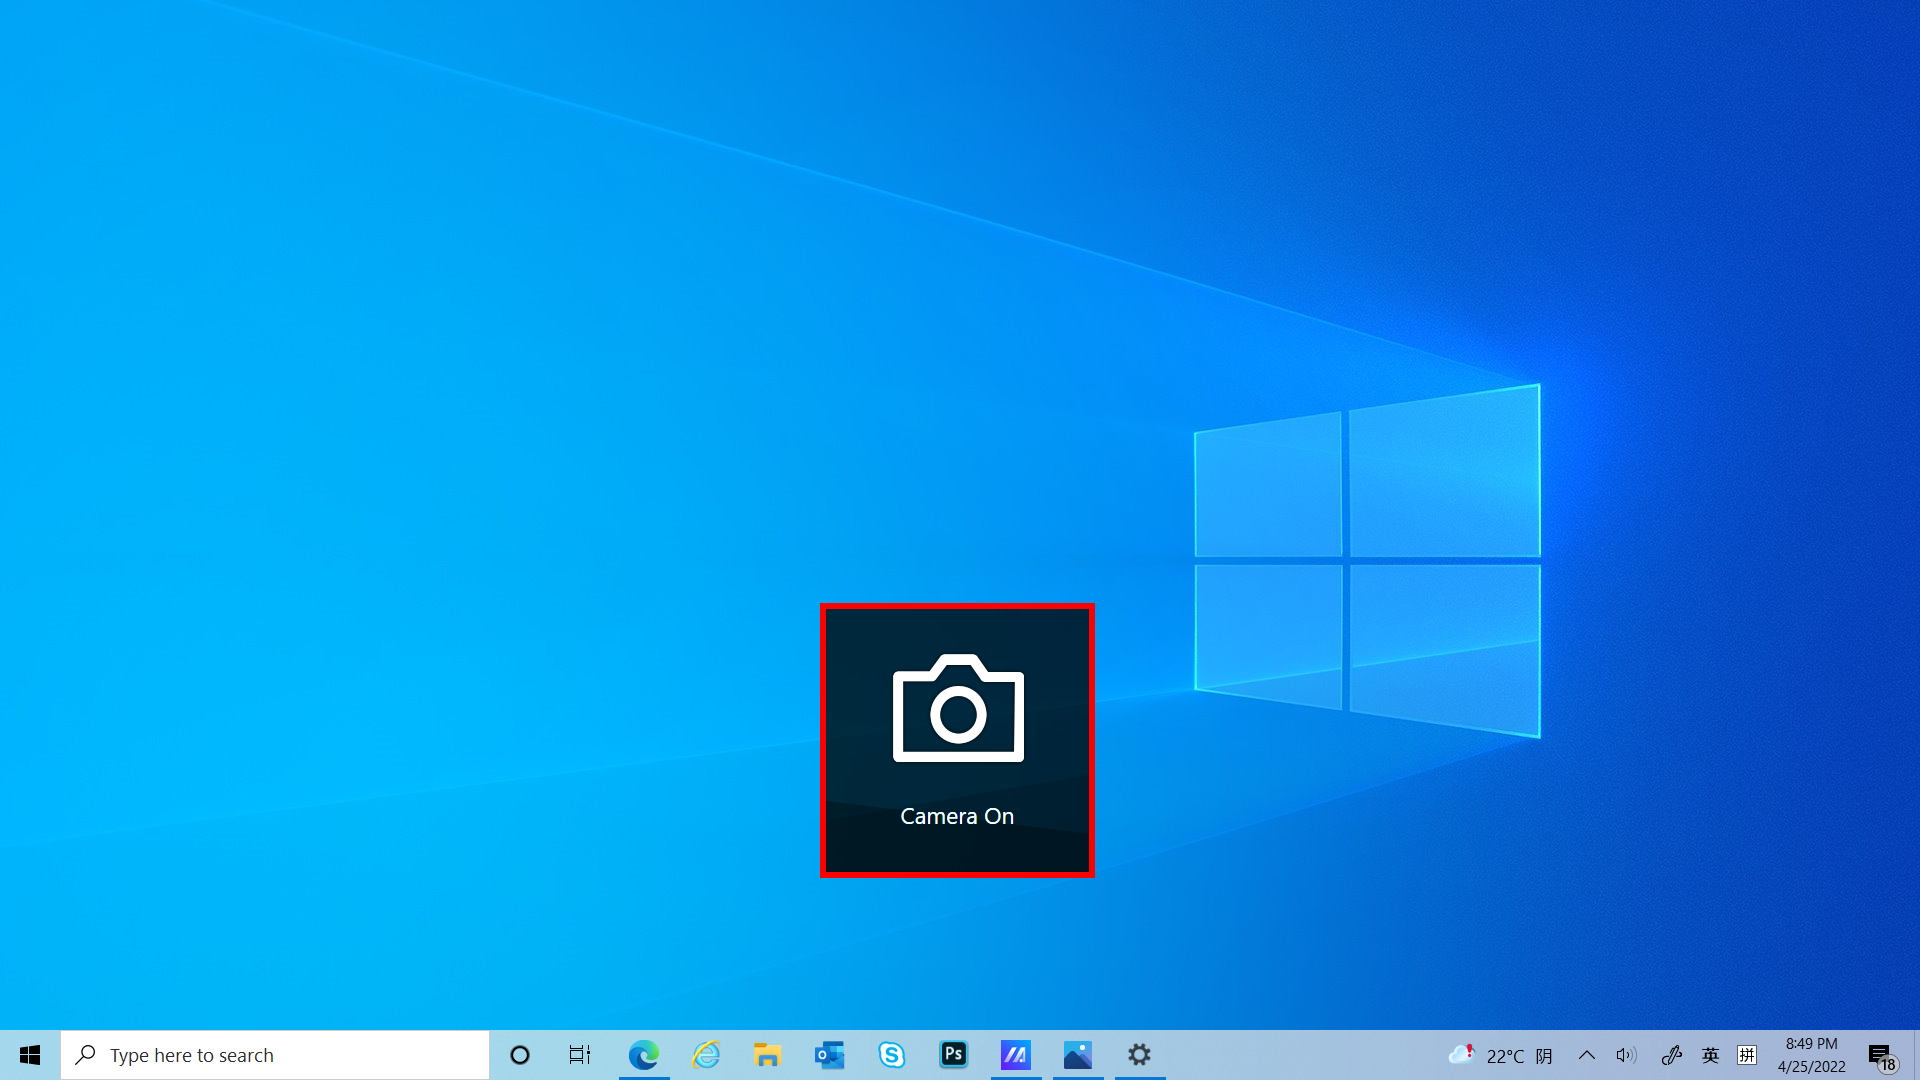
Click  [Camera] to quickly switch the Camera function, and [Camera On/Off] will be displayed on the desktop.
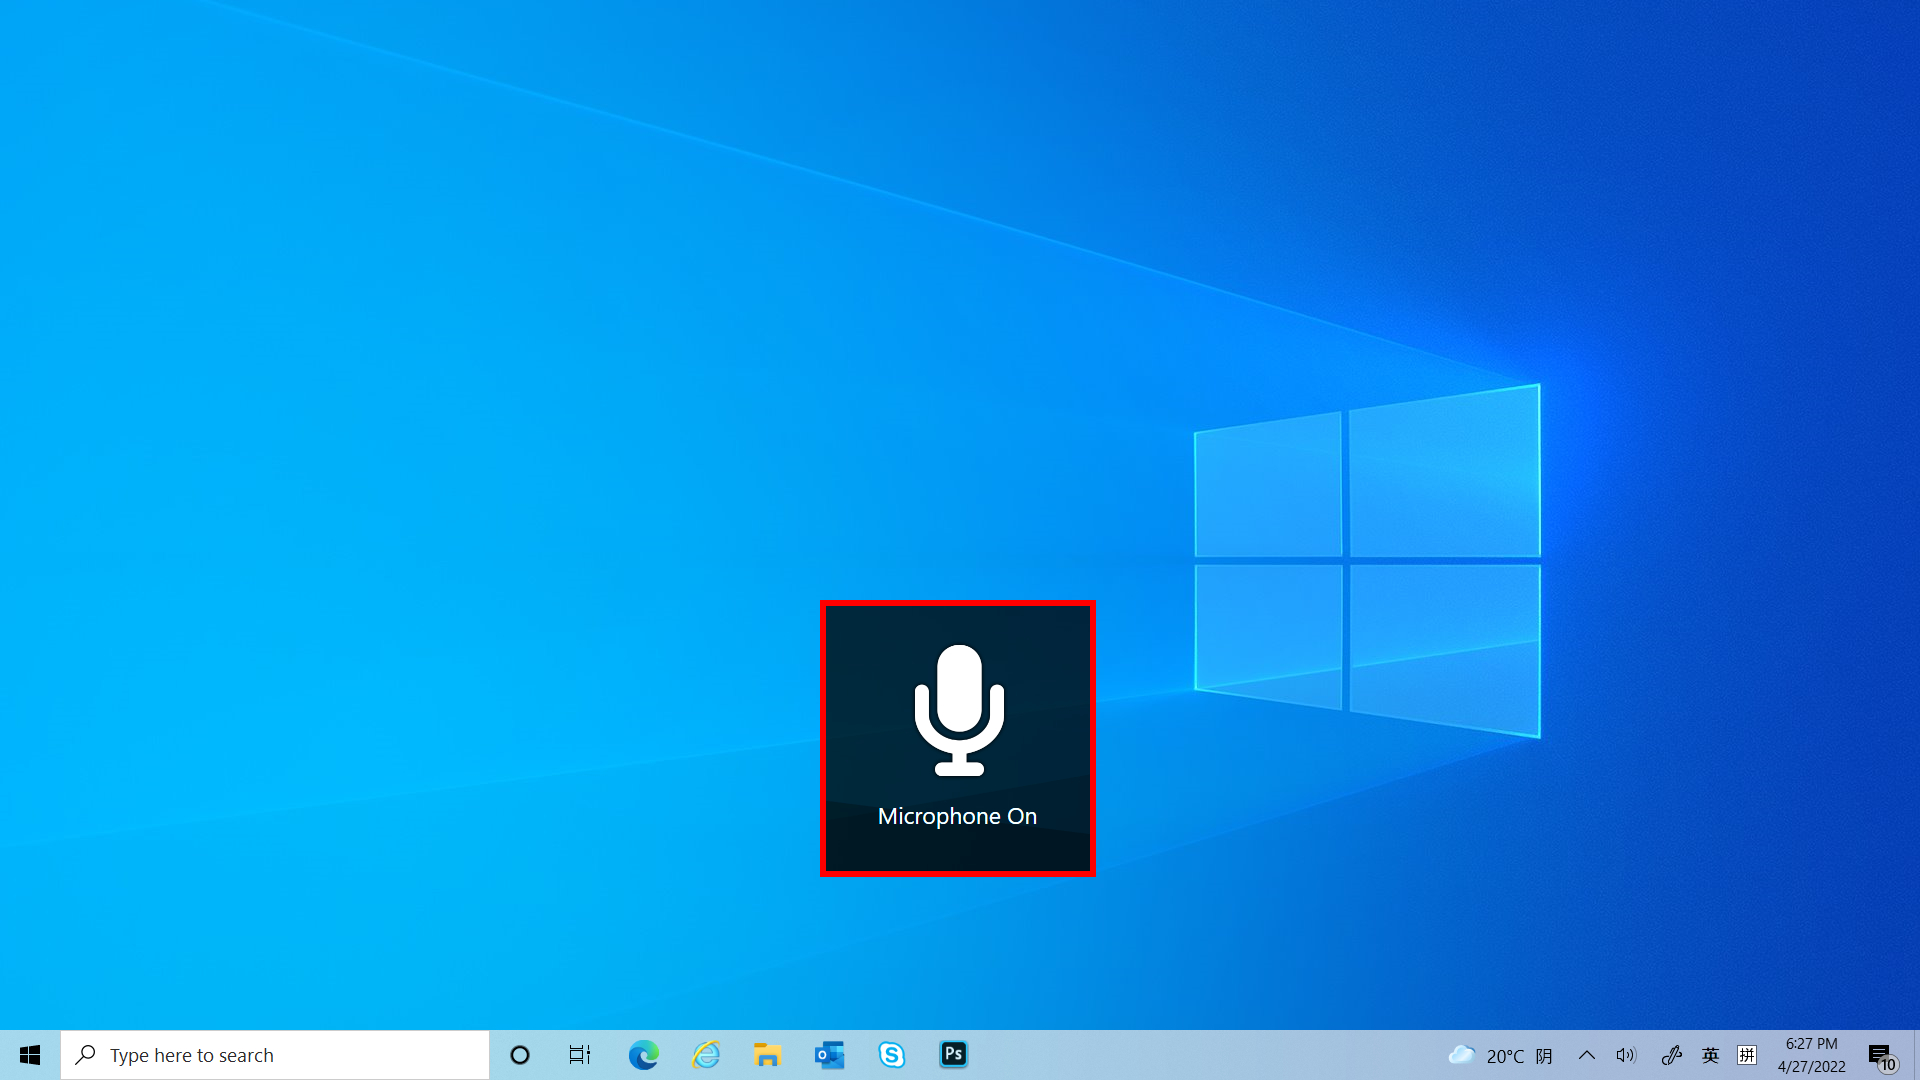
Click  [Microphone] to quickly switch the Microphone function on and off, and [Microphone On/Off] will display on the desktop.
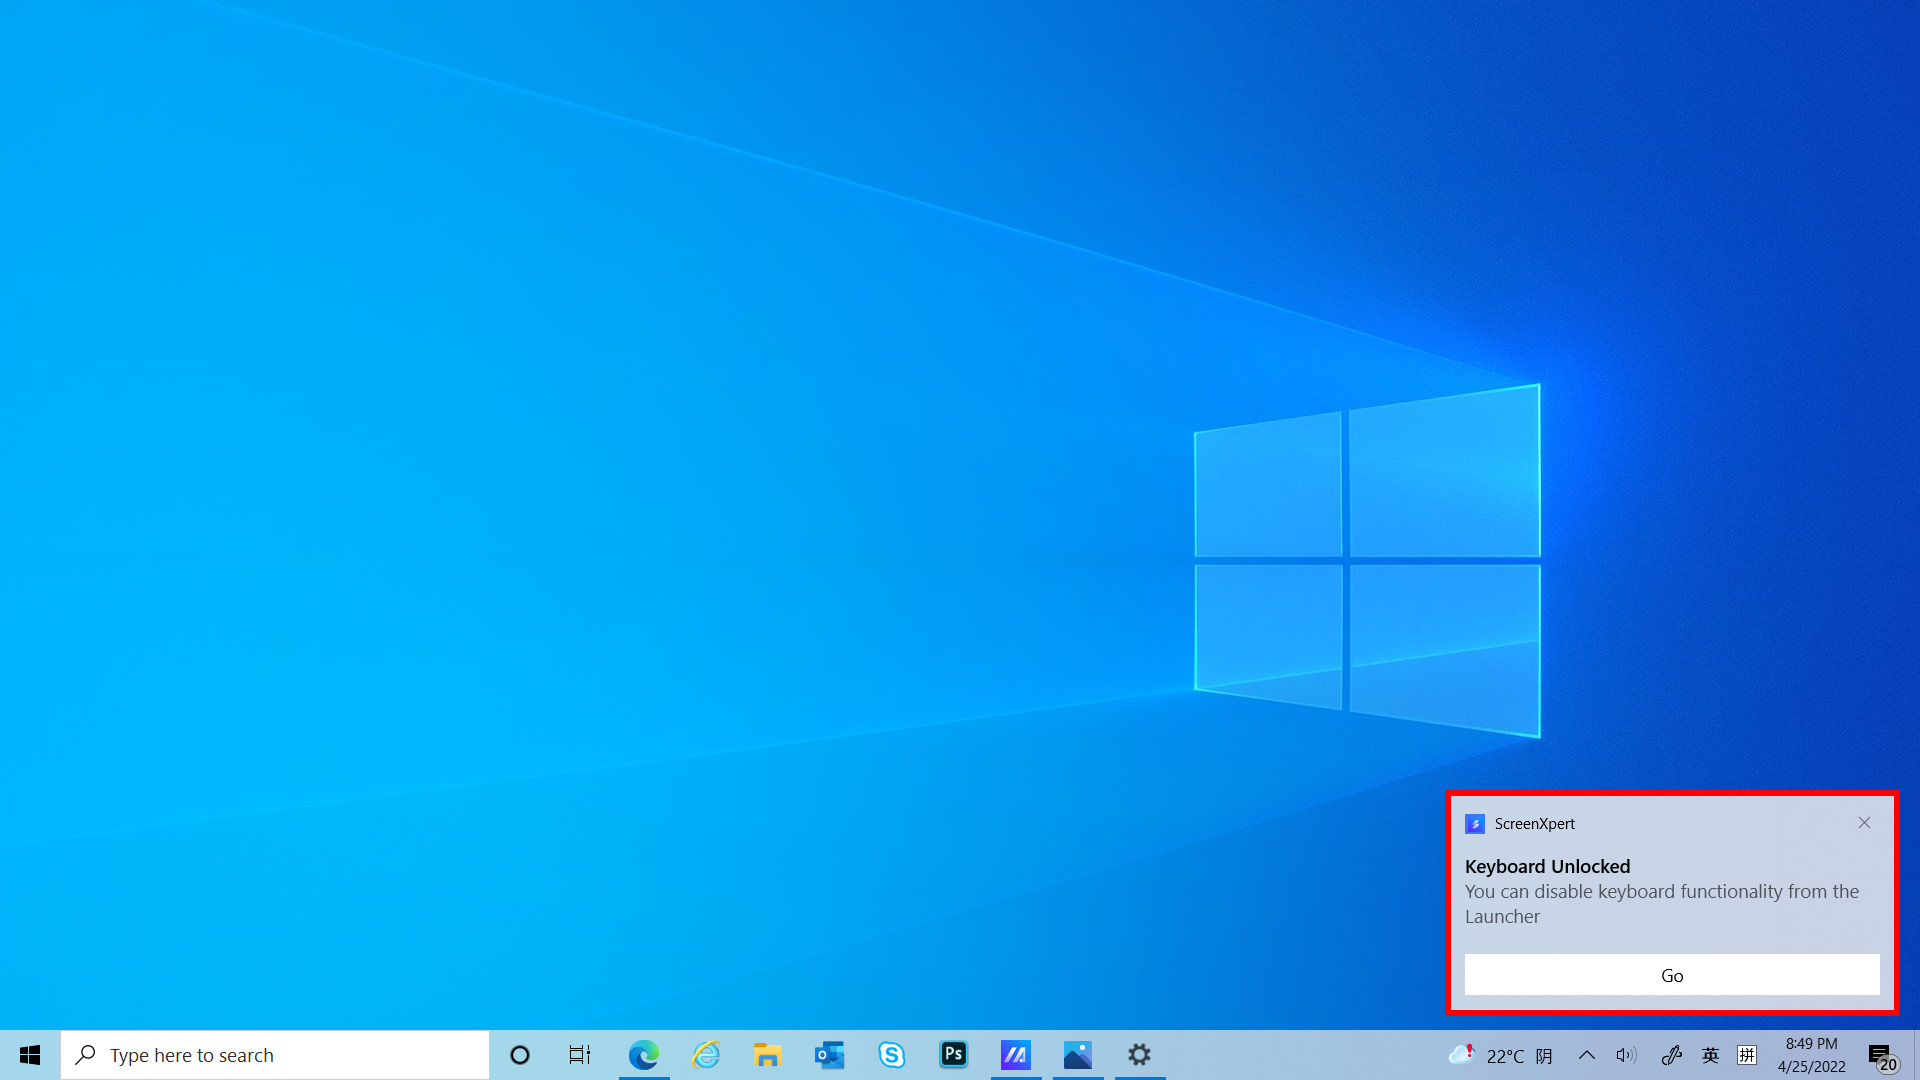
Click  [Keyboard] to quickly switch the Keyboard function lock and unlock, and [Keyboard Lock/Unlock] will display on the desktop.
If a window is displayed on the ScreenPad Plus, you can quickly minimize the window by clicking [Show Desktop].
ScreenPad Plus already shows the desktop.
※ After ScreenXpert version 3.0.23.0, the [Phone Call] function will be removed from ScreenXpert.
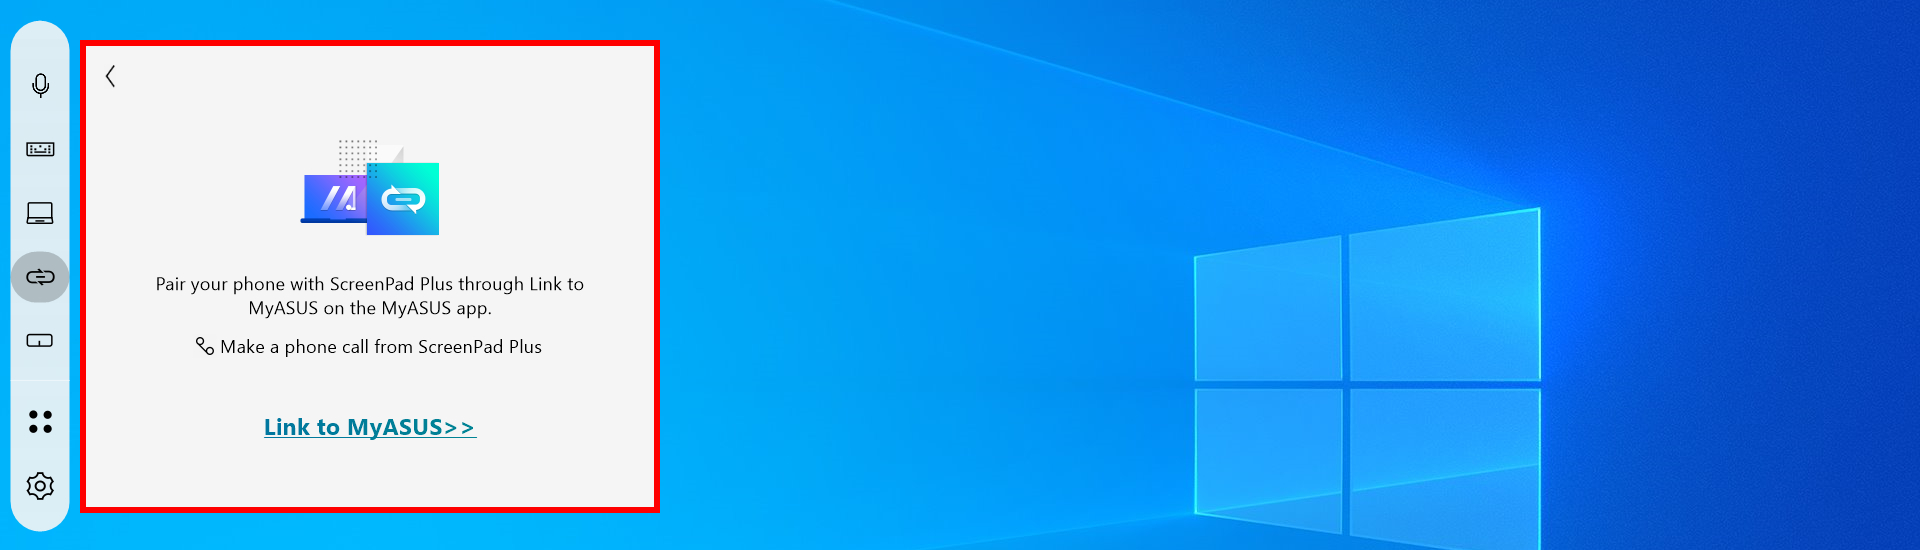
Clicking  [Link to MyASUS] allows you to quickly open the window to make a phone call, if you would like to learn more about Link to MyASUS, please click here.
Clicking  [TouchPad] will turn on ScreenPad Plus's TouchPad mode, and you can turn off by tapping the X in the top right corner.
(1) Click  [Utilities]. You can see ①[ASUS Built-in Apps], where you can add additional app icons, or you can delete or modify the location of the app. Click ②[+] to add new Task Group.
(2) In the ③[area], select your preferred Task Group layout and click ④[Next].
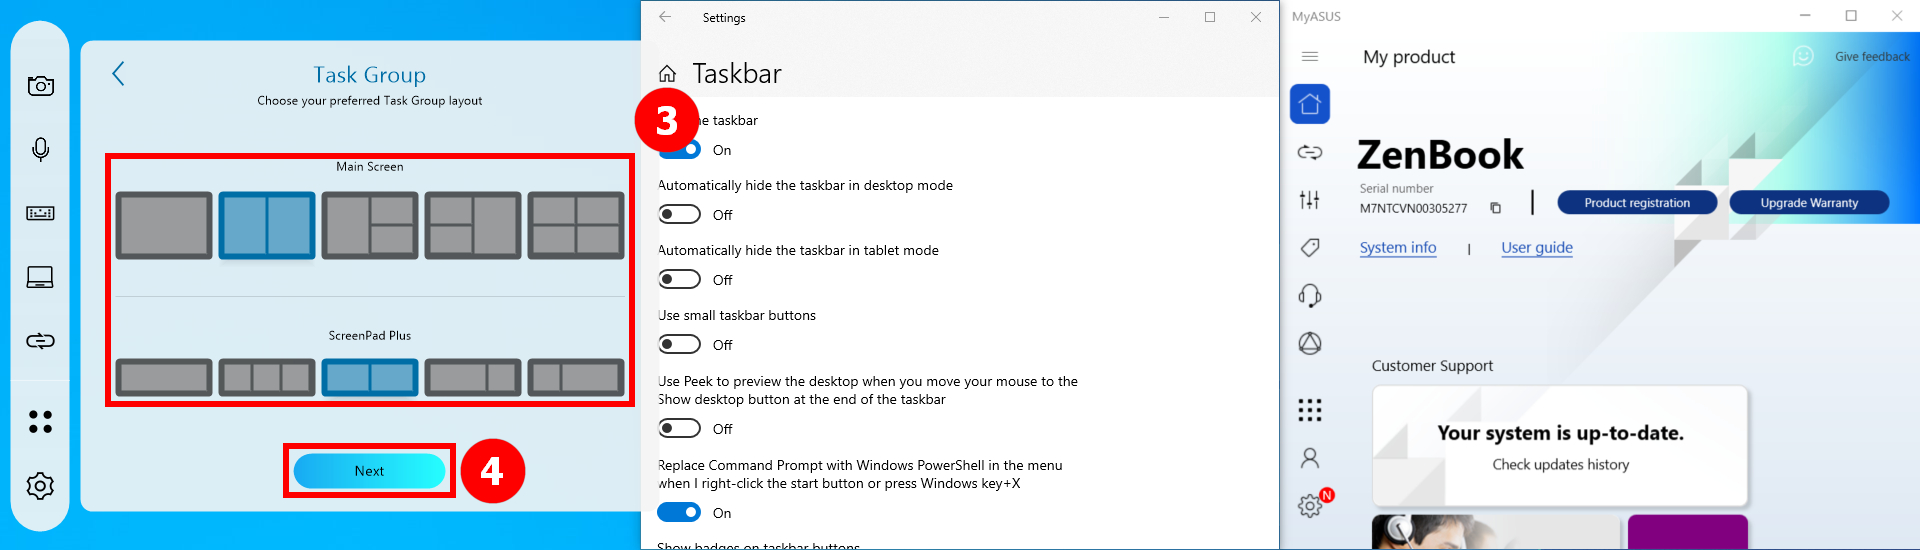
(3) Click ⑤[Capture].
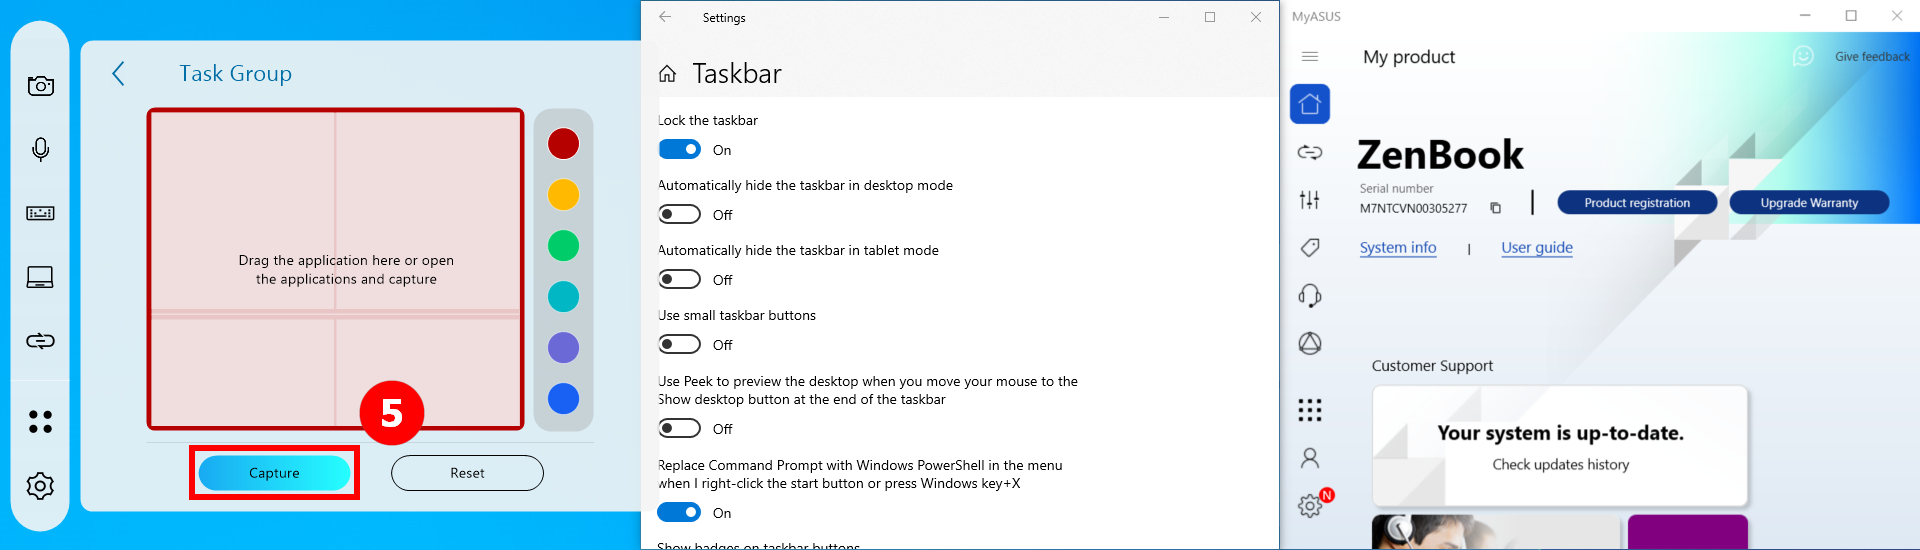
(4) The window that appears on your computer will be captured, such as ⑥[Area], where you can delete or reposition the app, or modify the name of the Task Group. When you complete editing, click ⑦[Done].
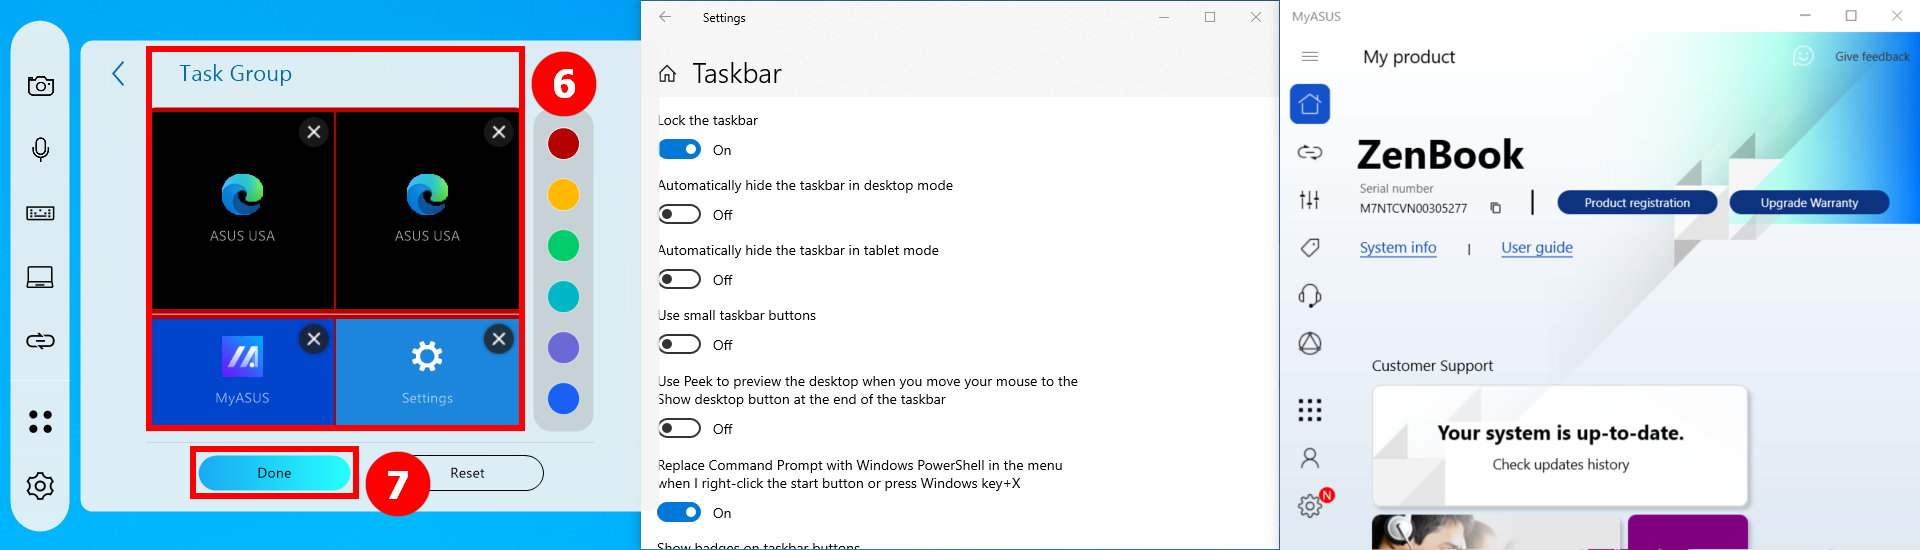
(5) Task Group is already established, click ⑧[Task Group].
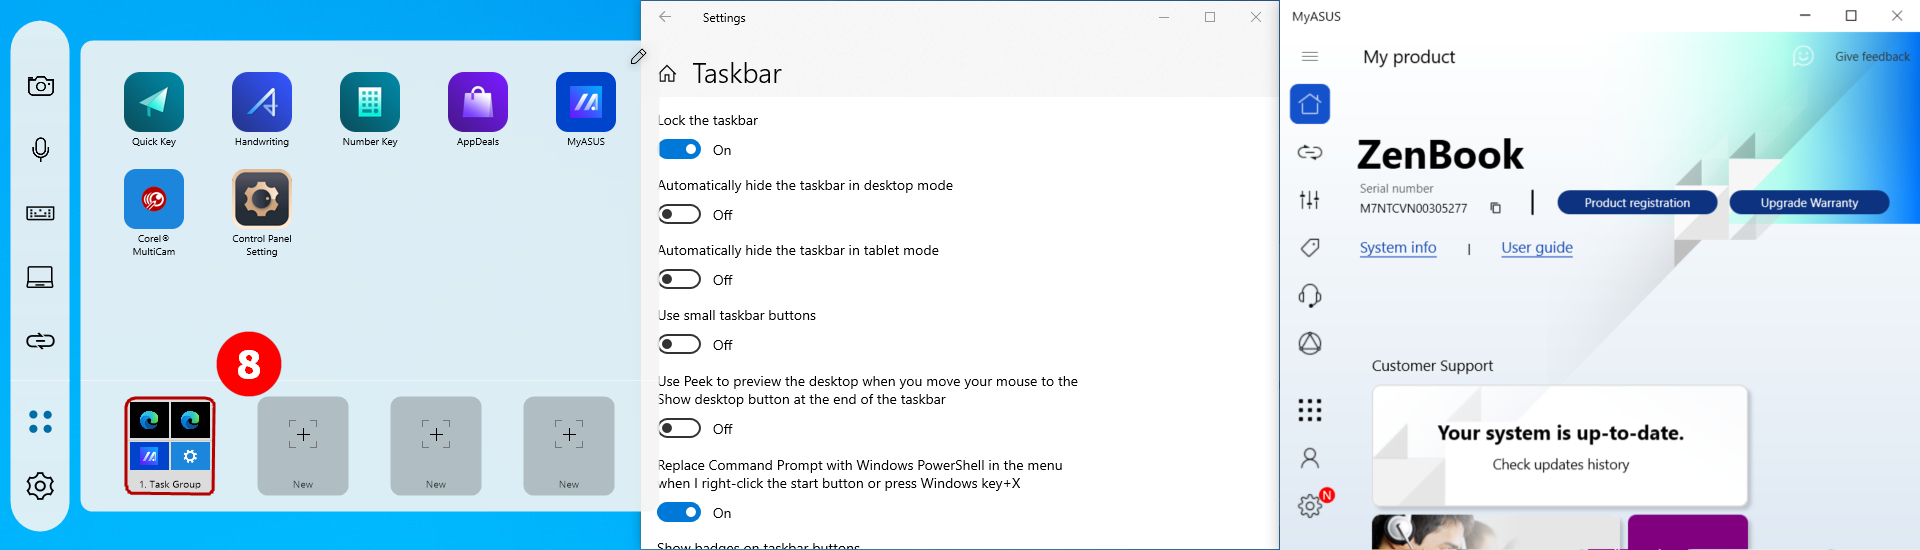
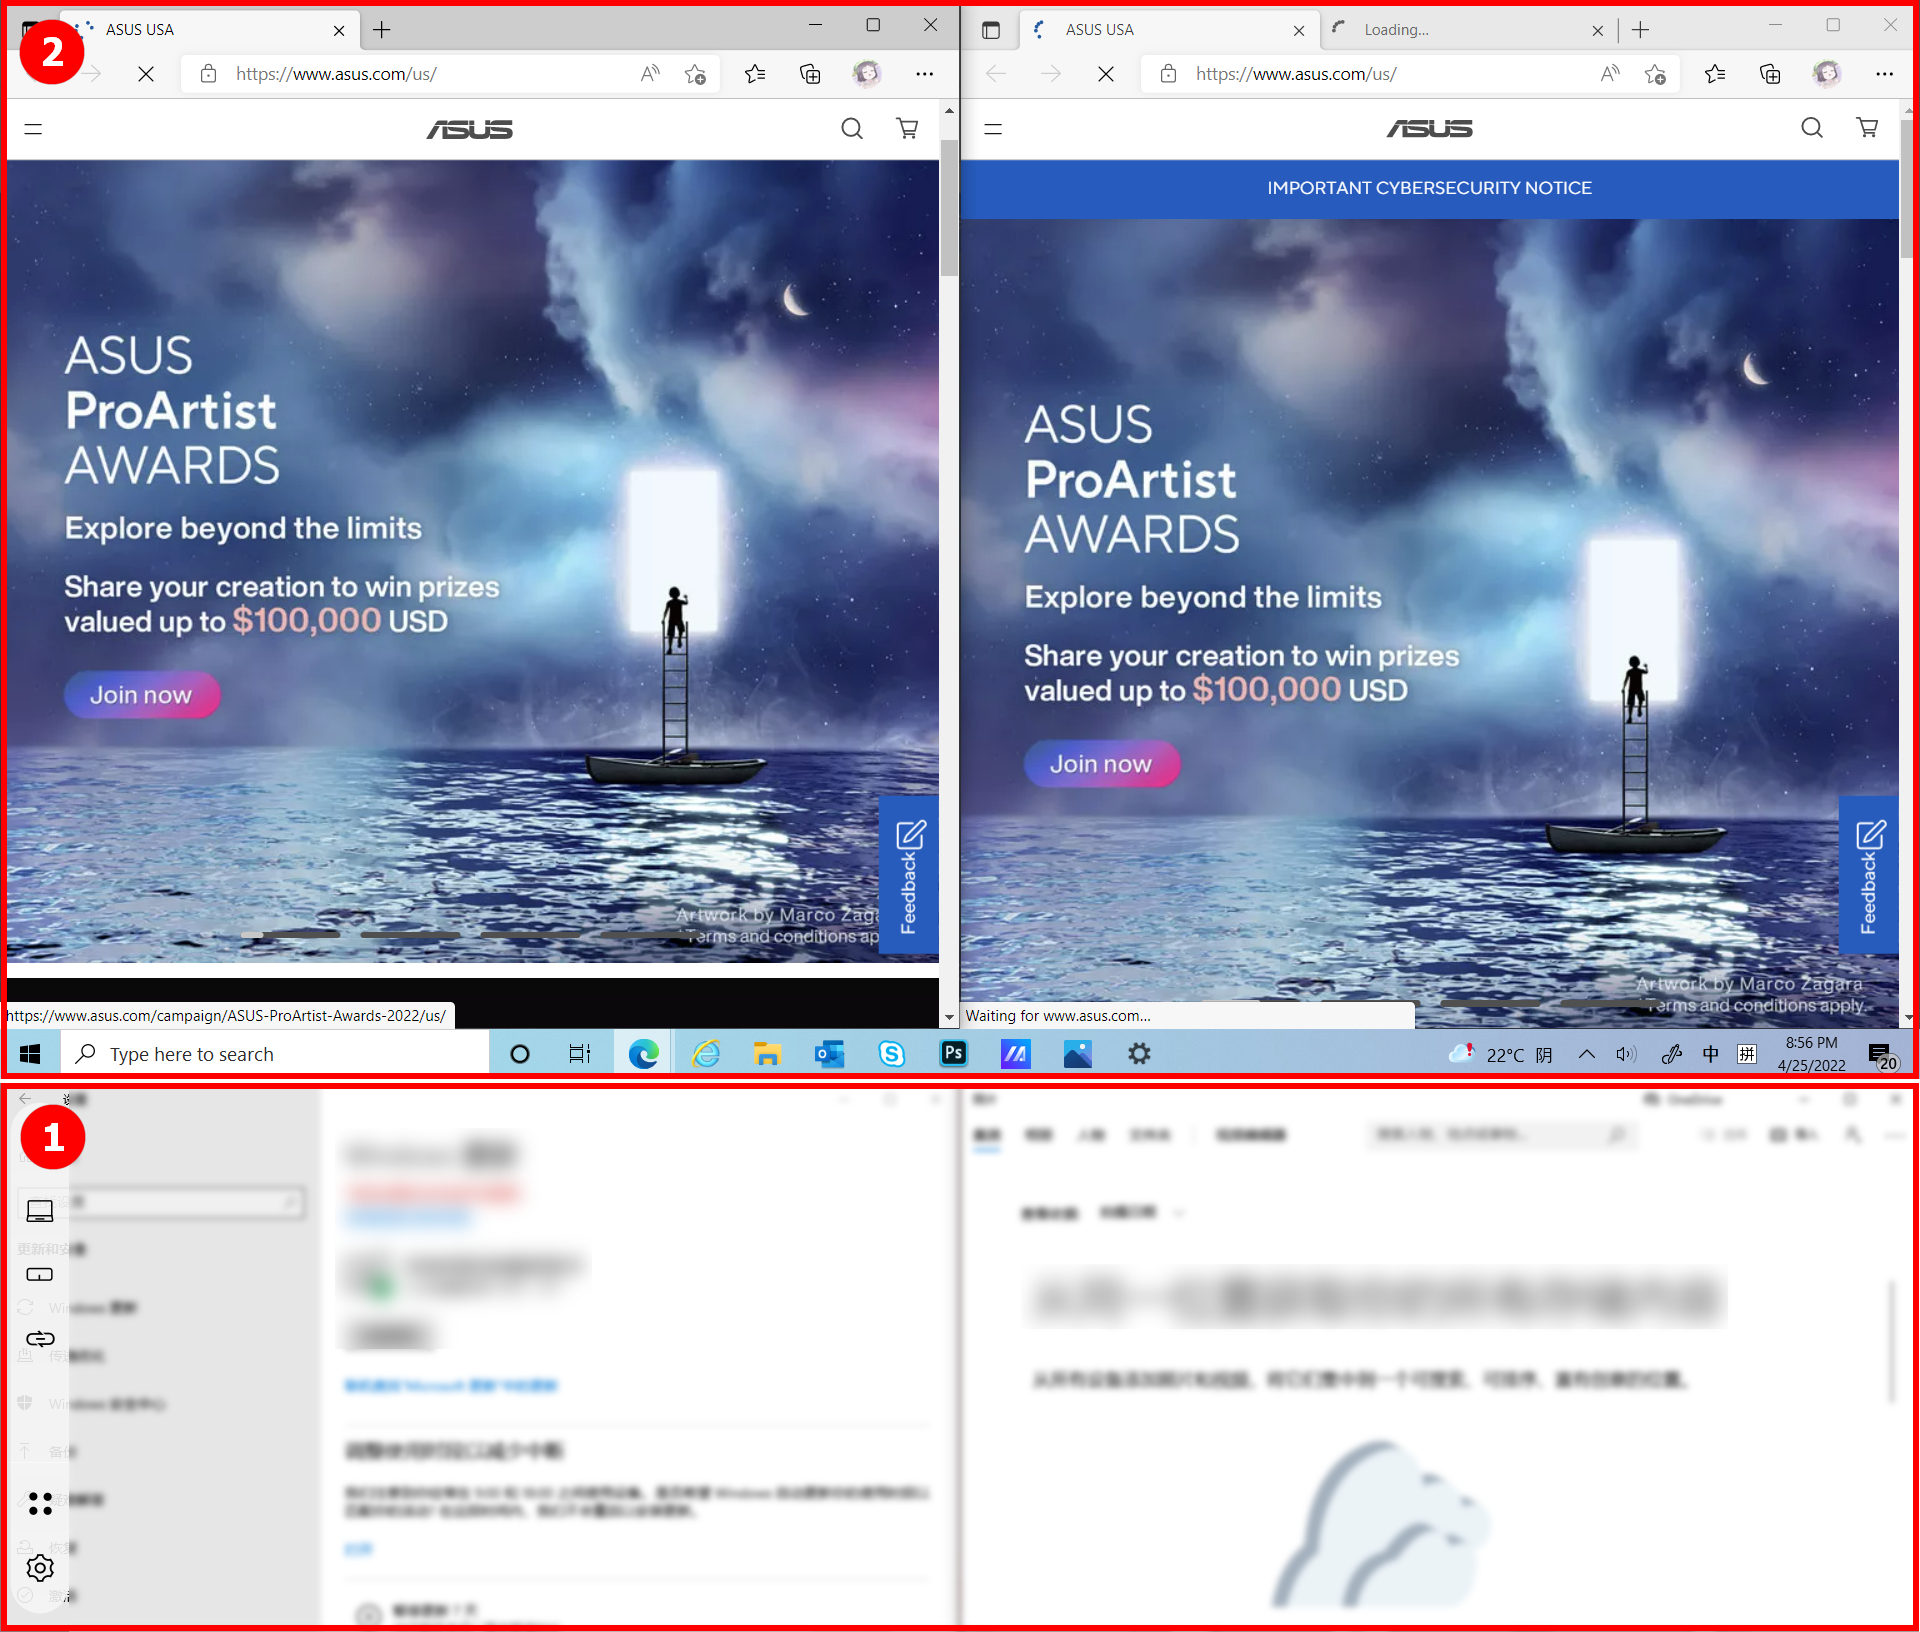
(6) The computer's ②[Main Screen] and ①[ScreenPad Plus] will press your previous settings to show the app.
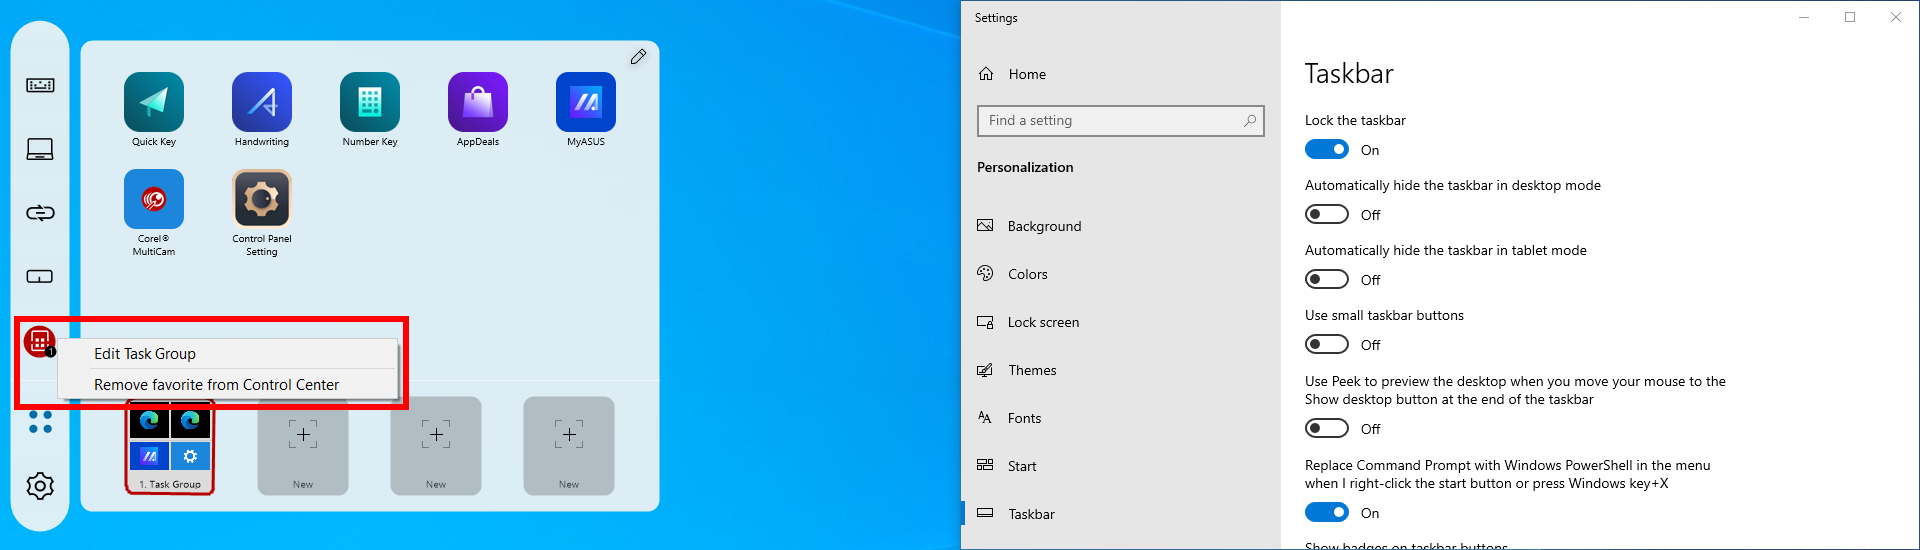
(7) Right-click [Task Group], click [Add as favorite to Control Center].

(8) You can see the icon of the [Task Group], which displays in the toolbar. You can use the feature quickly and easily by clicking the [Task Group] icon in the toolbar.
(9) Right-click the [Task Group] icon, click [Remove favorite from control center] to remove the [Task Group] icon from TheToolbar.
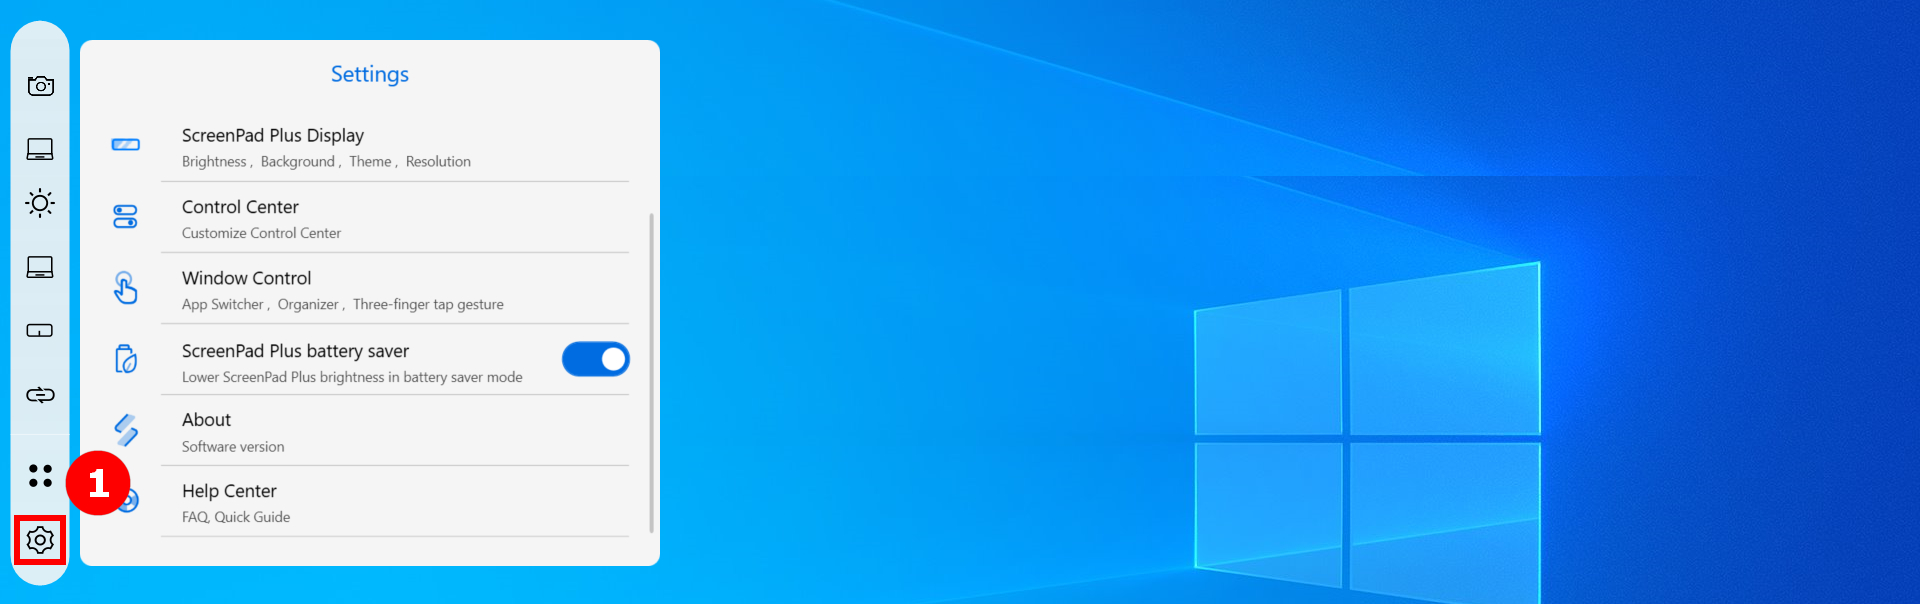
(1) Click  [Settings].
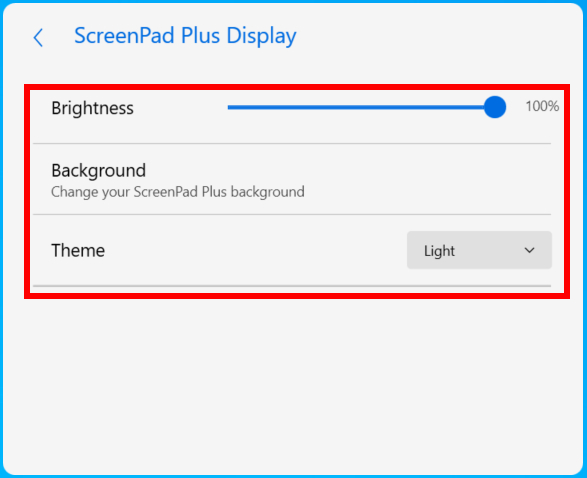
(2) In [ScreenPad Plus Display], you can adjust the brightness, change the background, modify the theme.
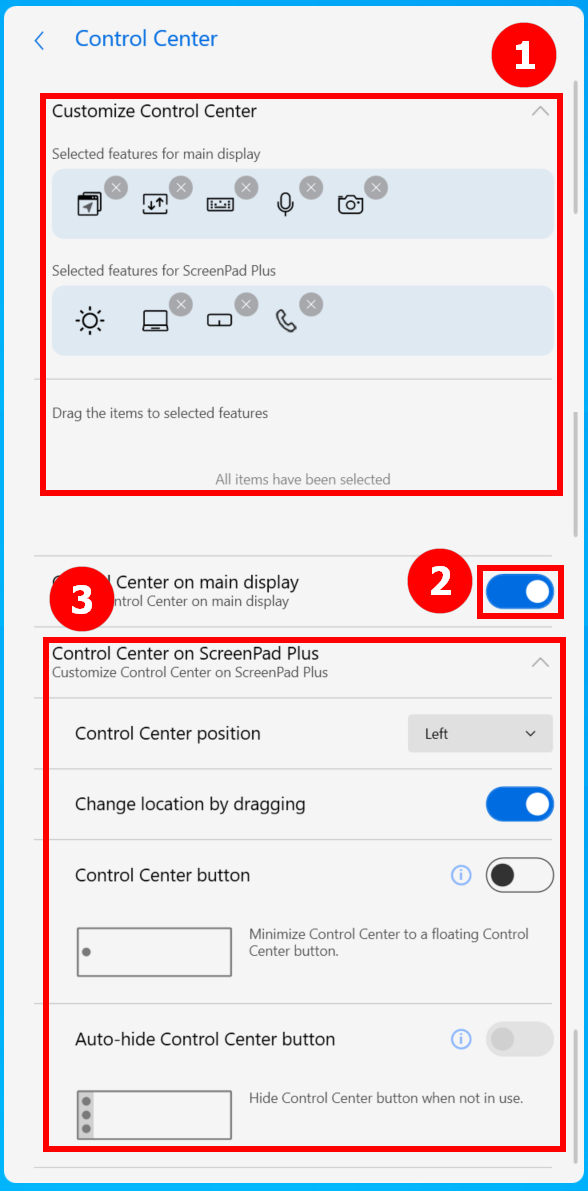
(3) In [Control Center]. You can adjust the ScreenPad Plus's features at the ①[Customize Control Center]. Toggle ②[Control Center on main display]. Modifications to the Control Center icon are in ③[Control Center on ScreenPad Plus].
(4) Control Center icon already displays on main screen. Click [Control Center].
(5) You can see that the set-up features are already shown on the main screen.
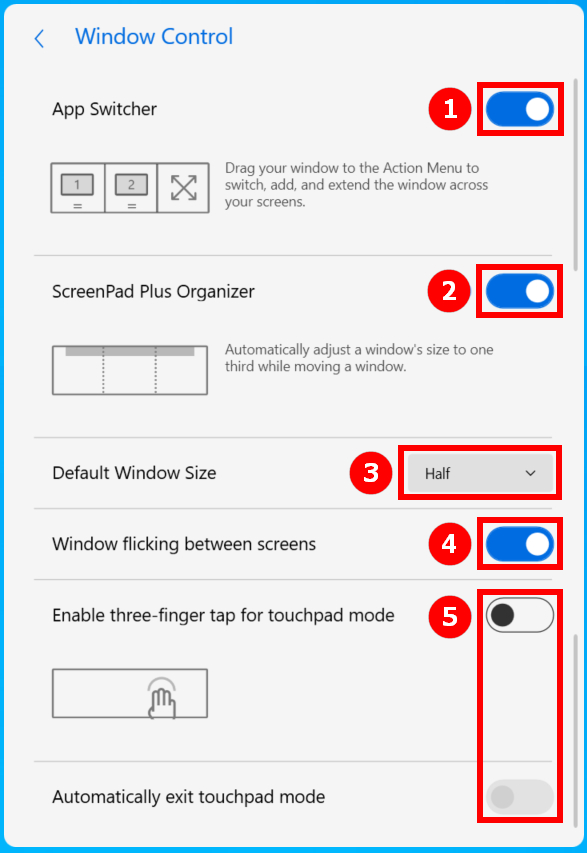
(6) In [Window Control], switch on ①[App Switcher], ②[ScreenPad Organizer], and then switch ③[Default Window Size], ④[Window Flicking between screens], and then switch ⑤[Enable three-finger tap for touchpad mode].
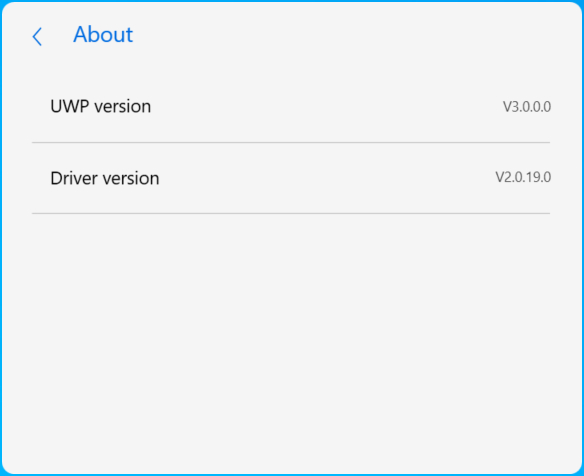
(7) In [About] section, you can view the UWP and Driver version.
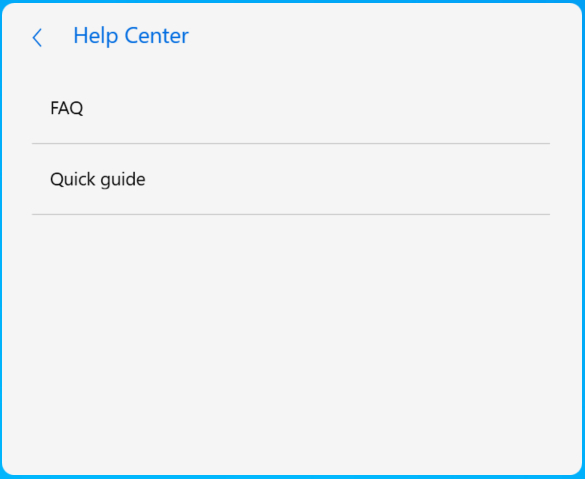
(8) In [Help] section, you can click on the FAQ to access this article quickly, or click Quick guide.
16. Install & Uninstall ScreenXpert
To install the ScreenXpert app ond driver:
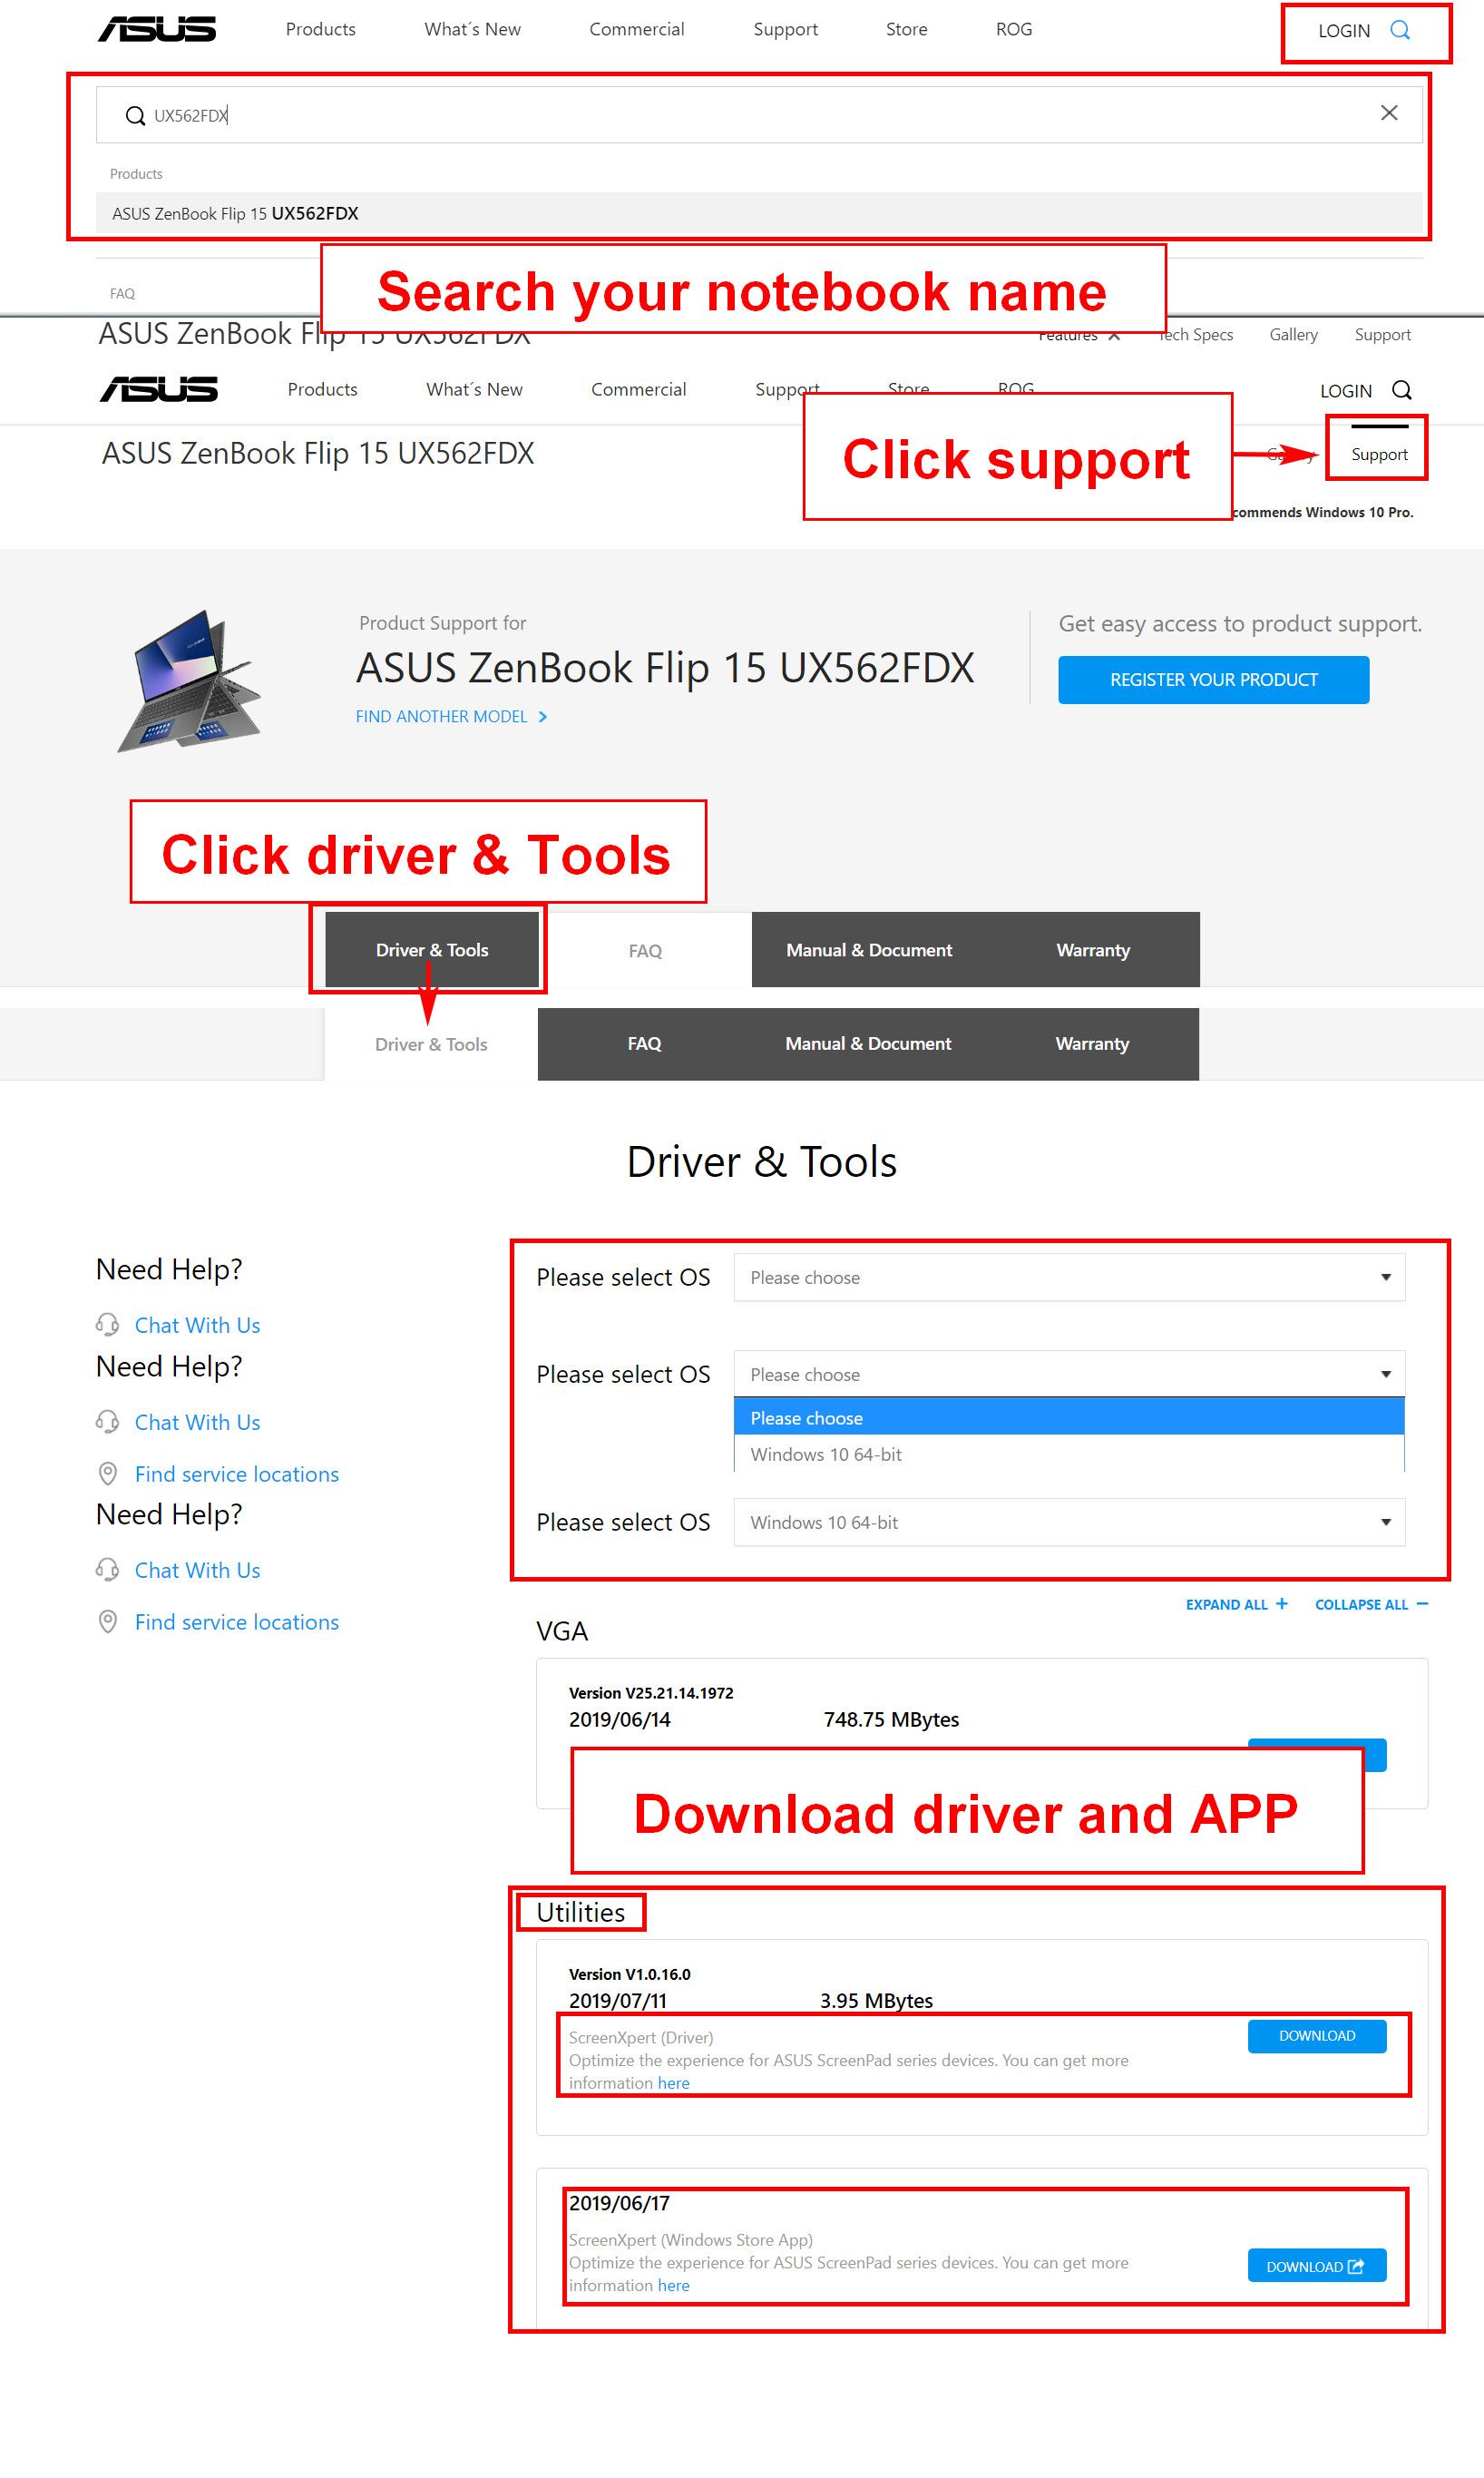
1.Go to the ASUS Official website and search for your notebook model.
2.Click [support] then click [Driver & Tools].
3.Choose your notebook OS.
4.Download the driver and app, then install both.
You can uninstall ScreenXpert from the content provided at the following link: https://www.asus.com/support/faq/1013598