[TUF Gaming SSD Enclosure] How to display the TUF Gaming A1 drive on your PC with a brand new SSD installed?
To provide you more detailed instruction, you can also click ASUS Youtube video link below to know more about [How to Install and Set Up TUF Gaming SSD Enclosure]
https://www.youtube.com/watch?v=JfO54CguAMs
If you are installing a brand new SSD module, follow the steps below in order to display the TUF GAMING A1 drive on your PC.
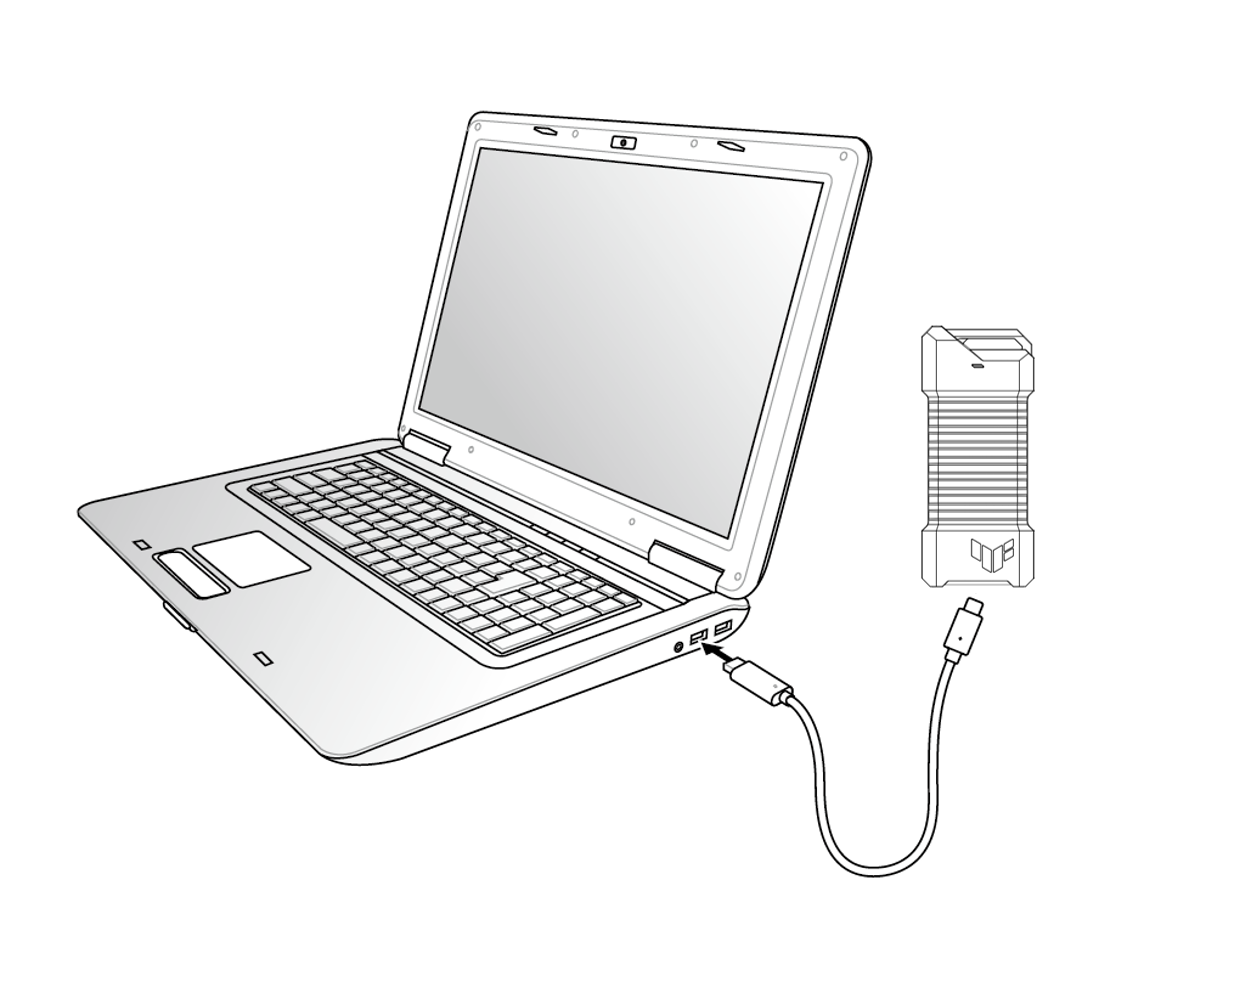
1. Install a new SSD module into the TUF GAMING A1, and then connect it to the PC via a USB port. Please refer to picture below for how to connect the computer and TUF GAMING A1. Once connected, the light on the front of TUF Gaming A1 will remain on.
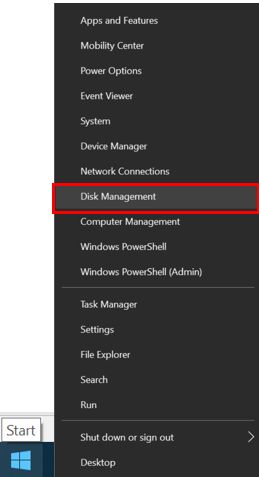
2. Right-click on the Windows Start menu, then select Disk Management.
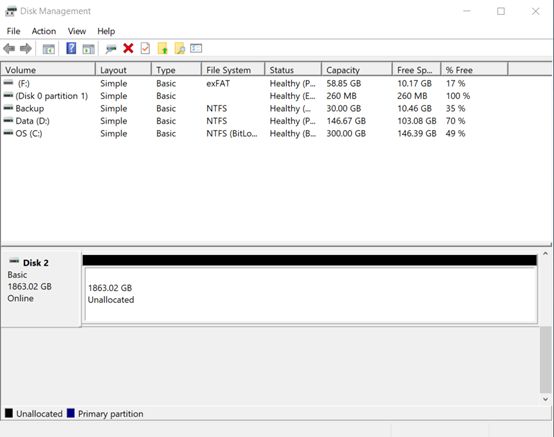
3. If your PC detects the new installed SSD on the TUF Gaming A1, an unallocated partition will appear.
4. The unallocated partition might not appear for the new installed SSD module due to the following reasons:
a. The SSD might already formatted. Please go to Step8 for following steps.
b. The new SSD is not detected by the PC. Ensure the TUF Gaming A1 is properly connected to the PC. (Please refer to picture in step1)
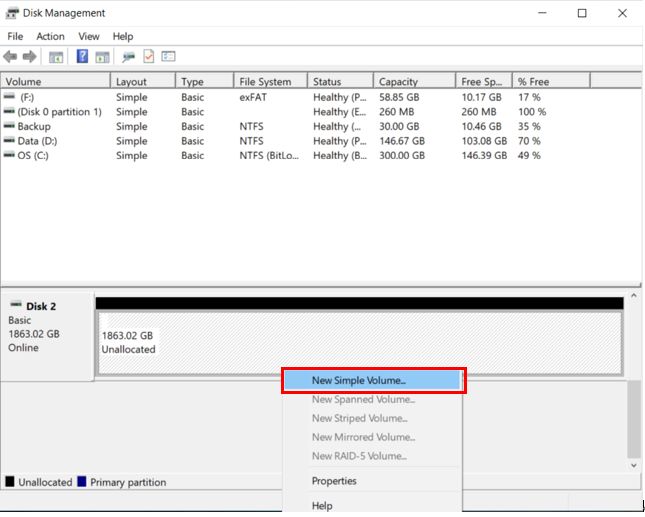
5. Right-click on the unallocated partition, and then select New Simple Volume.
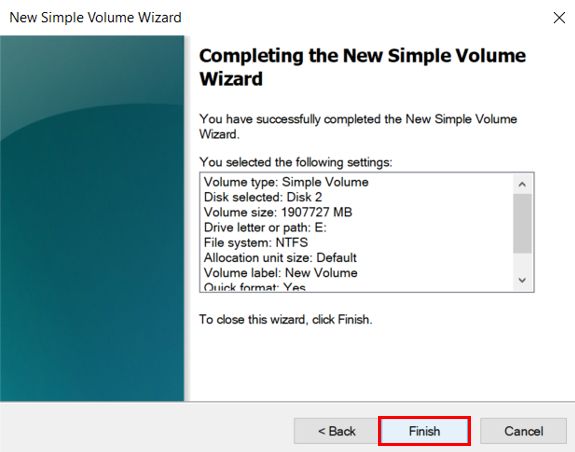
6. Click [Next] to continue the New Simple Volume Wizard. Here you can set up preference settings.
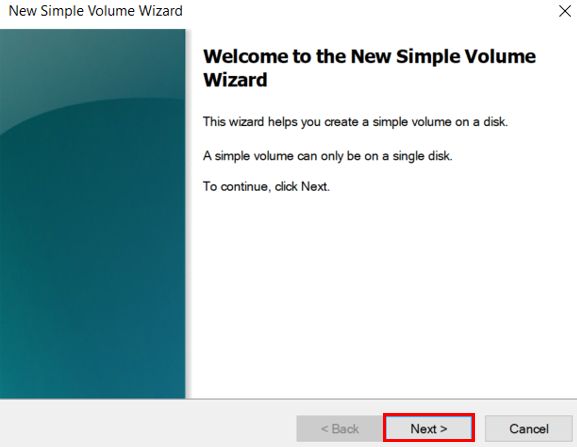
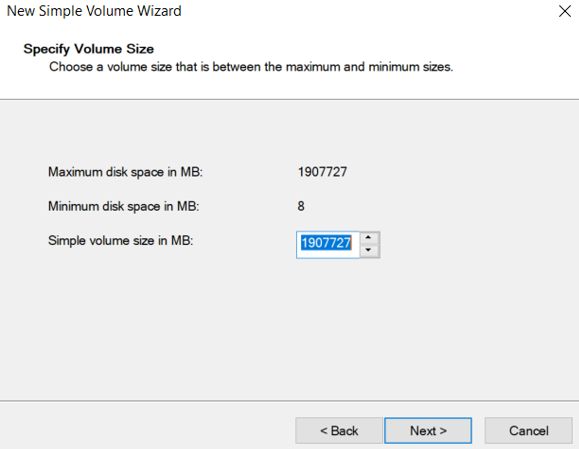
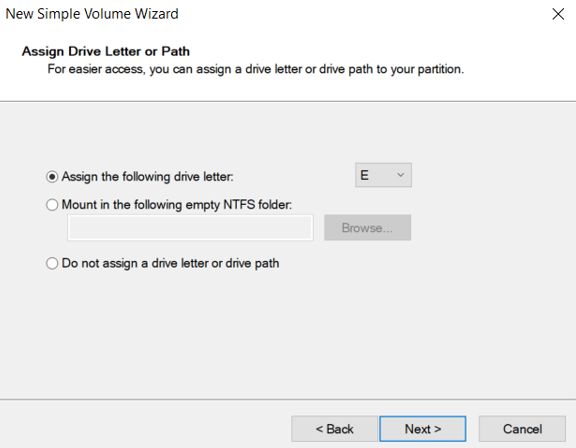
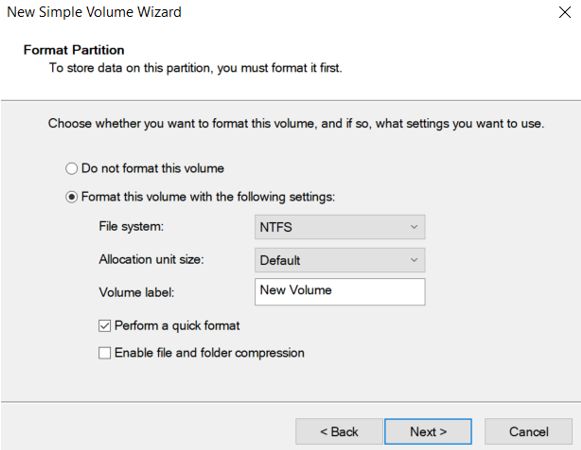
7. Click [Finish] to complete the Wizard if all the preference settings are correct.
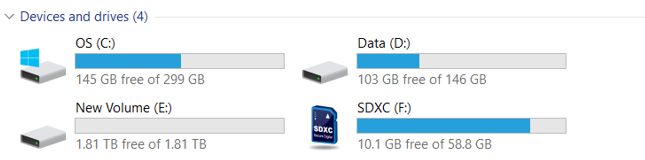
8. After finishing the New Simple Volume Wizard, the PC should display the installed SSD drive and allow you to access the disk.
How to get the (Utility / Firmware)?
You can download the latest drivers, software, firmware and user manuals in the ASUS Download Center.
If you need more information about the ASUS Download Center, please refer to this link