[Windows 11/10] Recommended Actions When You Encounter “Insufficient Storage Space”
If your Windows device displays a warning indicating insufficient storage space, it means that the available capacity on your drive is nearing its limit. This can adversely affect system performance and disrupt everyday use.
Below are several common and effective methods for freeing up disk space, designed to help you better manage your storage and alleviate related issues. Please follow the instructions corresponding to your version of the Windows operating system.
Note: If you continue to require additional storage after clearing disk space, you may also consider using cloud storage solutions as needed. Through MyASUS under [Recommended], you can access cloud storage services provided by Dropbox or ASUS Secure Auto-Backup. Alternatively, after activating Microsoft 365, you can use OneDrive to obtain extra storage space, making it easier to manage and back up your personal files.
Windows 11 operating system
Manage drive space with Storage Sense
Storage Sense is an Microsoft tool that can help you automatically free up space on your device by deleting items that you don’t need, such as temporary files or items in the Recycle Bin. Visit the link to learn more about Storage Sense: Storage Sense document from Windows support.
Here are step-by-step instructions for using Storage Sense to clean up your device storage:
Note: Storage Sense works on your system drive only, which contains the Windows operating system and is usually referred to as C:. To free up space on other drives, go to [Start] > [Settings] > [System] > [Storage], then select [Storage used on other drives] under [Advanced storage settings].
- Type and search [Turn on Storage Sense] in the Windows search bar①, then click [Open]②.

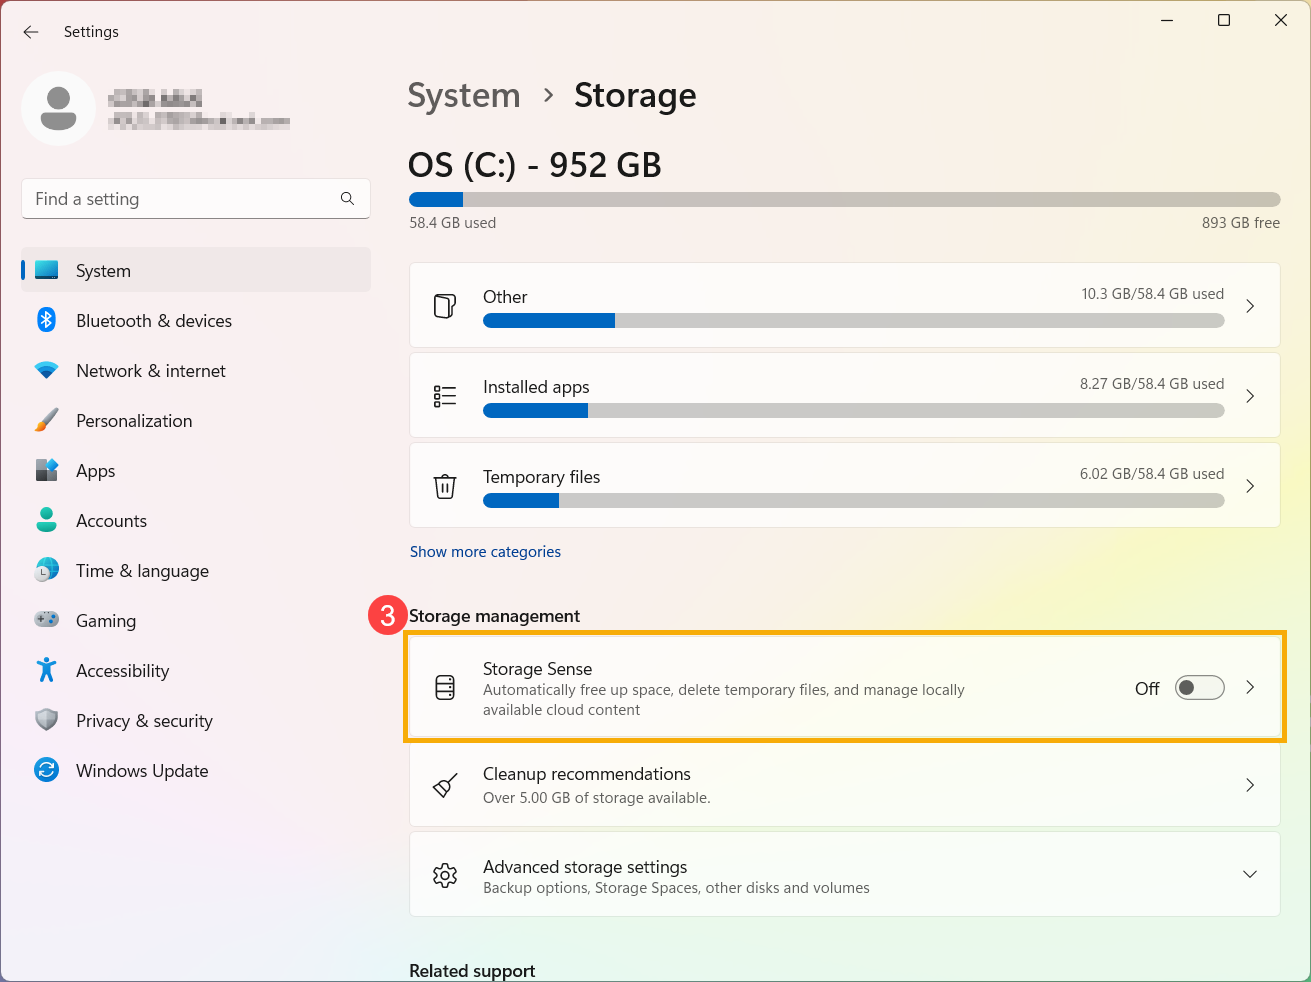
- Select [Storage Sense]③.
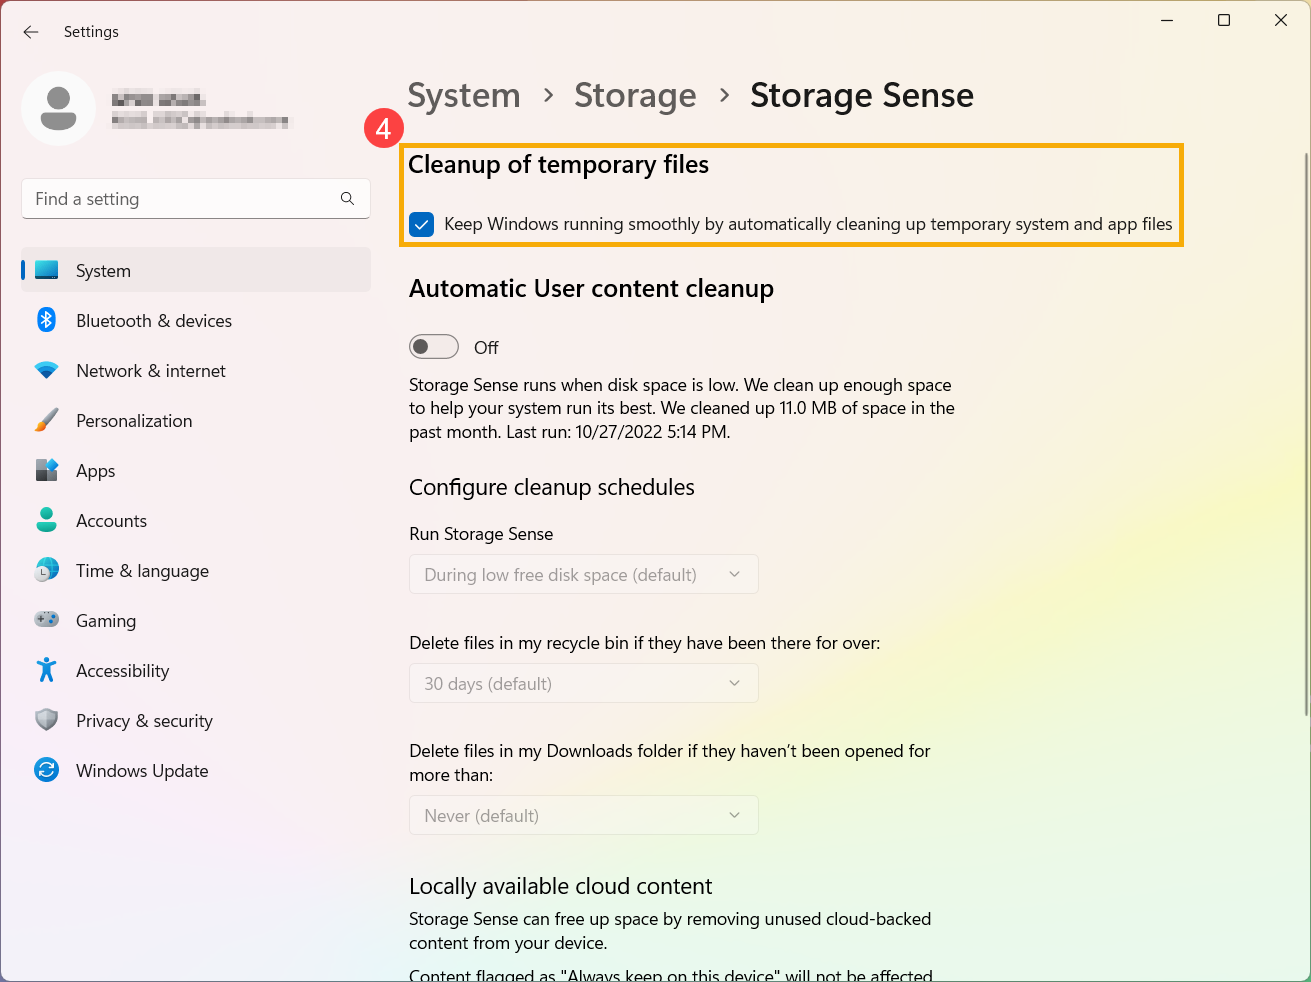
- Check the box in [Cleanup of temporary files] section④.
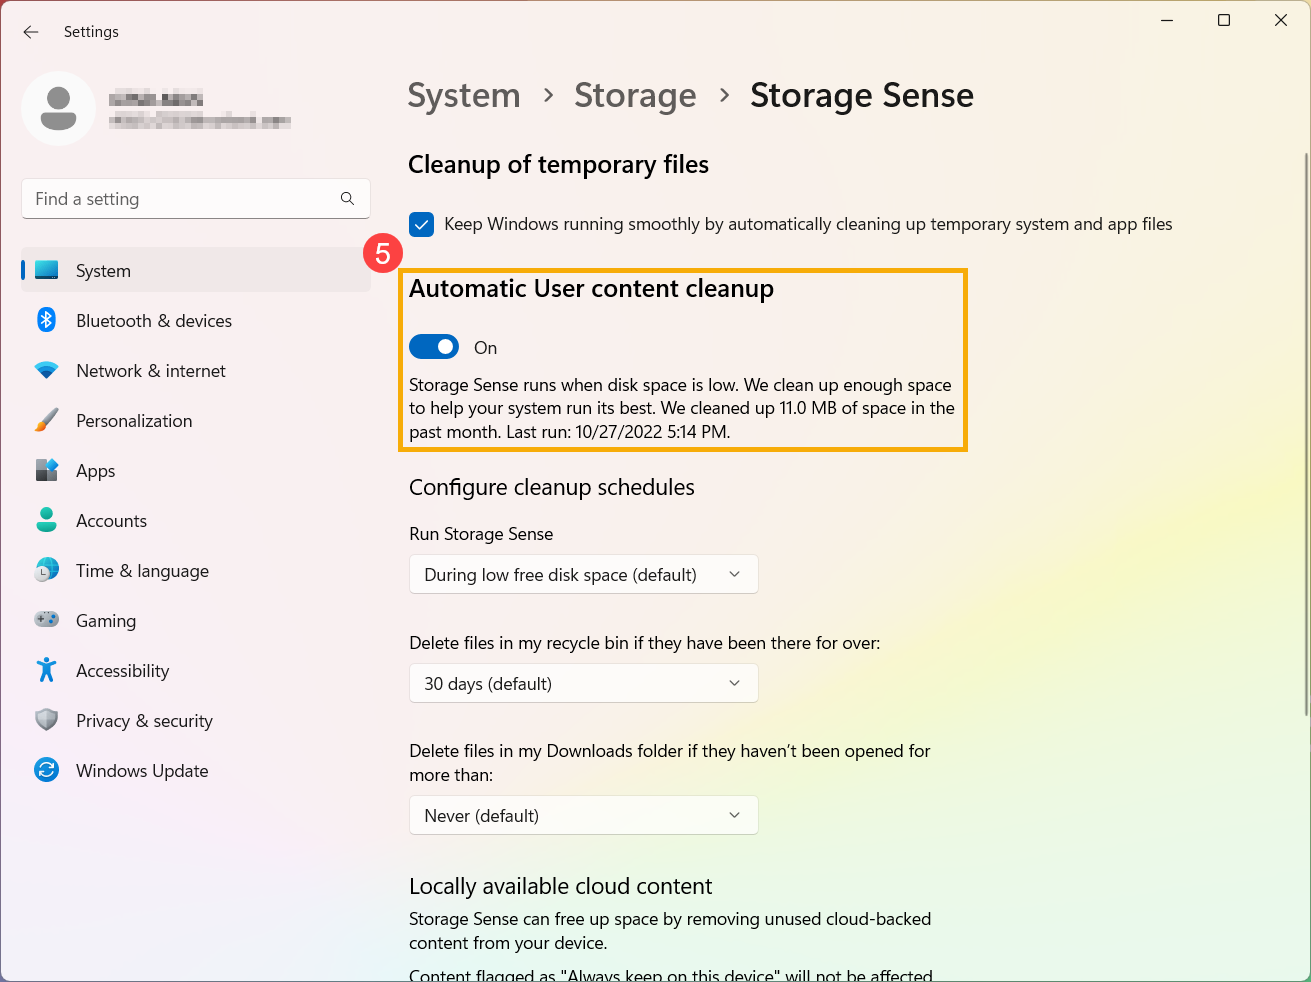
- Toggle Automatic User content cleanup to "On"⑤.
- Configure cleanup schedules:
Choose when to run Storage Sense. You can select how often you would like to run automatic, periodic cleanup via drop-down menu⑥.
Under Delete files in my recycle bin and Delete files in my Downloads folder if they haven’t been opened for more than, choose how often the files from your [Recycle Bin] or [Downloads] folder will be deleted⑦.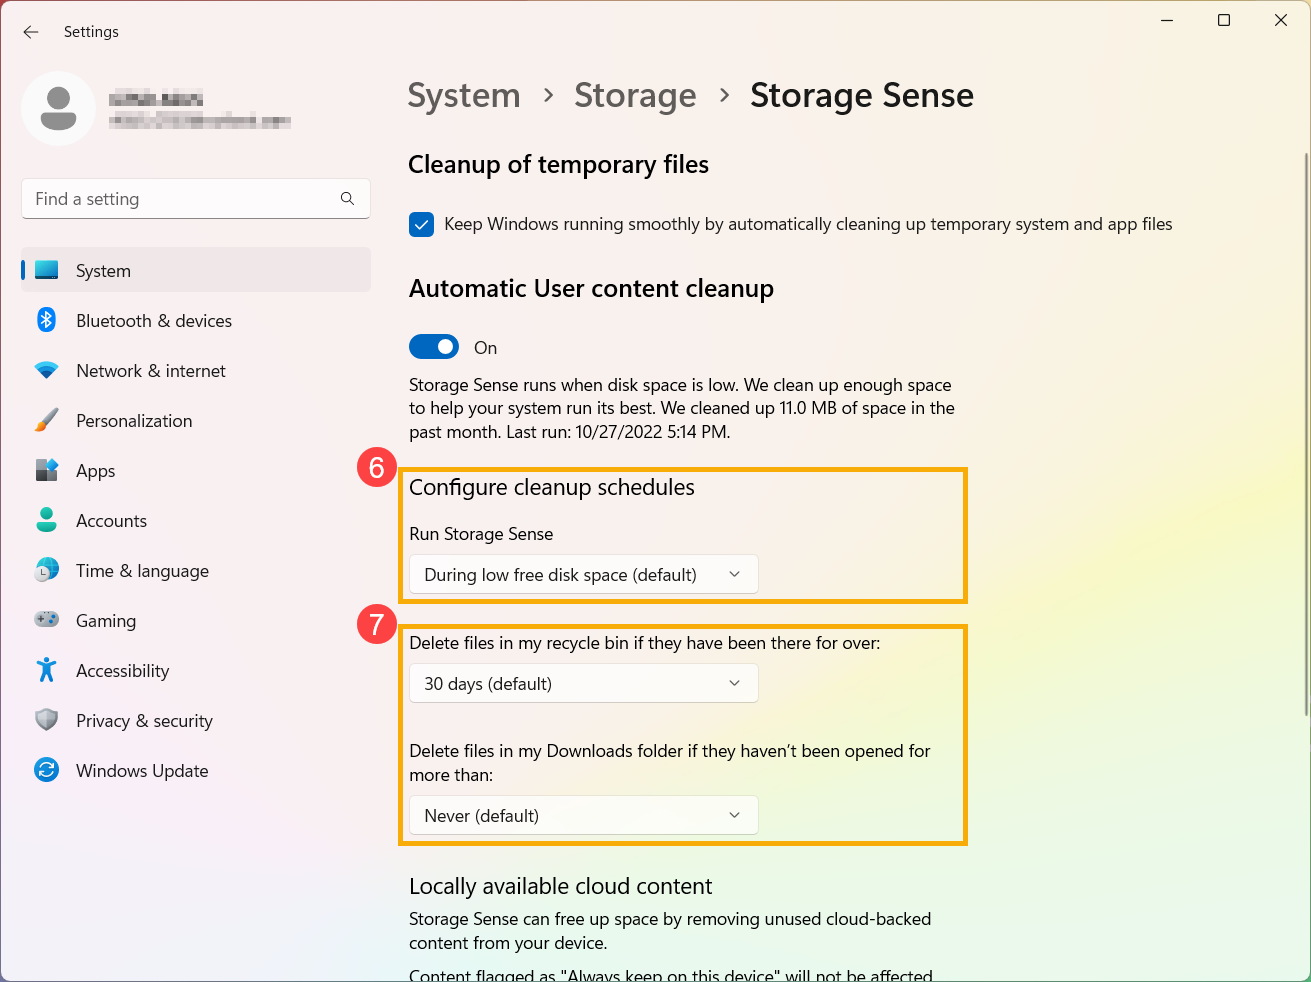
- If your device is signed in to a cloud account, you can choose how often your inactive files will become online-only⑧.
Note: You will only be able to see cloud content settings if you’re signed in to your cloud account.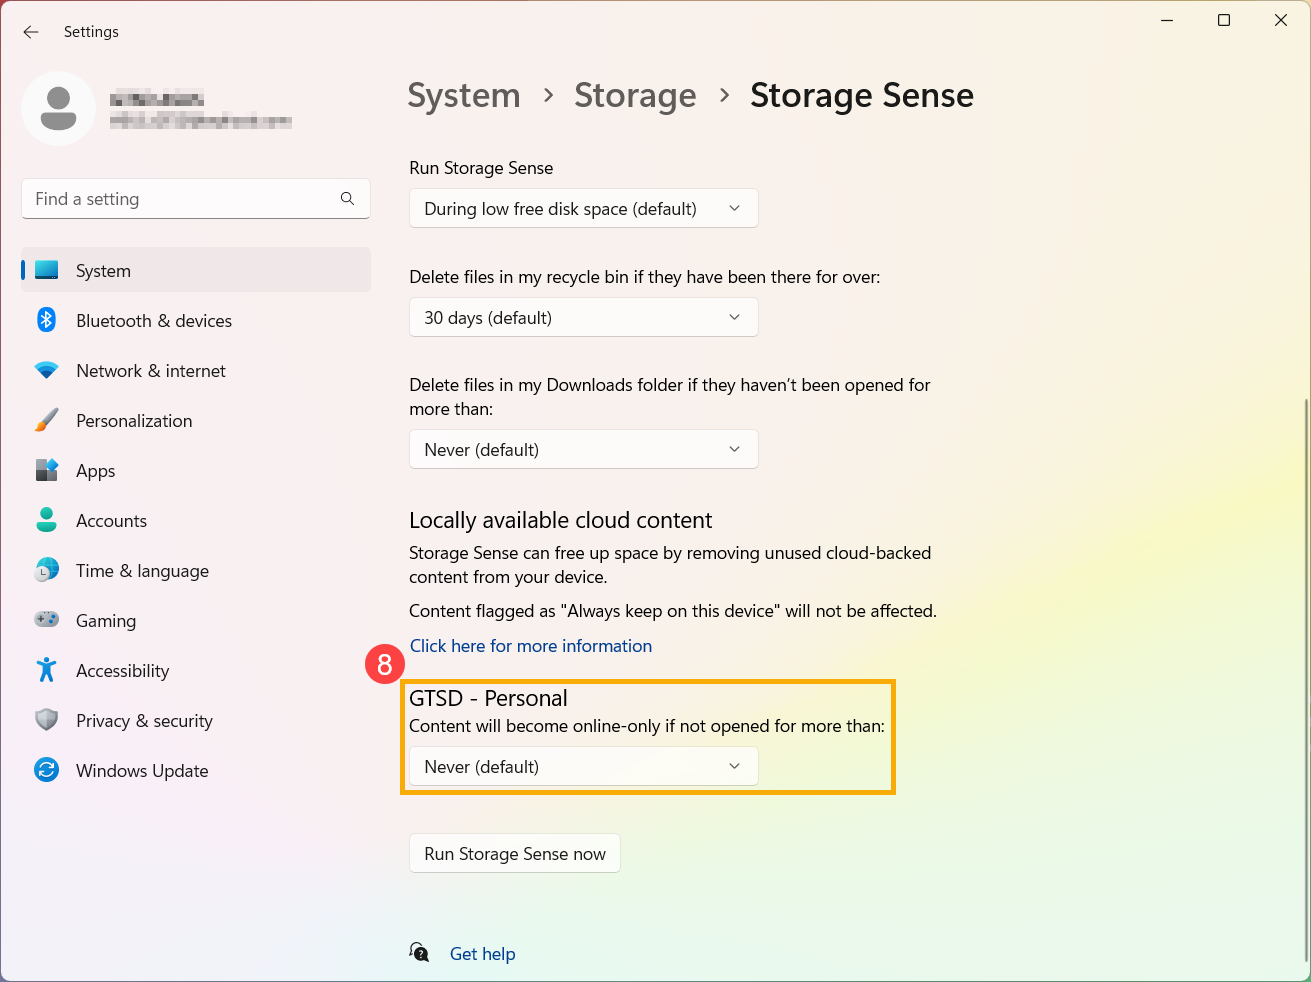
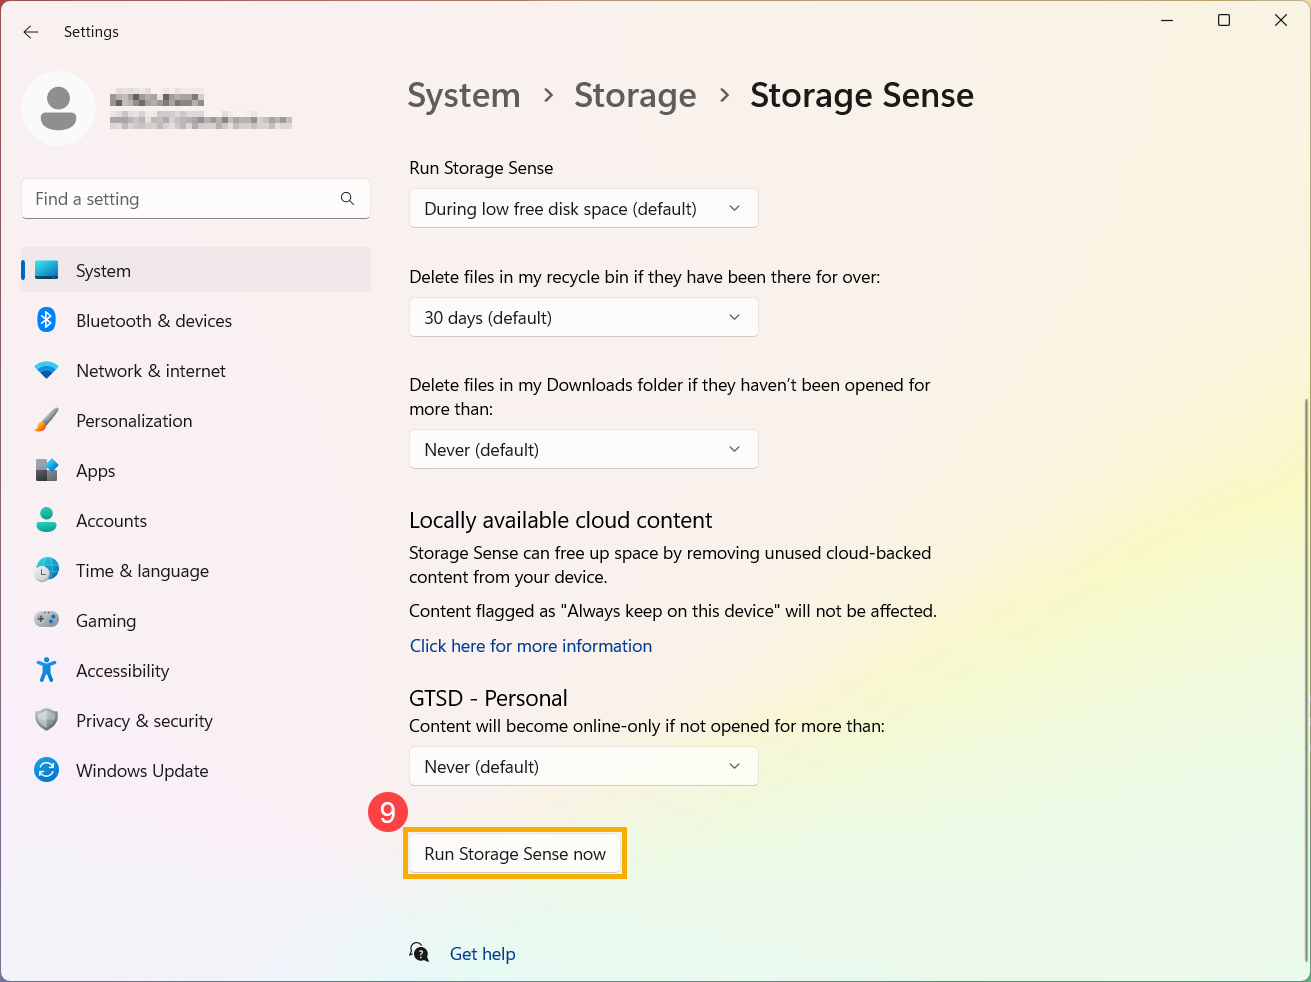
- You can also click [Run Storage Sense now]⑨ to run Storage Sense immediately using the previously selected settings .
Delete files with Cleanup recommendations
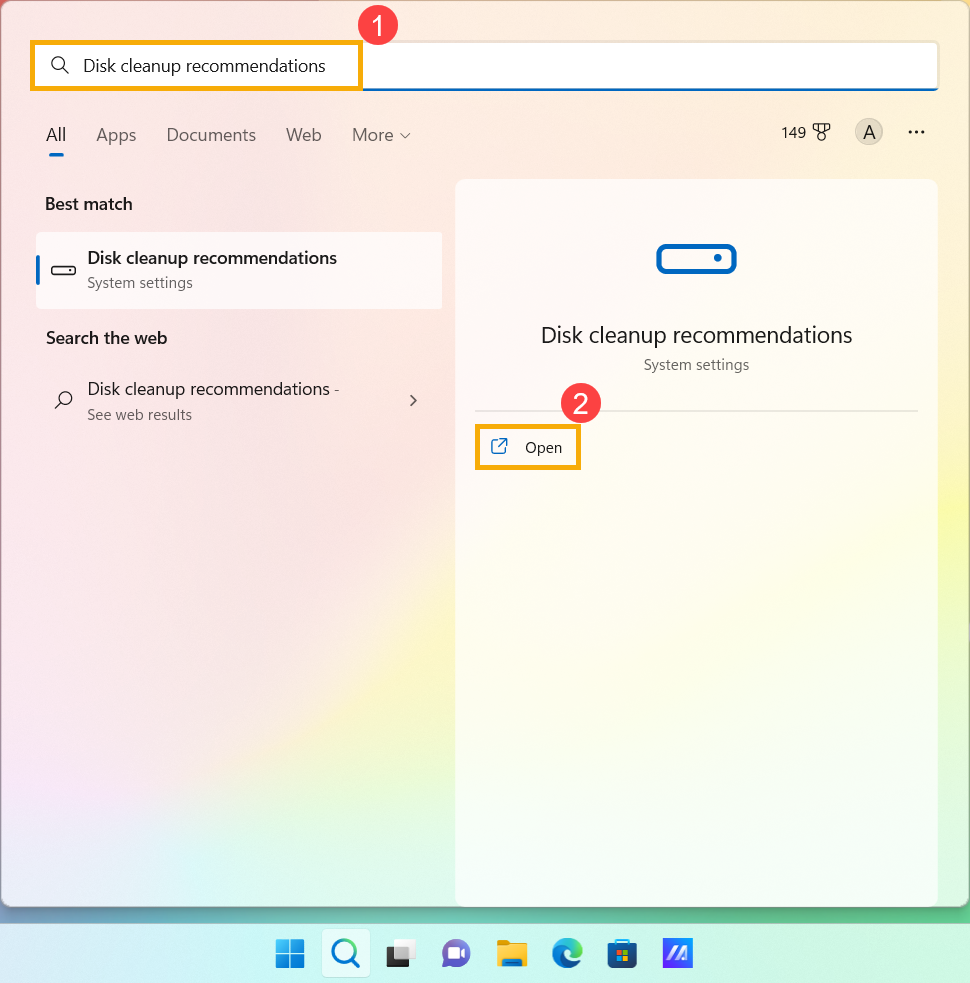
- Type and search [Disk cleanup recommendations] in the Windows search bar①, then click [Open]②.
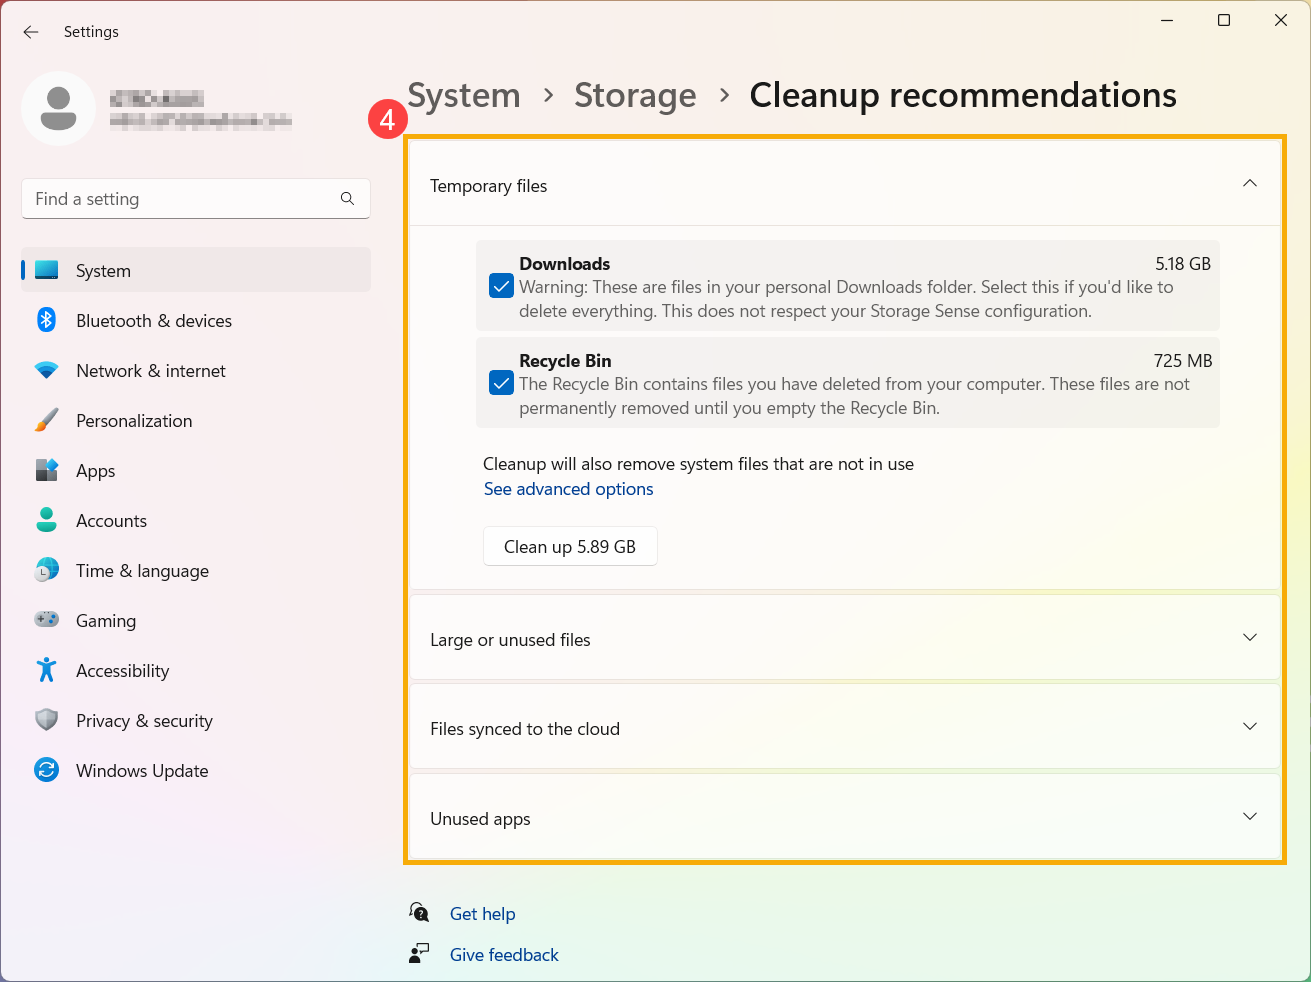
- Select [Cleanup recommendations]③.

- Select the Temporary files, Large or unused files, Files synced to the cloud, or Unused apps menus and select which files you wish to remove in respective menus, then select the [Clean up] button for each section④.
Uninstall non-essential applications
You can uninstall unused or non-essential applications on your device to free up storage space. To do so, follow the steps below:
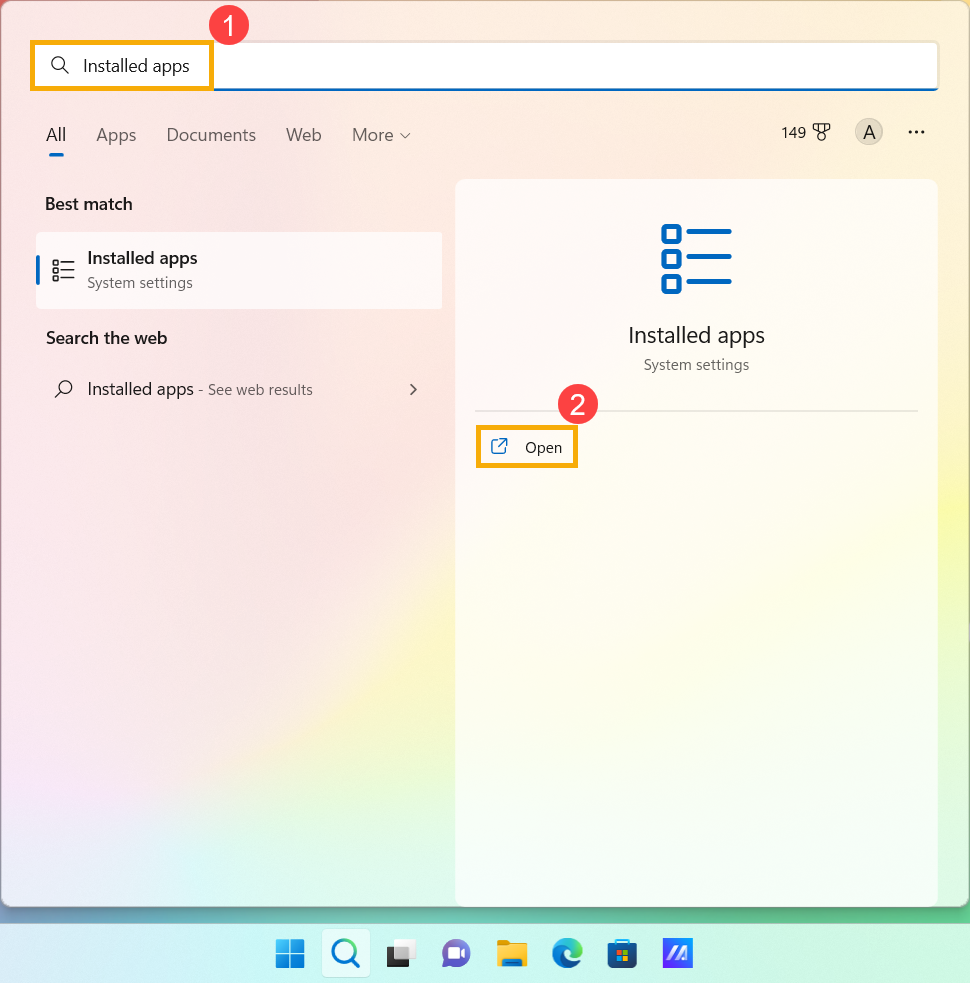
- Type and search [Installed app] in the Windows search bar①, then click [Open]②.
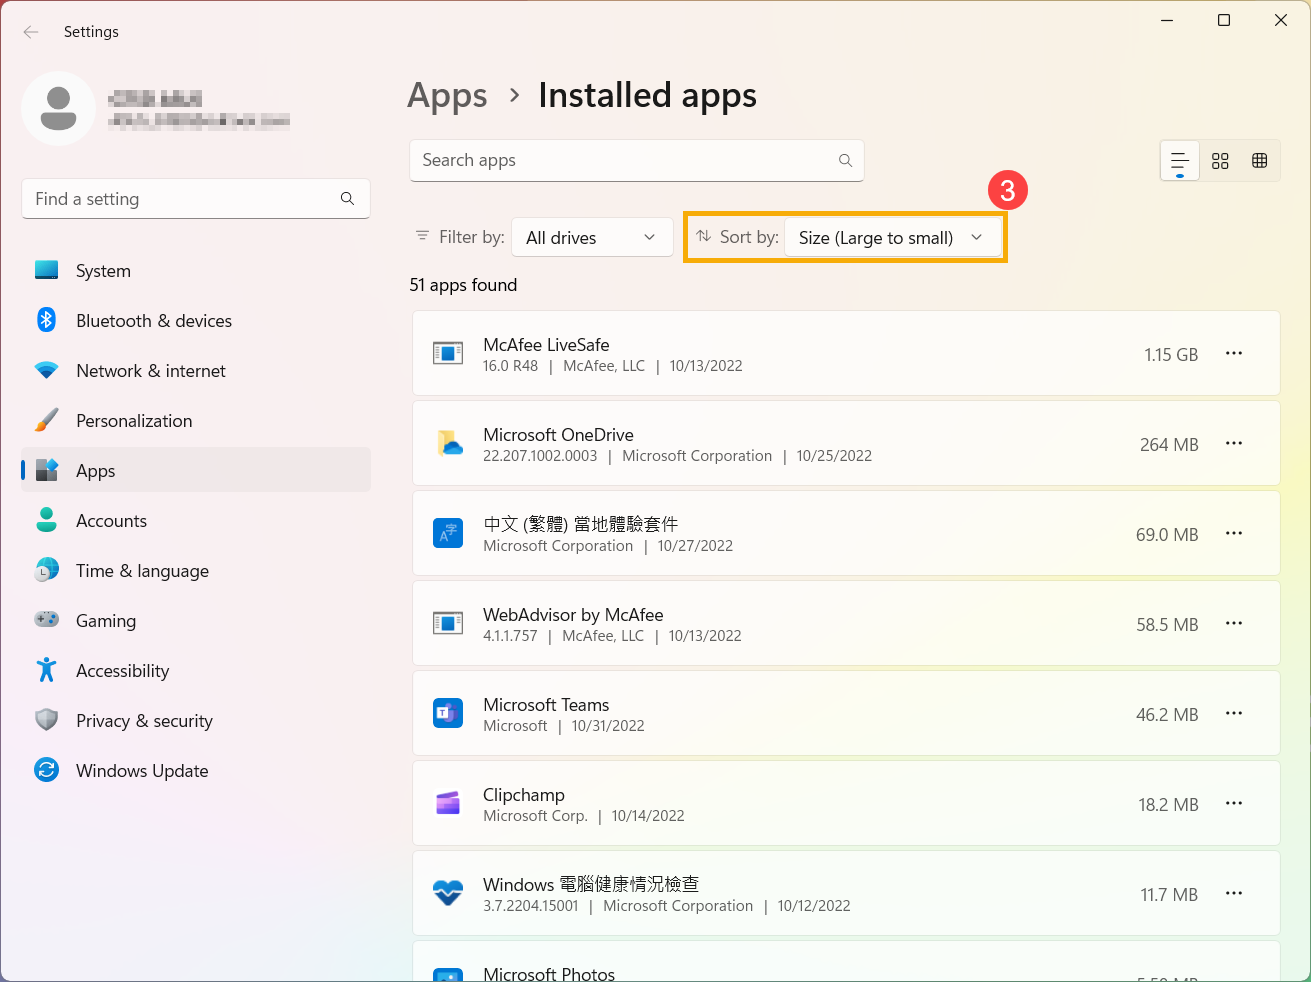
- Select [Size (Large to small) ]③ in the Sort by filter to quickly identify the applications that take up the most space.
- Select the application you don't need, click the [More]
 icon④ next to each app, then select [Uninstall]⑤.
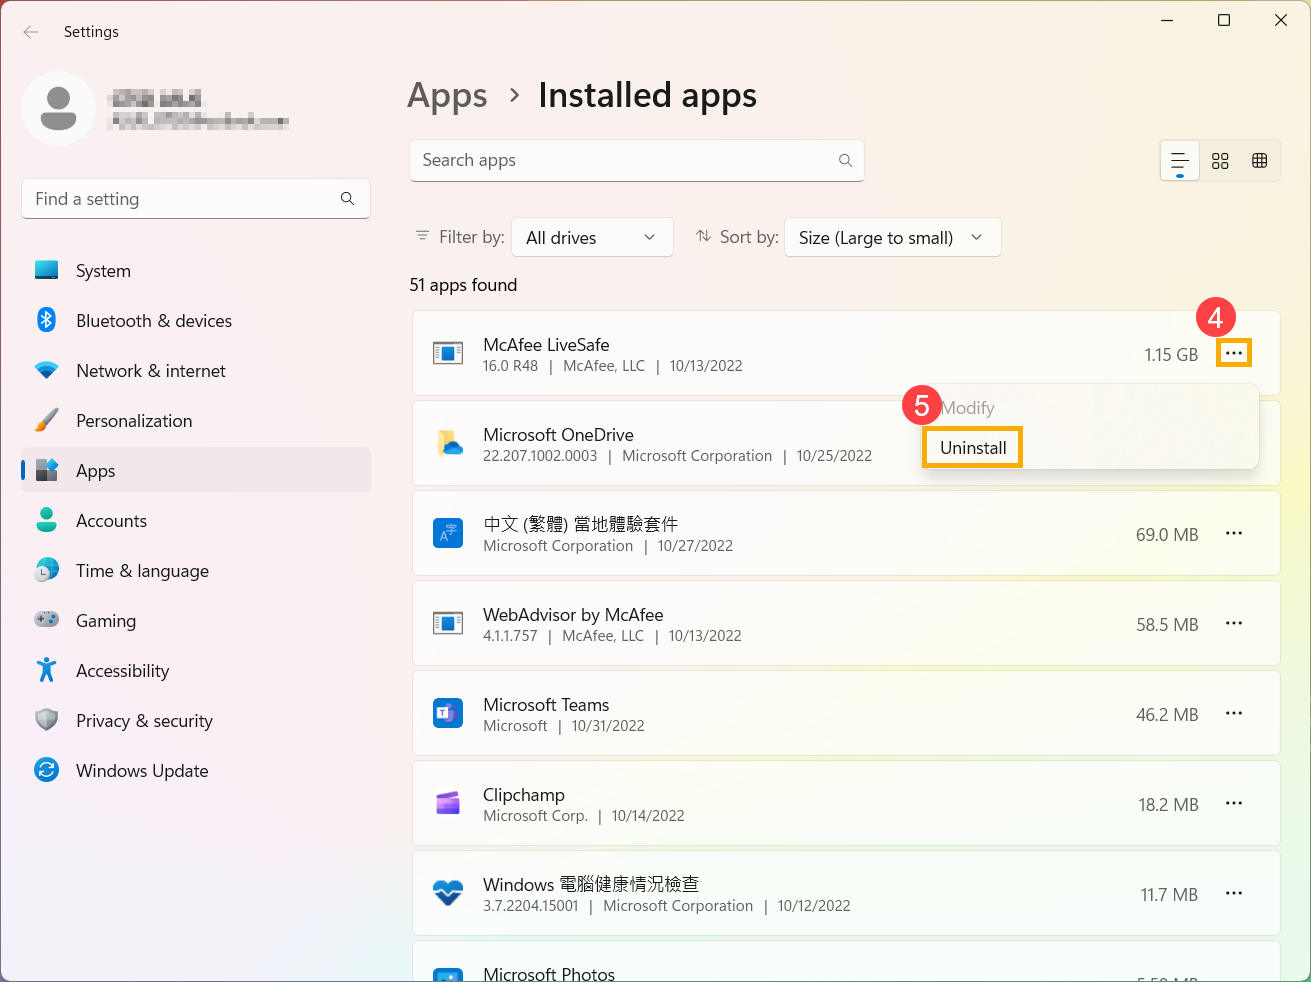
- Repeat the above steps to remove other unneeded applications.
- After uninstalling all the unneeded applications, please restart your device.
Delete personal files or move them to an external storage device
Personal files, such as videos, music, photos, and documents, can take up a lot of space on your device. Refer to the following steps to see which files are using the most space, and erase them if needed:
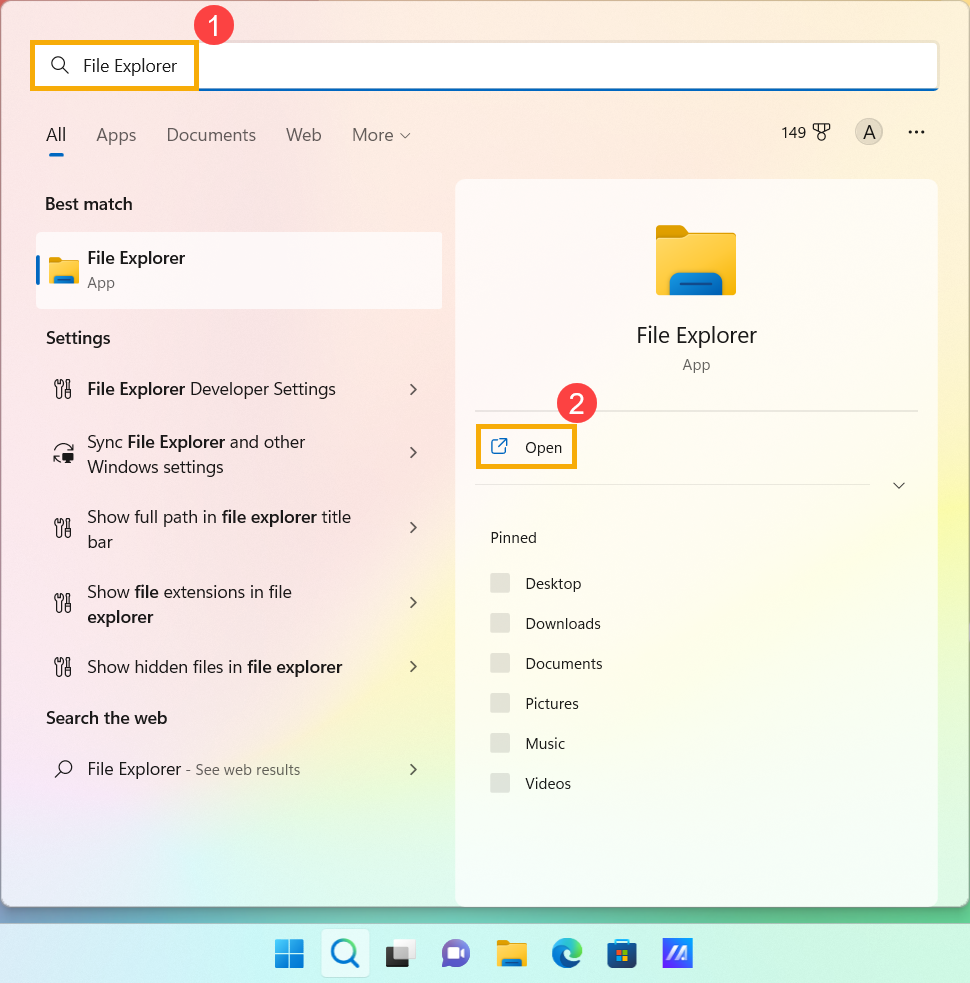
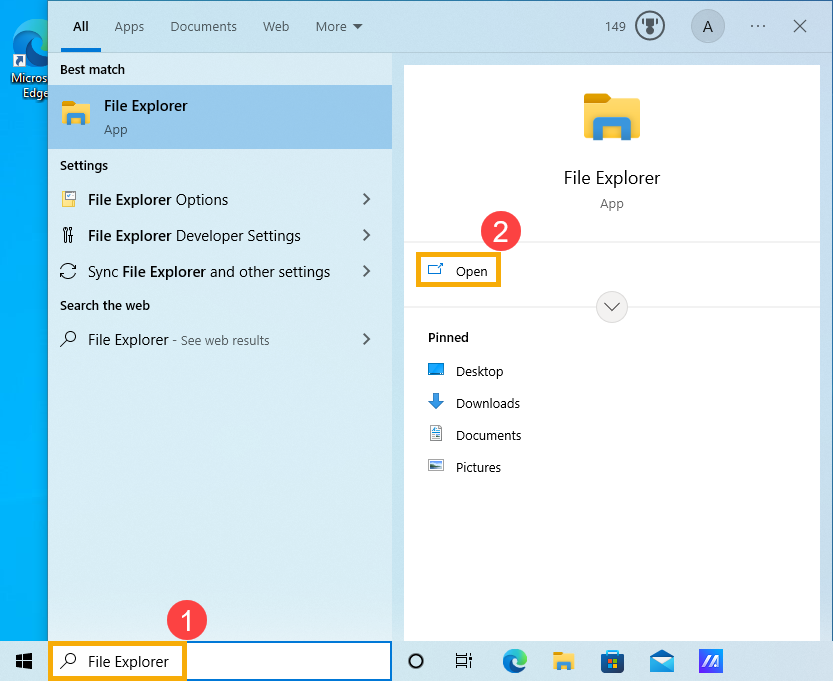
- Type and search [File Explorer] in the Windows search bar①, then click [Open]②.
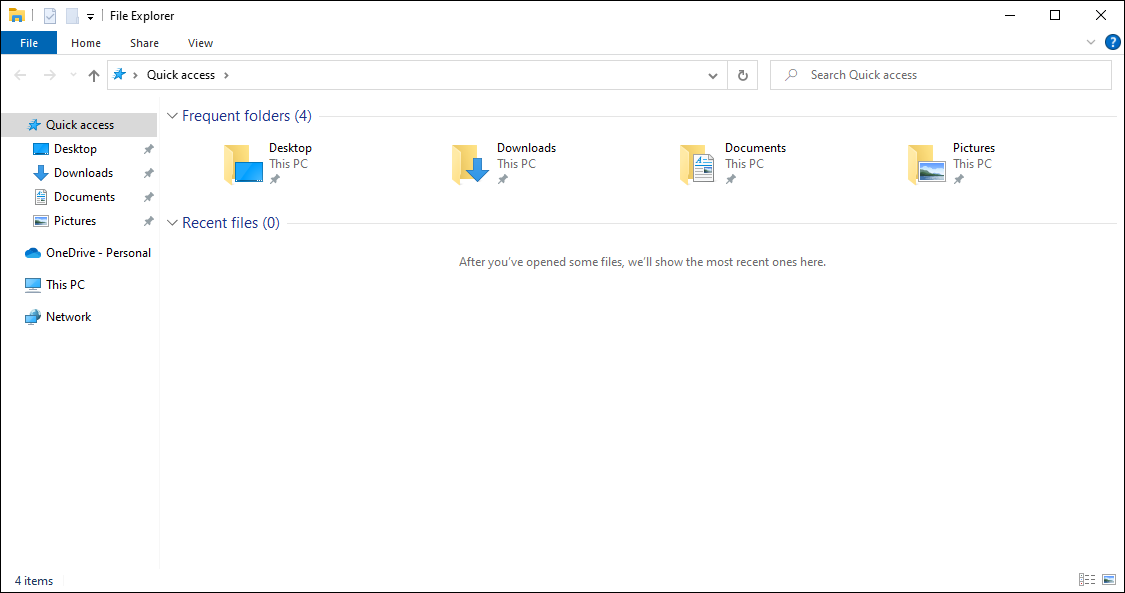
- In File Explorer window, find the files you want to move.

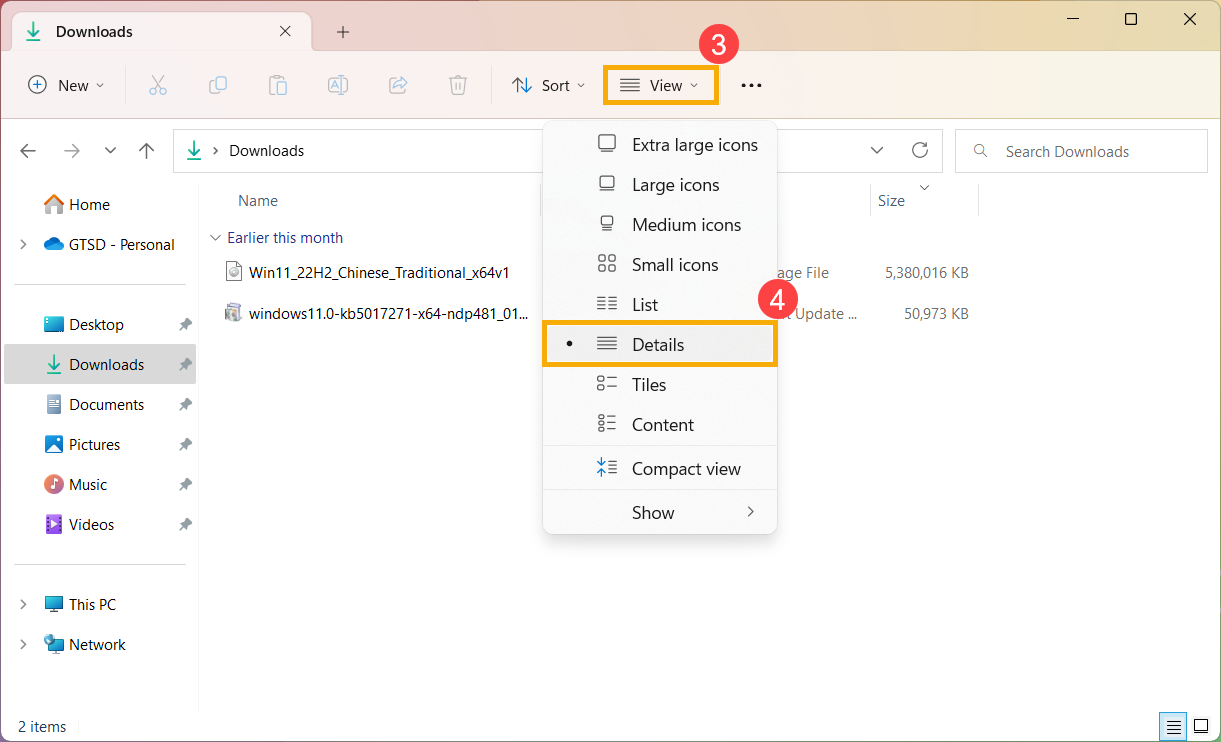
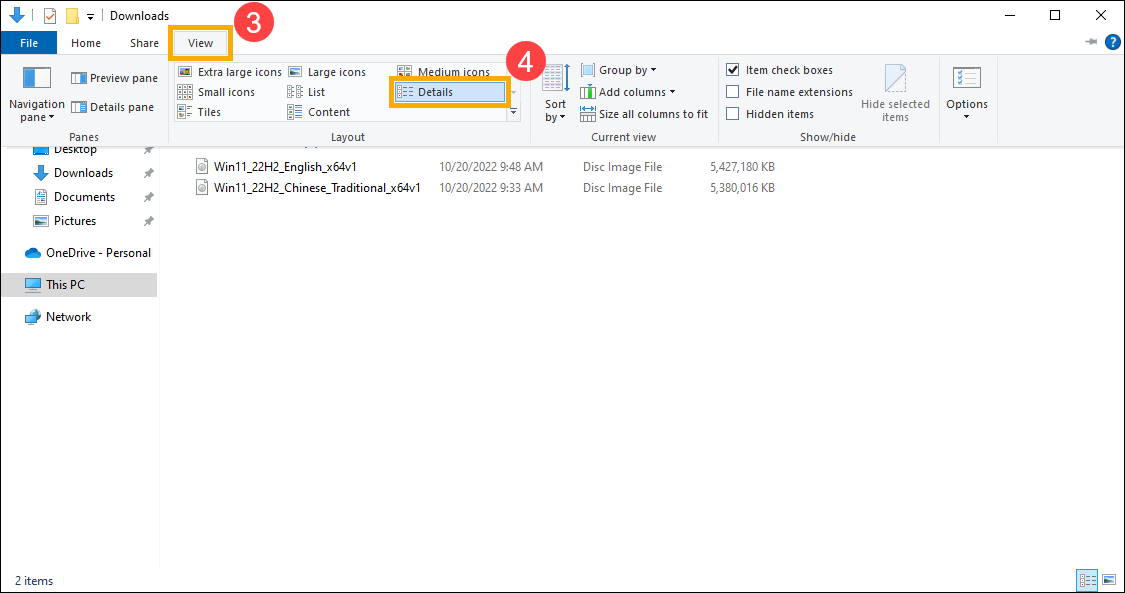
- To see the size of the files in a folder, select [View] from the taskbar③, then select [Details]④.
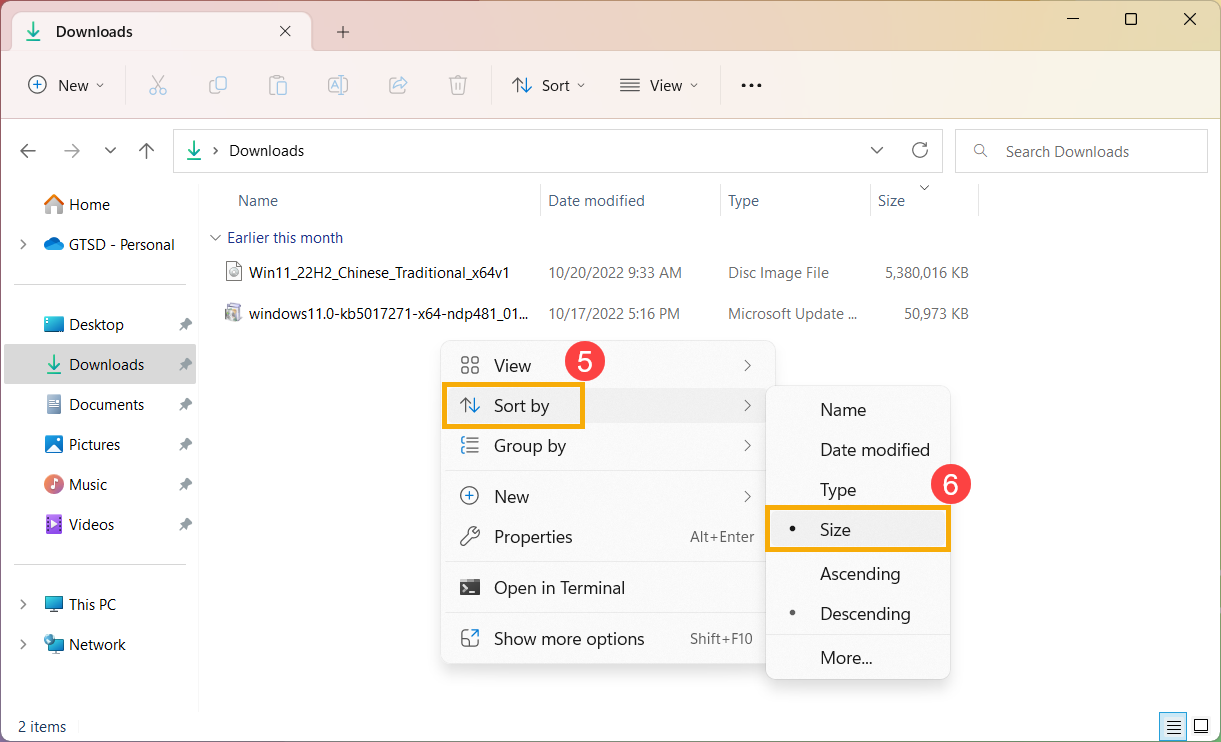
- Right-click anywhere in the free space in the File Explorer window, select [Sort by]⑤, then select [Size]⑥ to sort your files from largest to smallest.
- If you notice files you no longer need on your device, you can either delete them or move them to an external storage device, such as a USB drive or an SD card.
Note: When deleting files, remember to empty the Recycle Bin to completely remove them from your device and free up space on your device's storage drive.
Change where new content is saved
If your device has two or more drives, you change which drive the new files will be saved on. This can help prevent you from running out of space on the default drive(C:\).
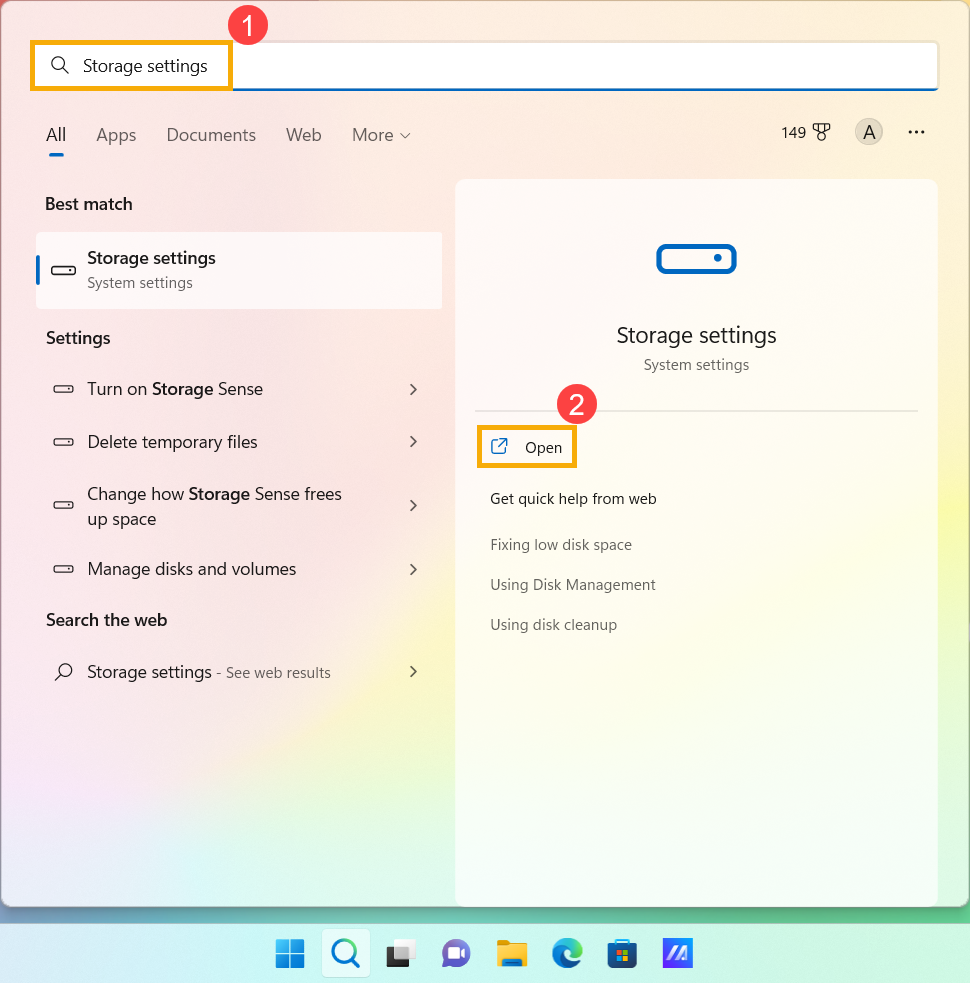
- Type and search [Storage settings] in the Windows search bar①, then click [Open]②.
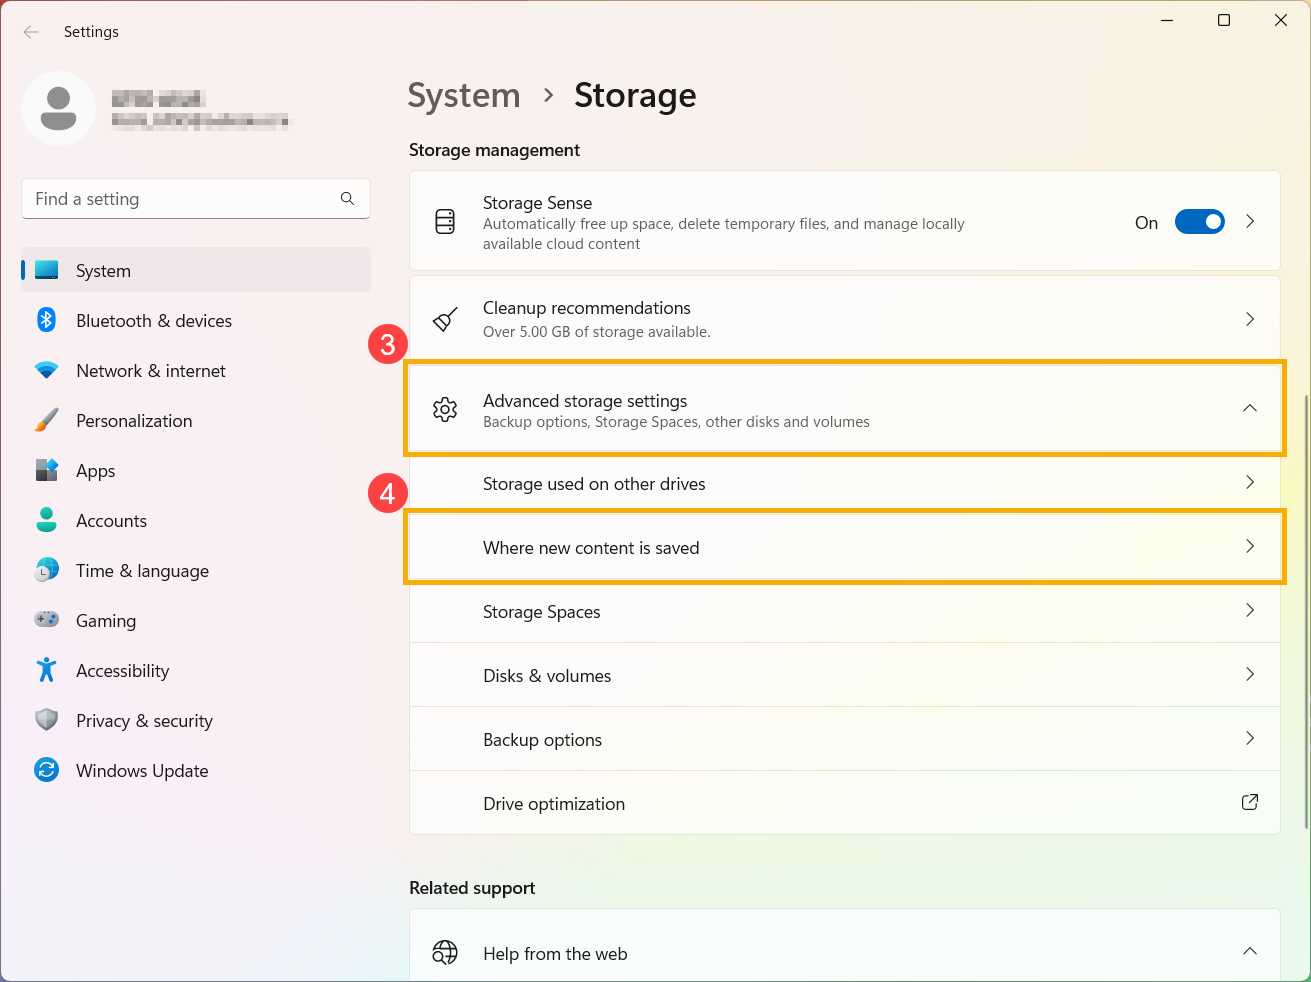
- Expand the [Advanced storage settings] menu③, then select [Where new content is saved]④.
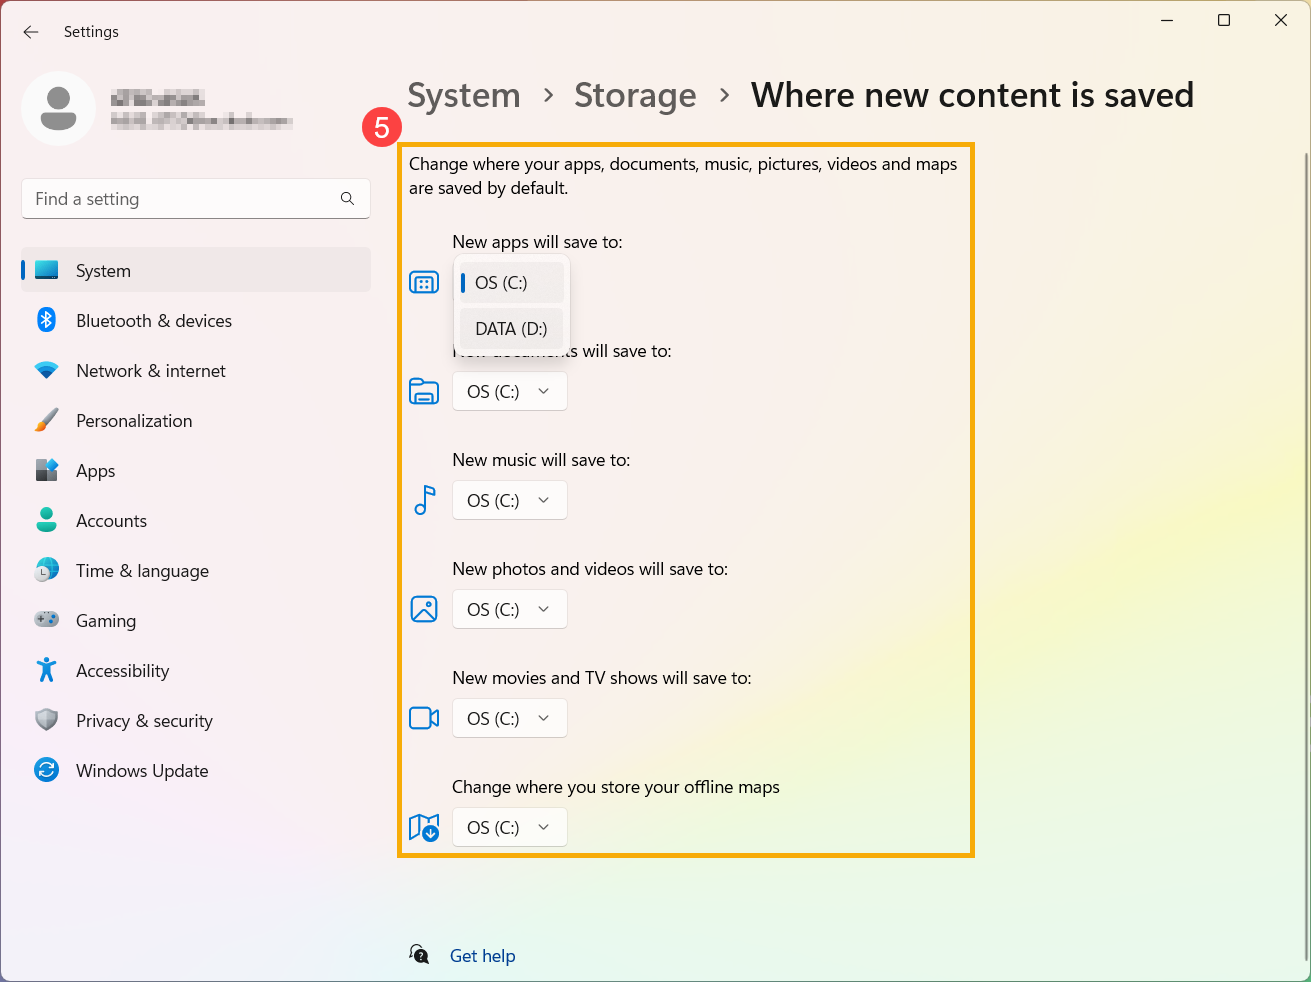
- For each content type, select a drive you wish to save the files from the drop-down menu⑤. If the drive you want to use isn't on the list, make sure it's connected to your PC.
Windows 10 operating system
Manage drive space with Storage Sense
Storage Sense is a Microsoft tool that can help you automatically free up space on your drive by deleting item that you don’t need, such as temporary files or items in the Recycle Bin. Visit the link to learn more about Storage Sense: Storage Sense document from Windows support.
Here are step-by-step instructions for using Storage Sense to clean up your device's storage:
Note: Storage Sense works on your system drive only, which contains the Windows operating system and is usually referred to as C:. To free up space on other drives, go to [Start] > [Settings] > [System] > [Storage], then select [View storage usage on other drives] under [More storage settings].
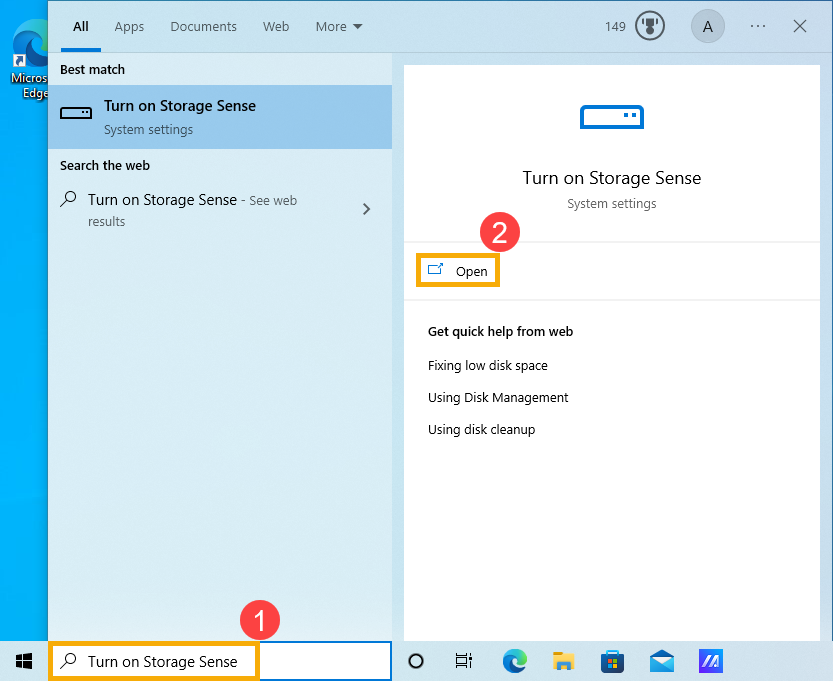
- Type and search [Turn on Storage Sense] in the Windows search bar①, then click [Open]②.
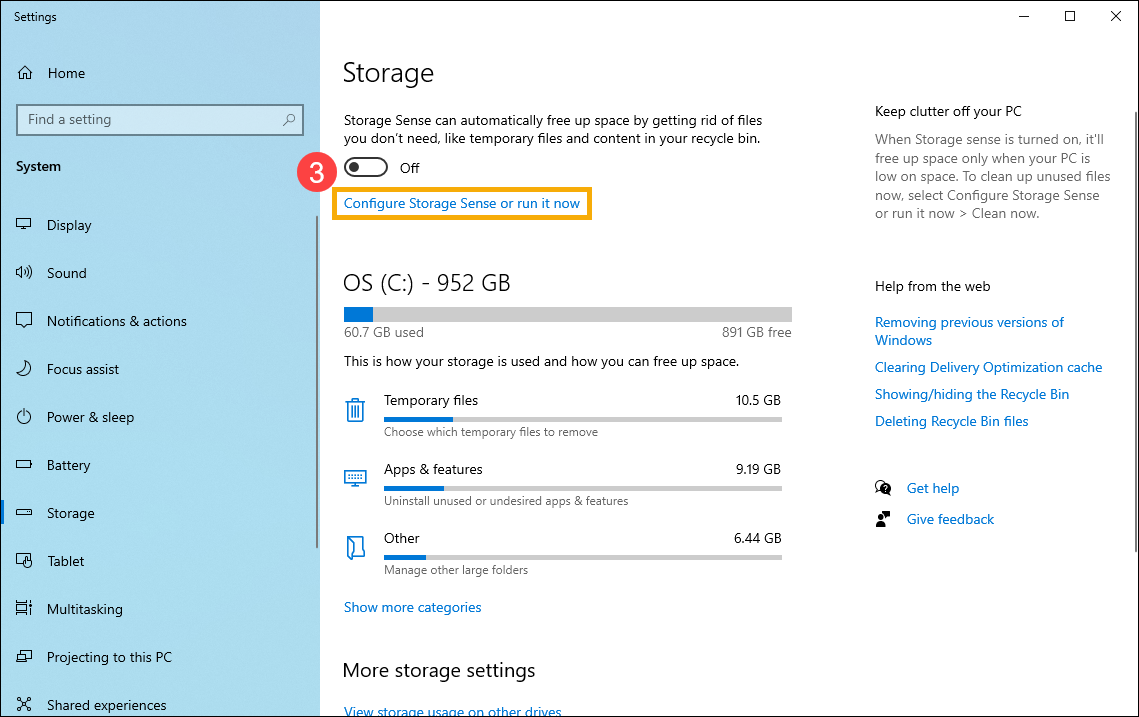
- Click [Configure Storage Sense or run it now]③.
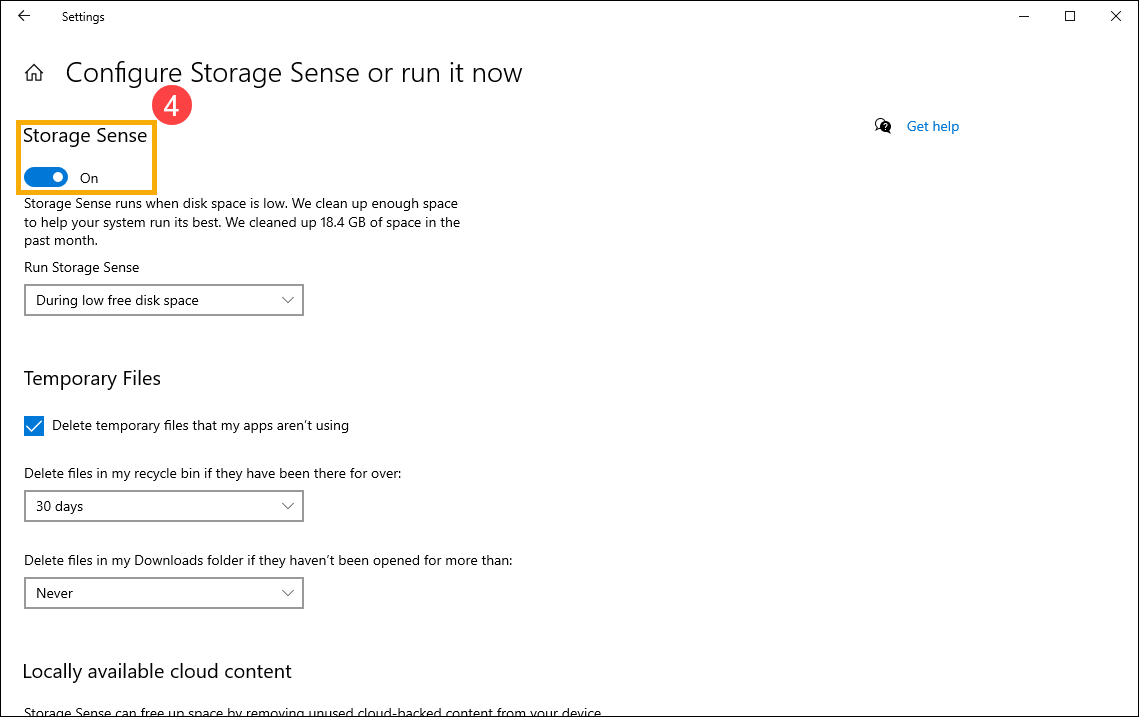
- Turn on Storage Sense④.
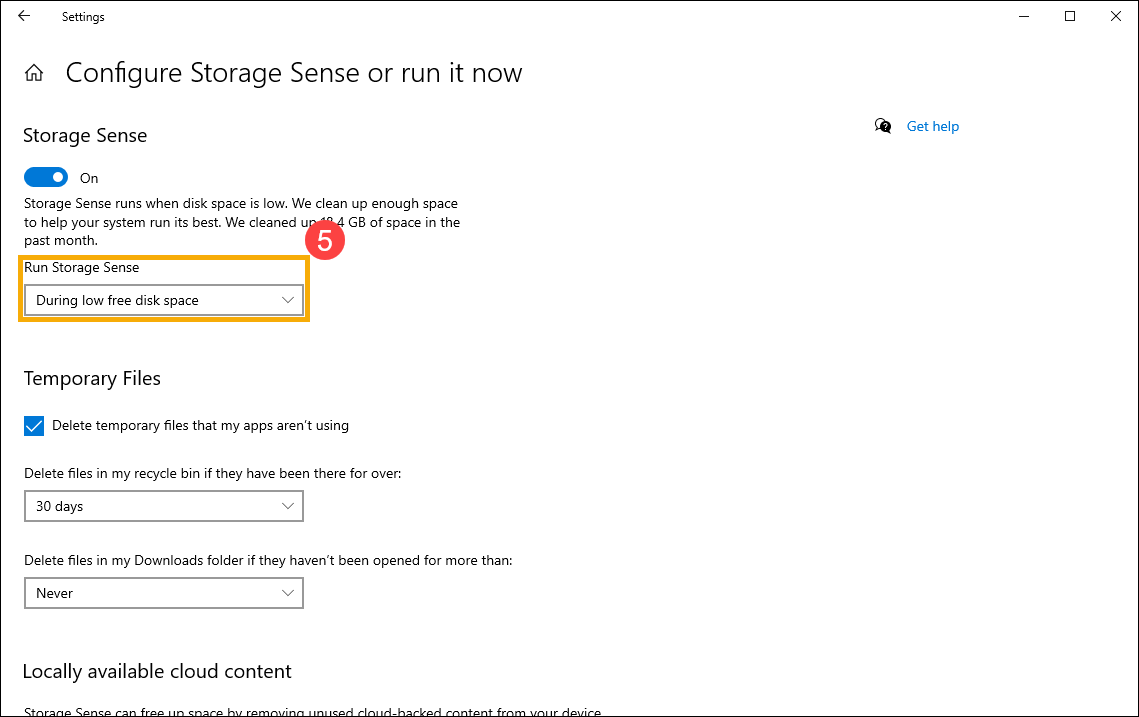
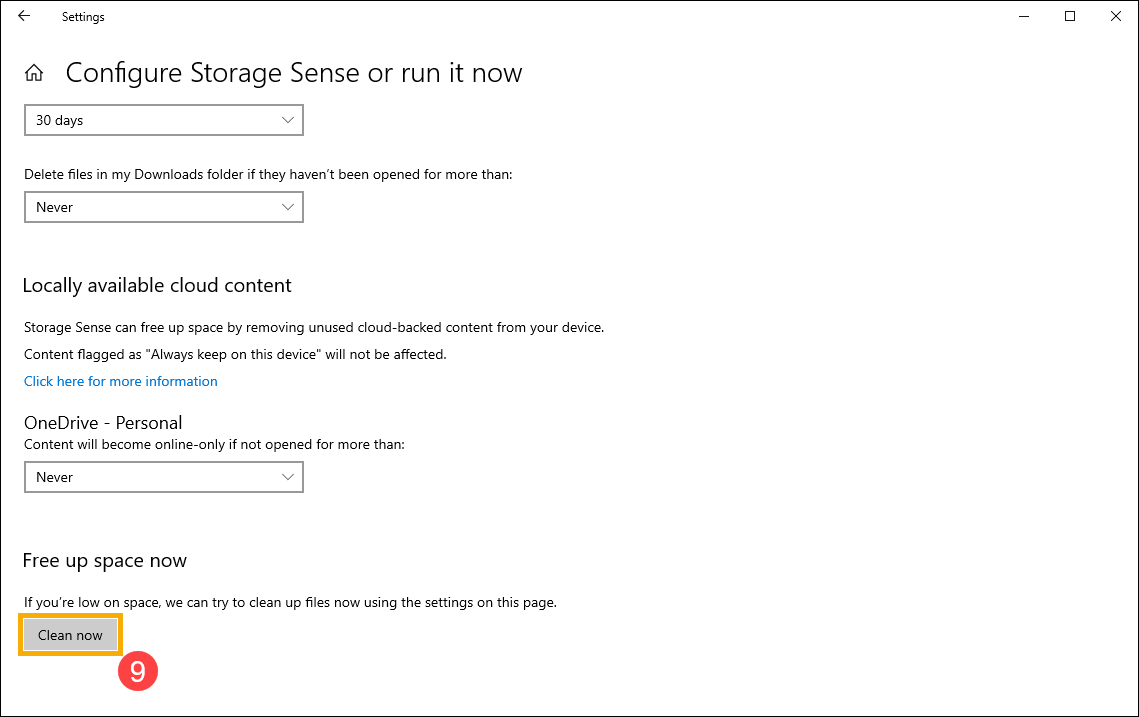
- Choose when to run Storage Sense, you can select how often you would like to run automatic, periodic cleanup via drop-down menu⑤.
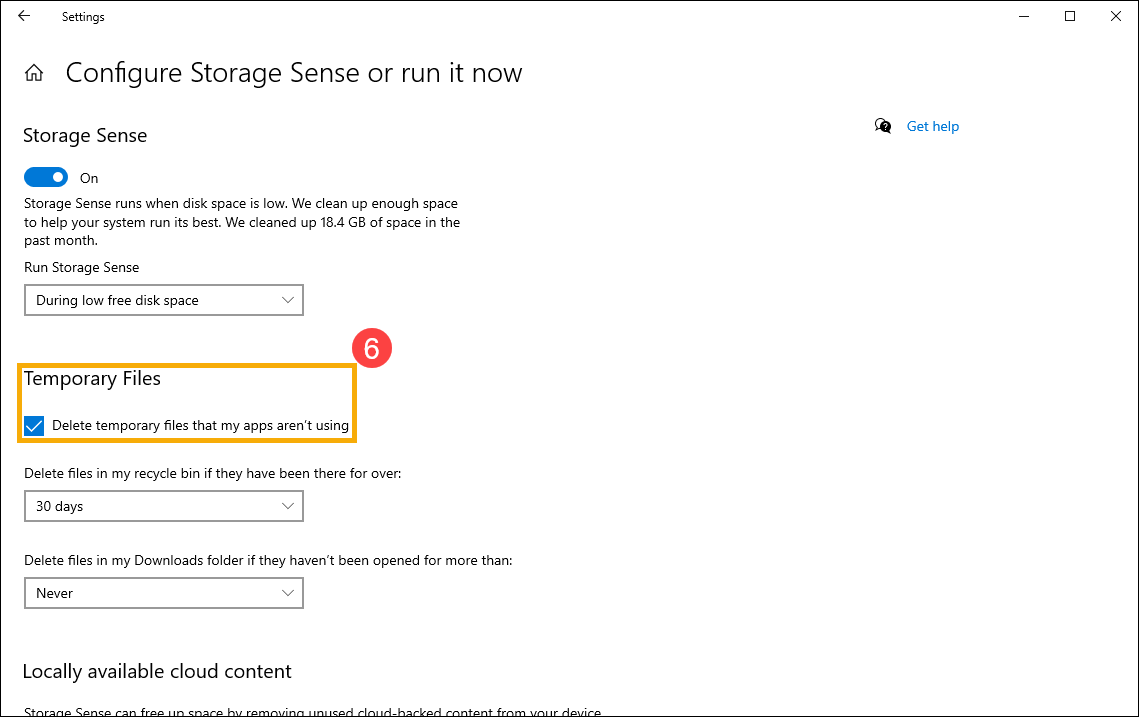
- Check the box to [Delete temporary files that my apps aren’t using]⑥.
- In Delete files in my recycle bin and Delete files in my Downloads folder if they haven’t been opened for more than menu, choose how often you will to automatically erase the files from your [Recycle Bin] or [Downloads] folders⑦.

- If your device is signed in to a cloud account, you can choose how often the inactive files will become online-only⑧.
Note: You'll only see cloud content settings if you’re signed in to your cloud account.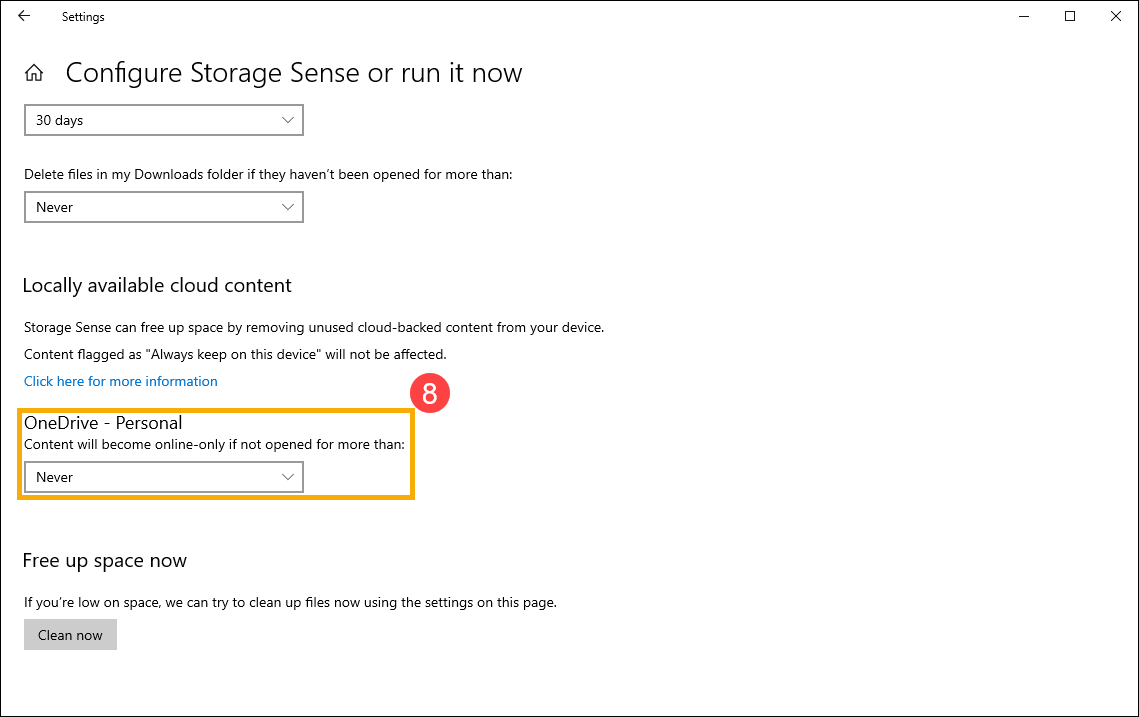
- You can also click [Clean now]⑨ to run Storage Sense immediately using the previously selected settings.
Delete files with Disk Cleanup
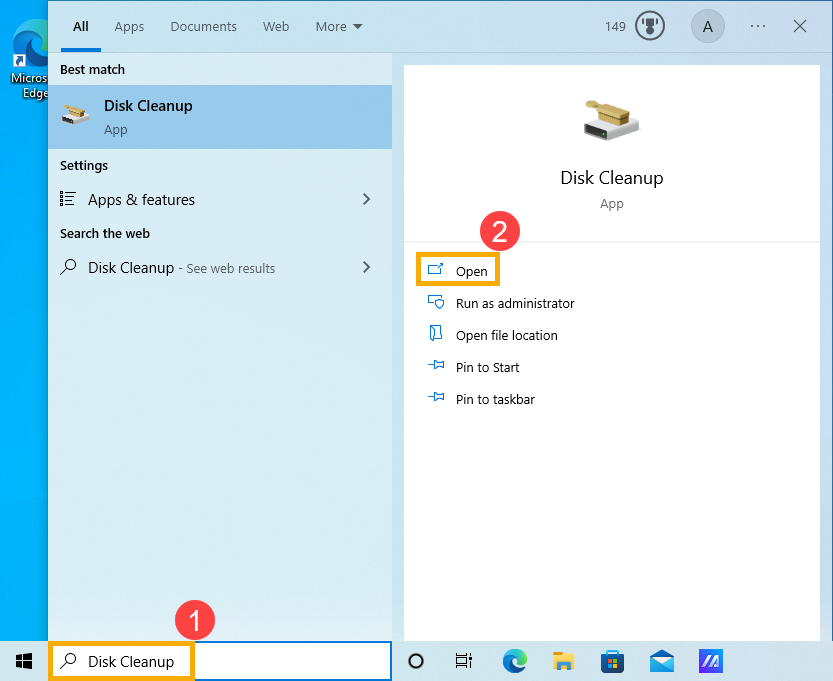
- Type and search [Disk Cleanup] in the Windows search bar①, then click [Open]②.
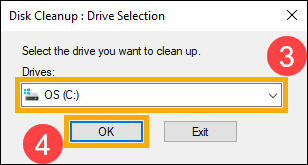
- Select the drive you want to clean up③, then select [OK]④.
- Select [Clean up system files]⑤ to free up even more space by deleting system files.
Note: To be able to clean up system files, you need to be signed in to an account with Administrator permission.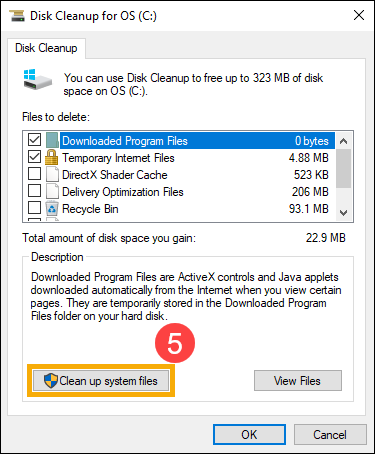
- Check the boxes next to all types of files you wish to delete⑥, then select [OK]⑦.

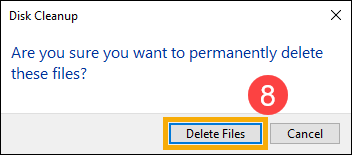
- In the confirmation window, click [Delete Files] to start the cleanup⑧.
Uninstall non-essential applications
You can uninstall applications you don’t need on your device to free up storage space. Follow the steps below to do this:
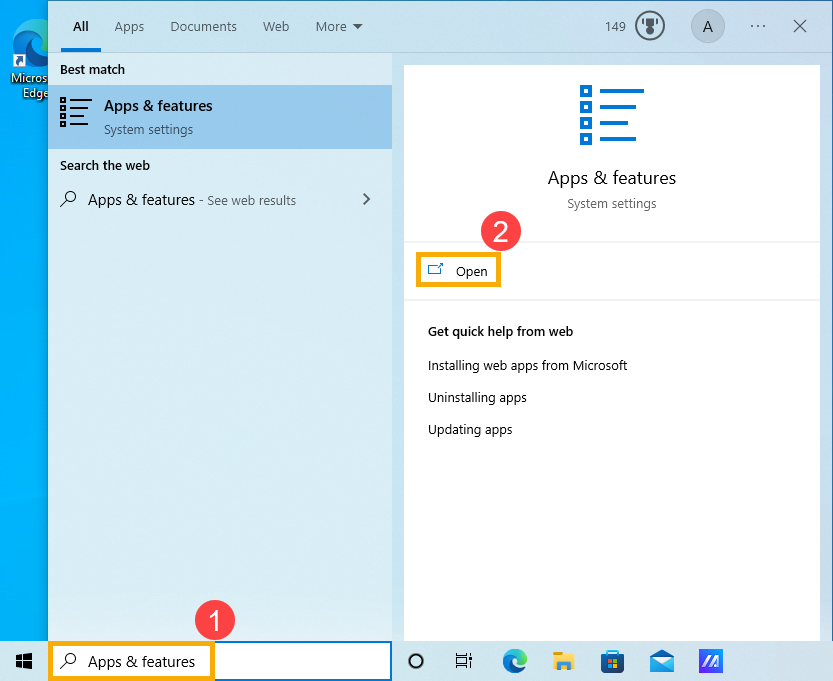
- Type and search [Apps & features] in the Windows search bar①, then click [Open]②.
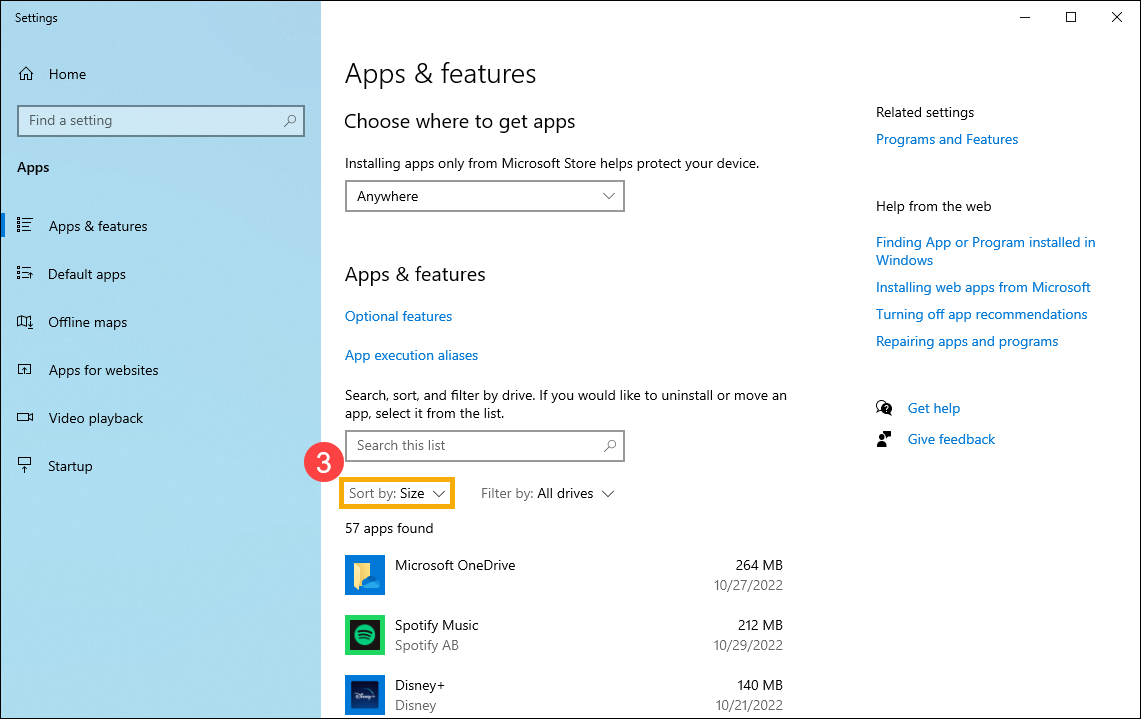
- From the Sort by filter, select [Size]③ to quickly identify the applications that take up the most space.
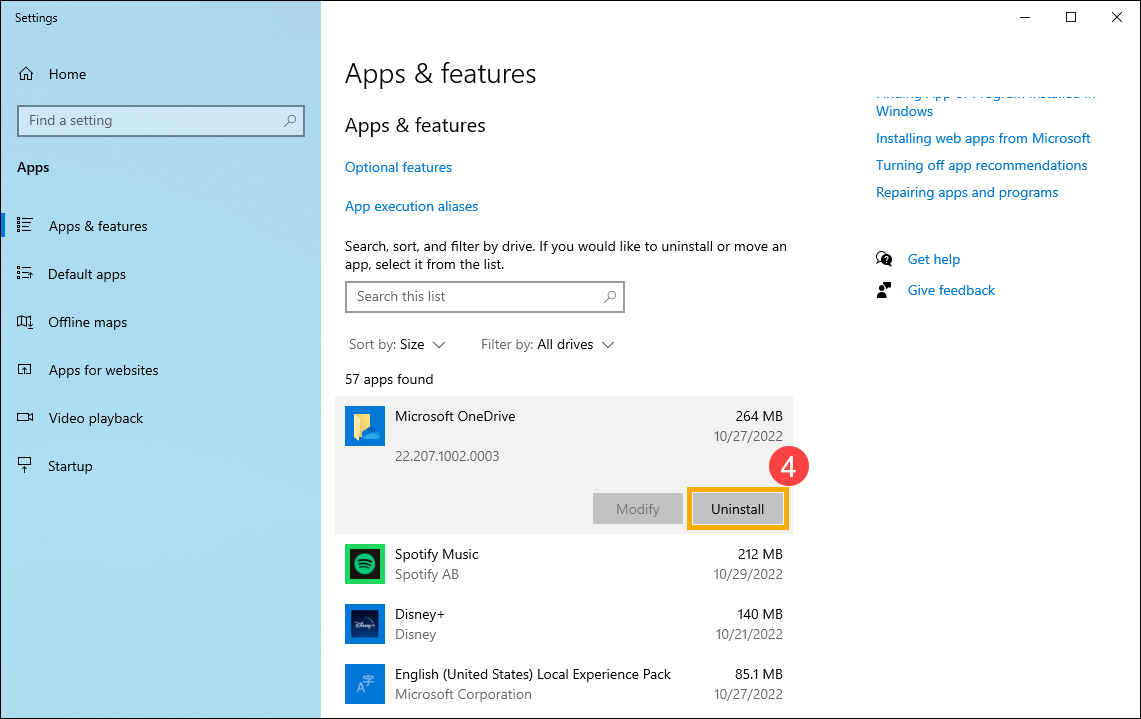
- Select an unneeded application, then click [Uninstall]④.
- Repeat the above steps to remove other applications you do not need.
- After uninstalling all unneeded applications, please restart the device.
Delete personal files or move them to an external storage device
Personal files such as videos, music, photos, and documents, can take up a lot of space on your device. Follow following steps to see which files are using the most space and how to delete them:
- Type and search [File Explorer] in the Windows search bar①, then click [Open]②.
- In the File Explorer window, find the files you wish to move.
- To see the size of the files in a folder, select [View] from the taskbar③, then click [Details]④.
- Right-click in an open space in the File Explorer window, select [Sort by]⑤, then click [Size]⑥ to sort the files from largest to smallest.
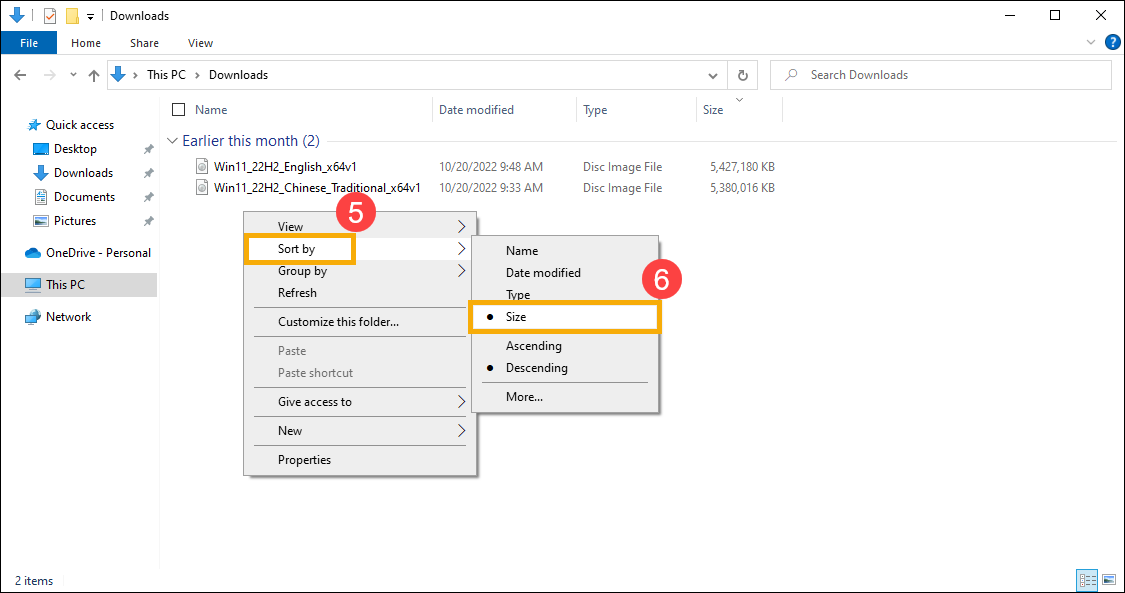
- If you notice any files you no longer need on your device, you can either delete them or move them to an external storage device, such as a USB drive, or an SD card.
Note: After deleting files, remember to empty the Recycle Bin to completely remove them from your device and free up space.
Change where new content is saved
If your device has two or more drives, you change which drive the new files will be saved on. This can help your prevent running out of space on the default drive(C:\).
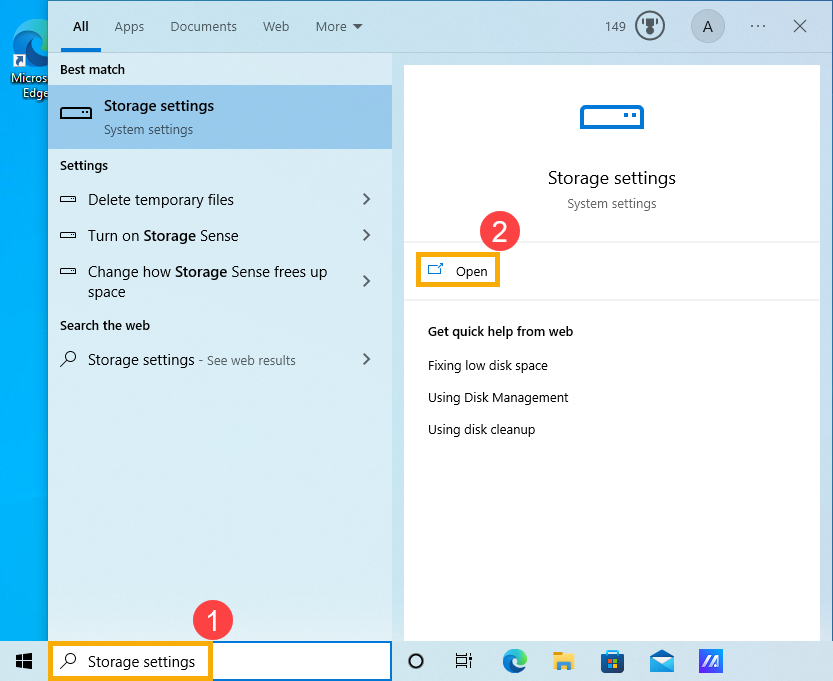
- Type and search [Storage settings] in the Windows search bar①, then click [Open]②.
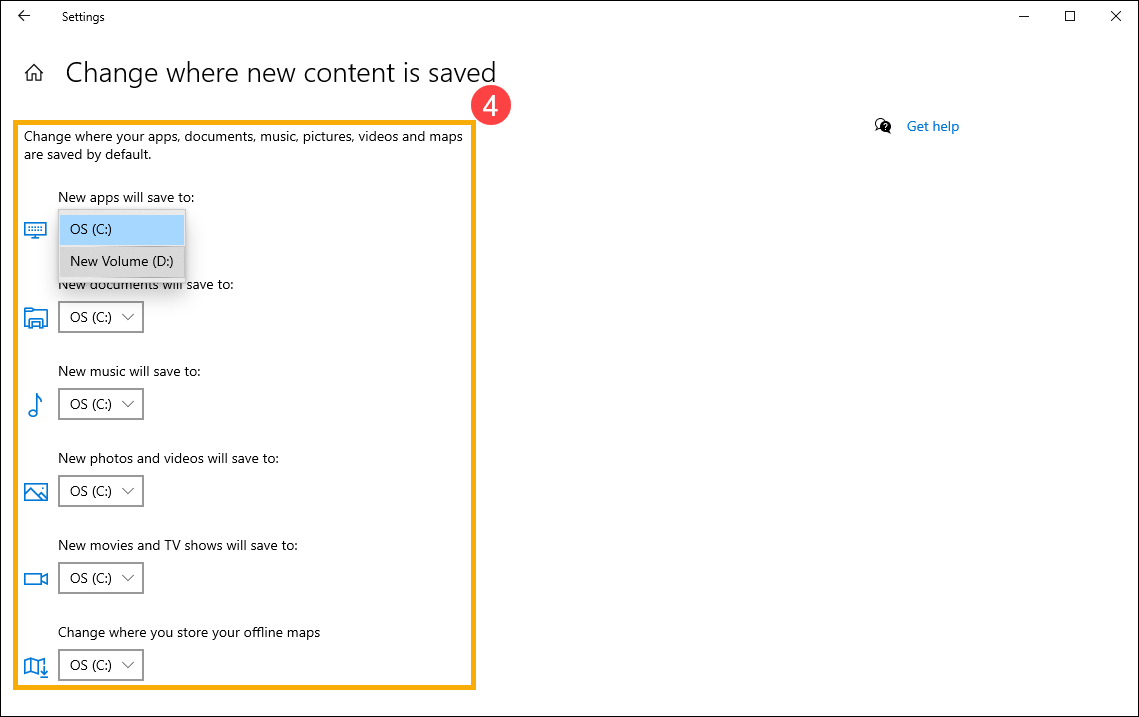
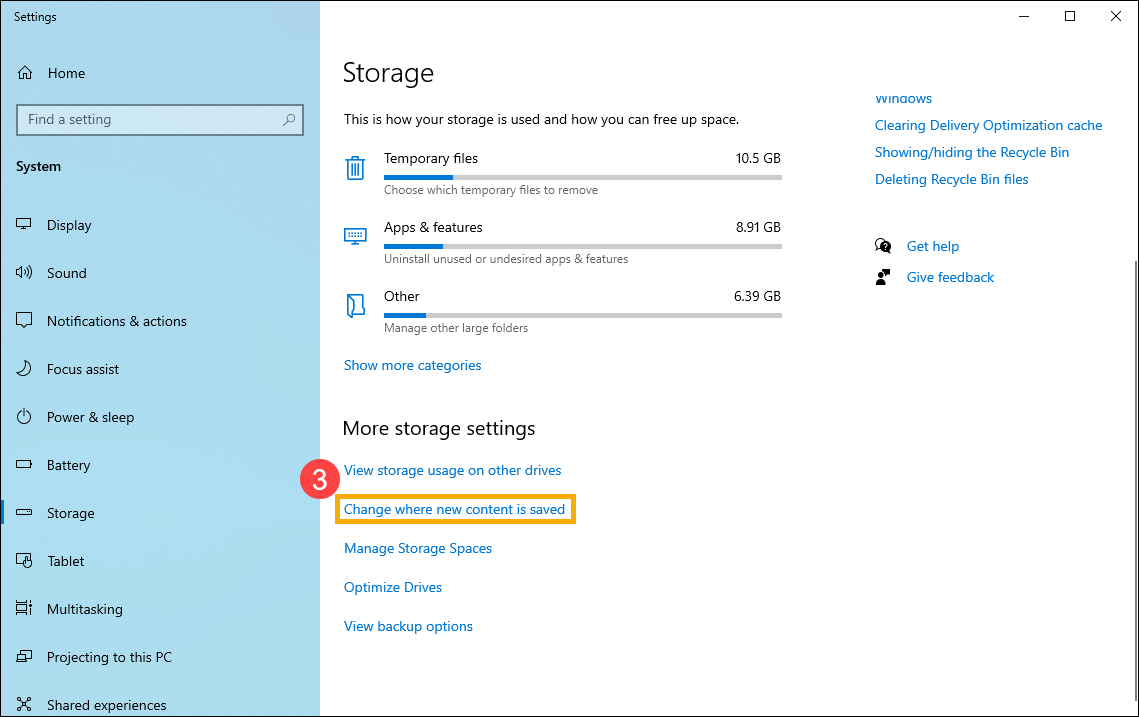
- In the More storage settings menu, select [Change where new content is saved]③.
- For each content type, select a drive which you wish to save from the drop-down menu④. If the drive you wish to use isn't on the list, make sure it's connected to your PC.