[Desktop Chassis] How to install additional chassis wheels on ProArt PA602?
Notice
1. Please wear gloves to protect your hands before disassembling and assembling, and pay attention to the corners of the parts to avoid scratches.
2. When the side panel is made of glass, please handle it with care when disassembling the side panel of the case to avoid collision/fall/stress.
3. When disassembling, please lay the casing flat on a flat surface to prevent the side panel from falling during disassembly and assembly.
ProArt PA602 has built-in wheels that enable effortless maneuvering, adapting to various flexible scenarios. Users can choose optional wheels to make ProArt PA602 easy to transport across different sets or from one studio to another. This article explains how to install additional chassis wheels on ProArt PA602.
Additional chassis wheels specifications
Note: Wheels are not included. You can purchase compatible wheels on your own for installation according to the following specifications.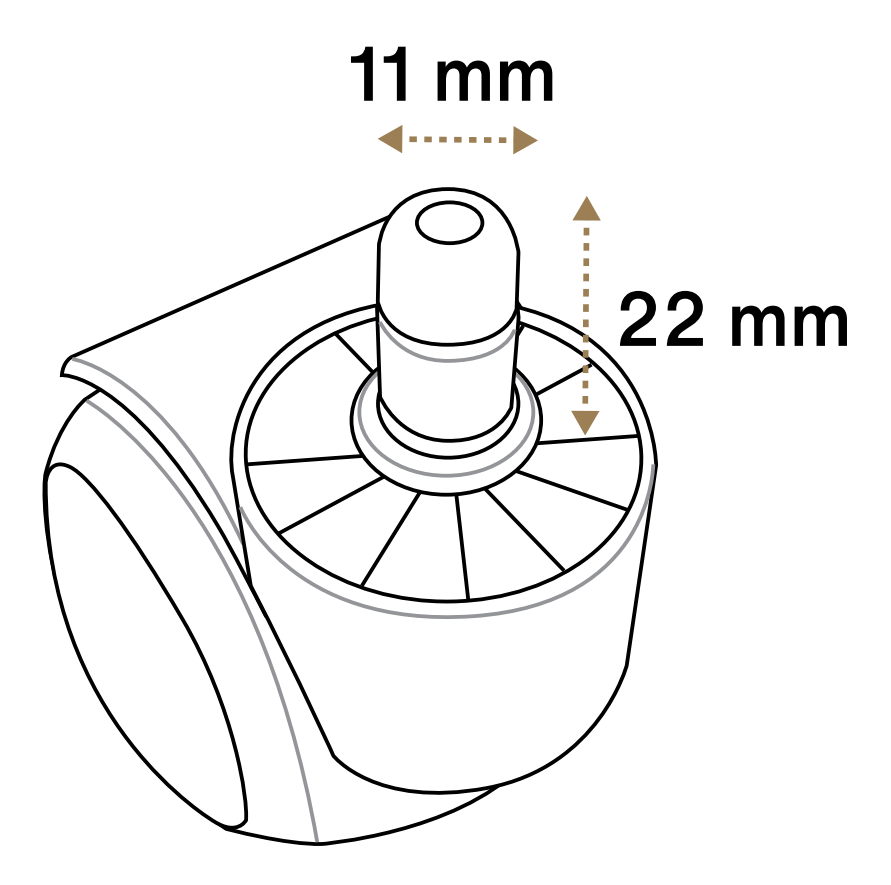
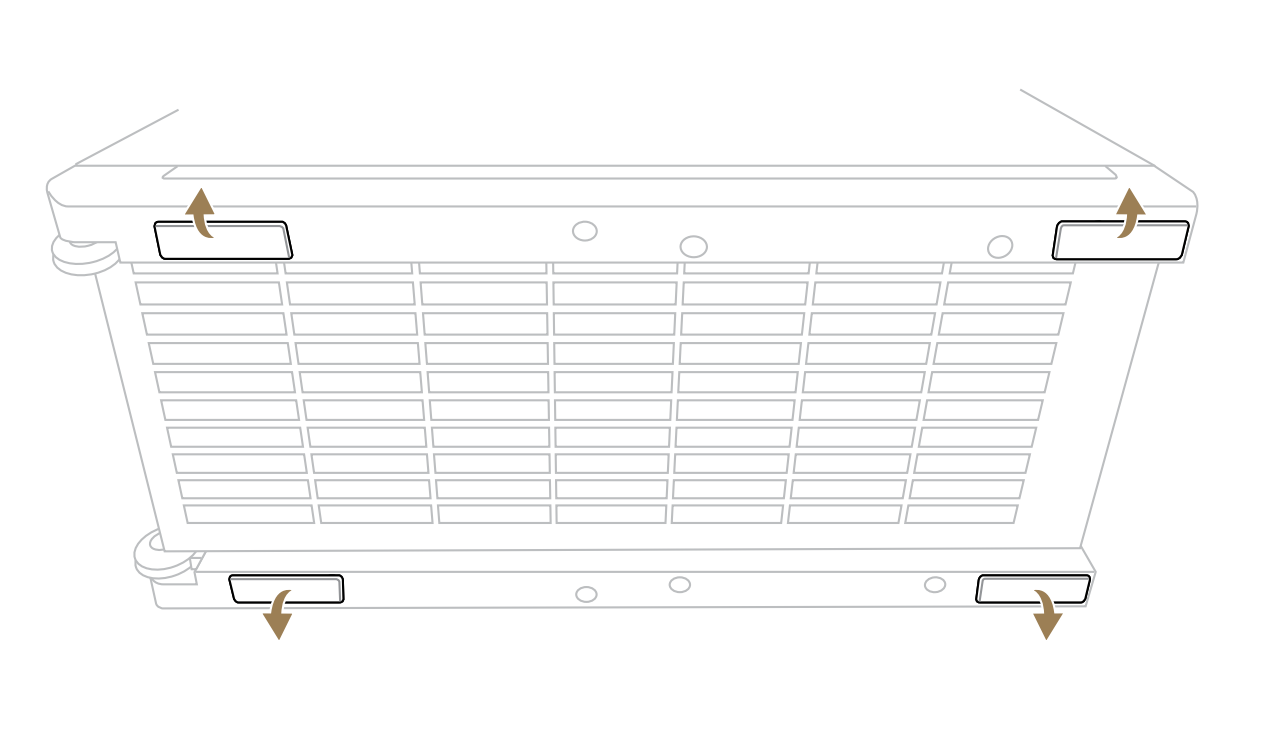
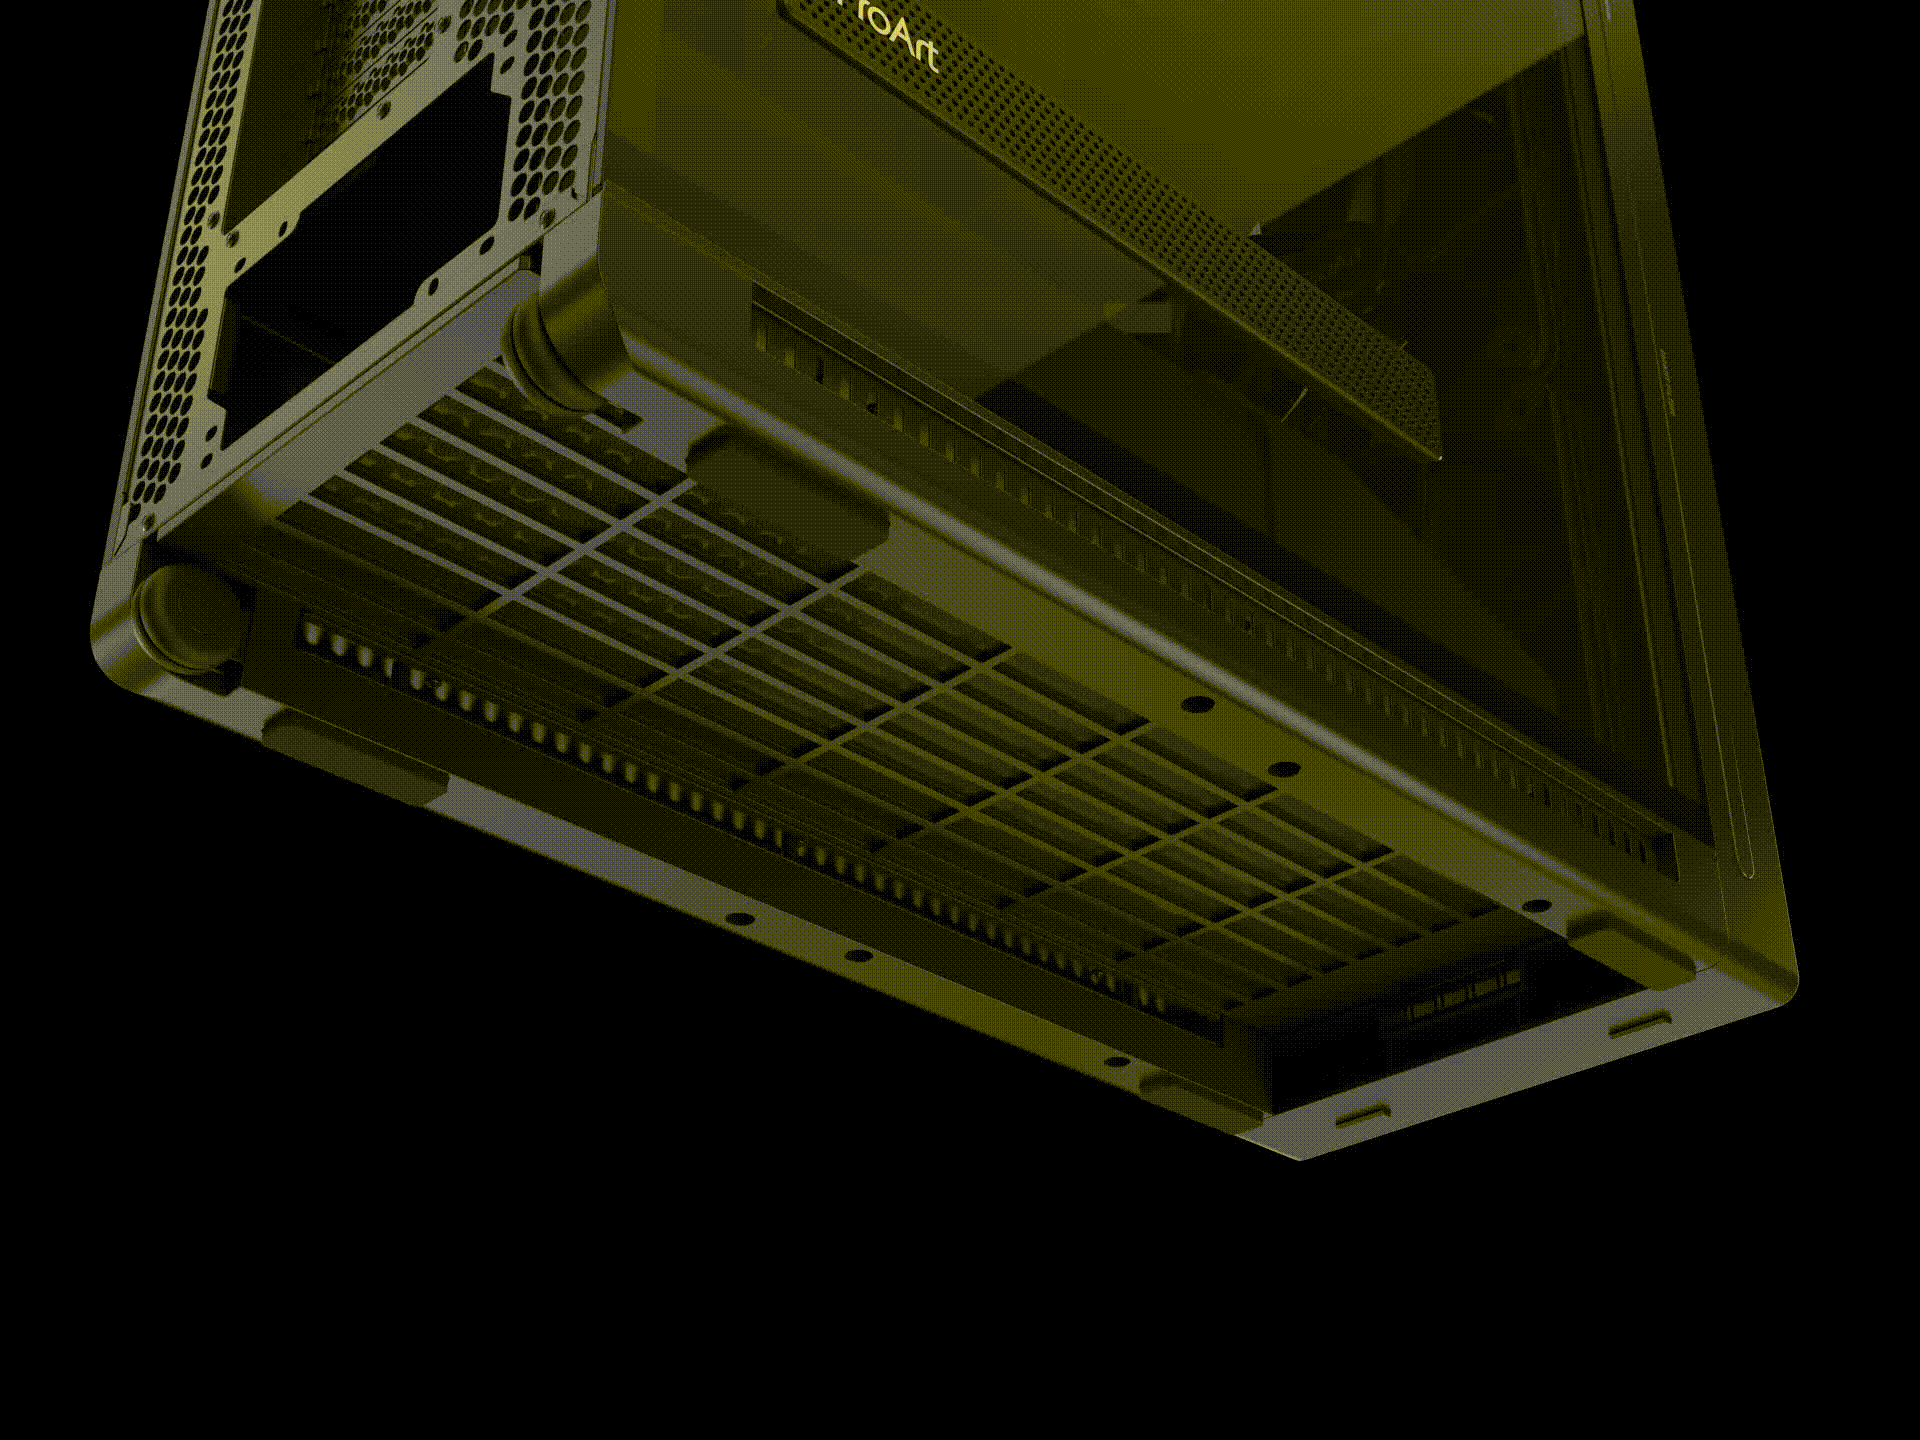
Step1. Remove the rubbers from the bottom.
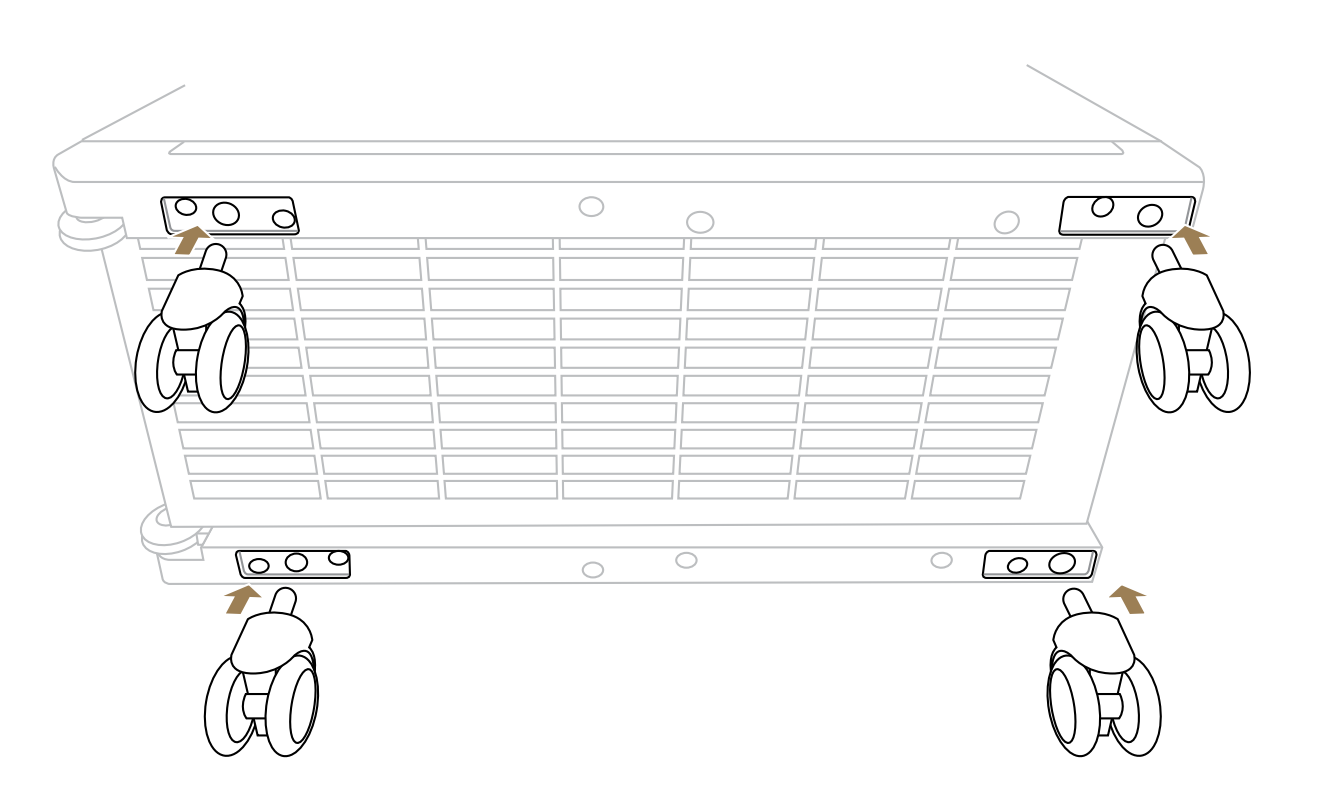
Step2. Install the additional chassis wheels.
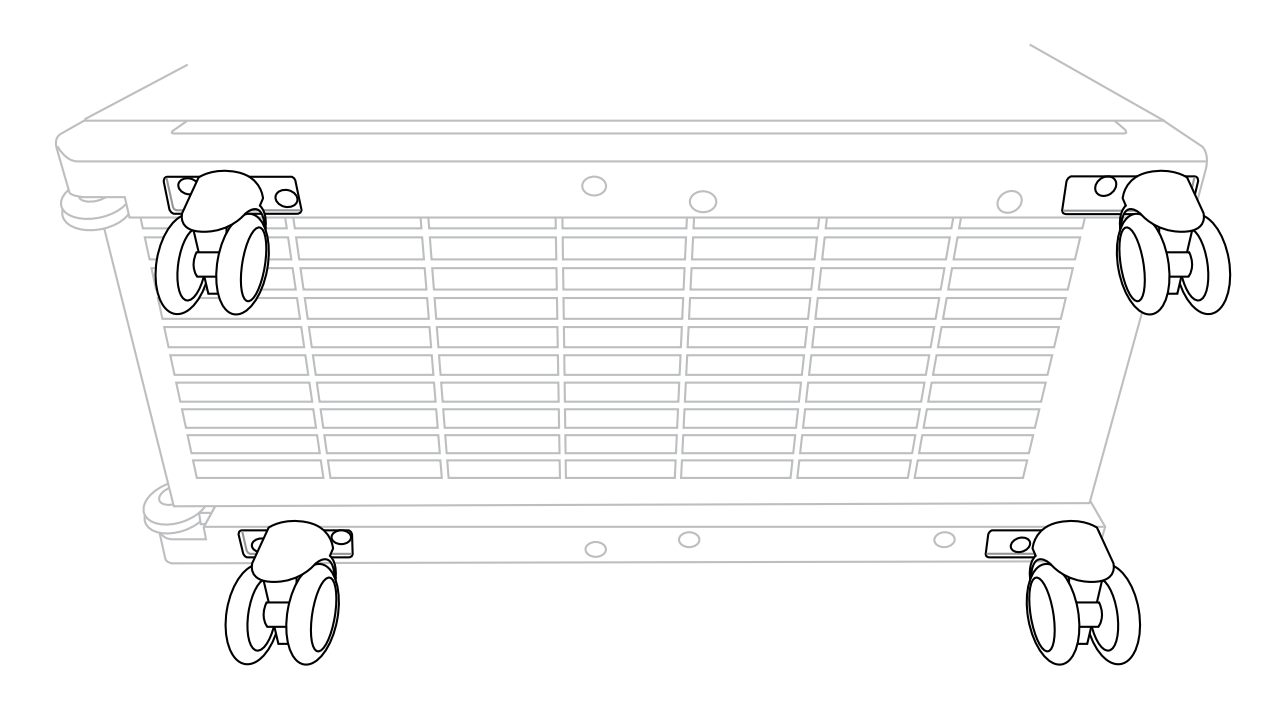
Step3. Installation of the additional chassis wheels is finished.
Please refer to the video.
Visit ASUS official website to learn more information.