Relative Topices
[Graphic Card] ASUS GPU Tweak III Introduction
GPU Tweak III is a software for adjusting system parameters of NVIDIA and AMD desktop graphics cards, including overclocking, voltage adjustment, fan control, and other functions.
Performance optimization parameter settings can also be performed on the hardware through GPU Tweak III.
Table of Contents:
Download ASUS GPU Tweak III
Install ASUS GPU Tweak III
ASUS GPU Tweak III features introduction:
Function setting introduction
GPU Tweak III mode description (click the icon to enable)
GPU Tweak III graphics card parameter panel introduction
OSD (ON-SCREEN DISPLAY) function description
Q&A
How to get (ASUS GPU Tweak III)?
You can get the latest software, manuals, drivers and firmware at the ASUS Download Center.
If you need more information about ASUS Download Center, please refer to this
Step.1 Click below Link to ASUS GPU Tweak III official websites.
https://www.asus.com/campaign/GPU-Tweak-III/index.php
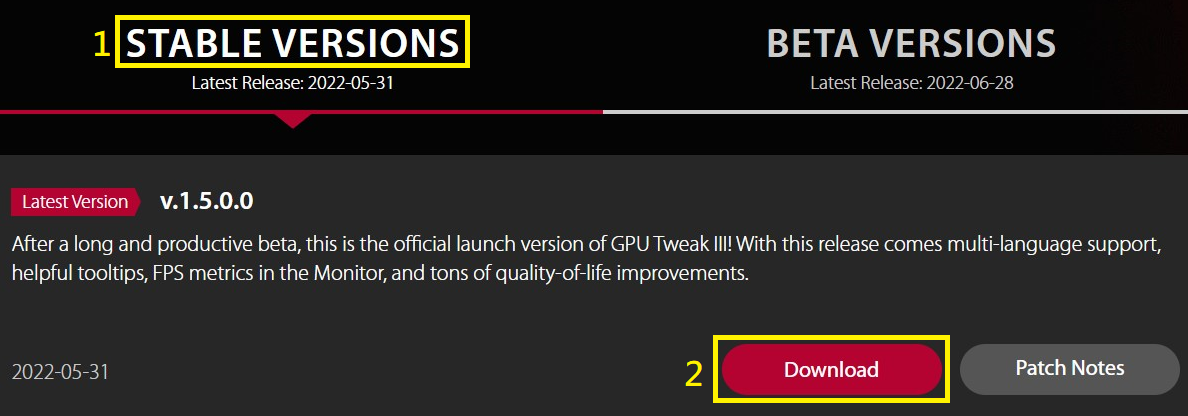
Step 2. After entering the webpage, scroll down to the download page. Click (1) STABLE VERSIONS (2) Click Download to start the download
(Note: GPU Tweak III only supports Windows 10 / 11)
 )
)
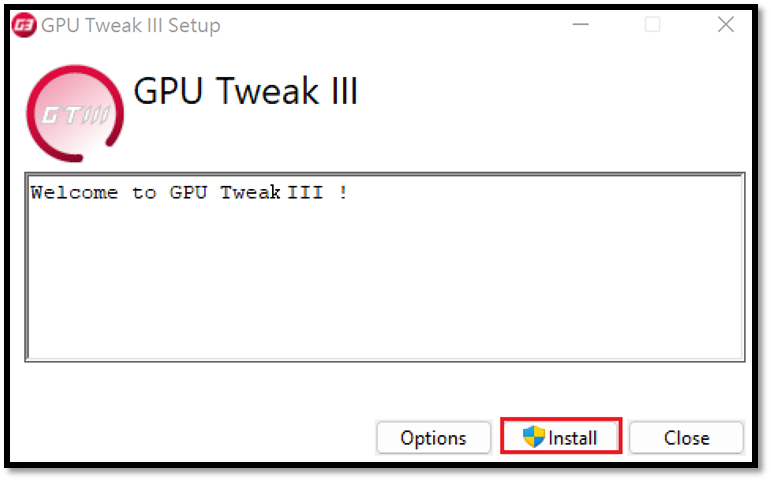
Step 1. Unzip the file, double-click the GPU-Tweak-III exe. file to start the installation process.

Step 2. Click Install, follow the program installation guide and click Next to complete the installation program.
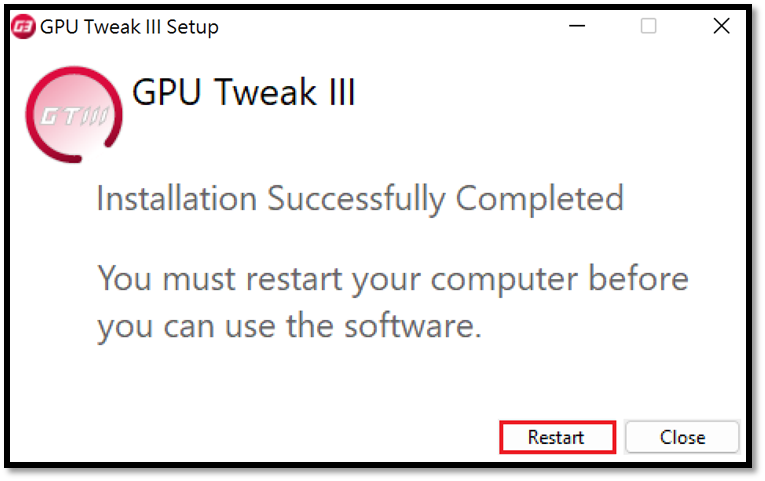
Step 3. Click Restart to reboot to complete the installation.
 .
.
ASUS GPU Tweak III features introduction:
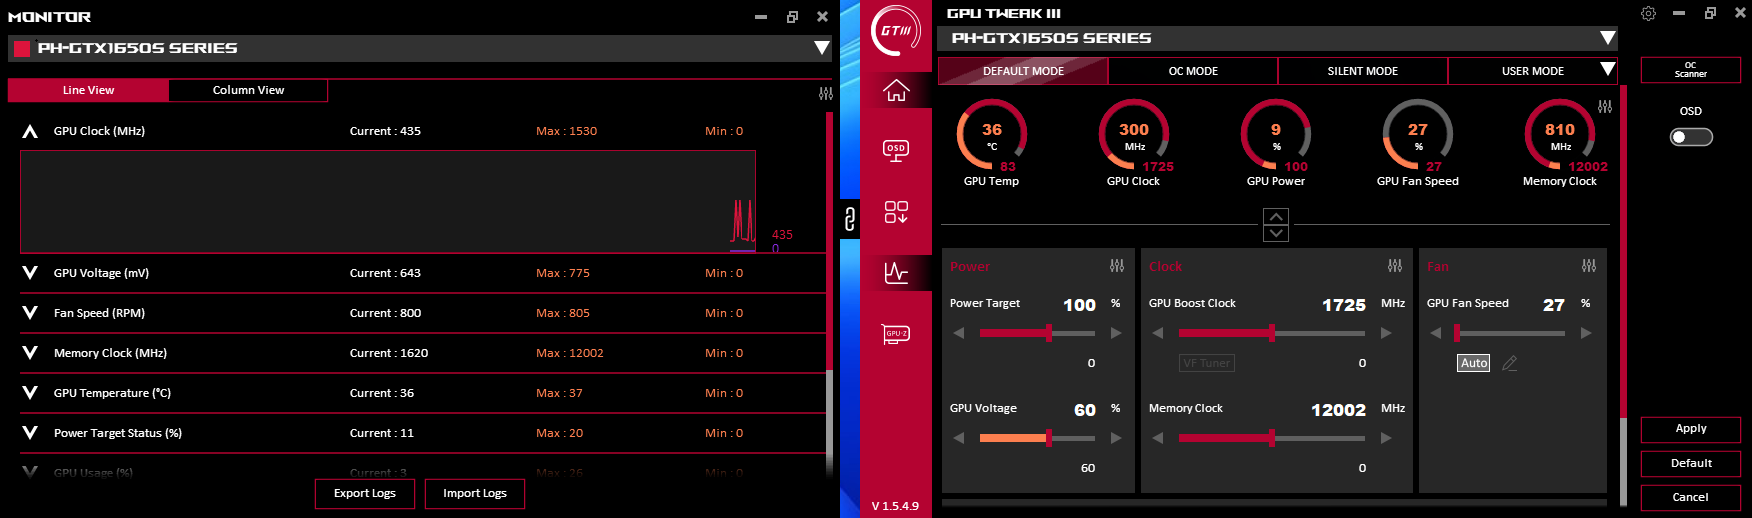
Click GPU Tweak III icon on desktop to enter the Home screen.
As shown below. The left window is the monitoring window, and the right one is the function setting window. You can also click the middle icon  to link or to detach the monitoring window and the function setting window.
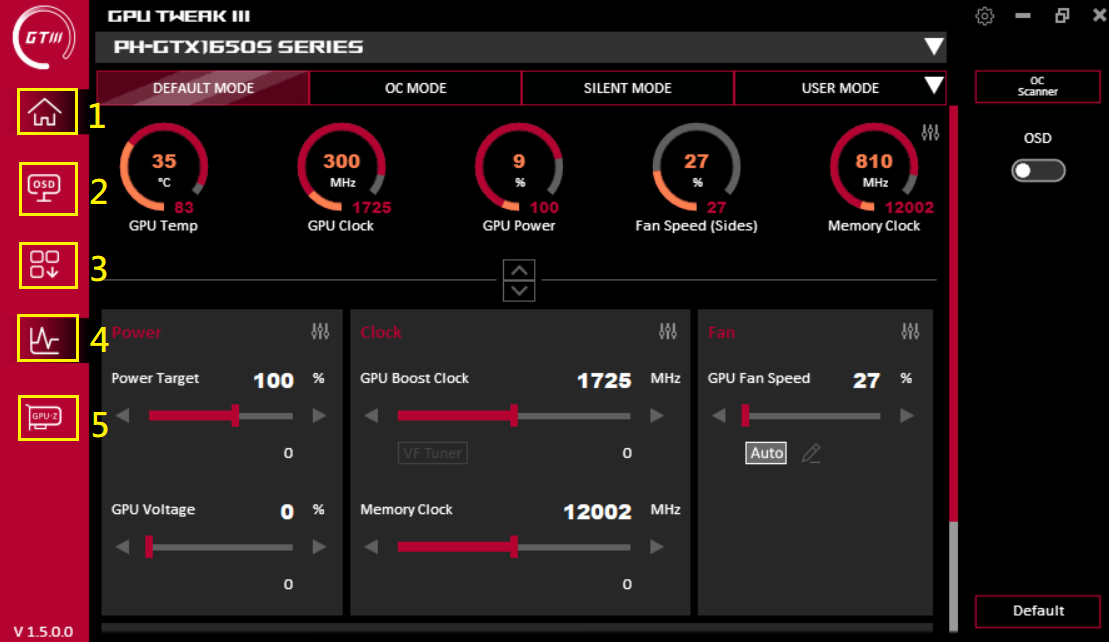
Function setting introduction
There are five functions on the left side of the function setting window, as following:
(1) Home page (2) OSD function setting page (3) Utility program download (4) Monitor window (5) GPU-Z window
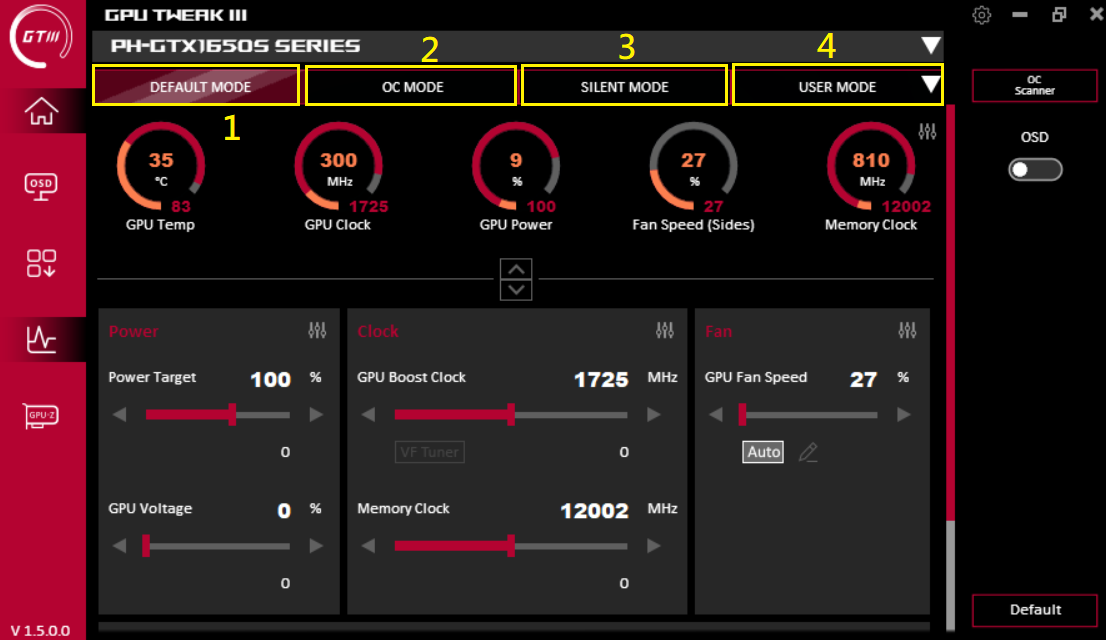
GPU Tweak III mode description (click the icon to enable):
(1) Default mode: Use the initial setting parameters of the graphics card
(2) Overclocking mode: Higher performance mode with higher temperature and fan noise than the default mode
(3) Quiet Mode: Mode with lower fan noise, higher temperature and lower performance than the default mode
(4) Custom mode: Users need to save the data in the advanced mode settings. Click to apply directly and click ▼ to enter the custom mode settings
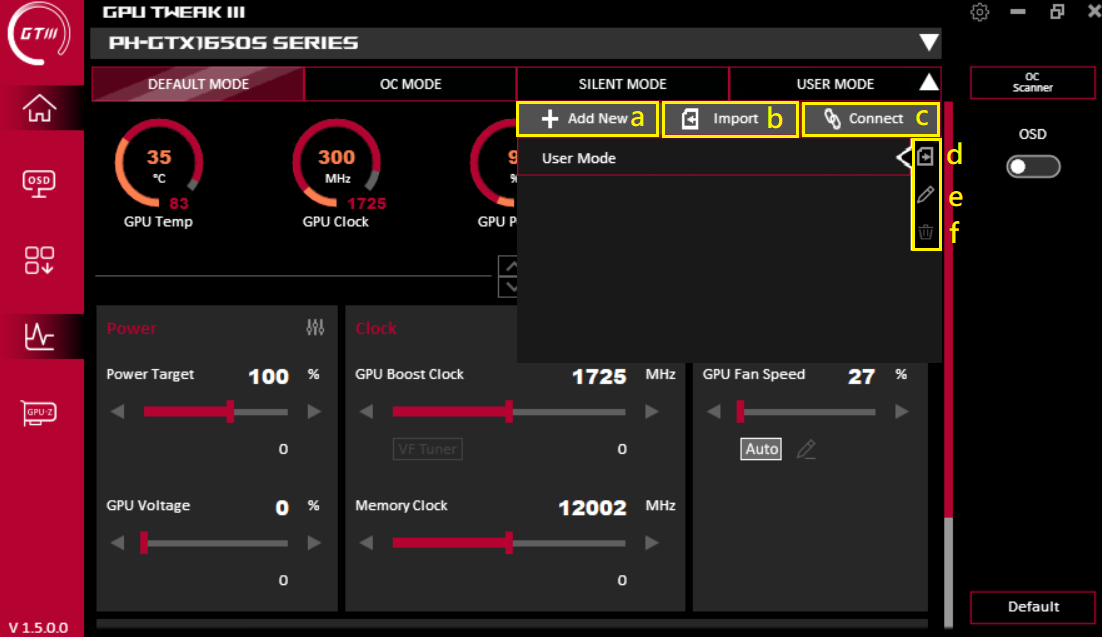
Custom Mode Settings Instructions:
(a) Add: Add a new profile (b) Import: Import a saved profile (c) Link: Customize an application or game using a specific mode or corresponding profile
(d) Export: Export the configured parameters (e) Edit: Rename the configuration file name (f) Delete: Delete the existing configuration file
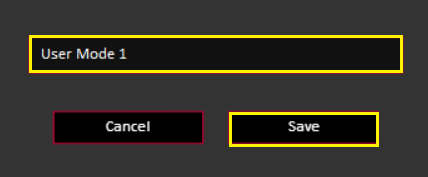
Add: After entering your desired profile name, click Save to save the new profile.
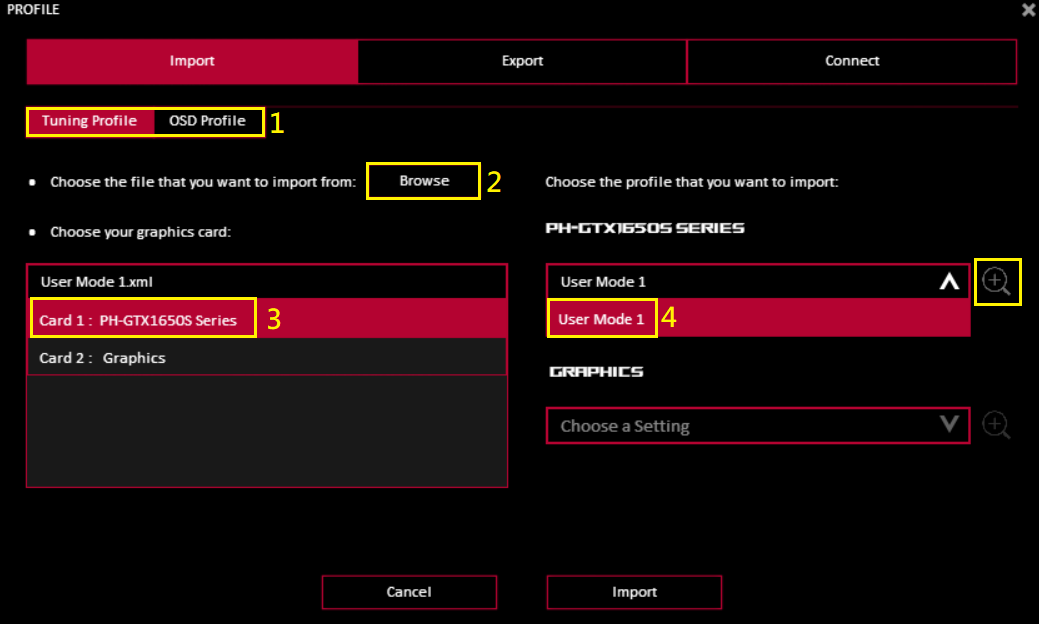
Import:
(1) Choose the type of profile you want to import
(2) Select the profile location
(3) Select the graphics card to import the profile
(4) Select the profile name to import
(5) Preview profile parameters
(6) Import the configuration file
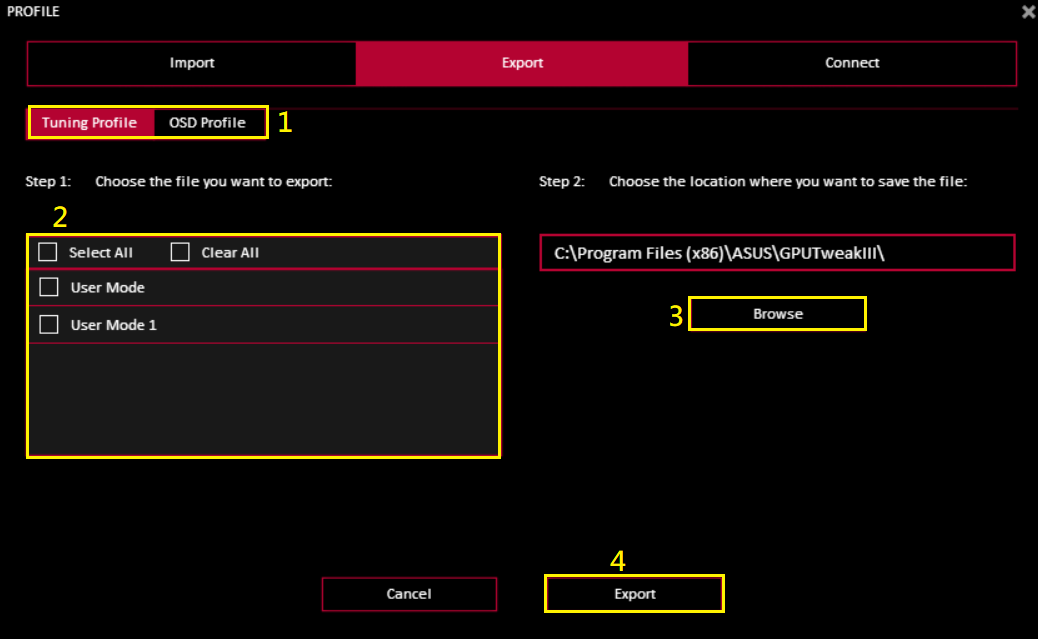
Export:
(1) Select the type of profile you want to export
(2) Select the name of the profile to export
(3) Select the export path or folder of the profile
(4) Export setting file
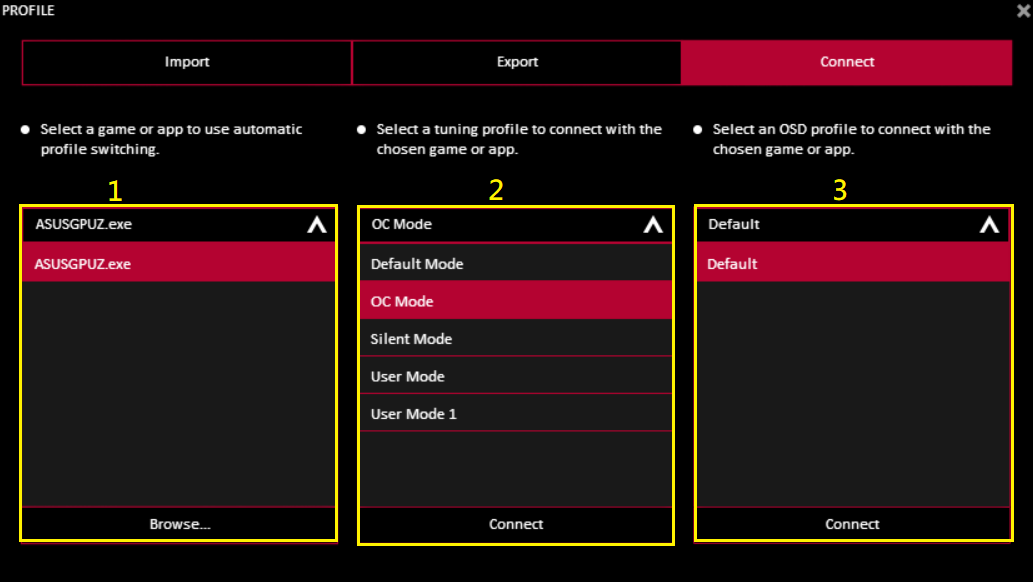
Links: Links can use a specific profile or custom mode for a specific application or game
(1) Click Browse to select the application or game you want to apply
(2) After selecting the mode or profile to be used, click "Connect"
(3) Select the corresponding OSD profile and click "Connect"
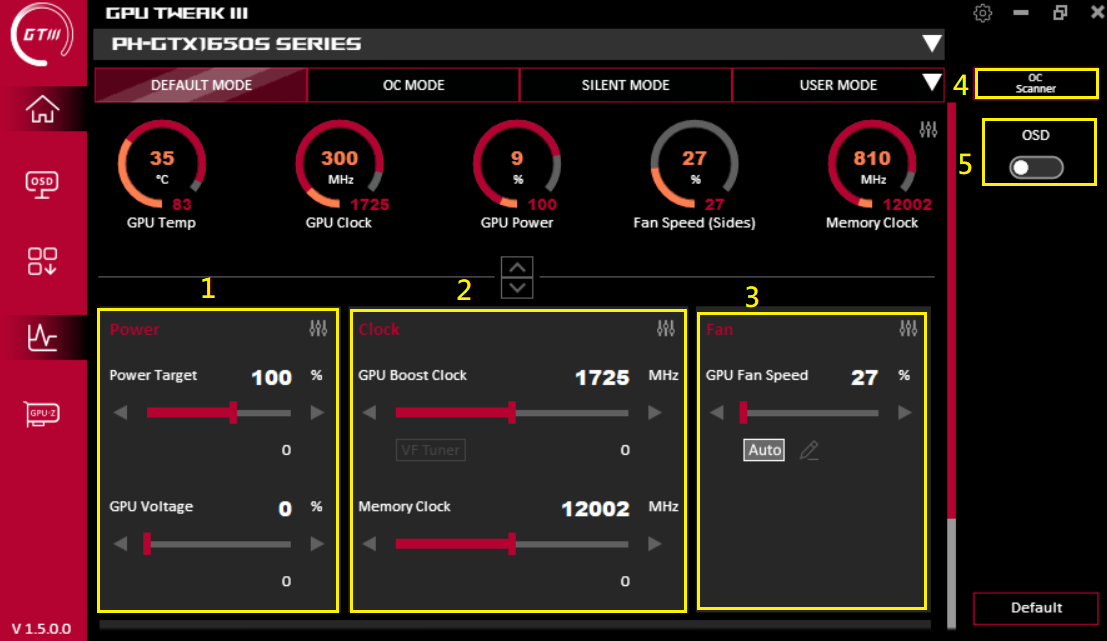
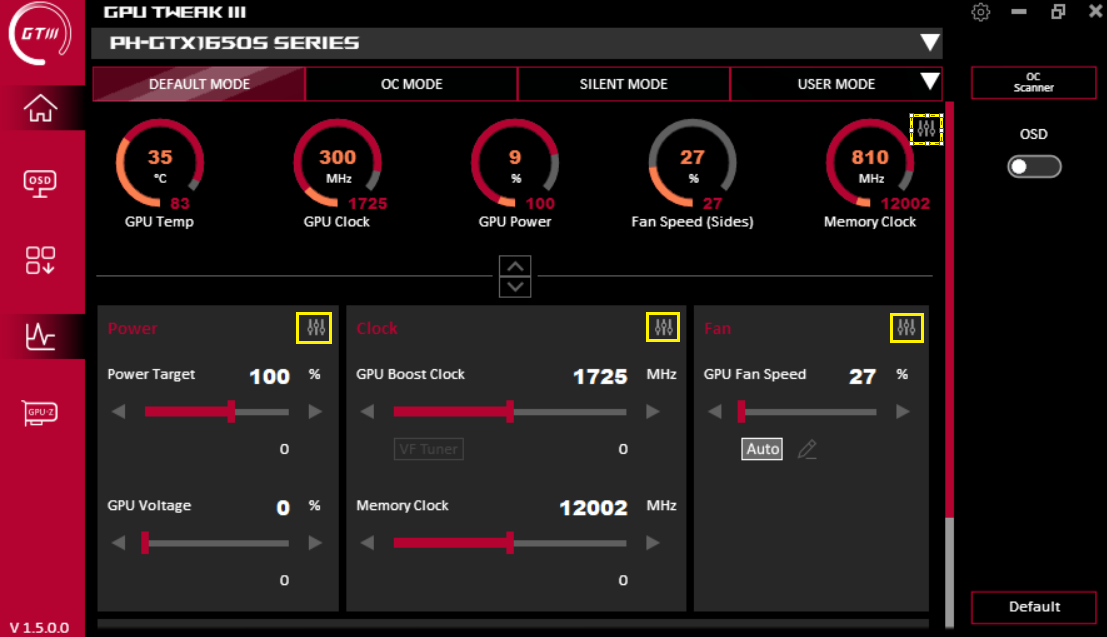
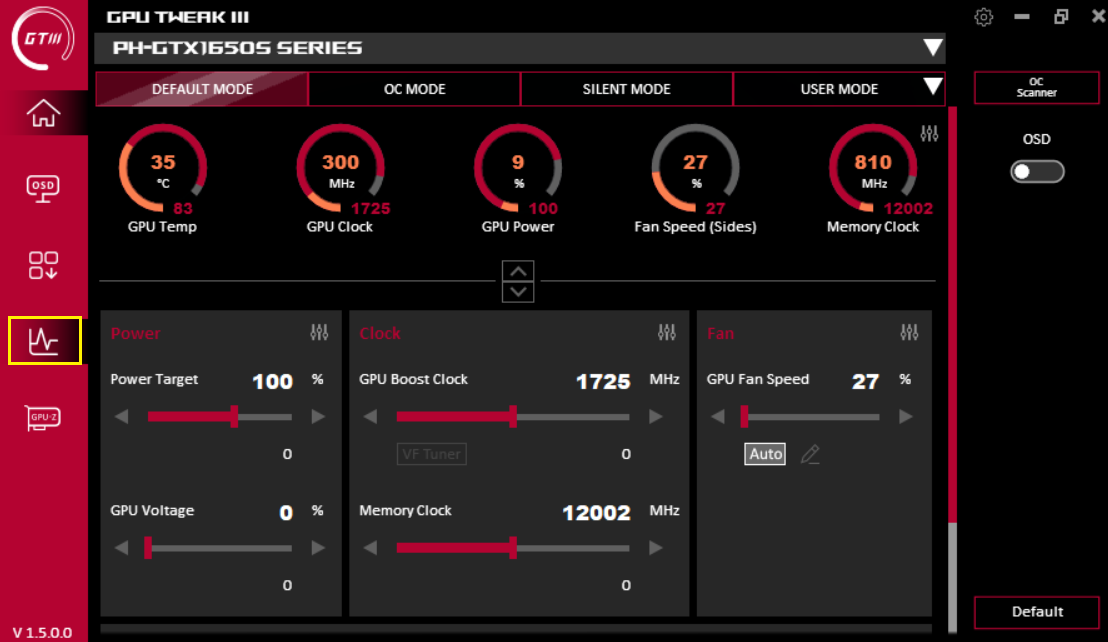
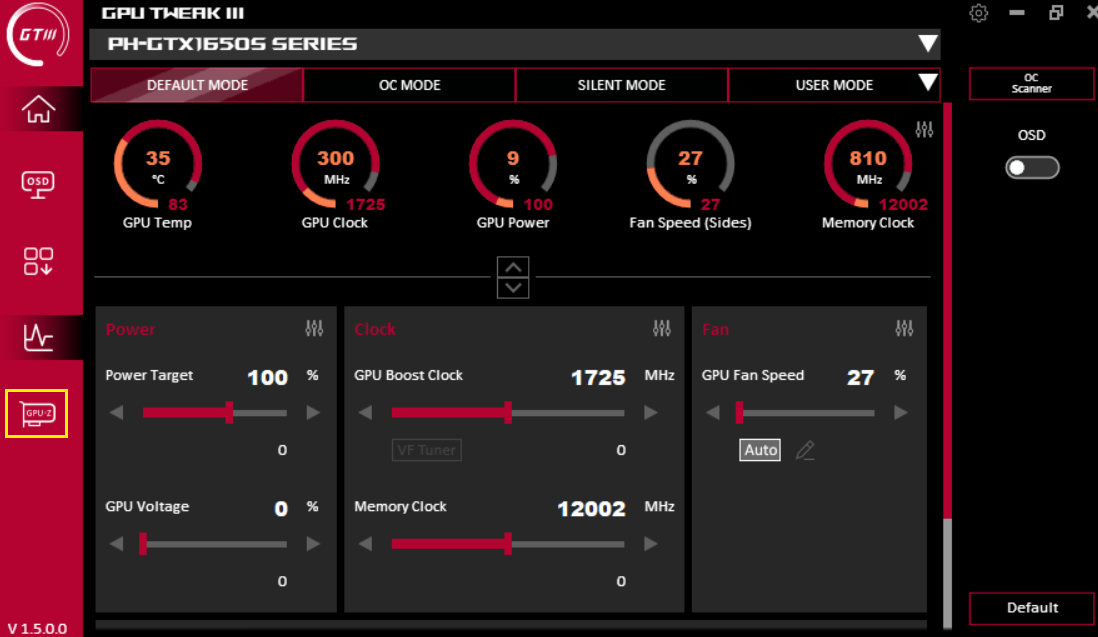
GPU Tweak III graphics card parameter panel introduction
(1) Power consumption: power consumption and GPU voltage can be adjusted
(2) Frequency: You can adjust the operating clock of the graphics card and the frequency of the graphics card memory. The “VF Tunner” button can customize the voltage and clock settings (refer to the frequency VF Tunner description at below 2-1)
(3) Fan: You can adjust the fan speed side of the graphics card or the fan speed of the external system. The “Edit Mode Button” can customize the fan temperature and speed setting (refer to the following 3-1 Edit Mode Description)
(Note: The options will be slightly different depending on the specifications of the graphics card fan)
(4) OC Scanner: The software automatically detects the optimal overclocking range of the graphics card and automatically adjusts
(5) OSD: To enable the OSD (ON-SCREEN DISPLAY) function in the game
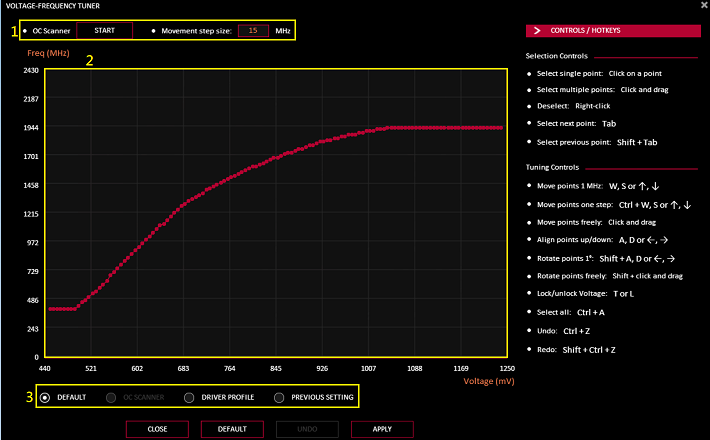
2-1. Frequency VF Tunner :
:
(1) OC Scanner has the same function as the above. The unit movement amount can set the value of the frequency when moving one grid
(2) The curve graph can set the voltage corresponding to the frequency by itself
(3) The mode has preset/OC Scanner/driver operation/previous setting to be set
3-1.  Fan edit mode options:
(1) Fan speed update period: Set the fan speed change (in milliseconds) (the larger the set value is, the lower the fan speed change frequency would be)
(2) Temperature Hysteresis: Set the GPU temperature delay degree to avoid too frequent fan speed changes (the larger the setting value is, the lower the fan speed change frequency would be)
(3) Custom fan speed and temperature corresponding relationship curve

4.  OC Scanner
(1) [Advanced settings] : You can customize the value, target power consumption / target temperature / graphics card memory increase or decrease frequency amplitude / target voltage
(2) Click [Start] to automatically adjust (the process may take up to 30 minutes)
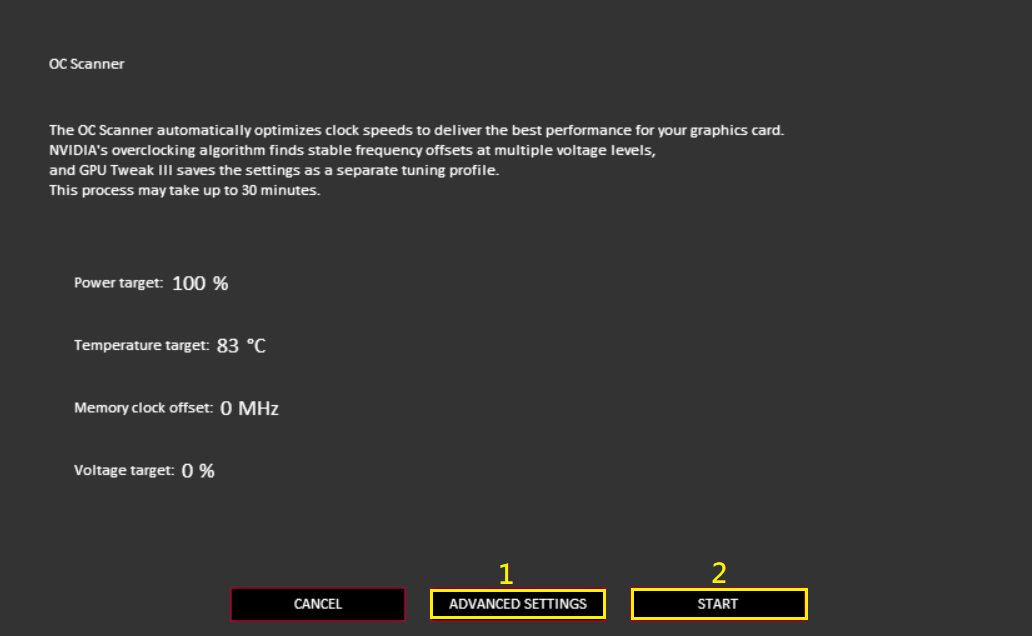
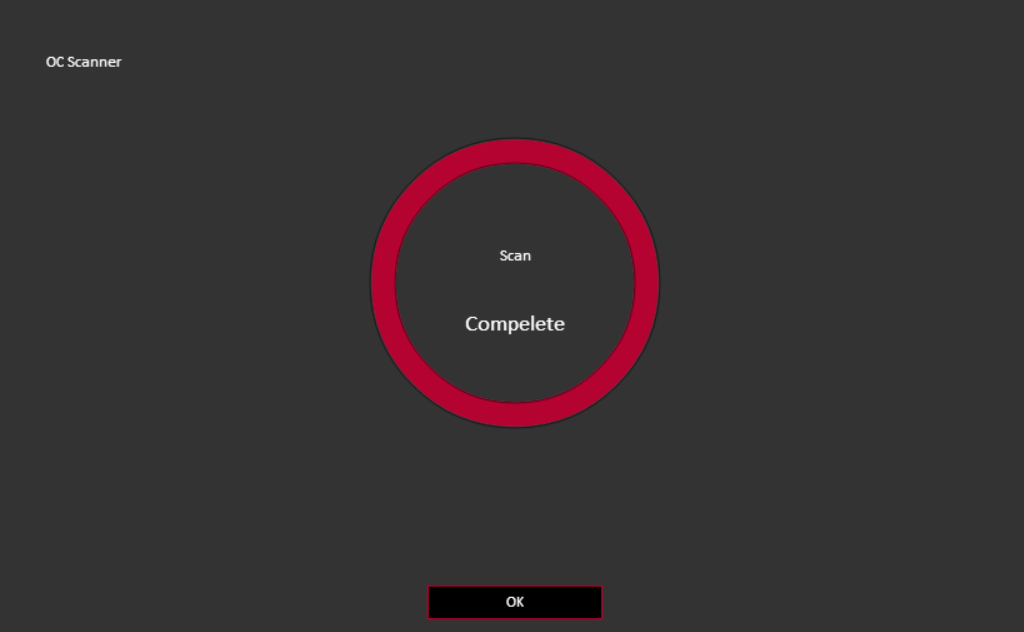
After the adjustment completes, click [OK] to save.
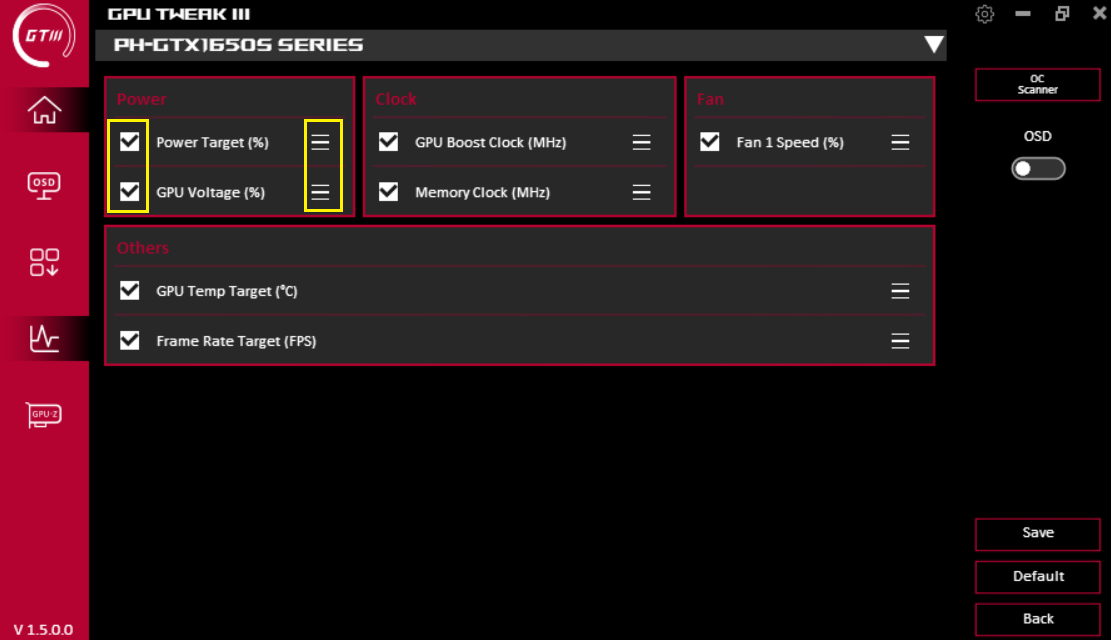
 Sort function options: Click the icon in yellow box below to activate the sorting function.
Check to set whether this item displays in the settings panel. Drag ≡ to sort option up or down.
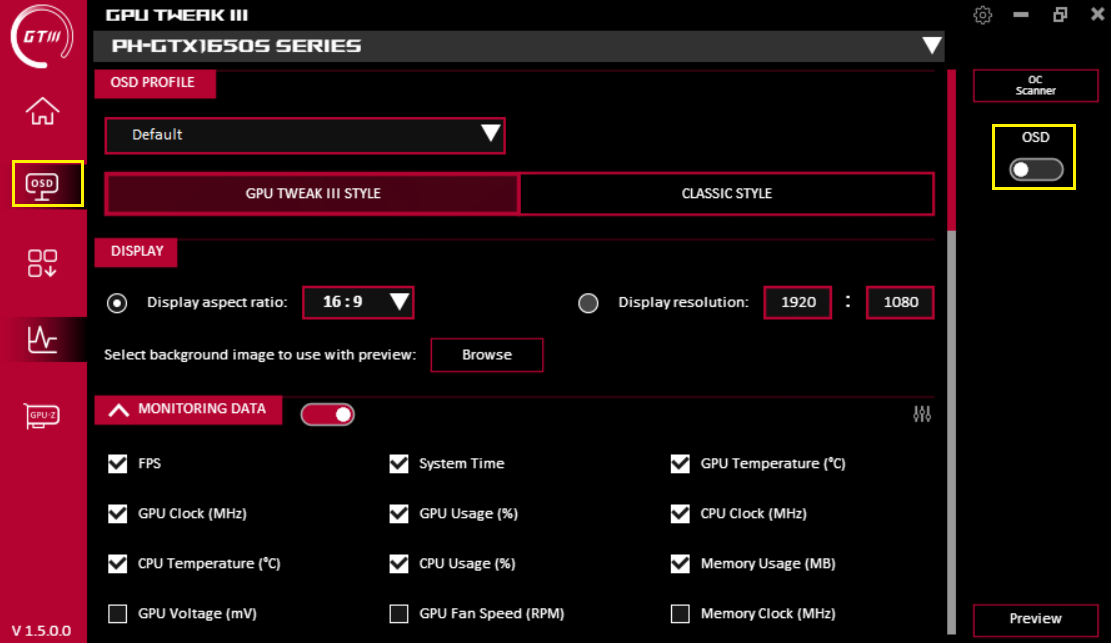
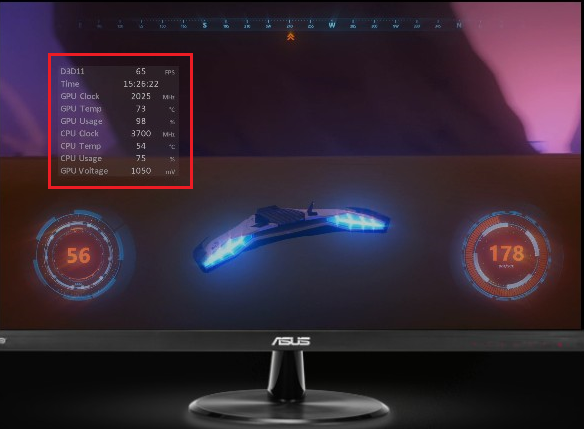
OSD (ON-SCREEN DISPLAY) function description:
Click the OSD icon on the home screen to enter the OSD setting screen. The OSD function can instantly display various parameter information of the monitor display card on the game screen. To activate this function, you need to enable the OSD function on the home screen.
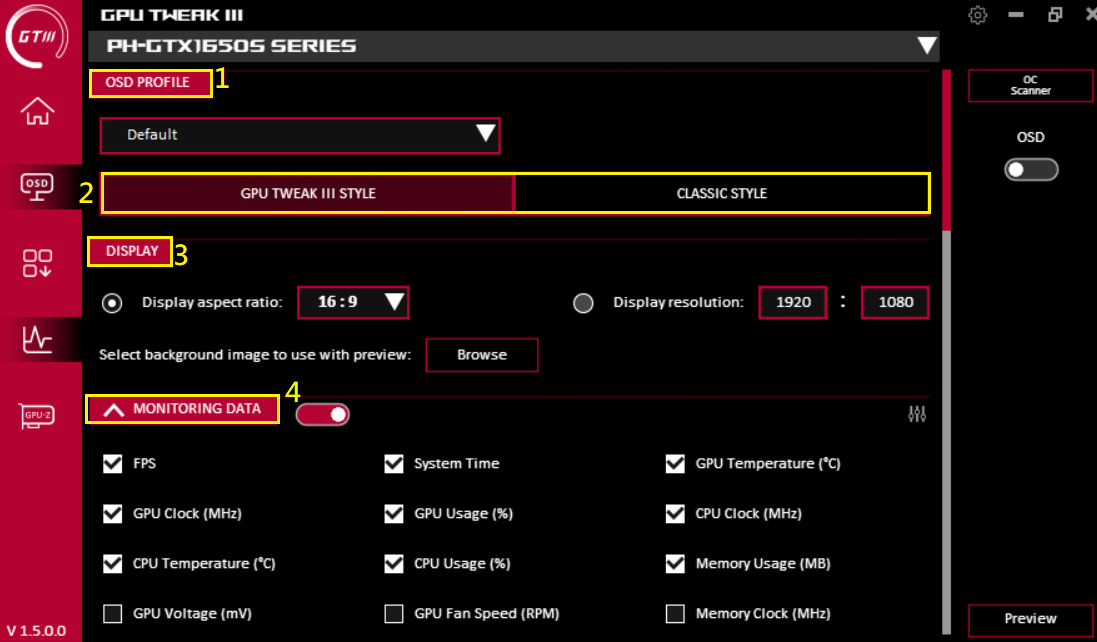
(1) OSD profile: You can load the OSD profile that has already been set
(2) Set OSD display GPU TWEAK III style / classic style
(3) Display: Set the length and width of the OSD display or customize resolution and background image
(4) Monitoring information: You can choose the information that you need to display.
2. GPU TWEAK III Style
Classic style

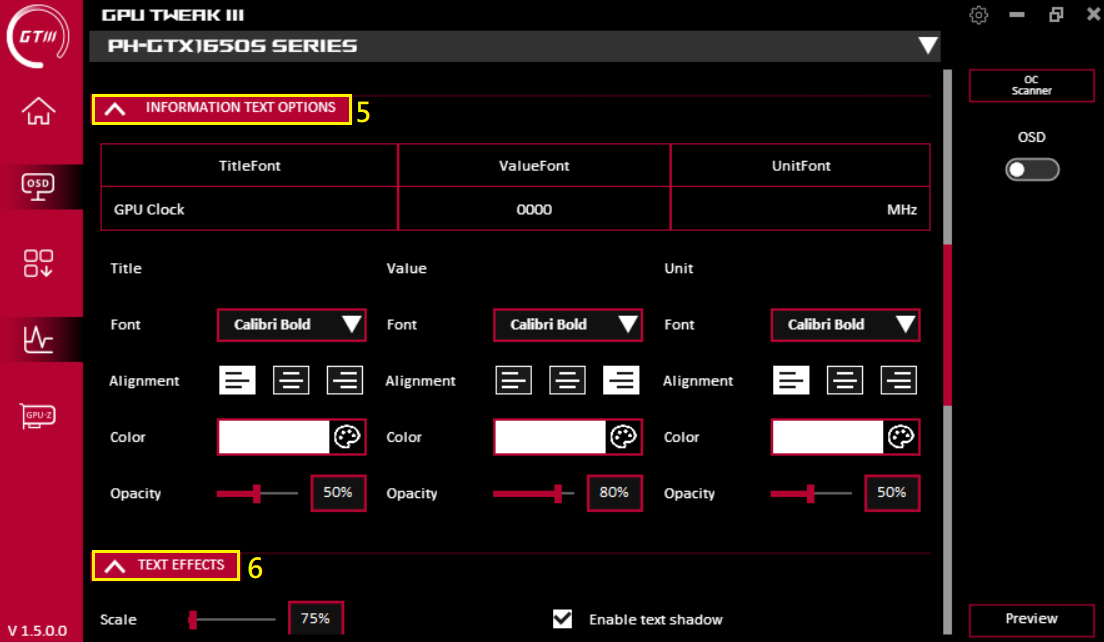
(5) Text options: Set your own text color and other information
(6) TEXT EFFECTS: Set text effects
(7) Background effects: Set background effects
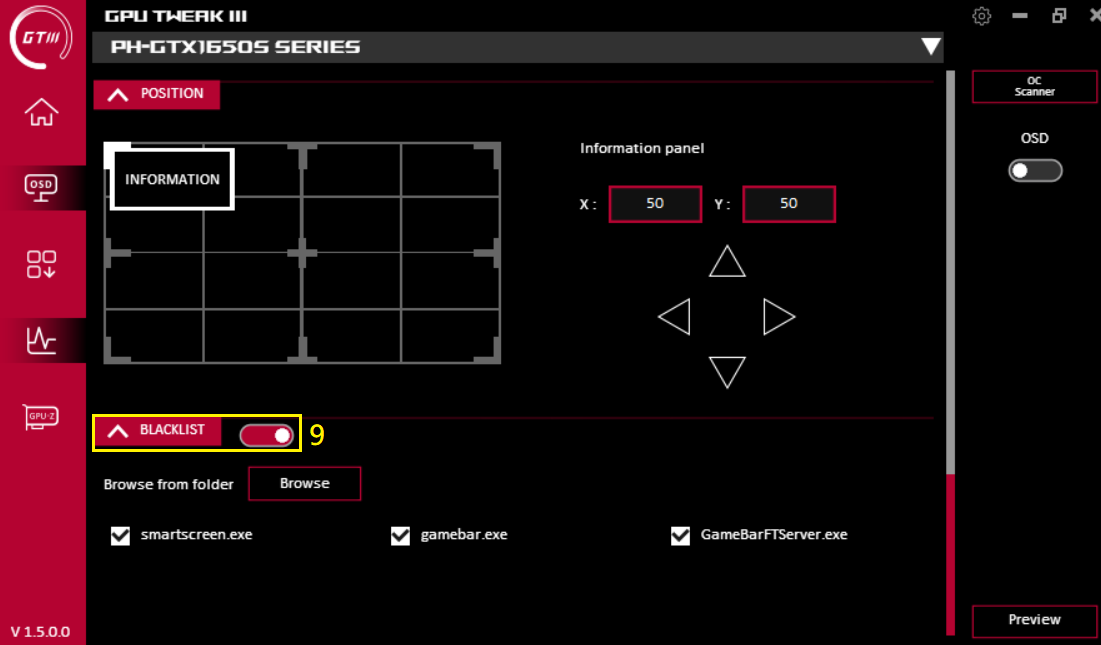
(8) Position: Set the OSD display position, you can move the OSD position by dragging, or input the coordinate X, Y position
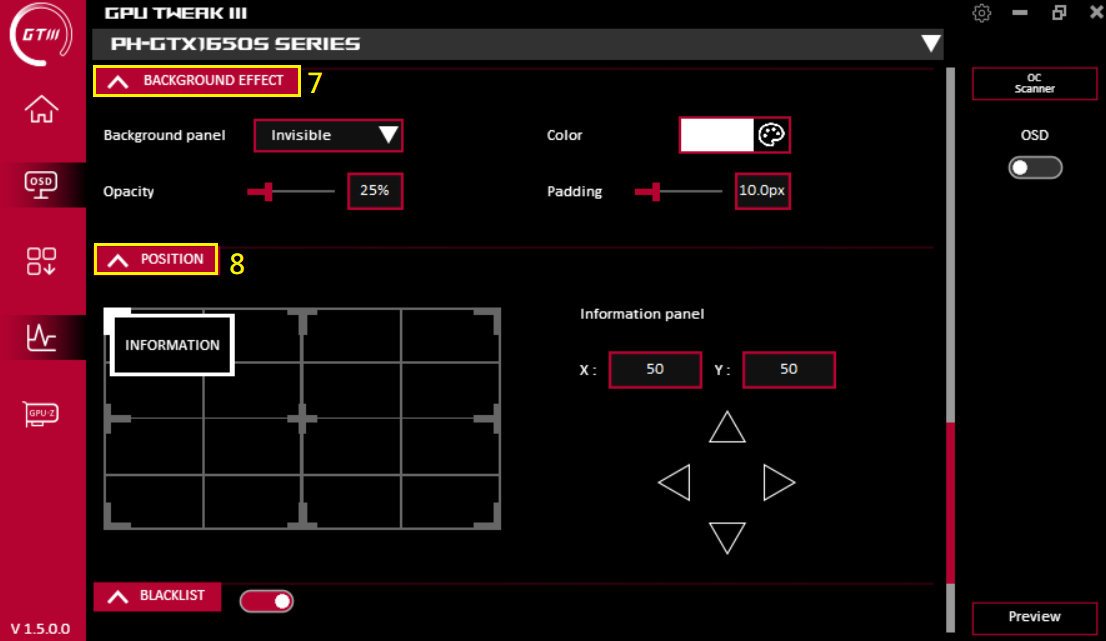
(9) Blacklist: It can exclude applications that do not use OSD
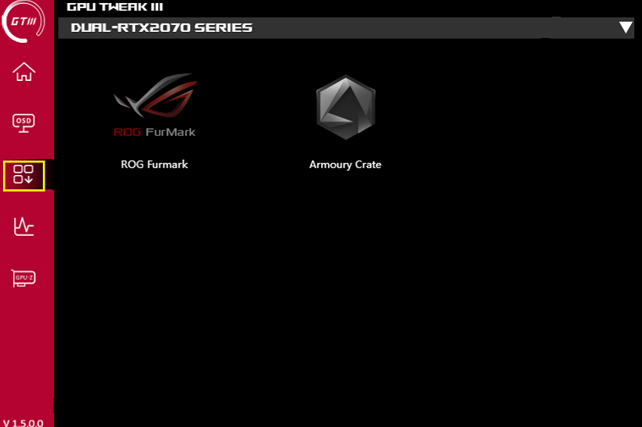
Tool download:
On this page, you can download, install, and open various useful third-party tools.
Armoury Crate: ASUS supports lighting effects software (requires a graphics card that supports AURA function)
ROG FurMark: Software for testing graphics card stability.
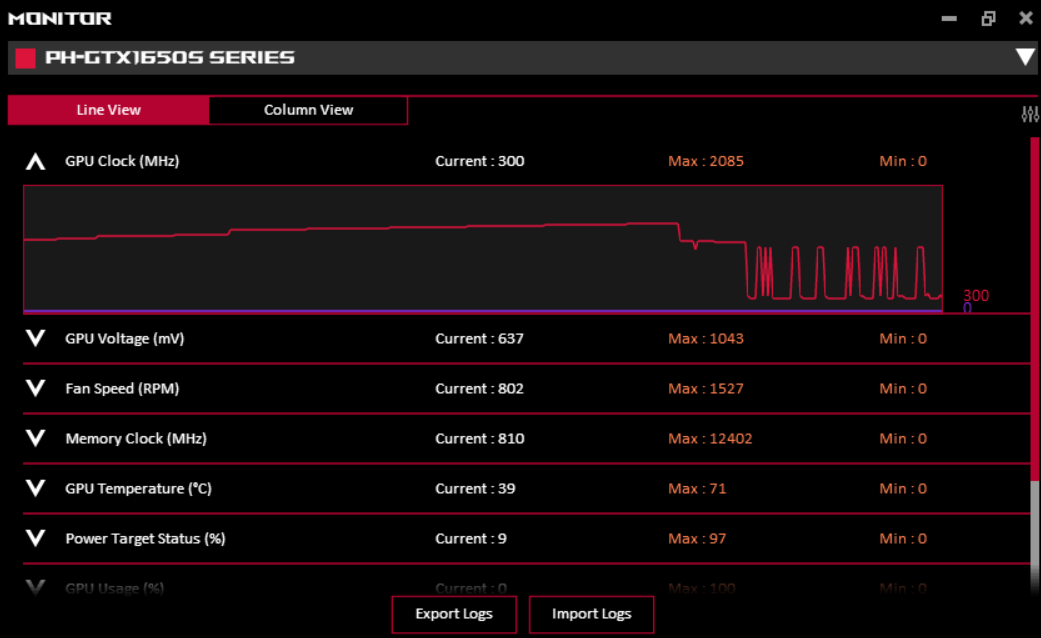
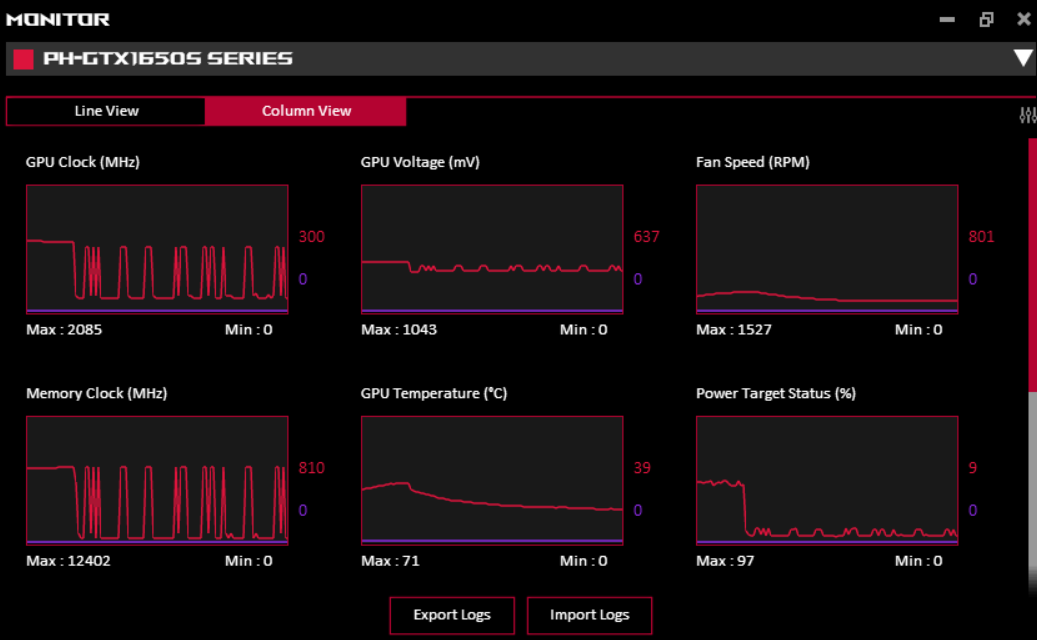
Monitoring window:
Click the monitoring icon on the home screen to open the monitoring window. You can confirm the current graphics card GPU frequency, voltage, fan speed and other settings. The display mode can be set, and support log export and import.
Line View:
Column View:
GPU-Z Features:
Click the GPU-Z icon on the main screen to open the GPU-Z software
GPU-Z can fully present the graphics card parameter information. For related information, please refer to the following picture.
(V1.6.1.5 or latest version show ASUS BIOS version and graphics card BIOS version)

Q1. How to deal with the black screen when overclocking fails?
A1: When overclocking fails, resulting in black screen, please completely power off the computer and restart the computer, and it can restore the normal startup value before the overclocking failure.
Q2. How can I confirm that my graphics card supports GPU TWEAK III?
A2: GPU TWEAK III is applicable to all graphic cards of NVIDIA / AMD
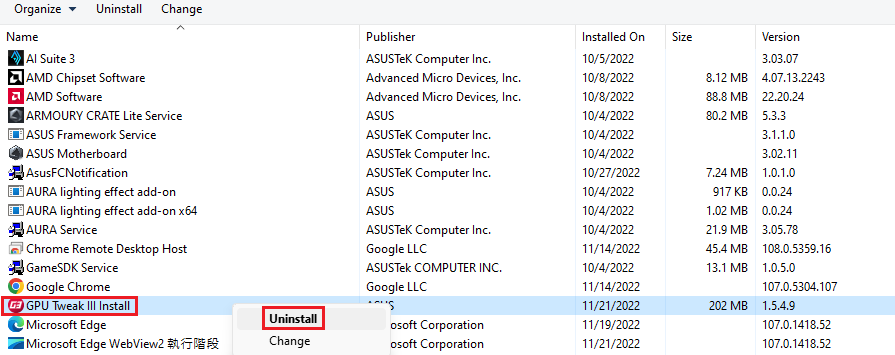
Q3. How to uninstall GPU TWEAK III?
A3: if you encounter any abnormal setting issue or want to uninstall GPU Tweak III , Please click the desktop console icon  , click the program and function icon
  ,Find the name of GPU Tweak III, click the right mouse button, and click Uninstall/Change (U). Follow the program guide to complete the uninstallation。
Q4.Thermal Map Functional description?
A4. Only supports ROG Matrix and ROG Astral series model。 The function is Embedded sensors across the VRMs, chokes and VRAM collect data for the Thermal Map, empowering you to check real-time temperatures in each area and to easily adjust system settings for optimized performance。
。
Q5. Power Detector+ Functional description?
A5.Only supports ROG Matrix and ROG Astral series model。 The function is Power Detector+ can detect anomalies across any of the six power pins from the 12VHPWR cable. If a fault is detected, you are immediately notified that the power cable needs to be reseated. 。
Q6. Mileage Functional description?
A6.Only supports ROG Matrix and ROG Astral series model. The is Mileage feature tracks usage at different power levels, so you can keep an eye on what kind of load you have used across multiple game sessions.
Q7: What is the ROG Equalizer cable setting?
A7: In GPU Tweak III V2.1.1.7 and later versions, the ROG Equalizer setting is available on the right side of the interface. Enabling this setting increases the current thresholds from 9.2A to 17A and from 12.5A to 18A. For safety, only enable this setting when the ROG Equalizer cable is in use.

