[Notebook] MyASUS in UEFI BIOS - Introduction
MyASUS in UEFI provides to ASUS Notebook users the new interface in UEFI.
The screen design of MyASUS in UEFI allows users to get rid of the old blue and white screen BIOS operation experience, and use rich pictures and colors to allow users to have similar operating experience to the OS in the UEFI environment. The non-computer technicians do not need to worry about not knowing how to use it.
In addition to adjusting hardware setting, MyASUS in UEFI can also provide System Diagnostics and Cloud Recovery in UEFI environment.
If the system cannot boot to the OS environment, you can use the Cloud Recovery in MyASUS in UEFI to recharge the operating system. Only needs to follow the prompts in an environment with an internet connection to quickly restore to the factory settings. With technical support, you can re-install the OS by yourself.
- System Requirment
- How to enter MyASUS in UEFI BIOS
- Dashboard
3.1 How to enter BIOS settings page
3.2 How to Upgrade the BIOS - Permission Settings
- System Diagnostics
- Cloud Recovery
- Support Intel 12th Gen Intel® Core™ processors(Alder lake) or later (Some models do not support the Cloud Recovery function)
- Suppor AMD's Ryzen 6000 processors(Rembrandt) or later (Some models do not support the Cloud Recovery function)
- Only laptops with the third and fourth digits of the Serial Number N0 are supported, such as NAN0CV0xxxxxxxx
- Local backup require an external storage device
- Cloud Recovery require LAN or Wi-Fi network
- Power supply
2. How to enter MyASUS in UEFI BIOS
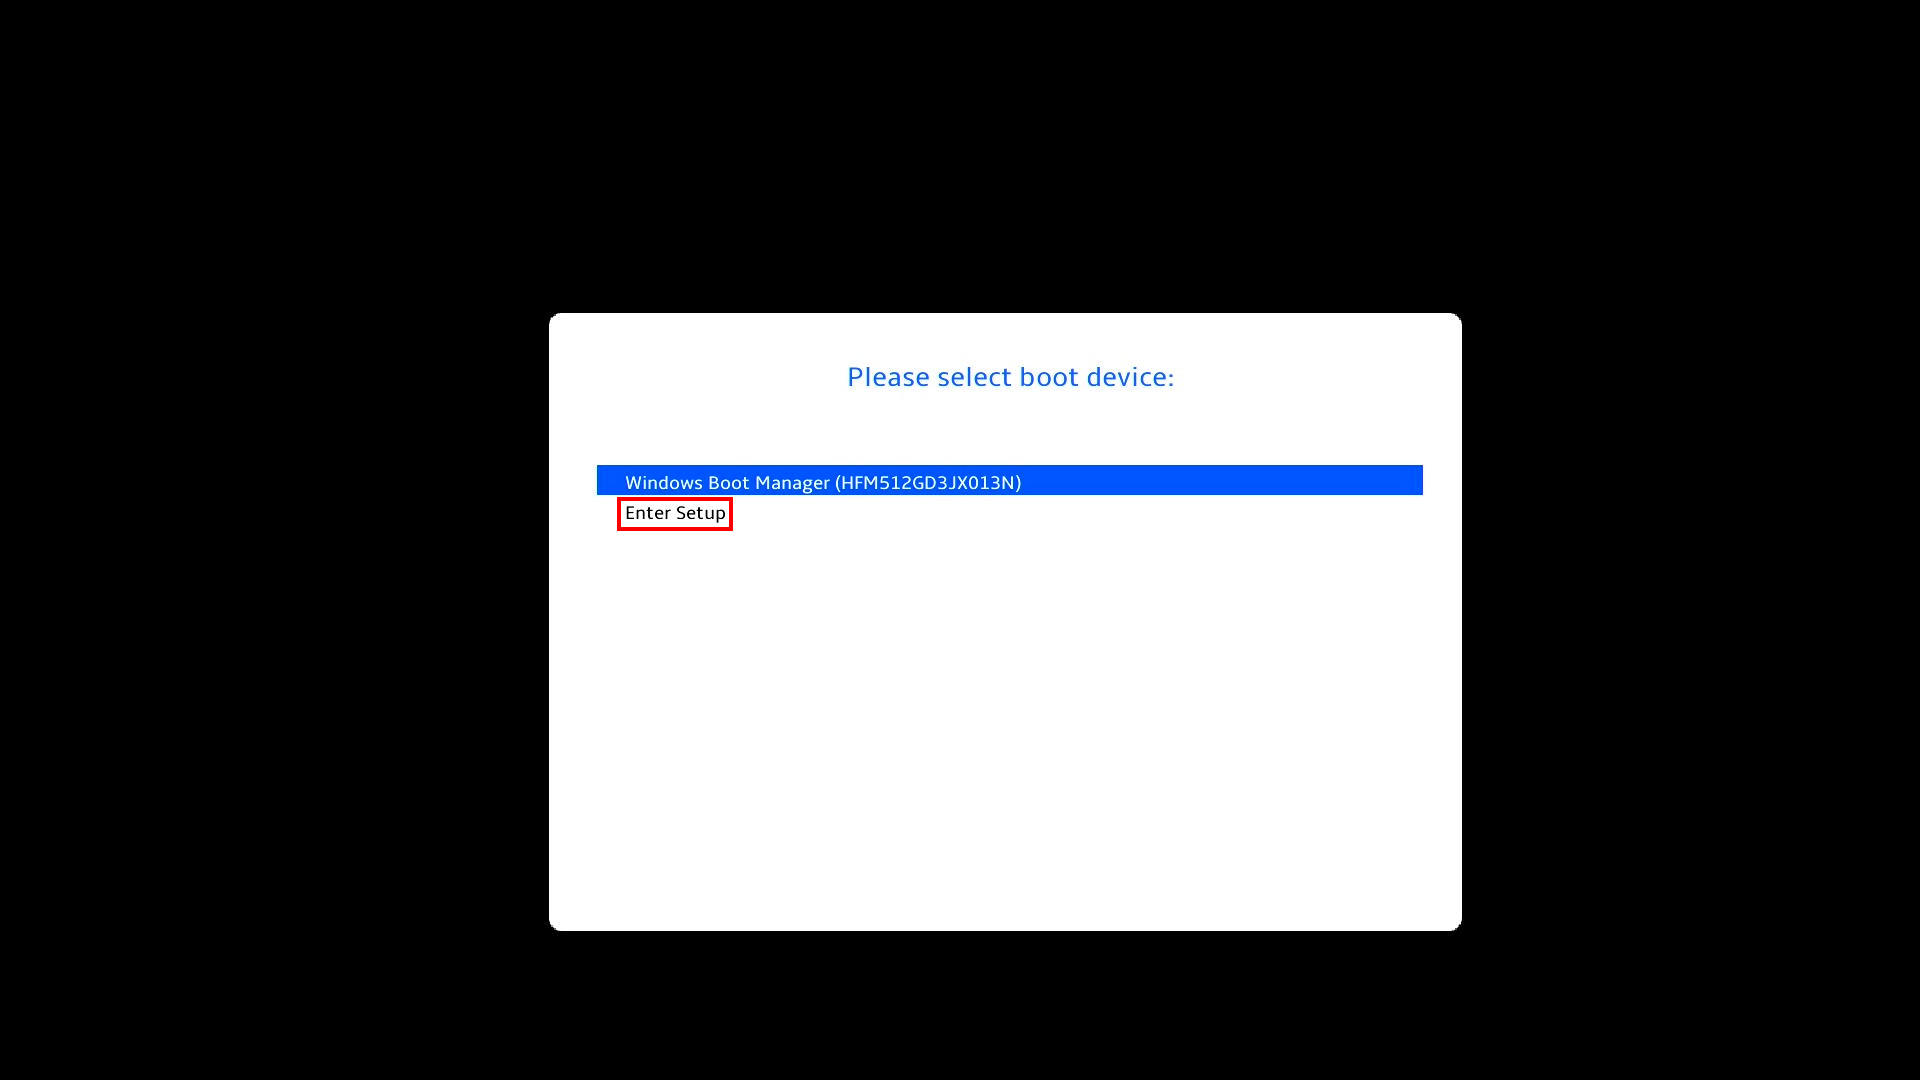
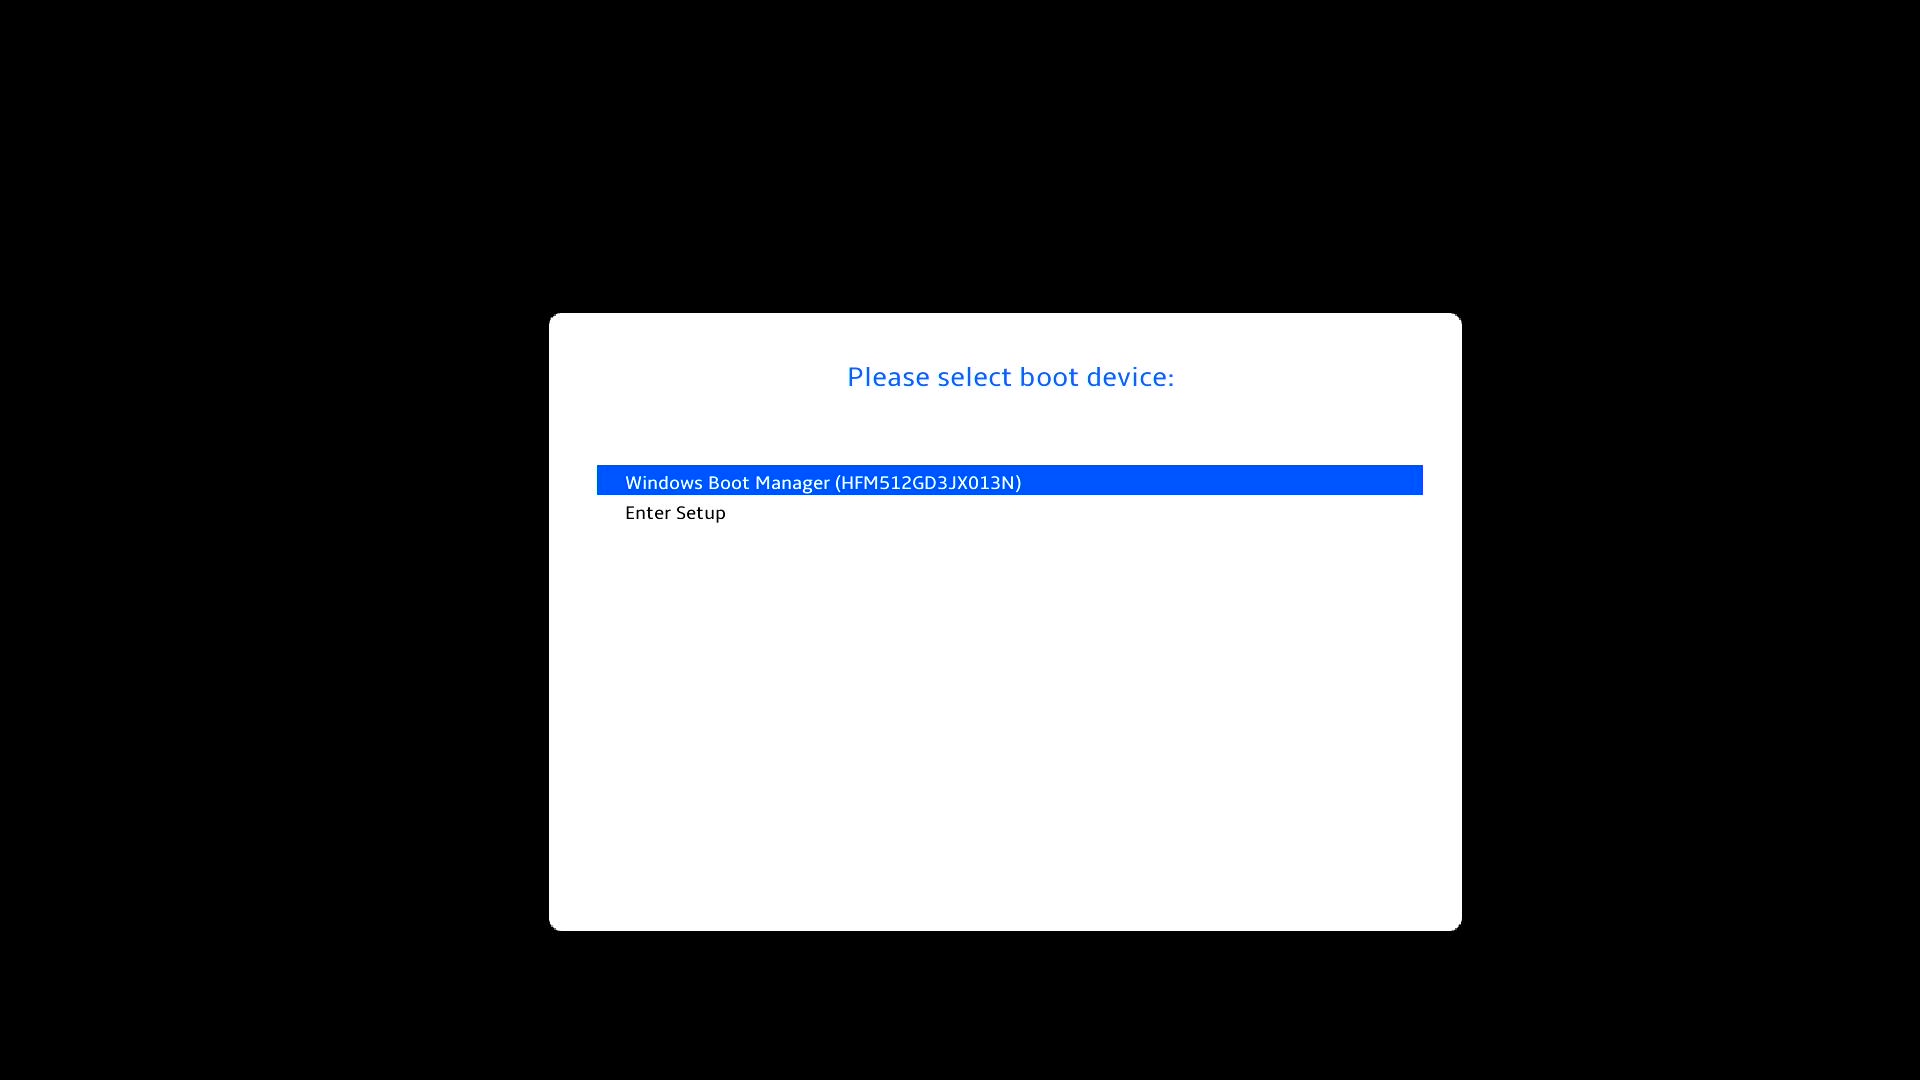
Press the [ESC] or [F2] key on the keyboard at boot time and the following screen will appear. Press the arrow keys on your keyboard, select [Enter Setup], and press Enter on your keyboard to enter MyASUS in UEFI BIOS.
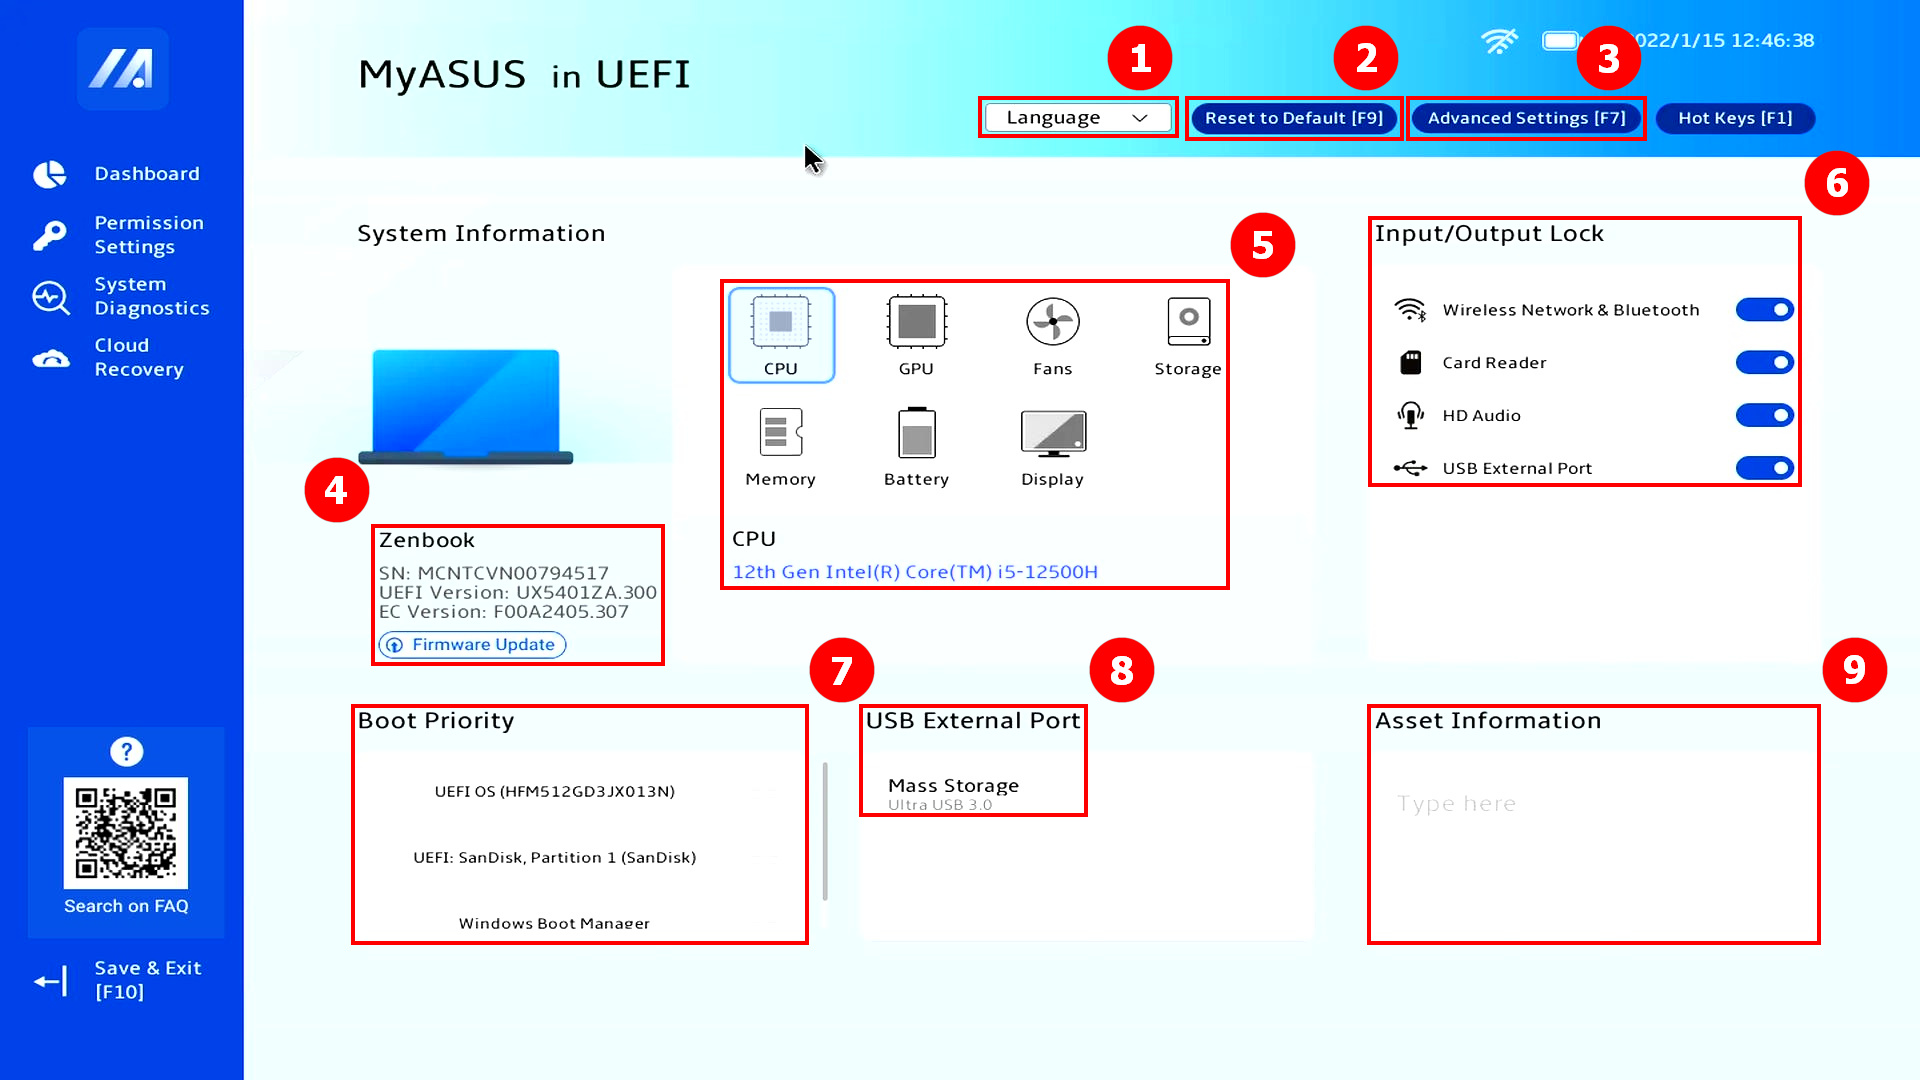
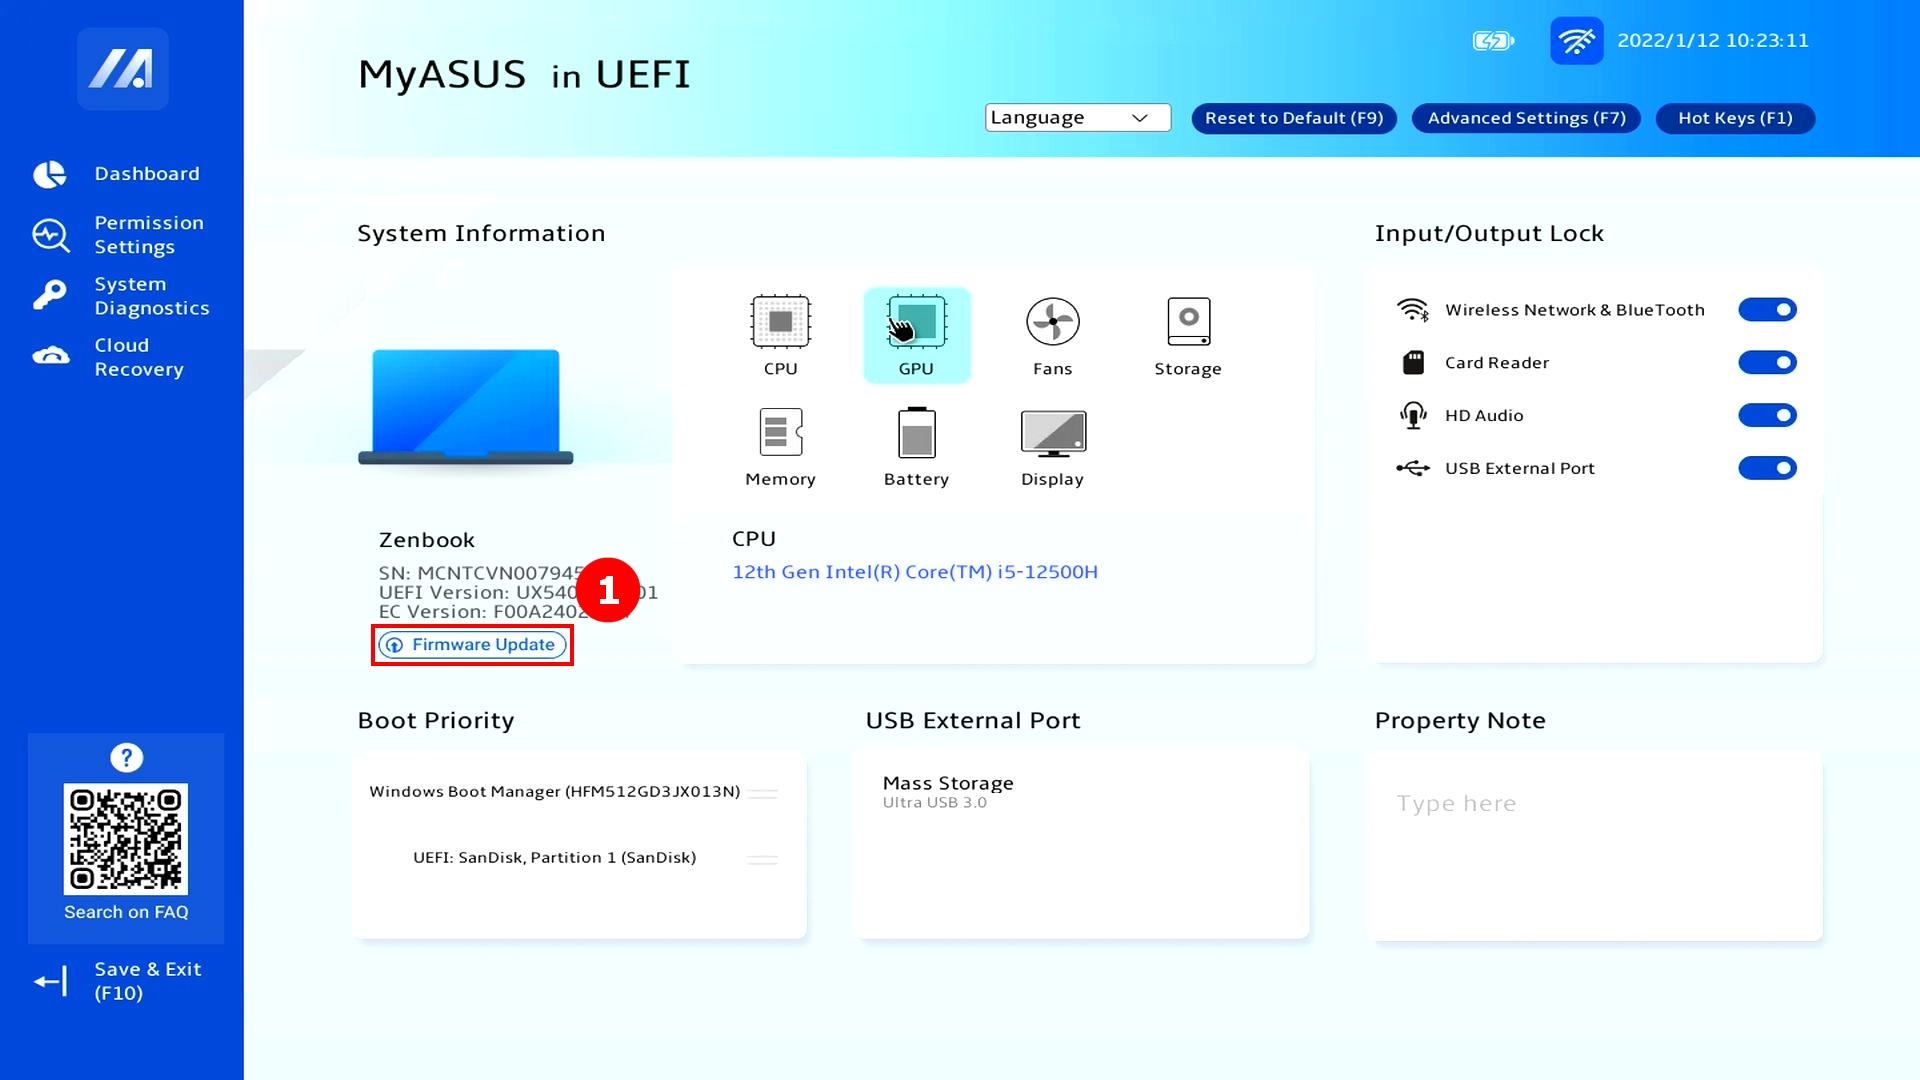
Go to [MyASUS in UEFI BIOS] Main Interface - Dashboard. You can switch languages at ①[Language]. Click ②[Reset to Default] to restore the system default settings. Click ③[Advanced Setting] to enter the BIOS settings page. At ④[Firmware Update], view the computer name, BIOS version, and other information, and click ④[Firmware Update] to upgrade the BIOS version. View PC hardware details in ⑤[Hardware Information]. Quickly turn off or turn on features such as WiFi or Bluetooth in ⑥[Input/Output Lock], but if you turn them off, they won't be available on Windows. Prioritize startup items in ⑦[Boot priority]. In ⑧[USB External Port], view the devices connected to the USB Port. In ⑨[Asset Information], fill in the information you want to record. When you have set up a function in the dashboard or a function in the BIOS, press F10 to save when you exit.
3.1 How to enter BIOS settings page
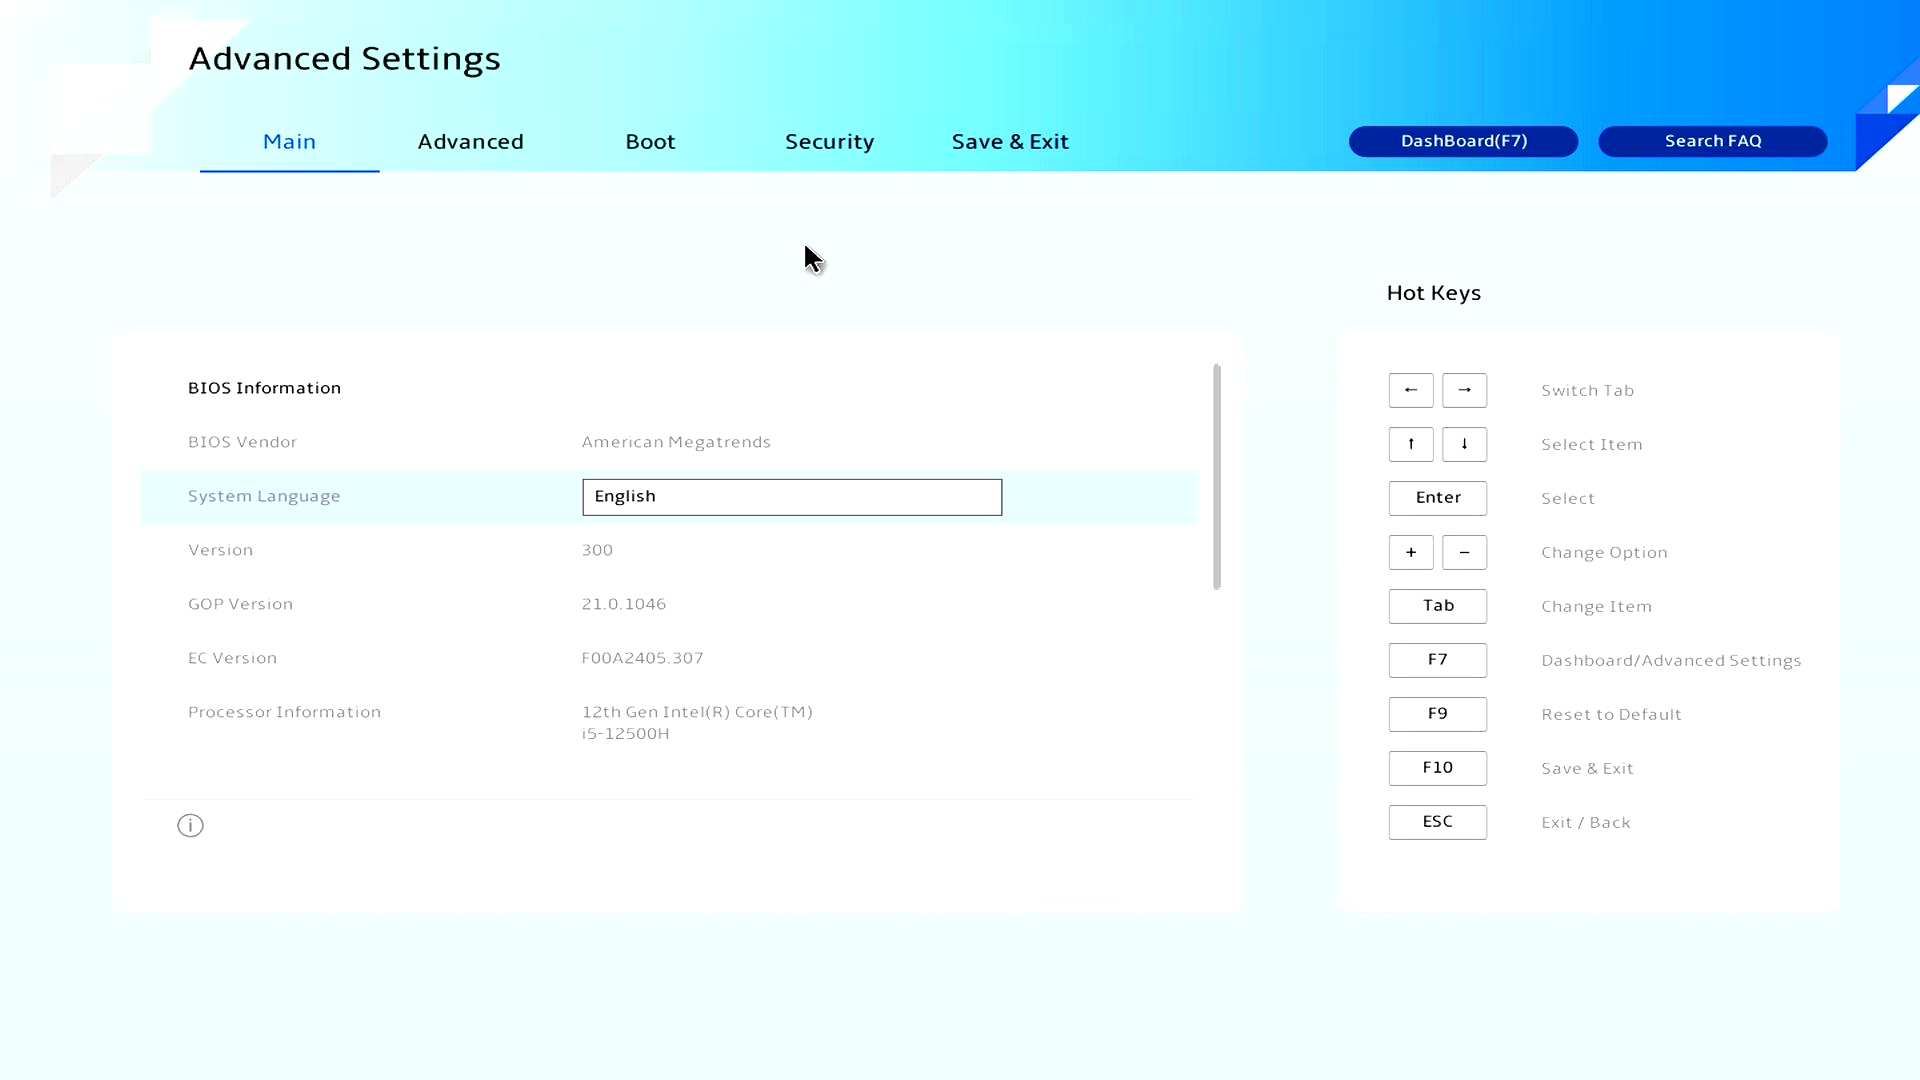
Press F7 to enter the Advanced Settings page, where you can set the functions within the BIOS, when you are finished, press F10 to save and exit.
(1) Click ①[Firmware Update].
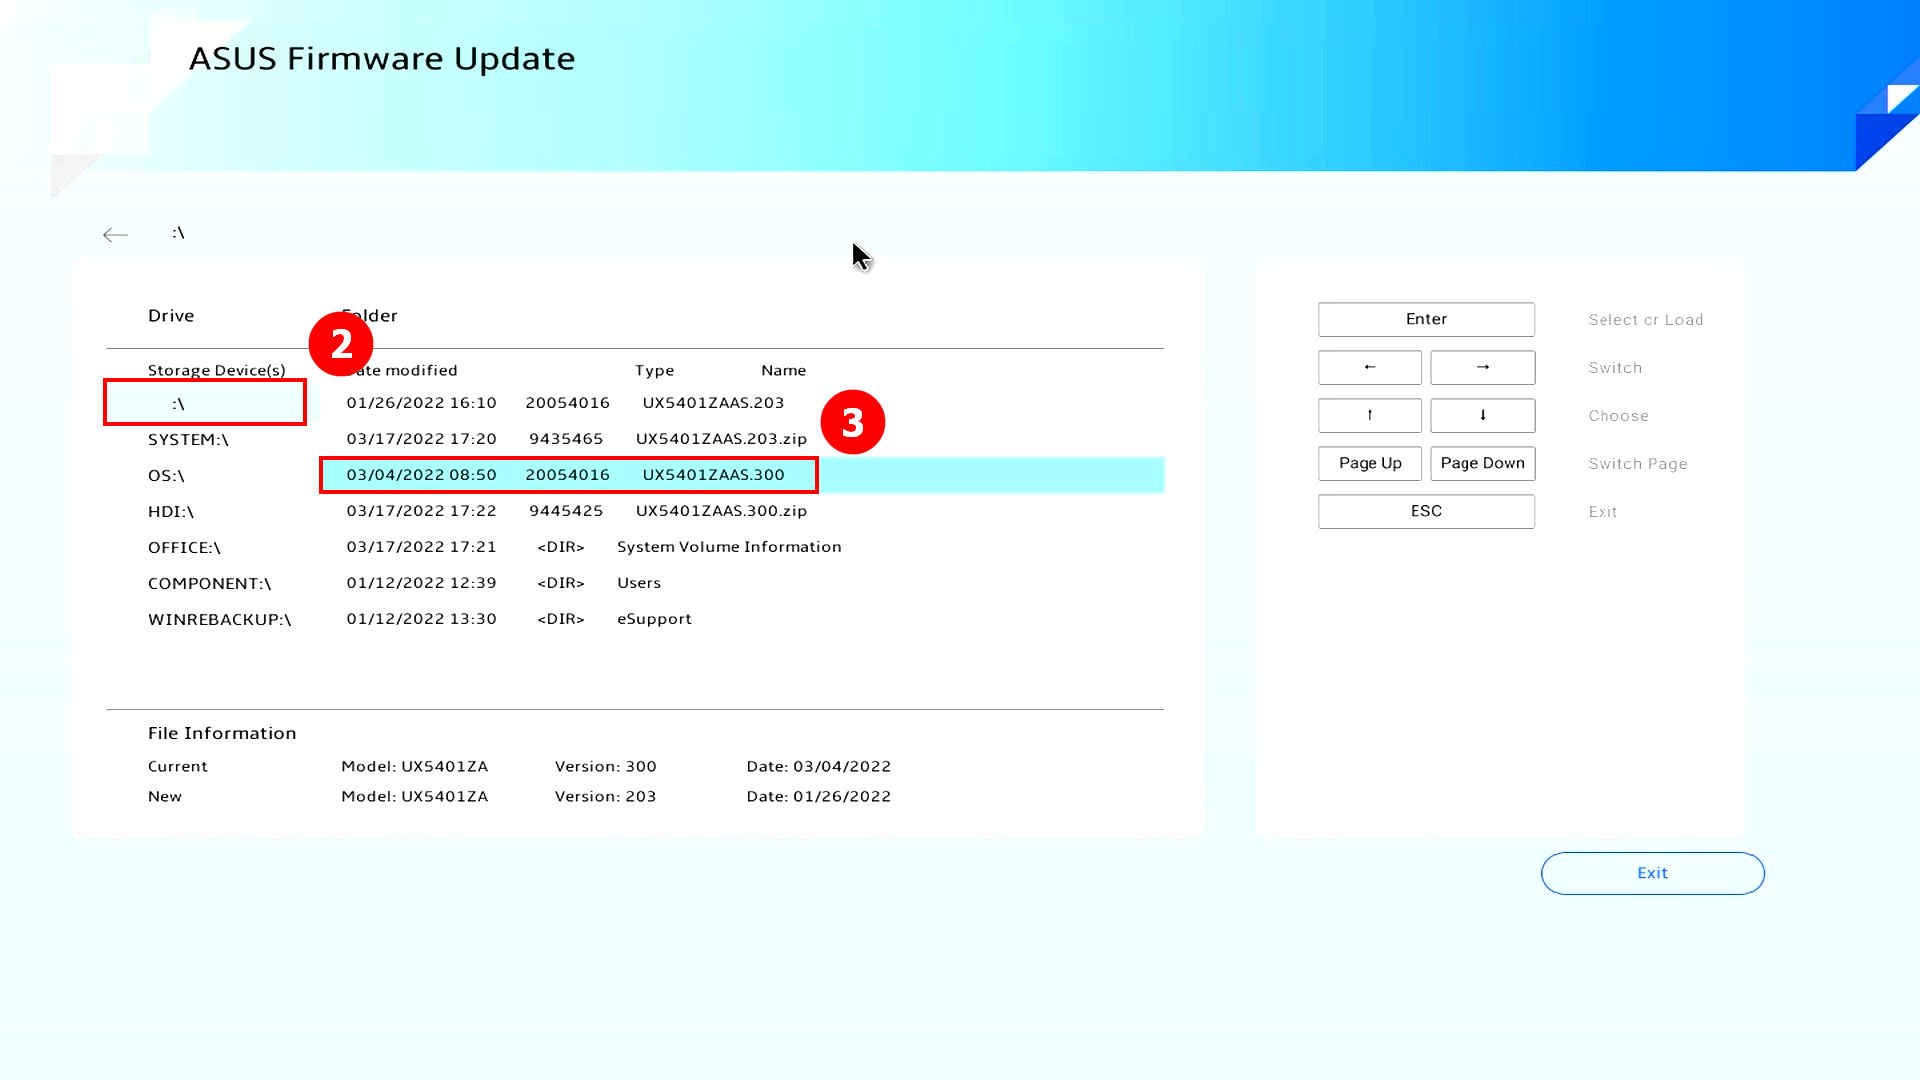
(2) In storage Device(s), find ②[path] where the BIOS upgrade document is stored, select ③[BIOS Upgrade File], and press Enter.
How to download the BIOS upgrade file:
- You can download the BIOS upgrade file by going to the MyASUS App-> User Service-> Live update.
- You can also go to the ASUS website - > search for your computer name - > download the BIOS upgrade file at Support.
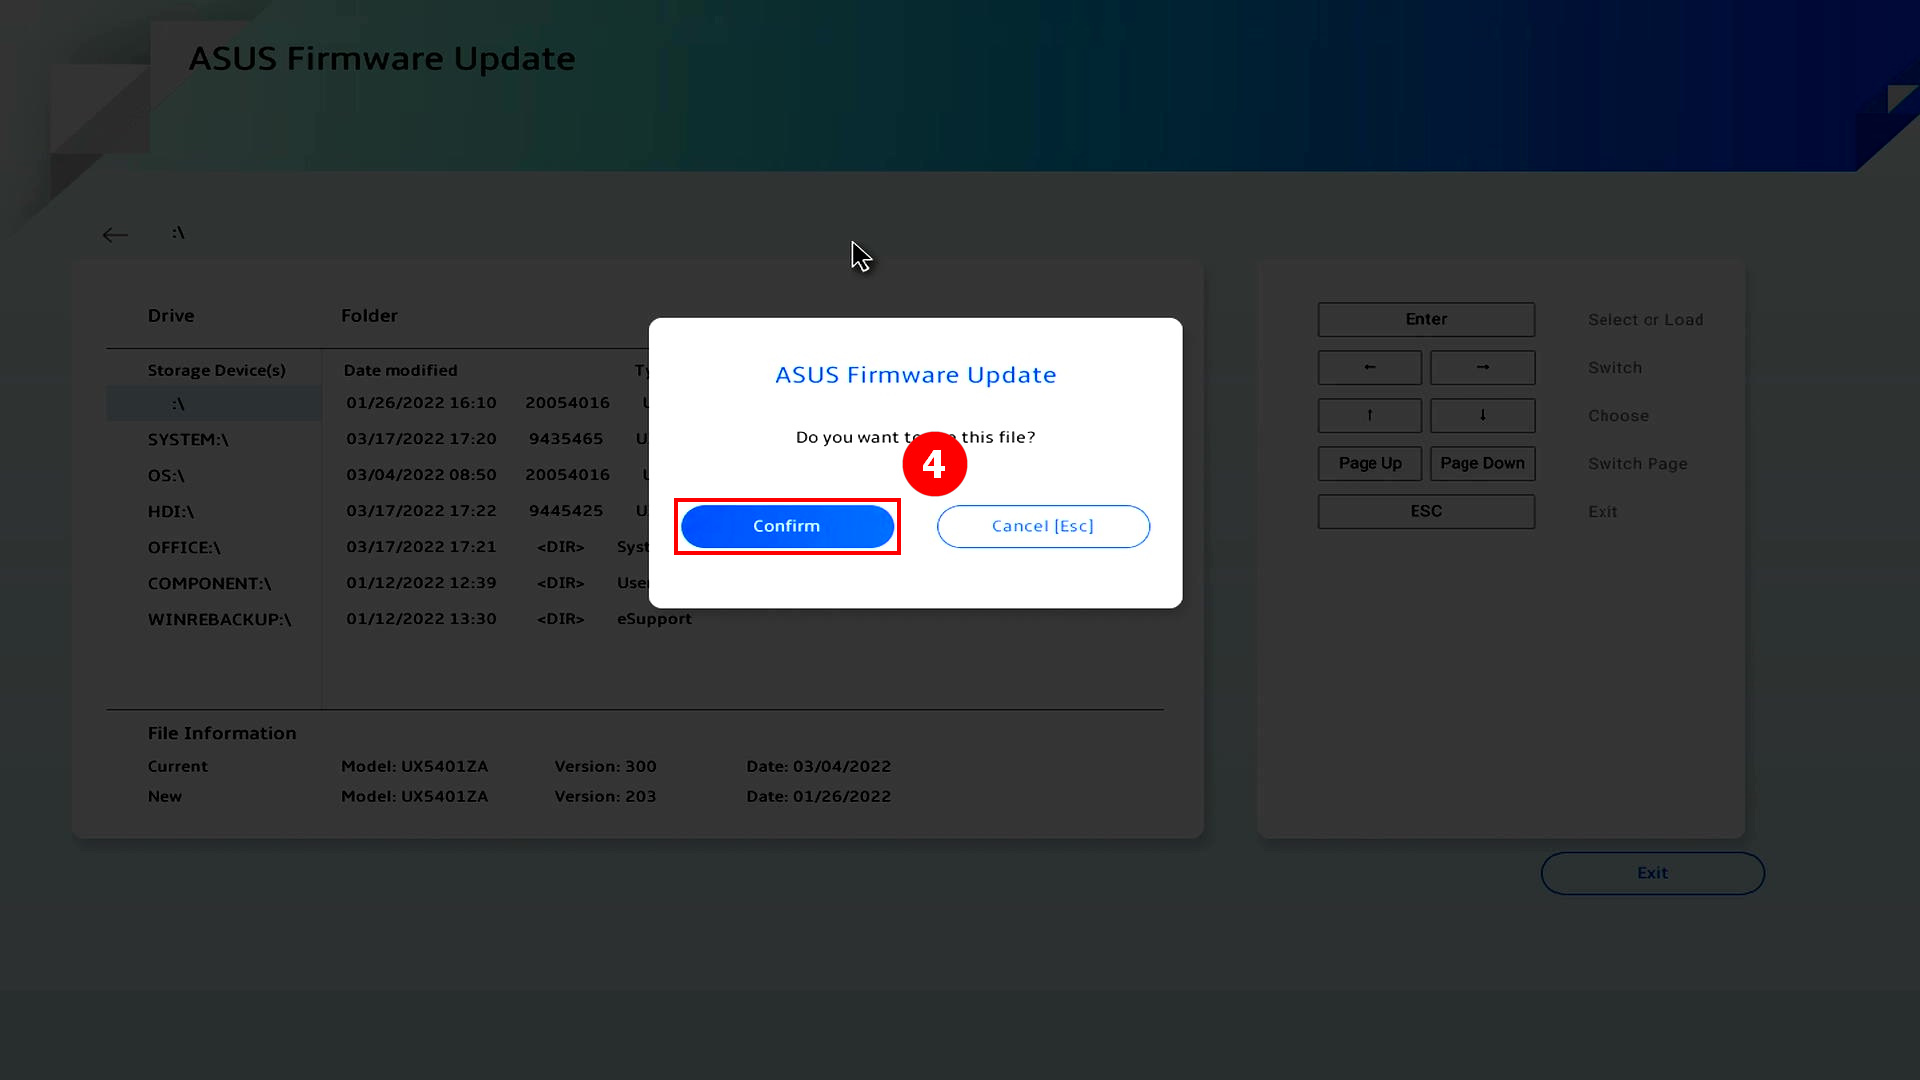
(3) Click ④[Confim].
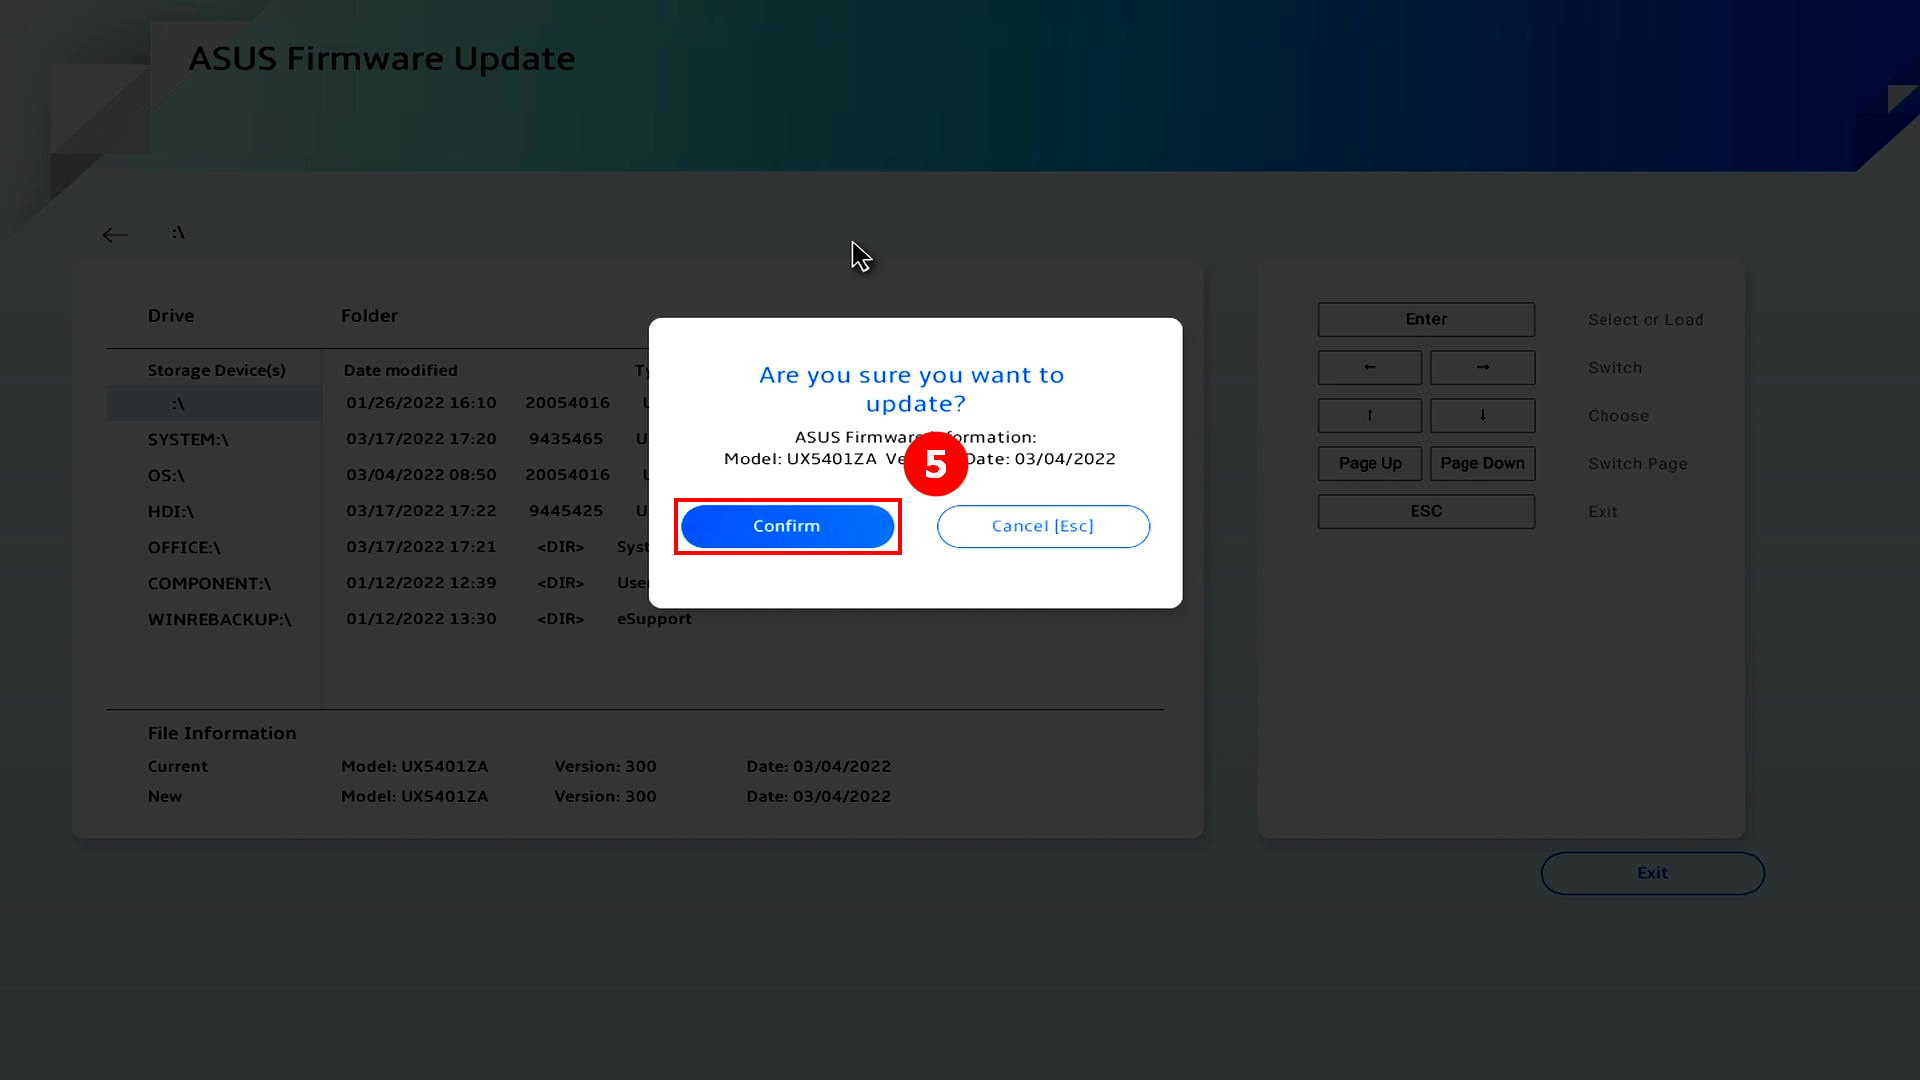
(4) Click ⑤[Confirm].
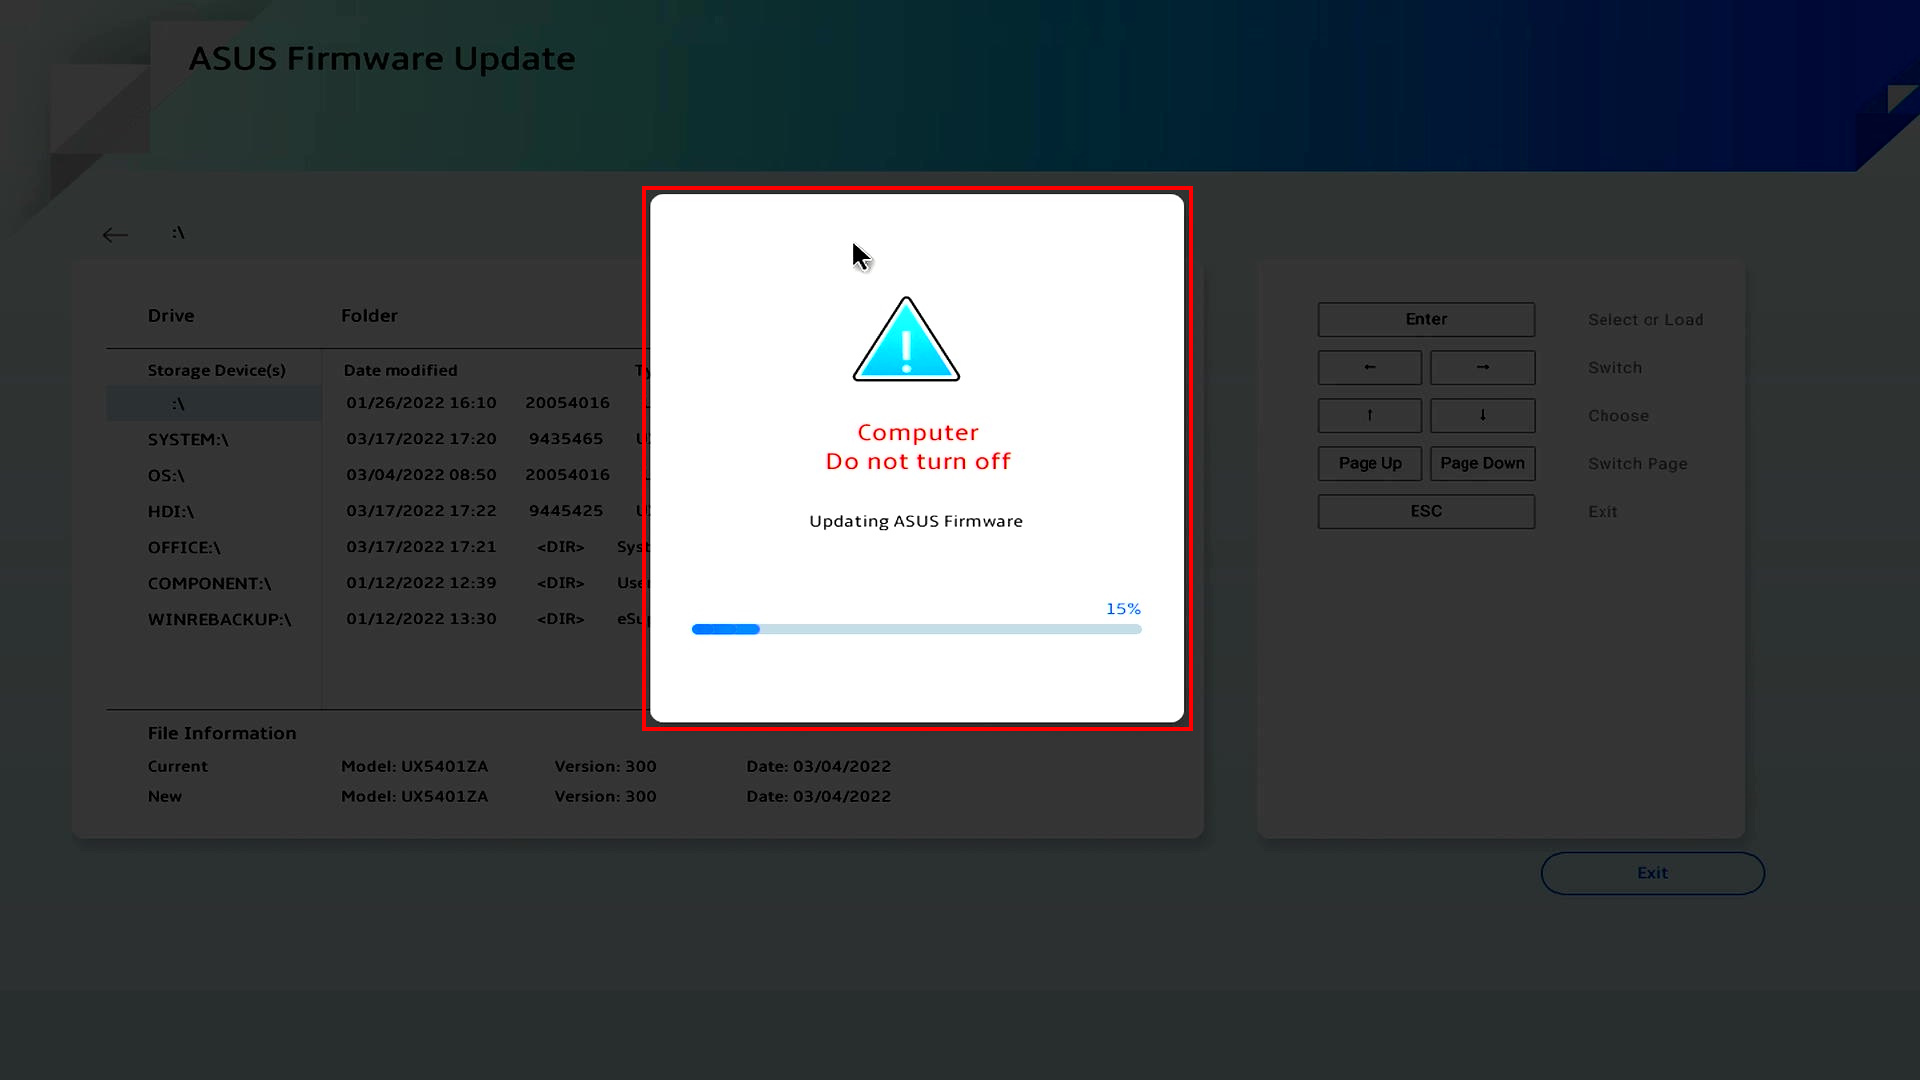
(5) The BIOS starts to upgrade, please keep the computer charger connected, do not touch the computer, wait patiently for the BIOS upgrade, after the upgrade will enter Windows.
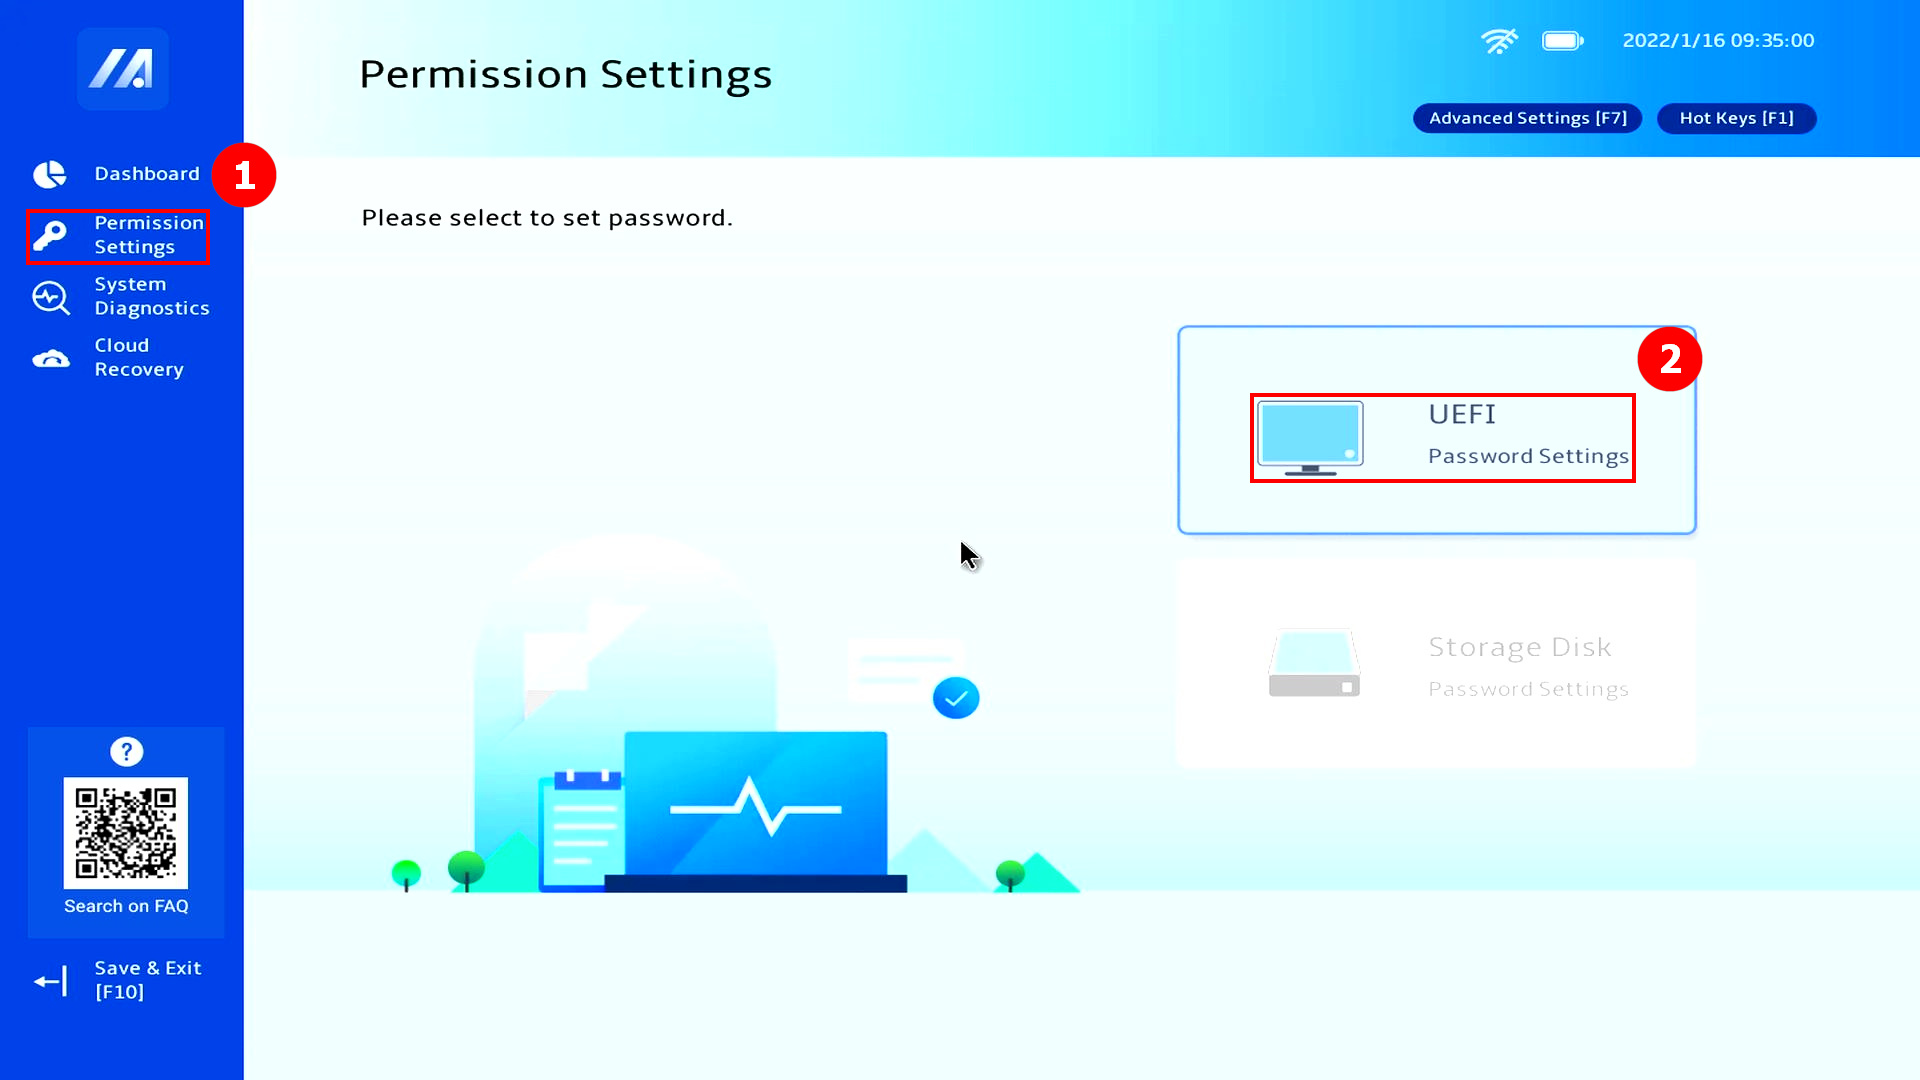
(1) Click ①[Permission Settings], Click ②[UEFI-Password Settings].
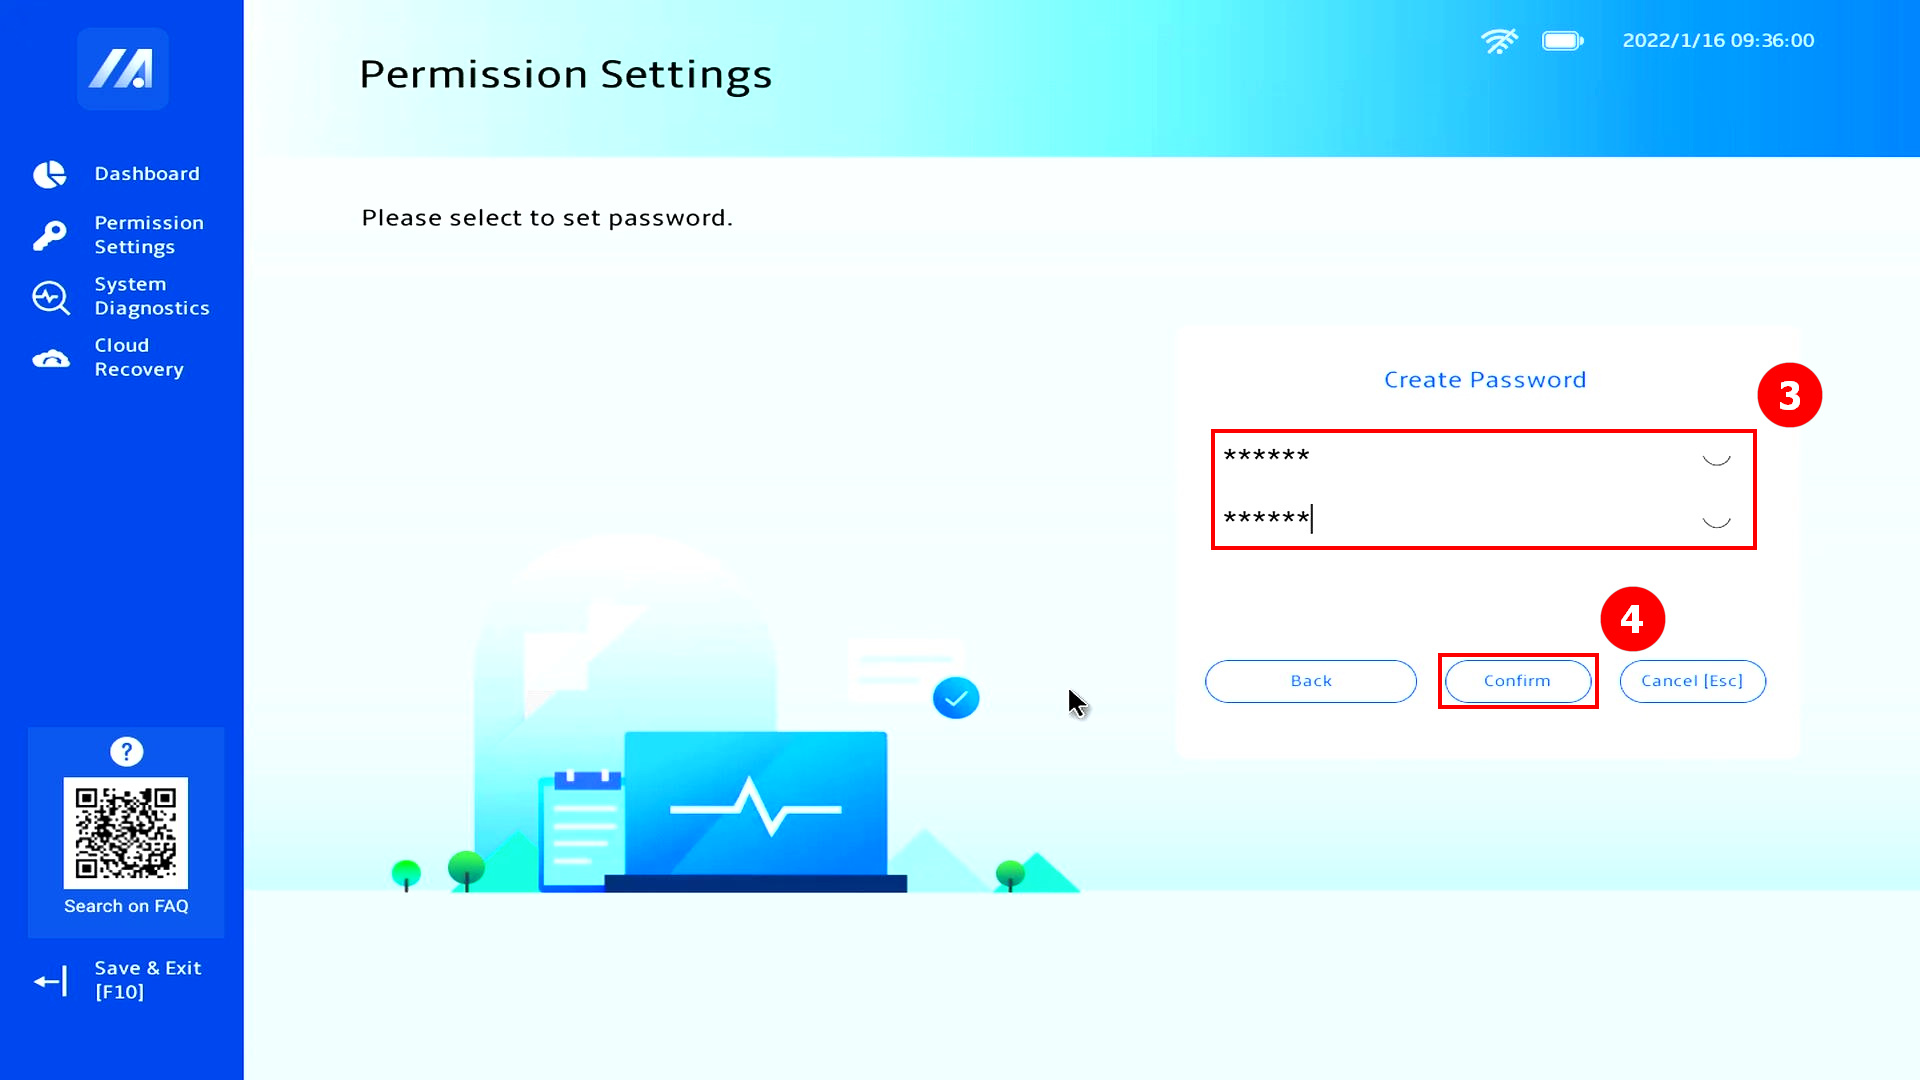
(2) Set your ③[Password] and click ④[Confirm].
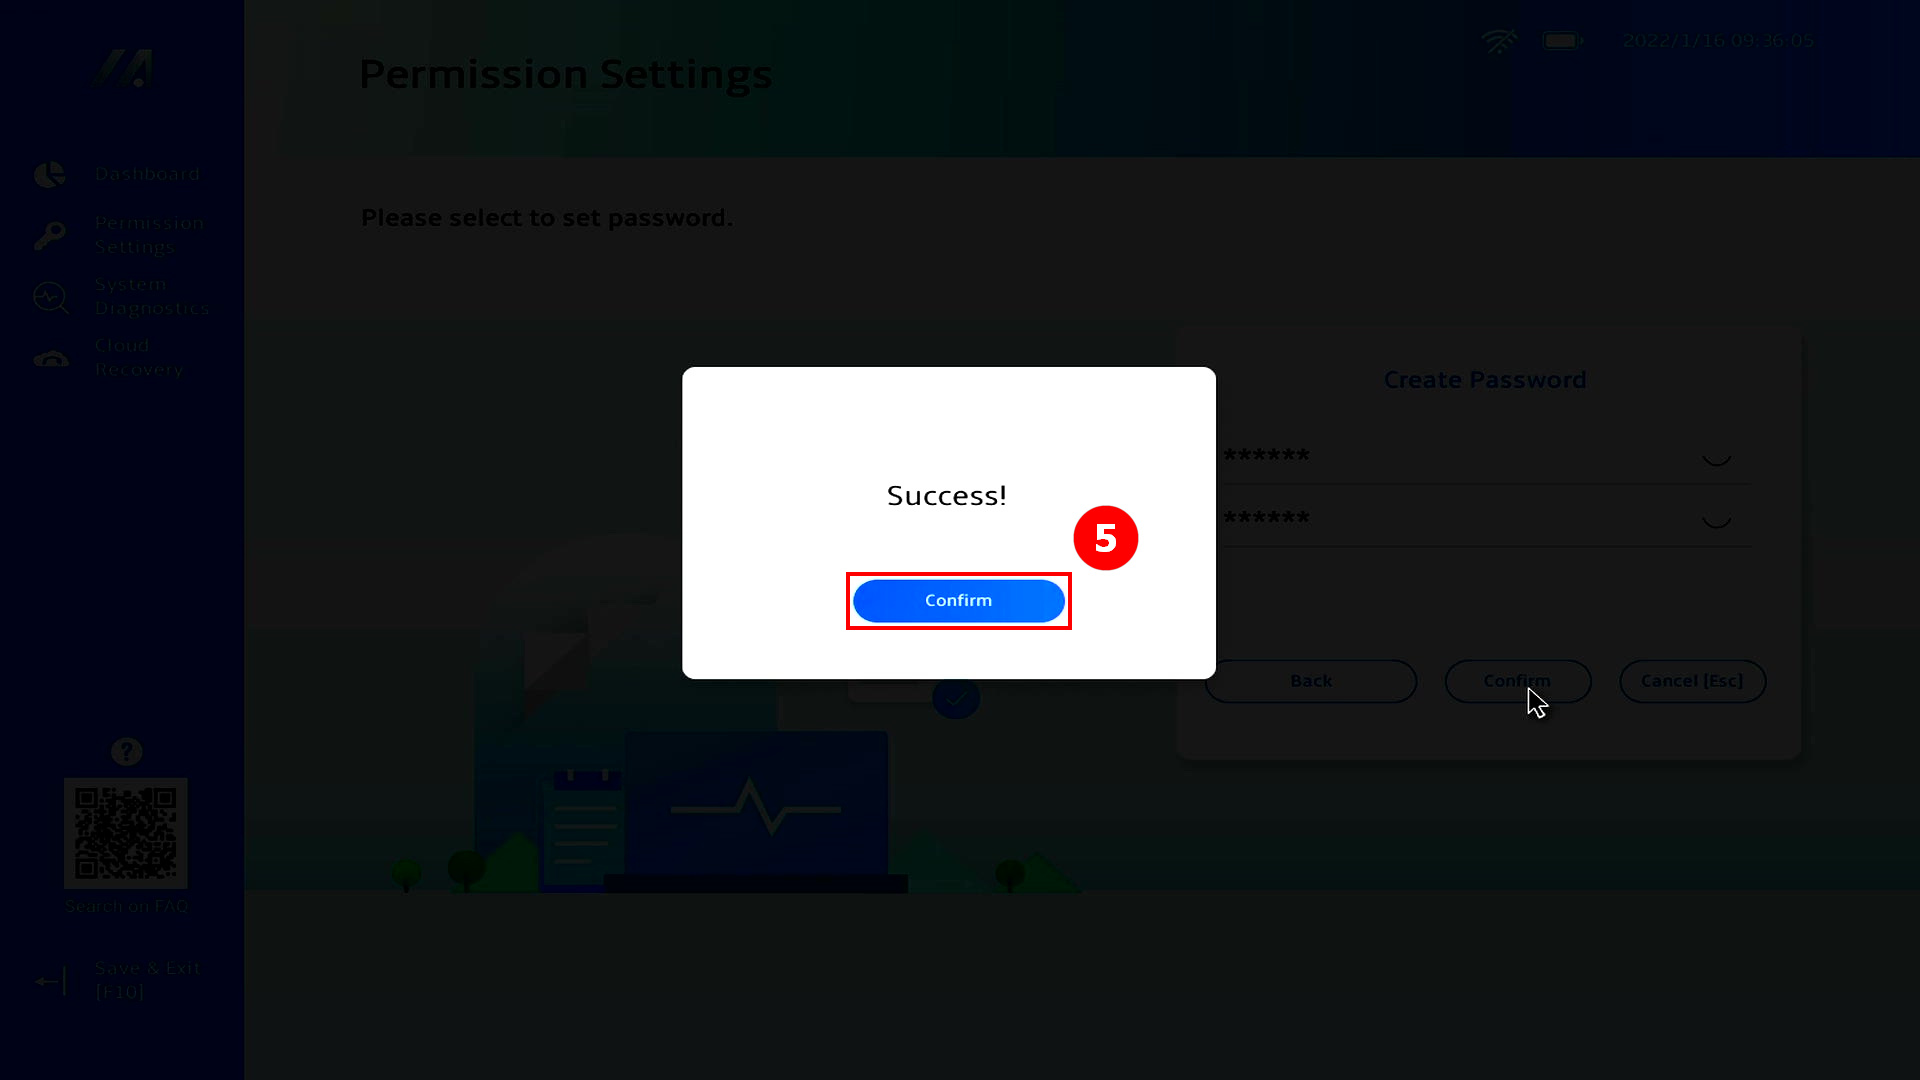
(3) A pop-up window will appear, click ⑤[Confirm], press F10 to save and exit.
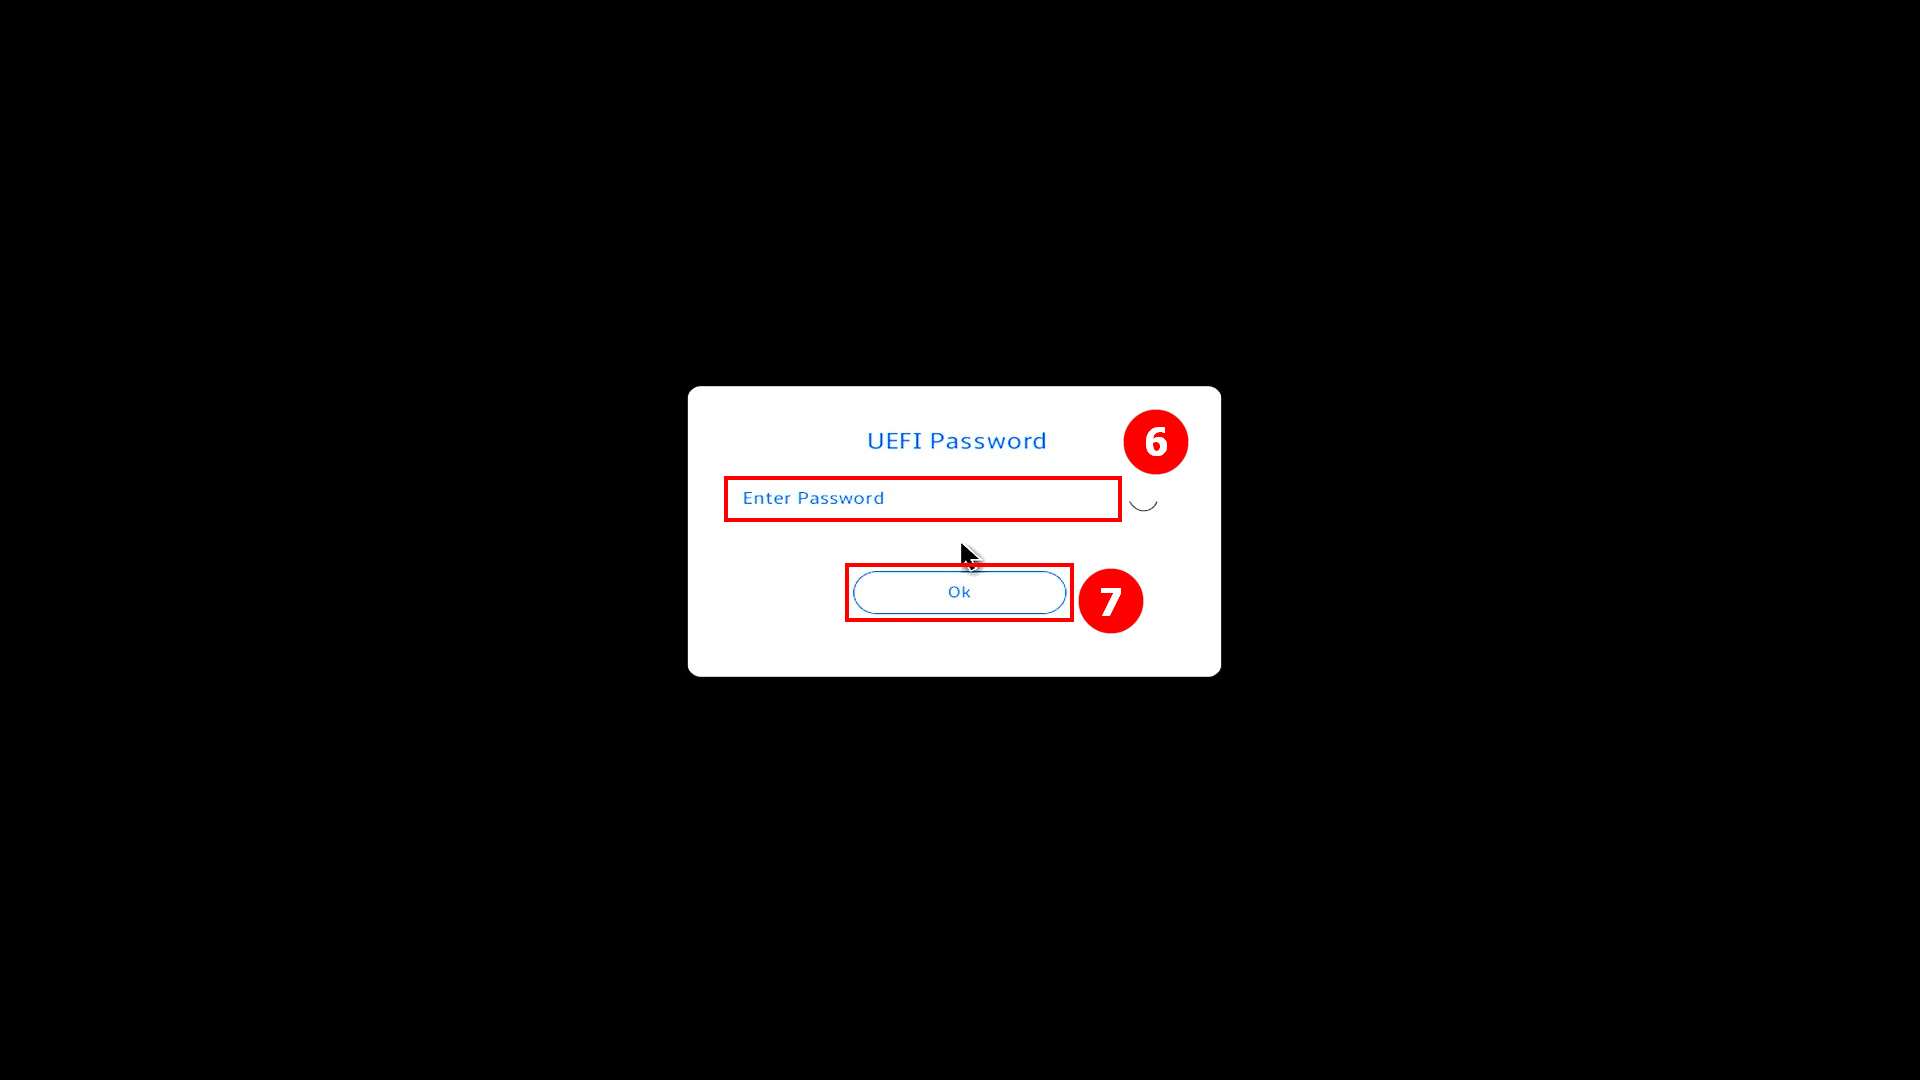
(4) When you press the [ESC] or [F2] key on your keyboard the next time you power on the system to enter Boot Manager, the following screen appears, enter ⑥[UEFI Password], and click ⑦[OK].
If you do not press the [ESC] or [F2] keys, your computer will automatically enter the Windows and the following screen will not be displayed.
If you forget the password, please contact ASUS Customer Service for assistance.
(5) Now that you've entered Boot Manager, select the action you want.
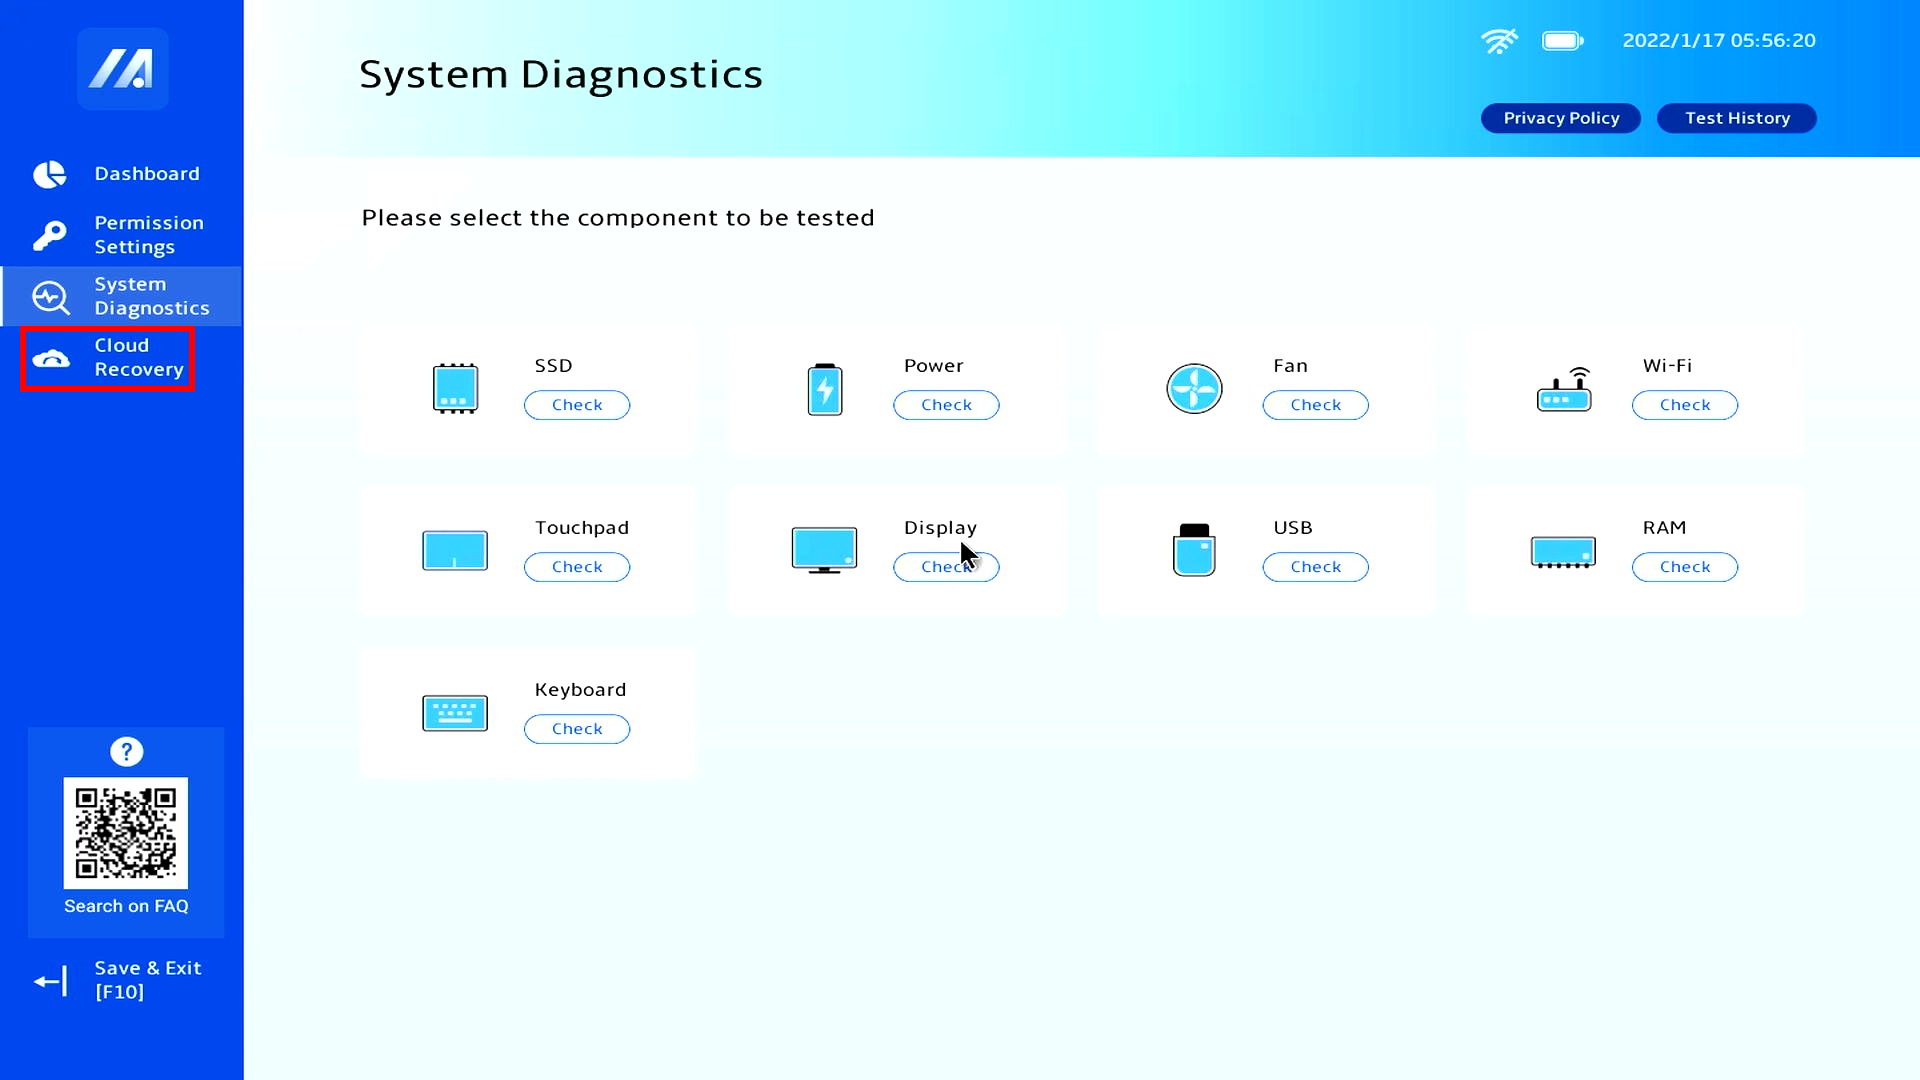
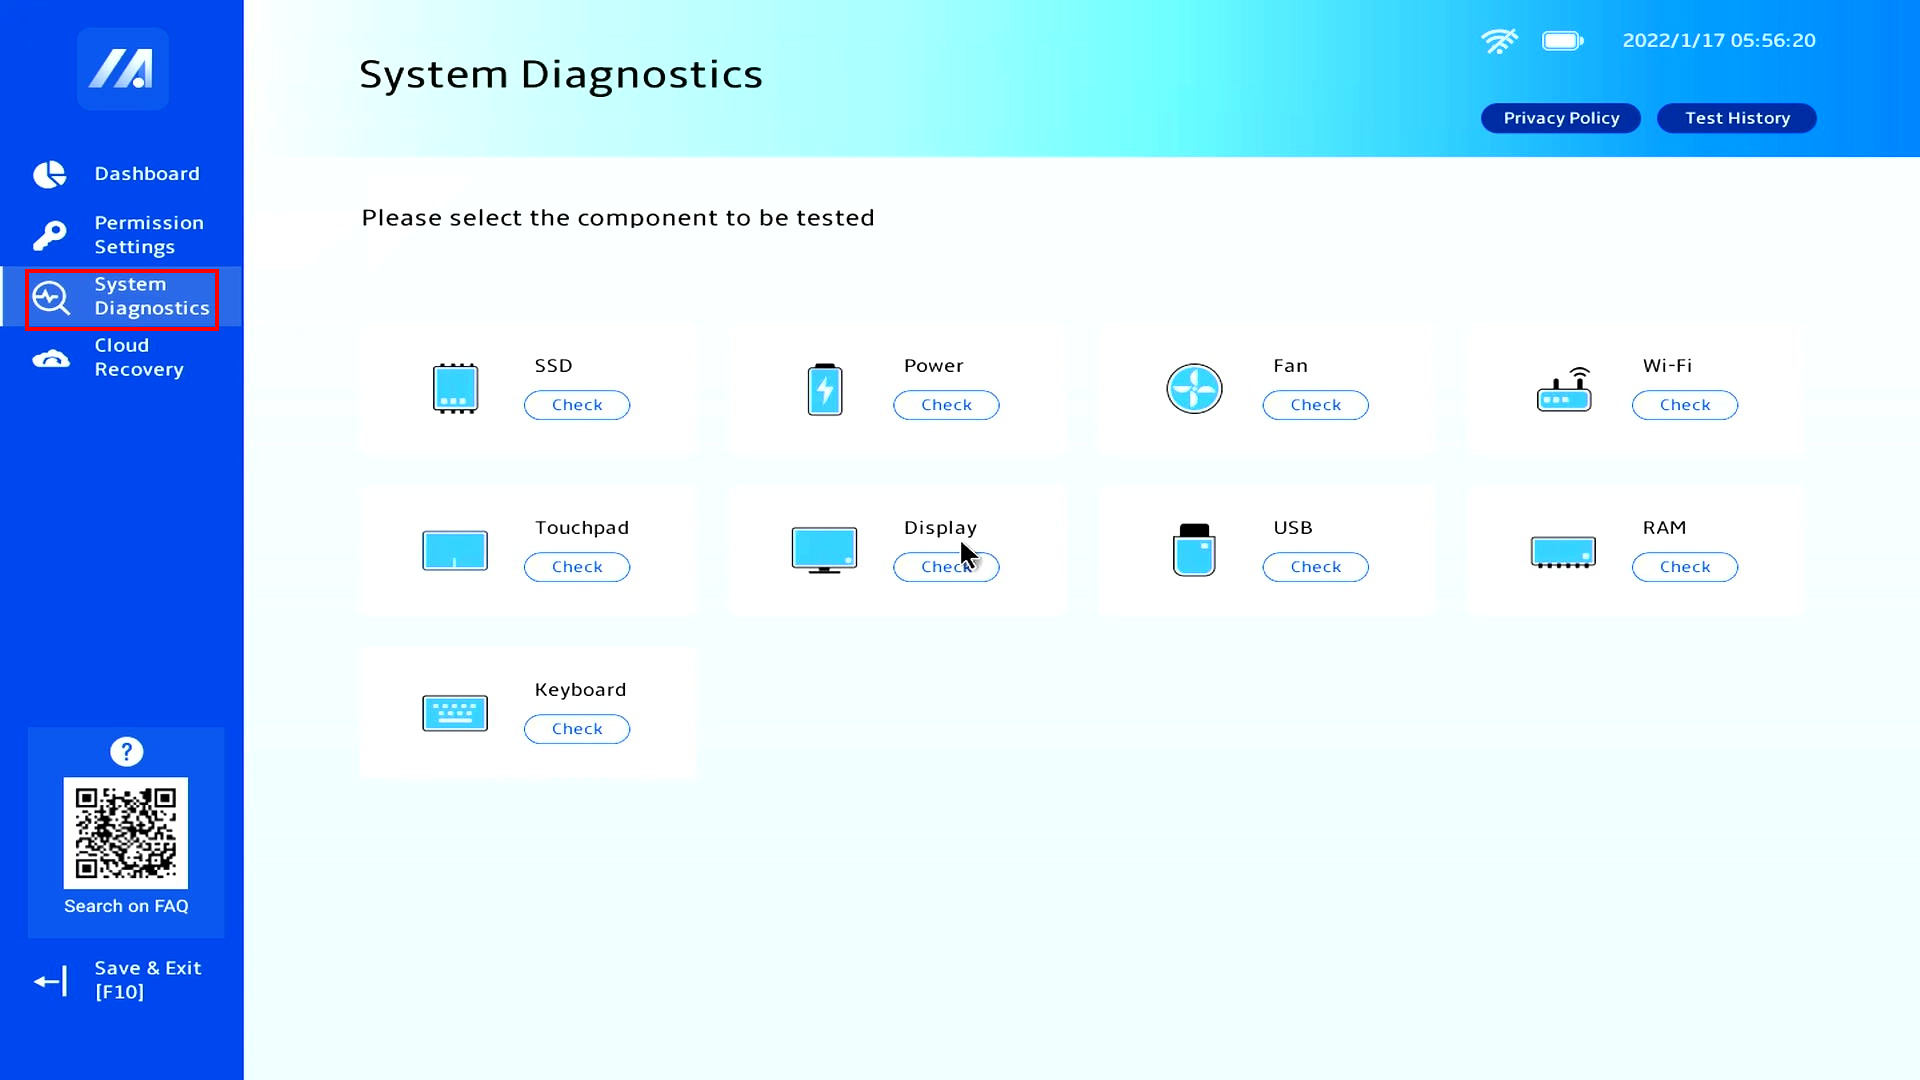
Click [System Diagnostics] and you can test component on that page. For detailed testing methods, please click: [Notebook] System Diagnostics UEFI BIOS - Introduction | Official Support | ASUS Global
*For some models of Wi-Fi component test, only support device check function
Click [Cloud Recovery], and you can use this function to restore your computer's operating system. For detailed methods, please click: Cloud Recovery in UEFI BIOS - Introduction | Official Support | ASUS Global
※Some models do not support the Cloud Recovery function
