Related Topics
[Chromebook] Troubleshooting - Abnormal Camera Issue on Chromebook
If you encounter issues with your Chromebook camera not functioning properly (e.g., blurry images, no display, or camera not found message), please follow the troubleshooting steps below.
Inspect the Camera’s Appearance
- Verify whether the camera is obstructed, for instance, by a screen protector or a privacy film.
Sometimes, if the camera lens is covered in dust or dirt, it may affect the image quality. Please use a clean, soft cloth to gently wipe the camera lens, ensuring it remains pristine.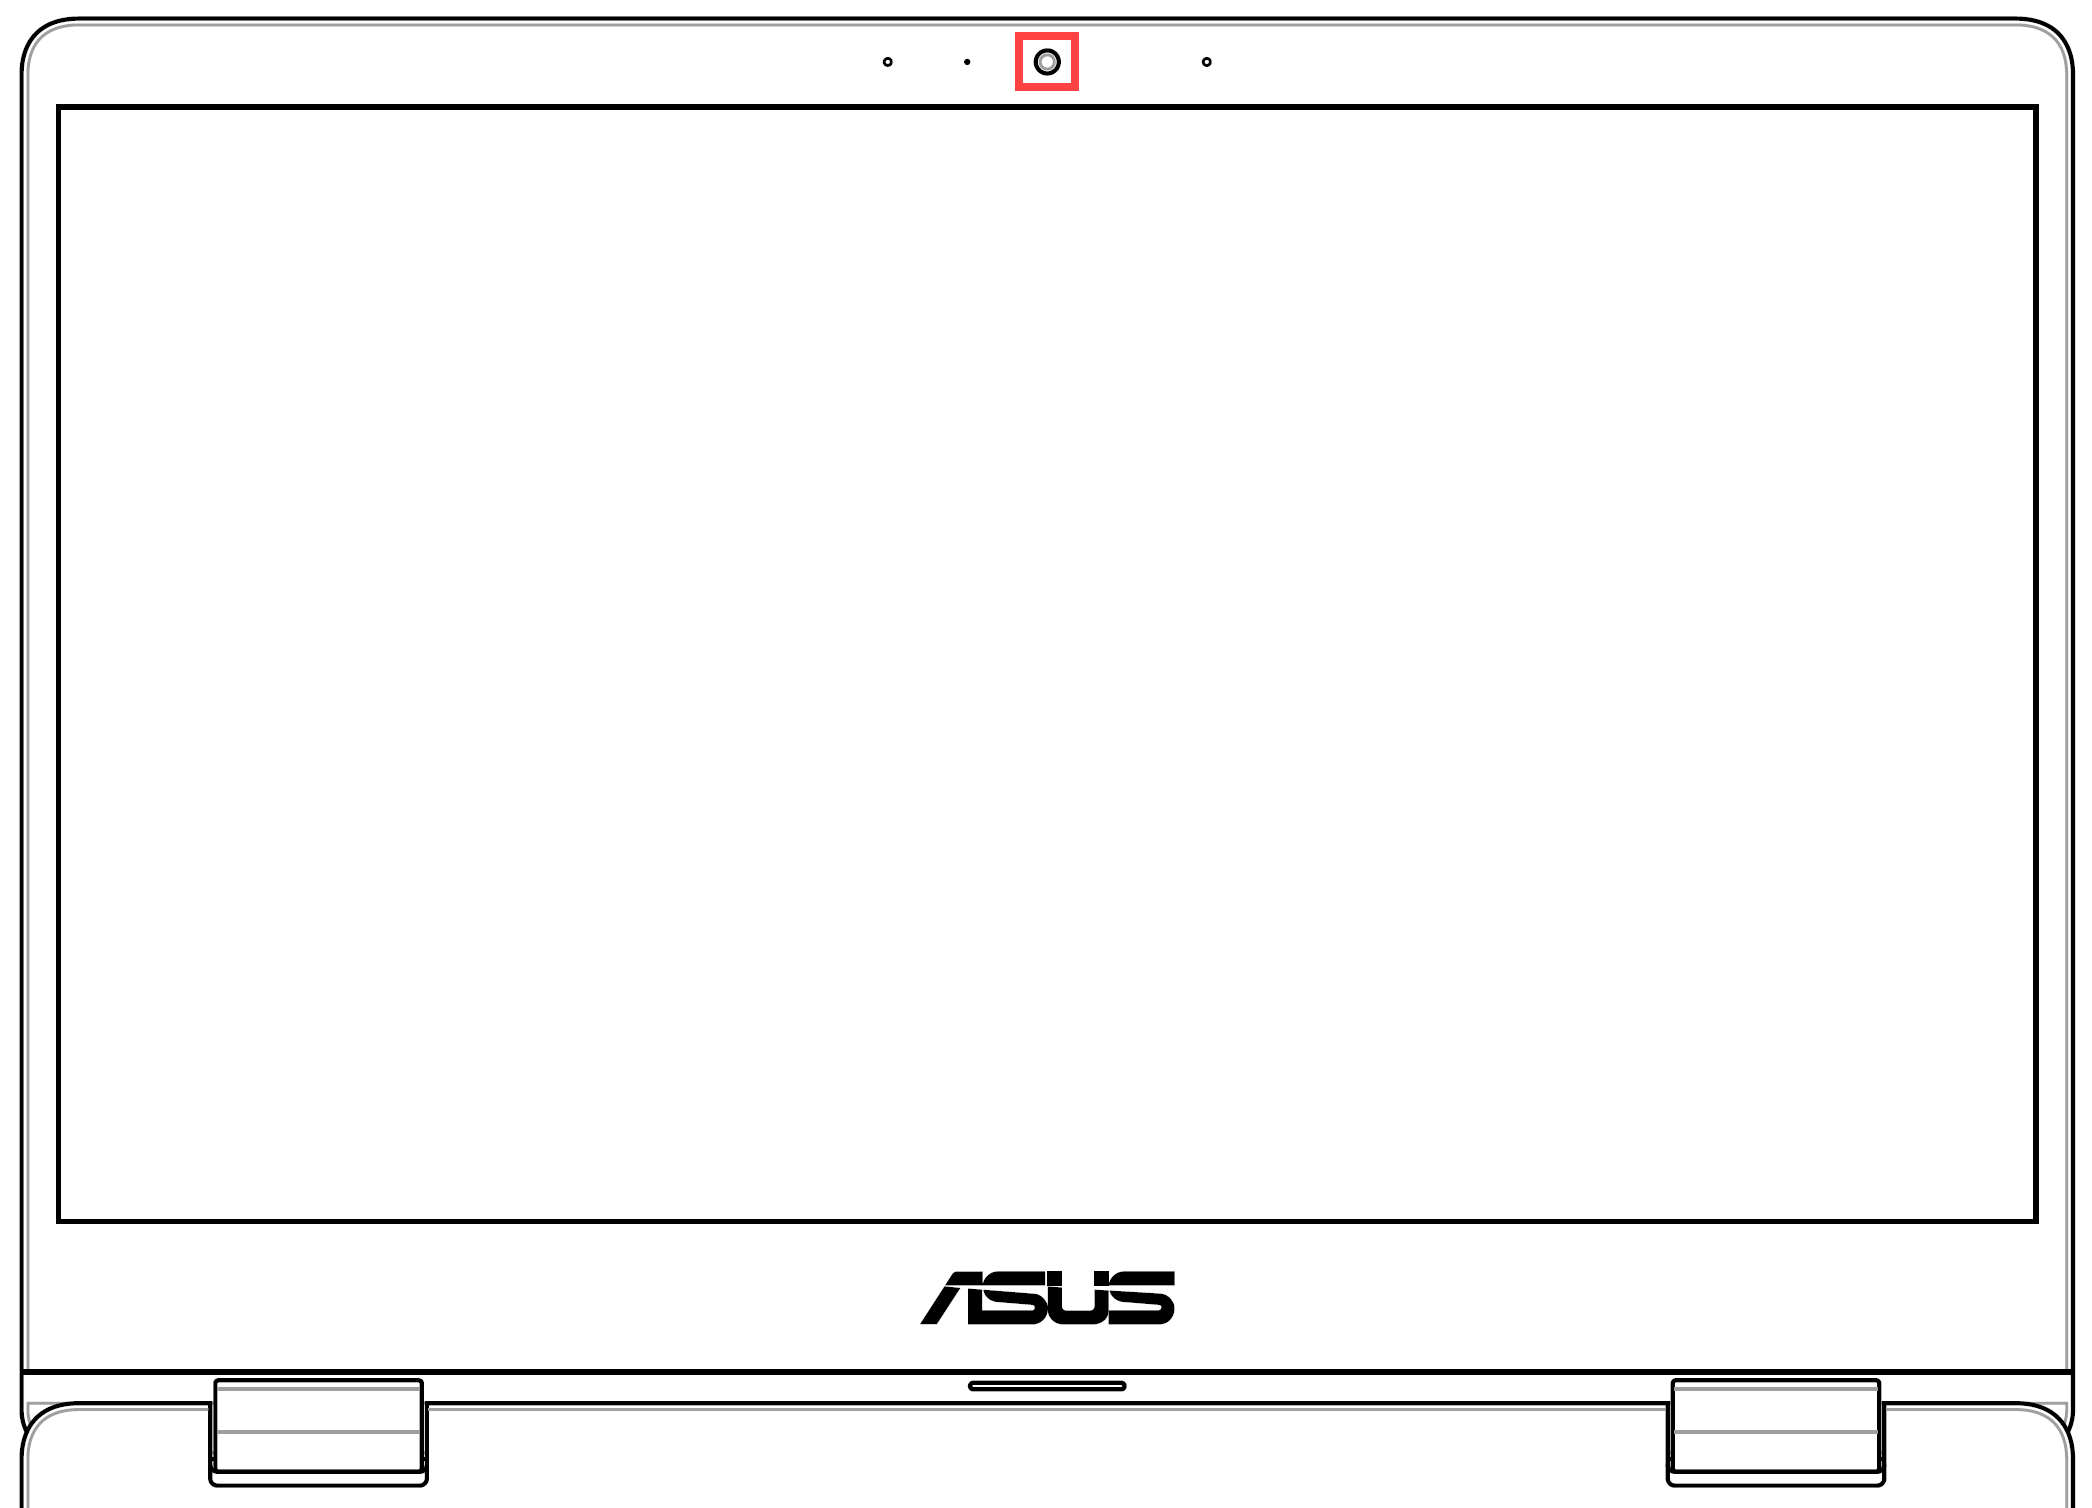
- Certain Chromebooks may be equipped with a physical privacy shield for the camera. When you intend to use the camera, ensure that the privacy shield is in the closed position.
Note: The location of the privacy shield may vary depending on the model. If you are uncertain whether your Chromebook is equipped with a physical privacy shield, please refer to the instructions in the User Manual.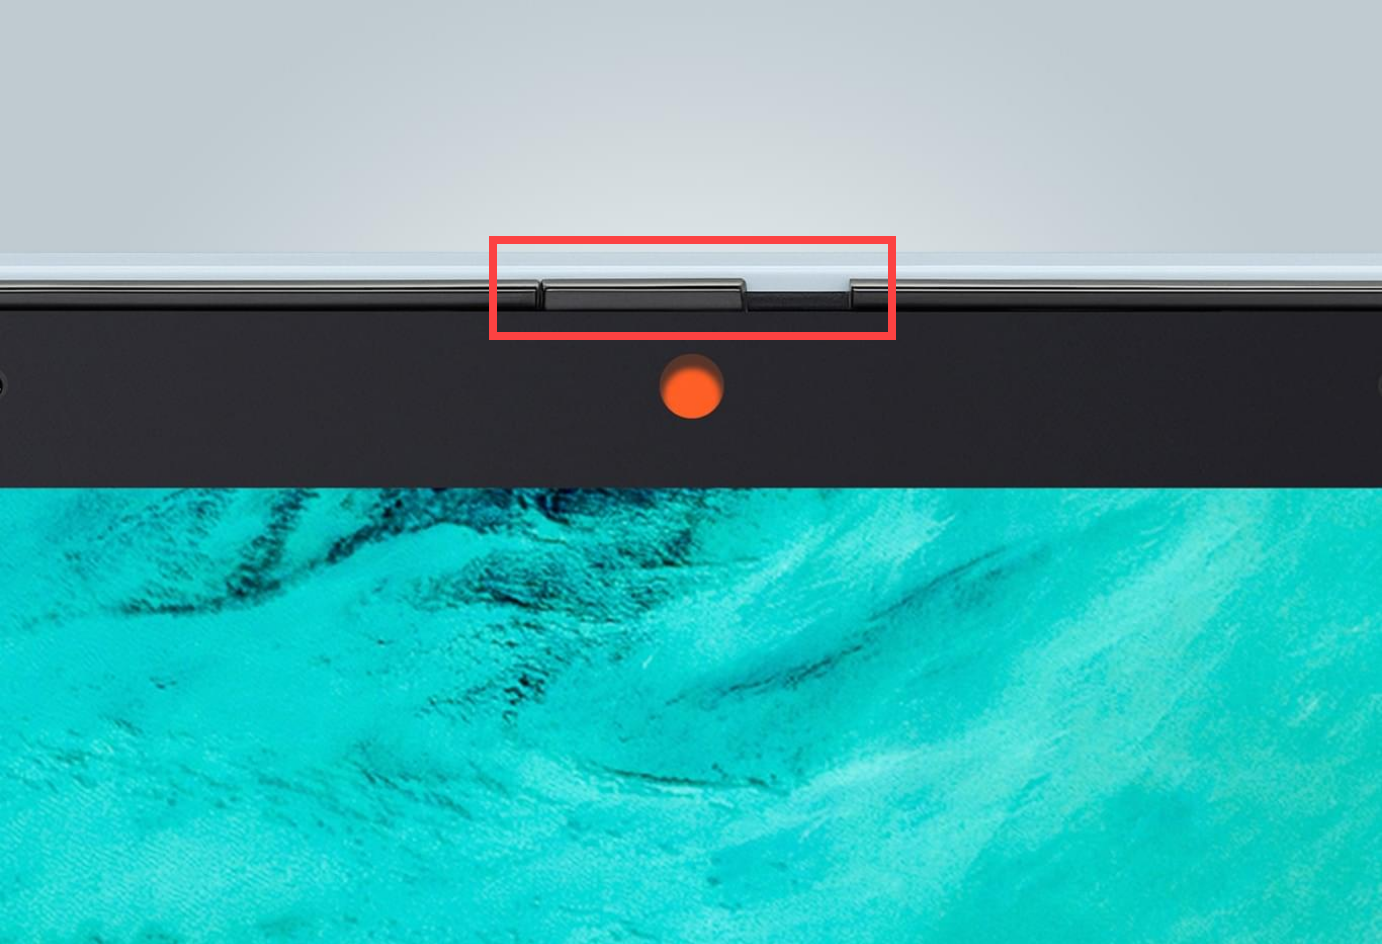
Verify Proper Functionality Using the Built-in Camera App
Utilize the native camera application in Chrome OS to capture photos and record videos, ensuring the camera operates without any issues.
- Click the [Launcher]
 ① located in the bottom left corner of the screen.
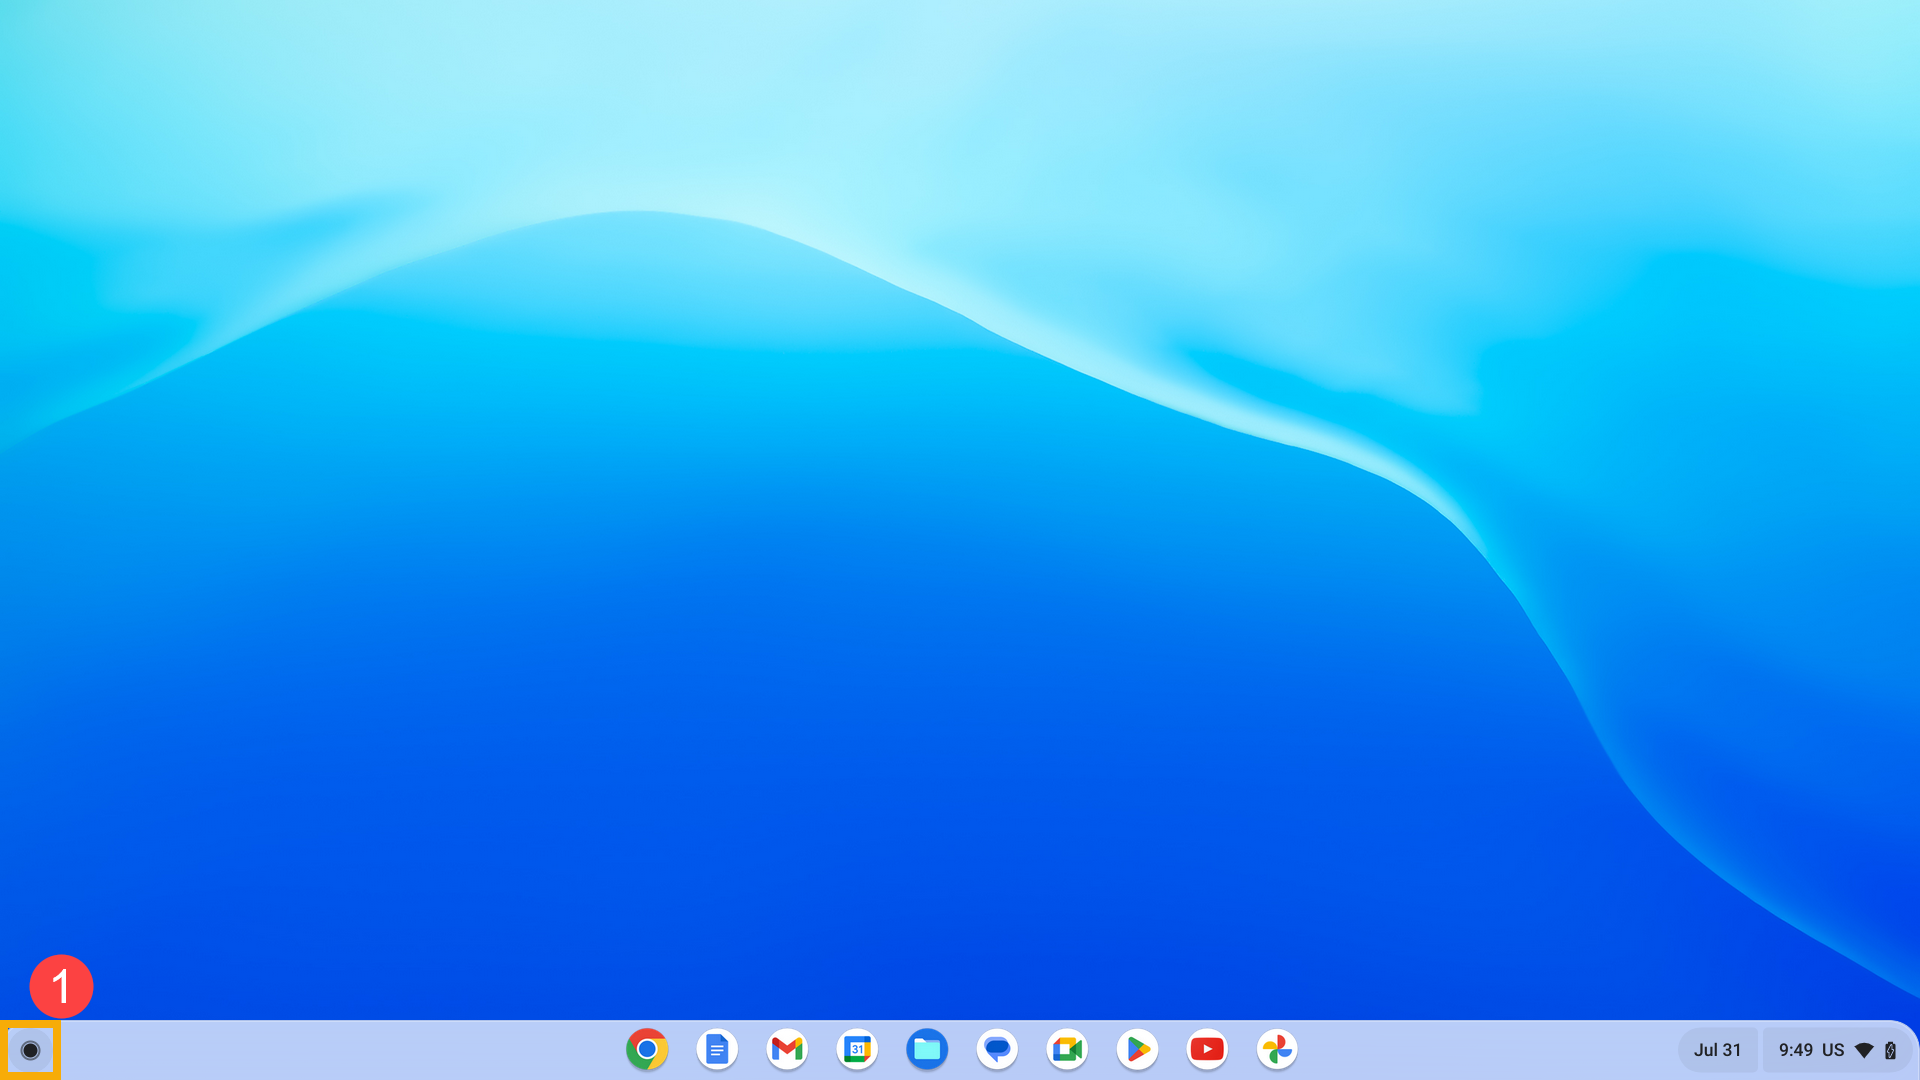
- Open the [Camera] app
 ②.
②.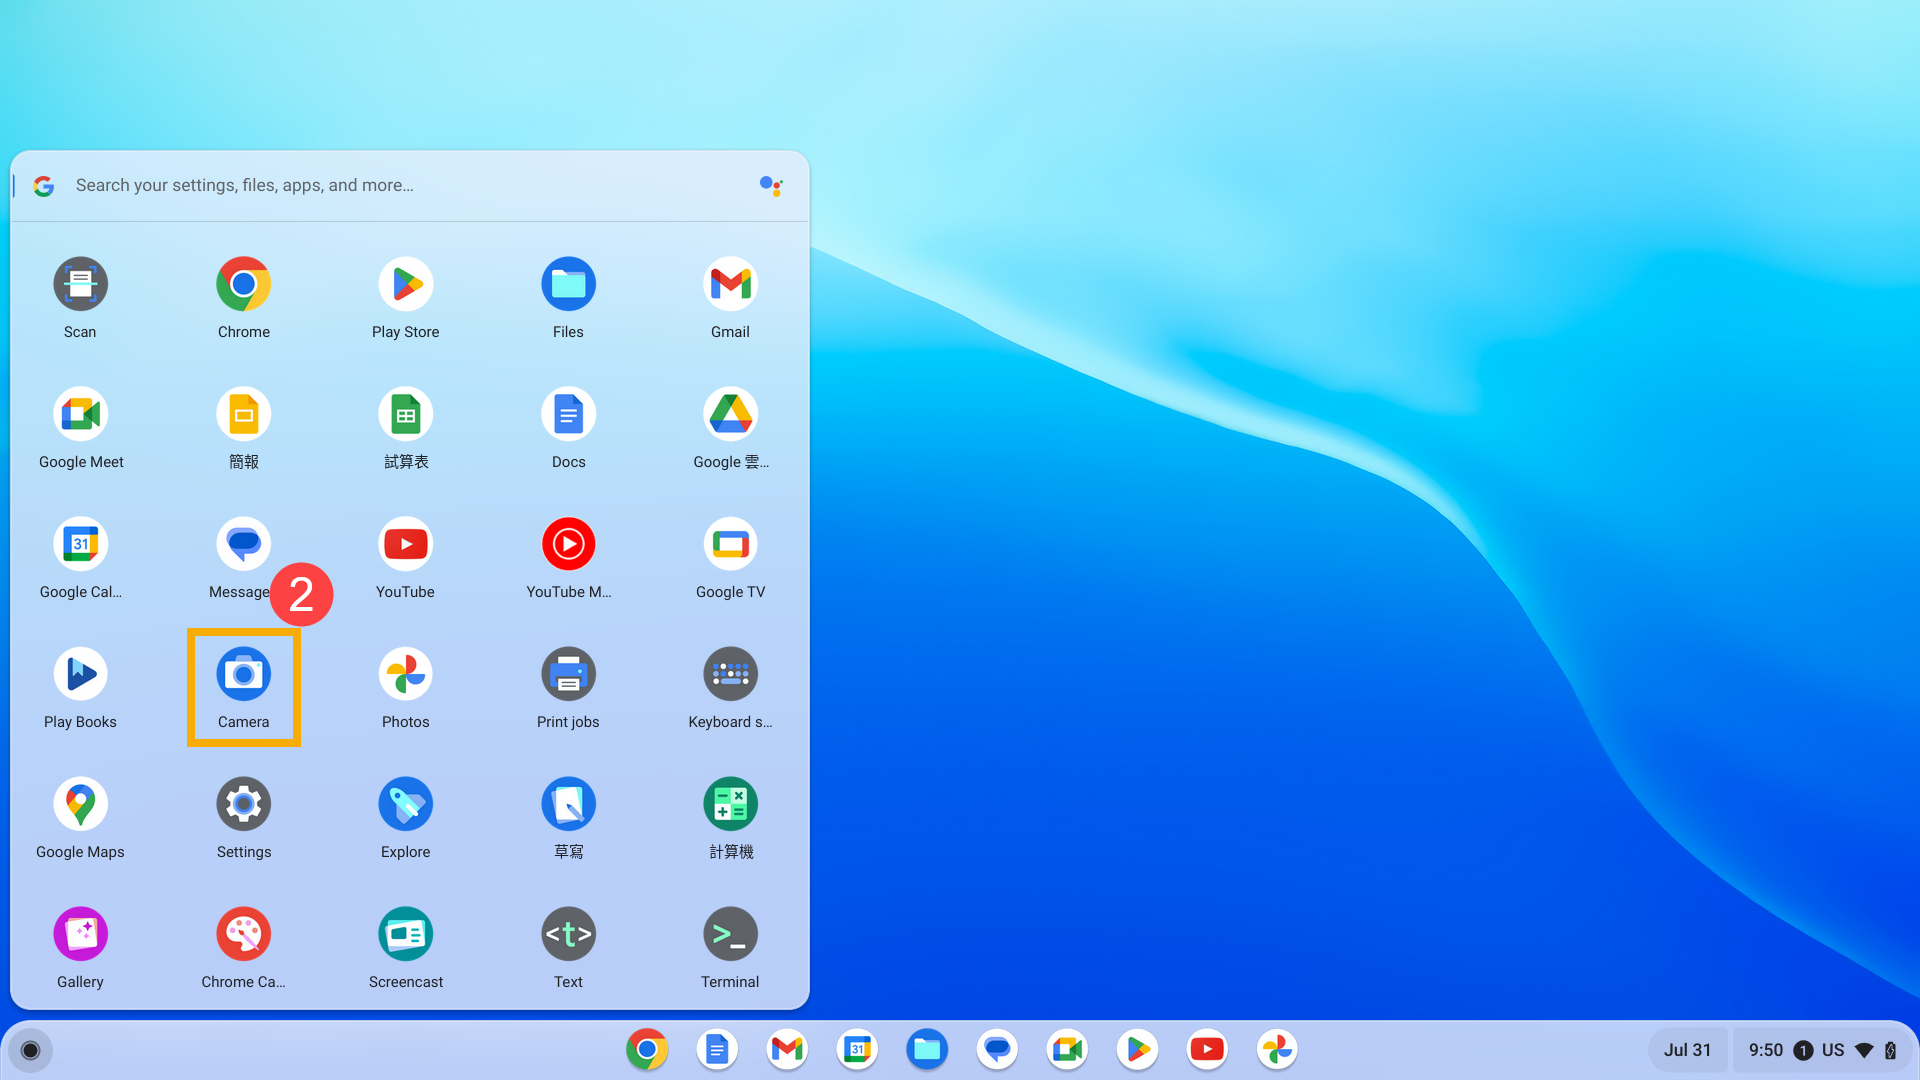
- Confirm whether the built-in camera app displays images correctly.
You can perform tests by choosing one of the options at the bottom. Select 'Video' for recording, 'Photo' for capturing images, or 'Scan' for scanning documents or QR codes.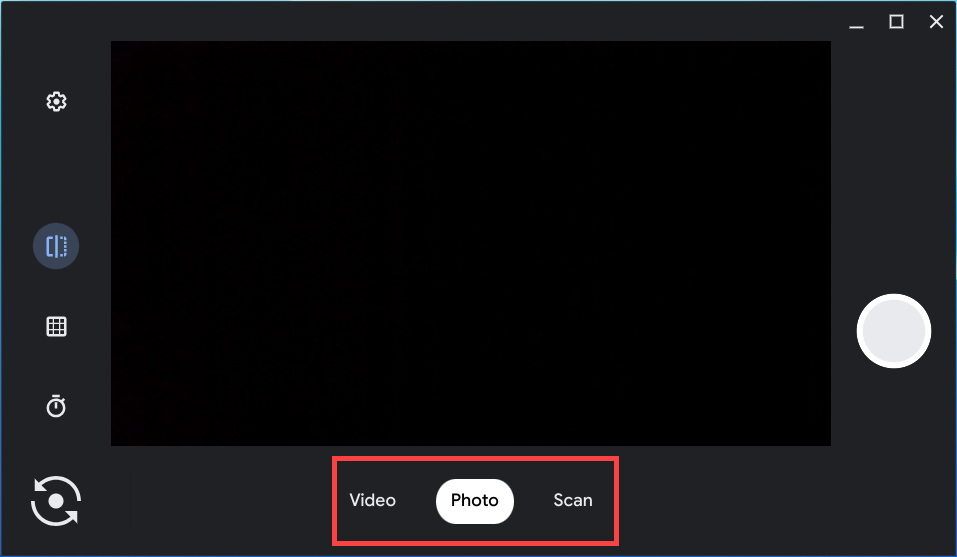
- If your Chromebook is equipped with two built-in cameras or an external camera is connected, click the [Switch camera] icon
 ③ in the bottom left corner to perform additional tests.
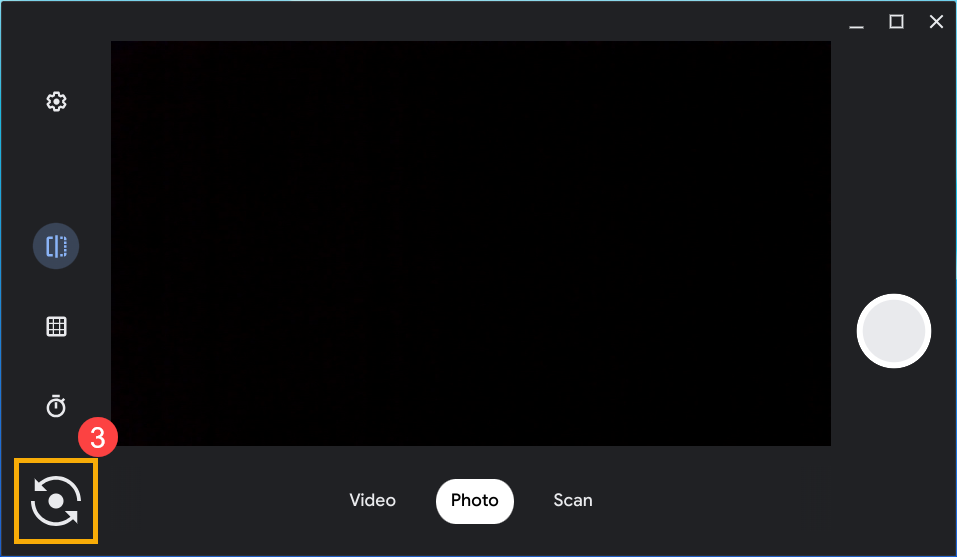
Granting Camera Access to Applications
Applications need to obtain relevant permissions to utilize the camera in the Chrome operating system. Typically, when an application requires camera access for the first time, the system will prompt you to grant permission.
If you haven't provided permission or need to modify settings, the following steps will use the Google Meet app as an example.
- Click the [Status Bar]① located in the bottom right corner of the screen, and then click [Settings]
 ②.
②.
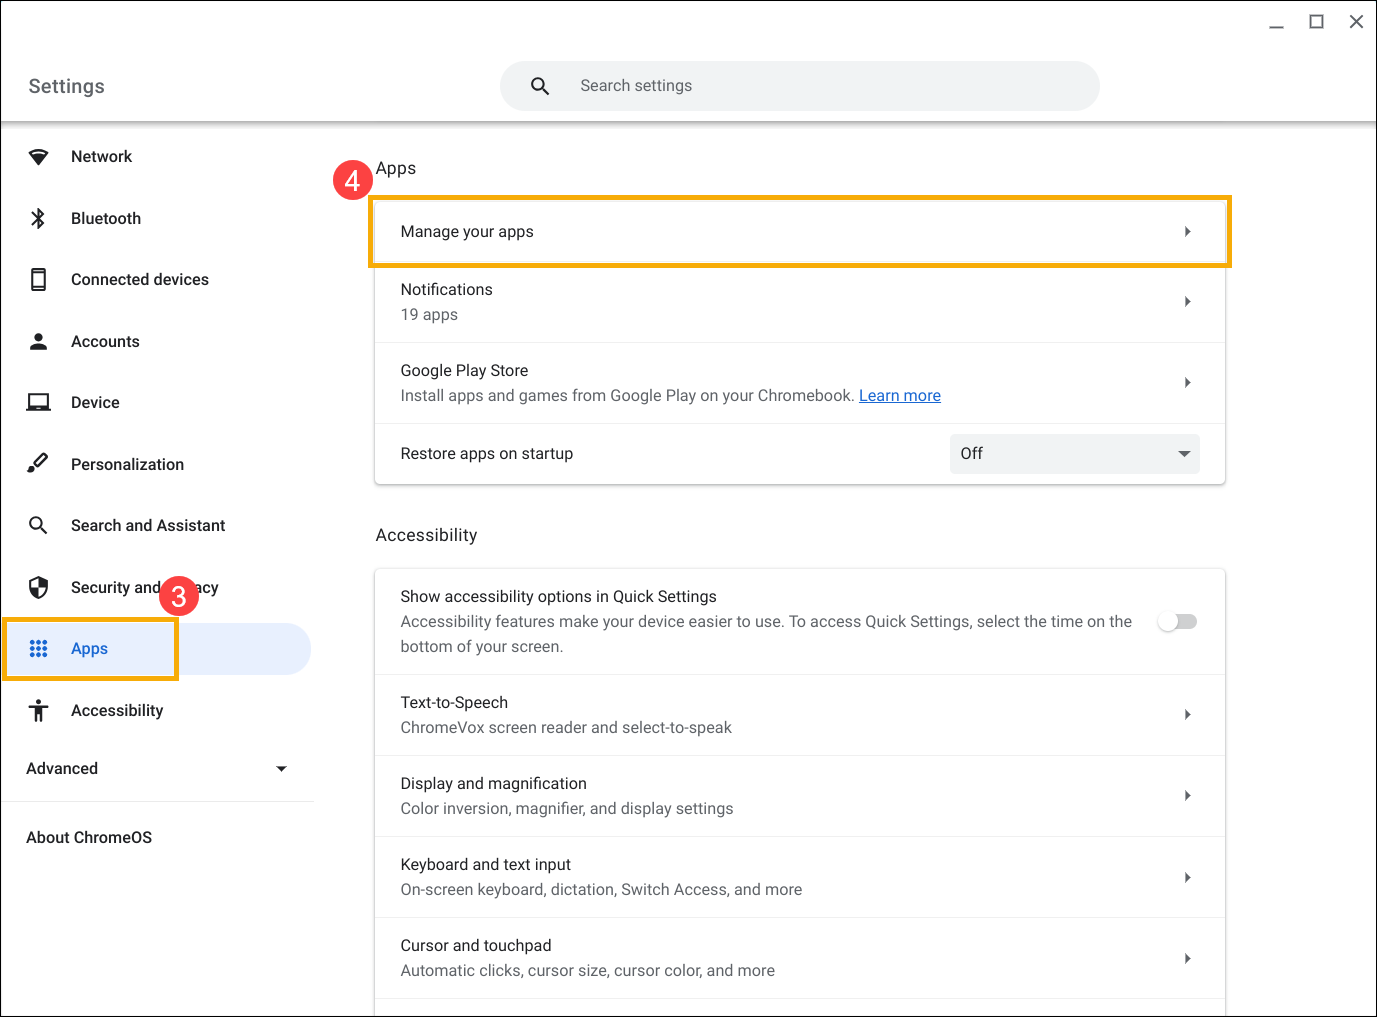
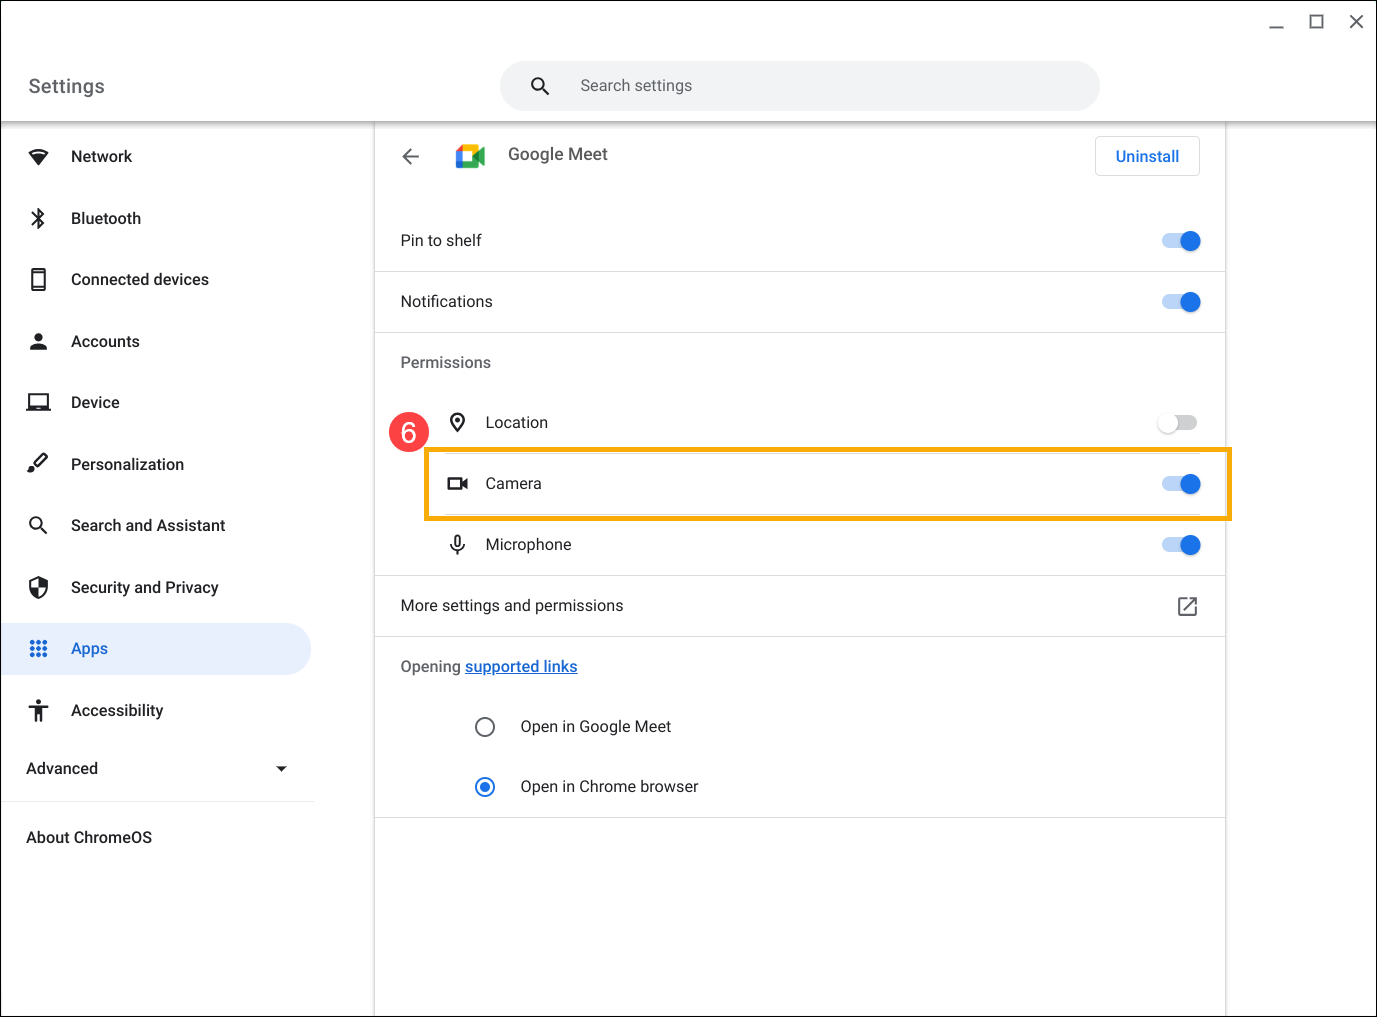
- Click [Apps]③, and then click [Manage your apps]④.
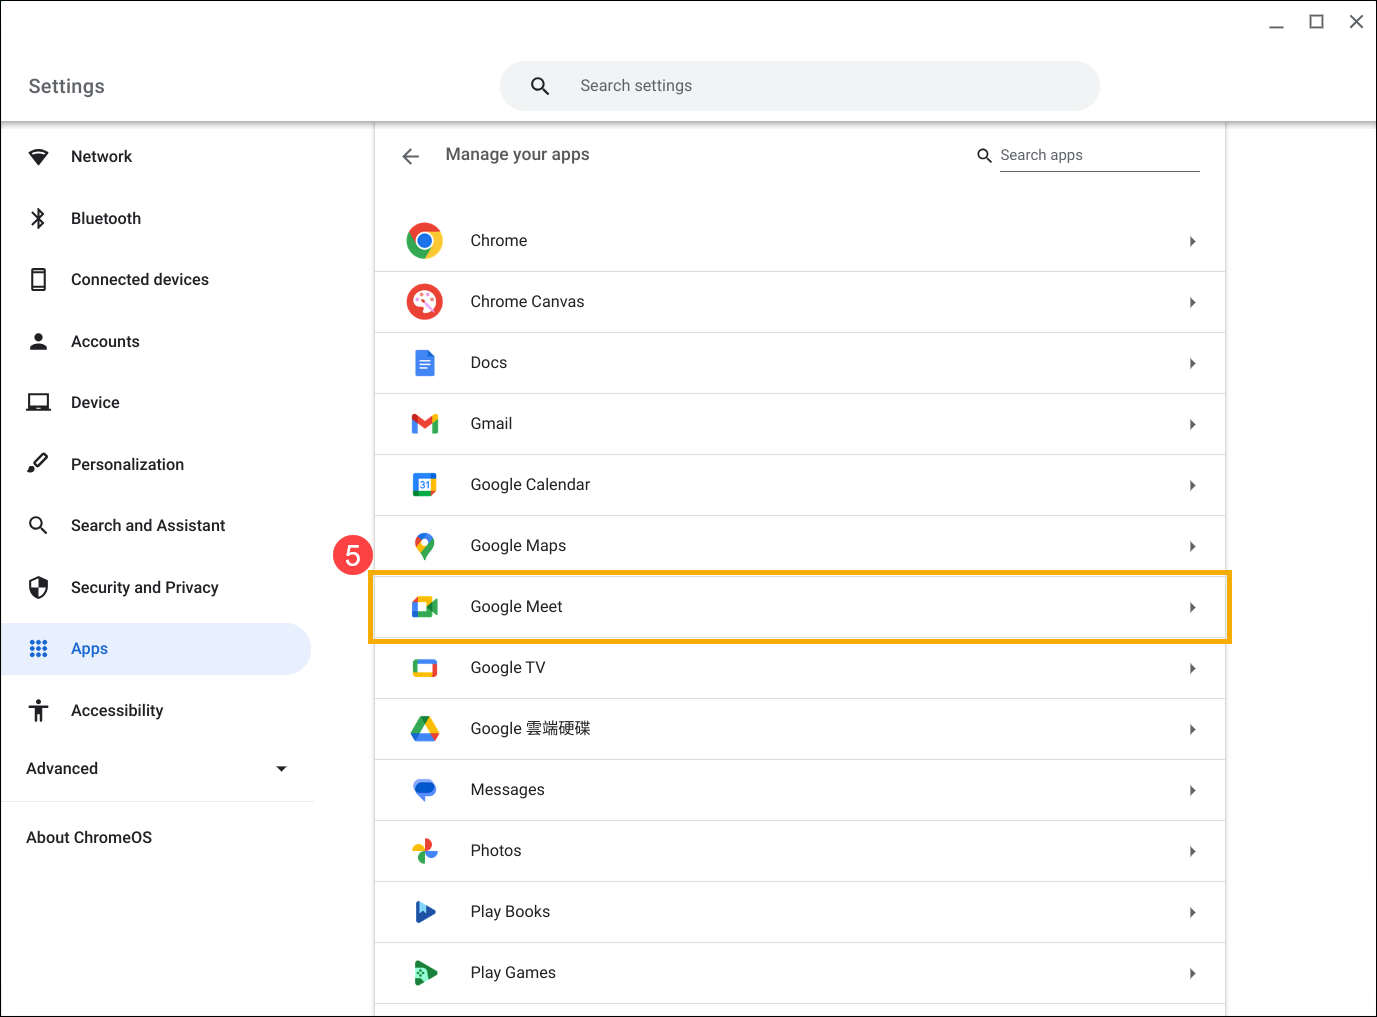
- Choose the application for which you wish to modify settings⑤.
- Ensure that the permission setting for [Camera] is Enabled⑥.
- If other applications can use the camera properly, consider uninstalling the app where it doesn’t work, then reinstalling the app.
Additional Troubleshooting Steps
If your camera still cannot function properly, please try the following steps:
- Restart your Chromebook. Turn off your Chromebook, then wait a few seconds before restarting them.
Note: To restart the Chromebook, hold the [Power button] until the device turns off, then turn it on again.
 - Update Chrome OS. Ensure your Chromebook has the latest version of Chrome OS installed. To check for available updates, refer to this article: Updating Chromebook's Operating System.
- Perform a hardware reset on your Chromebook. Refer to this article for instructions: How to Reset Chromebook Hardware Settings.
- If the above troubleshooting steps have been completed but the problem persists, consider resetting or recovering your Chromebook.
Reset (Powerwash) your Chromebook to factory settings. - Recovery Chromebook operating system.
You can also refer to the Google Chromebook Help on the official website for more detailed information:
https://support.google.com/chromebook/answer/6309225
If your issue remains unresolved, please contact the ASUS customer service center for further assistance.