Related Topics
[Gaming NB] Armoury Crate - GameVisual Introduction
Application Install& Uninstall
GameVisual is a screen color management tool that provides a variety of screen color scenarios to bring players the best personal visual experience.
Supports ROG and TUF series Gaming laptop, and equipped with ASUS System Control Interface V2 or above version.
*The feature can only support Laptop built-in display.
The GameVisual utility has been integrated into the Armoury Crate application. Users need to configure the GameVisual settings through the Armoury Crate application.
Supported Version: Armoury Crate application version must be higher than V2.7.13 above, and equipped with ASUS System Control Interface V2 or above version.
*Please refer to Link for more details about Armoury Crate Introduction.
Application Install& Uninstall
How to get and install Armoury Crate, please refer to ASUS official website
How to uninstall Armoury Crate, please refer to ASUS official website
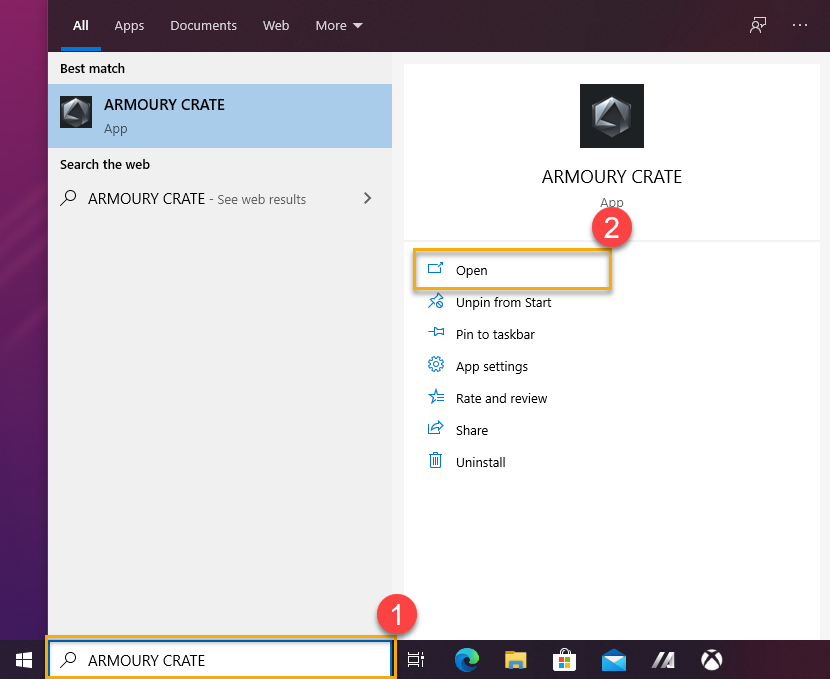
Please type and search [ARMOURY CRATE]① in the Windows Search Box, and then click on [Open]②.
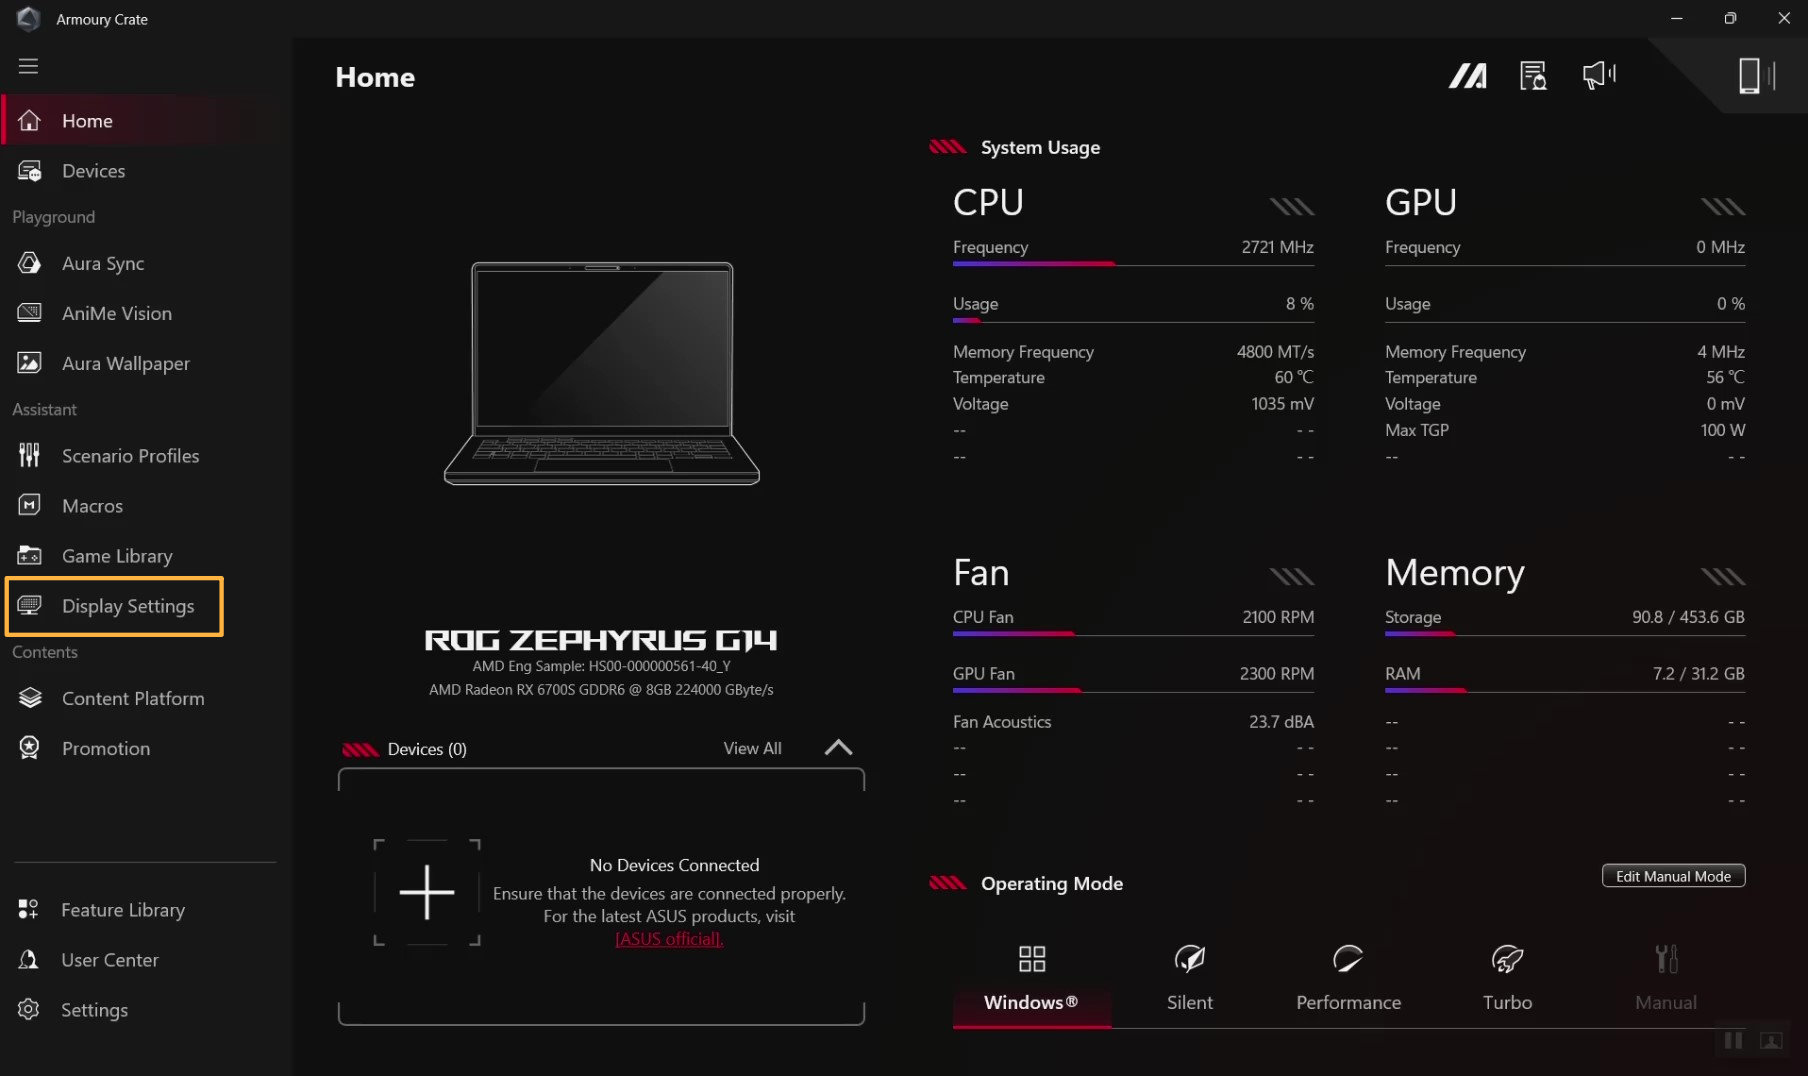
In Armoury Crate homepage, selecting [Display Settings]and you will enter GameVisual setting page.
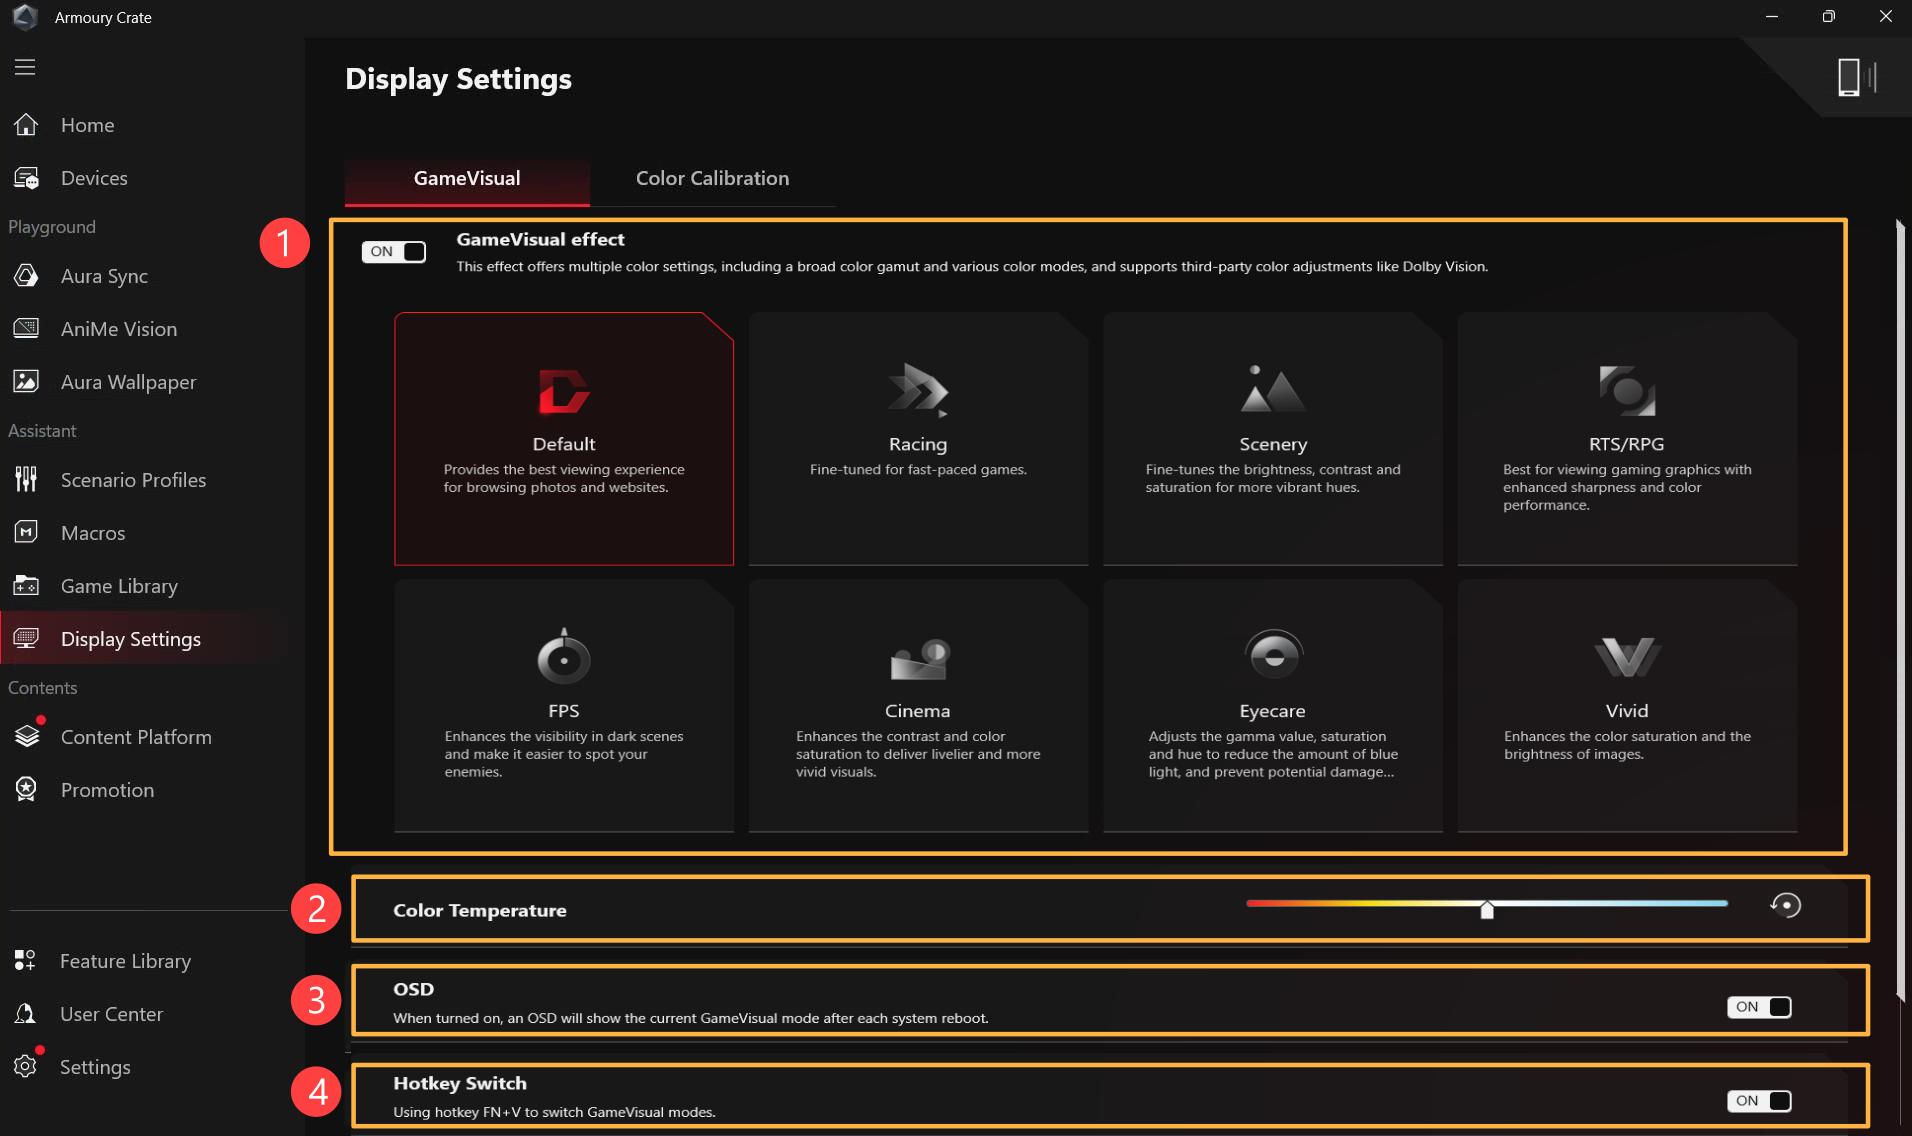
GameVisual:
① GameVisual effect: This effect offers multiple color settings, including a broad color gamut and various modes, and supports third-party color adjustments like Dolby Vision.
② Color Temperature: Color temperature is a phenomenon that describes the change in light's temperature, and the light's color changes accordingly. It can also be simply understood as the "change in the color temperature of light". Users can change the color temperature through the slider on the right for settings.
*Except Eyecare mode, you can fine-tune the screen Color Temperature for each screen color mode.
③ OSD switch: When turn on, an OSD will show the current GameVisual mode after each system reboot.
④Hotkey Switch: Turn on to use hotkey 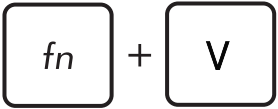 to switch GameVisual modes.
*The feature doesn't support ASUS TUF Gaming series products.
Through GameVisual Color Calibration and color calibrator, it can provide gamers for a basic calibration with high level of color accuracy on ROG gaming laptop screen.
The Color Calibration function can support calibrator (X-Rite i1Display Pro、Display Plus HL、Display Pro HL、ClolorChecker Display Plus、ColorChecker Pro). Please refer to X-Rite website for more information. Reference about i1Display Pro Overview& Video、Support and User Guides.
Launch Color Calibration:
In Armoury Crate homepage, selecting [Display Settings]① and then [Color Calibration]② get into operation page.
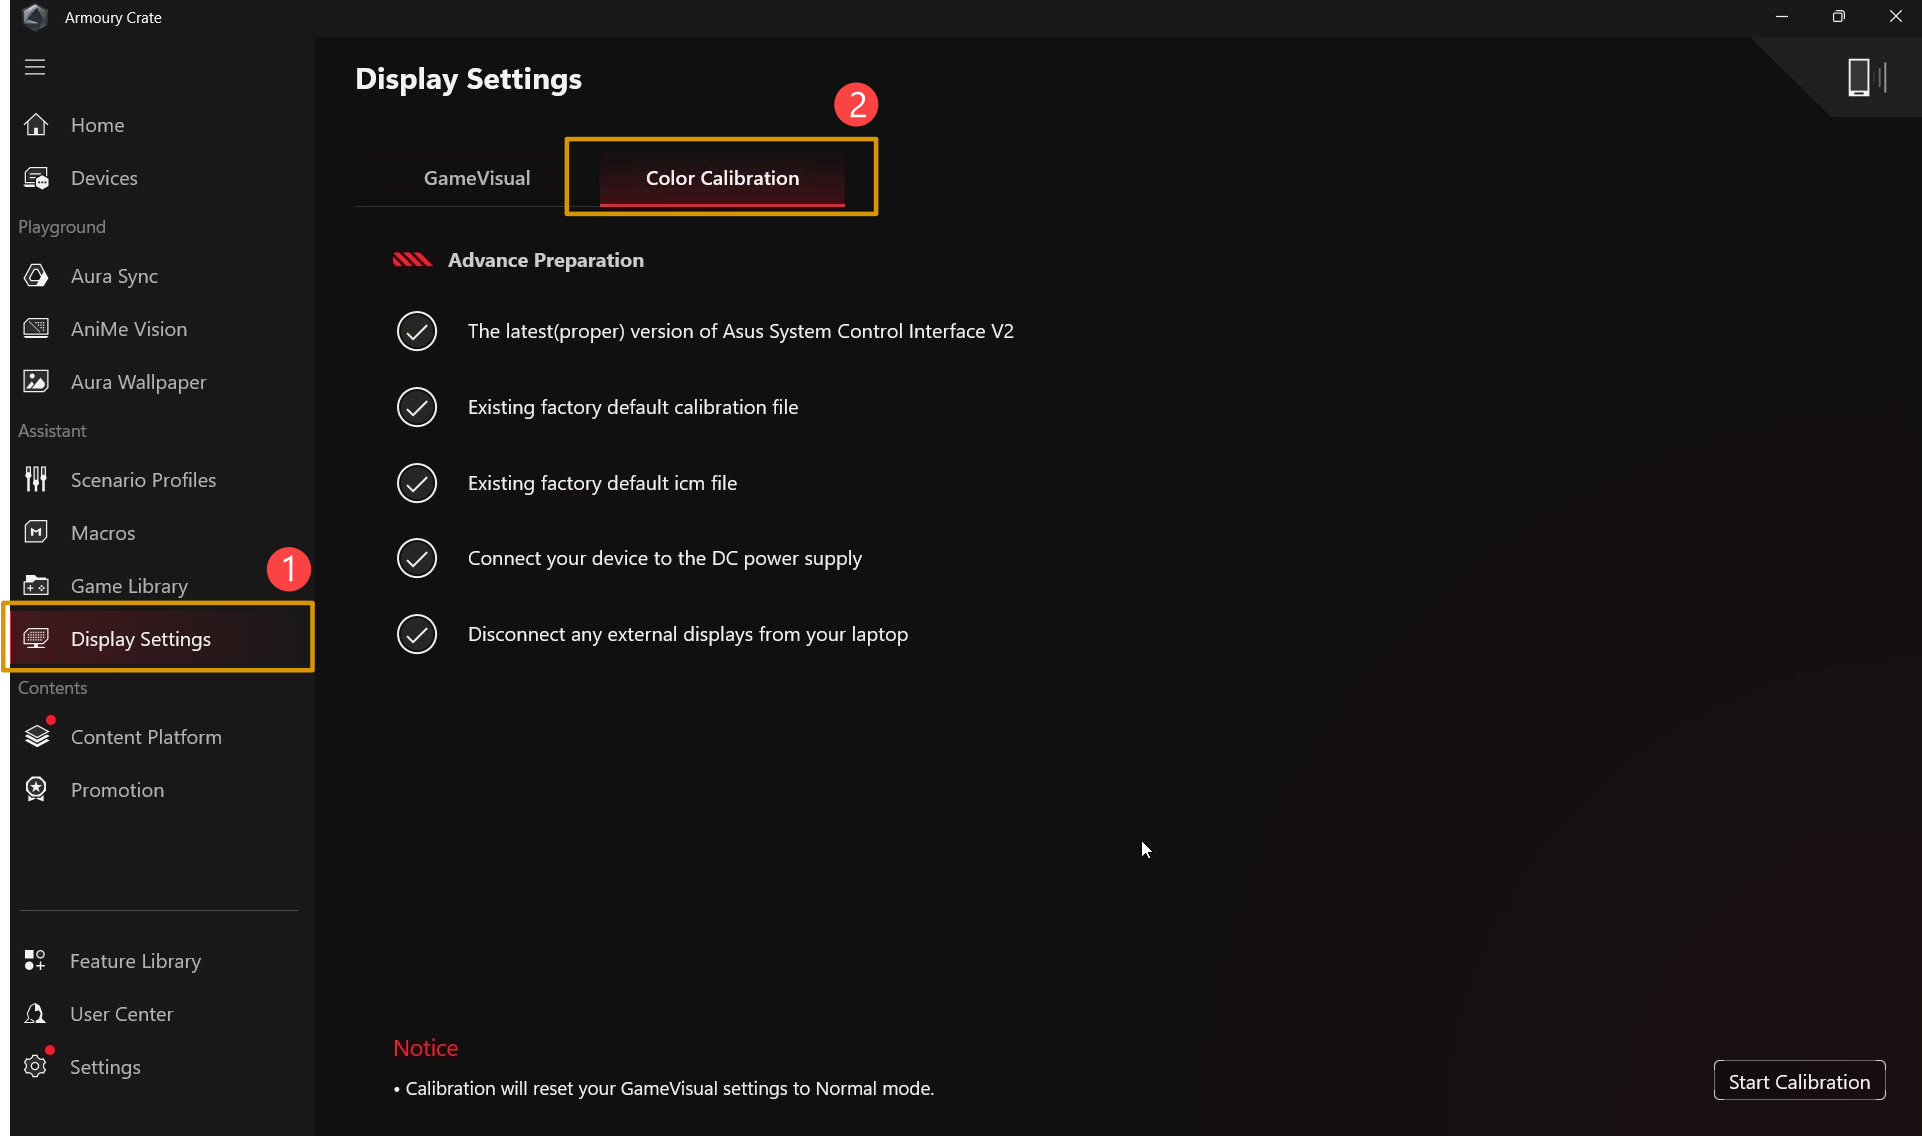
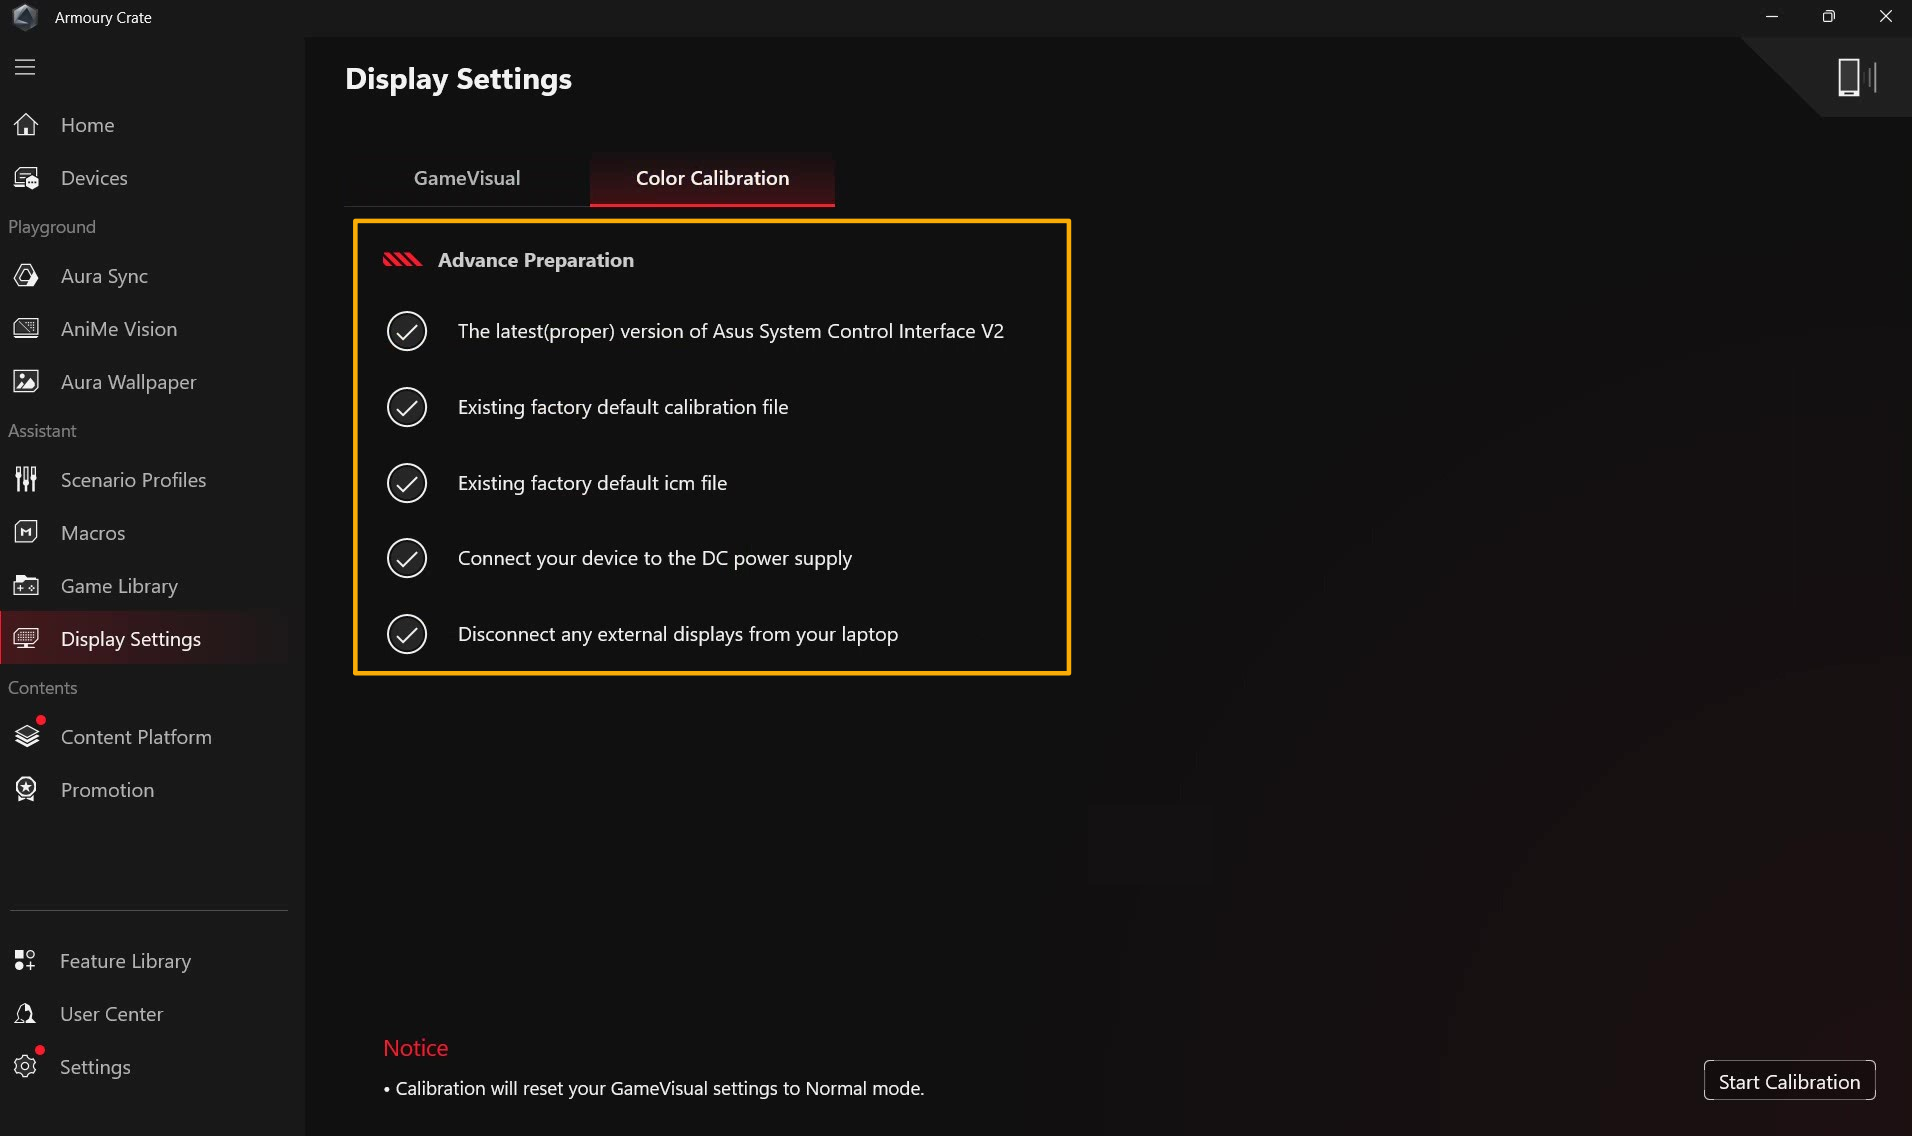
Advance Preparation:
At Color Calibration homepage, the system will automatically check all Advance Preparation items before start calibration. When the condition is met, a white check mark  is displayed, and a red exclamation mark
  will appear for items that do not meet the requirements. If there is a red exclamation mark in Advance Preparation, please refer to Q&A 2.
Start Color Calibration:
Please confirm all Advance Preparation① are with the white check mark  , and then you are allowed to click [Start Calibration]②.
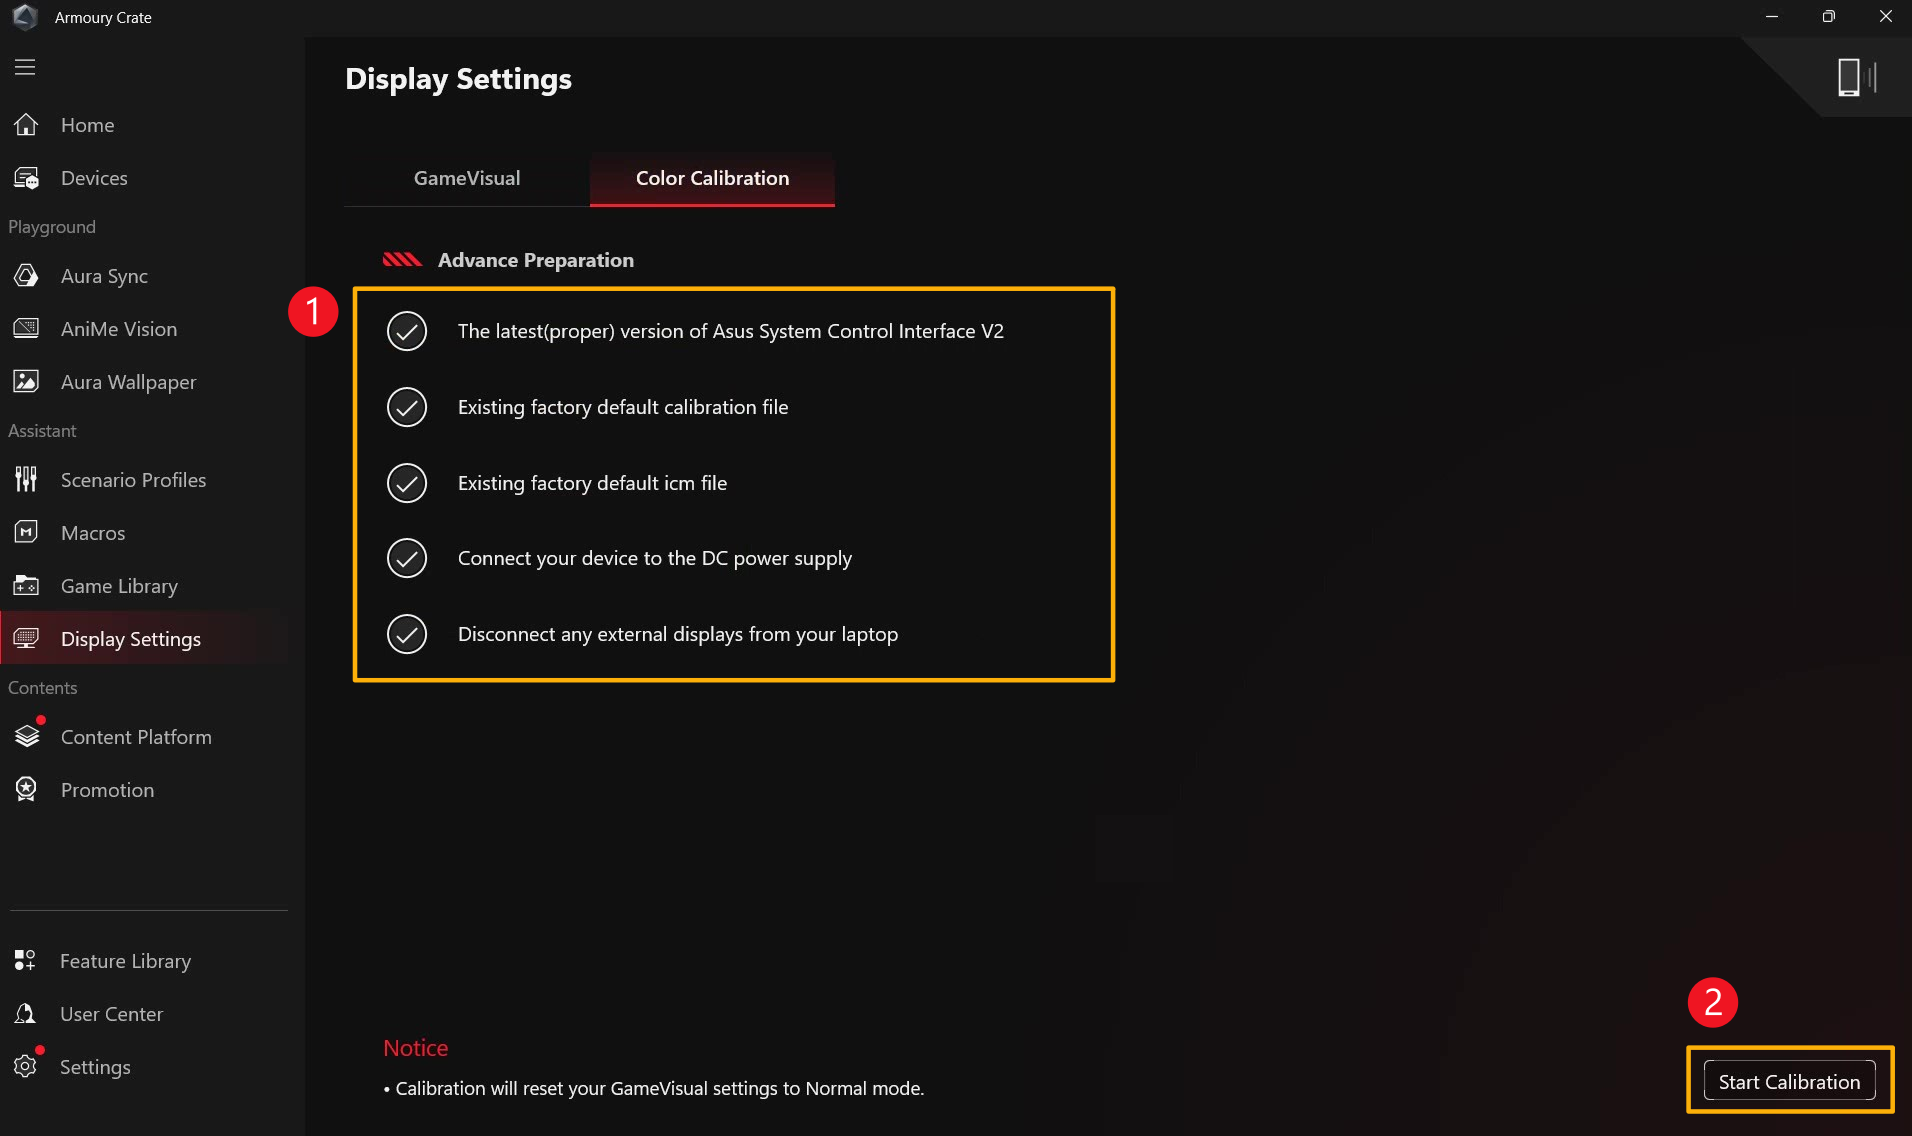
Connect calibrator③ to your laptop's USB port, and then click [Next]④.
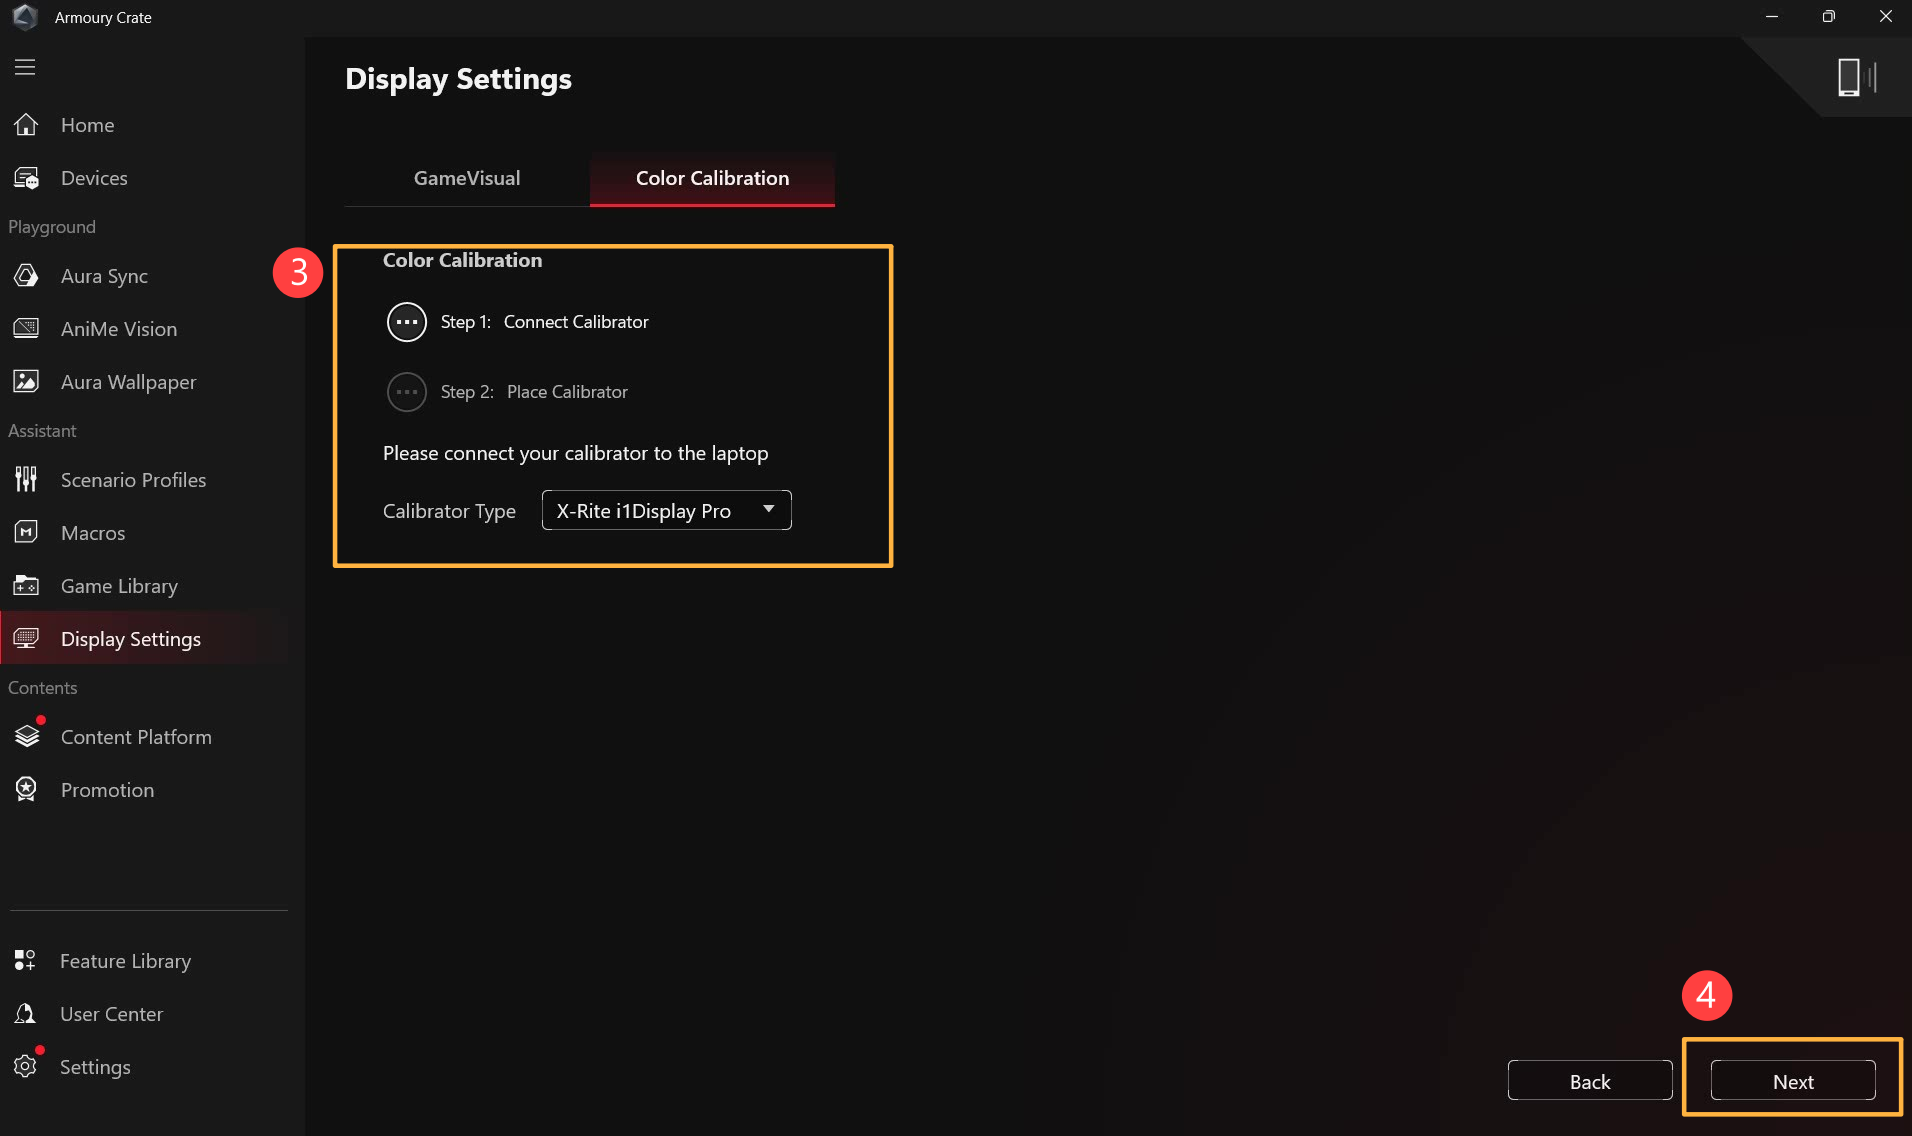
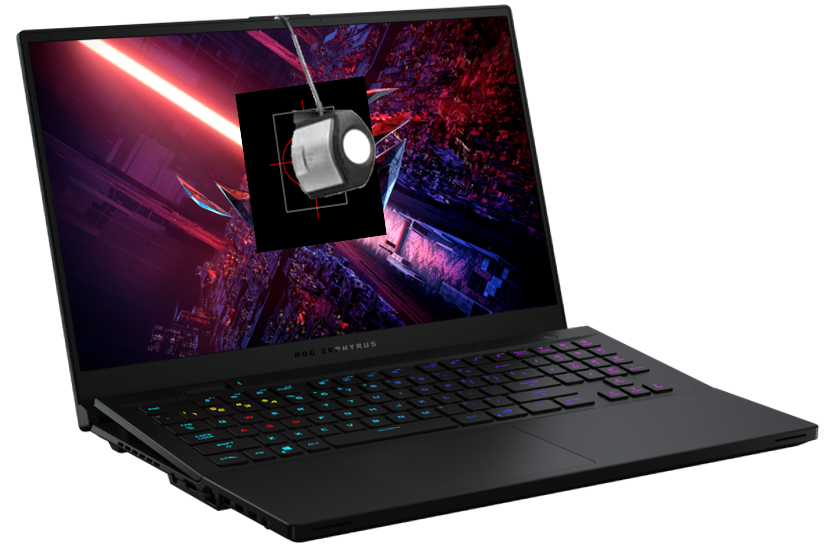
Please follow the instruction to turn on the measuring lens of the color calibrator and place it tightly in the red circle⑤ on the screen, and click [Next]⑥ to start color calibration.
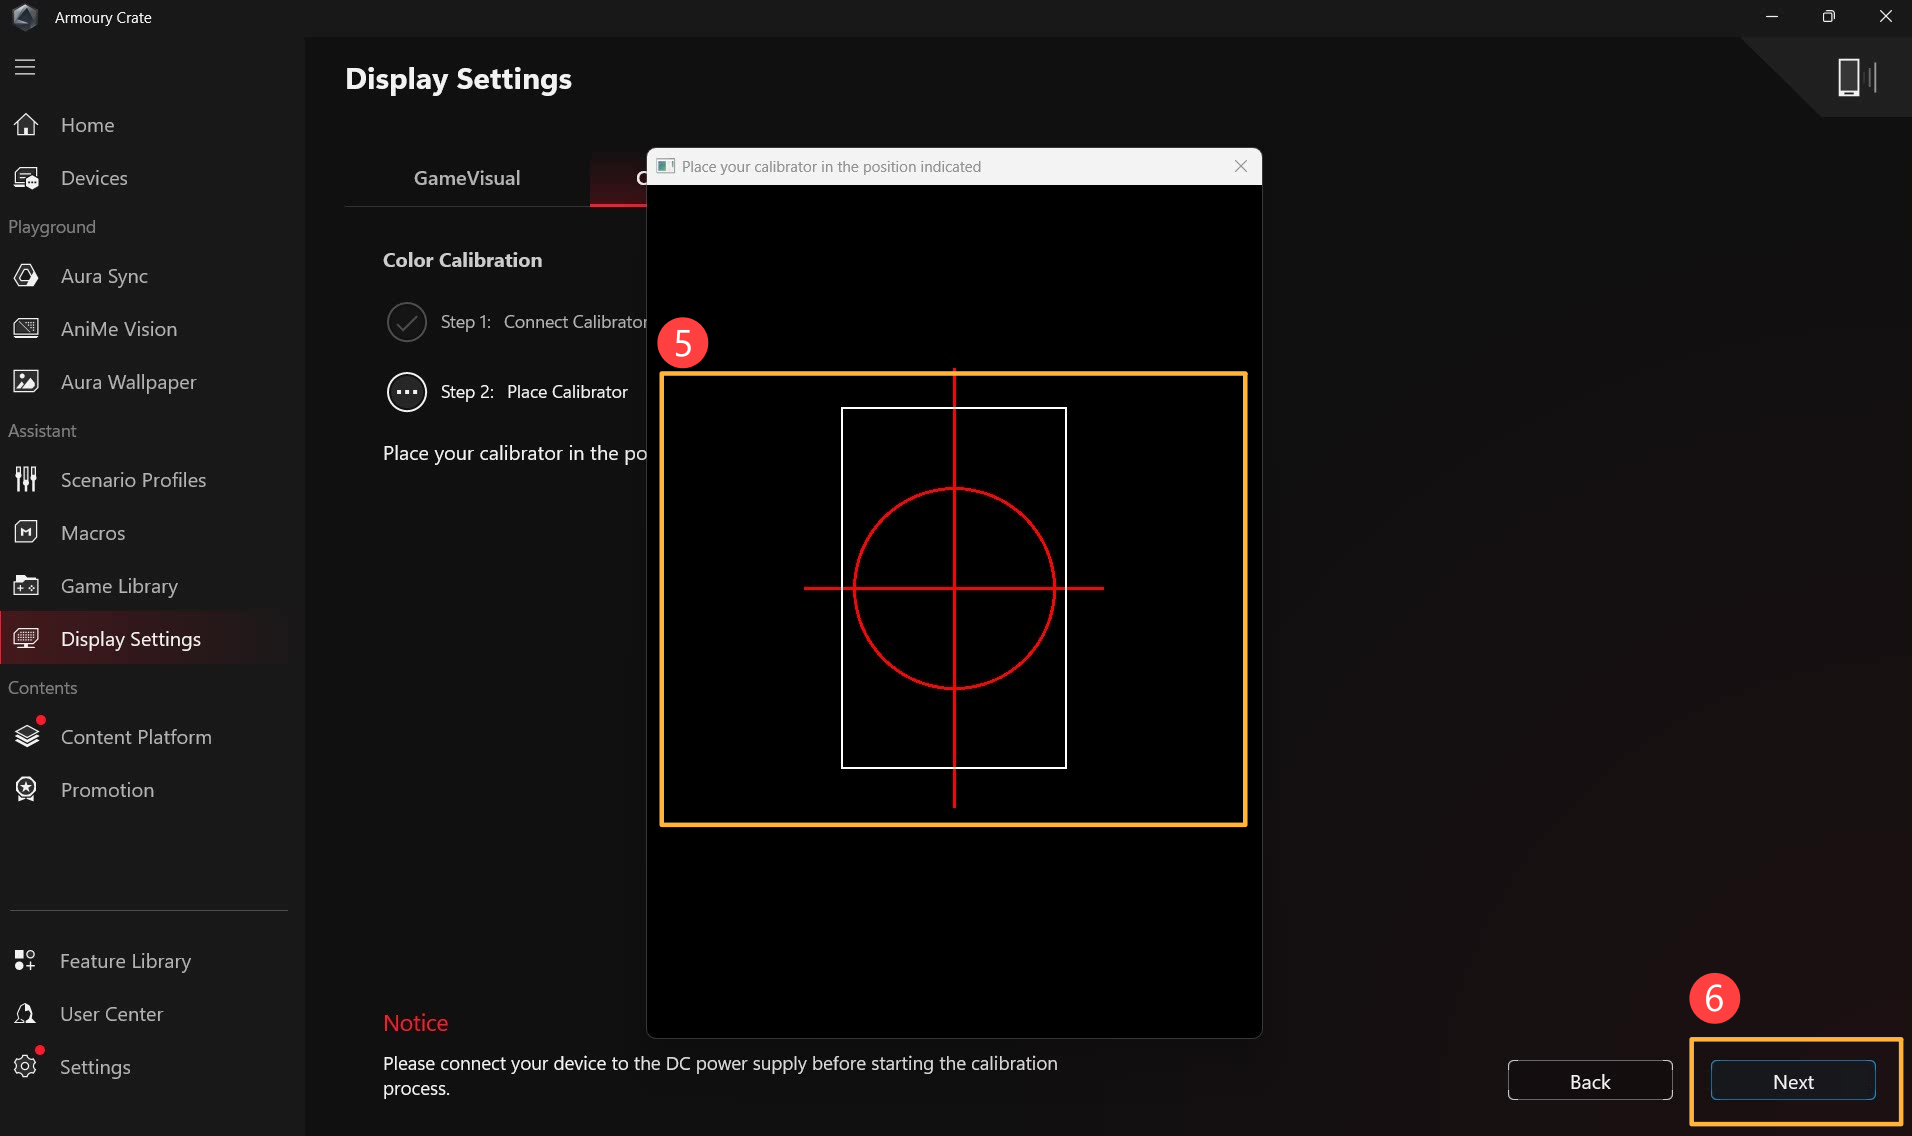
During color calibration, the screen will continue to change colors and flashing. After completion, the color calibration result will be showed in Color Calibration Report.
Color Calibration Report:
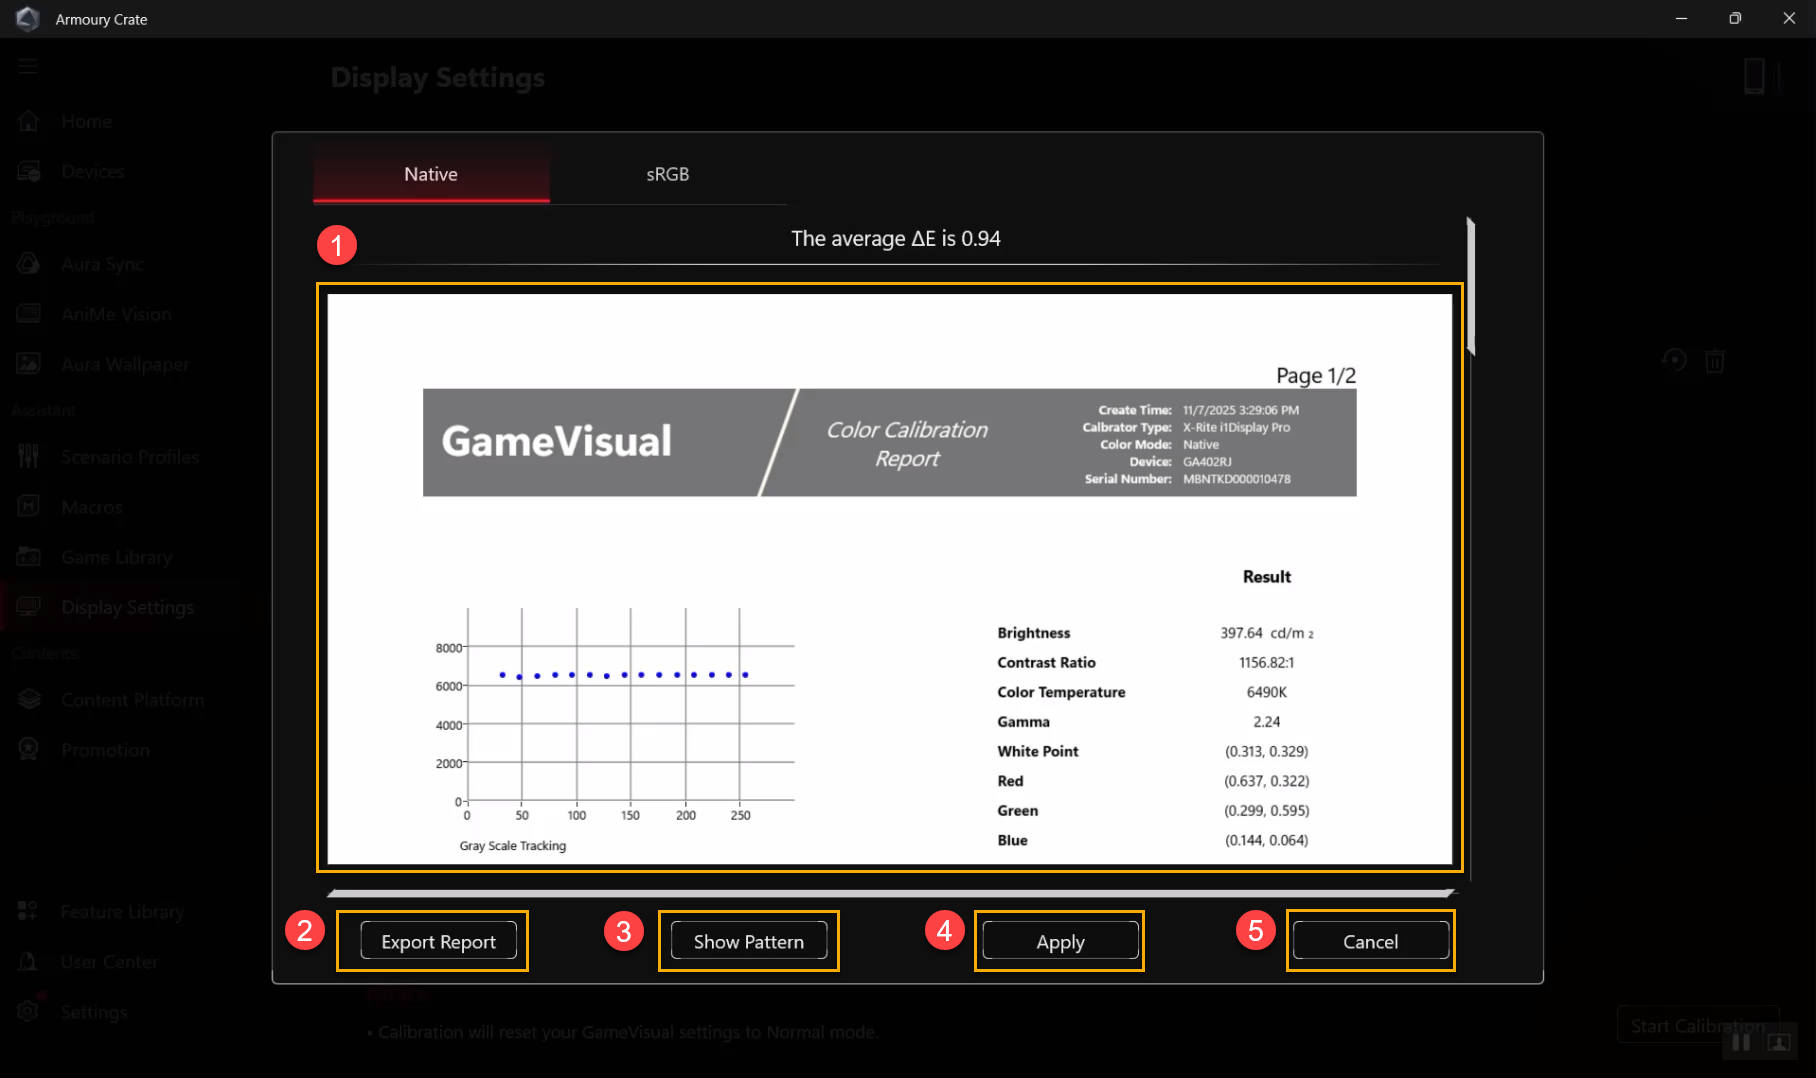
①Color Calibration Report: Through the color calibration report, gamers can review the calibration result.
②Export Report: Clicking [Export Report] to export and save the calibration result file.
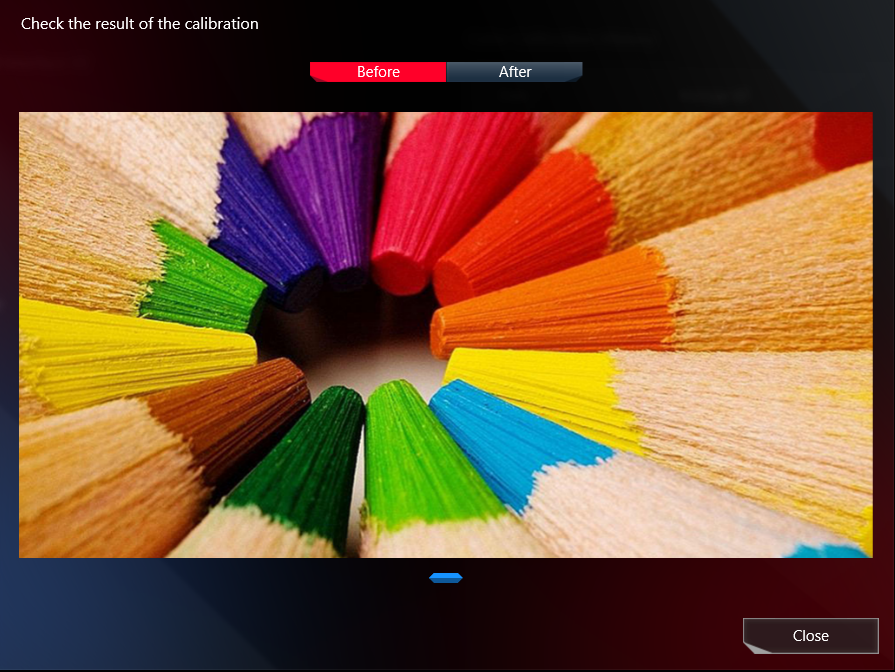
③Show Pattern: Clicking [Show Pattern] , gamers can look through the image to see the difference between Before and After correction on display.
④Apply: Clicking [Apply] to apply the current calibration result.
⑤Cancel: Back to the Color Calibration homepage.
Q1: Can I install GameVisual individually?
A1: Once your device is with ASUS system control interface V2 installed, the GameVisual utility will be integrated into the Armoury Crate application, and you can install and setup GameVisual through Armoury Crate application only.
Q2: How should I do when Advance Preparation appears a red exclamation mark  ?
?
A2:
*The latest (proper) version of ASUS System Control Interface V2: Please update the latest ASUS System Control Interface V2 version, and refer to [How to check and update the version of MyASUS and ASUS System Control Interface].
*Existing factory default calibration file: It is a factory default. If there is a red exclamation mark appears, please contact ASUS service center for support.
*Existing factory default ICM file: It is a factory default. If there is a red exclamation mark appears, please contact ASUS service center for support.
*Connect your device to the DC power supply: Please check whether your device connect DC power supply, or refer to [Laptop Frequently Asked Question].
*Disconnect any external displays from your laptop: Please check whether disconnect all external displays from your laptop.