[Gaming NB/Gaming DT] MyASUS System Diagnosis - Component Test
MyASUS in WinRE is a smart diagnosis technology specially designed by ASUS for computers. When you cannot enter the computer system or the computer runs abnormally after booting, you can check the operating status of the system hardware to determine whether the computer hardware is normal.
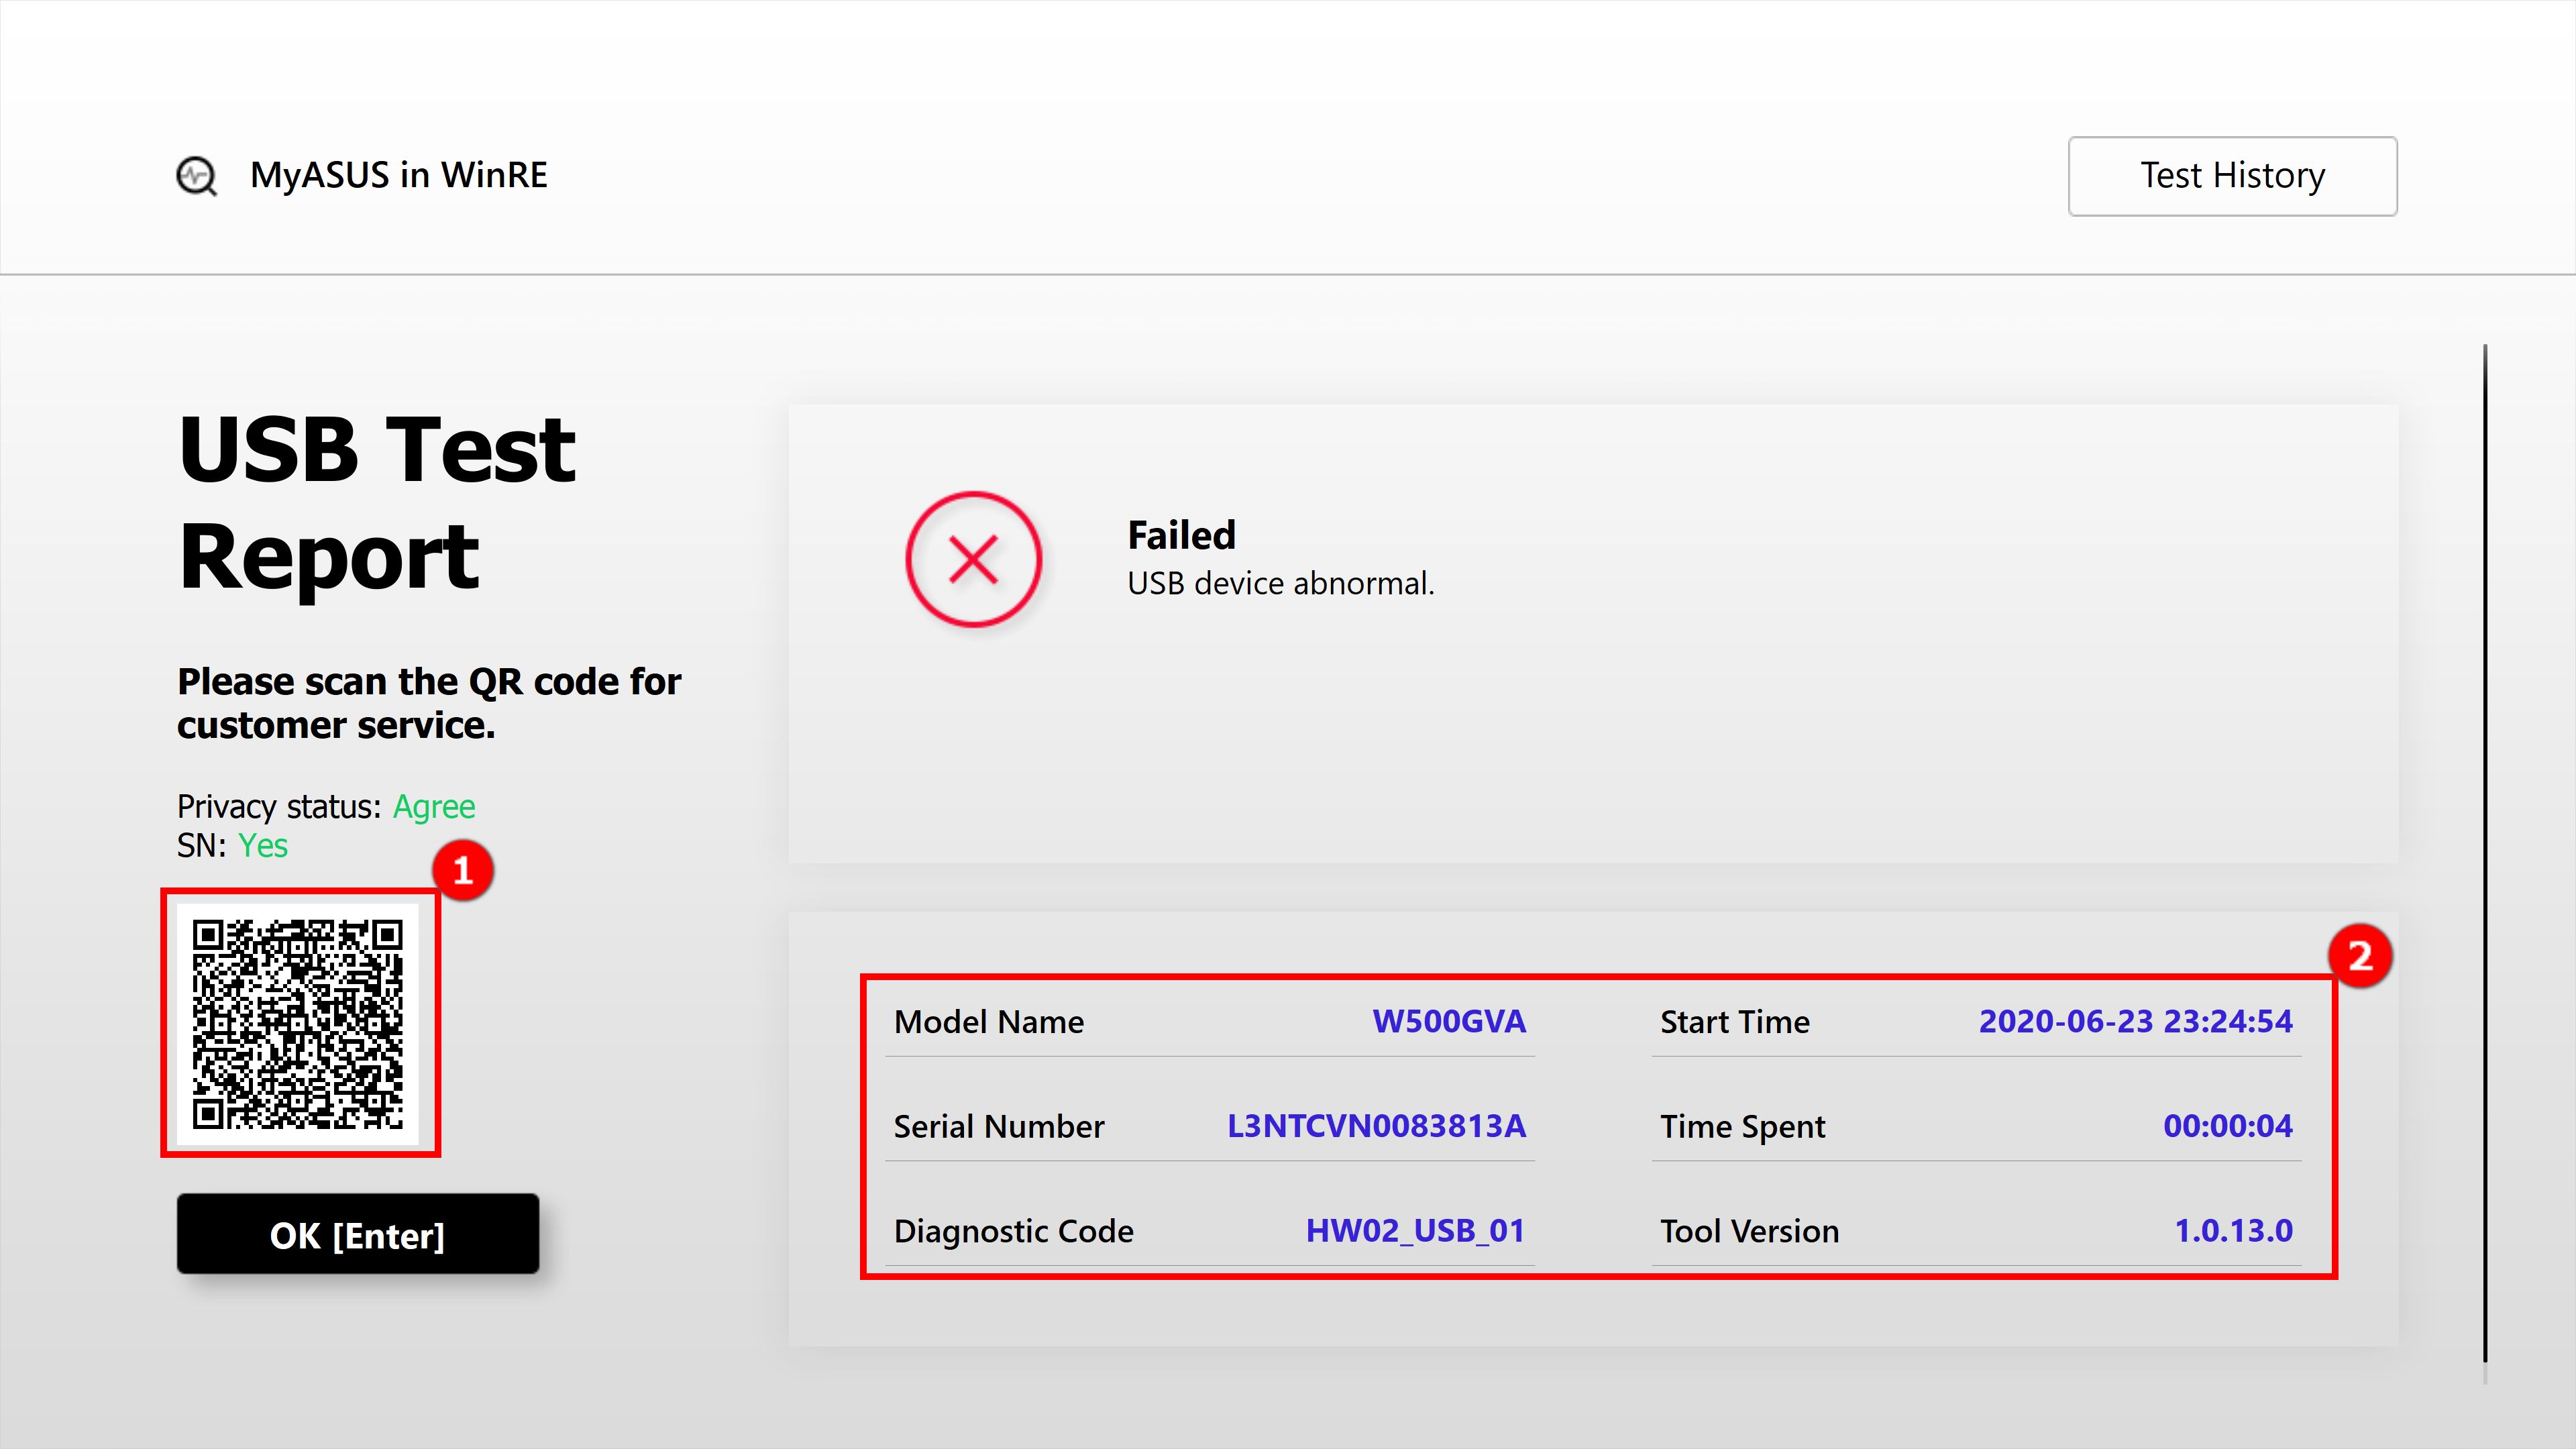
If the diagnosis result shows that the component is abnormal, MyASUS in WinRE will provide QR Code, test report and diagnosis code. You can scan the QR Code with your mobile phone or other devices (under the condition of agreeing to the privacy statement, the information contained in the QR Code will include the computer's product serial number and diagnostic code) to open the ASUS support maintenance page and obtain the technical support from ASUS.
*Note: It depends on the service policy of different regions
1. Launch MyASUS System Diagnosis- Component Test
2. MyASUS System Diagnosis- Component Test Setup
4. MyASUS System Diagnosis- Component Test Items
1. Launch MyASUS System Diagnosis- Component Test
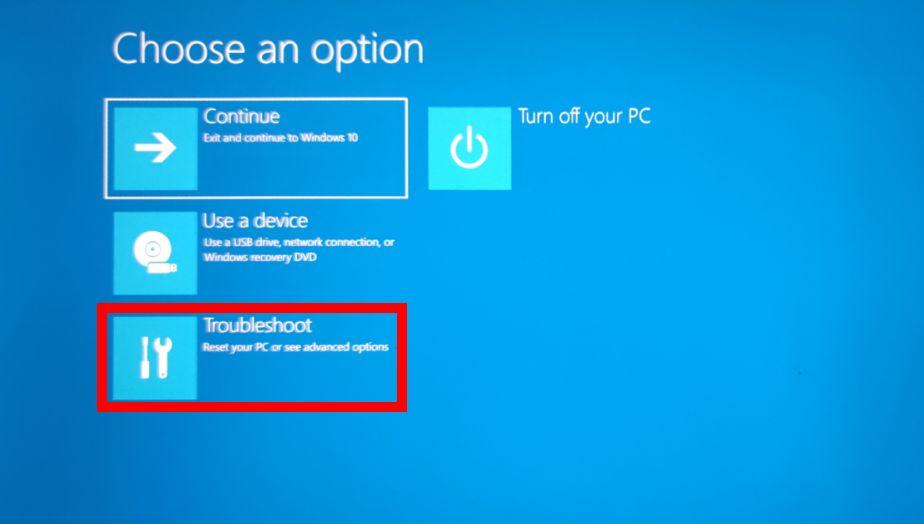
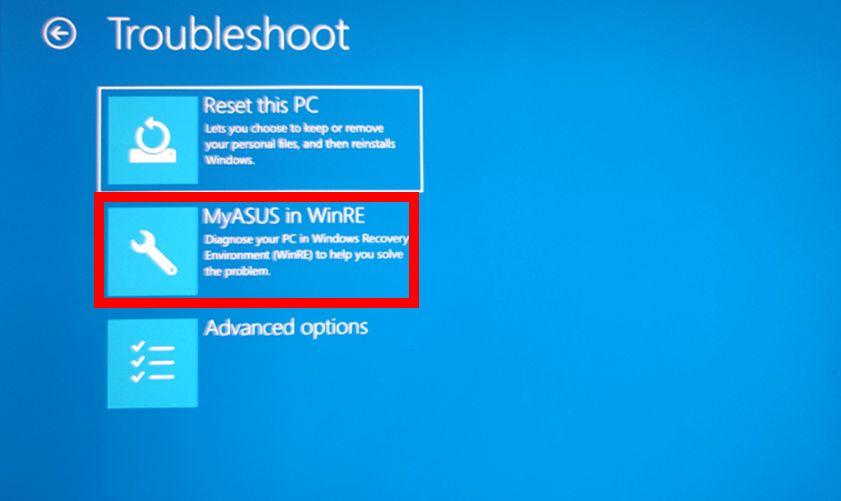
1.1 While pressing the power button of your computer, then quickly press F9 or F12 several times until the the screen displays "Please wait". After that, you will enter Windows RE [Choose an option] Interface, and then click [Troubleshoot], then click [MyASUS in WinRE].
*If [MyASUS in WinRE] is not found when opening this interface, the computer does not support this function.
Note: If you are unable to access Windows RE using F9 or F12, you can perform the relevant operations within the Windows operating system. For detailed steps, please refer to this article: How to Enter the Windows Recovery Environment via Advanced Startup Options in Windows Settings.
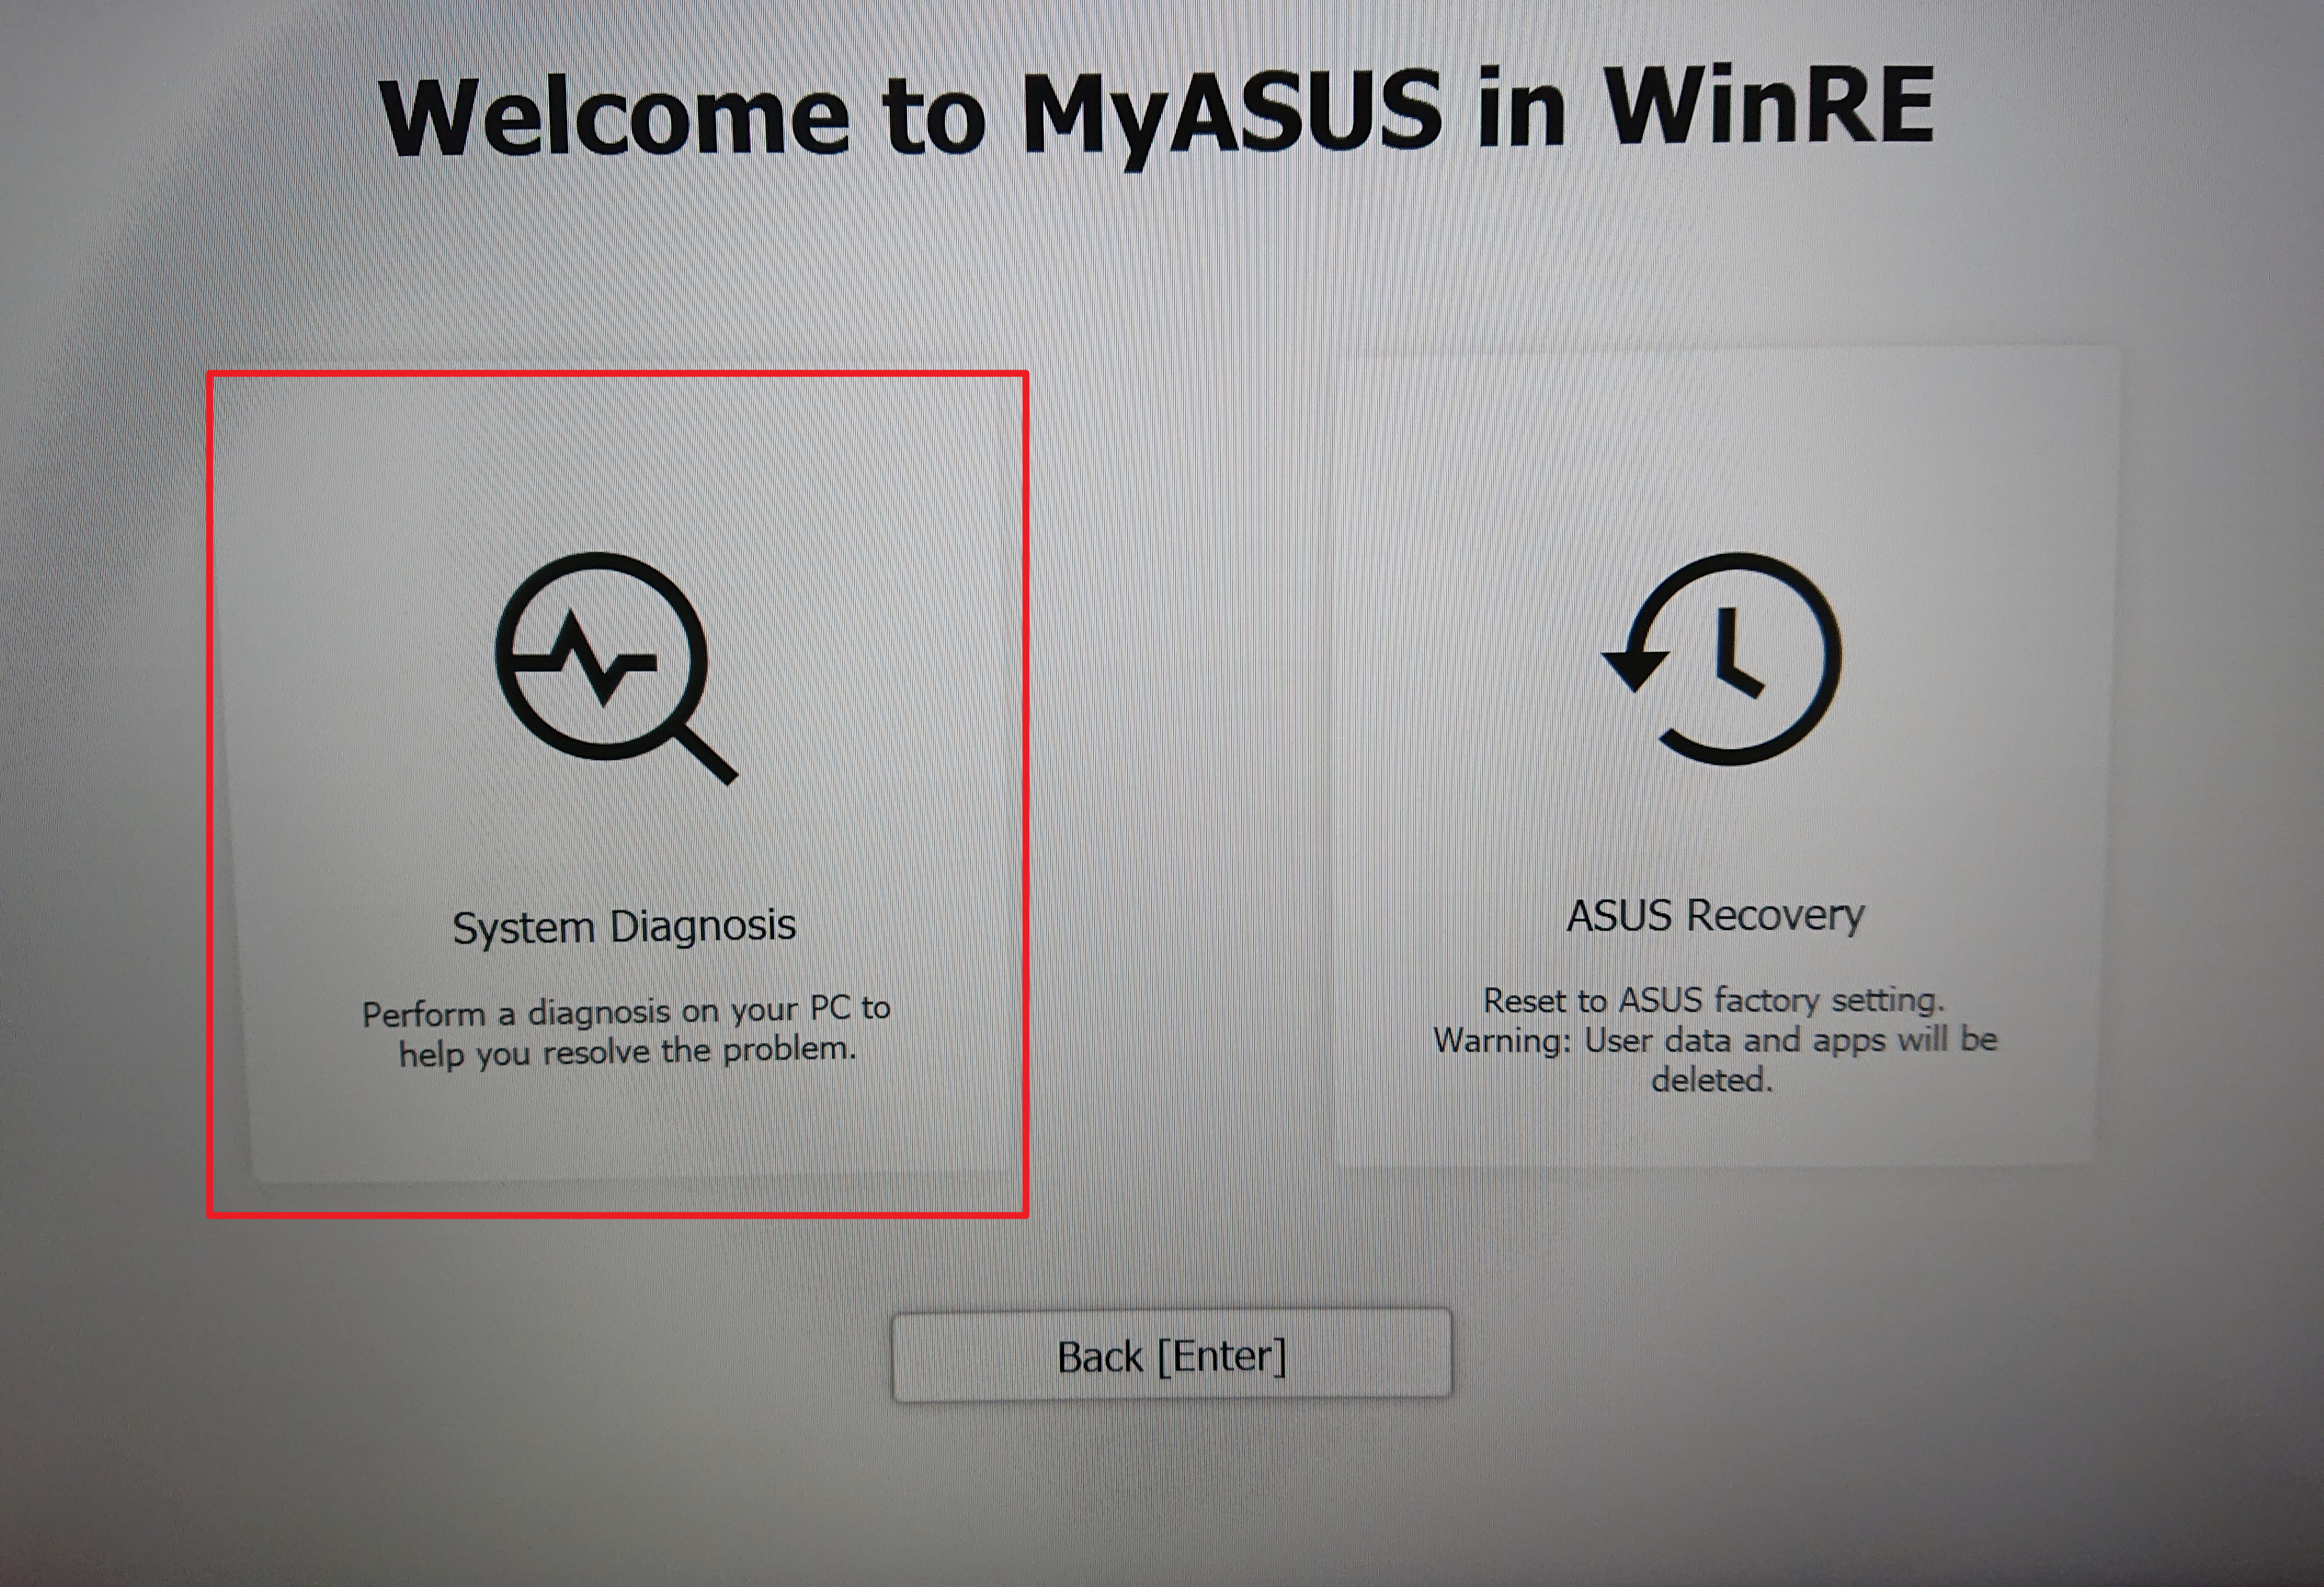
1.2 Enter the main interface of MyASUS in WinRE, then select [System Diagnosis].
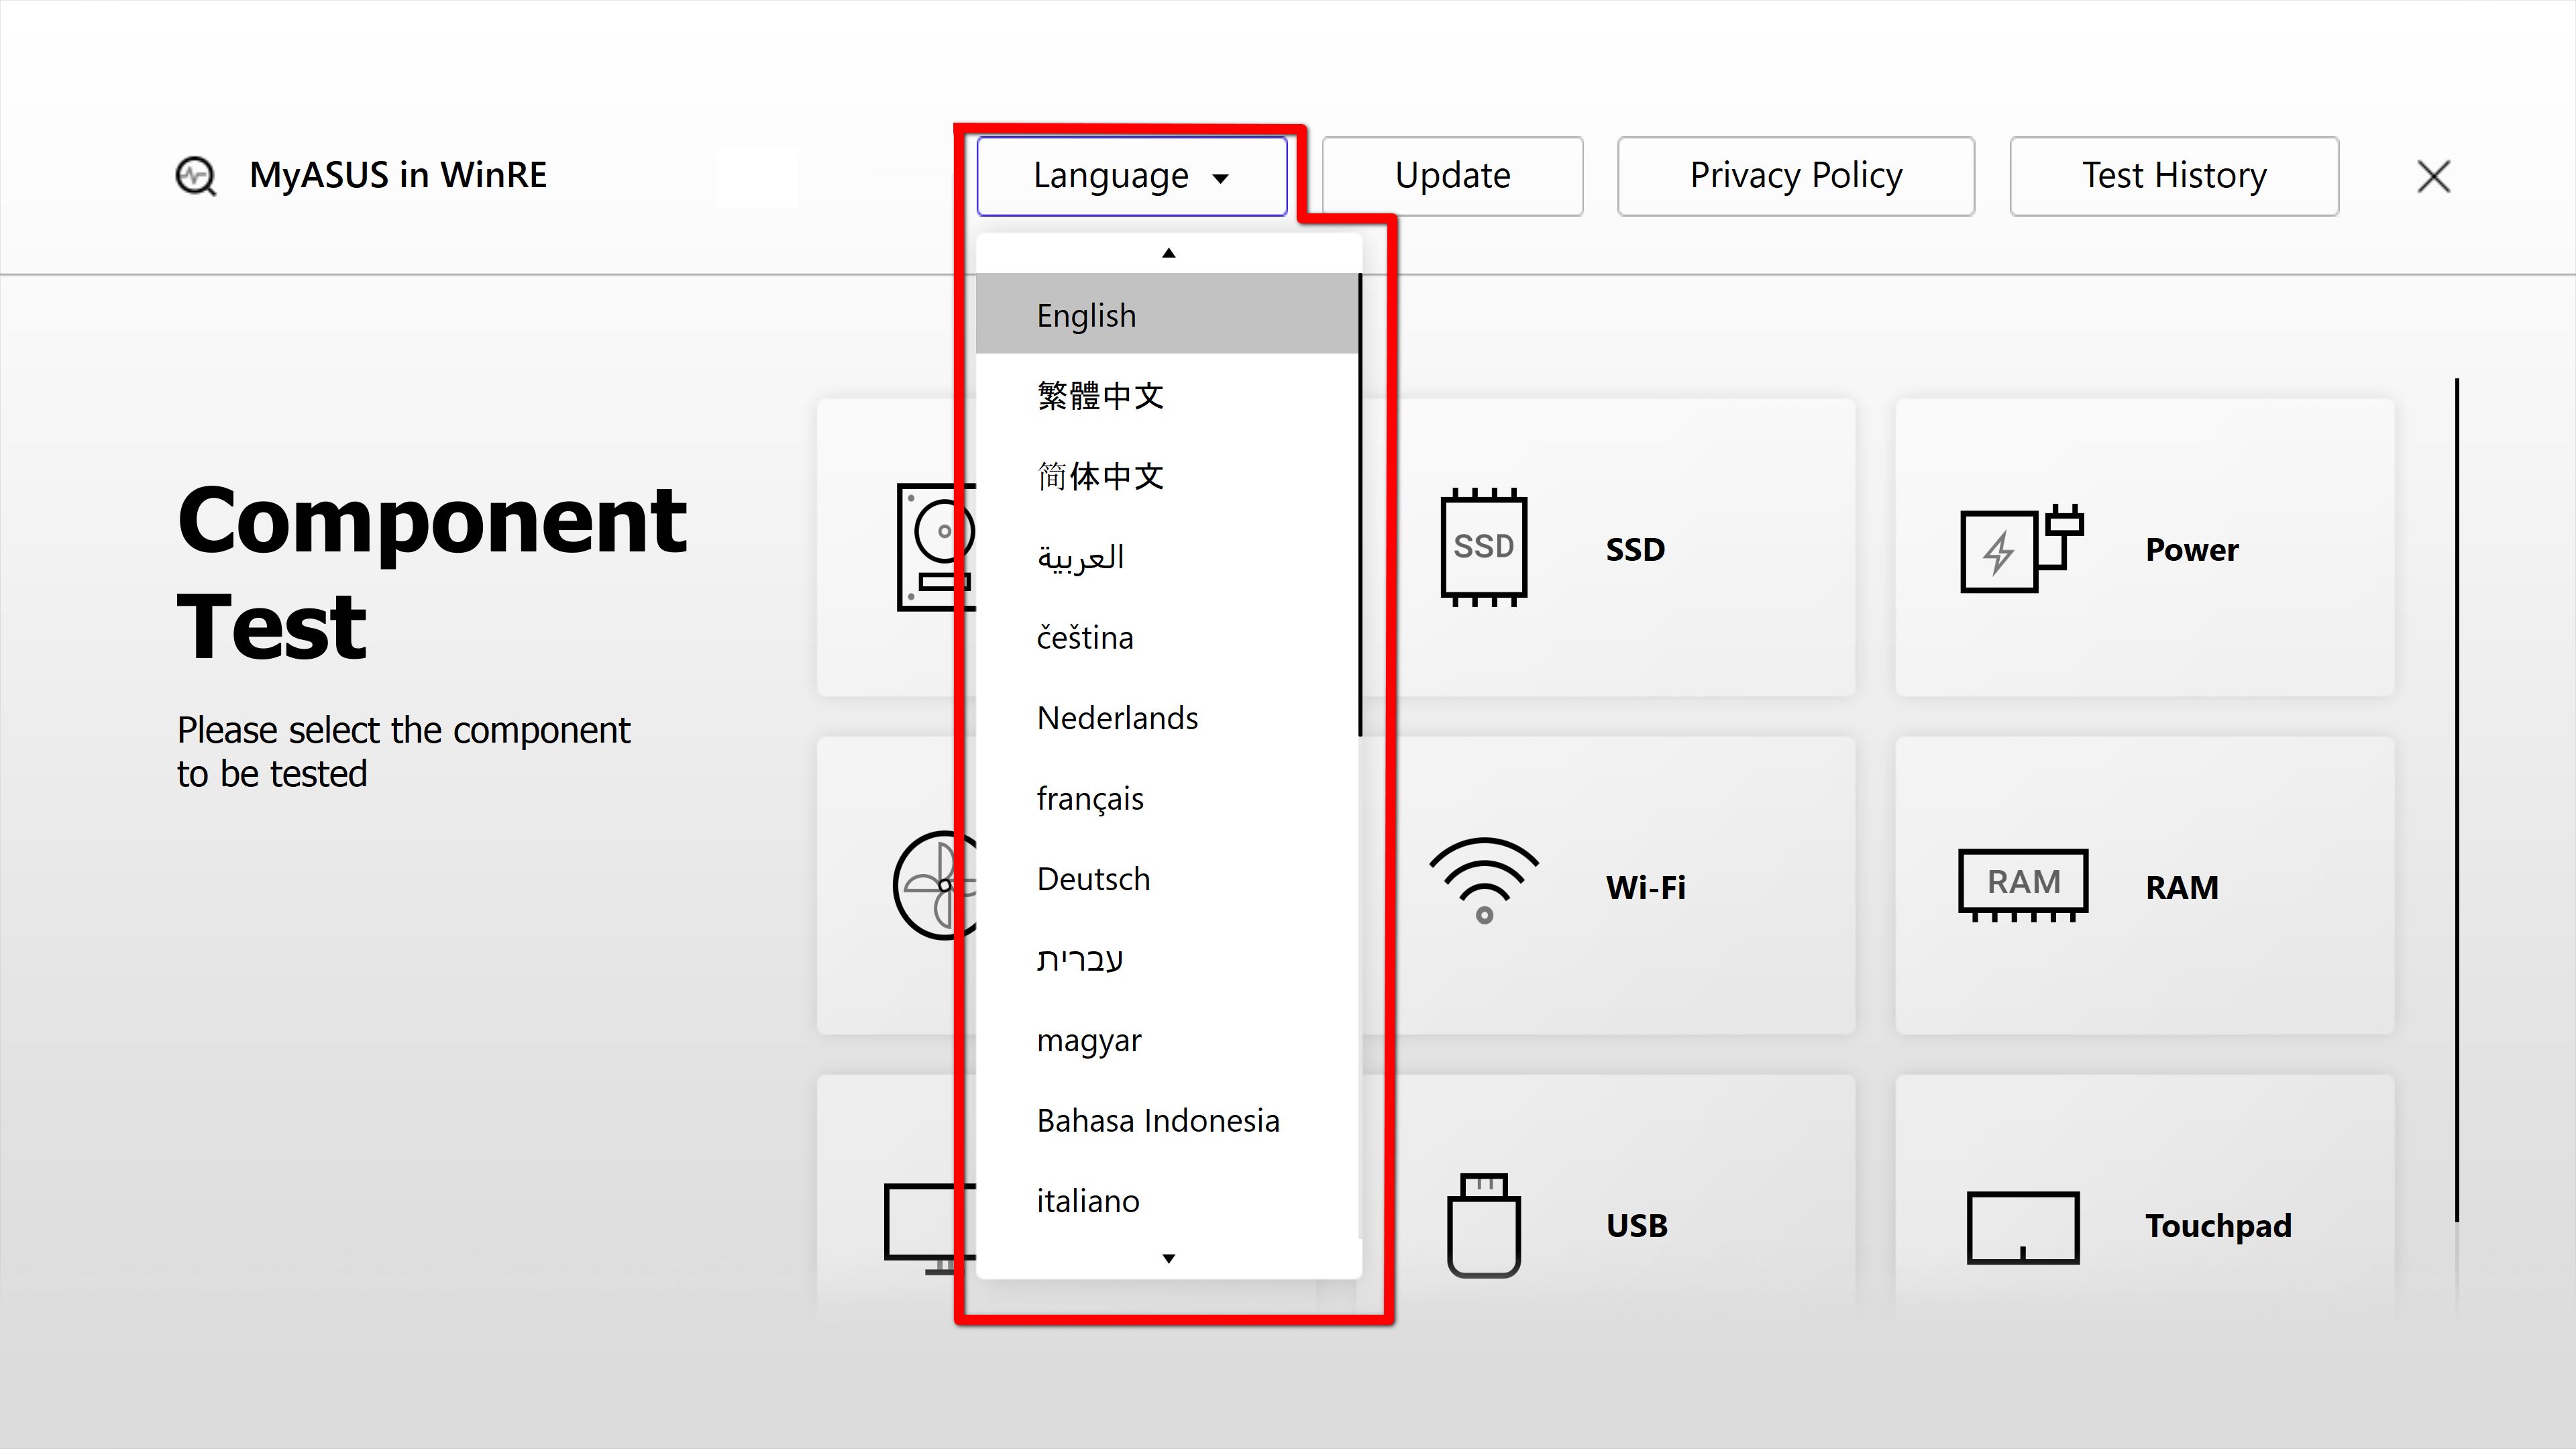
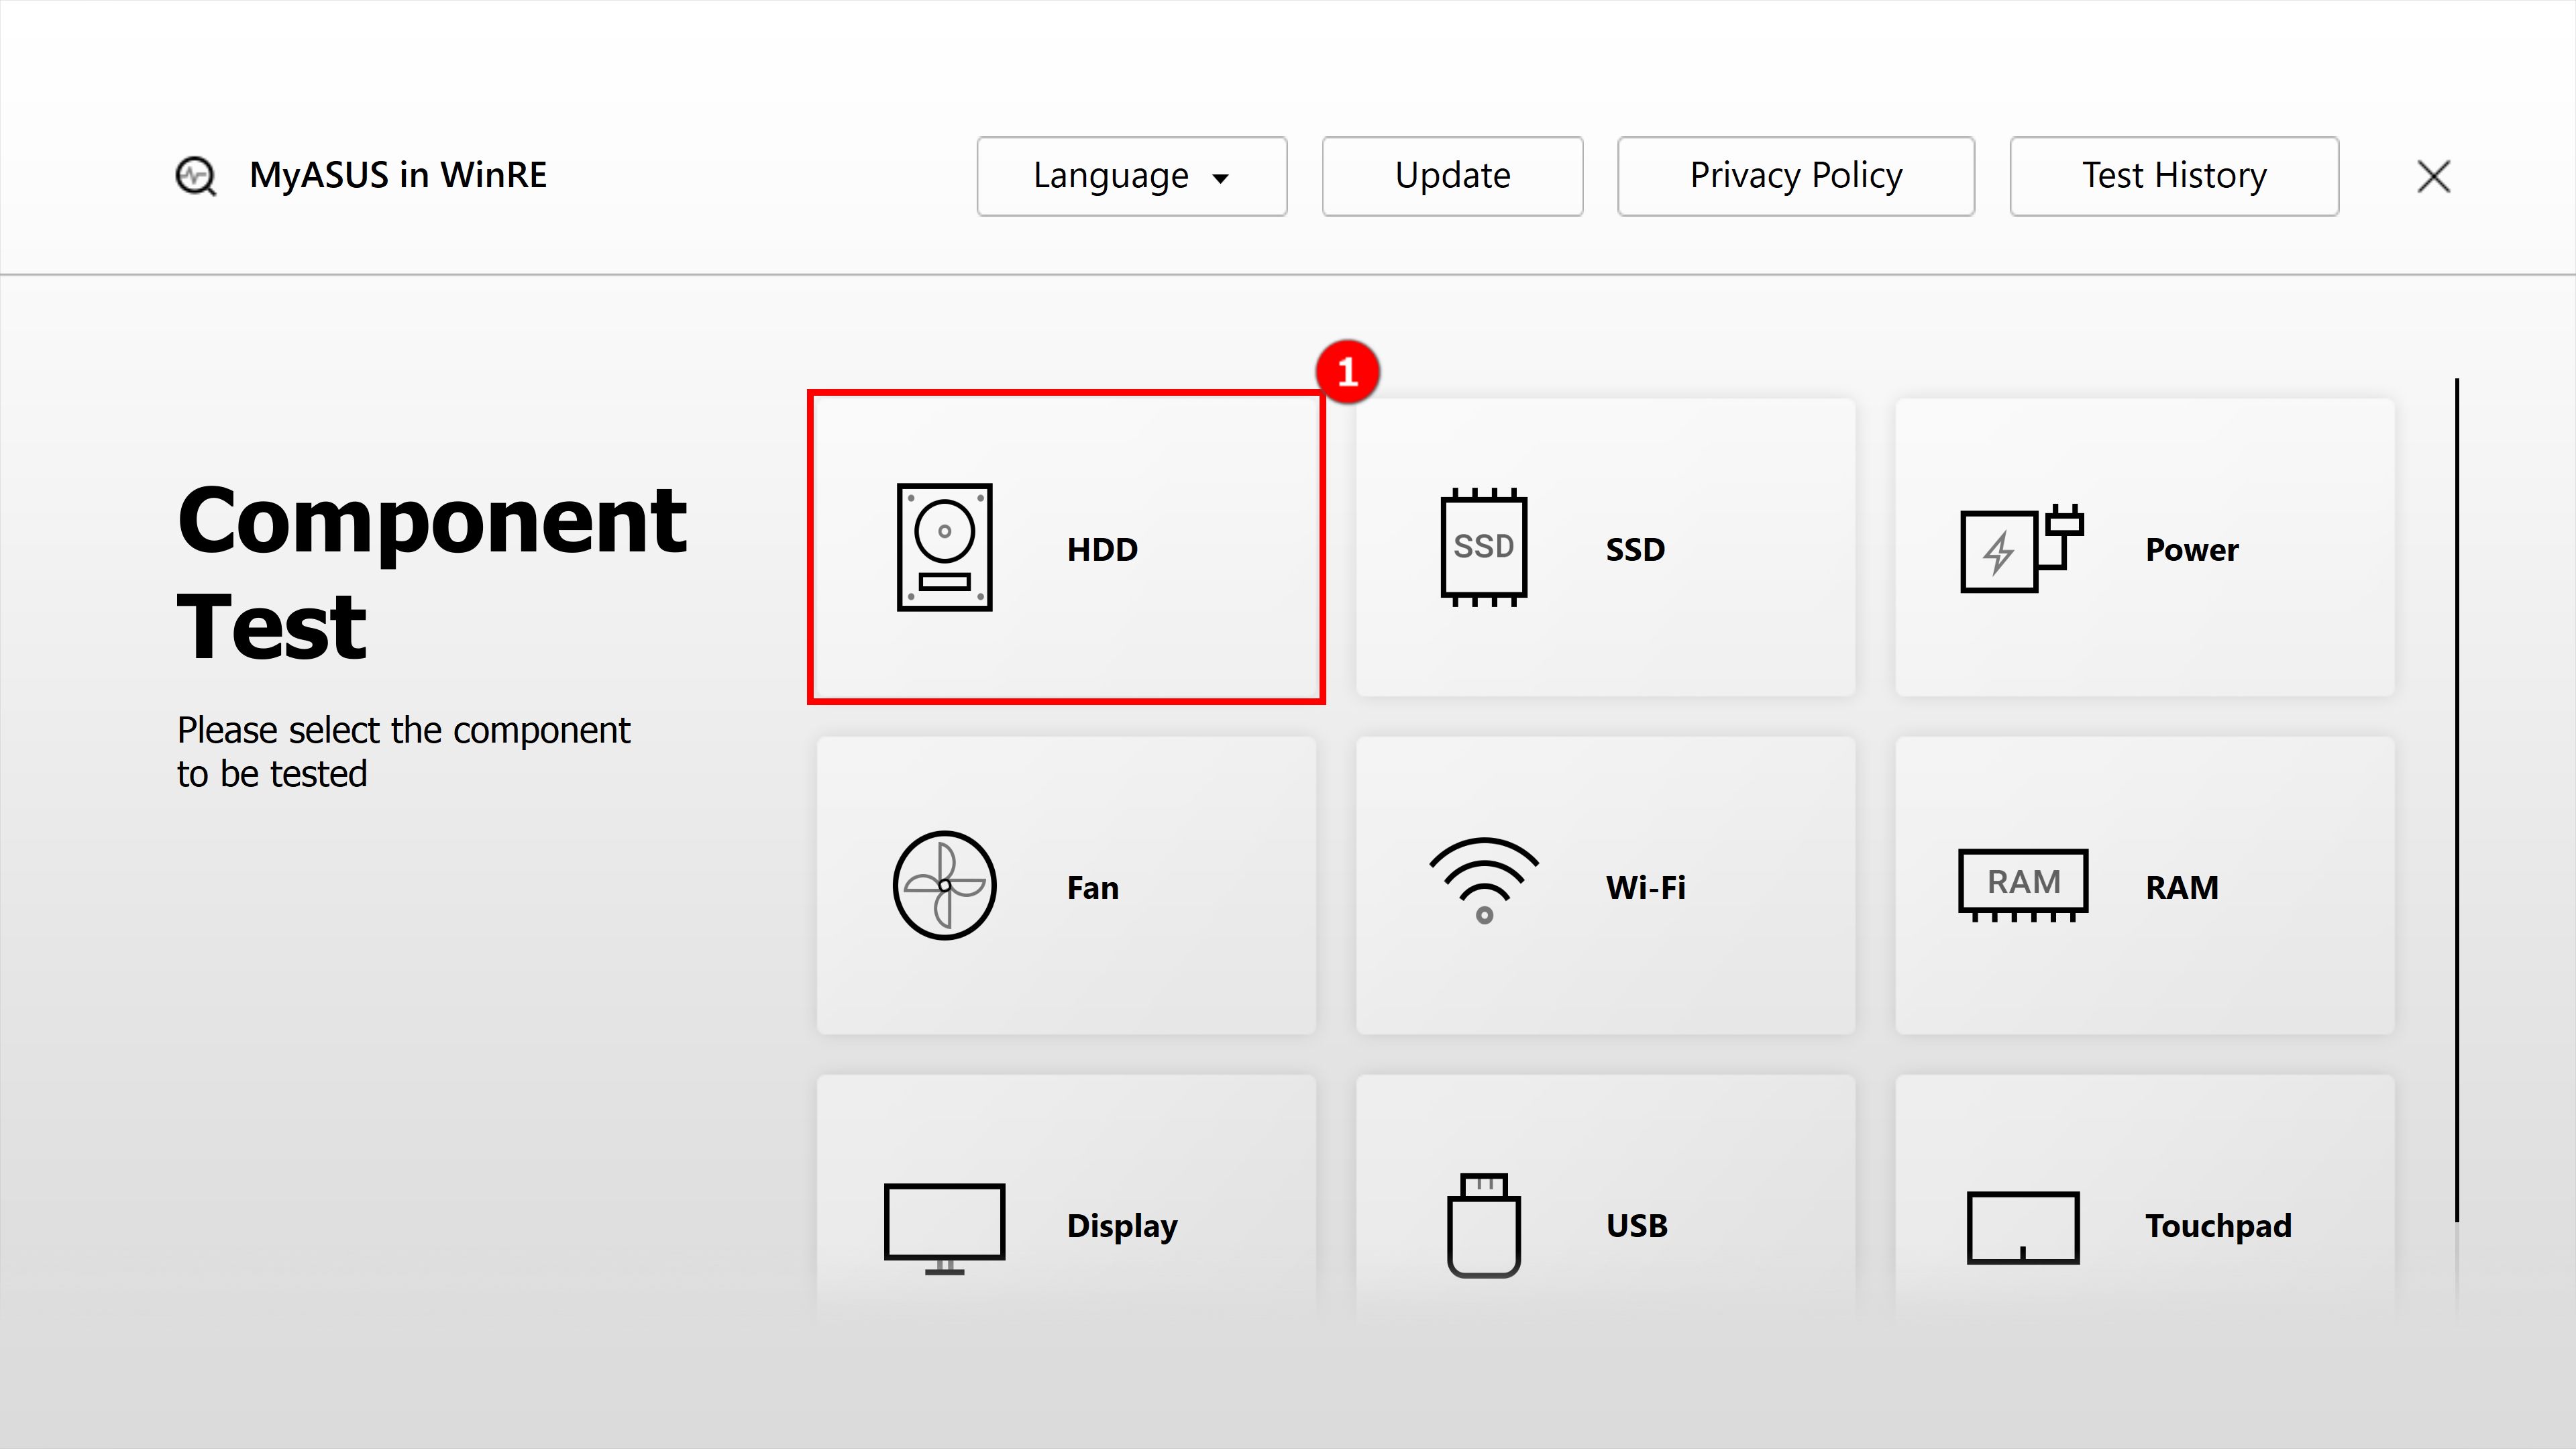
1.3 Enter the main interface of Component Test as shown in the figure below.

2. MyASUS System Diagnosis- Component Test Setup
2.1 Choose Language of MyASUS System Diagnosis- Component Test.
2.2 Upgrade MyASUS in WinRE. Please click ①[Update] and select ②[OK]. (The upgrade requires the network connection. If you can't connect to the Internet, you can refer to 4.2-1 of this article for operation).

2.3 Test History. You can see the previous test records in ①[Test History]. Double-click ②[one of them] and you can see the details of the test.

2.4 The Display history test report is shown below.

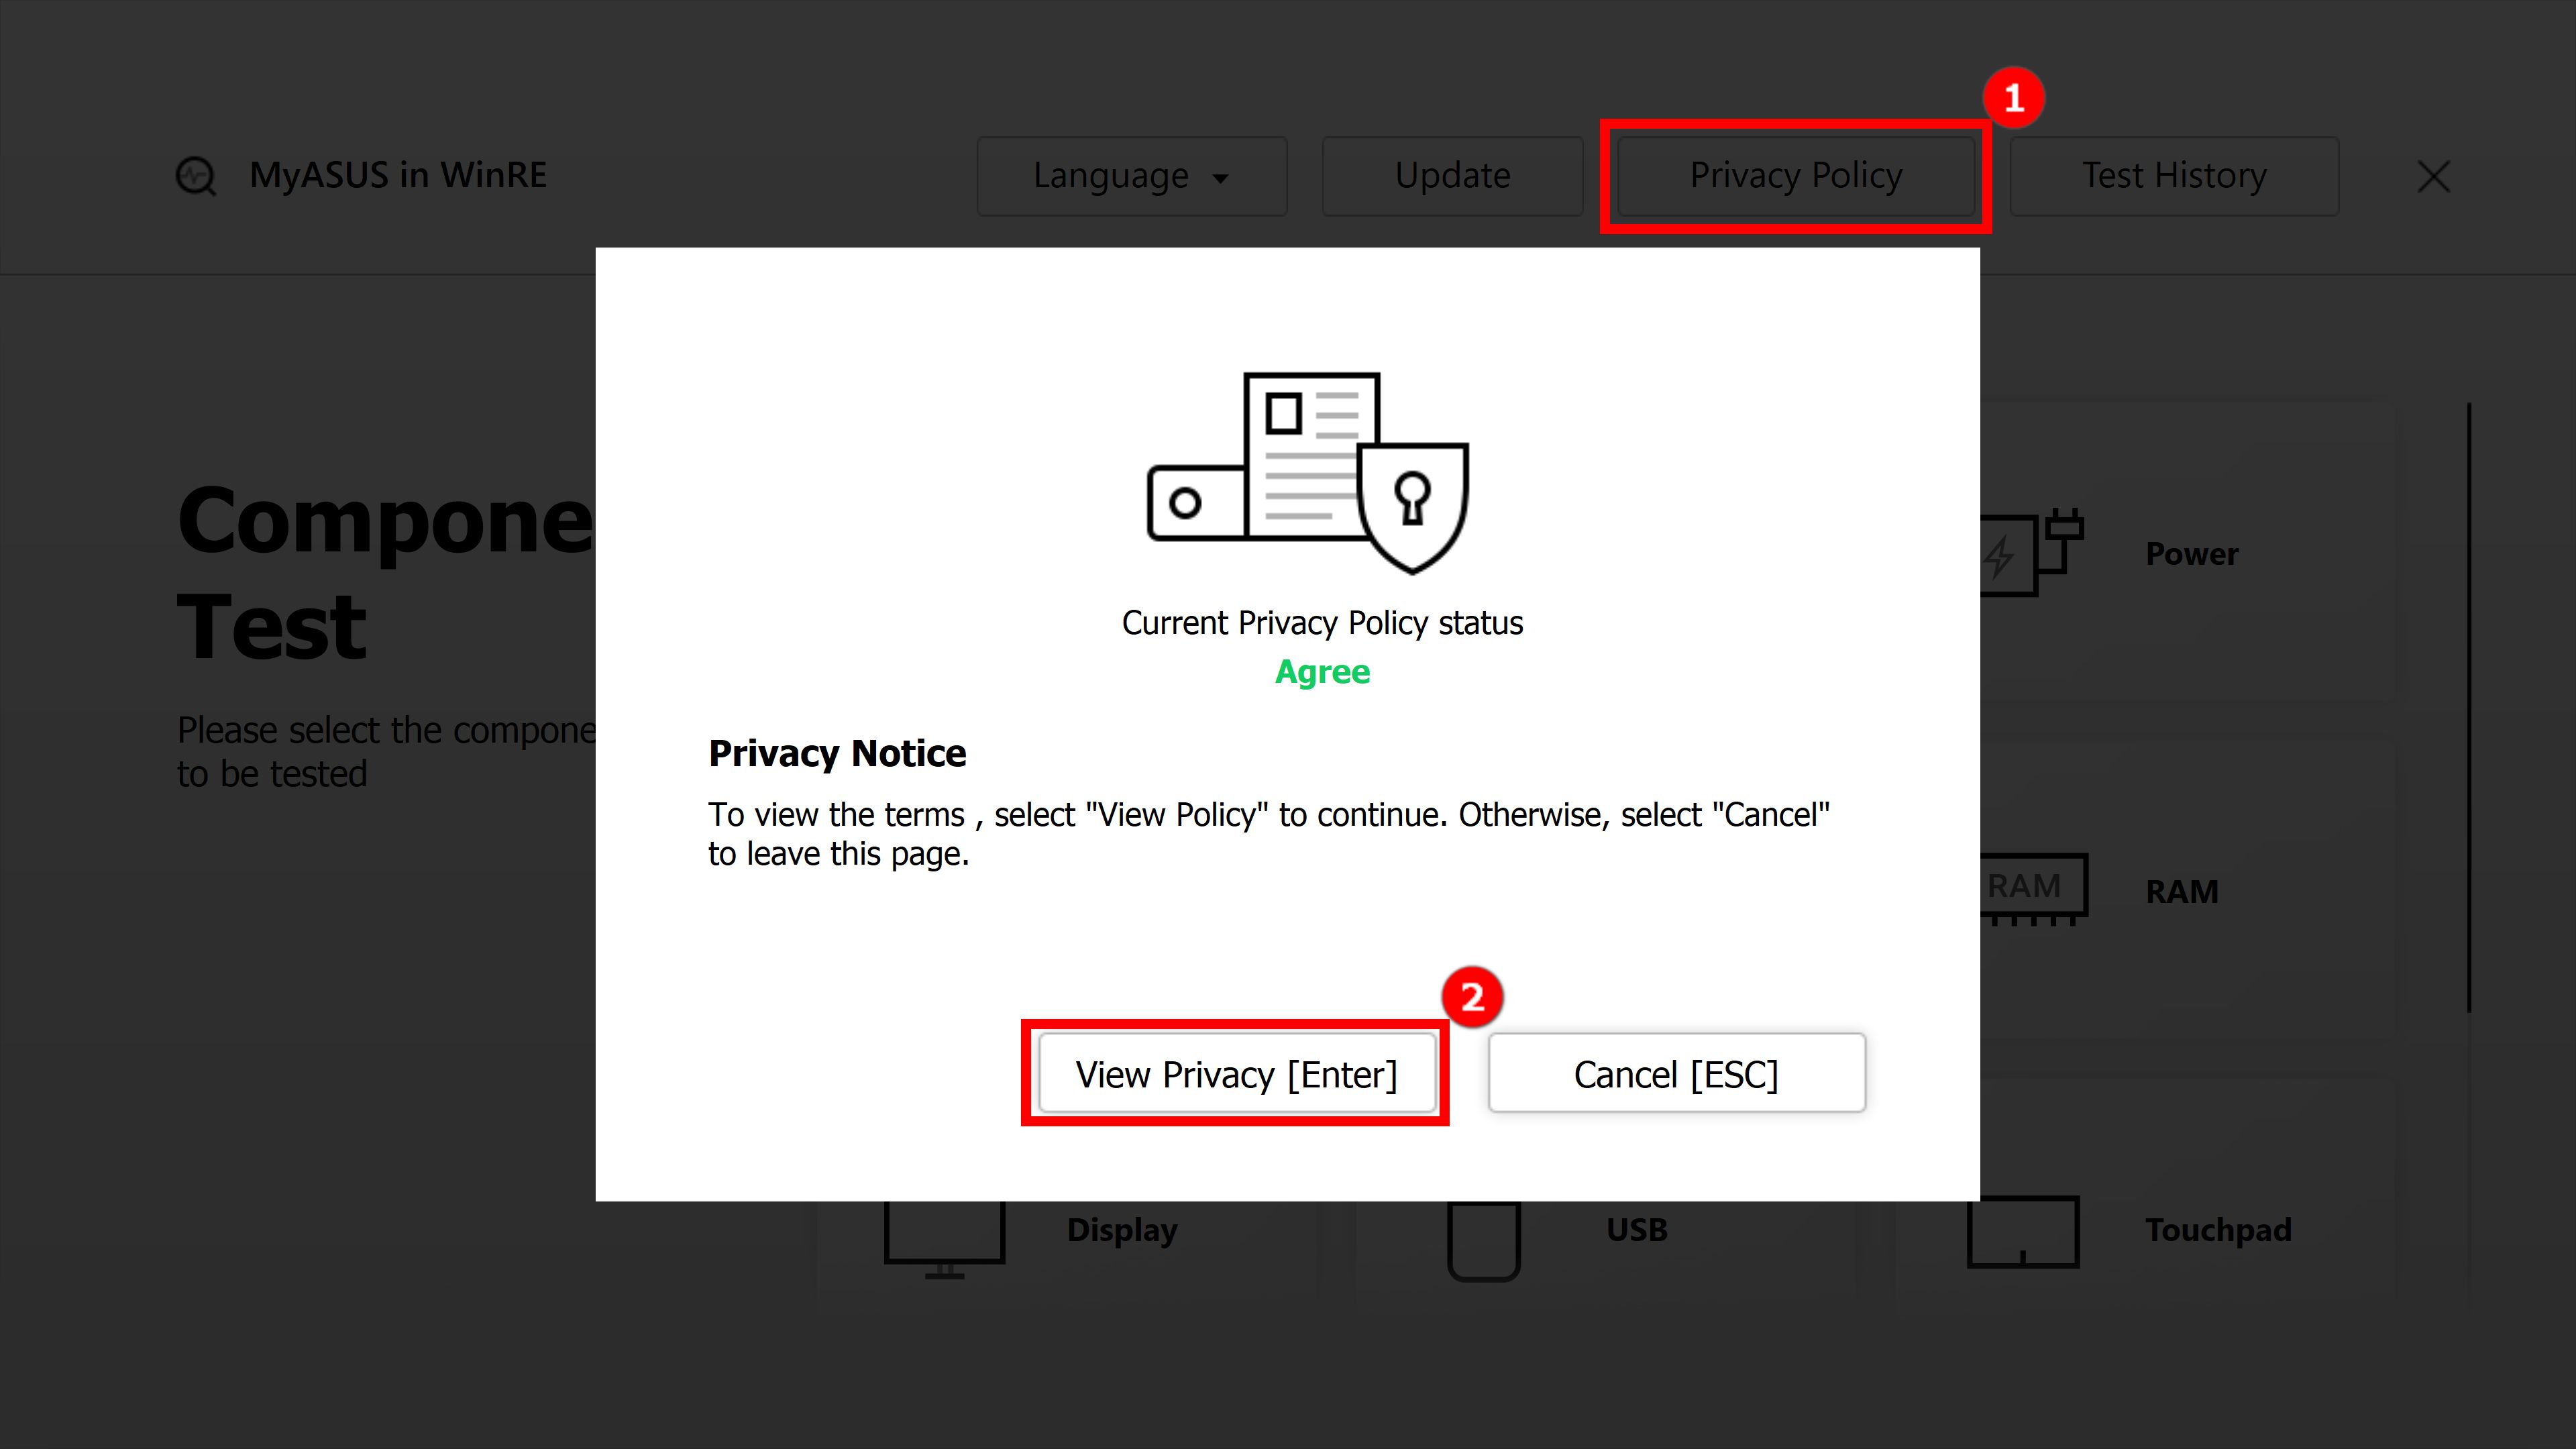
Open the ①[Privacy Policy], you can see the current privacy policy status. Click ②[View Privacy], then you can choose to ③[Agree] or to ④[Decline] the Privacy Policy.

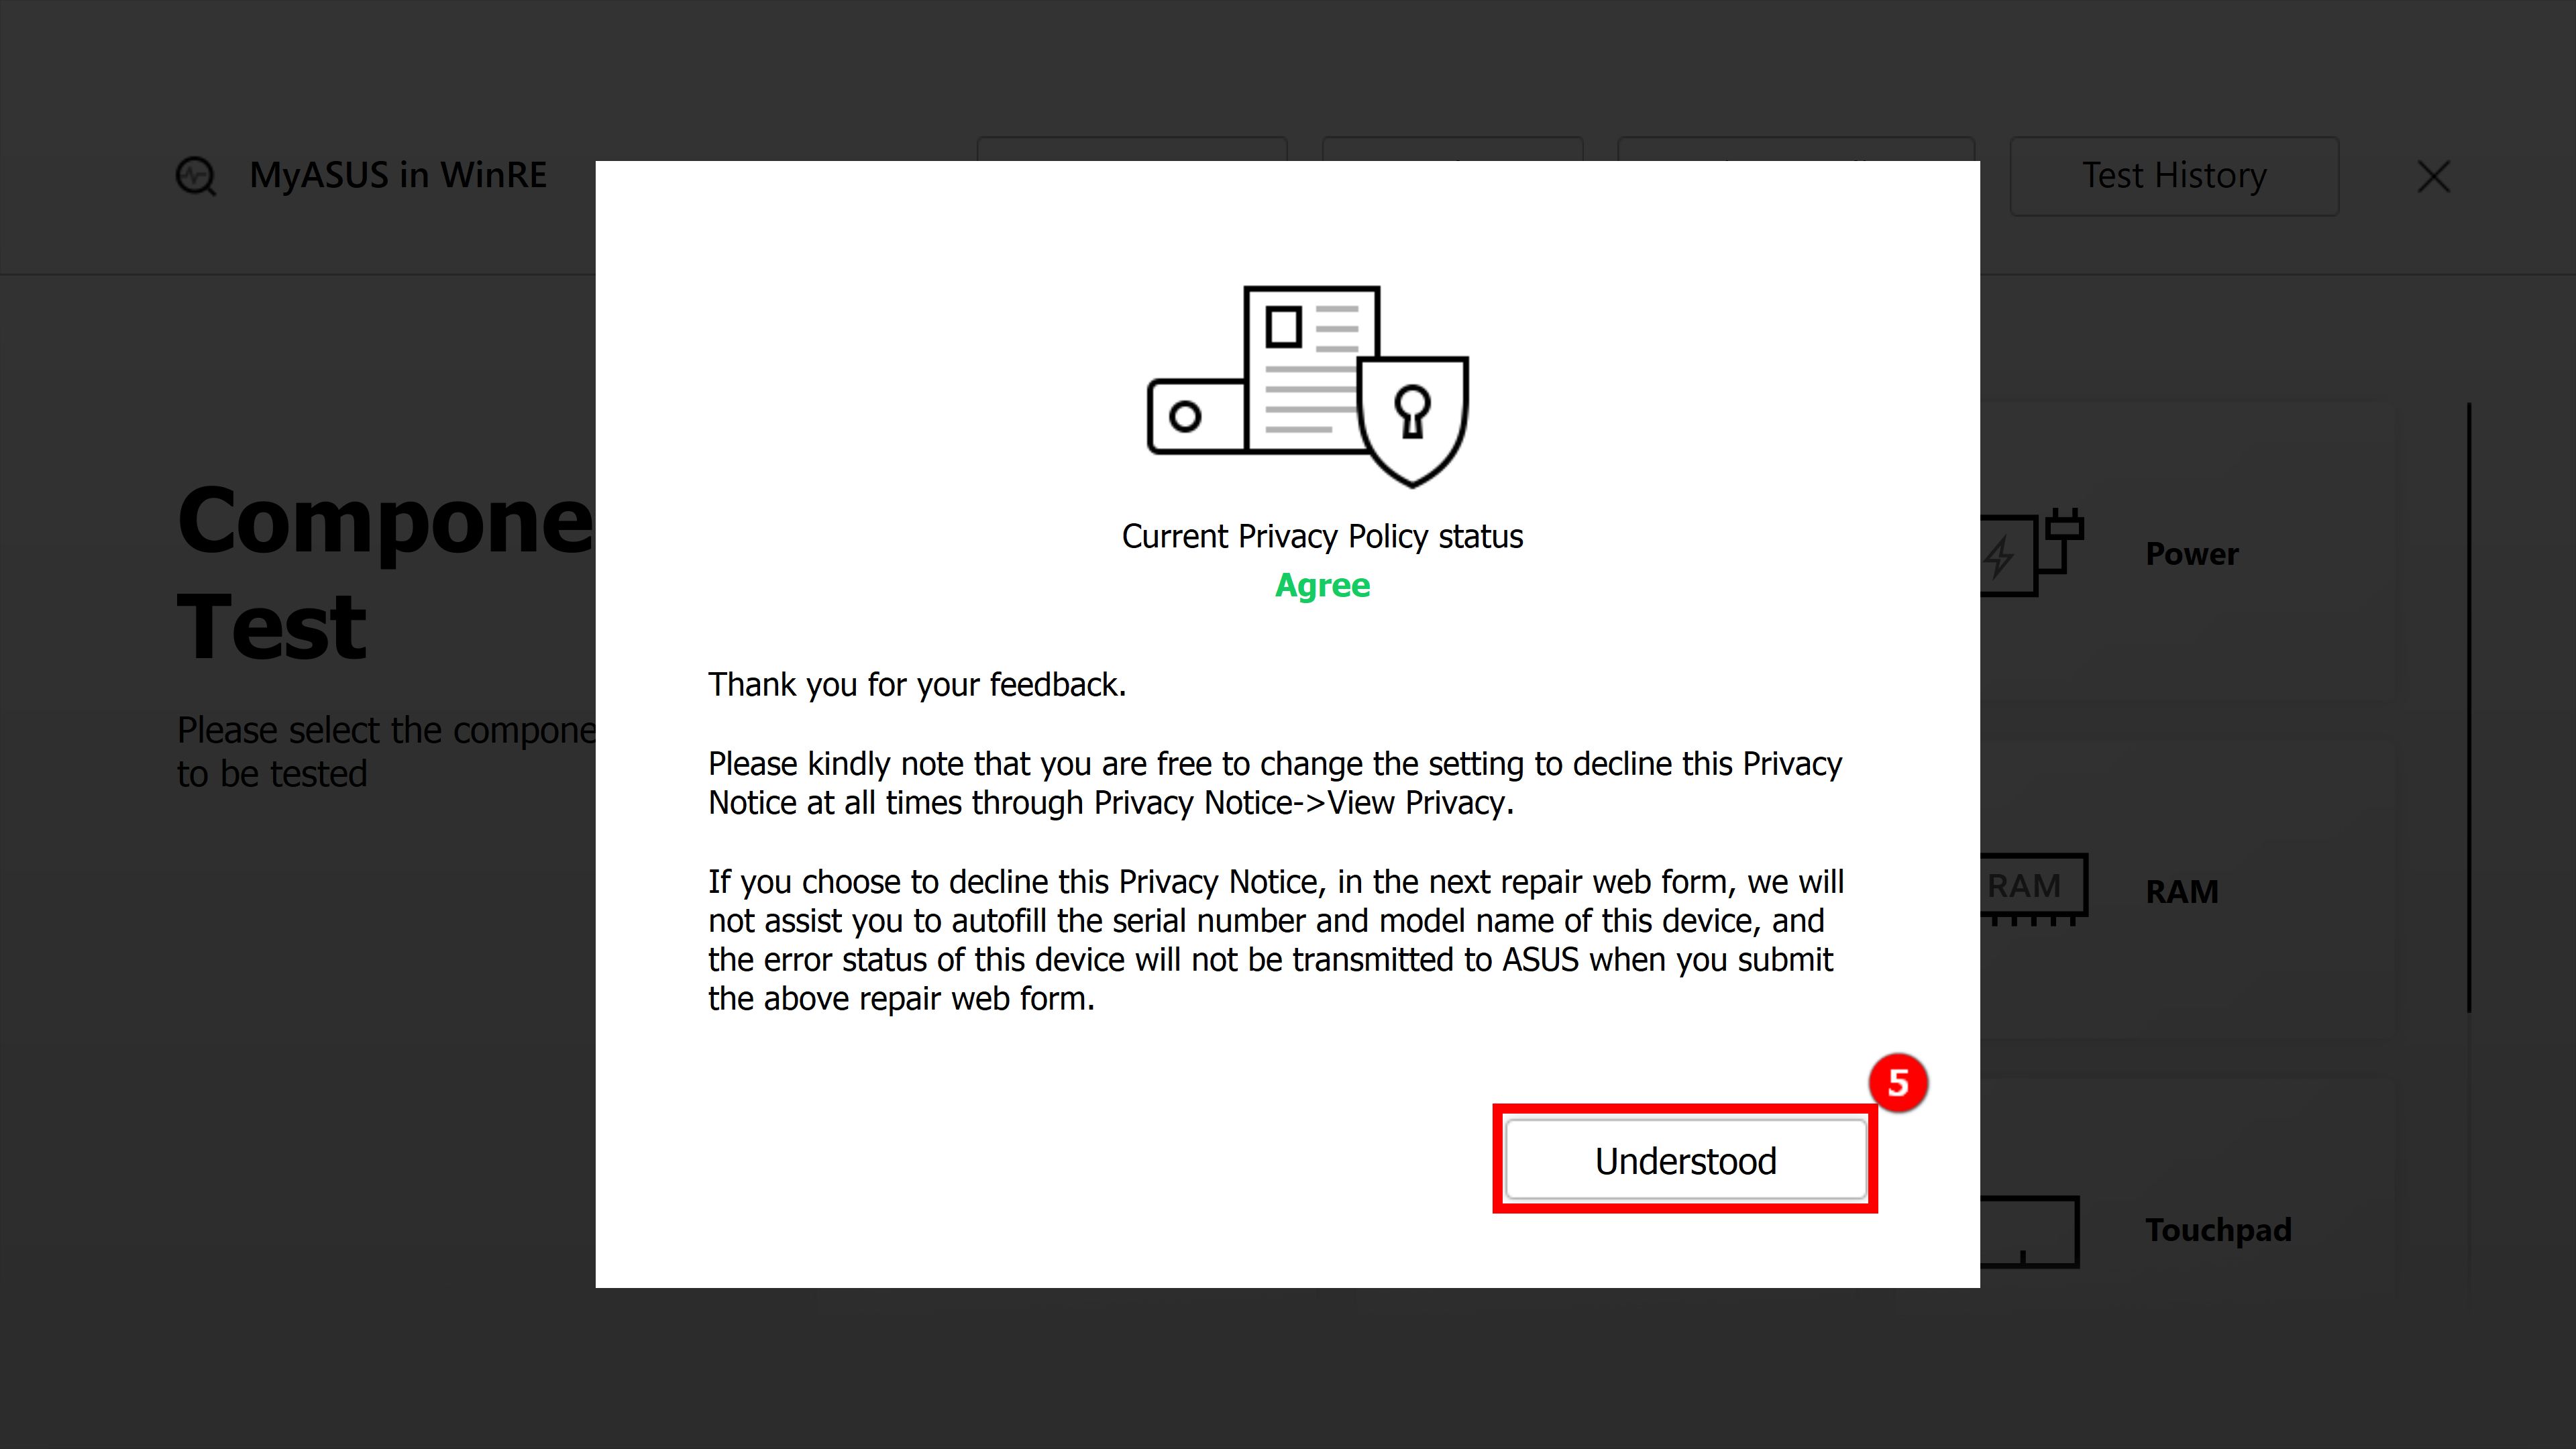
3.1 After you click ③[Agree], click ⑤[Understood] to agree with the privicy policy.
3.2 After you click ④[Decline] to decline the privacy policy, click ⑥[Still Decline].

Notice:
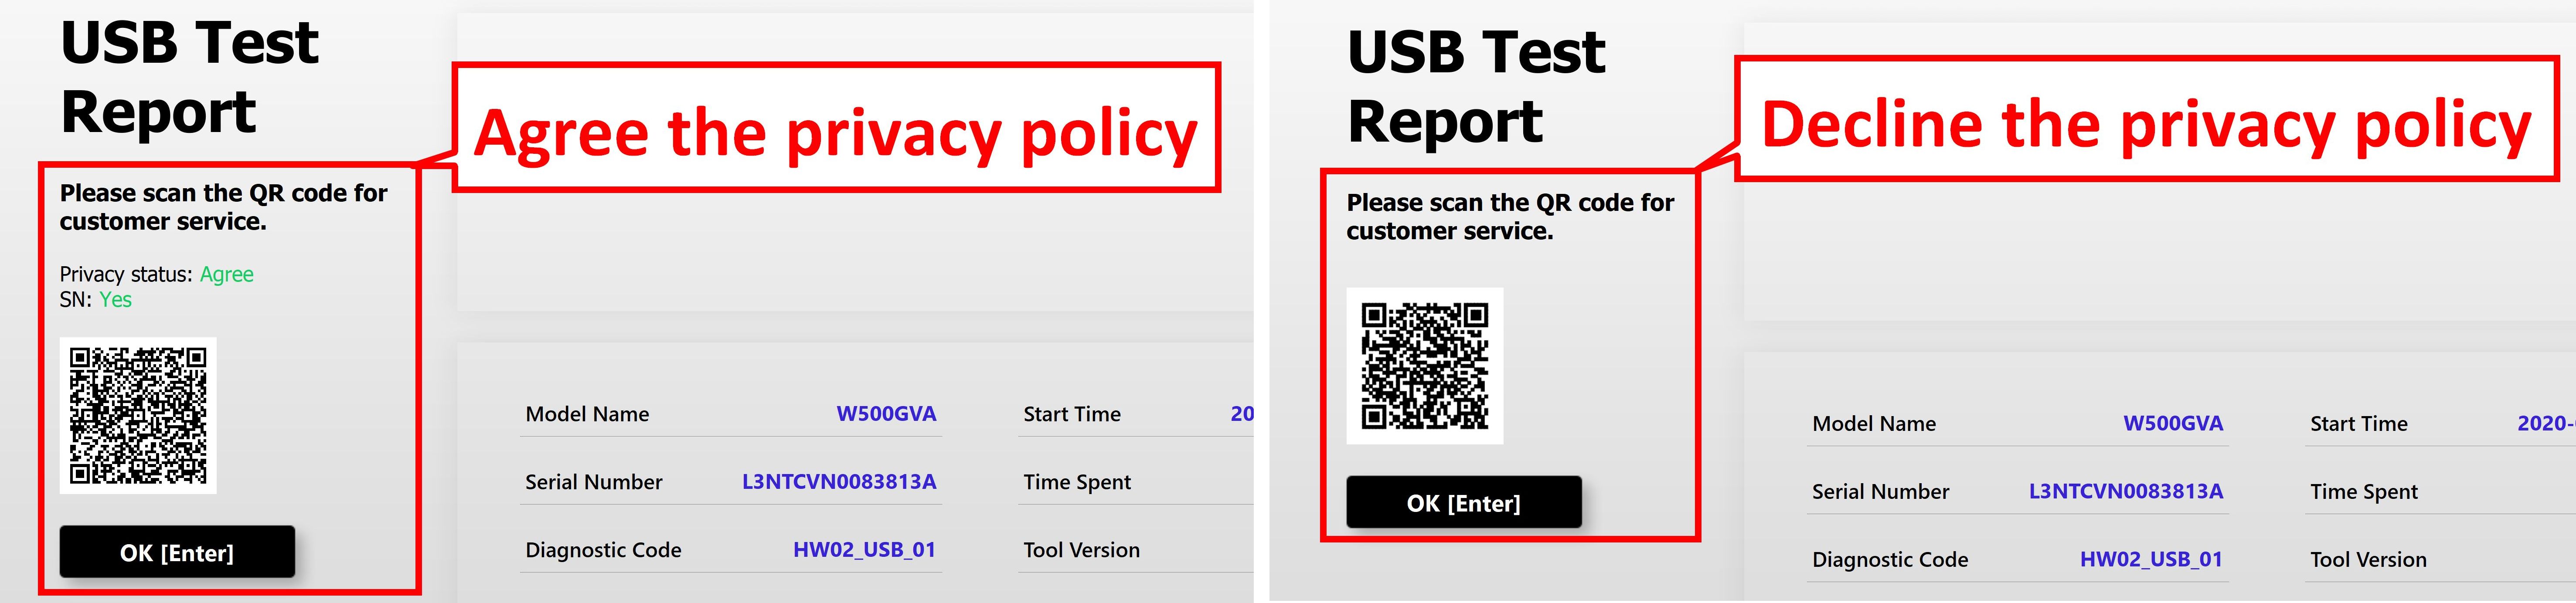
Agree status: In the state of agree, the machine code and diagnostic code of the computer will be recorded in the QR code. Scanning the QR code with your mobile phone will open the ASUS Repair Page. Since you have agreed to the Privacy Statement, the repair form already contains the computer's machine code and diagnostic code. Now you only need to fill in your personal information and the computer's status and pickup information, and ASUS will carry out the pickup and repair.
Decline status: In the state of disagreement, the QR code will not record the computer's machine code and diagnostic code. Compared with the "Agree" state, the "Decline" state requires you to fill in the computer's machine code and diagnostic code yourself, which increases the difficulty of applying for repairs. It is recommended that you agree to the privacy statement.
(The following two pictures are screenshots of "Agree and Decline" of the privacy statement. You can see that the QR code in the consent state contains more information so the information you need to fill in manually will be less.)
4. MyASUS System Diagnosis- Component Test Items
Note: The following check components may vary depending on the device model.
Take the simple test on component ①[HDD] as an example to introduce the test process. Please follow the below picture guide for the operation (The test process of SSD, power, fan and other components are similar to the test process of HDD, please refer to the HDD test process for your testing).
In Point 4.2 and 4.3 of this article, we will introduce more complex test items: Wi-Fi, Display.
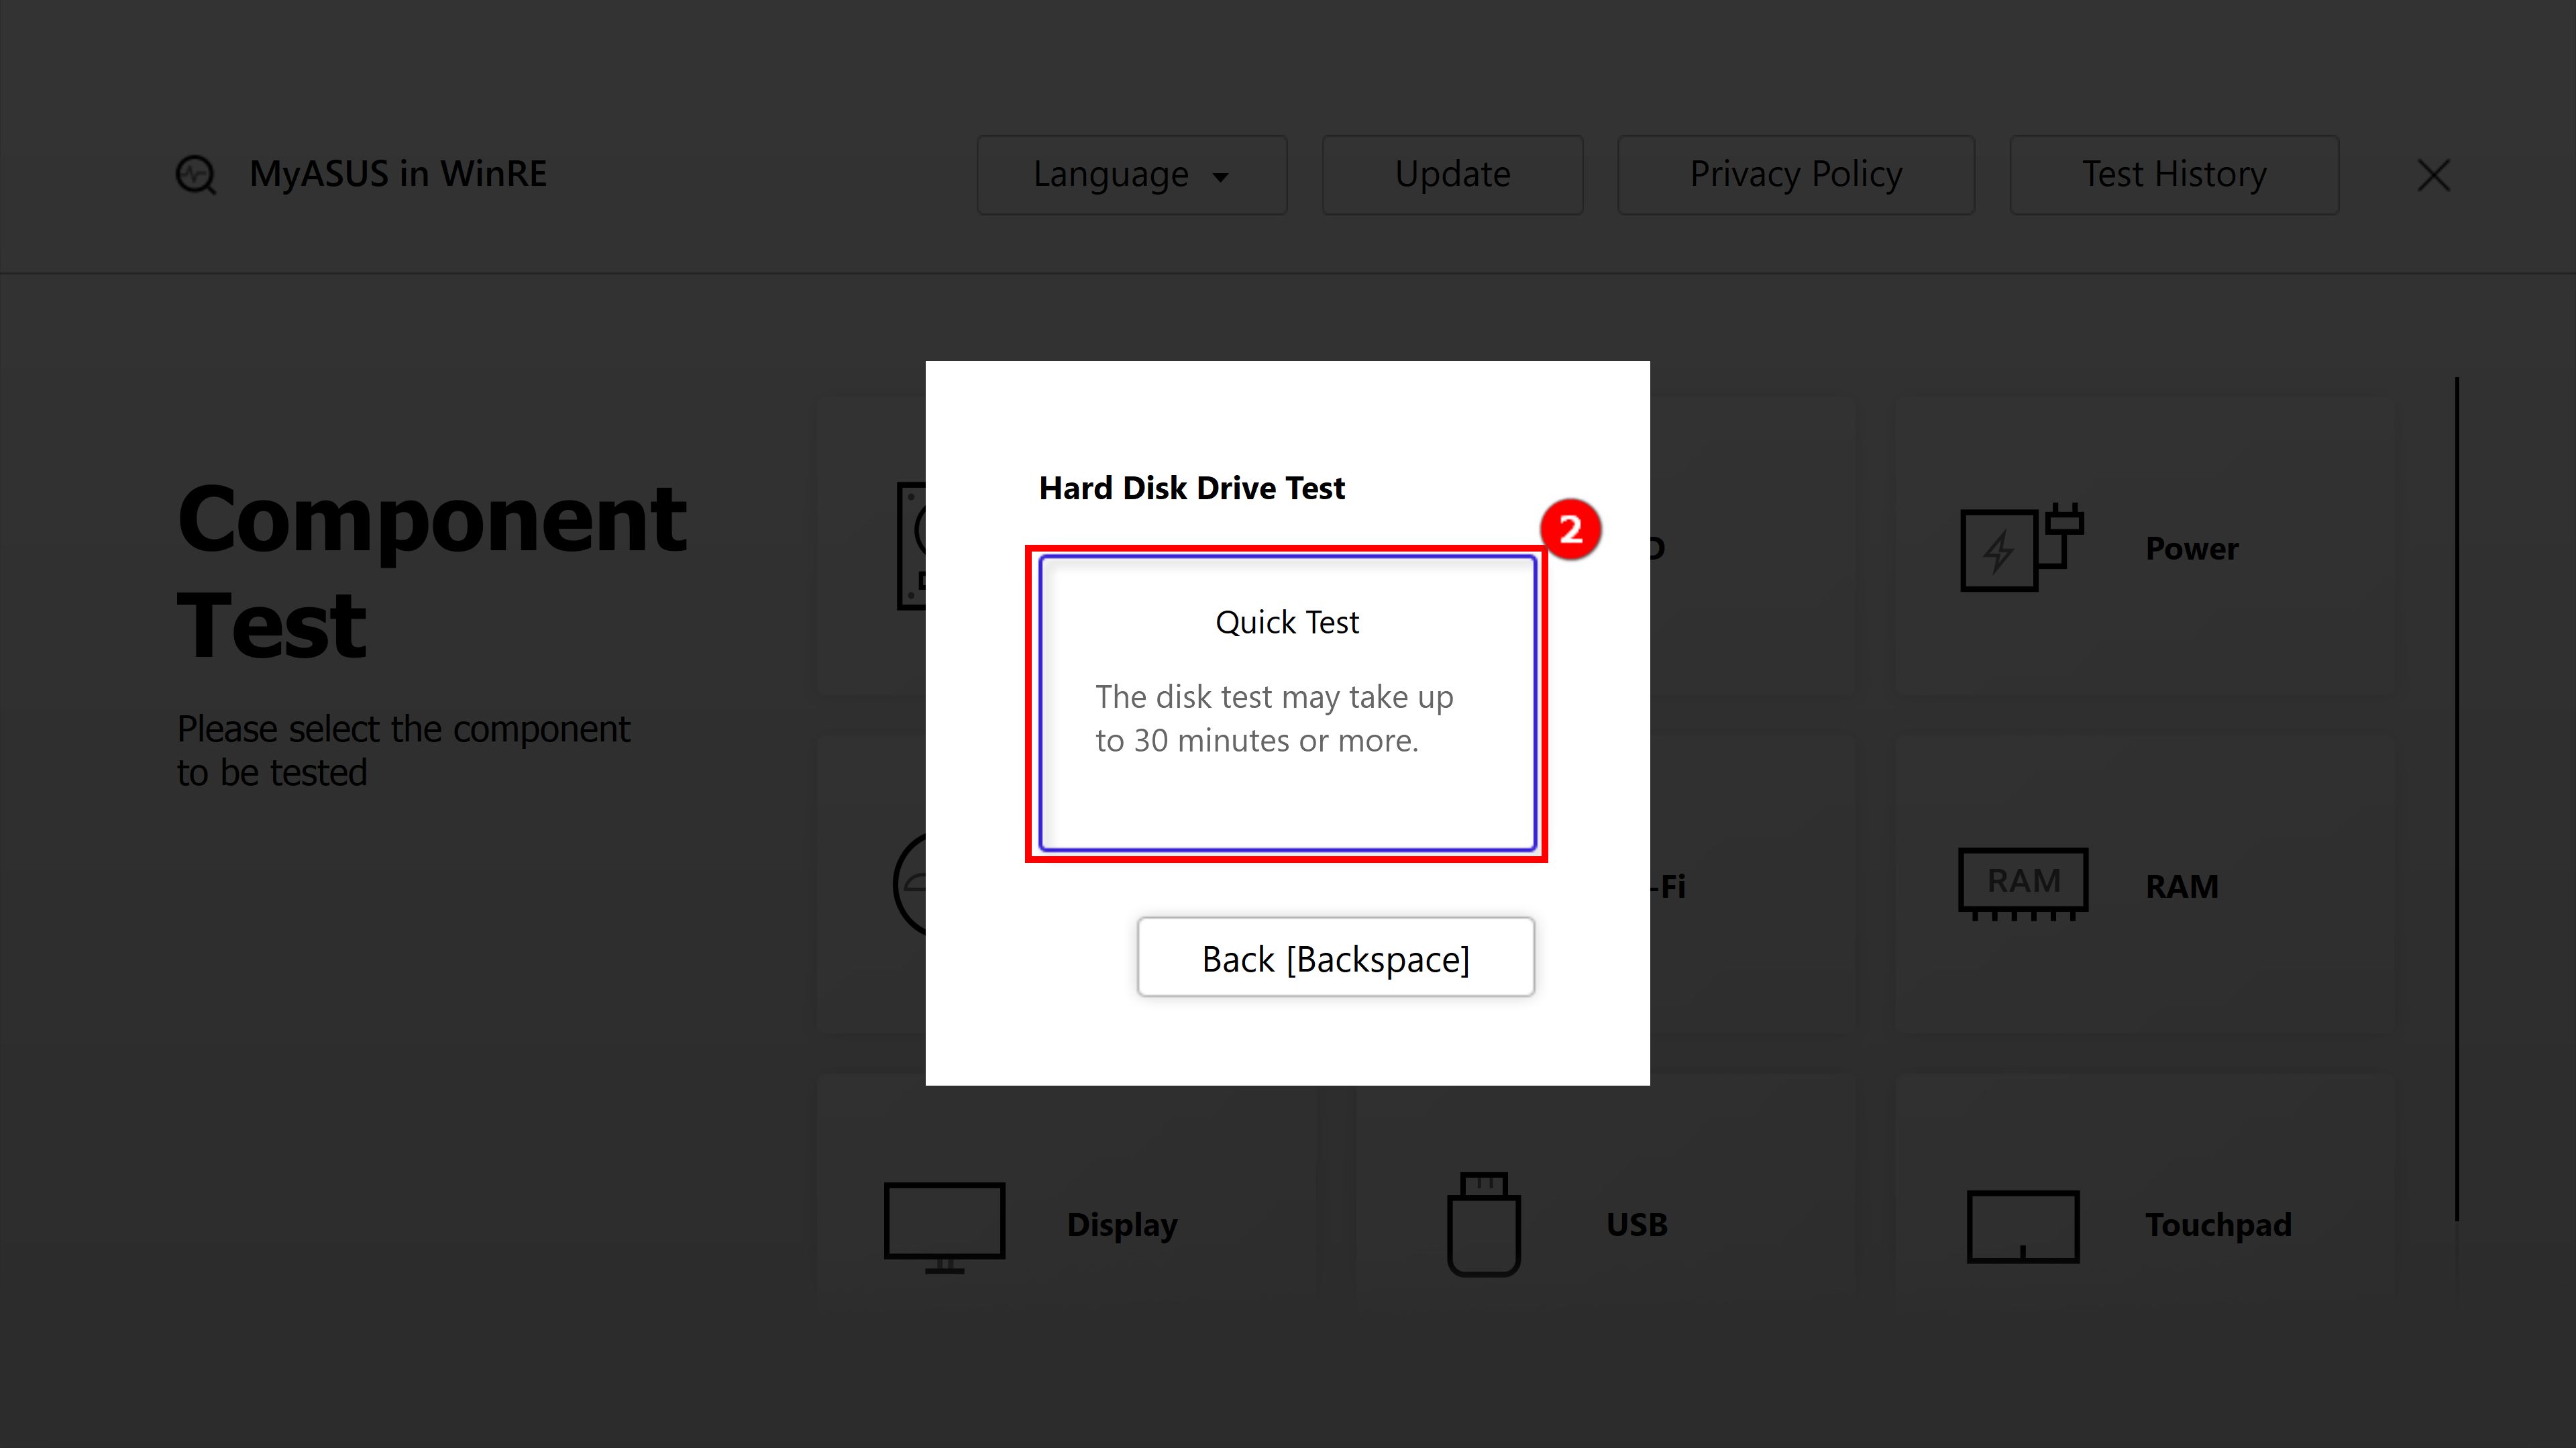
4.1-2 Select ②[Quick Test]

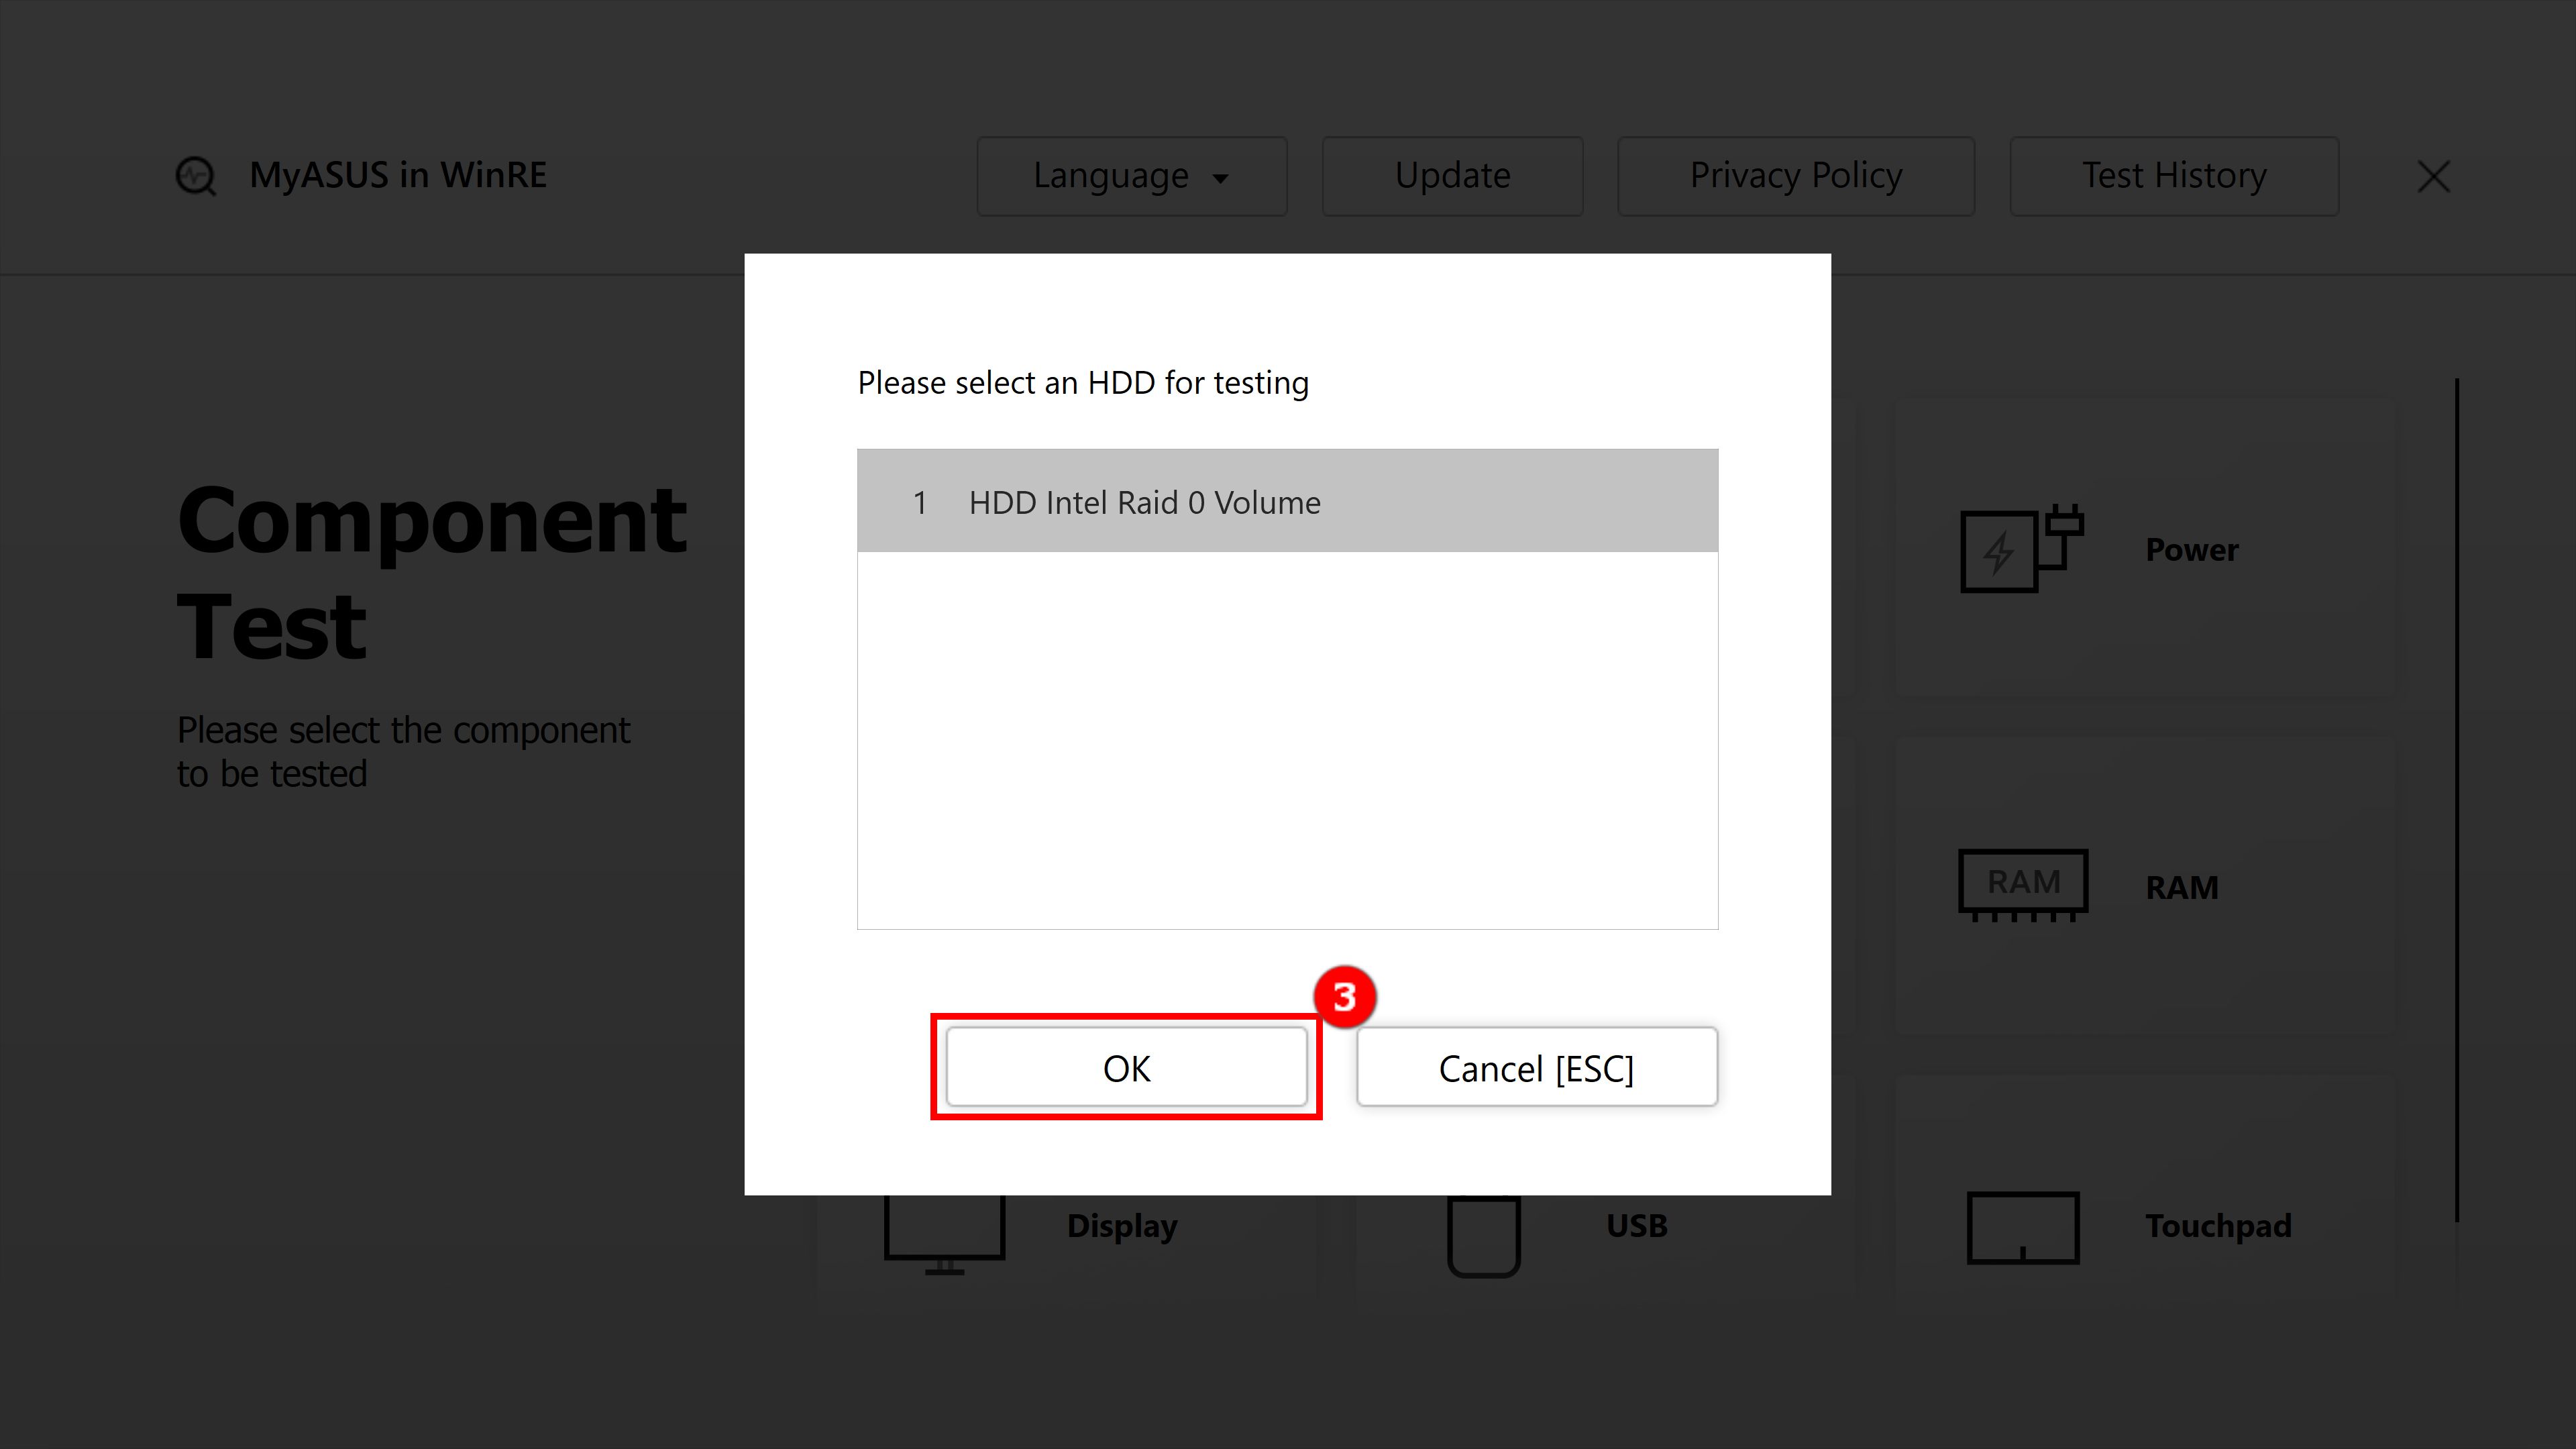
4.1-3 Choose the Hard Disk Drive you would like to test, and click ③[OK]
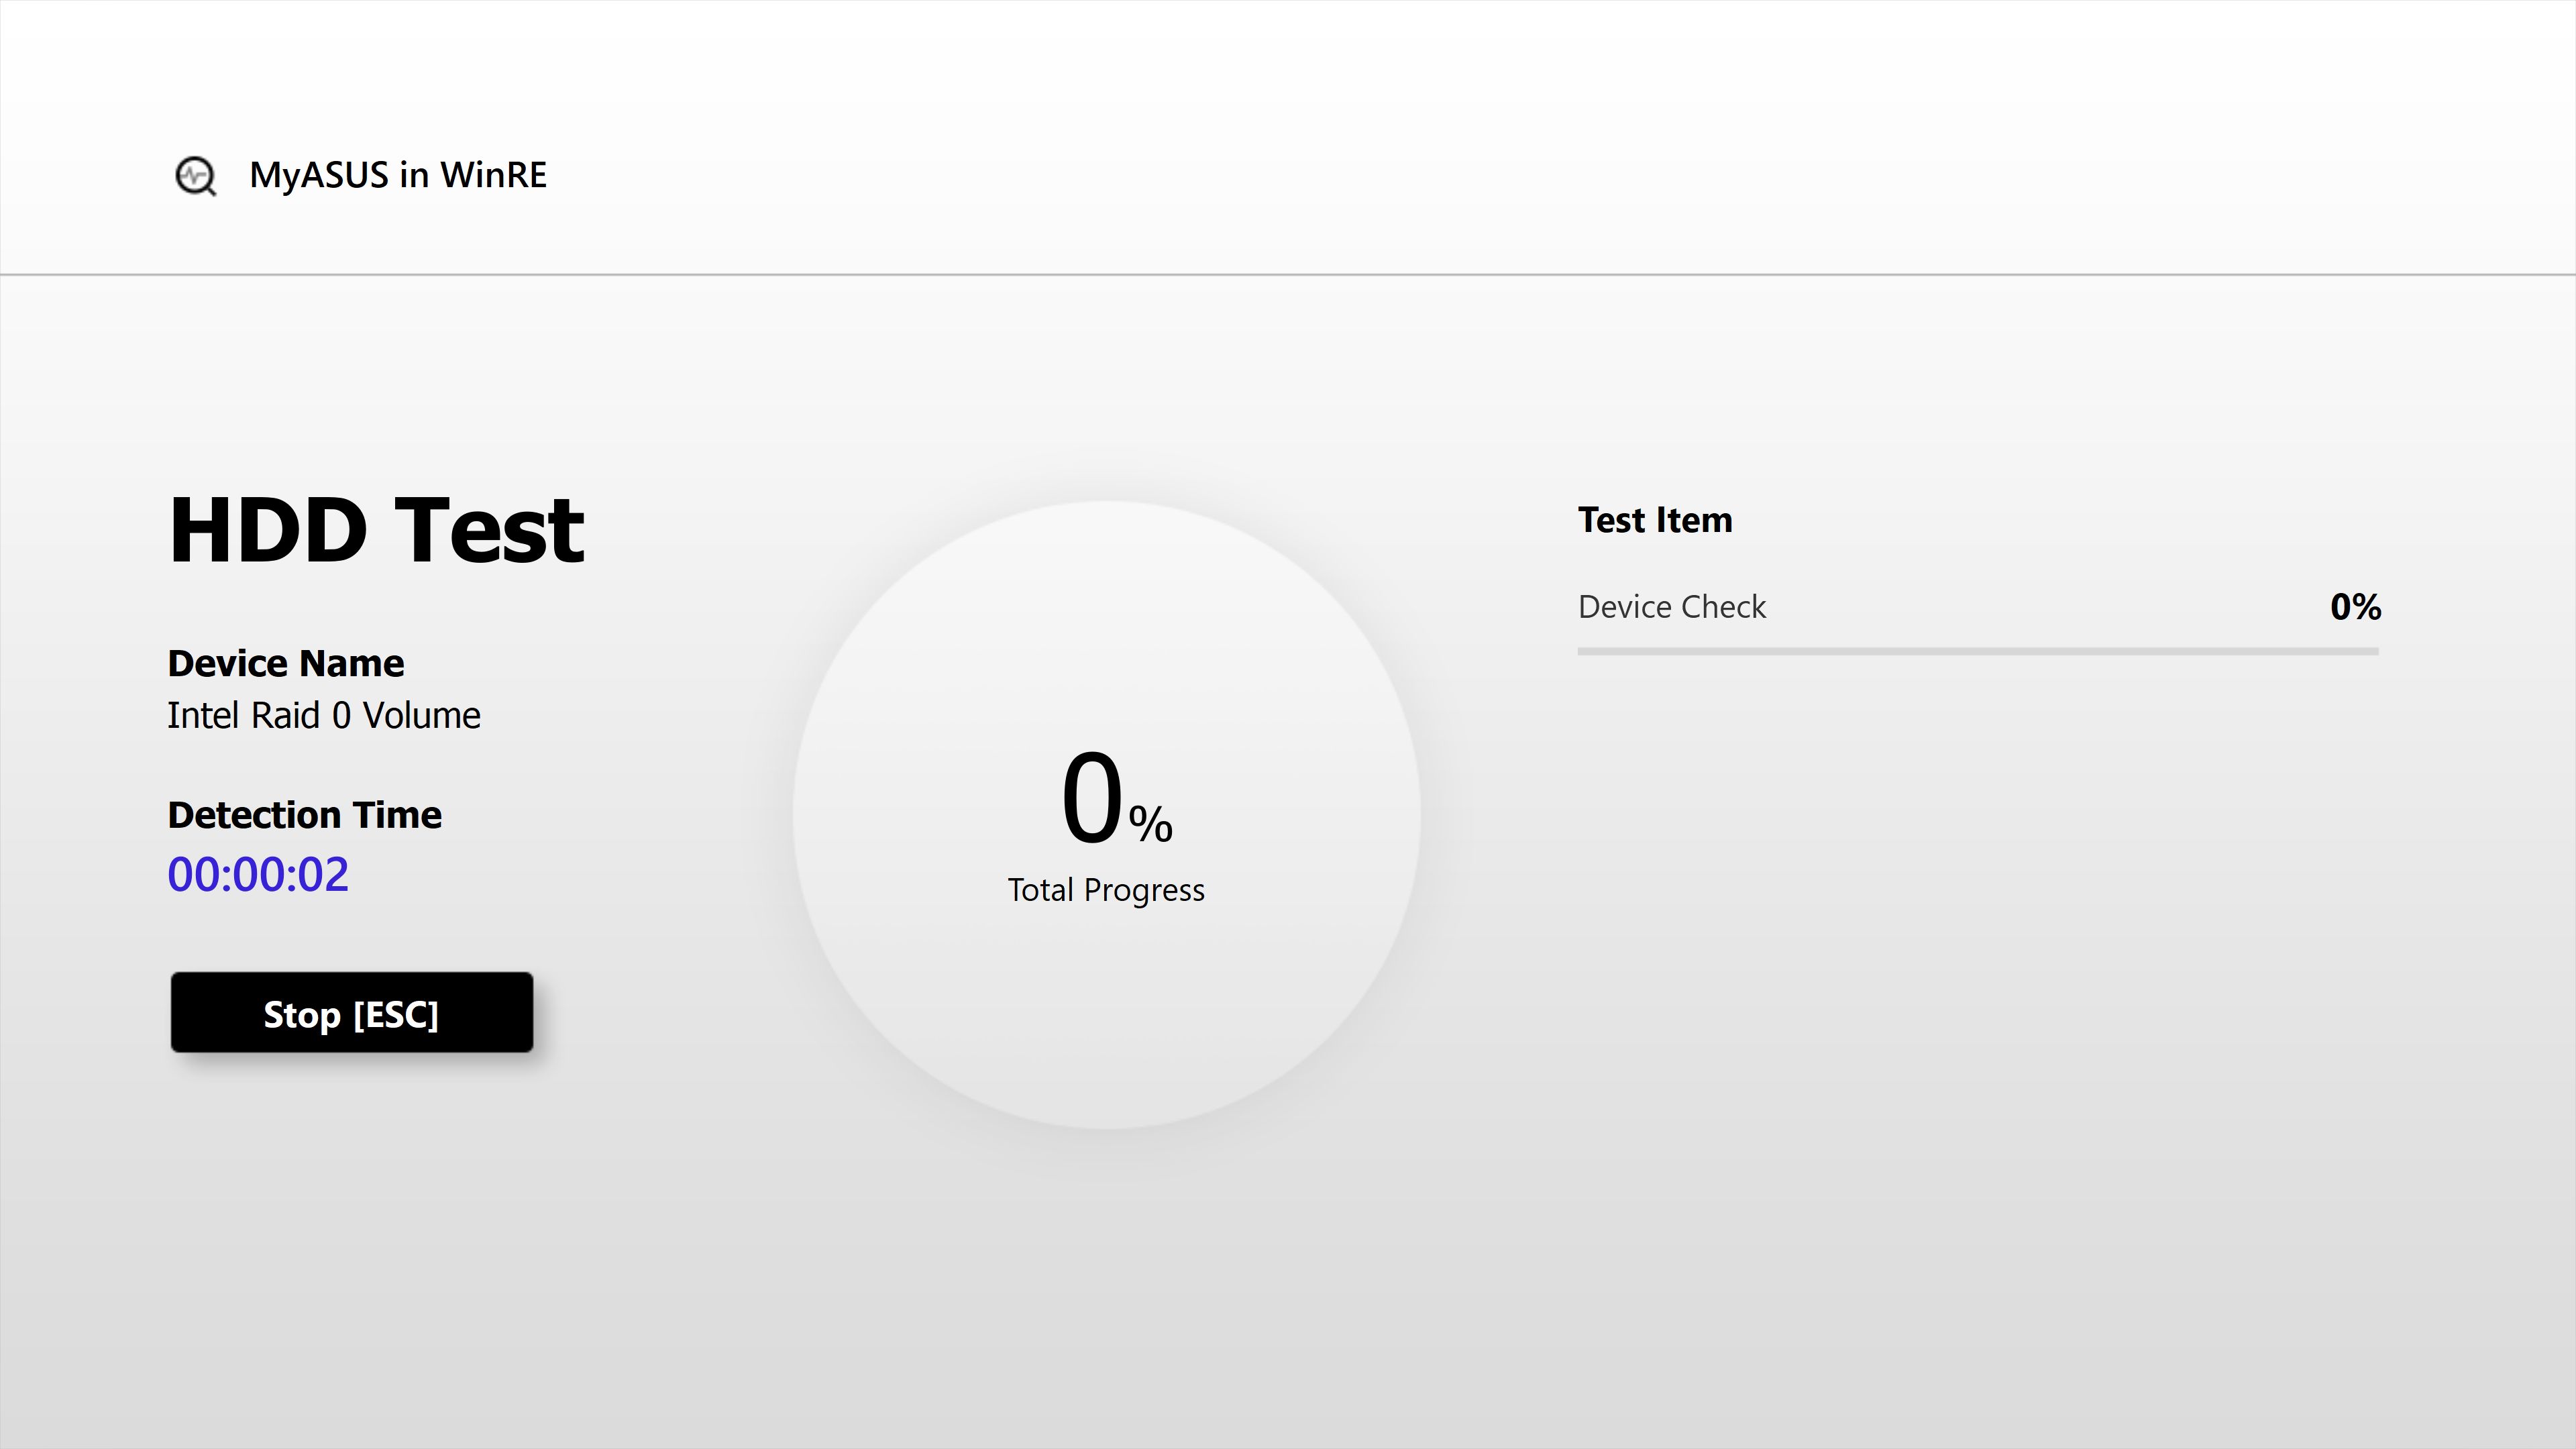
4.1-4 Testing
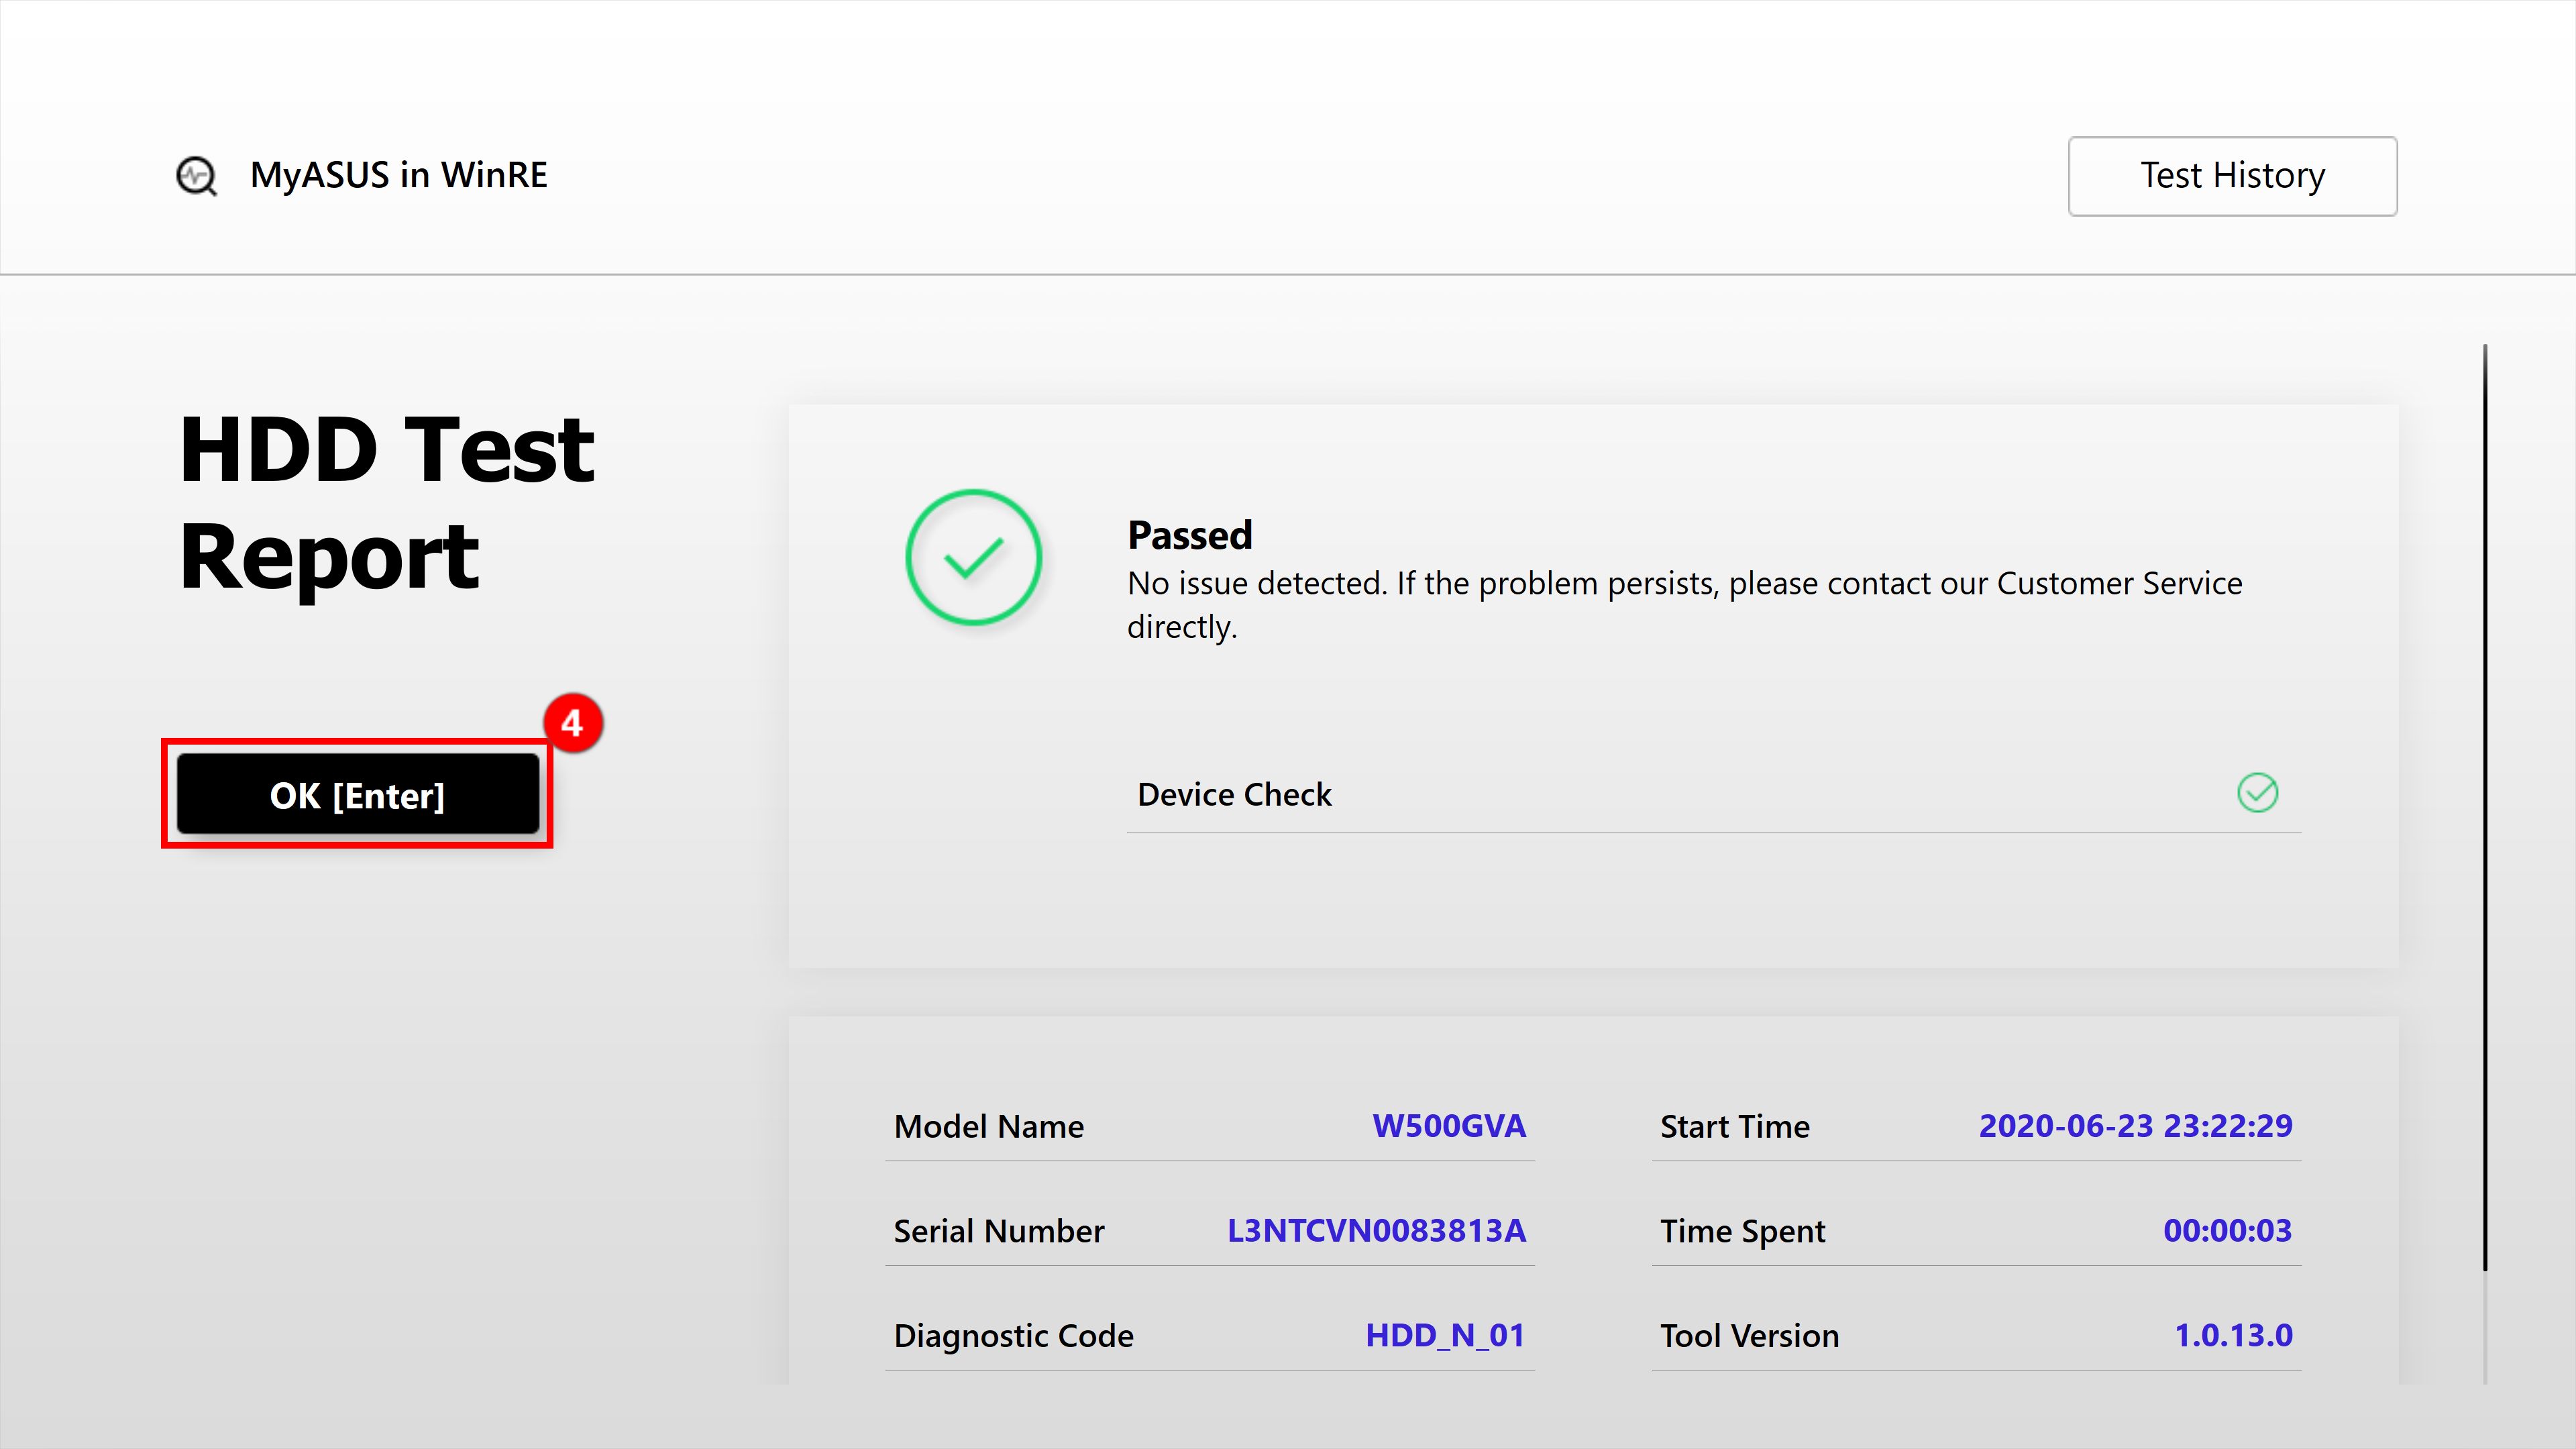
4.1-5 Test passed, and click ④[OK] to return to main interface of Component Test .
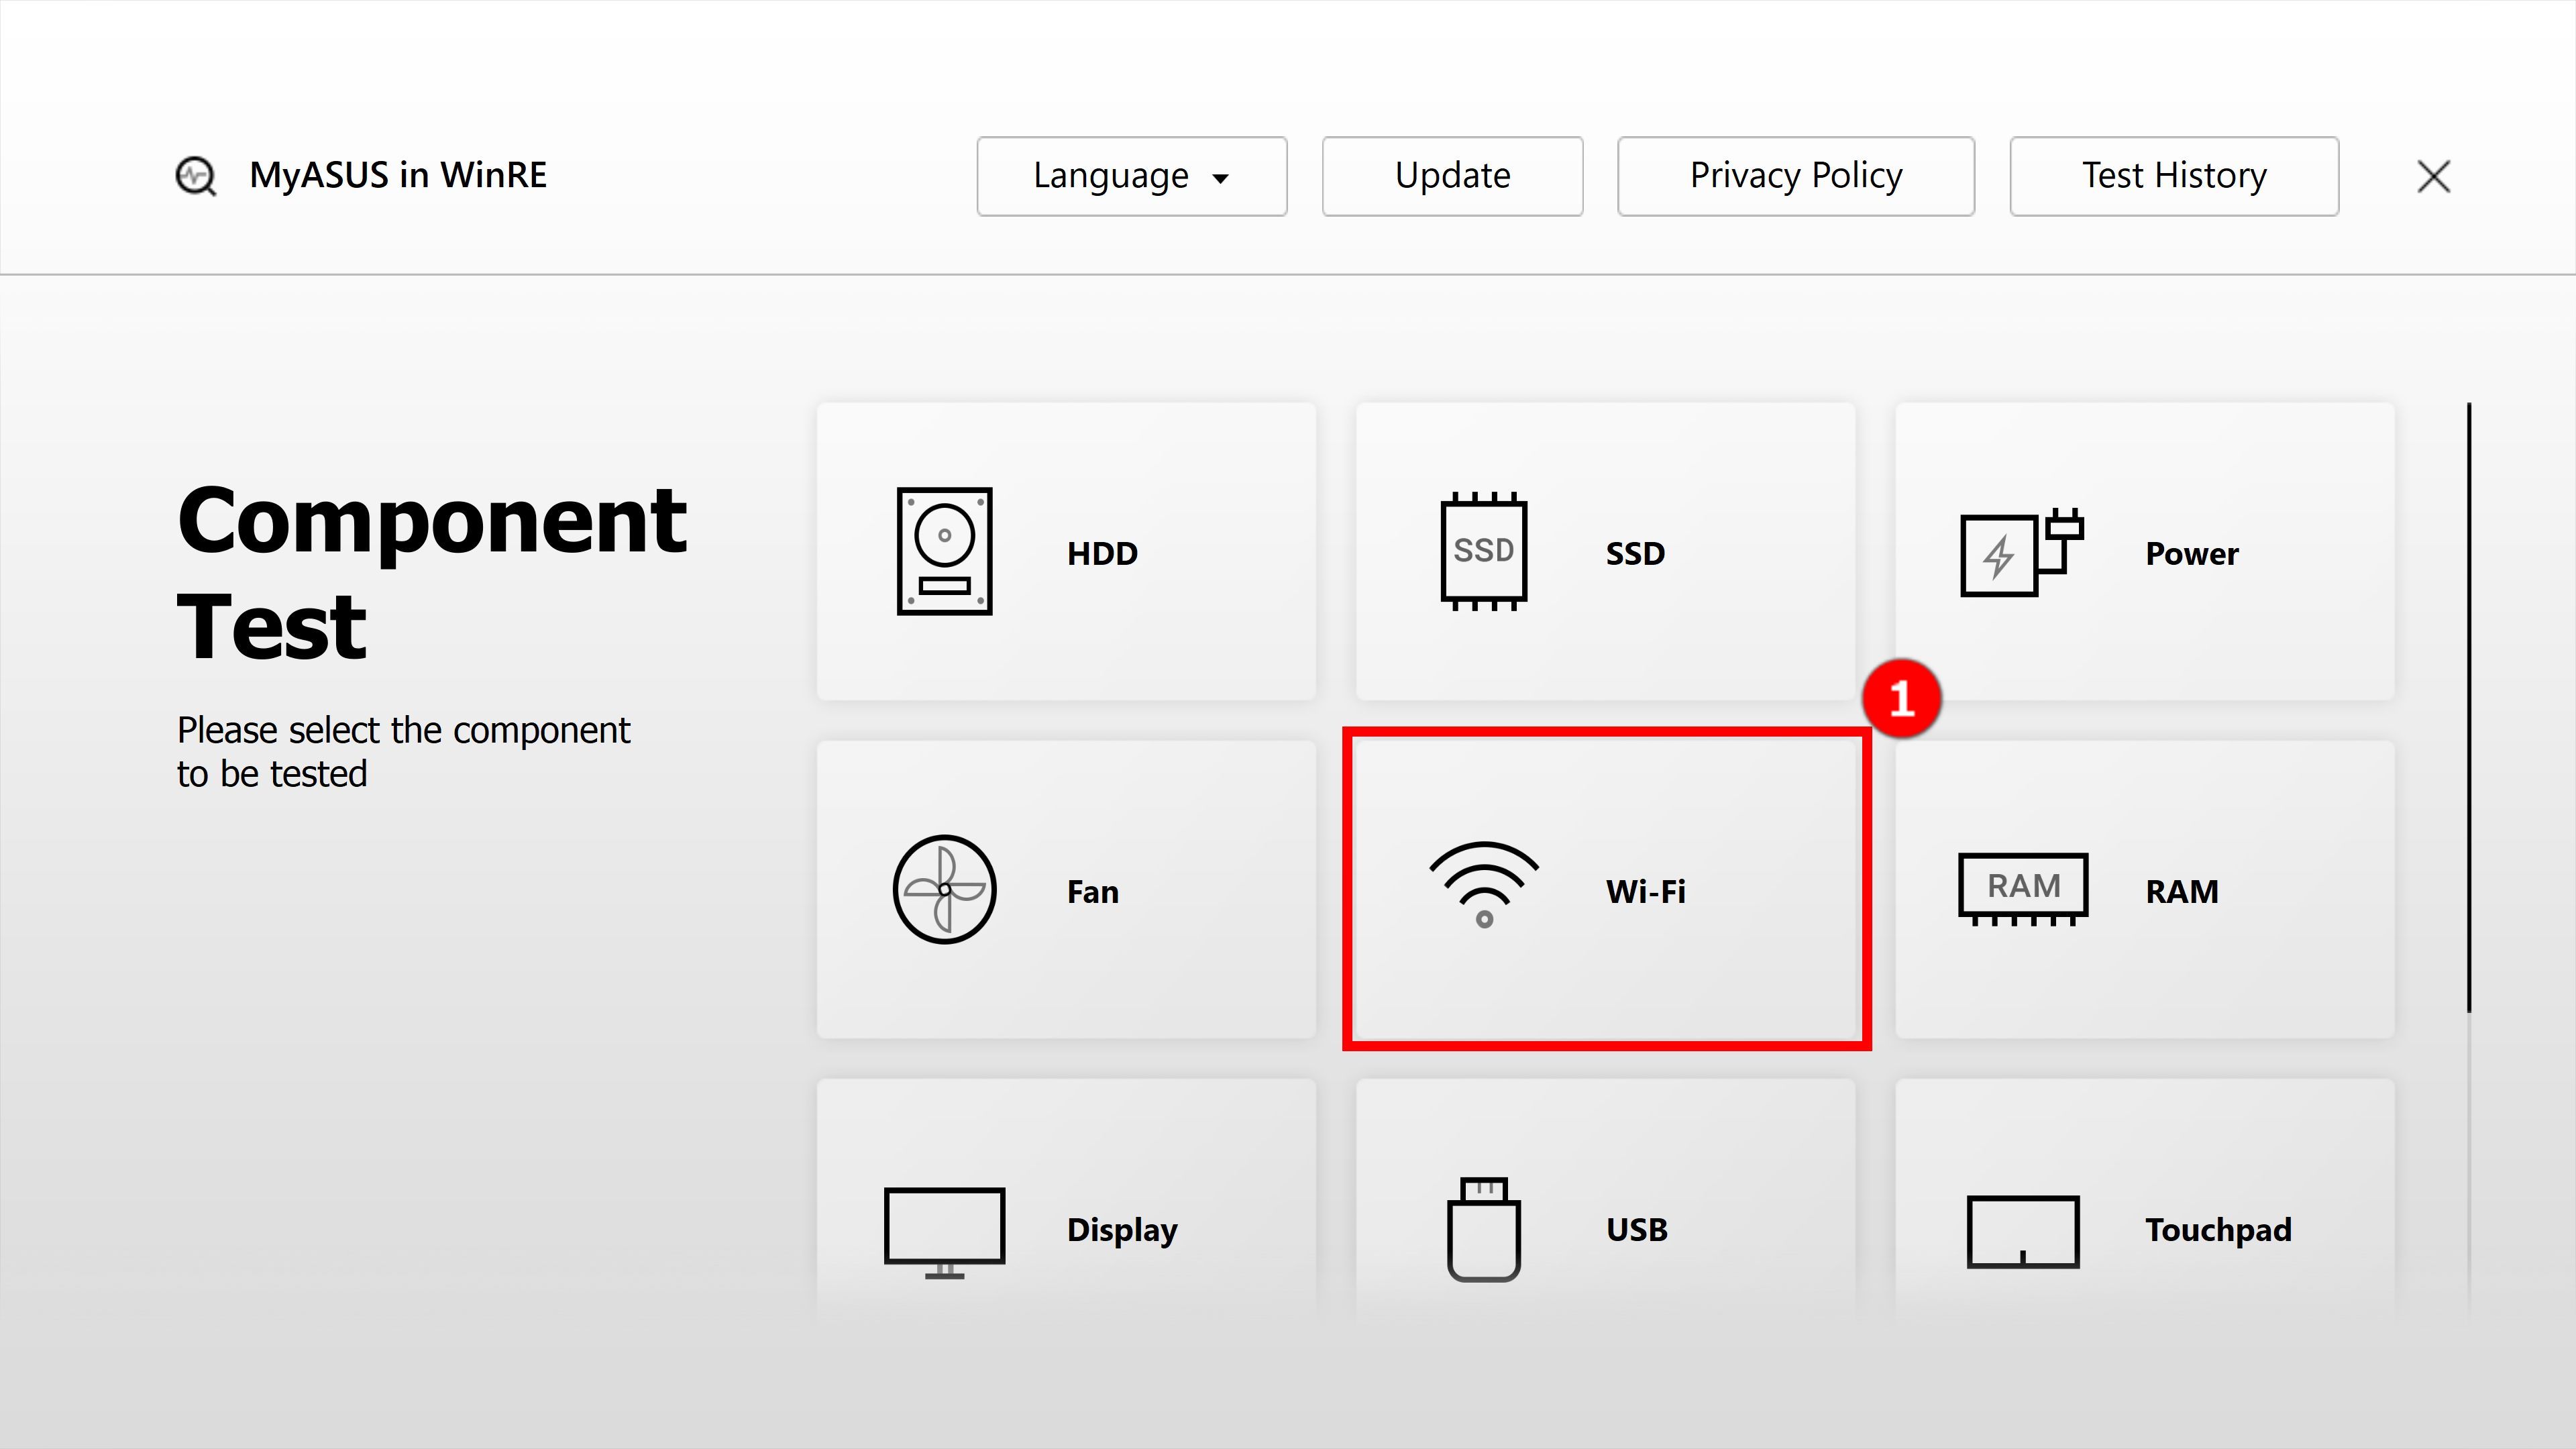
Click ①[Wi-Fi] item on the main interface. During the test, a window will pop up which requires you to connect to a wireless network. Find your ②[Wireless Network], and click ③[OK].

4.2-2 Enter the ④[password], and click ⑤[Connect].

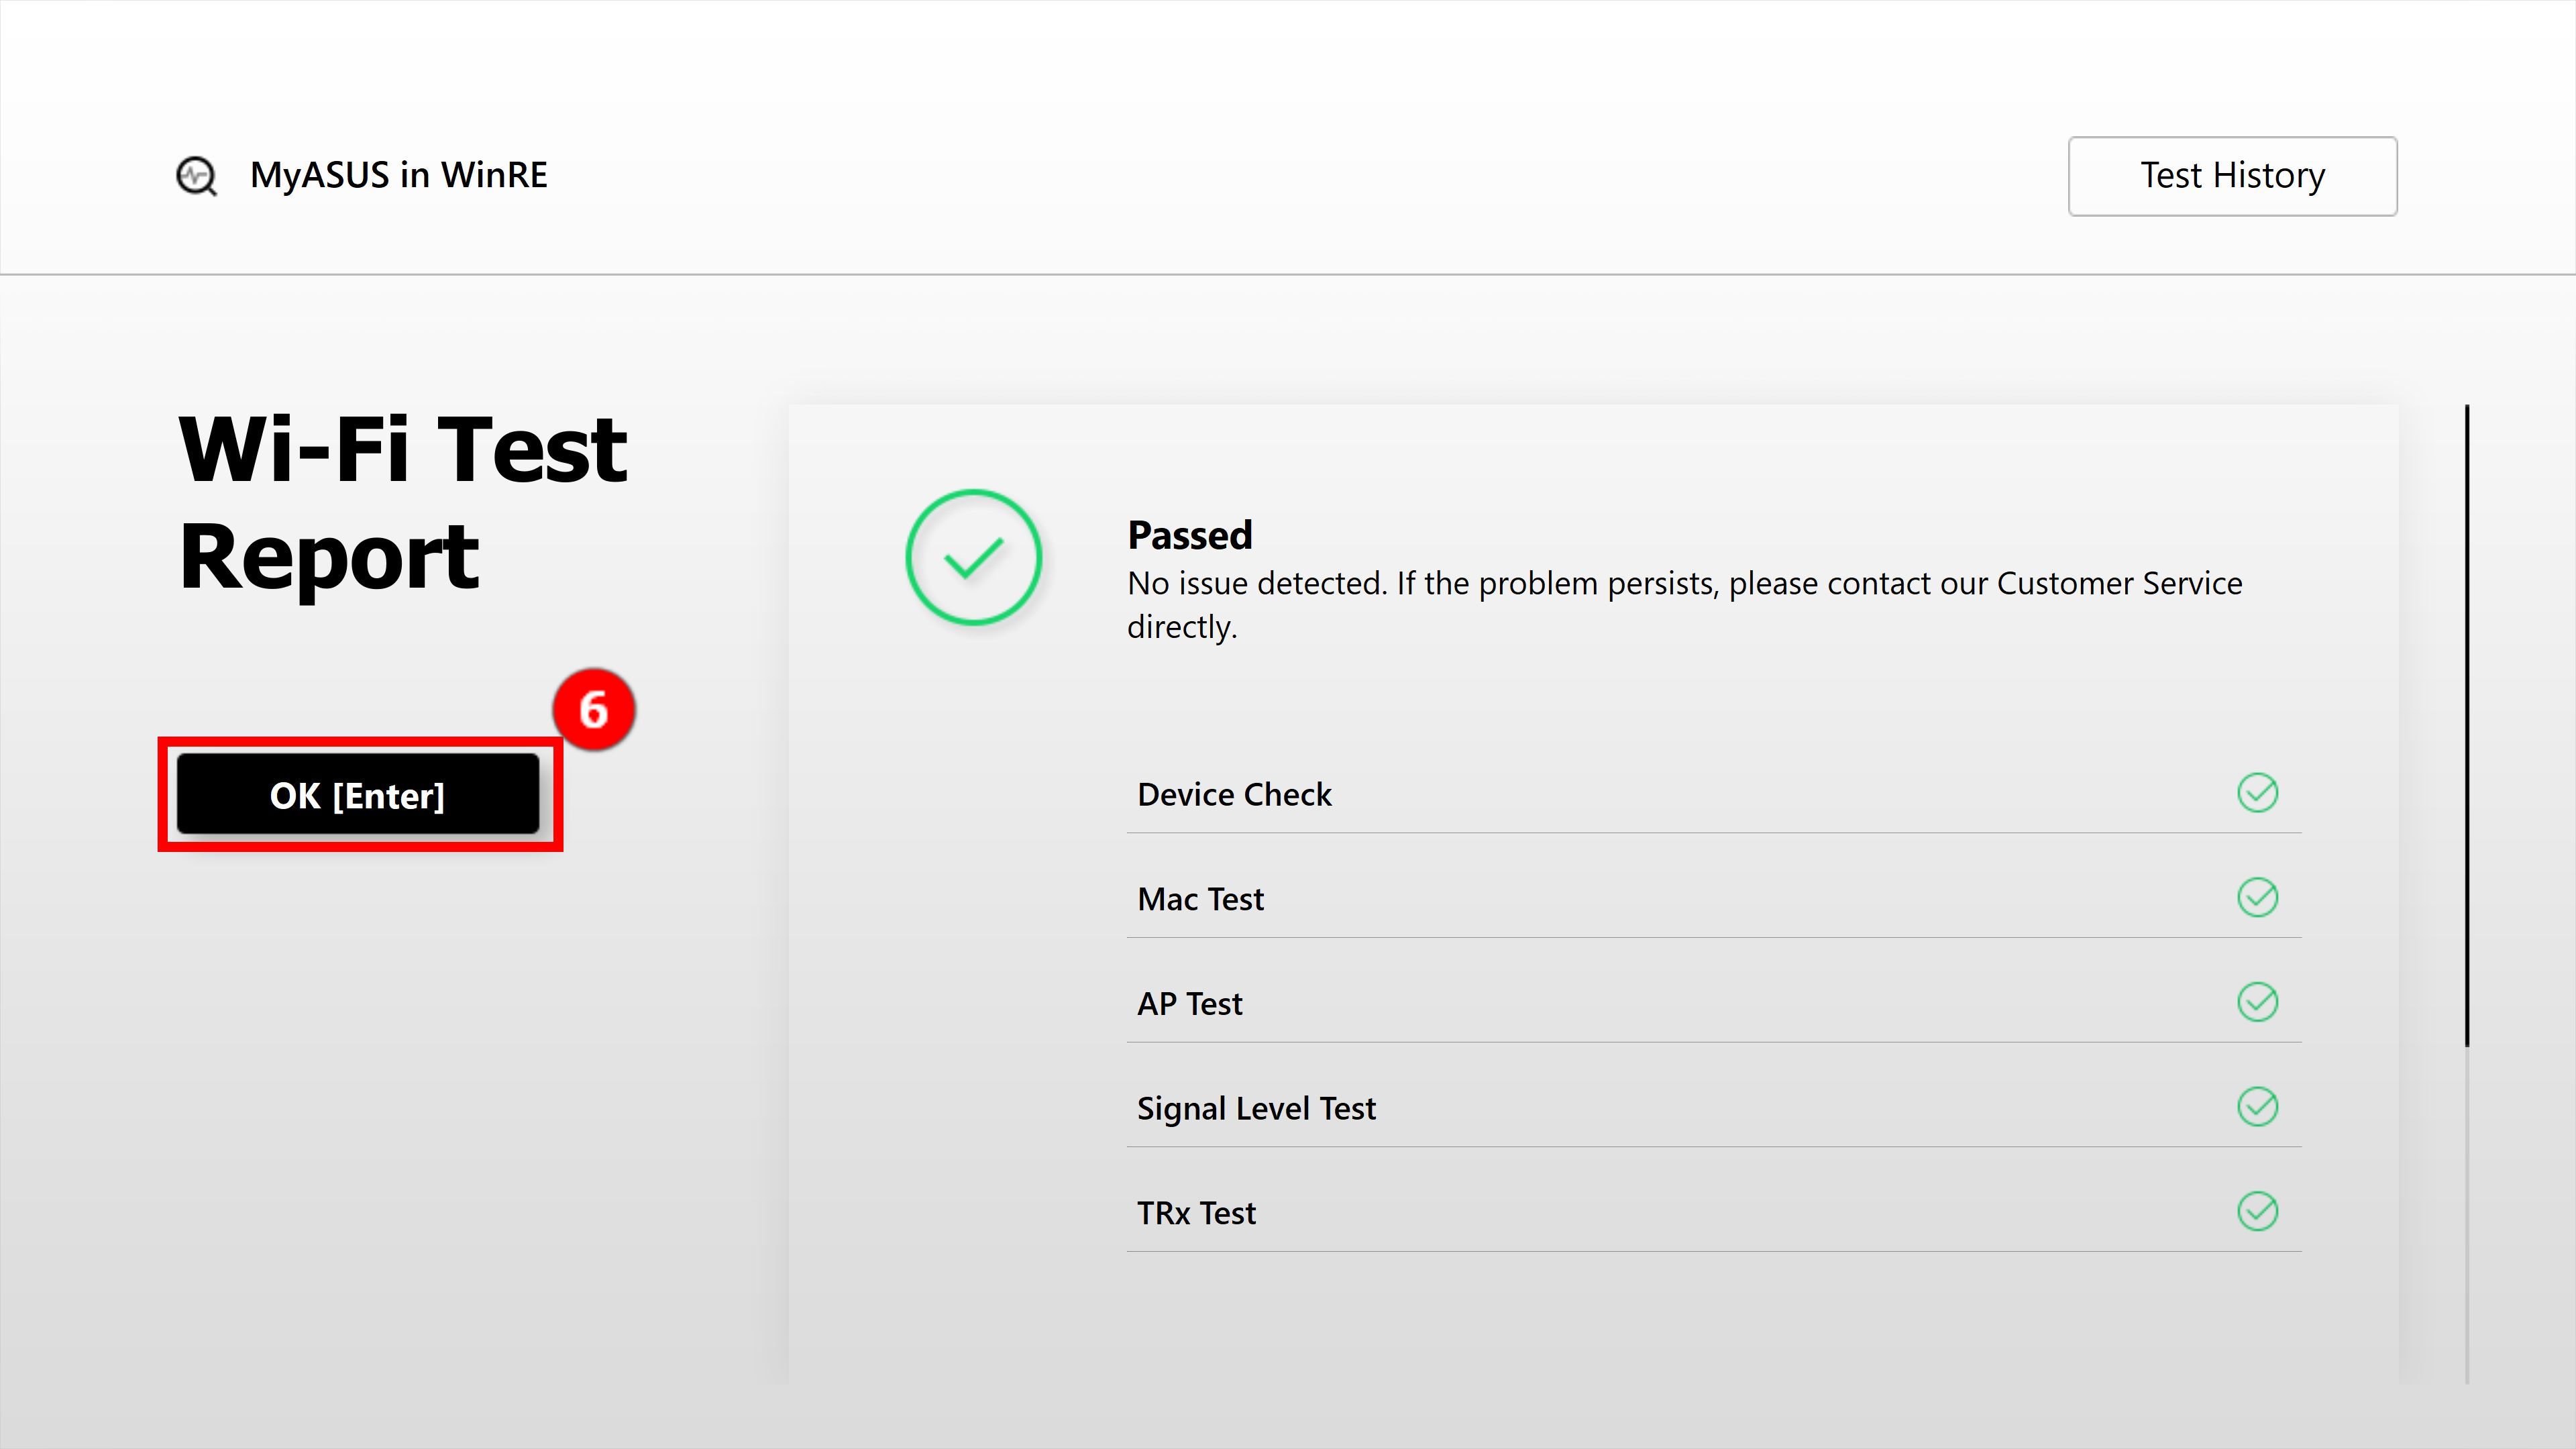
4.2-3 Wi-Fi test will continue to run. After the test is completed, click ⑥[OK] to return to the main interface.

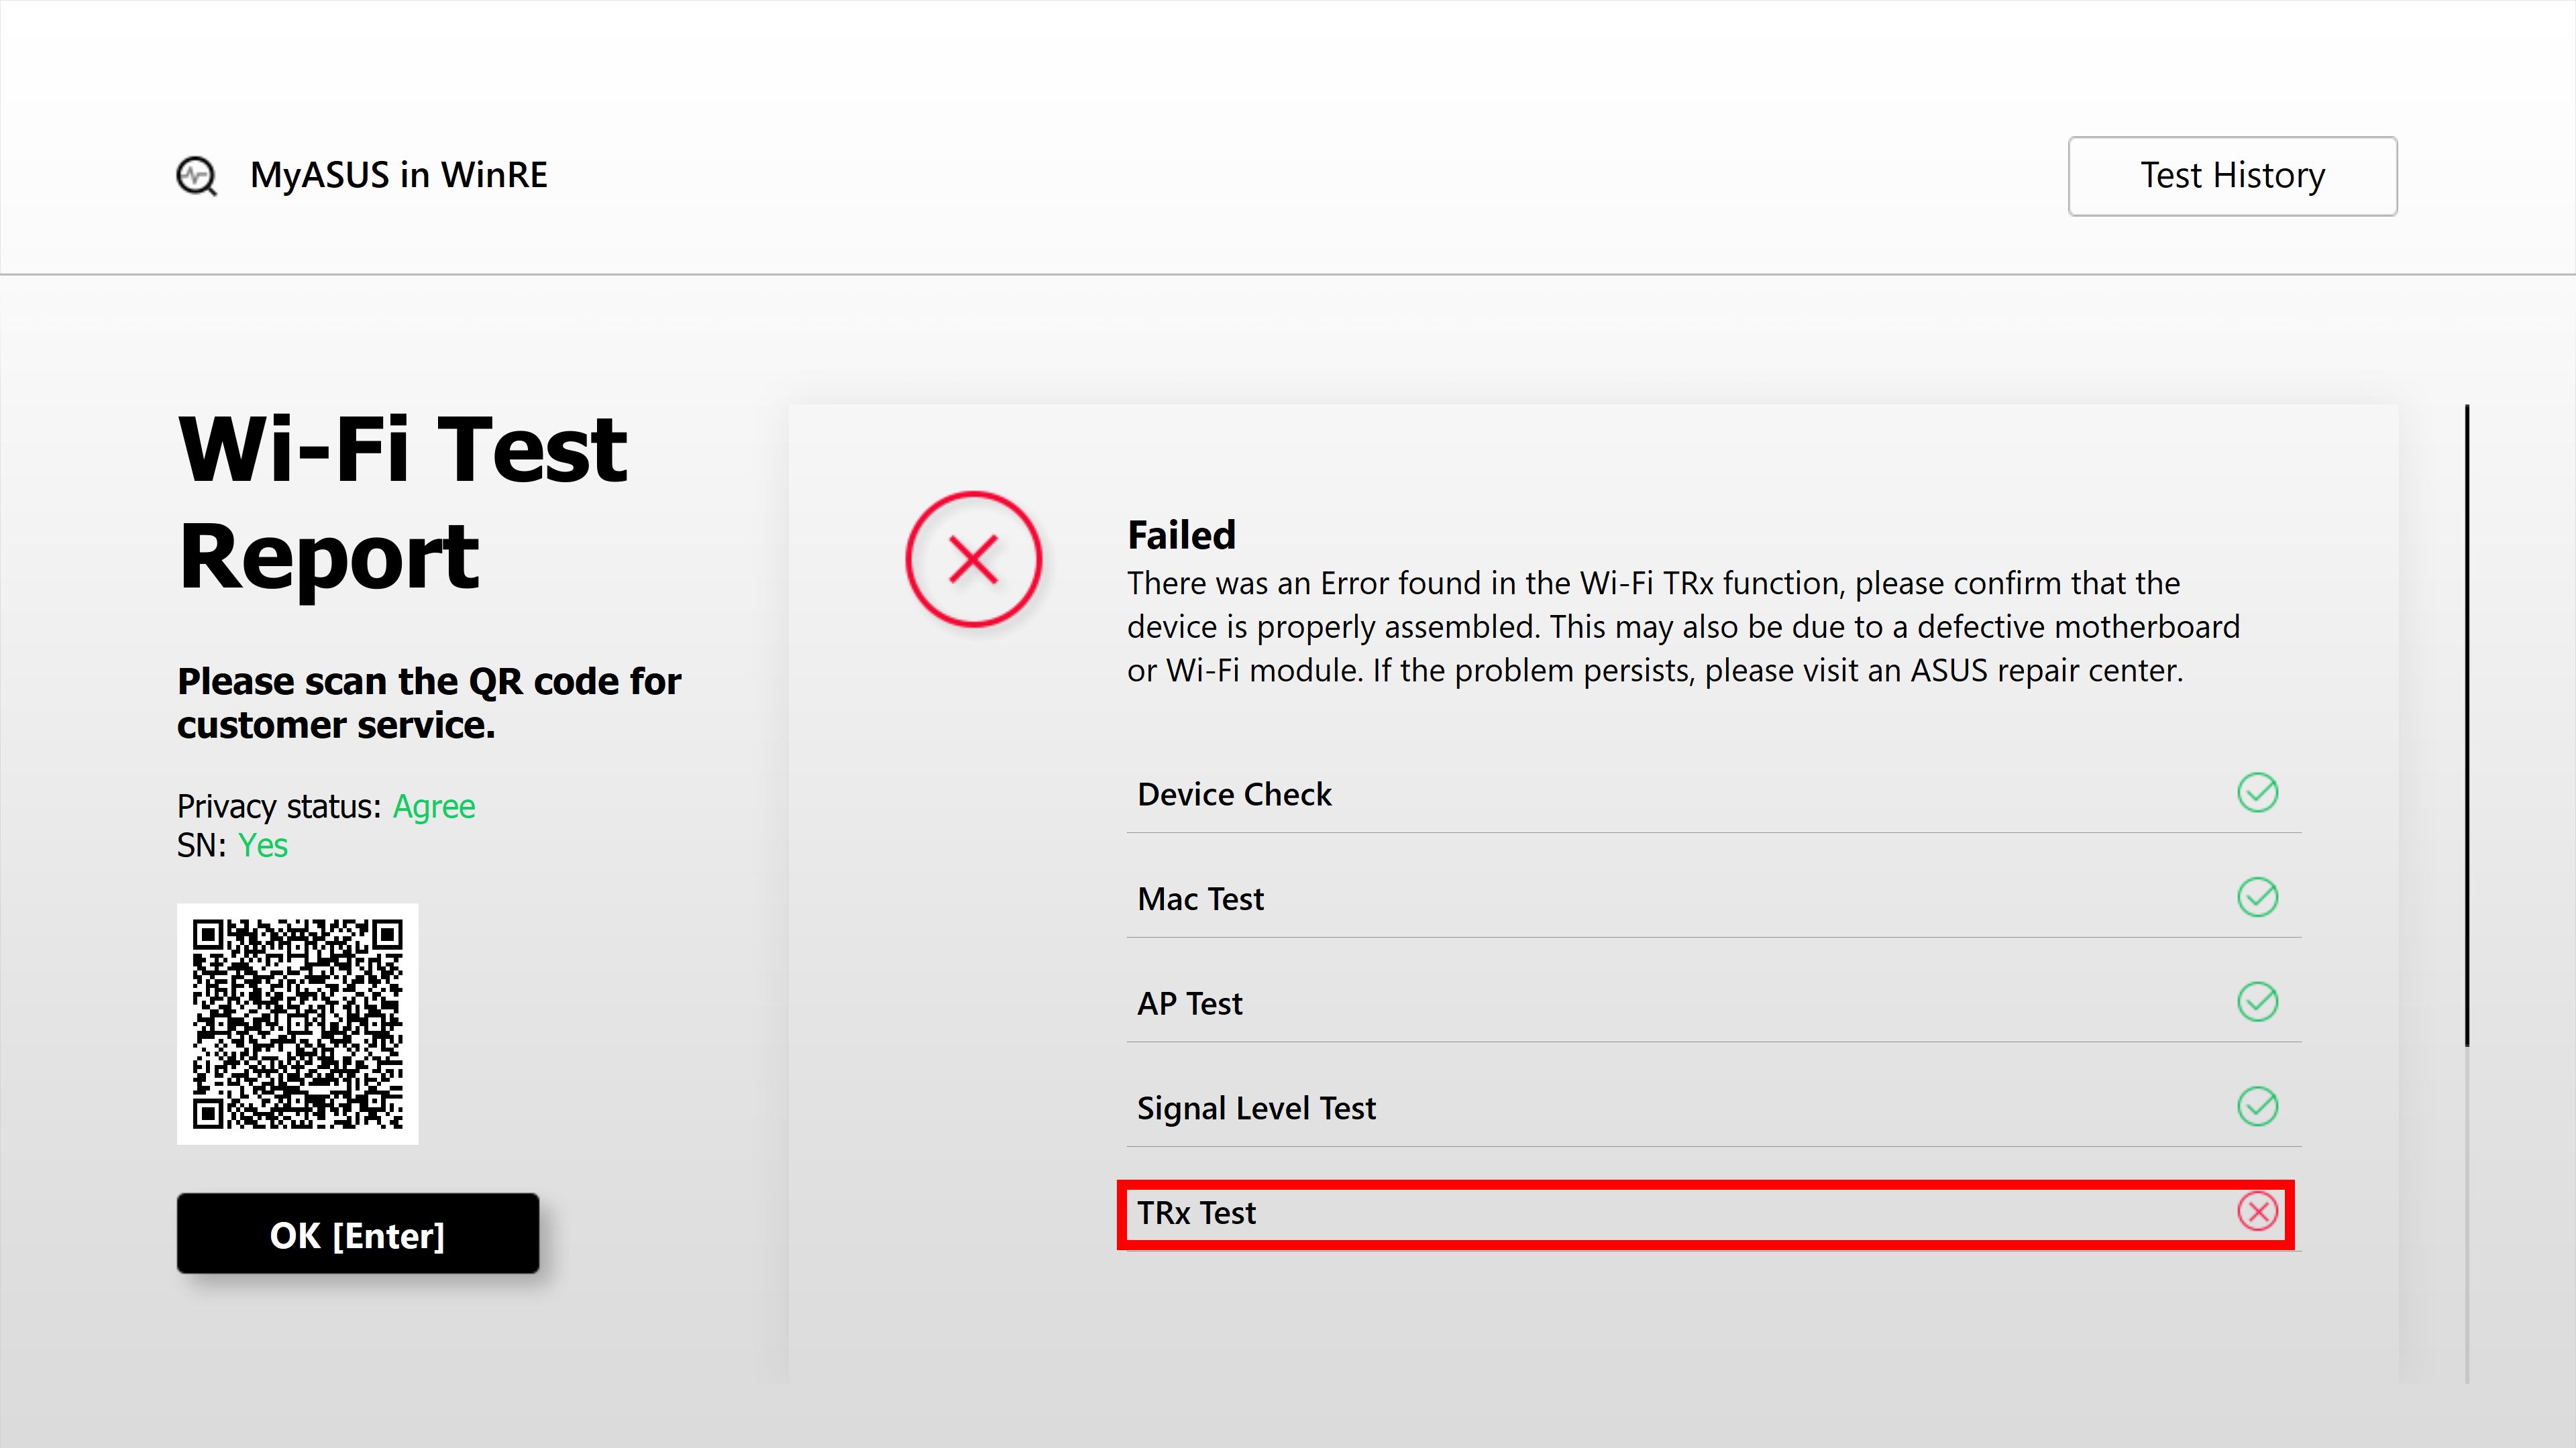
4.2-4 If TRx test "Failed" appears, there might be the problems with the connected wireless network. Please make sure that the wireless network is unblocked, and then test again. If you are connected to a normal wireless network but the test result still fails, follow the instructions in FAQ Q1 below.
Click ①[Display] on the main interface. The following screen will appear, and click ②[OK].

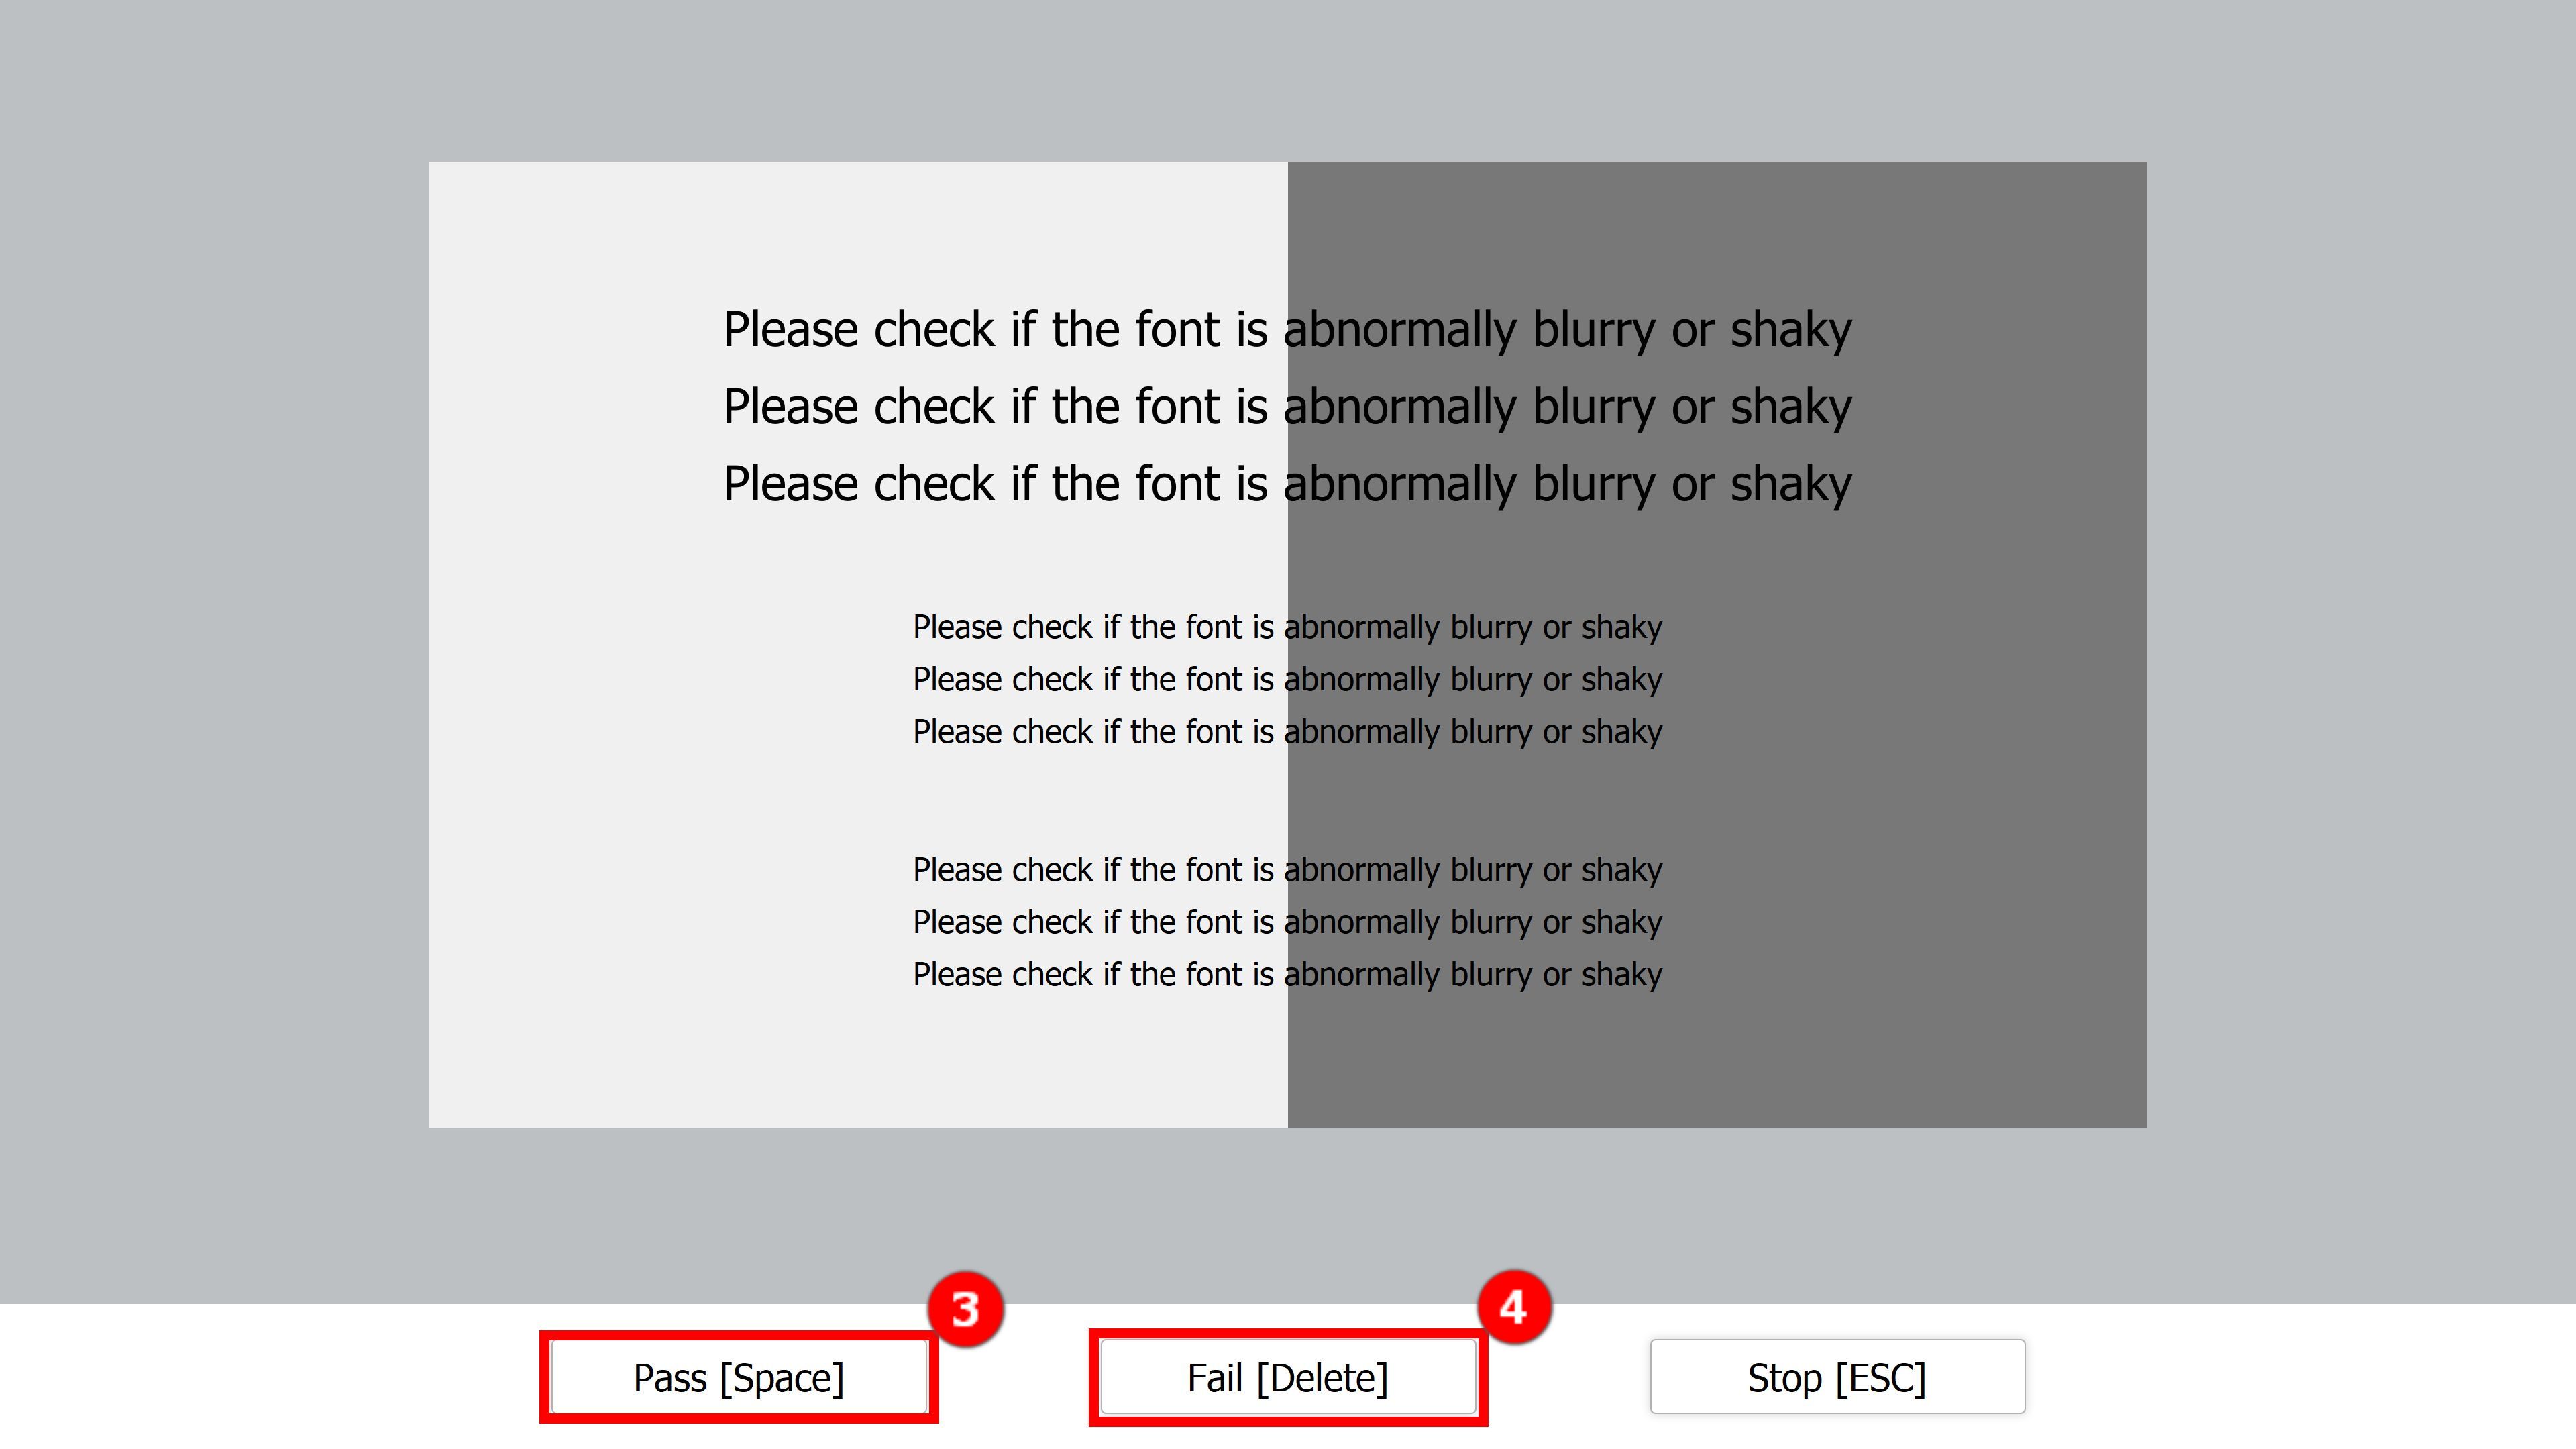
4.3-2 The user is required to judge whether the screen display is normal with the naked eyes. If it is normal, please click ③[Pass] to enter the next test. If there is a problem with the display, please click ④[Fail].
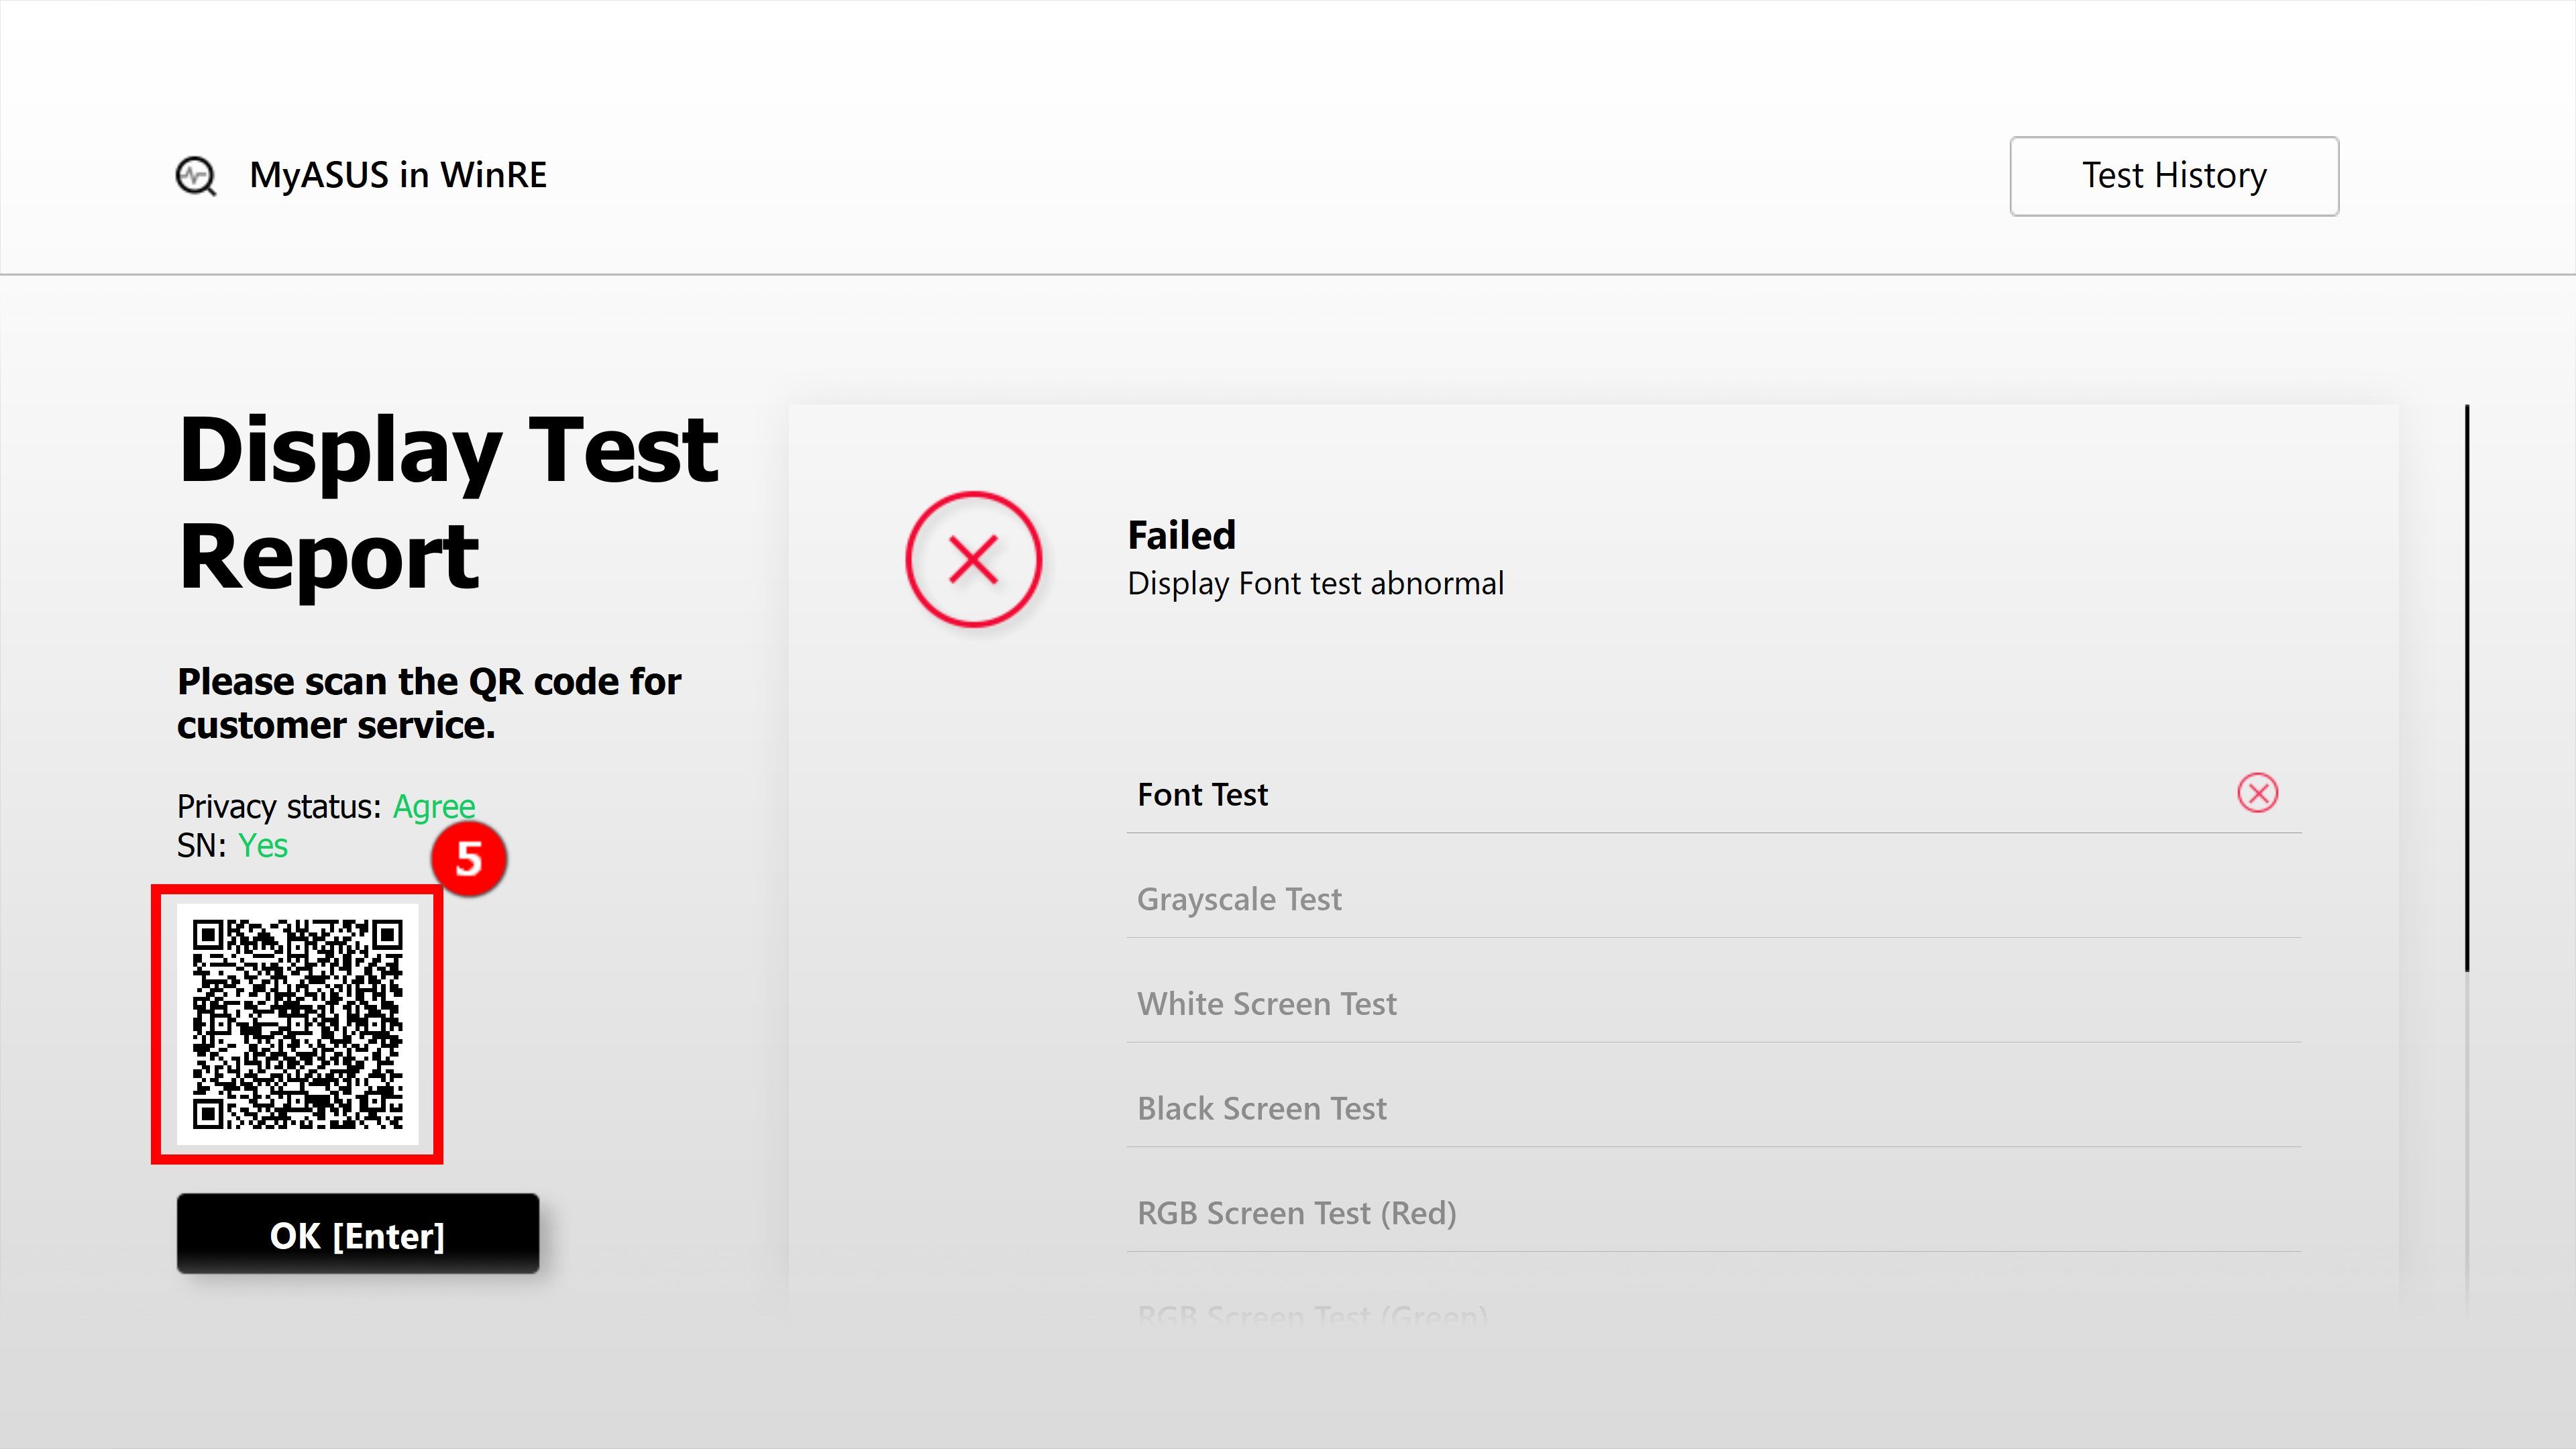
4.3-3 When the display test report shows as "Failed", please use your mobile phone to scan the ⑤[QR code], and then follow the instructions in FAQ Q1 below.
Q1: What should I do when "Failed" appears in the test report?
A1: First, please choose to agree in the "Privacy Policy" section 3 of this article. then use your mobile phone to scan the QR code (the QR code contains the machine code and the diagnostic code). The system will automatically generate a repair report for you. You only need to fill in your personal information, the computer status and pickup information, and ASUS will pick up and repair. (Note: This depends on the service policy of different regions)
Q2: What is the meaning of the three test results?
A2:
Pass: No problem is detected. This means that the test has completed and the result meets the standard. Please feel free to use the device.
Failed: Problem detected. It indicates that the test has completed with the problem detected. Please scan the QR code with your mobile phone and send it for repair as described in section 5 of this article
Warning: If the component cannot be detected or you abruptly terminate the test program during the detection process, a warning message will show up. Please check the components again or send them for repair.
Q3: While laptop boots up, why I'm unable to enter the Windows RE (Windows Recovery Environment)?
A3: Due to the products come with different operation system and version, the way to enter Windows RE page may be clicking F9 or F12 key until the screen shows "Please wait".
Q4: Why I can not see [MyASUS in WinRE] option after getting into [Troubleshoot] under Windows RE?
A4: Due to this feature is applicable to new gaming models released after January of 2020, with Windows 10 preinstalled. Products includes notebook PC and desktop PC in Gaming series (including ROG and TUF). While in [Troubleshoot] page, if [MyASUS in WinRE] is unavailable, it means your laptop doesn't equip with ASUS Recovery feature.