Related Topics
Troubleshooting - Device’s Battery not supplying power/charging, Battery not charging to full, Unable to power on via battery
Applicable Products: Notebook, Gaming Handheld
If you are facing issues with the battery not supplying power, not charging, or not charging to full capacity, please follow the troubleshooting steps below:
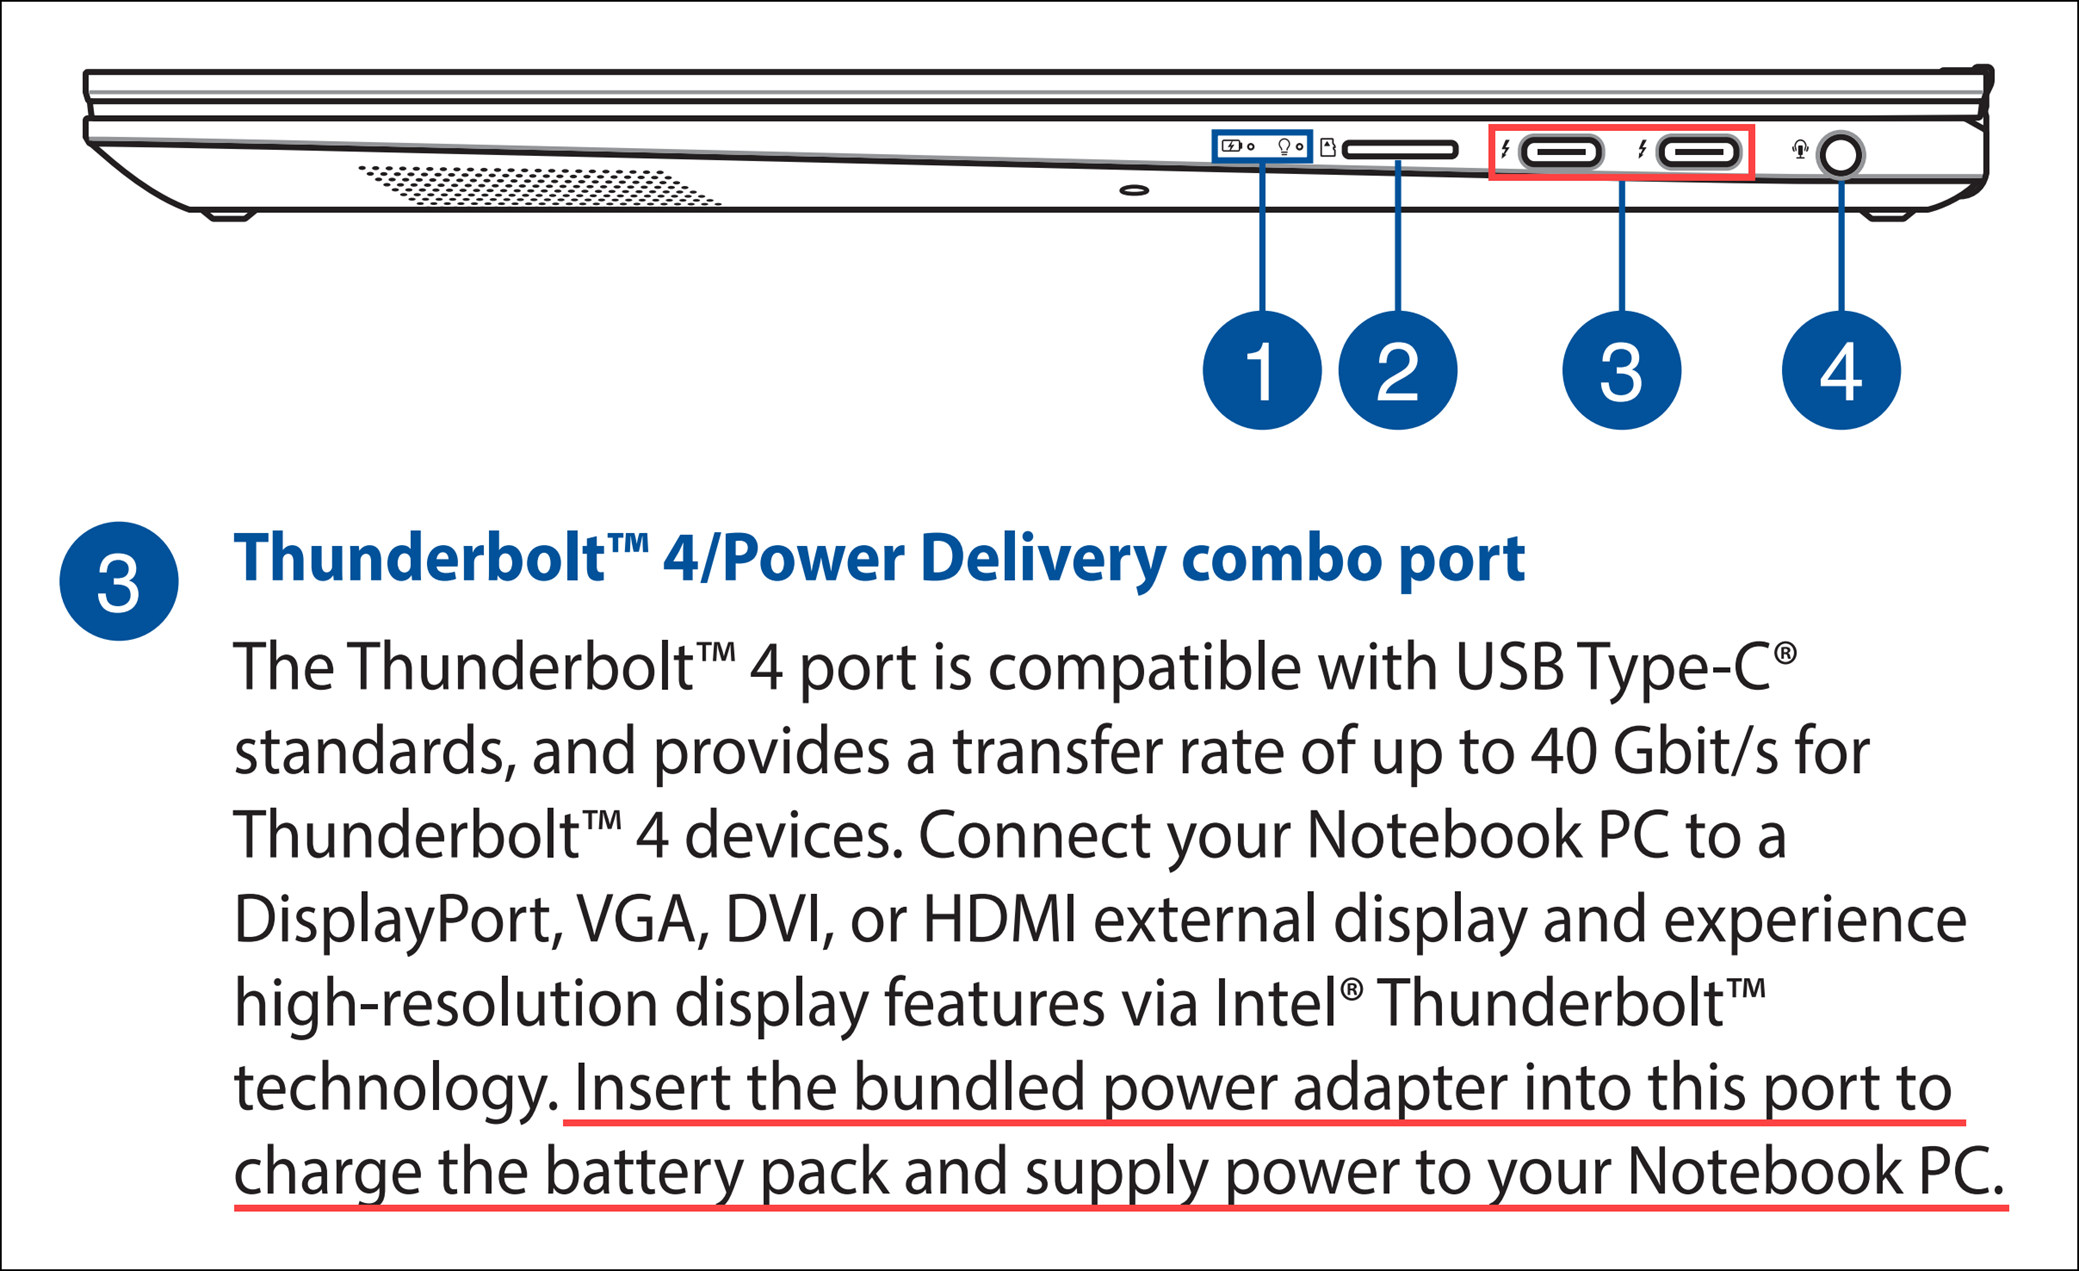
Note: If you are using USB Type-C charging, please ensure that the USB Type-C port on your device supports battery charging. If you are unsure of the USB Type-C functionality, refer to the user manual for your device. Refer to this article to download the user manual specific to your computer model: How to search for and download user manuals.
To provide you more detailed instruction, you can also click ASUS YouTube video link below to know more about How to Solve Battery Charging Problems on Laptops.
https://www.youtube.com/watch?v=vvd8fhQ51VU
Battery not supplying power/charging
Check the connection and appearance of the adapter and power cord (cable)
- Use the original ASUS adapter and power cord (cable) to avoid compatibility issues. If you have different ASUS products, do not mix adapters and power cords (cables) as power output specifications may differ.
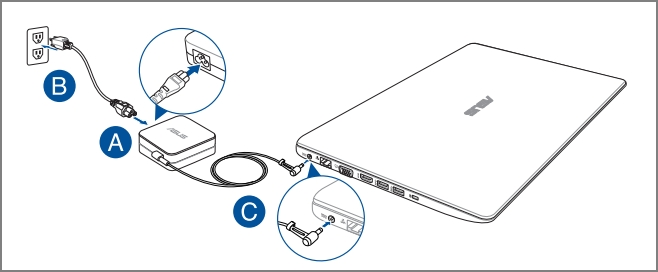
- Check the adapter jack for any looseness at the power cord plug (A), outlet side plug (B), or device side (C). Consider trying different outlets. (The following illustrations use a laptop as an example. For detailed information, please refer to the User Manual for your specific device model.)
- Inspect the adapter and cables for any signs of damage. If damaged, it is recommended to visit an ASUS service center for a replacement.
- After confirming the above, try reconnecting the power cable/plug/device ends.
- If your laptop has a removable battery, try reassembling it. Skip this step if the battery is non-removable.

- If the device/battery has not been charged for a while, connect it to power and leave it charging overnight. This may help revive the battery.
- If the issue persists after the above checks, proceed to the next troubleshooting step.
Perform CMOS clear (EC reset)
Try performing an EC (Embedded Controller) reset, RTC (Real-Time Clock) reset, or a hard reset to restore hardware to default settings and resolve battery charging issues.
Refer to this article for detailed steps: How to Reset the Embedded Controller (EC), Real-Time Clock (RTC), and Perform a Hard Reset.
If the issue persists after performing the CMOS clear (EC reset), proceed to the next troubleshooting step.
Update BIOS, Windows packages, and drivers
Regularly updating BIOS, Windows, and drivers can enhance system stability and performance. Ensure that your device is using the latest versions. Learn more about updating BIOS:
How to update the BIOS version in Windows system
How to Update BIOS with ASUS Firmware Update/EZ Flash
Learn more about updating Windows and drivers:
How to update drivers via System Update in MyASUS
If the problem persists after you have updated BIOS/Windows packages/drivers to the date, proceed to the next troubleshooting step.
Perform BIOS reset
- Access the BIOS setup screen on the device.
When the device is not powered on, press and hold the [F2] key on the keyboard, then press the power button to turn on the device. Keep holding the [F2] key until the BIOS setup screen appears, then release the [F2] key. Learn more about How to enter the BIOS setup screen.
Note: Gaming handhelds need to press and hold the volume (-) key, then press the power button to turn on the device. - Once in the BIOS setup screen, please refer to the following articles to understand how to restore BIOS settings: How to restore BIOS settings.
- When reset the BIOS settings is completed, the computer will restart and enter Windows. Please check the problem again. If the problem persists, please continue the next troubleshooting step.
Run battery issue diagnosis via MyASUS
- Type and search [MyASUS] in the Windows search bar①, then click [Open]②. (The left-side search illustration below is in Windows 11, and the right-side is Windows 10.)
Note: If you cannot find MyASUS, it may not be installed on your device. Refer to How to install MyASUS.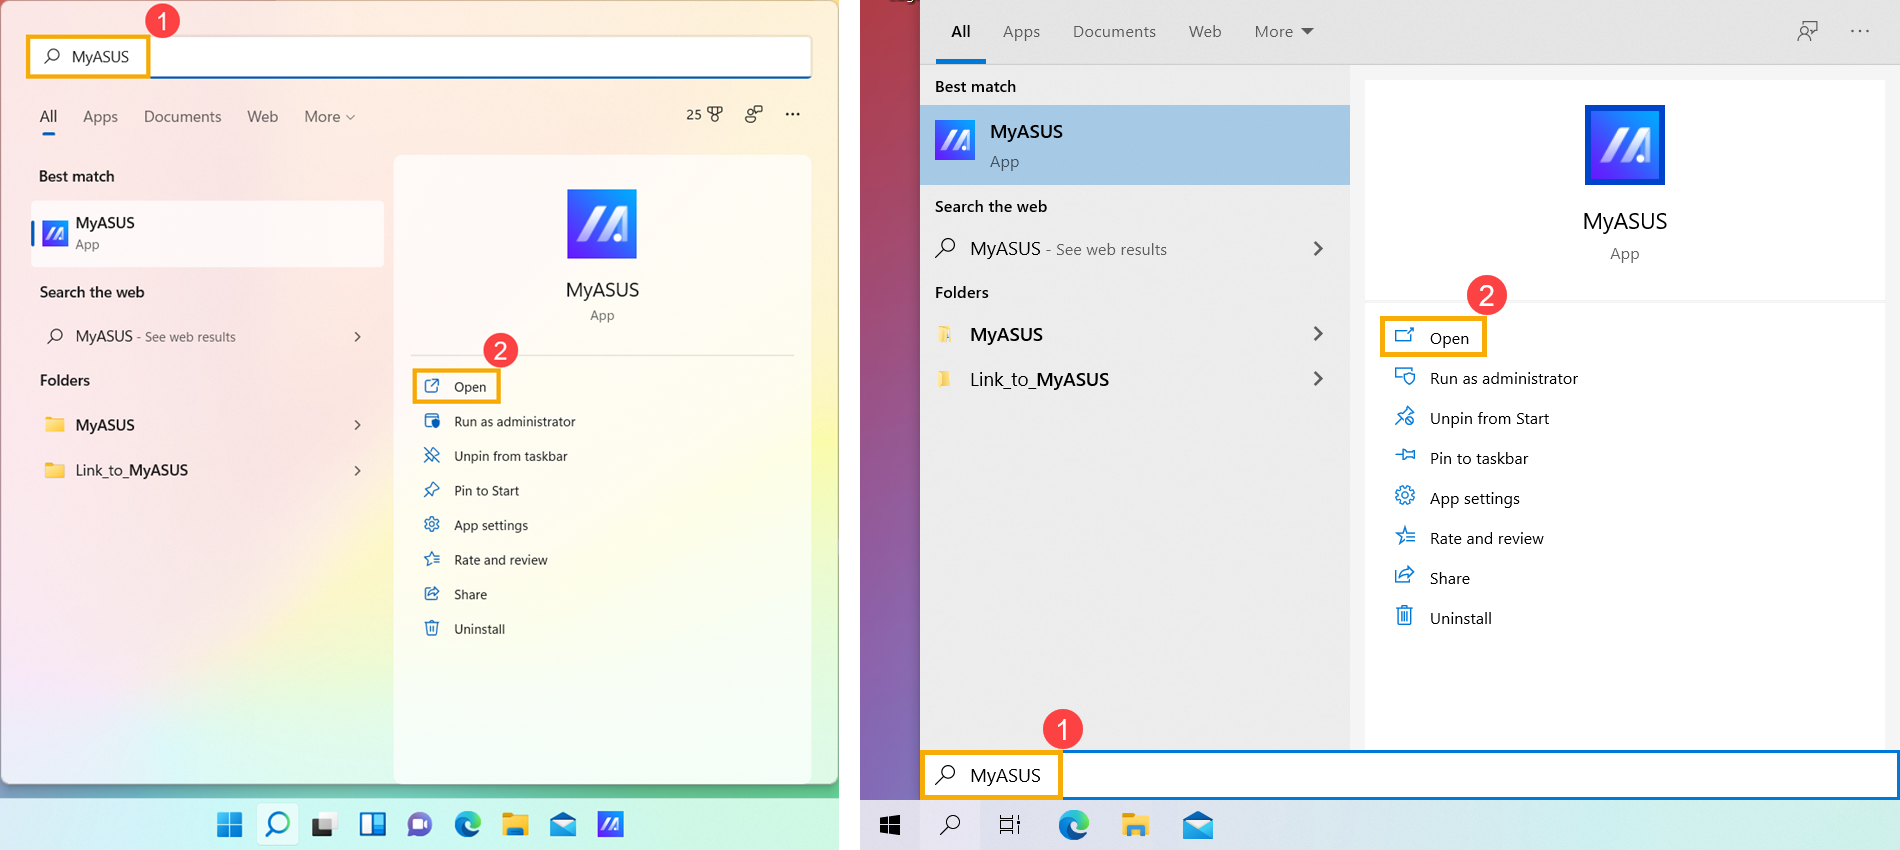
- In MyASUS app, click[System Diagnosis]③.
Note: If your device does not display the system diagnosis page in MyASUS software, it means your device does not support this feature. Continue to the next section for further troubleshooting. Here you can learn more about Why can I only see the partial features in the MyASUS app.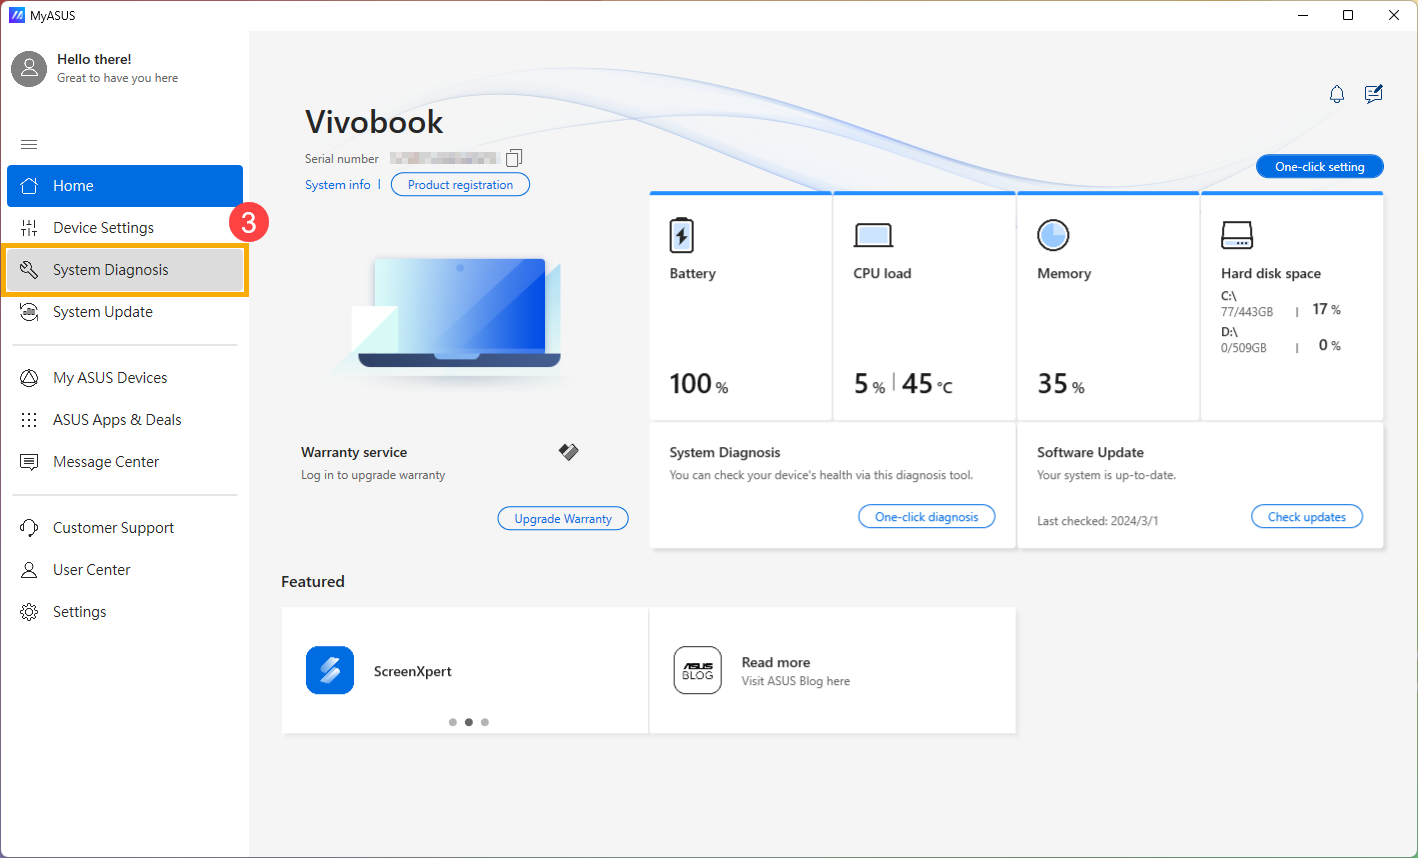
- In [Diagnostic Tool]④, click [Battery problems] item⑤. Here you can learn more about MyASUS System Diagnosis - Introduction.
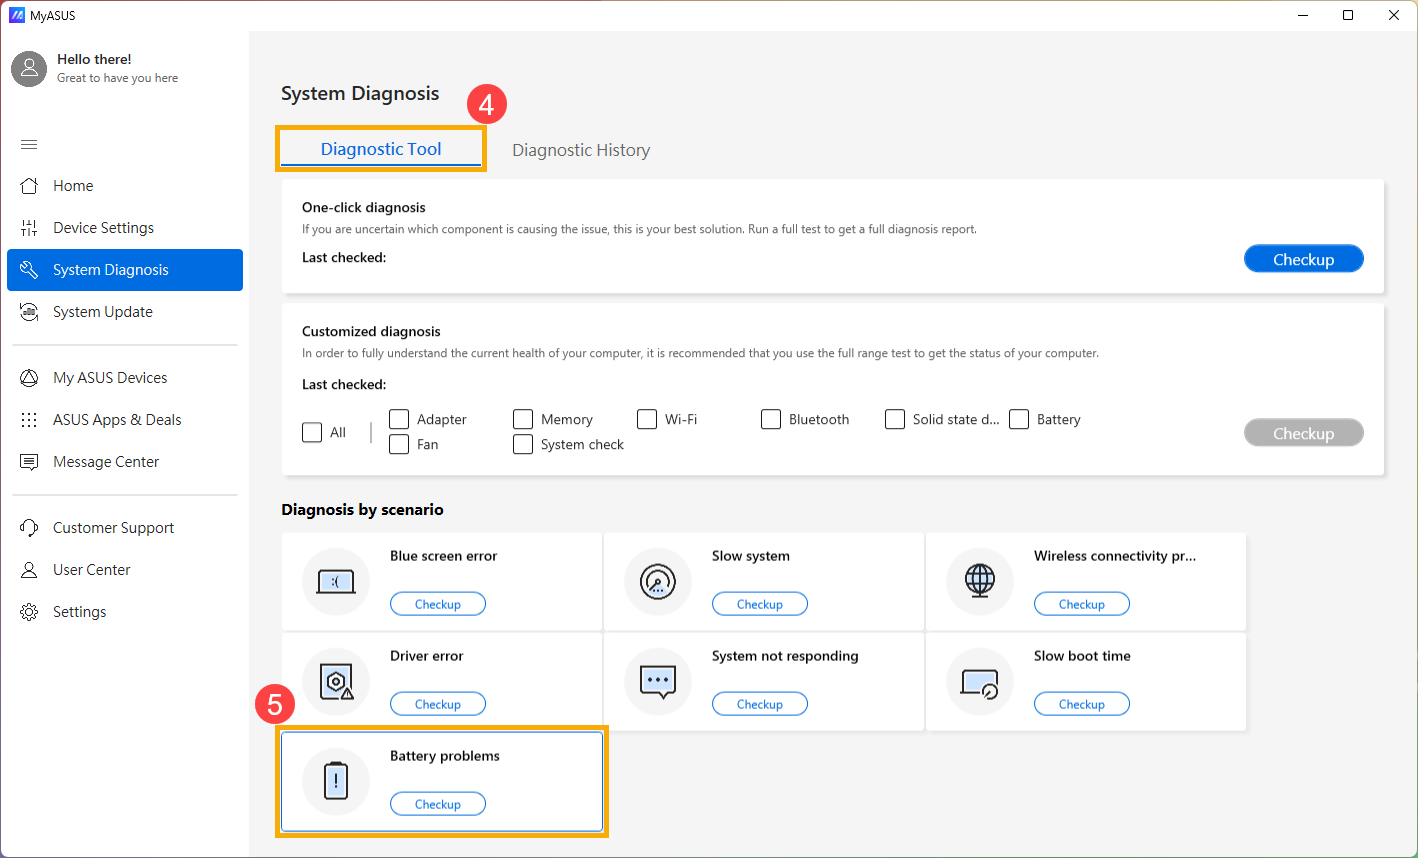
- Connect the device to power and click [Checkup]⑥.
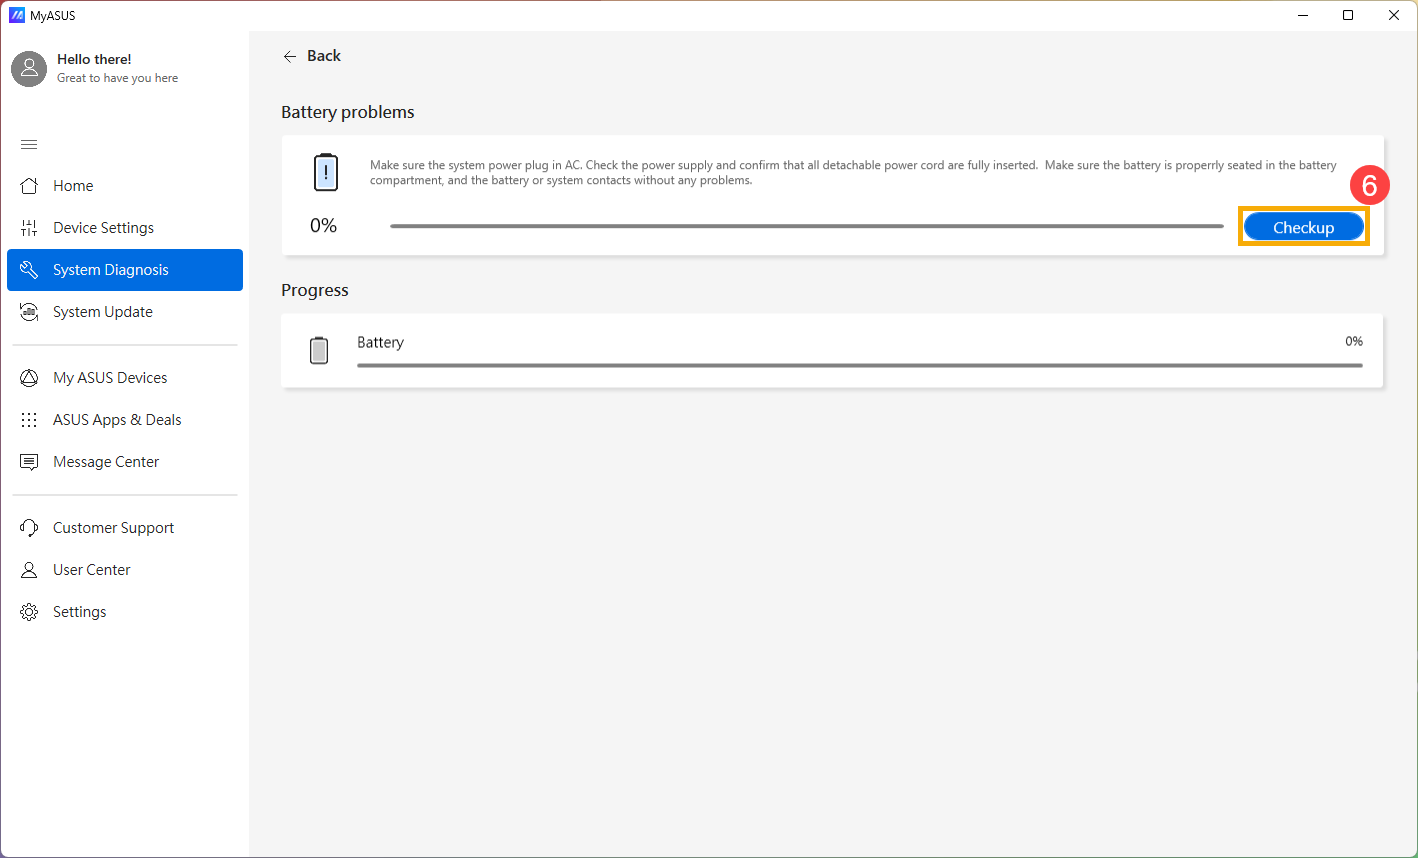
- After the check, click [Results]⑦. If errors are detected, try the troubleshooting suggestions provided by MyASUS. If the problem persists, proceed to the next troubleshooting step.

Reinstall the battery/AC adapter drivers via Device Manager
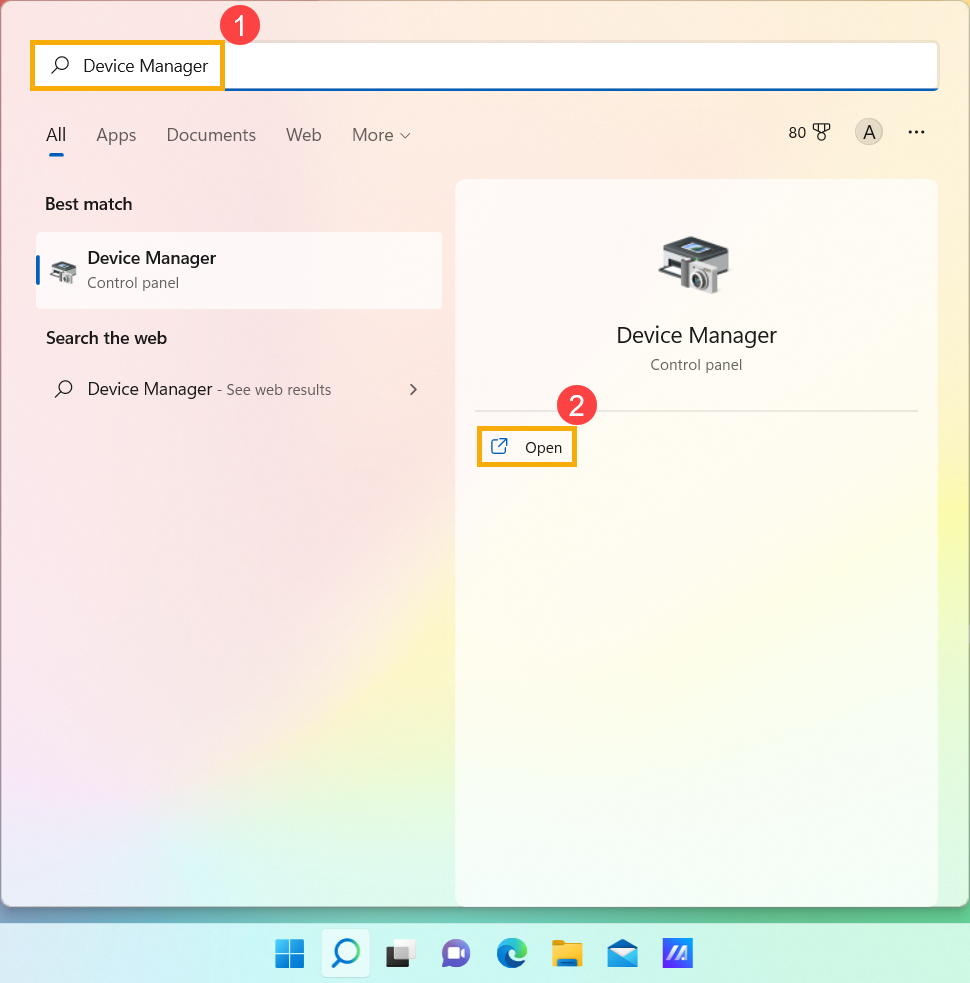
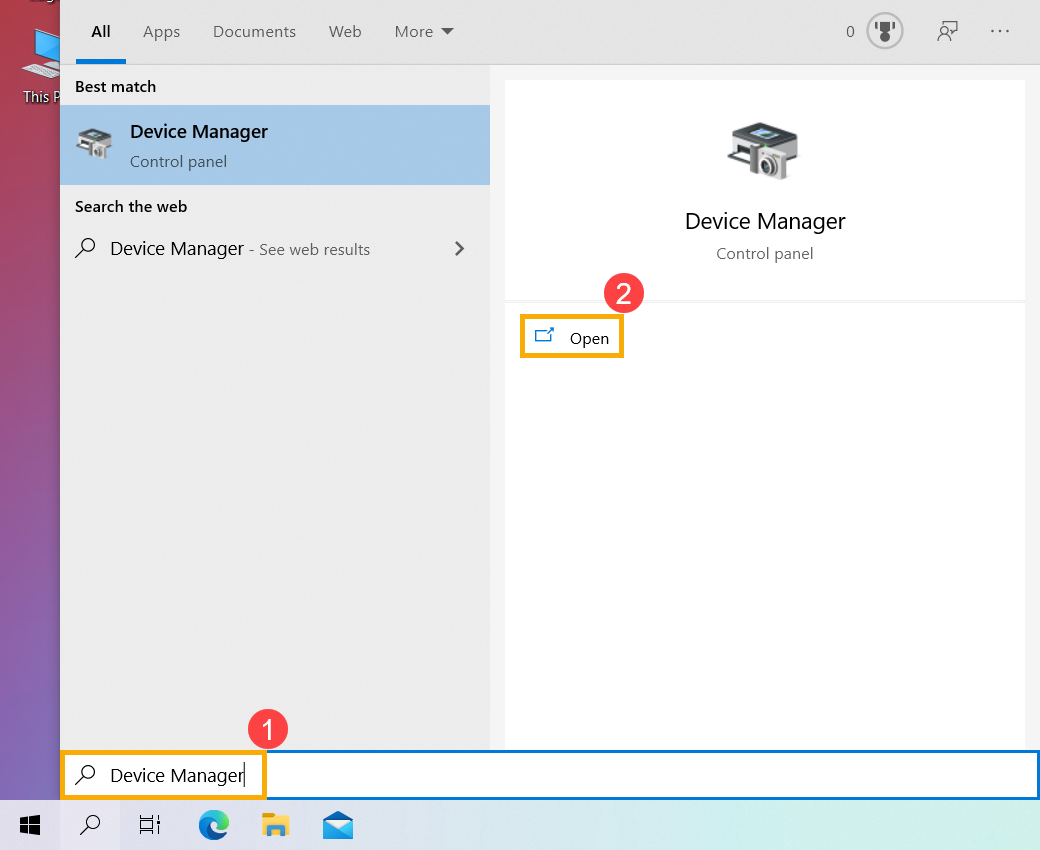
- Type and search [Device Manager] in the Windows search bar①, then click [Open]②. (The left-side search illustration below is in Windows 11, and the right-side is Windows 10.)
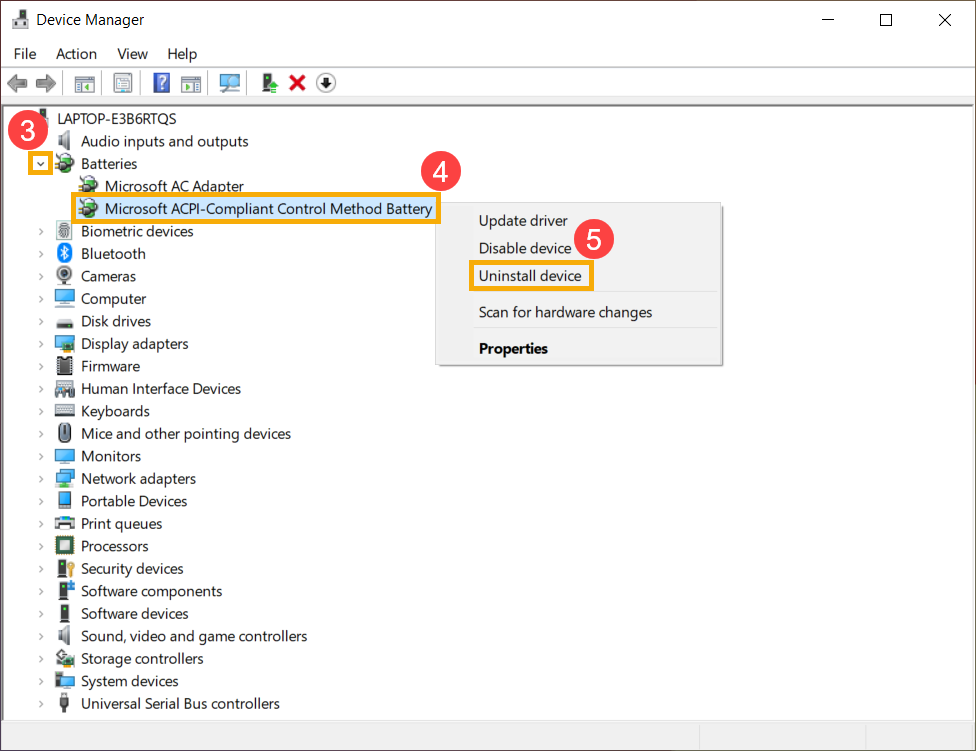
- Uninstall the battery drivers. Check the arrow next to [Batteries]③, then right-click [Microsoft ACPI-Compliant Control Method Battery]④ and click [Uninstall device]⑤.
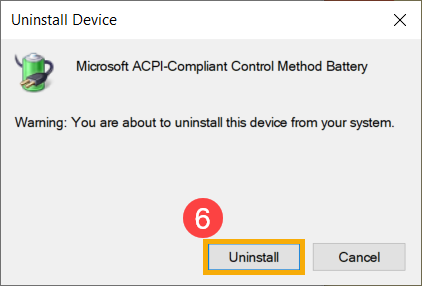
- Click [Uninstall]⑥.
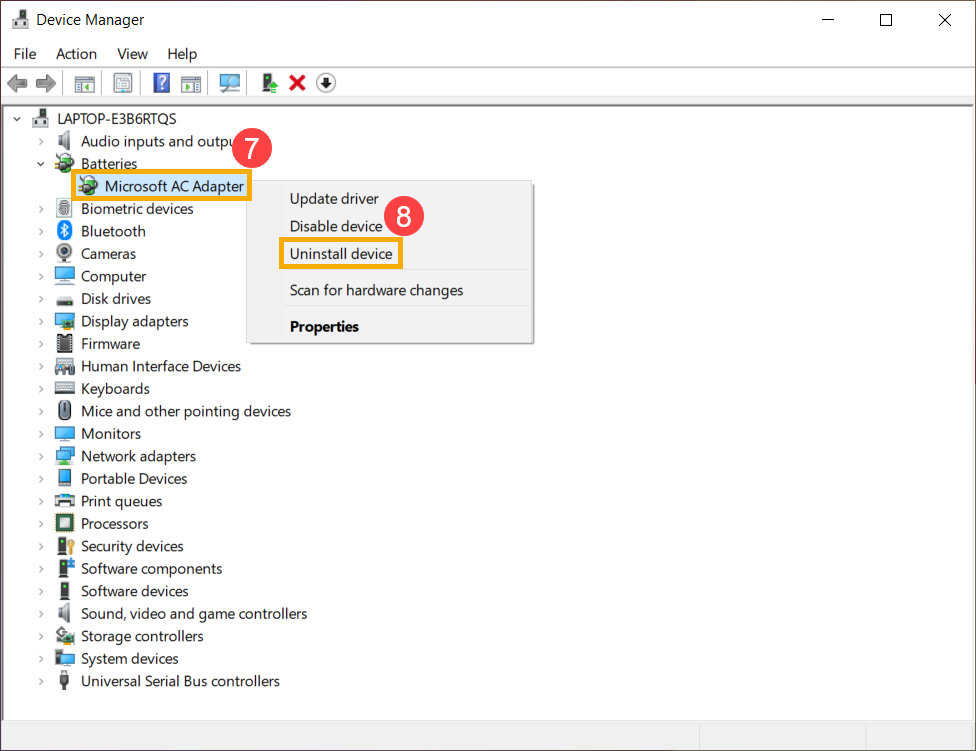
- In Batteries category, right-click [Microsoft AC Adapter]⑦ and click [Uninstall device]⑧.
- Click [Uninstall]⑨.
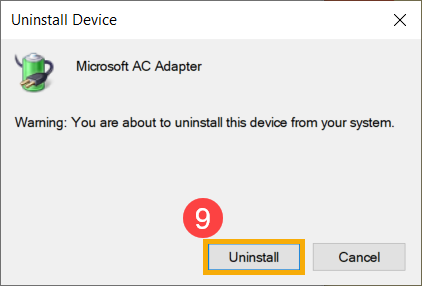
- After Microsoft ACPI-Compliant Control Method Battery and Microsoft AC Adapter both drivers are uninstalled, please restart the computer, and drivers will be automatically re-installed, then check the problem again.
If your problem is not worked out with above solution and information, please contact ASUS customer service center for further information.
If you experience the problem which is The battery doesn’t be charged when power level is above 95% with AC adapter connected.
This is a normal condition for battery protection, not a problem for either the battery itself or the charging function.
When the battery is charged to 100%, it will stop being charged. At this time, the battery will self-discharge very slowly owing to the chemical characteristics of a Li-on battery even though the device doesn’t consume any battery power.
The current design of ASUS devices come with built-in RSOC (Relative State Of Charge) and the purpose is to prolong the overall lifespan of the battery. The description below can explain this phenomenon:
- When the battery capacity is lower 95% with AC adapter connected, the battery will be charged to 100%, then stop being charged.
- When the battery capacity drops from 100% to 99%~95% with AC adapter connected, the battery will not be charged until the power level drops lower than 95%.
- When the battery capacity remains around 94% to 97%, the battery will not charge with the AC adapter connected. You can unplug and re-connect the AC adapter several times to resume charging to 100%.
If you experience the problem which is The battery stop being charged after the battery level is charged to 60% or 80%.
Please make sure whether you set up Battery Care Mode in MyASUS (for some models, the Battery Health Charging is a separate app). In order to protect the battery, Battery Health Charging allows you to set your battery's maximum power of ROSC (Relative State Of Charge) which helps extend the battery's lifespan. Here you can learn more about MyASUS Device Settings - Introduction.
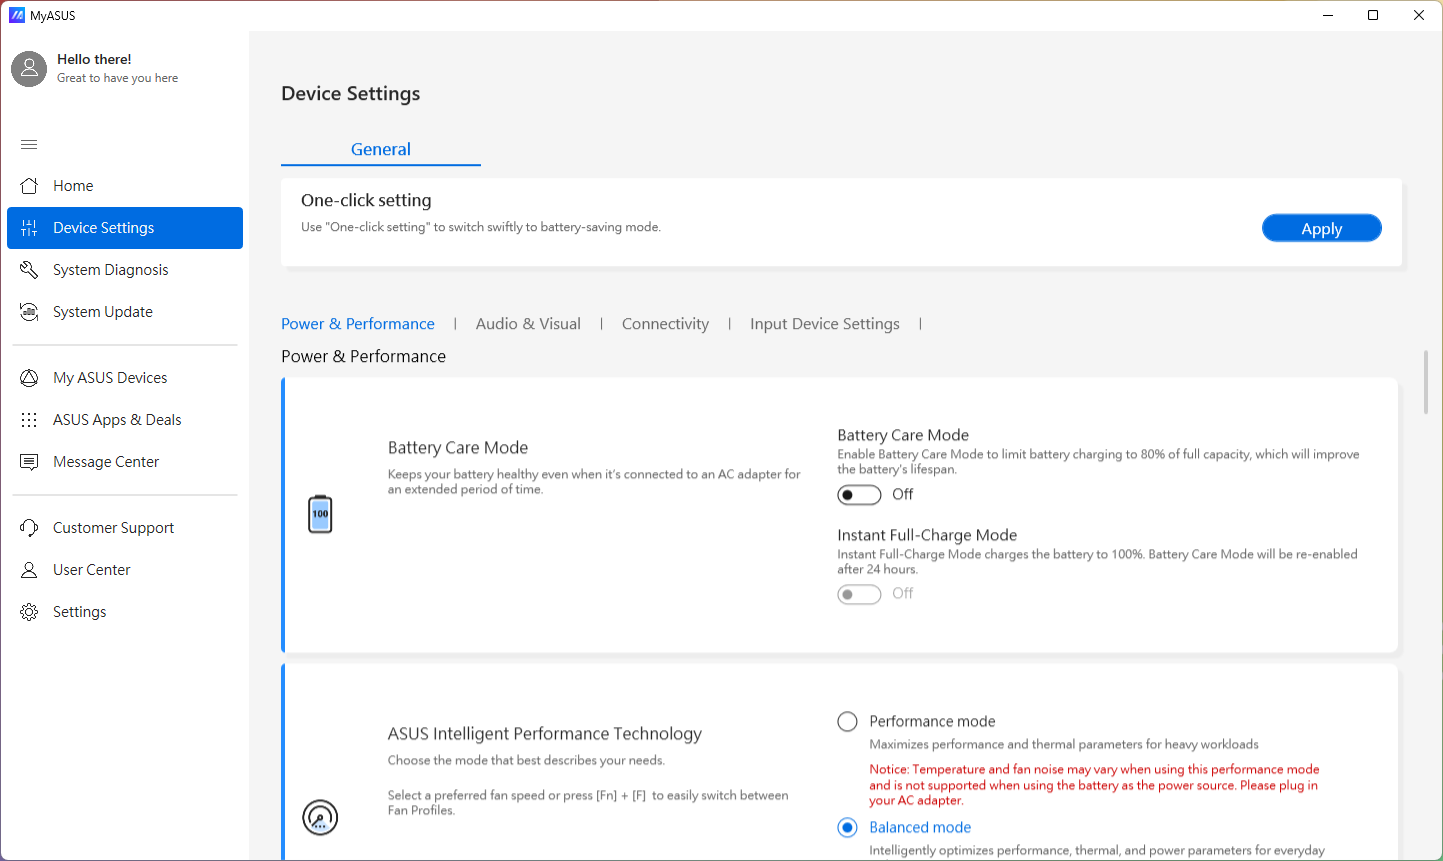
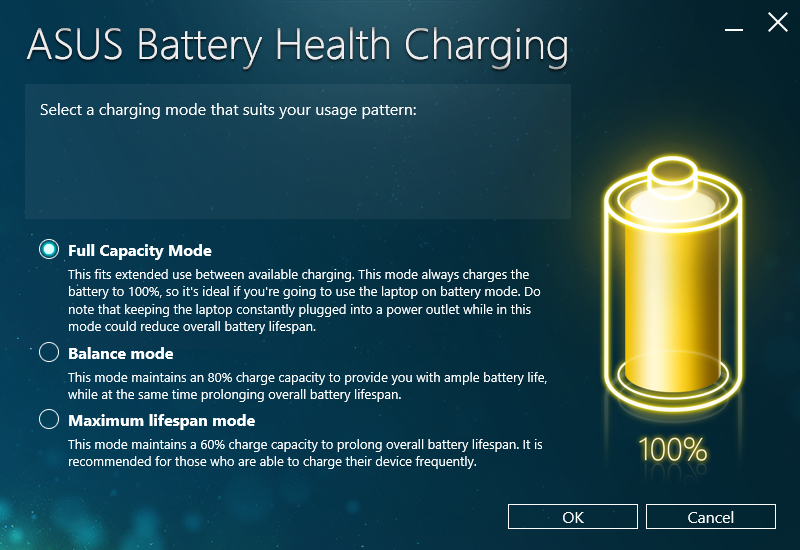
Note: For Intel Alderlake or AMD Rembrandt CPU models and earlier, this is referred to as Battery Health Charging in MyASUS (some models may use a separate software program). Here you can learn more about the introduction of ASUS Battery Health Charging.
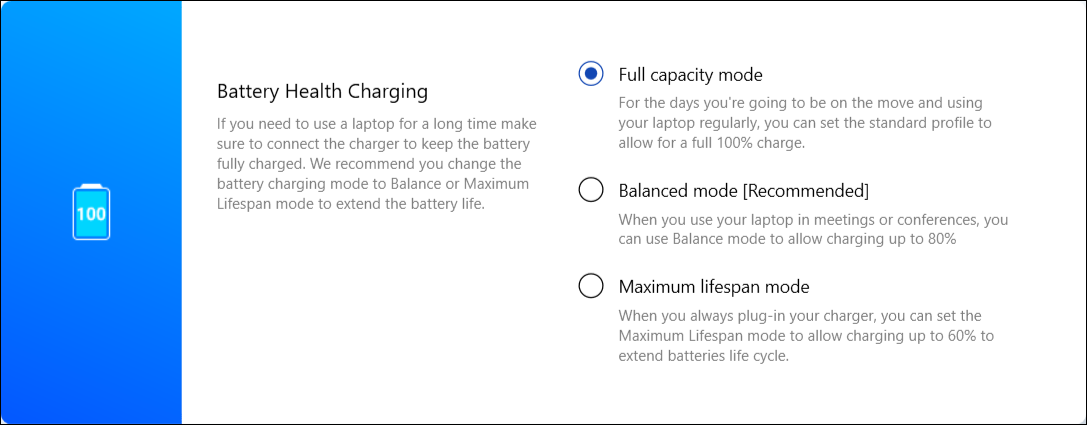
- Full capacity mode: The battery can be charged to 100%.
- Balance mode: The battery can be charged to 80%.
- Maximum lifespan mode: The battery only allows being charged to 60%.
If your problem is not worked out with above solution and information, please contact ASUS customer service center for further information.