Related Topics
[Windows 11/10] Backup and Restore your files (File History)
Applicable Products: Notebook, Desktop, All-in-One PC, Gaming Handheld, Motherboard, LCD Monitor, MiniPC
Use 「File History」 to back up your files to an external drive such as a USB flash driver or a portable hard drive, you also can back up to a network location. File History regularly backs up versions of your files in the Documents, Music, Pictures, Videos, and Desktop folders and the OneDrive files available offline on your device. Over time, you'll have a complete history of your files. If the originals are lost, damaged, or deleted, you can restore them. You can also browse and restore different versions of your files. For example, if you want to restore an older version of a file (even if it wasn't deleted or lost), you can browse through a timeline, select the version you want, and restore it.
Note: In default, File History only backs up copies of files that are in the Documents, Music, Pictures, Videos, and Desktop folders and the OneDrive files available offline on your device. If you have files or folders elsewhere that you want backed up, you need to add them manually.
Note: When utilizing file history to restore files, it will replace the current files with the backup from the chosen specific time point, bearing the same name. If you wish to retain your present files simultaneously, it is advised to independently perform a backup prior to proceeding with the restoration.
To provide you more detailed instruction, you can also click ASUS YouTube video link below to know more about How to Backup and Restore your files
https://www.youtube.com/watch?v=Hv4WvHxVUdg
Please go to the corresponding instruction based on the current Windows operating system on your device:
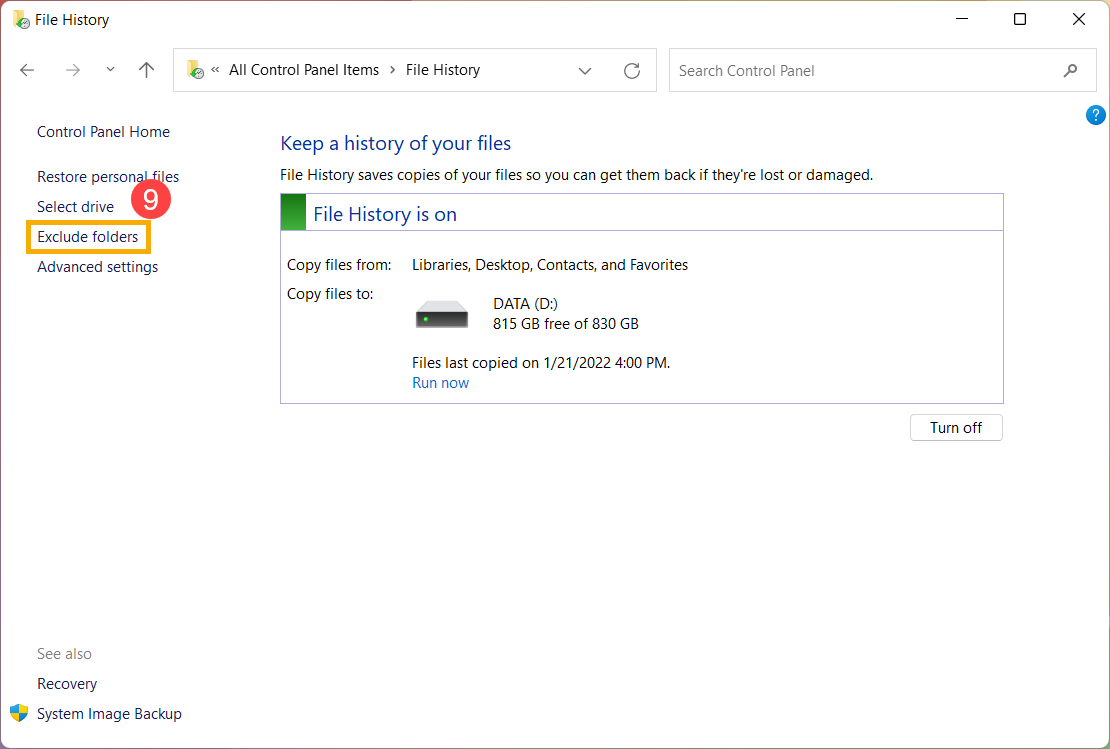
Backup your files with 「File History」
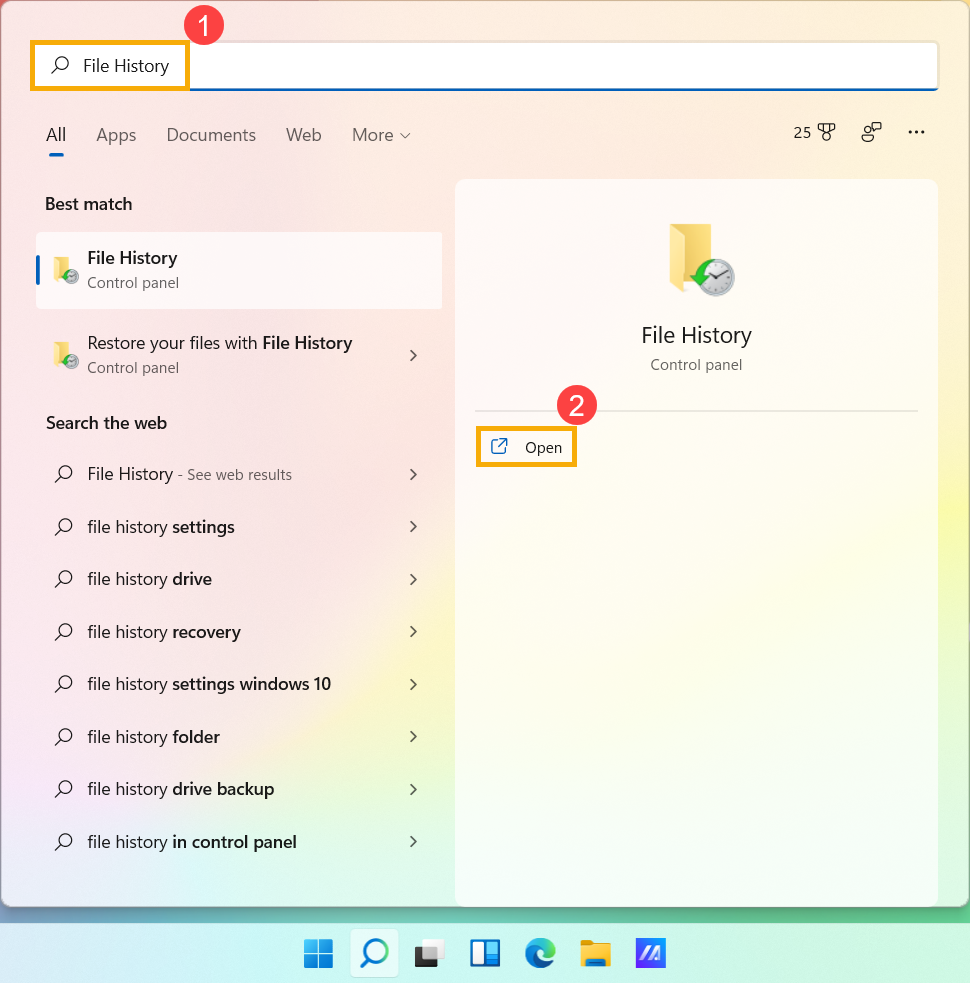
- Type and search [File History]① in the Windows search bar, then click [Open]②.
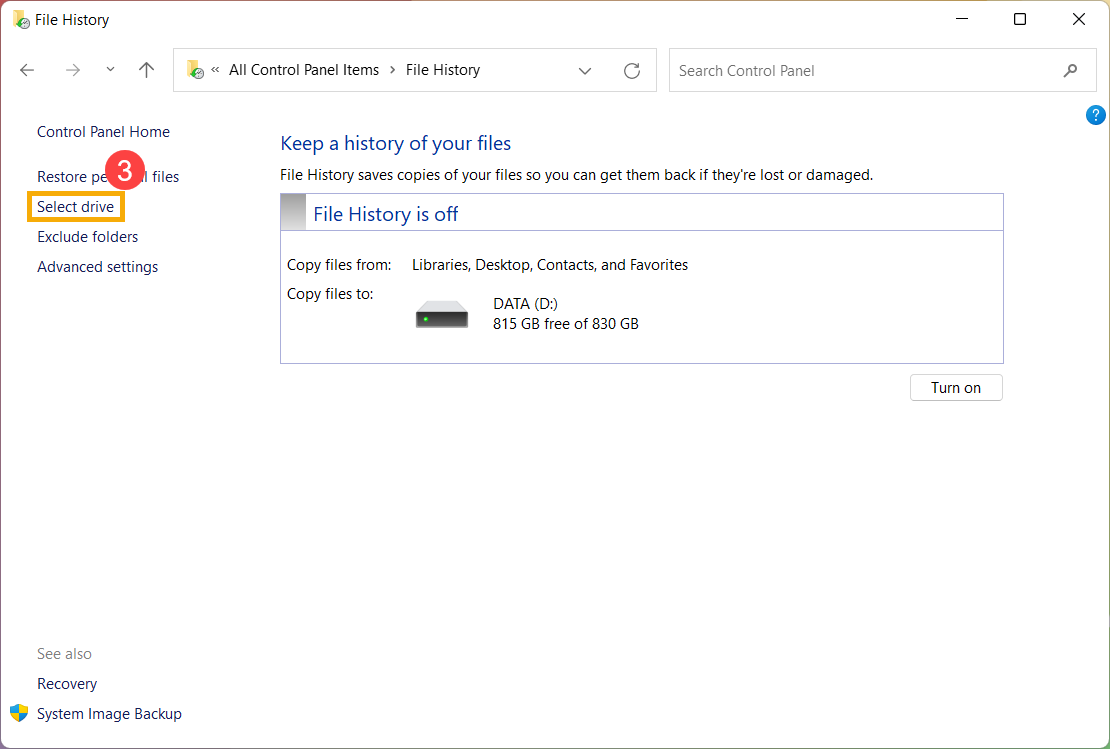
- Select [Select drive]③.
- Select a drive which you want to use to back up your files④, then select [OK]⑤.
If you want to back up your files to an external device, please make sure it has been connected.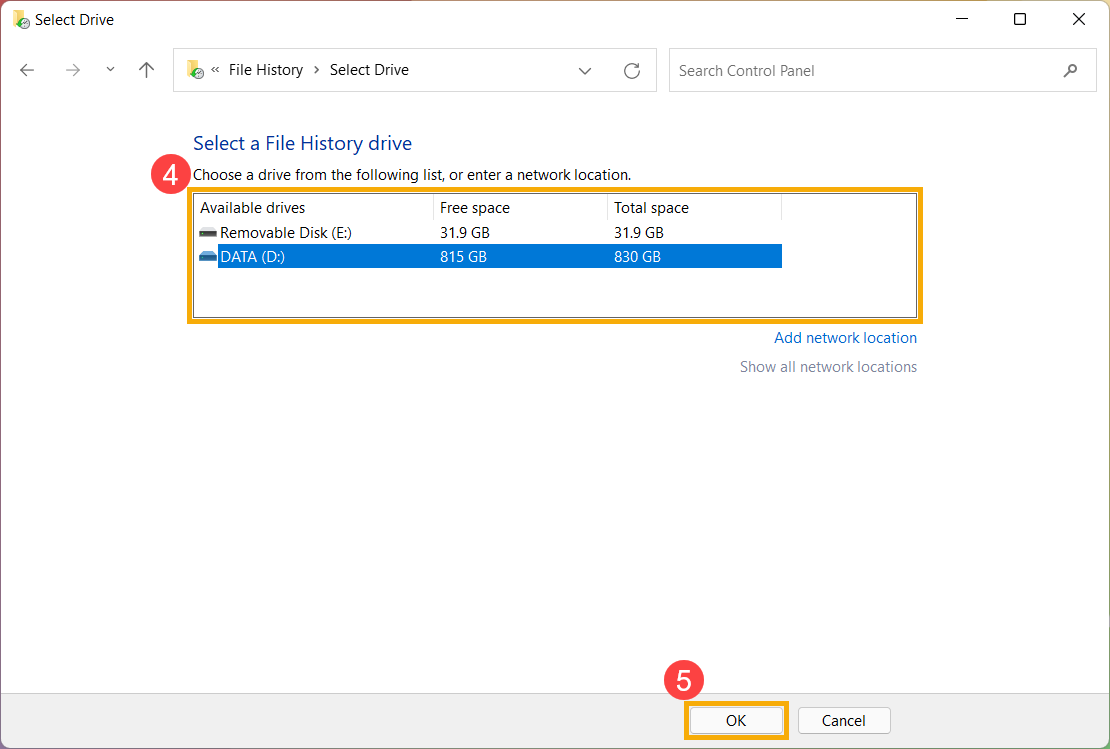
- After choosing a drive, the File History feature will be enabled.
You can select [Advanced settings]⑥ to set up the cycle time and period of backup settings.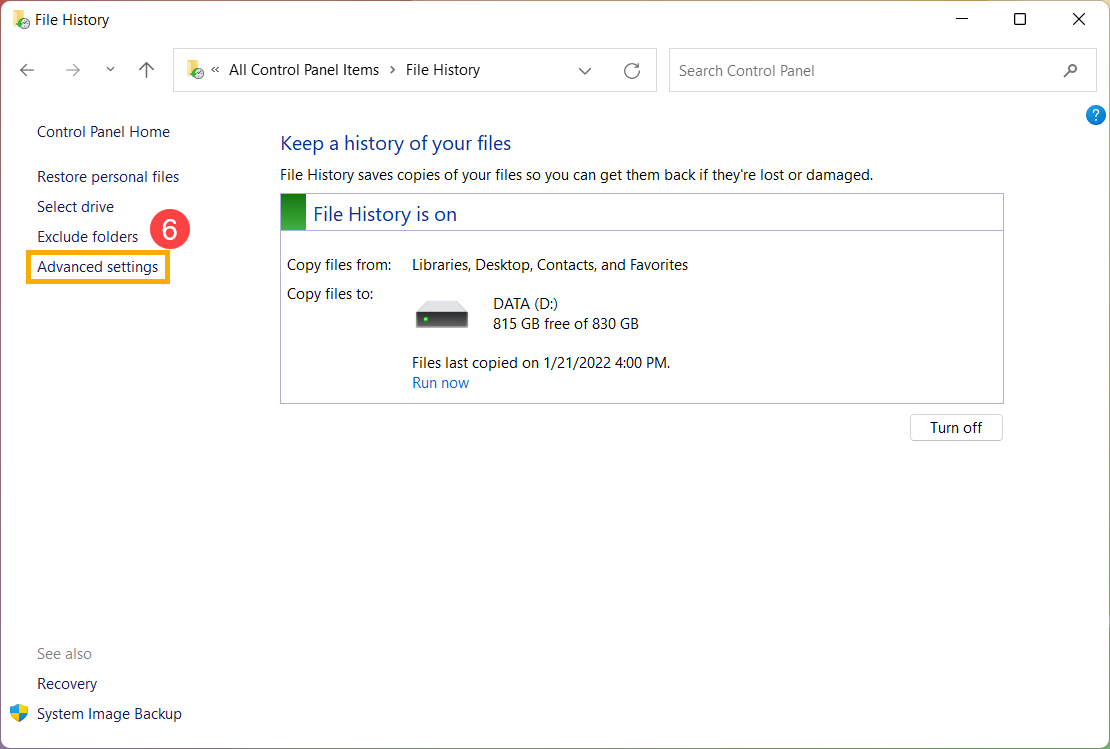
Choose the Save copies of file: how often you want to back up your files once, and the Keep saved versions: how long you want to keep your files⑦, then select [Save changes]⑧.
- If there are some folders by default settings you don’t want to back up, select [Exclude folders]⑨.
Click [Add]⑩ to add folders you don’t want to save copies, then select [Save changes]⑪.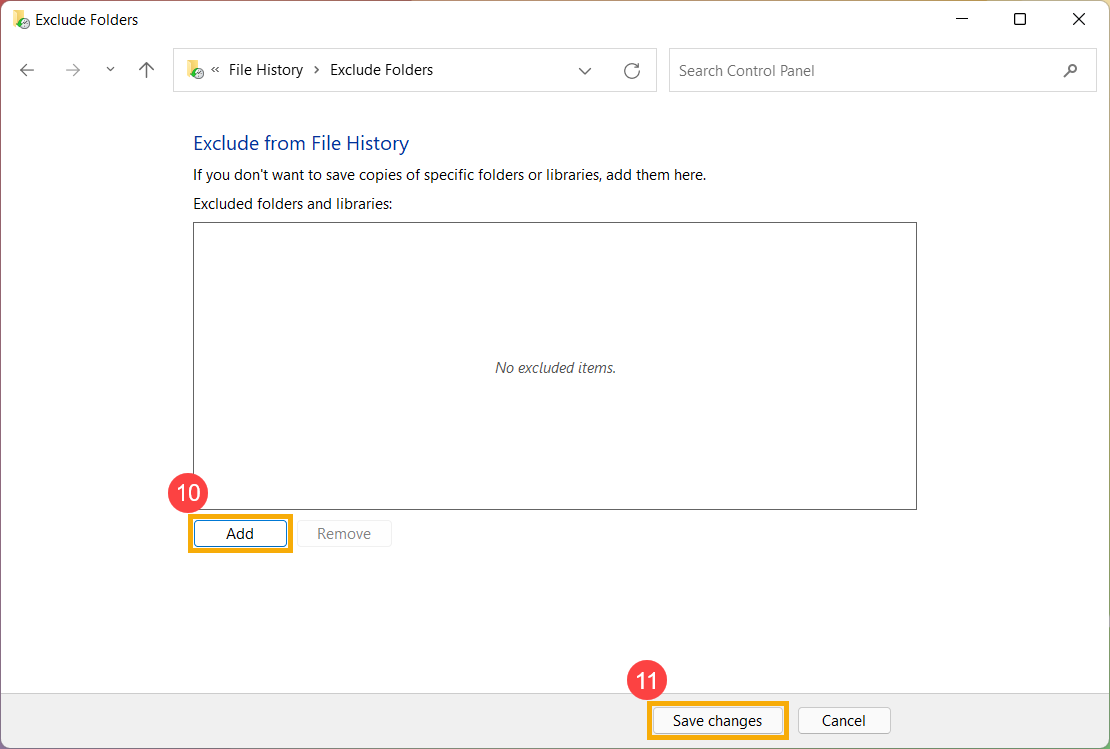
- If you wish to add a folder to File History for backup, please right-click on the folder⑫, and then click on [Show more options]⑬.

Once more options appear, select [Include in library]⑭, and then click [Create new library]⑮.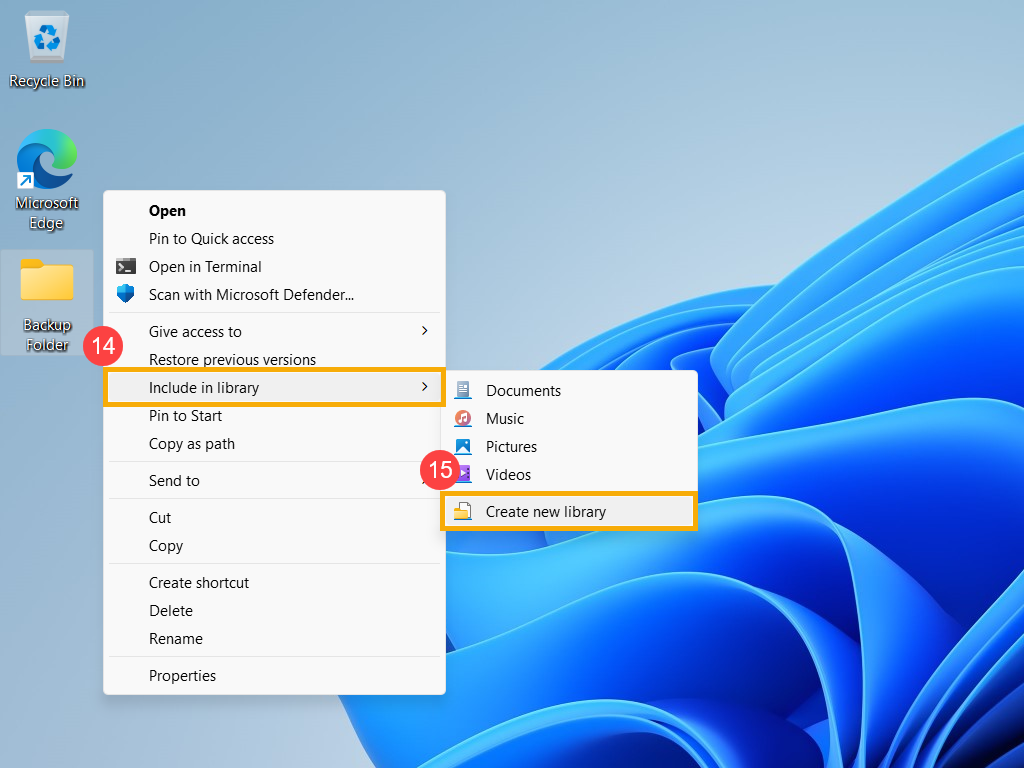
When the folder is added to the library, it indicates that this folder has been successfully added to the list of File History.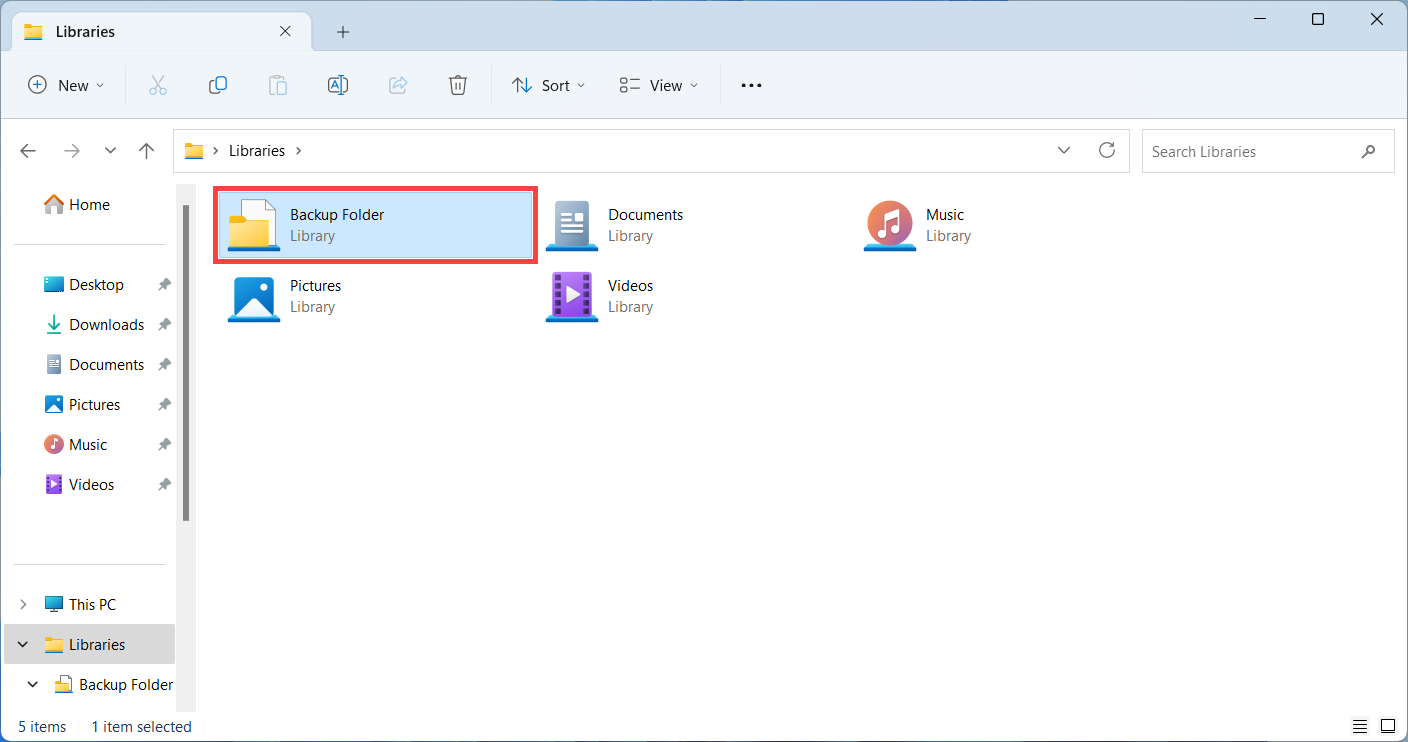
Restore your files with 「File History」
You can use 「File History」 to restore a file or whole files from a backed-up drive, and you can select a specific date to restore it if you had backed up your files with different versions by date. If you were using an external drive to back up your files, please make sure the drive has connected to the device.
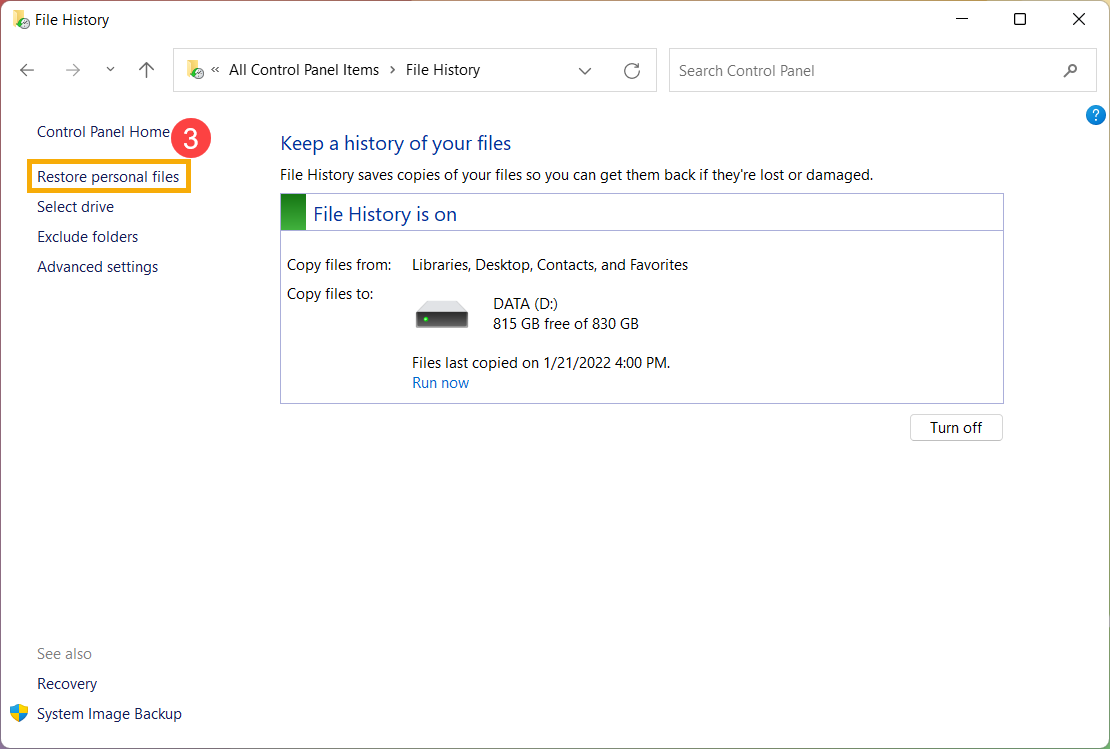
- Type and search [File History]① in the Windows search bar, then click [Open]②.

- Select [Restore personal files]③.
- You can select a file/folder, multiple files/folders, or all folders from the backup drive to restore it④. After the selection is completed, click the [Restore]
 icon⑤ and then Windows will start restoring your files.
Click the left arrow and right arrow
 icon to browse different versions of your files and folders by date.

Backup your files with 「File History」
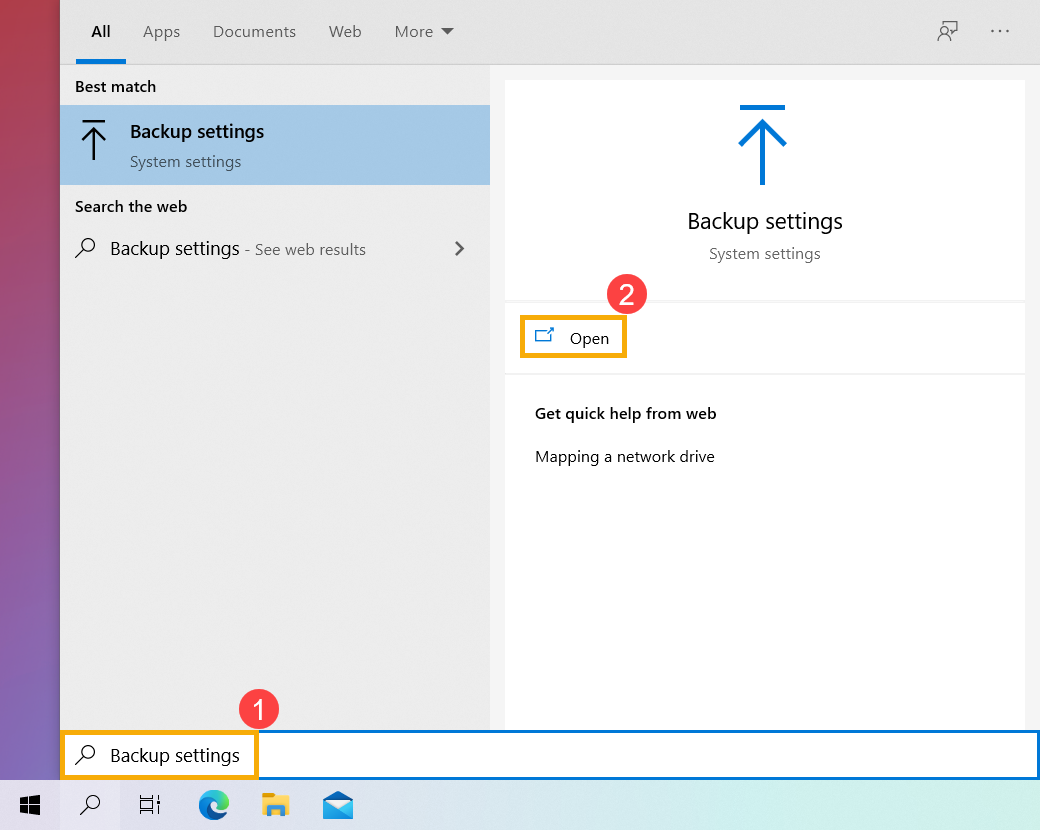
- Type and search [Backup settings]① in the Windows search bar, then click [Open]②.

- Select [Add a drive]③, then select a drive which you want to use to back up your files④.
If you want to back up your files to an external device, please make sure it has been connected.
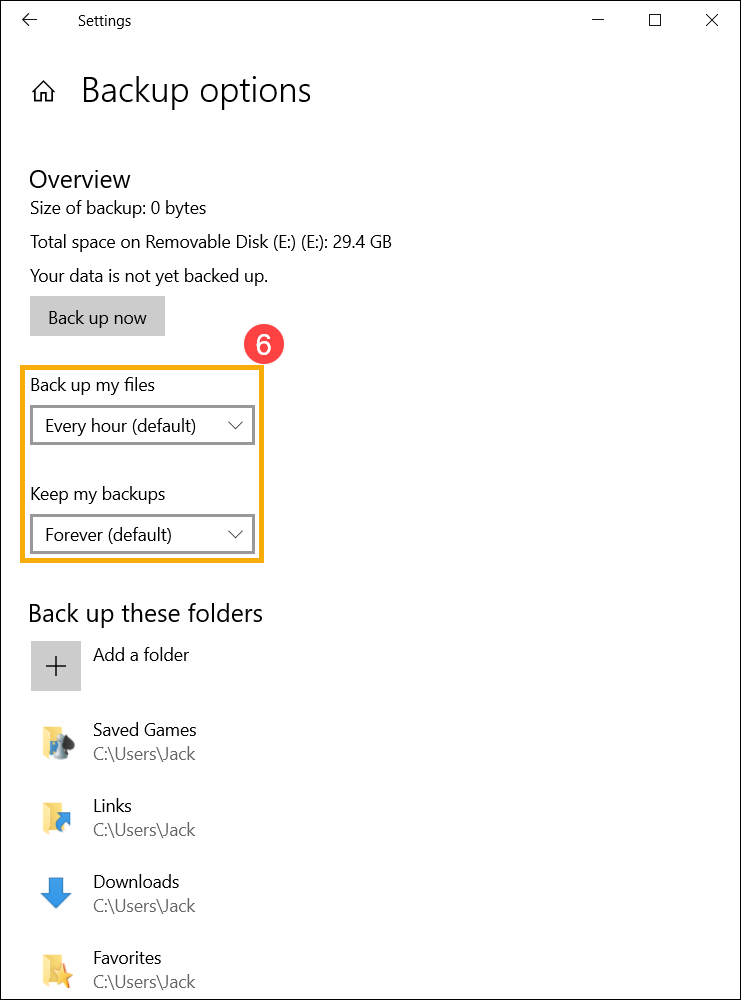
- After choosing a drive, the Automatically back up my files option will be enabled, and then please select [More options]⑤ to set up the cycle time and folder of backup settings.

- Choose the cycle time: how often you want to back up your files once, and the period: how long you want to keep your files⑥.
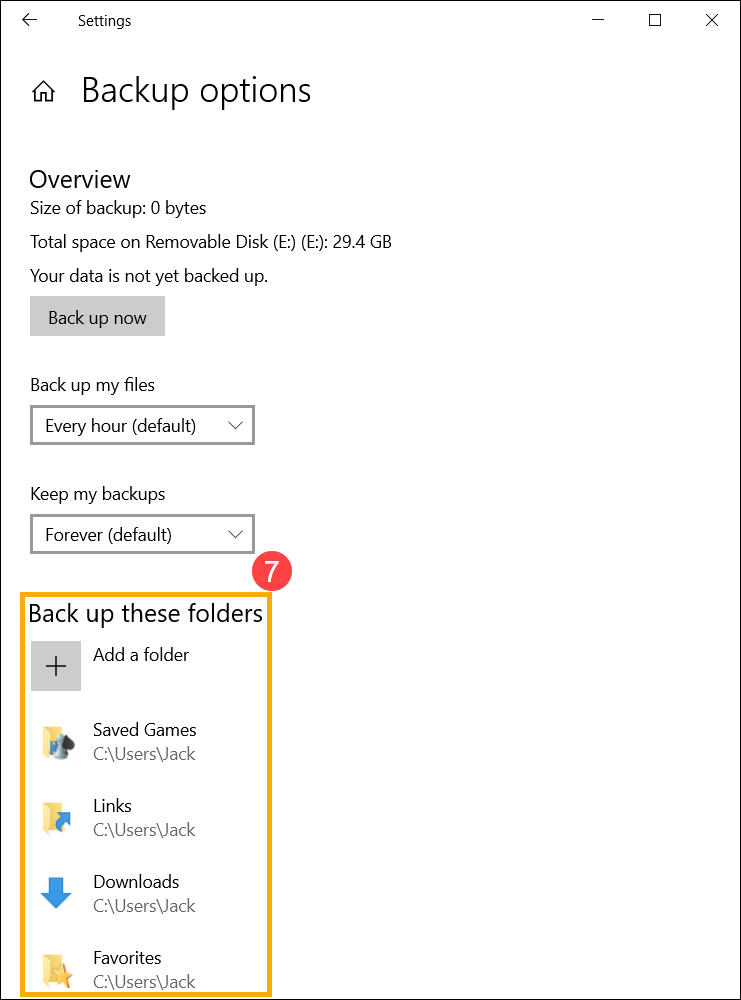
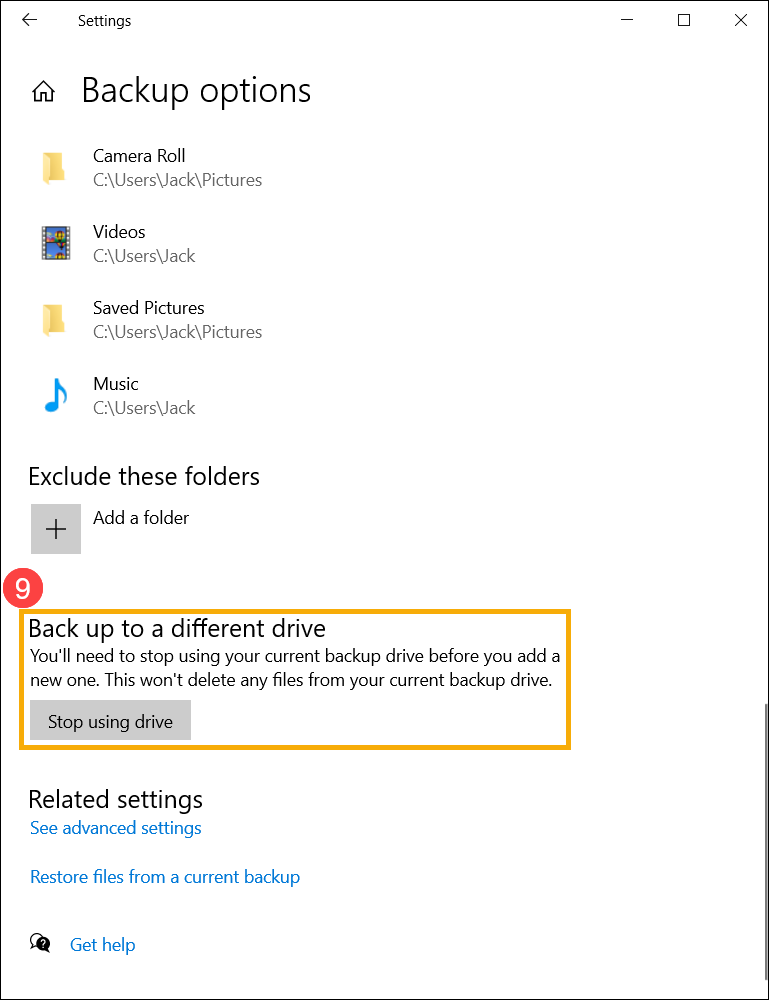
- The following will list which folders are backed up, and you also can select [Add a folder] to add the folders you want to back up⑦.
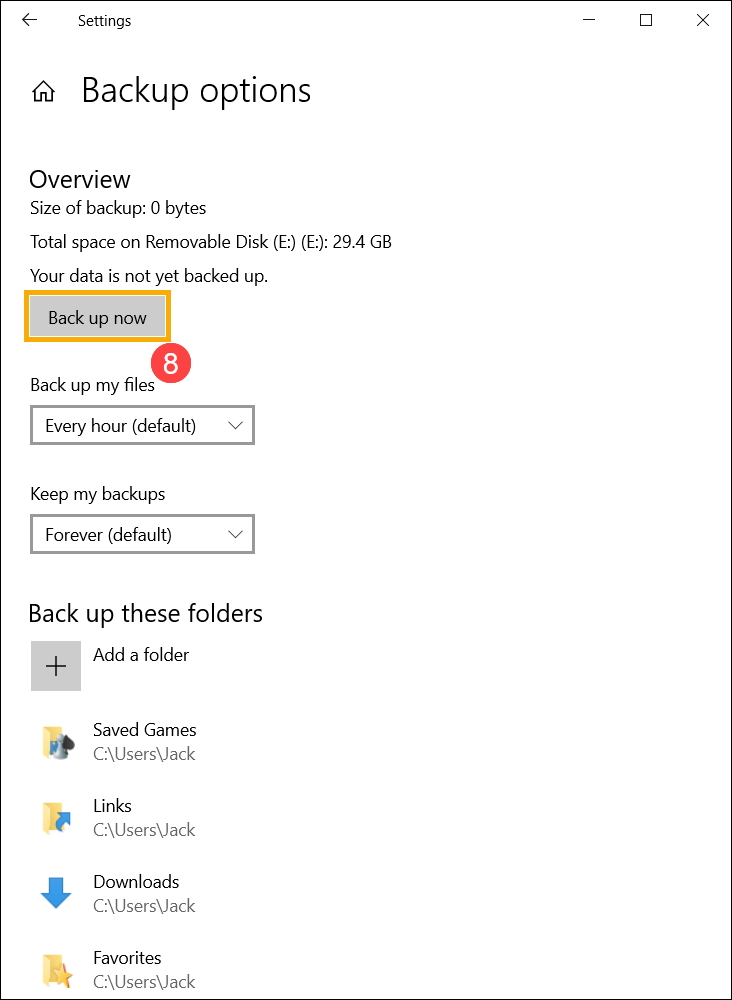
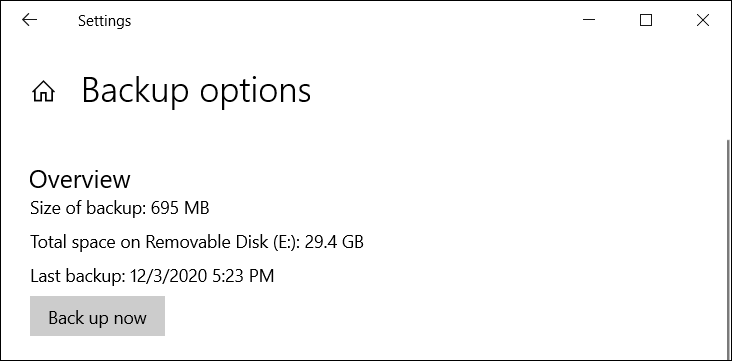
- After the setup is completed, please select [Back up now]⑧.
- After the backup is completed, it will display as below.
- If you want to change to different backup drive, you need to stop using your current backup drive first. Please select [Stop using drive]⑨, then you will be able to choose another drive to back up your file.
Restore your files with 「File History」
You can use 「File History」 to restore a file or whole files from a backed-up drive, and you can select a specific date to restore it if you had backed up your files with different versions by date. If you were using an external drive to back up your files, please make sure the drive has connected to the device.
- Type and search [Backup settings] in the Windows search bar①, then click [Open]②.
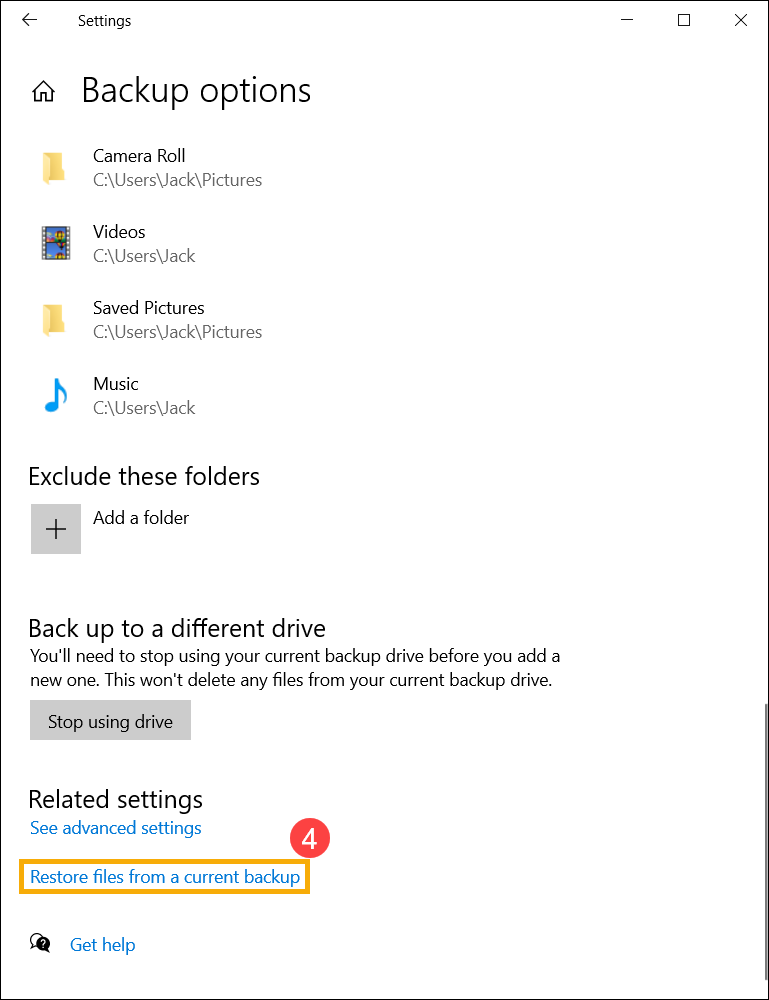
- Select [More options]③.

- Scroll down the page and select [Restore files from a current backup]④.
- You can select a file/folder, multiple files/folders, or all folders from the backup drive to restore it⑤. After the selection is completed, click the [Restore] icon⑥ and then Windows will start restoring your files.
Click the left arrow and right arrow icon to browse different versions of your files and folders by date. 