Related Topics
[Windows 11/10] Troubleshooting - Touchscreen / Touch Panel problems
Applicable Products: Notebook, All-in-One PC, Gaming Handheld
To provide you more detailed instruction, you can also click ASUS YouTube video link below to know more about How to Solve Touchscreen Problems on Your ASUS Device
https://www.youtube.com/watch?v=Un0w5FdlTrA
If you experience the touchscreen responding inaccurately, not sensitive, or not responding at all, please refer to the following troubleshooting in order. If your touchscreen doesn't have right-click function, please refer to How to set the right-click function for touchscreen.
Please go to the corresponding instruction based on the current Windows operating system on your device:
Confirm the device has a touchscreen function
If the screen has never responded to touch, but you think it should, please refer to the following methods to confirm whether your device has a touchscreen function.
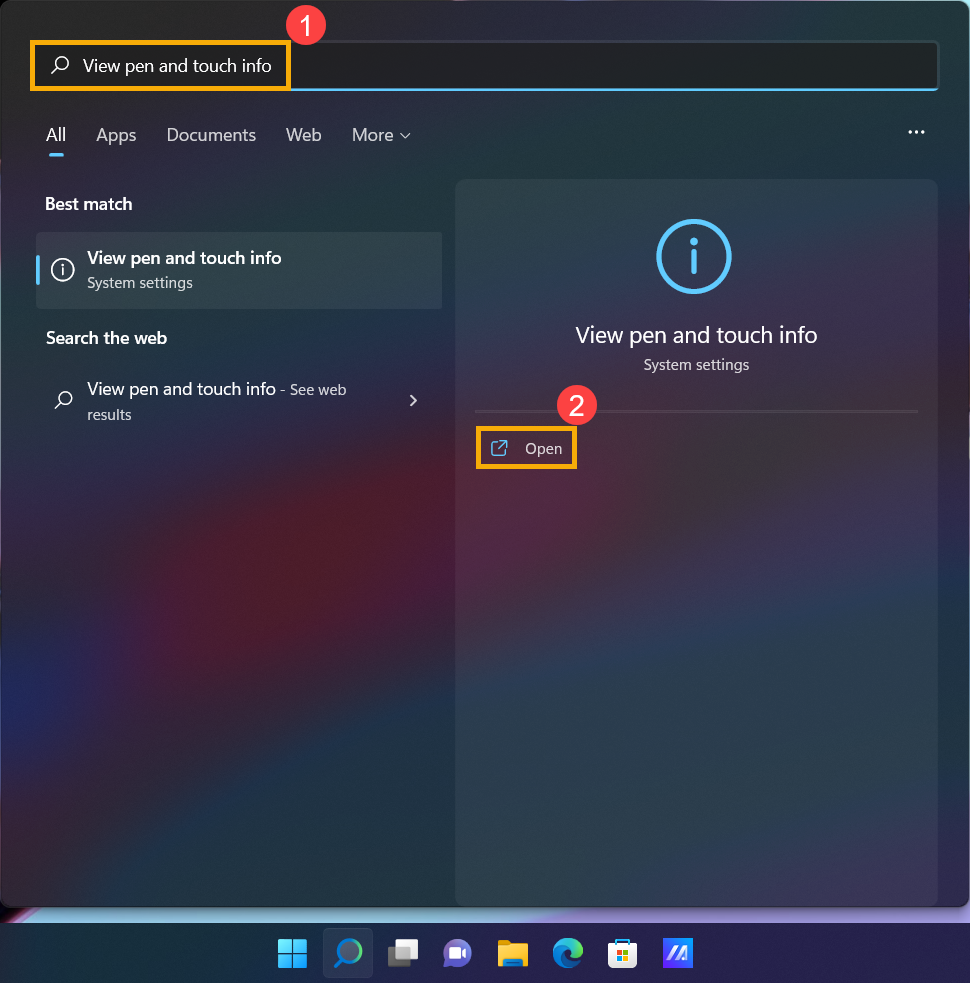
- Type and search [View pen and touch info] in the Windows search bar①, then click [Open]②.
- If the Pen and touch section shows as [No pen or touch input is available for this display]③, this means your device does not have a touchscreen function.
Note: If your screen supports touch input, but your device specifications do not indicate touch support, it is advisable to visit your local authorized ASUS service center for further evaluation.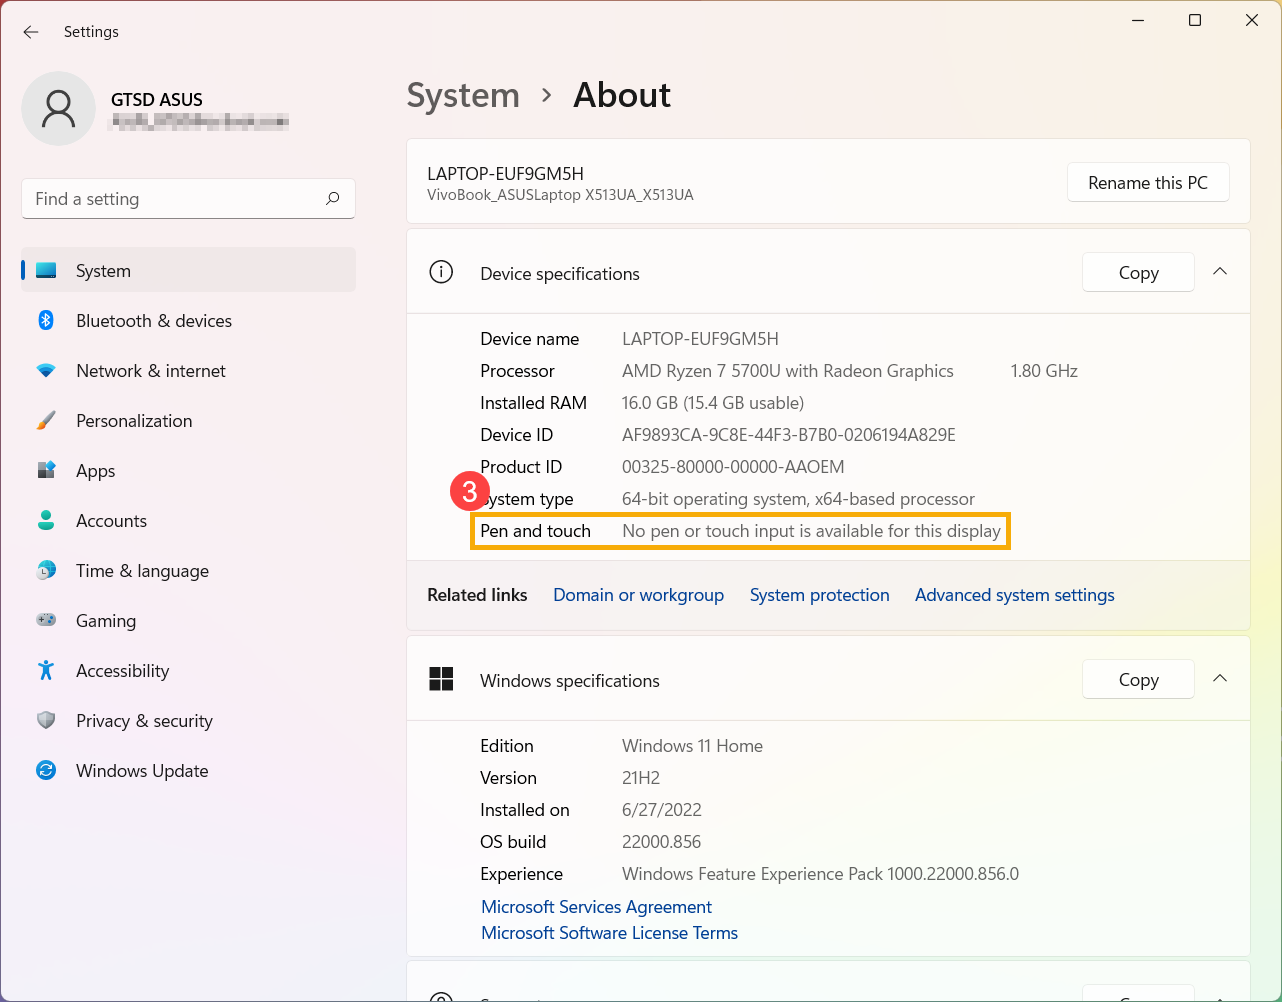
Clean the LCD screen
- Turn off the device first, then examine the condition of the screen for any damage.
- Please use a soft cloth dampened with cleaning solutions to gently wipe the screen clean of any dirt or smudges.
Note: The soft cloth should not be too wet and do not spray any cleaning solutions directly onto the screen or leave any liquid on the screen. You are able to use water to replace cleaning solutions if you don’t have any. - Let the LCD screen dry thoroughly, then turn on the device and check the touchscreen function.
Note: To avoid this problem, touch the screen only with clean hands or a stylus. - Installing a screen protector or some other accessories on or around the screen may sometimes interfere with the touch function of the screen. Therefore, please try removing those accessories from the screen and then test the screen again. If problems persist, please continue to the next step.
Enable and reinstall the touchscreen driver in Device Manager
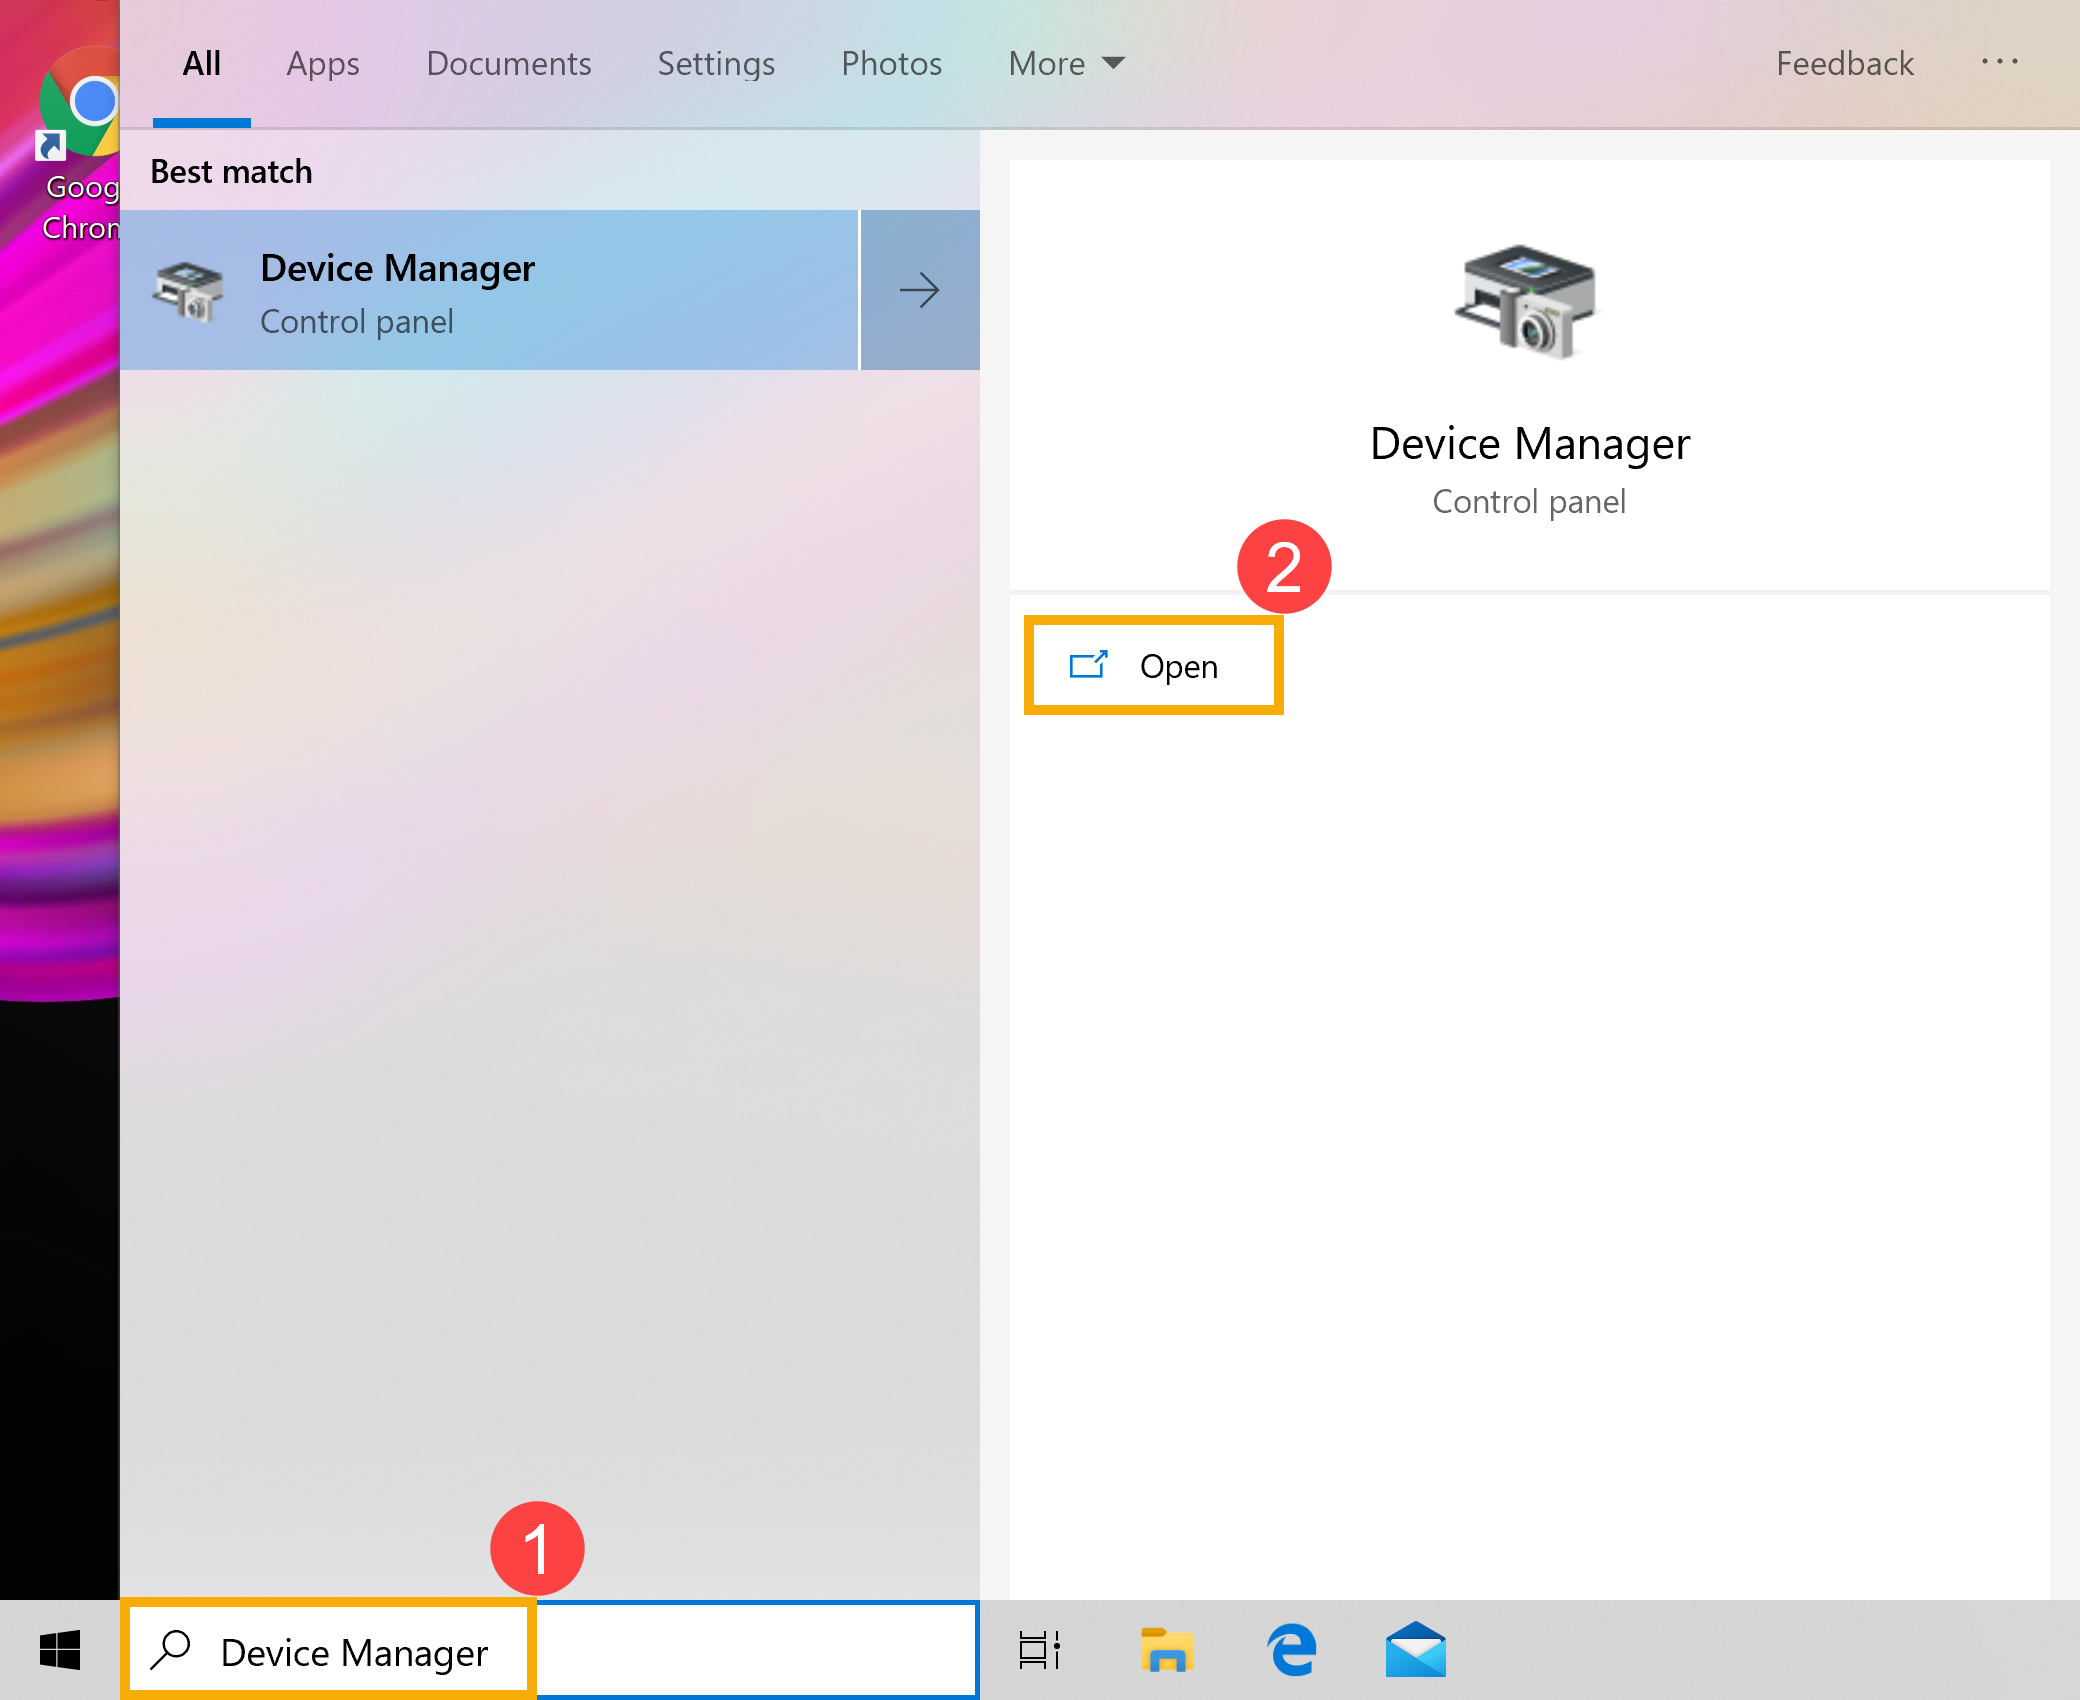
- Type and search [Device Manager] in the Windows search bar①, then click [Open]②.

- Check the arrow next to [Human Interface Devices]③, then right-click [HID-compliant touch screen]④ and select [Enable device]⑤.
If the Enable device option does not display, it means the touchscreen function is already enabled, please continue to the next step.
- Reinstall the touchscreen driver. Right-click the [HID-compliant touch screen]⑥, then select [Uninstall device]⑦.
Note: If you see two HID-compliant touchscreen drivers, uninstall the first driver, and then repeat the process for the second driver.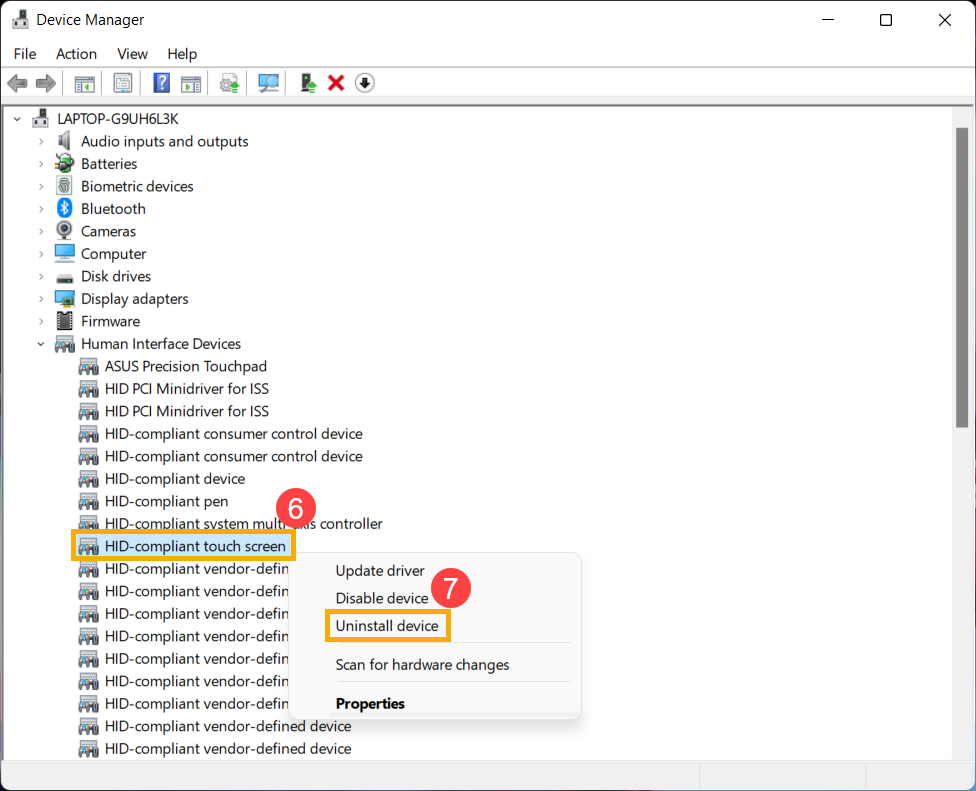
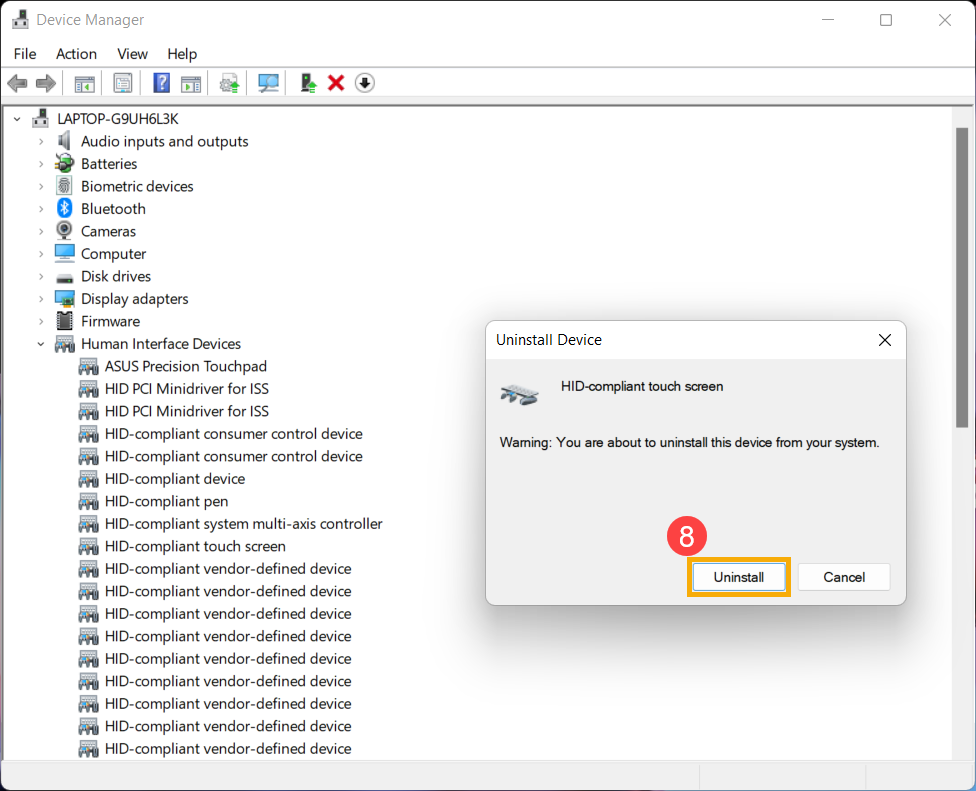
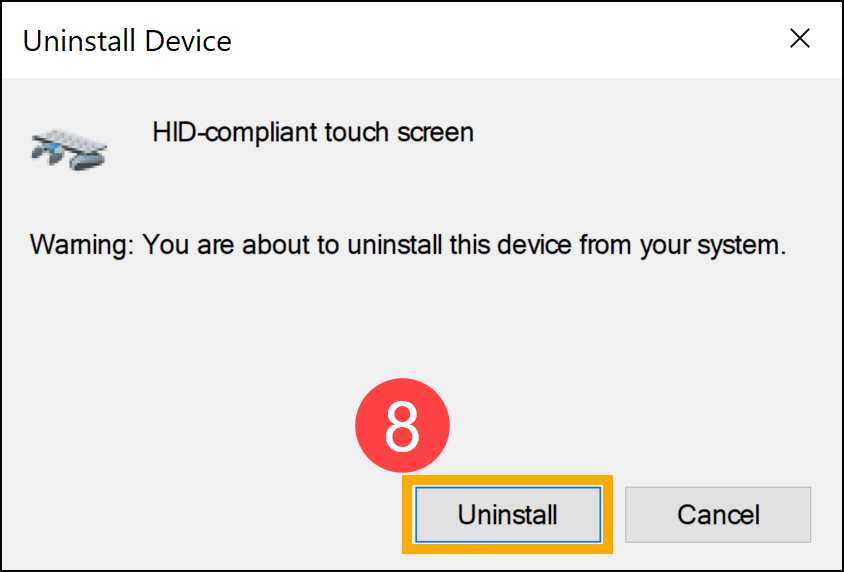
- Select [Uninstall]⑧.
- After the touchscreen drivers uninstall, select [Action]⑨ and [Scan for hardware changes]⑩ in the Device Manager.
The device will reinstall the touchscreen drivers, and the touchscreen driver’s name will display in the Human Interface Devices category.
Note: This process may need to download and install through the internet. Make sure your device is in an available network environment, then connect to internet.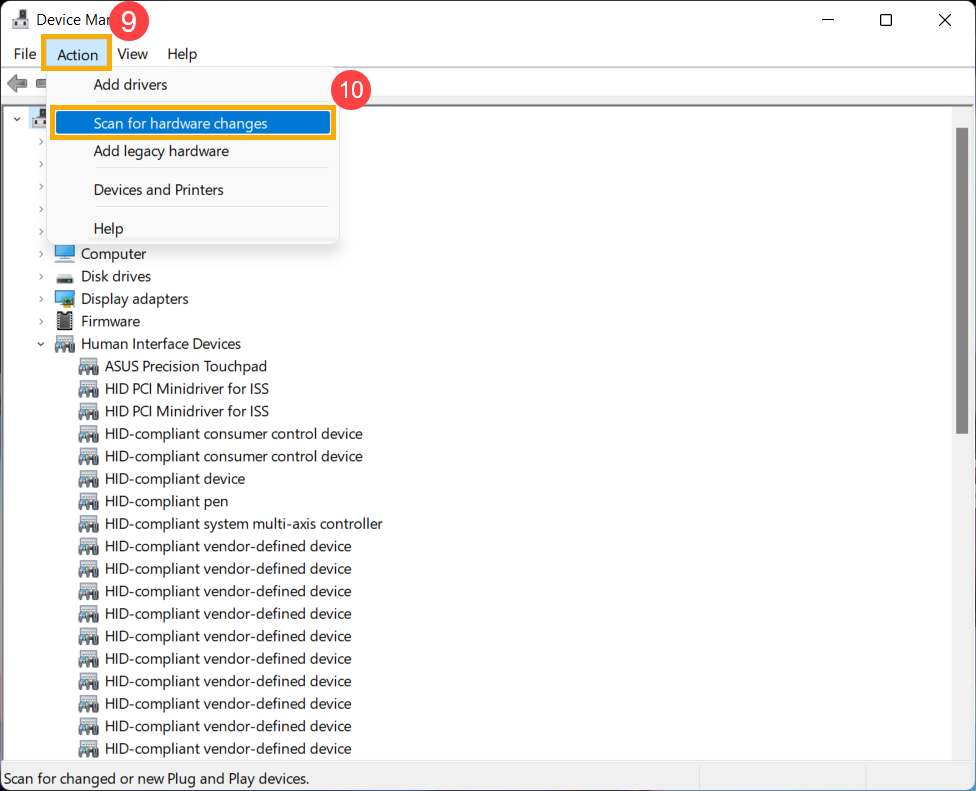
- After the touchscreen driver’s name displays in the Human Interface Devices category, please restart the device then test the touchscreen function again. If problems persist, please continue to the next step.
Update and confirm BIOS / Windows packages / drivers with the latest version on your device
Updating software usually helps the system stability and optimization, so we recommend you check and often update to the latest version on your device. Here you can learn more about:
How to update BIOS with EZ Flash
For executing Windows update and drivers update, here you can learn more about:
How to update drivers via System Update in MyASUS
If the problem persists after you have updated BIOS/Windows packages/drivers to the date, please continue to the next chapter for troubleshooting.
Configure the touch display
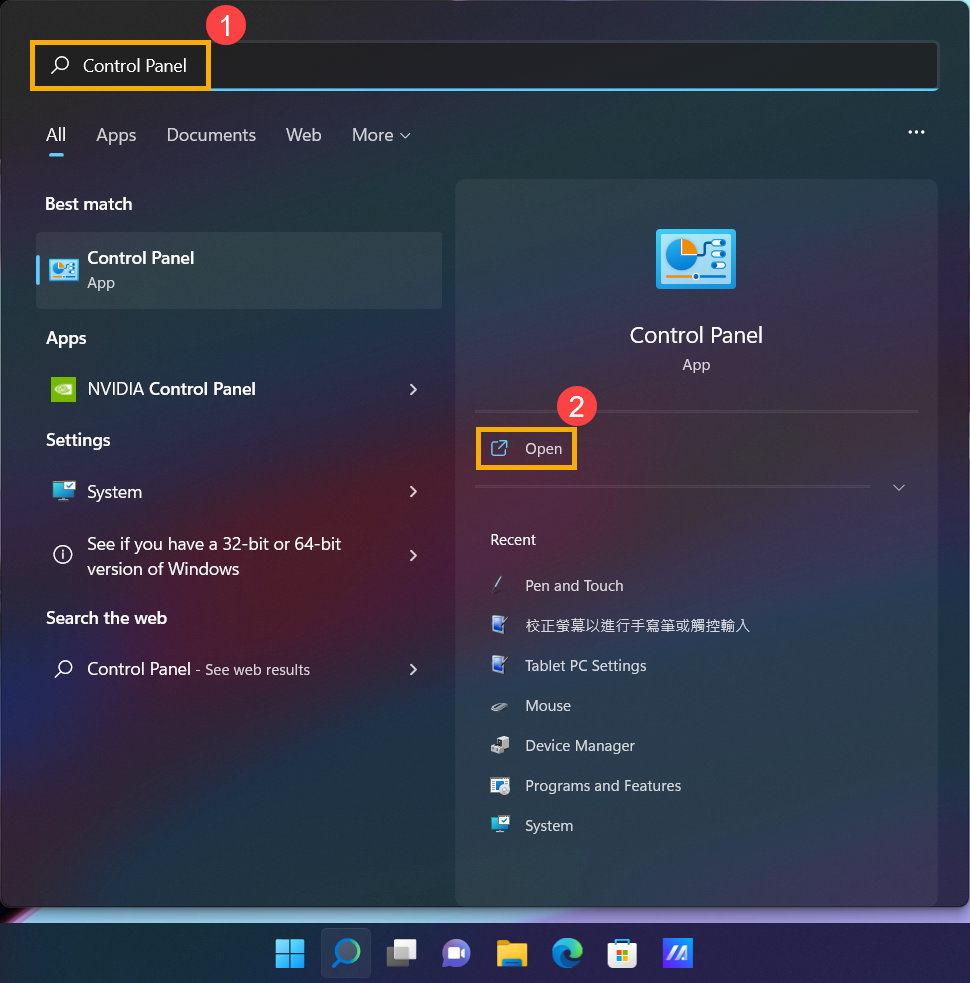
- Type and search [Control Panel] in the Windows search bar①, then click [Open]②.
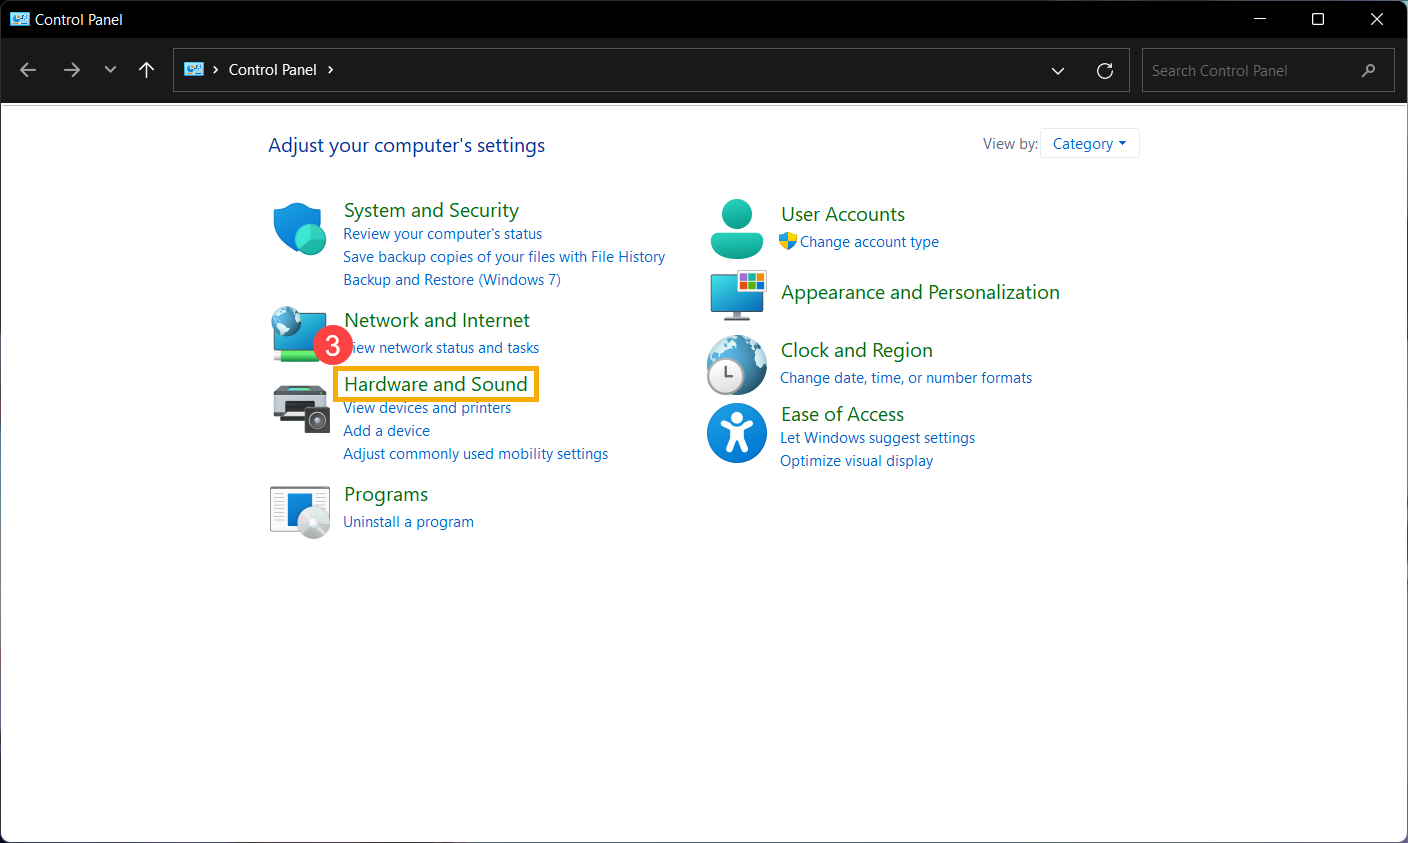
- Select [Hardware and Sound]③.
- Select [Calibrate the screen for pen or touch input]④.

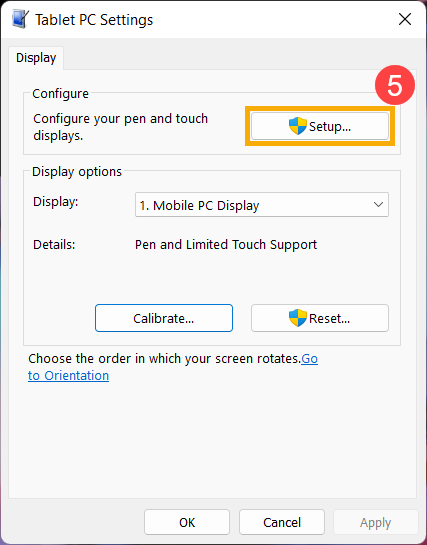
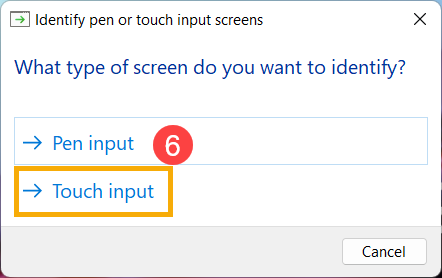
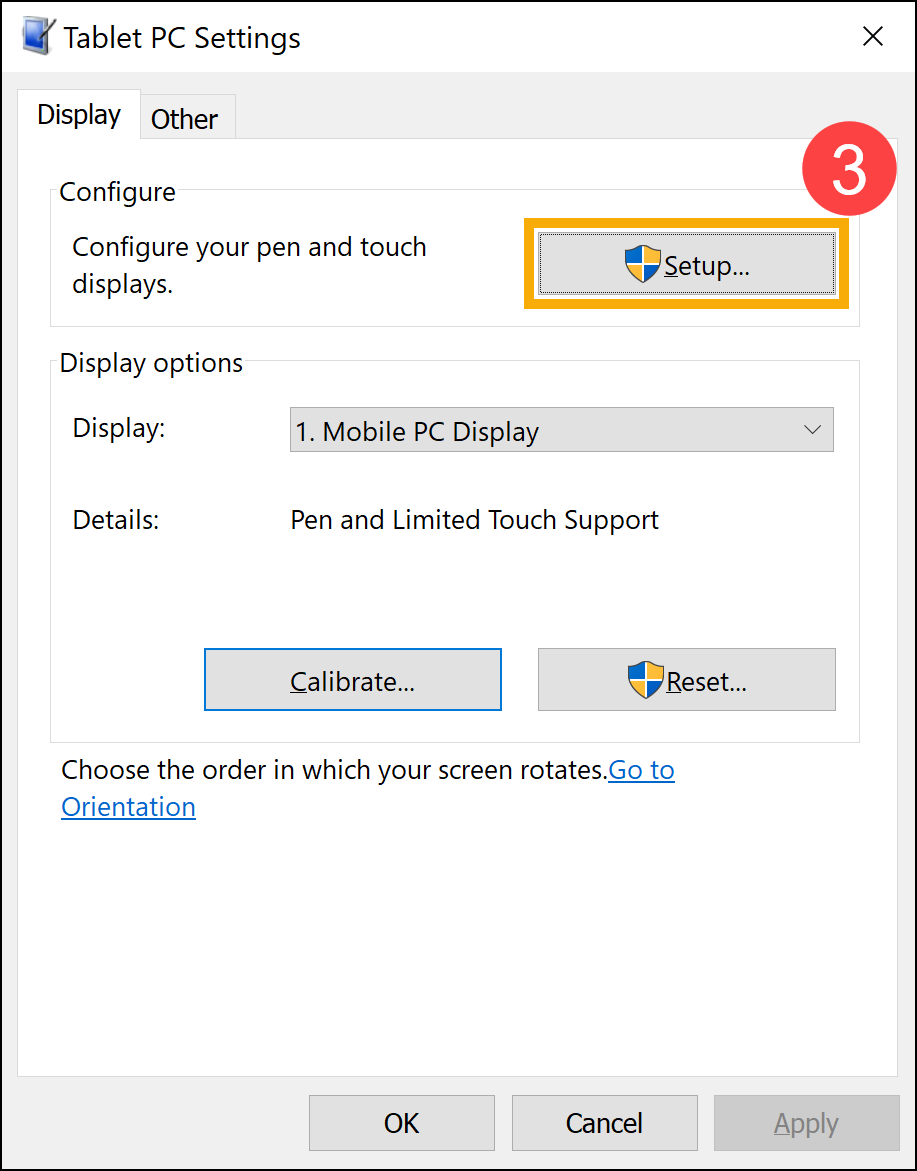
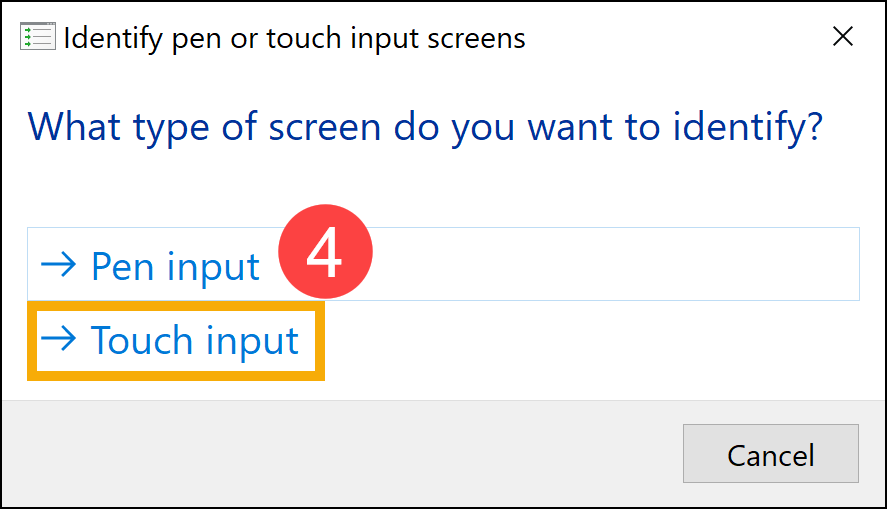
- Select [Setup]⑤, then select [Touch input]⑥. (If you are using a stylus, please select Pen input.)
- Follow the on-screen directions to identify your screen as a touchscreen.

- Tap the screen to check whether it is responding. If it does not, continue to the next step.
Reset touch calibration to the default settings
- Type and search [Control Panel] in the Windows search bar①, then click [Open]②.
- Select [Hardware and Sound]③.
- Select [Calibrate the screen for pen or touch input]④.
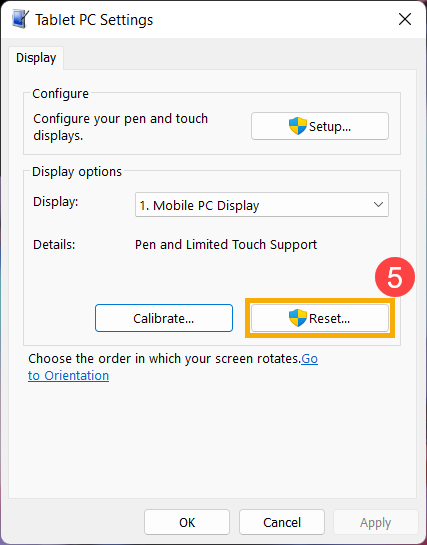
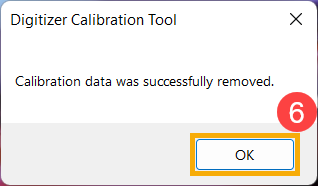
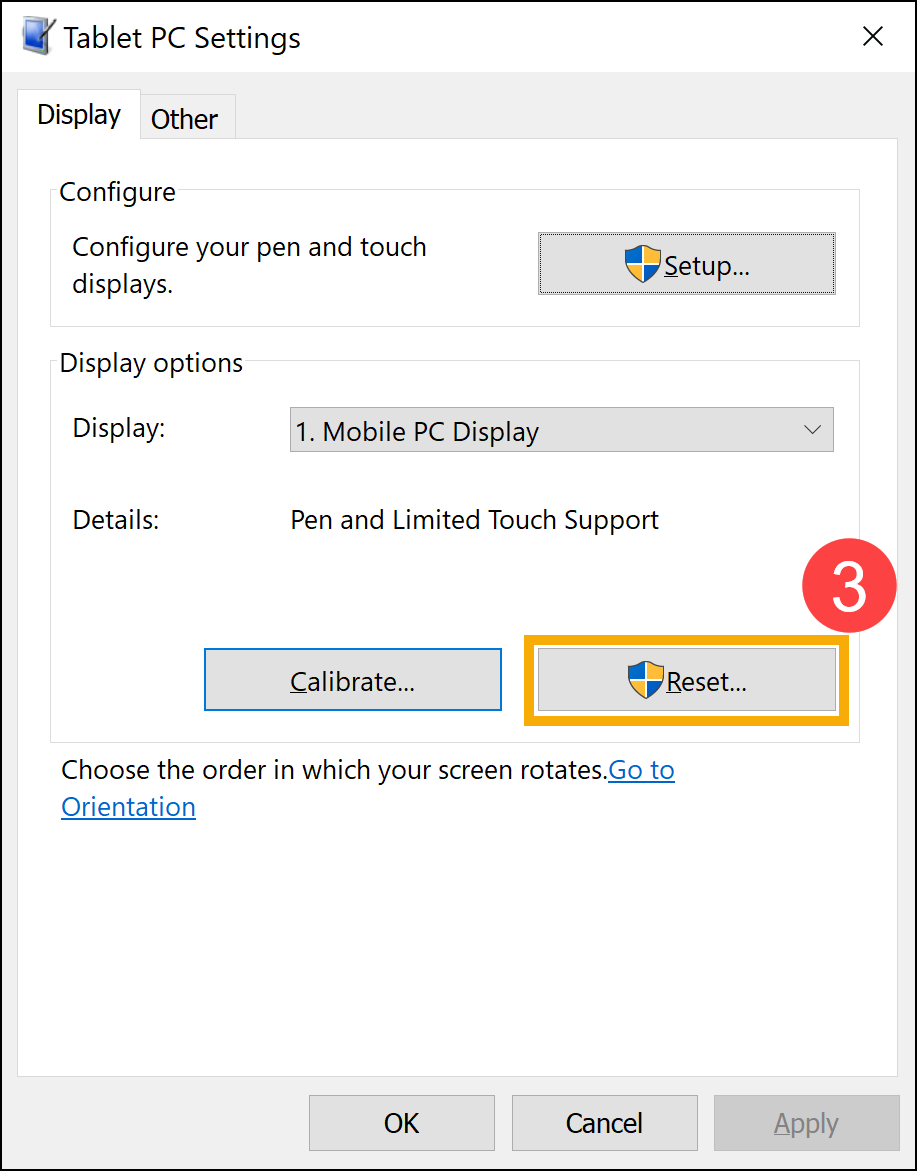
- Select [Reset]⑤, then click [OK]⑥.
- The touch calibration has been reset to the default settings, please restart the device and test the touchscreen function again. If problems persist, please continue to the next step.
Restore the system from restore point
If the touchscreen problem happens recently, and if you have ever created a restore point or there is an automatic system restore existed, try to restore the device to a point before the problem began to resolve the problem. Here you can learn more about How to use restore point to restore the system. If problems persist, please continue to the next step.
Reset the PC
If the problem persists after all troubleshooting steps are completed. Please backup your personal files, then reset the device to back to its original configuration. Here you can learn more about How to reset the system.
Confirm the laptop has a touchscreen function
If the screen has never responded to touch, but you think it should, please refer to the following methods to confirm whether your device has a touchscreen function.
- Type and search [View pen and touch info] in the Windows search bar①, then click [Open]②.
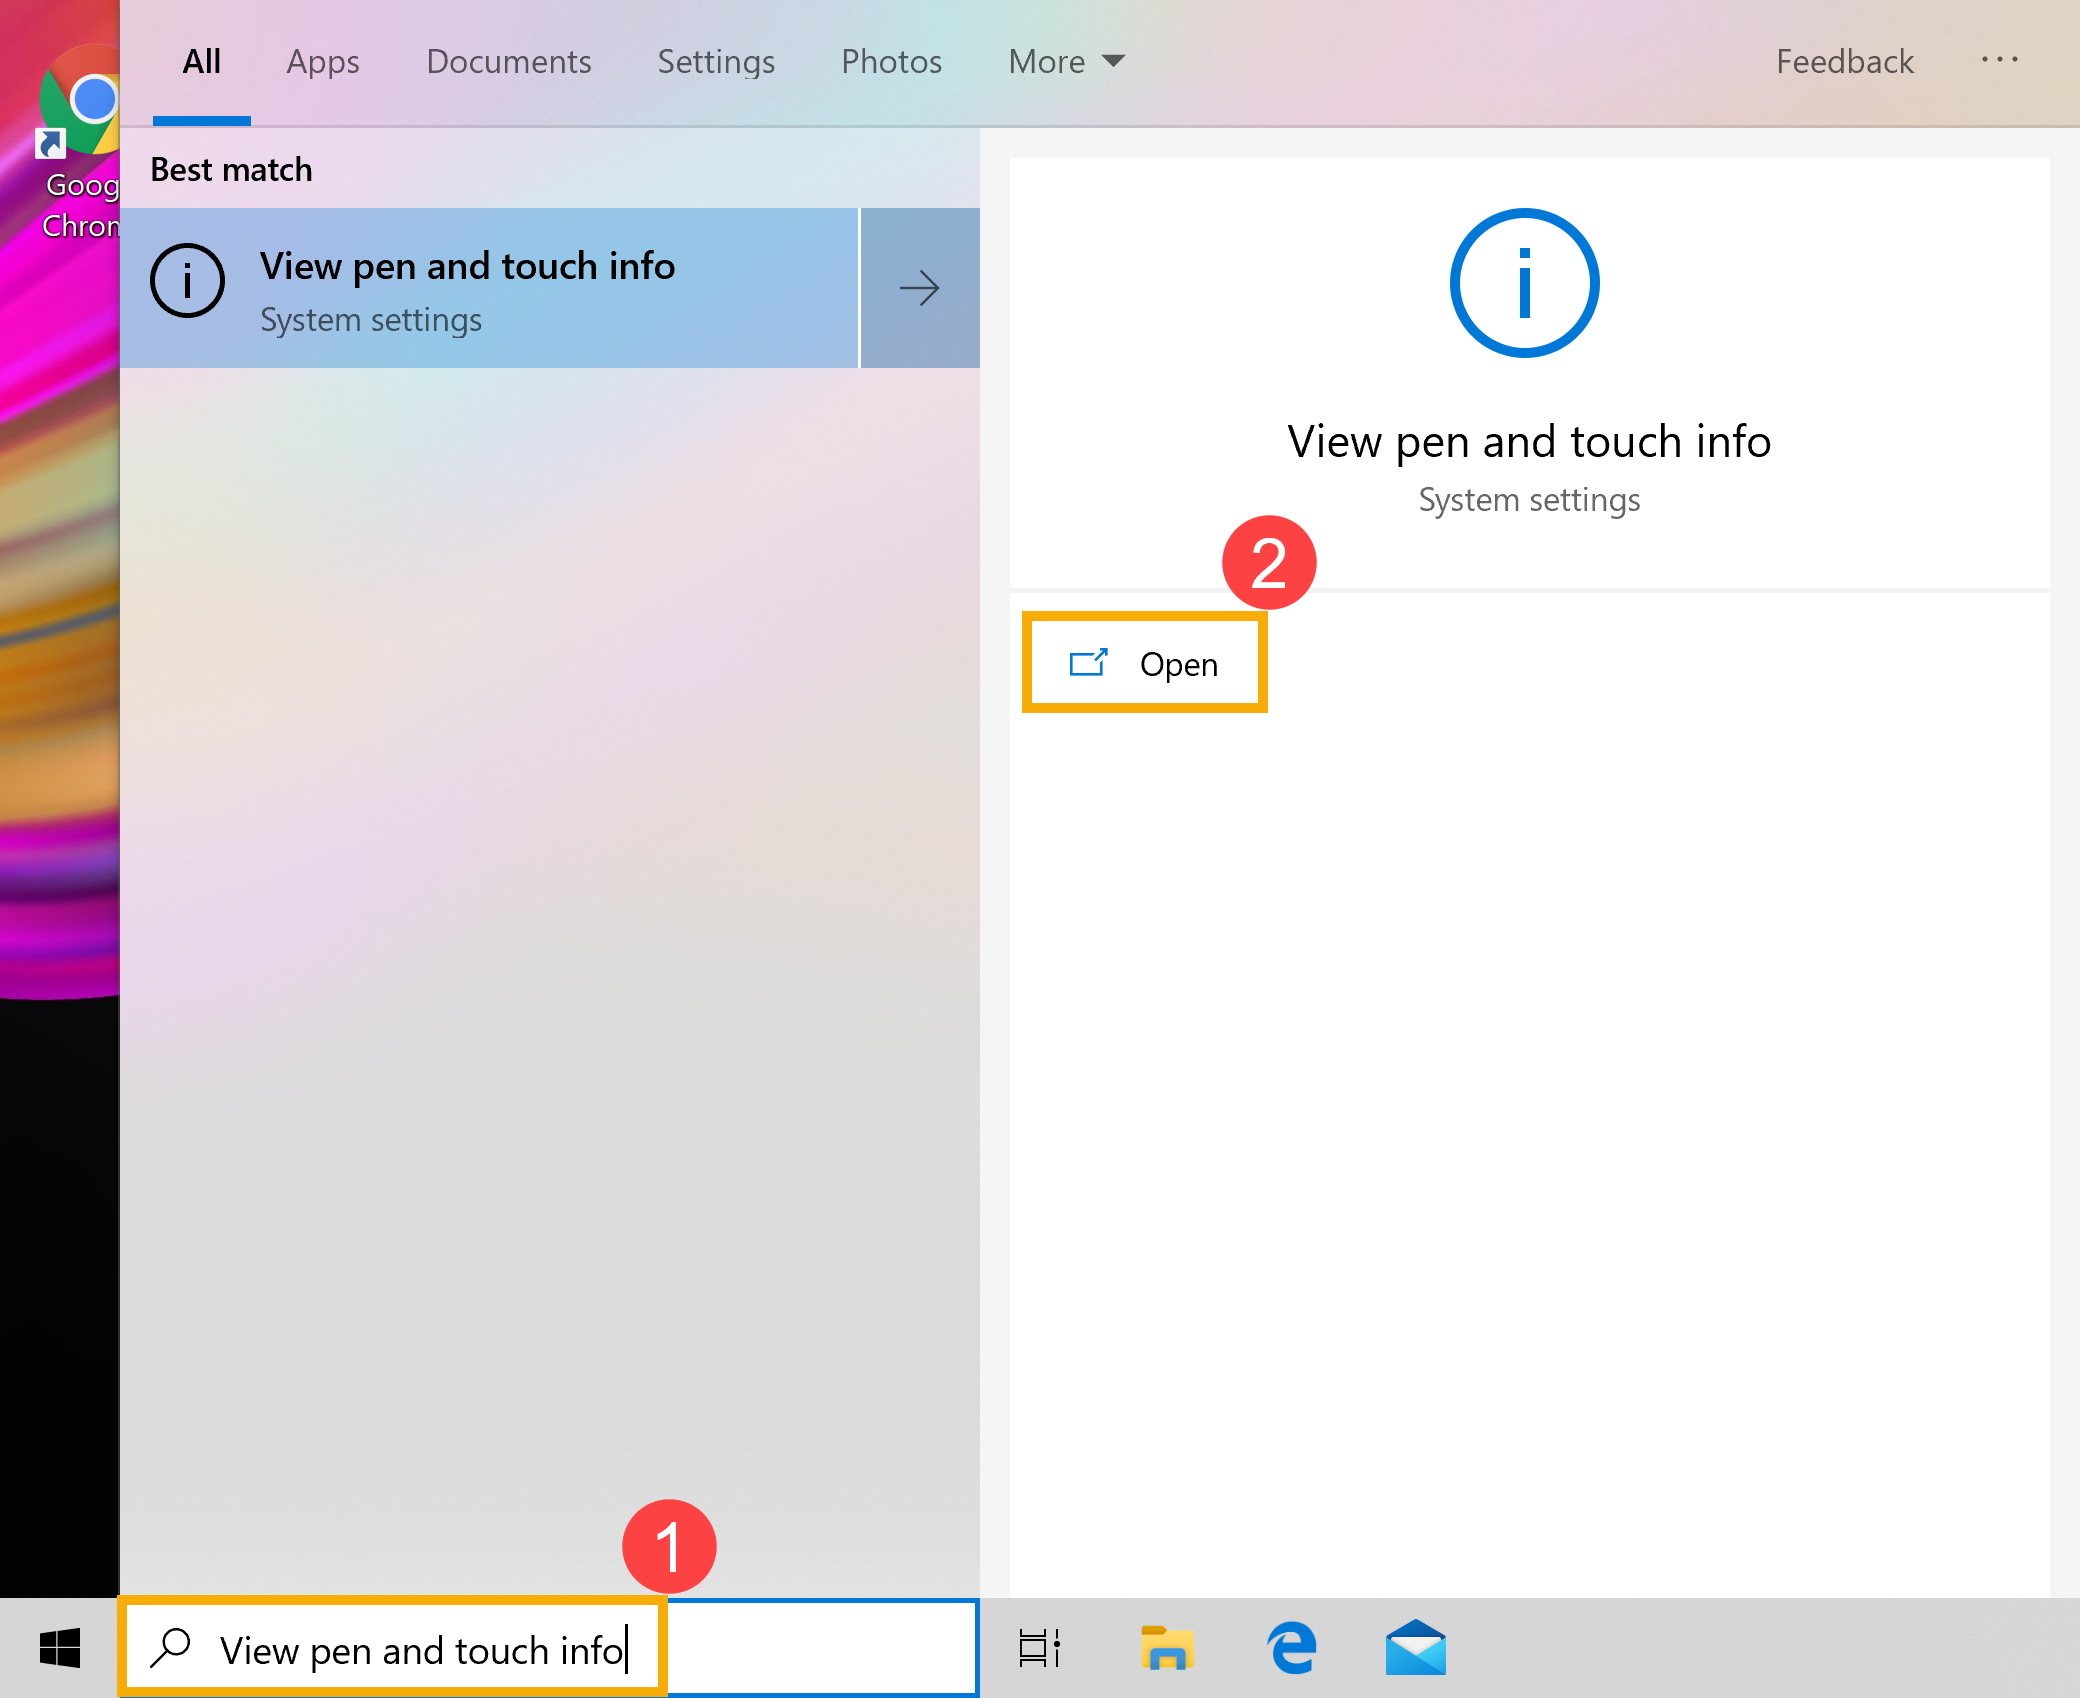
- If the Pen and touch section shows as [No pen or touch input is available for this display]③, this means your device does not have touchscreen function.
Note: If your screen supports touch input, but your device specifications do not indicate touch support, it is advisable to visit your local authorized ASUS service center for further evaluation.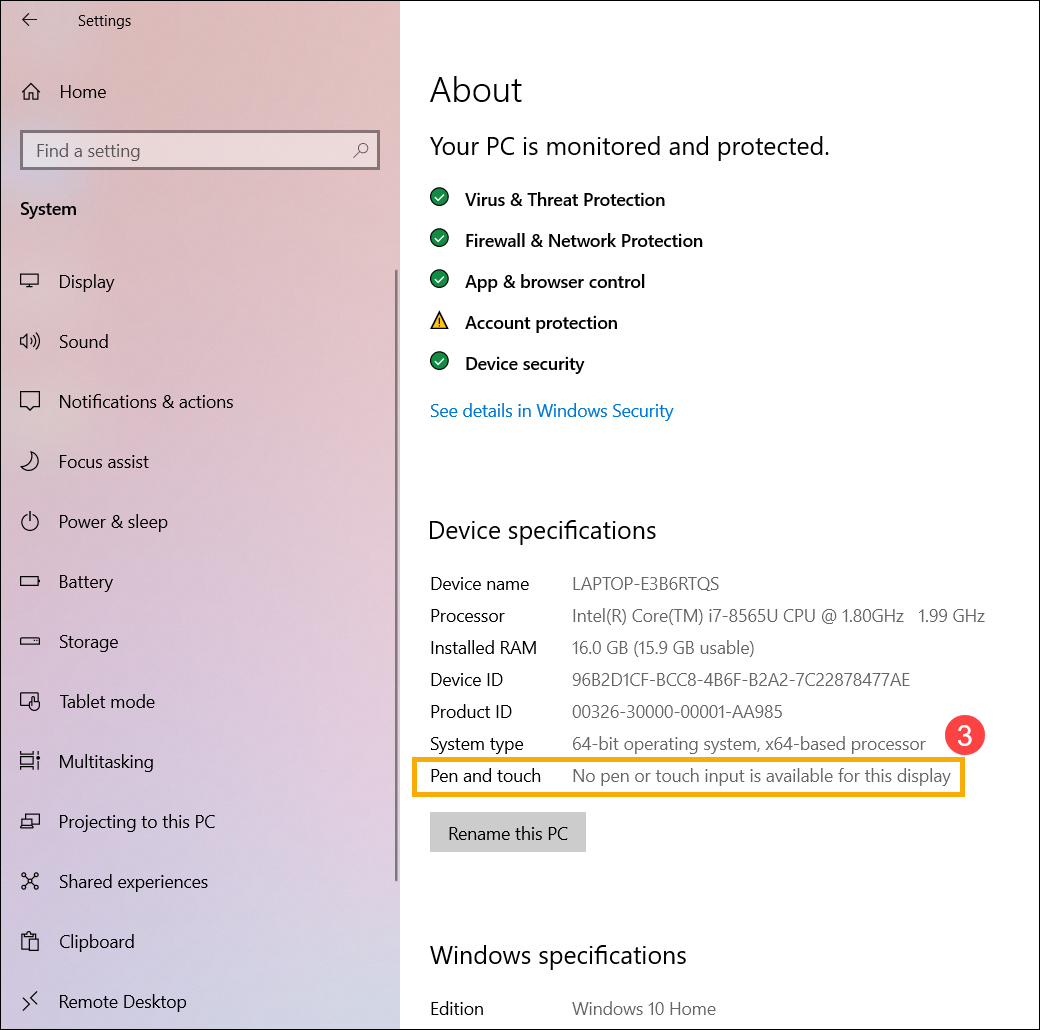
Clean the LCD screen
- Turn off the device first, then examine the condition of the screen for any damage.
- Please use a soft cloth dampened with cleaning solutions to gently wipe the screen clean of any dirt or smudges.
Note: The soft cloth should not be too wet and do not spray any cleaning solutions directly onto the screen or leave any liquid on the screen. You are able to use water to replace cleaning solutions if you don’t have any. - Let the LCD screen dry thoroughly, then turn on the device and check the touchscreen function.
Note: To avoid this problem, touch the screen only with clean hands or a stylus. - Installing a screen protector or some other accessories on or around the screen may sometimes interfere with the touch function of the screen. Therefore, please try removing those accessories from the screen and then test the screen again. If problems persist, please continue to the next step.
Enable and reinstall the touchscreen driver in Device Manager
- Type and search [Device Manager] in the Windows search bar①, then click [Open]②.
- Check the arrow next to [Human Interface Devices]③, then right-click [HID-compliant touch screen]④ and select [Enable device]⑤.
If the Enable device option does not display, it means the touchscreen function is already enabled. Please continue to the next step.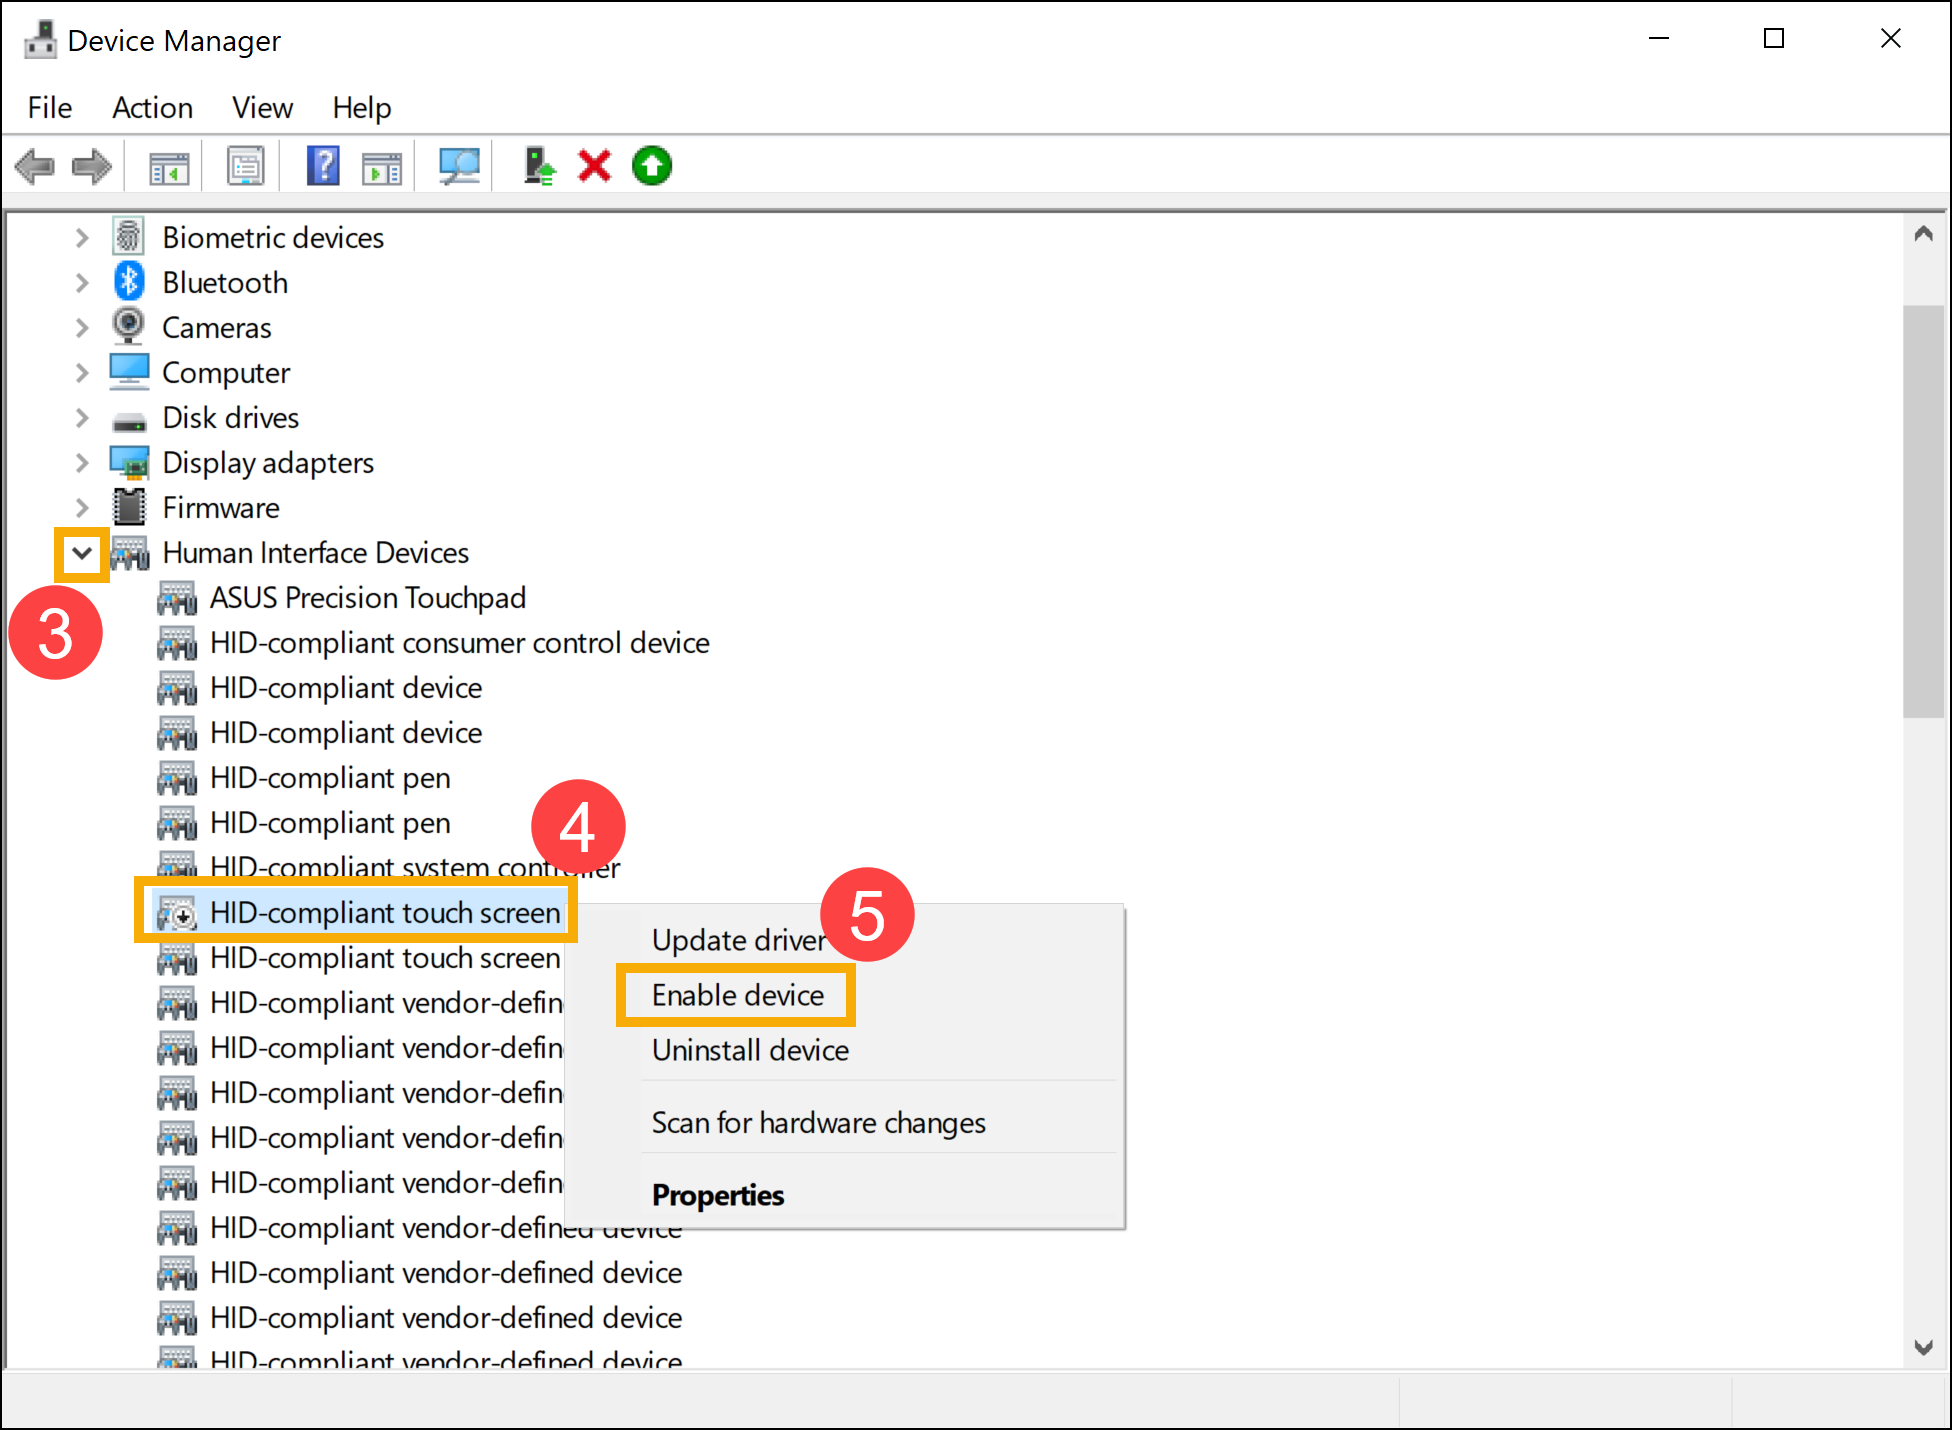
- Reinstall the touchscreen driver. Right-click the [HID-compliant touch screen]⑥, then select [Uninstall device]⑦.
Note: If you see two HID-compliant touchscreen drivers, uninstall the first driver, and then repeat the process for the second driver.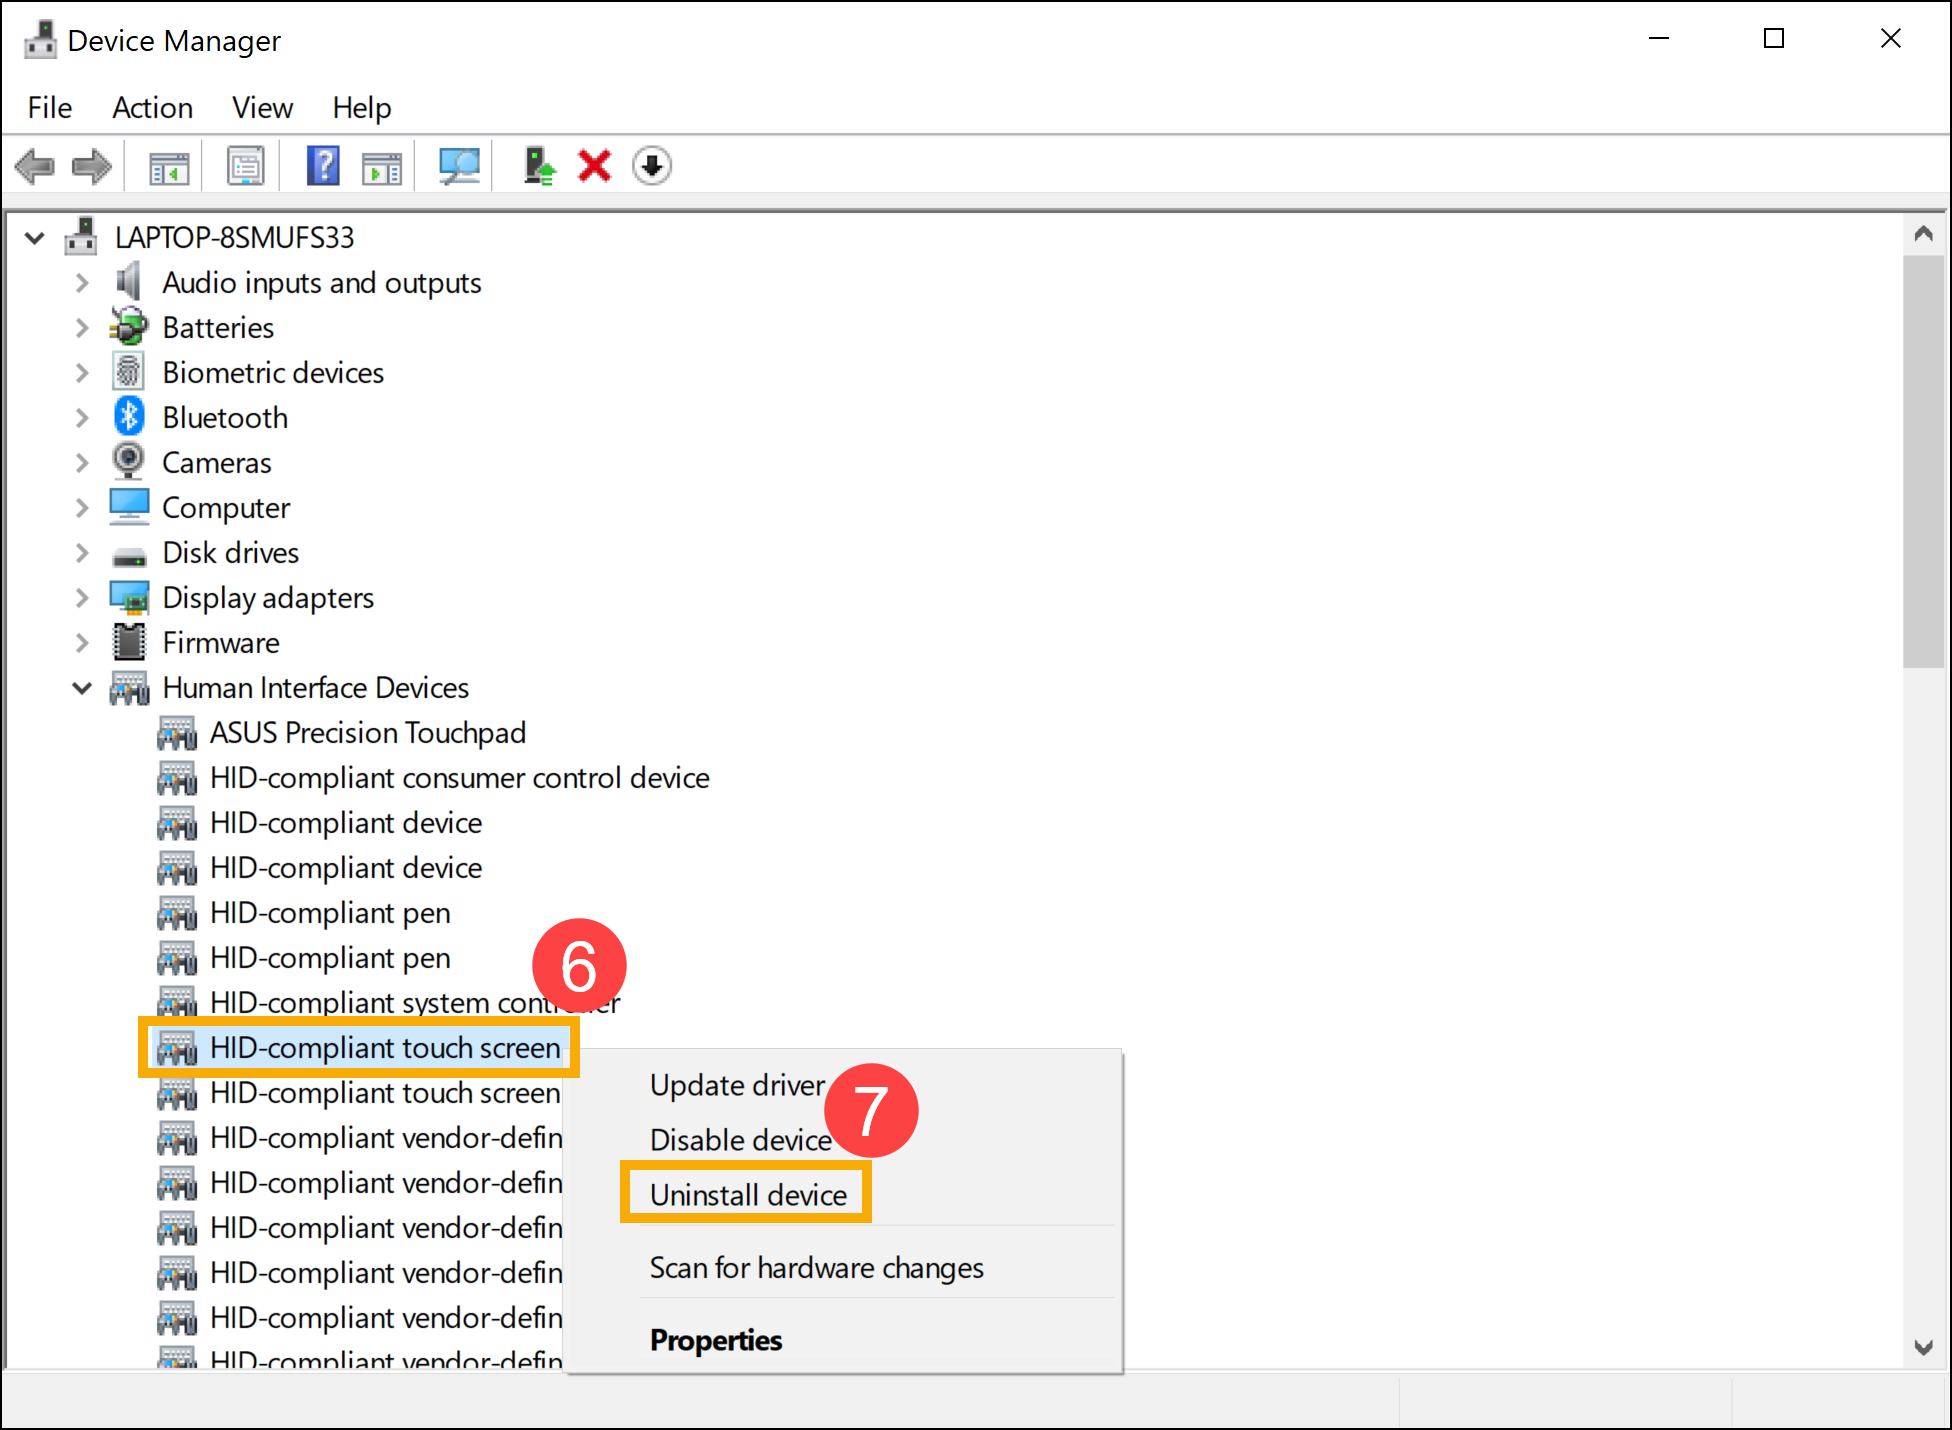
- Click [Uninstall]⑧.
- After the touchscreen drivers uninstall, please highlight [Human Interface Devices]⑨ in the Device Manager, then select [Action]⑩ and [Scan for hardware changes]⑪.
The device will reinstall the touchscreen drivers, and the touchscreen driver's name will display in the Human Interface Devices category.
Note: This process may need to download and install through the internet. Make sure your device is in an available network environment, then connect to internet.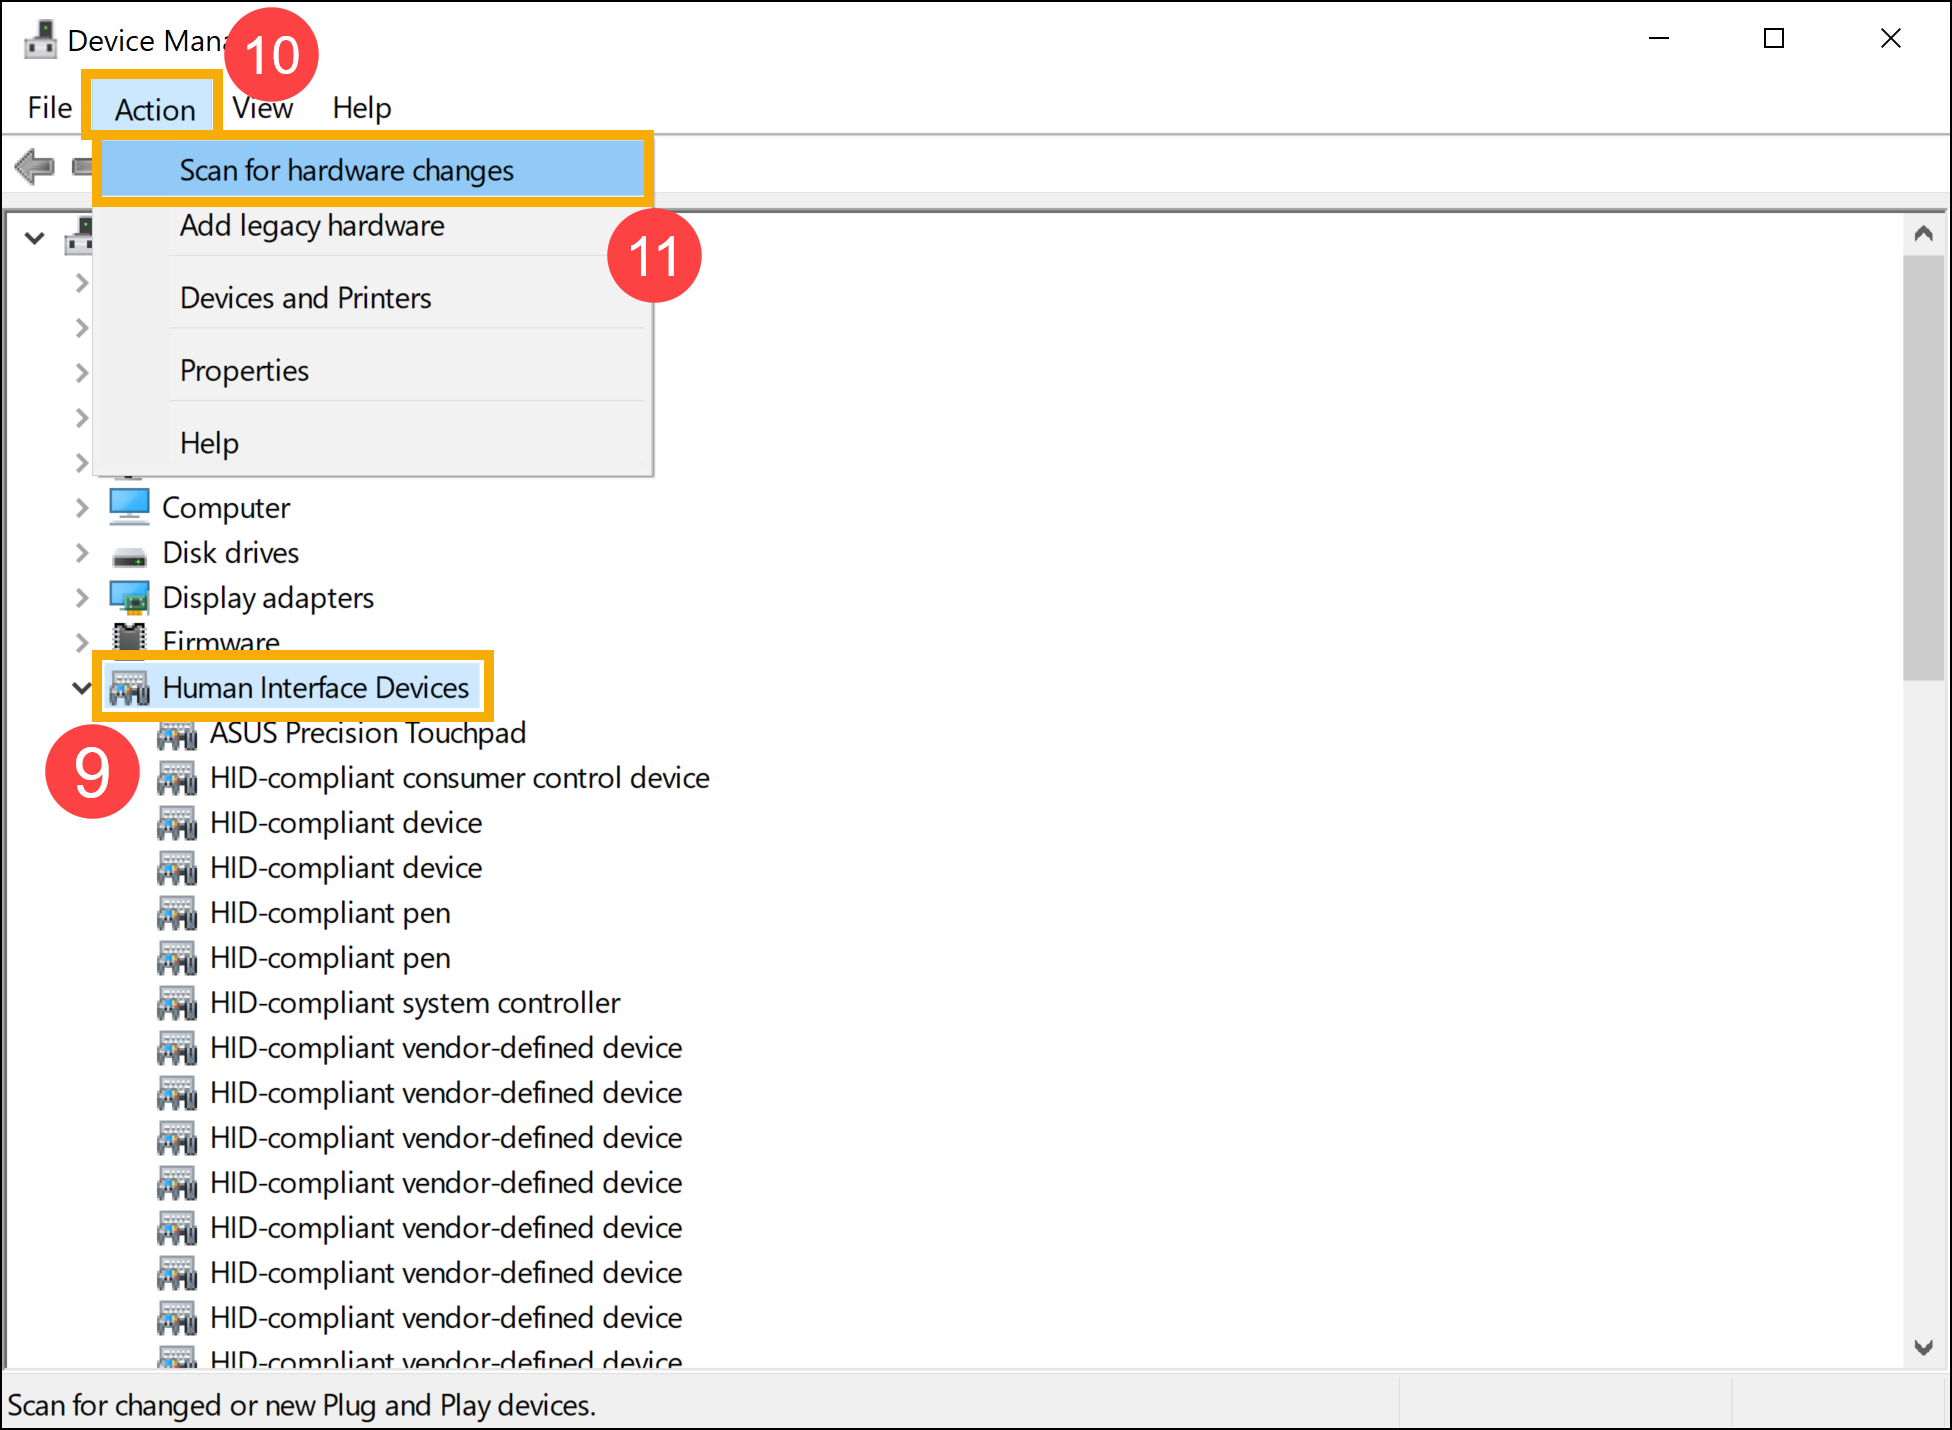
- After the touchscreen driver's name displays in the Human Interface Devices category, please restart the device then test the touchscreen function again. If problems persist, please continue to the next step.
Update and confirm BIOS / Windows packages / drivers with the latest version on your device
Updating software usually helps the system stability and optimization, so we recommend you check and often update to the latest version on your device. Here you can learn more about:
How to update BIOS with EZ Flash
For executing Windows update and drivers update, here you can learn more about:
How to update drivers via System Update in MyASUS
If the problem persists after you have updated BIOS/Windows packages/drivers to the date, please continue to the next chapter for troubleshooting.
Configure the touch display
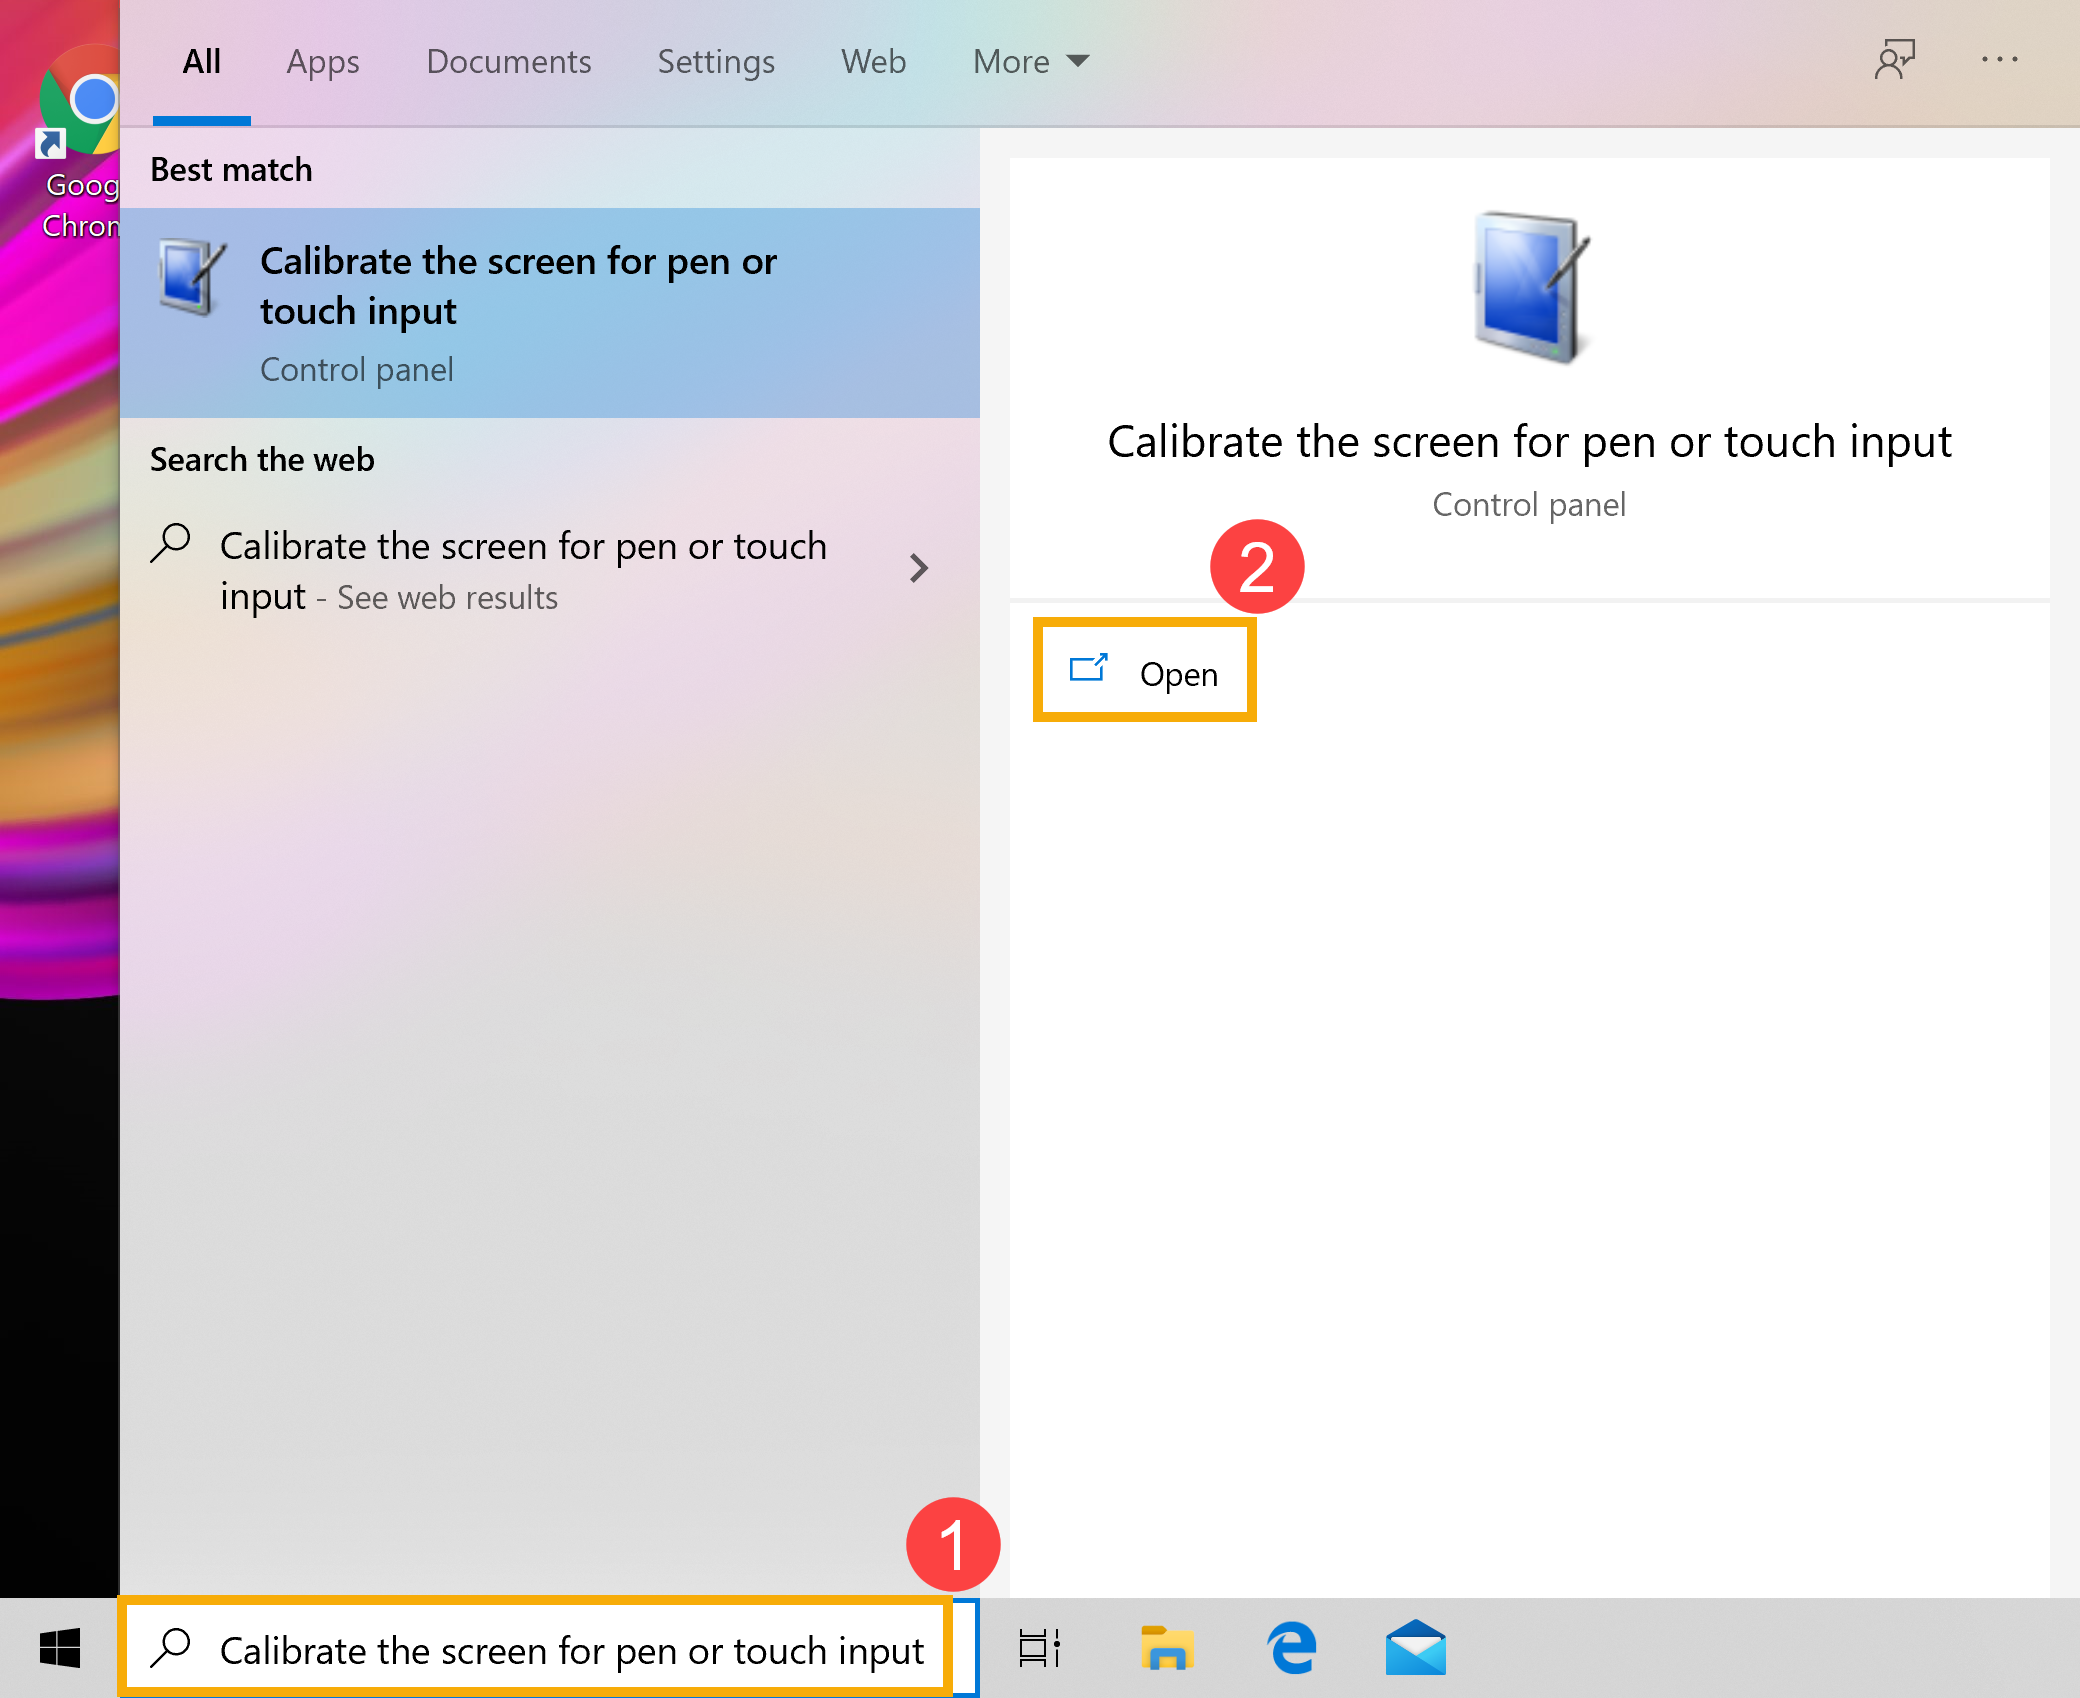
- Type and search [Calibrate the screen for pen or touch input] in the Windows search bar①, then click [Open]②.
- Select [Setup]③, then select [Touch input]④. (If you are using a stylus, please select Pen input.)
- Follow the on-screen directions to identify your screen as a touchscreen.
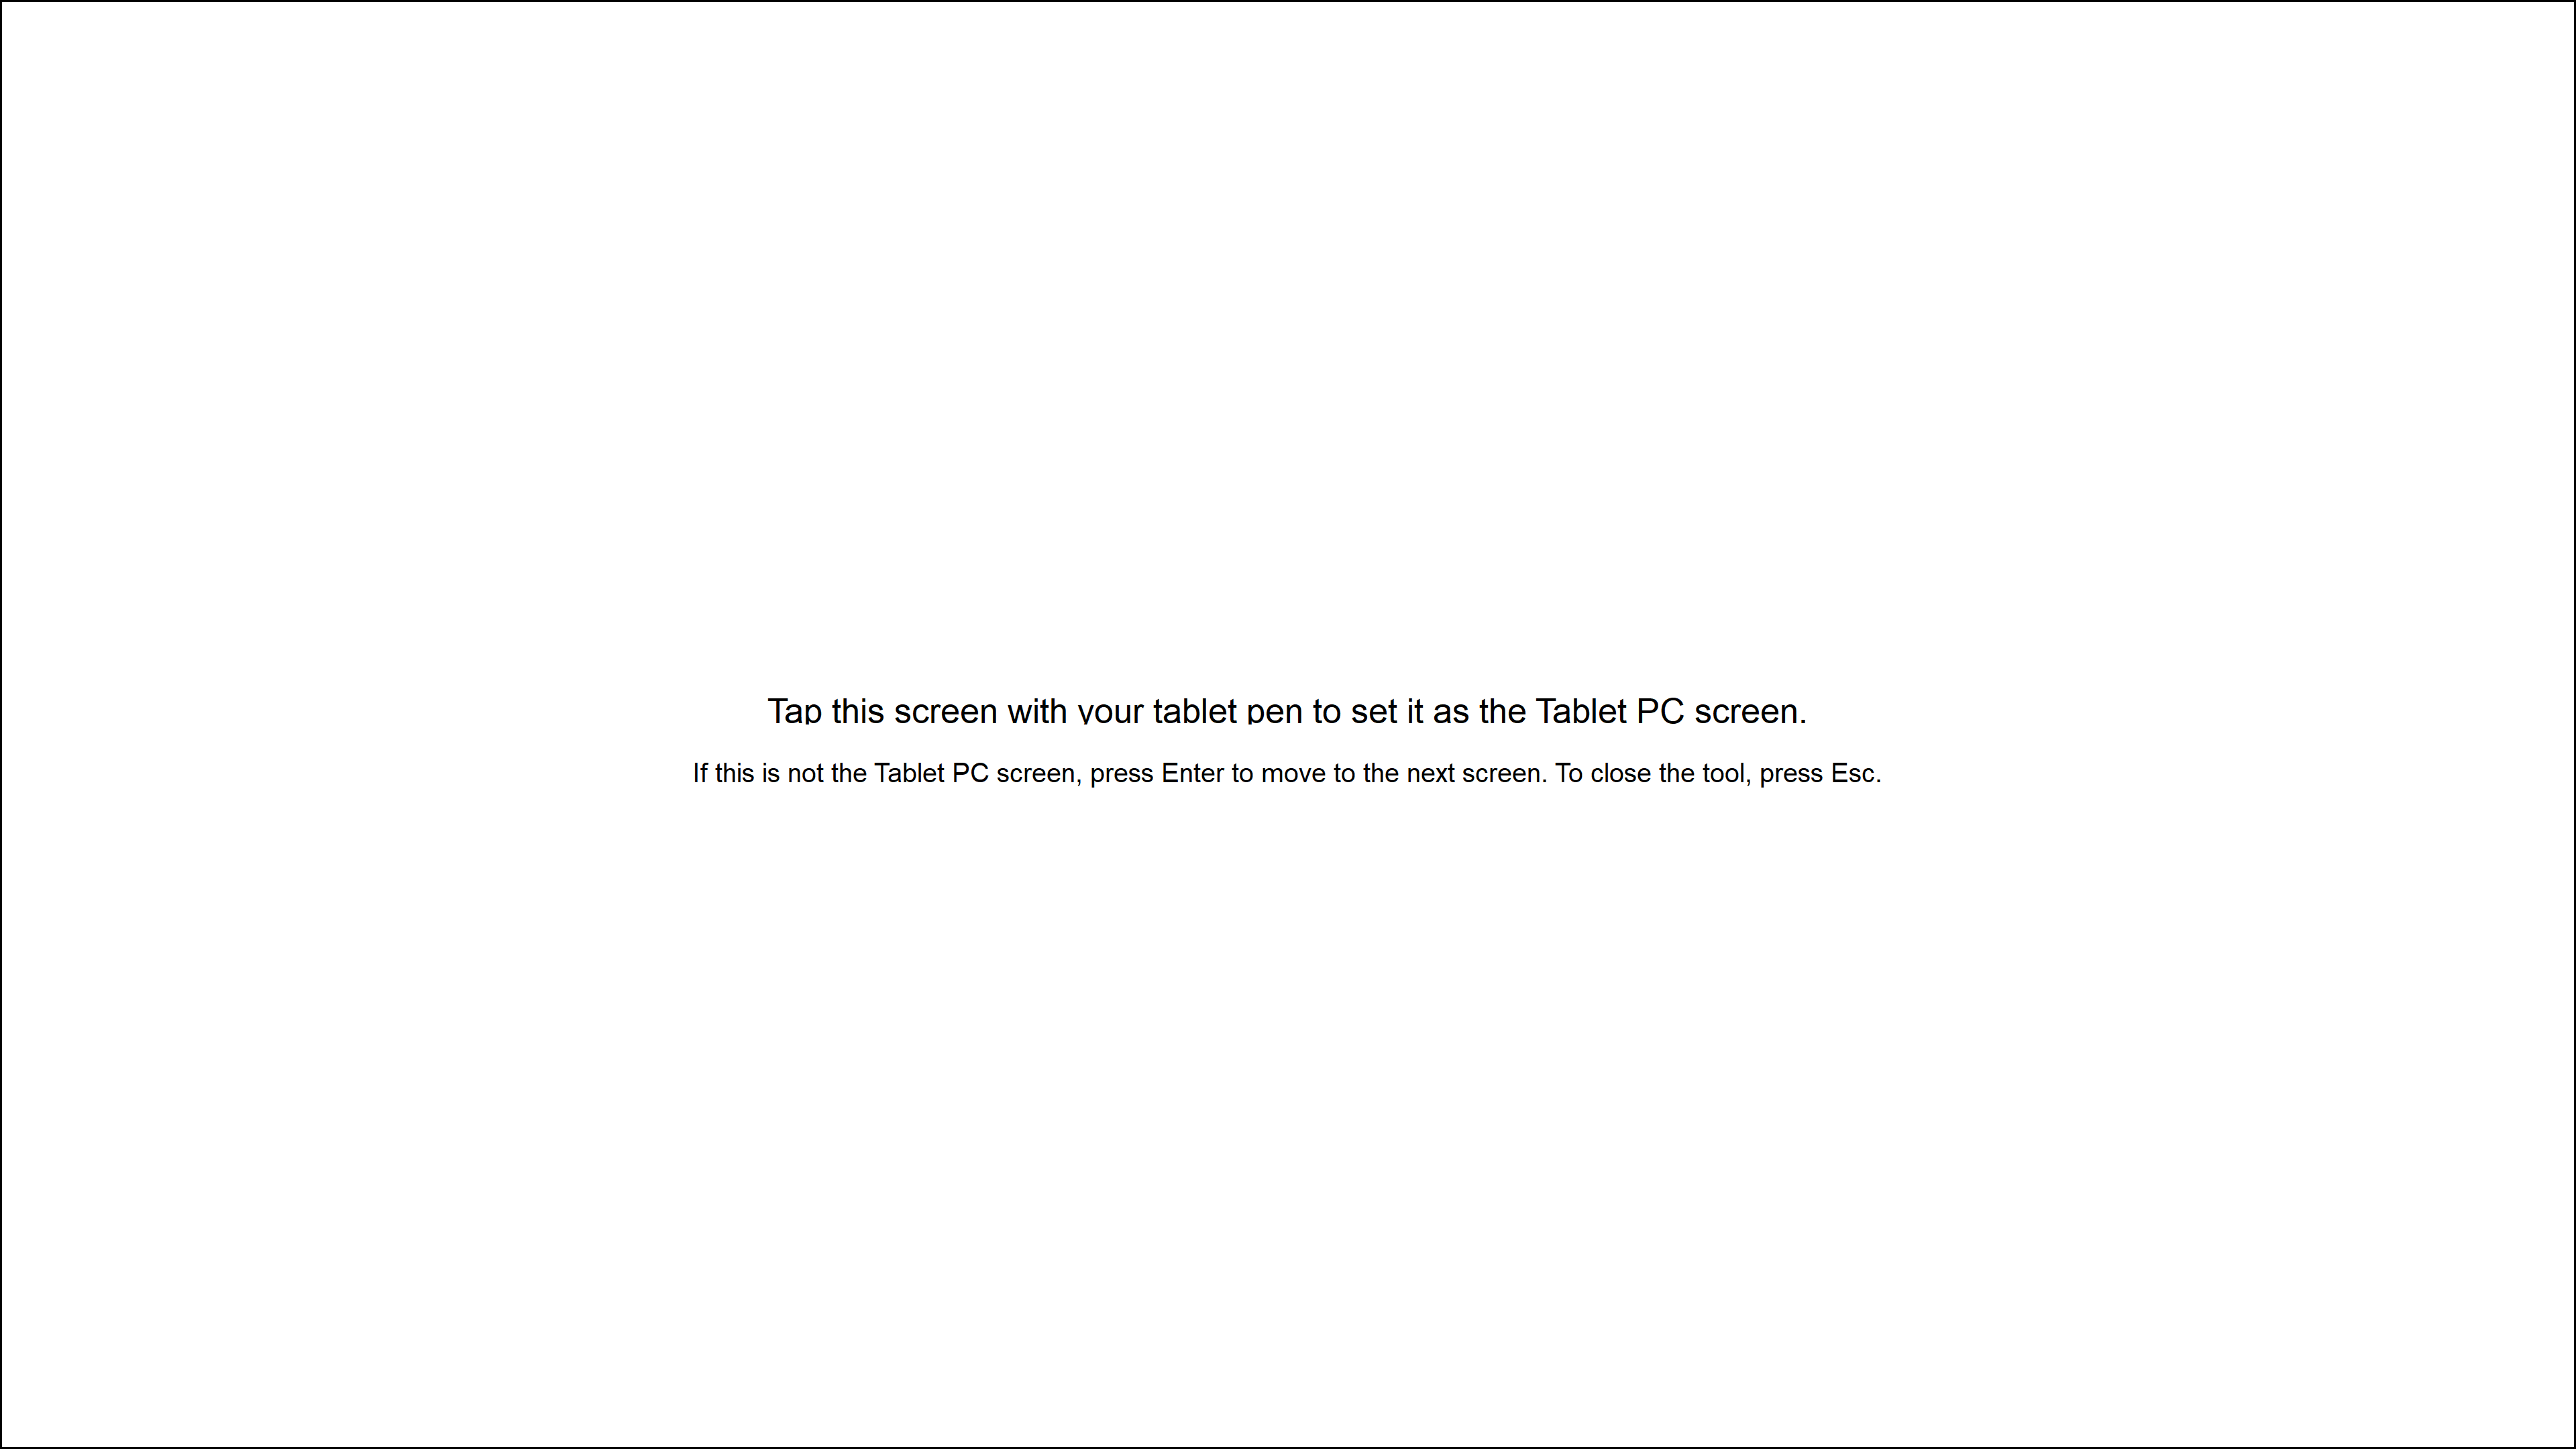
- Tap the screen to check whether it is responding. If it does not, continue to the next step.
Reset touch calibration to the default settings
- Type and search [Calibrate the screen for pen or touch input] in the Windows search bar①, then click [Open]②.

- Select [Reset]③, then click [OK]④.
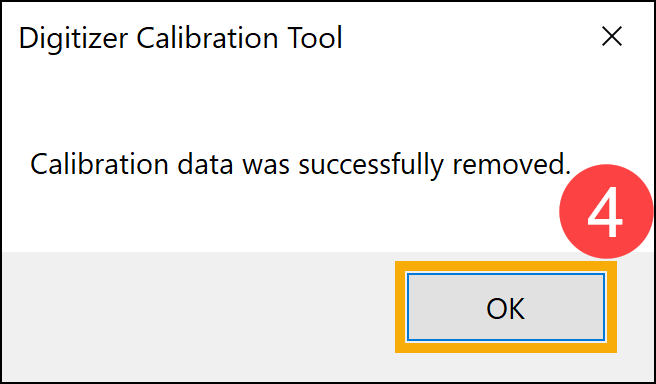
- The touch calibration has been reset to the default settings, please restart the device and test the touchscreen function again. If problems persist, please continue to the next step.
Restore the system from restore point
If the touchscreen problem happens recently, and if you have ever created a restore point or there is an automatic system restore existed, try to restore the device to a point before the problem began to resolve the problem. Here you can learn more about How to use restore point to restore the system. If the problem persists, please continue to the next chapter for troubleshooting.
Reset the system
If the problem persists after all troubleshooting steps are completed. Please backup your personal files, then reset the device to back to its original configuration. Here you can learn more about How to reset the system.
If you still cannot resolve your problem, download MyASUS and try the System Diagnosis for troubleshooting. Click below!

How to set the right-click function for touchscreen
- Type and search [Control Panel] in the Windows search bar①, then click [Open]②. (The left-side search illustration below is in Windows 11, and the right-side is Windows 10.)

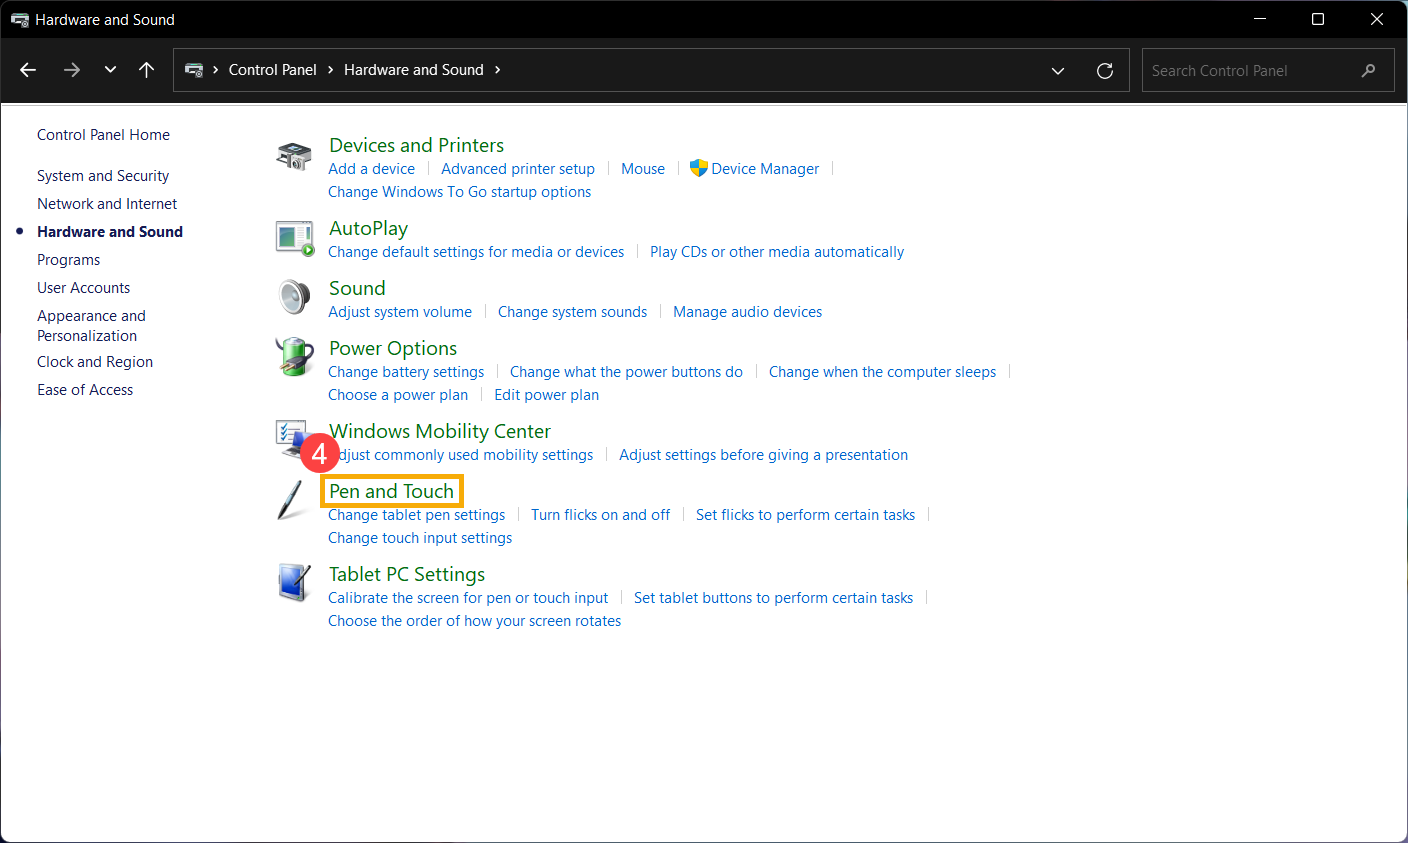
- Select [Hardware and Sound]③.
- Select [Pen and Touch]④.
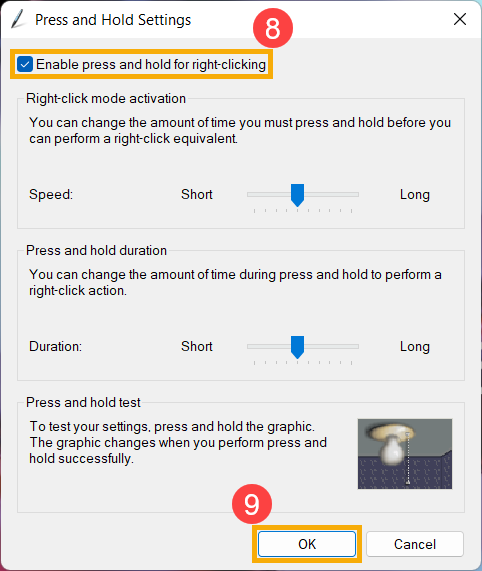
- Select the [Touch] tab⑤, then choose the [Press and hold] action⑥ and click [Settings]⑦.
Note: If you are using a stylus, select the Pen Options tab.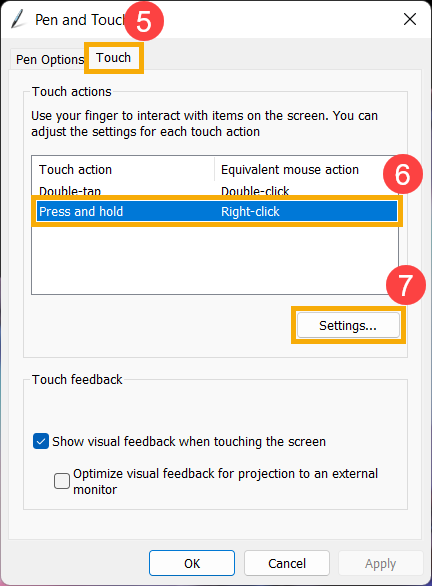
- Check the box to [Enable press and hold for right-clicking]⑧, and select [OK]⑨, then the right-click function for touchscreen will be enabled.