[Graphic Card] ASUS GPU Tweak II - Introduction
Table of Contents:
ASUS GPU Tweak II Introduction
Download ASUS GPU Tweak II
Startup ASUS GPU Tweak II
Easy Mode
Advanced Mode
Monitor panel
FAQ
ASUS GPU Tweak II Introduction
ASUS GPU Tweak II is a smart graphics card software that allows you to monitor and adjust graphics card settings, and to achieve optimal performance.
This program contains two types of user interfaces "Easy Mode" and "Advanced Mode".
[Easy Mode]:Provides user with ASUS preset quick optimization function options.
[Advanced Mode]:Provides user-defined overclocking and other setting options.
Download ASUS GPU Tweak II
How to get (ASUS GPU Tweak II)?
You can get the latest software, manuals, drivers and firmware at the ASUS Download Center.
If you need more information about ASUS Download Center, please refer to this Link.
*How to check product model: https://www.asus.com/support/Article/565/
Operation method:
1. Download the latest BIOS file corresponding to your motherboard model from ASUS Download Center and save it in the USB flash drive.
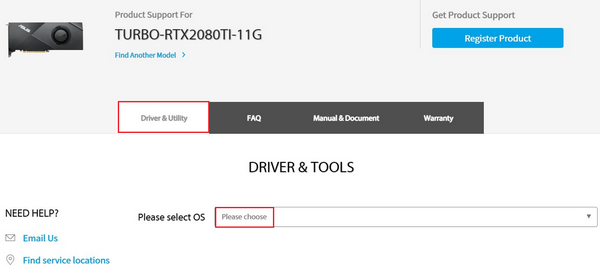
Enter the product model -> click on the Driver & Utility
(Ex: TURBO-RTX2080TI-11G)

2. Click Drivers and Utility-> Select Operating System
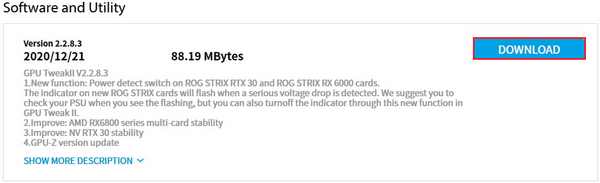
3. Find ASUS GPU Tweak II in the Software and Utility category, and click Download to download the file (recommended to use the latest version)
After the installation completes, double-click GPU Tweak II on the desktop  Icon, then you can start the program.
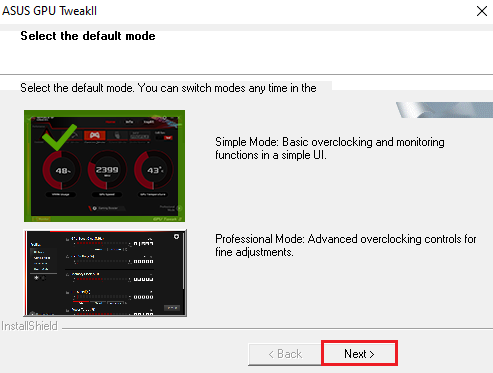
[Easy Mode] and [Advanced Mode] can be both selected when starting the program for the first time. Please refer to the following instructions:
[Easy Mode]:Provides user with ASUS preset quick optimization function options.
[Advanced Mode]:Provides user-defined overclocking clock and other setting options.
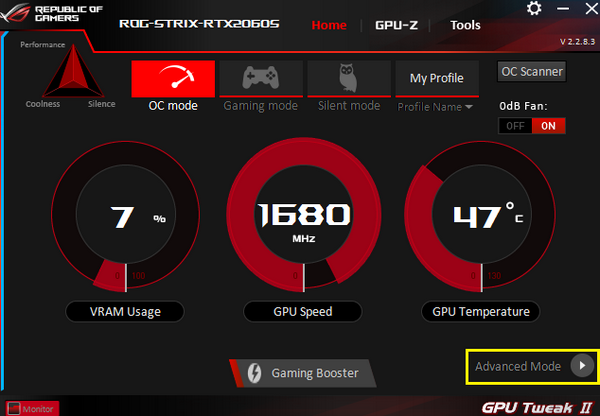
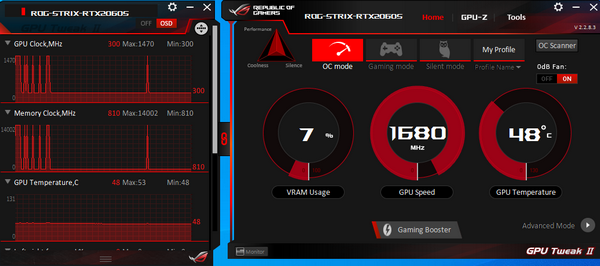
Easy Mode :
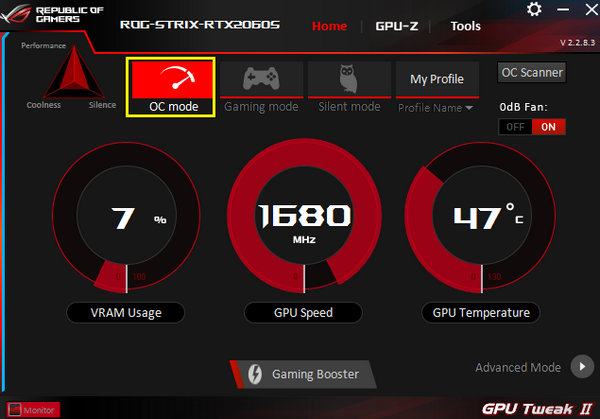
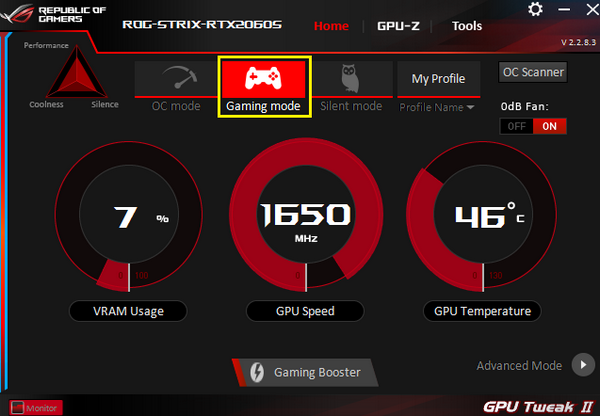
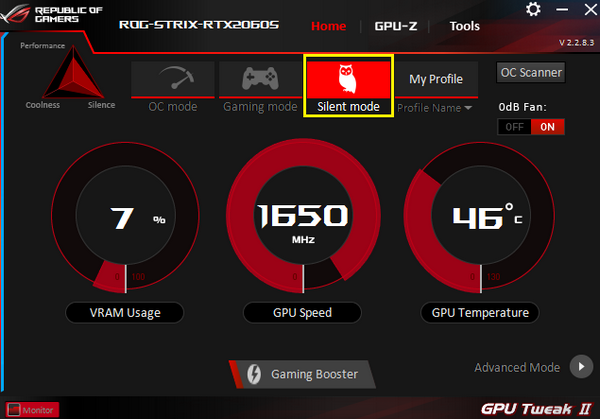
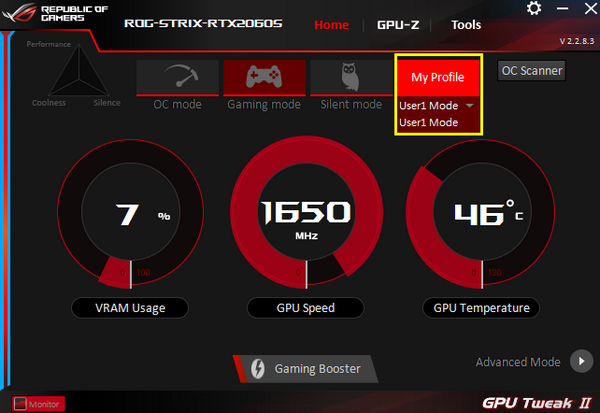
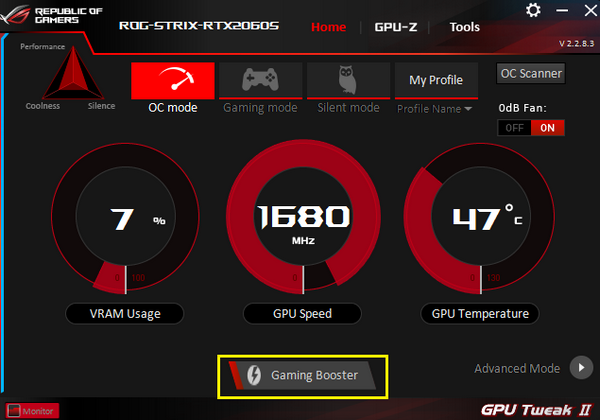
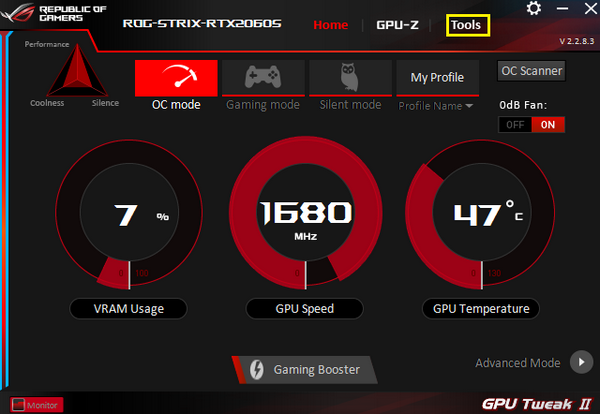
The reference screen of the homepage under the Easy Mode panel is as the following:
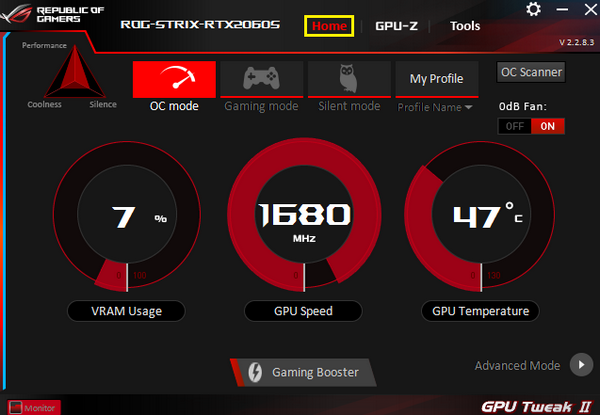
ASUS Default mode description (click the icon to enable):
OC mode : It’s the higher performance mode, and it may lead to higher temperature and bigger sound of fan than Game mode.
Gaming modes: performance, temperature and fan balance mode.
Silent mode: with a lower fan sound but higher temperature and lower performance than the game mode.
Custom mode: Users need to set the save data in the advanced mode first, click to apply.
Gaming Booster one-key optimization function description.
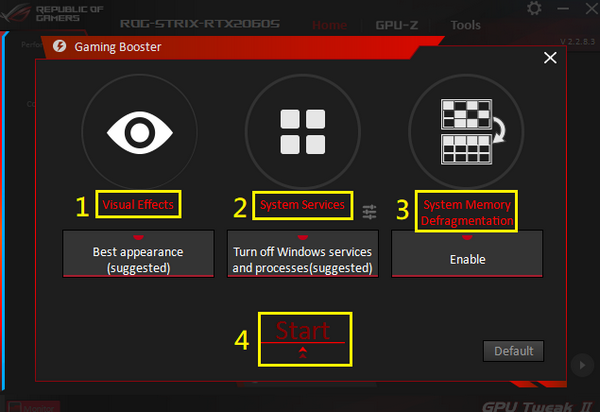
After clicking the one-key optimization button, the following screen will appear
1. Visual Effects: You can turn off the Windows visual effects function to improve the performance of games or applications
2. System Service: You can choose to automatically disable Windows services, programs, or disable resident applications, then the performance is improved.
3. System memory reorganization: It can automatically release memory resources without closing any services and processes, and then improve system operating efficiency
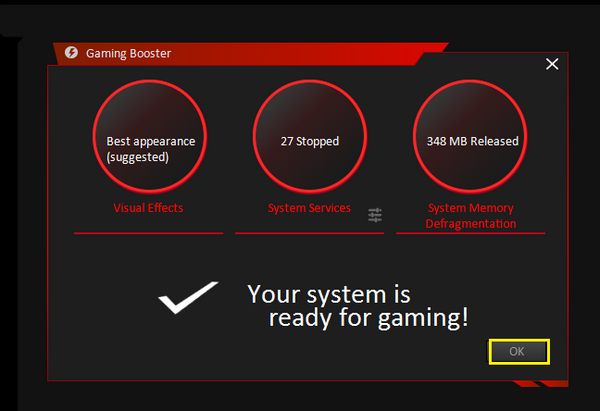
4. Start: Click the [Start] button to optimize. After the optimization is completed, refer to the figure below and click OK to return to the program interface.
Click OK Button.
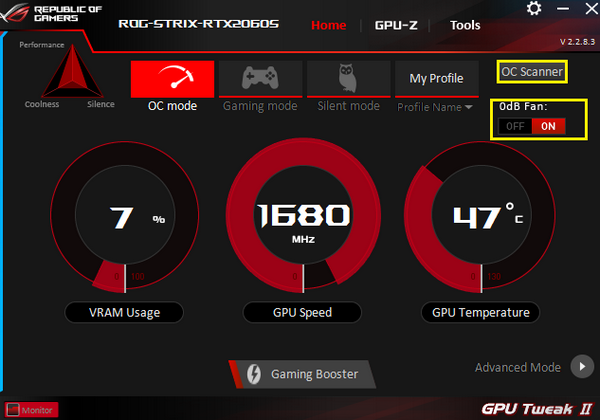
OC Scanner: Automatic calculation of optimized overclocking clock
0db Fan: You can turn On / Off the fan 0db function
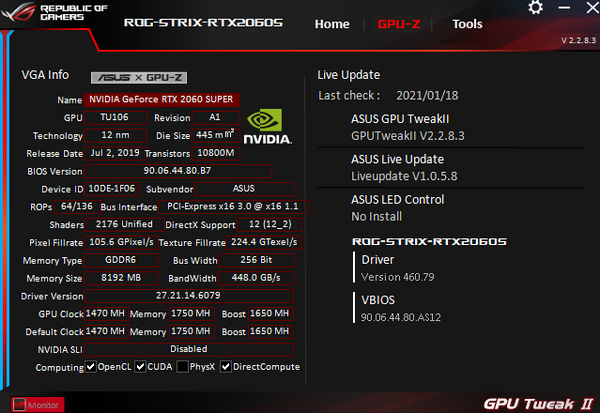
GPU-Z function description.

GPU-Z can fully display the graphics card information. For other related information , you can refer to the following figure.
Tool function description
Download, install, and open various useful third-party tools here.
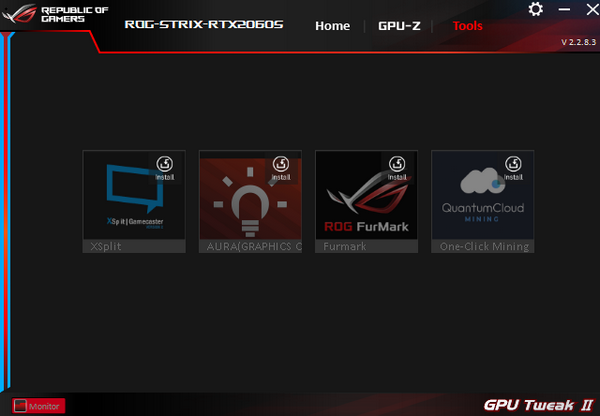
XSplit: Provides powerful live streaming and recording applications for free (third-party software) https://xsplit.com
AURA: ASUS supports lighting effects software (needs graphics card to support AURA function) https://www.asus.com/campaign/aura/jp/download.php
ROG FurMark: The software to test the stability of the graphics card https://geeks3d.com/furmark/rog/
Quantum Cloud: Use the idle graphics card to share the computing power through the QuantumCloud program to earn points for free.
https://www.quantumcloudai.com/
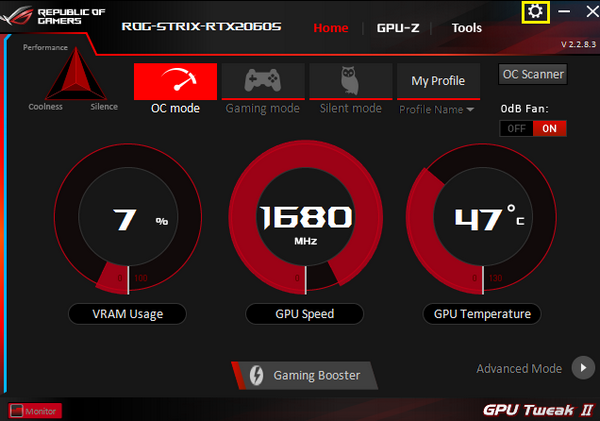
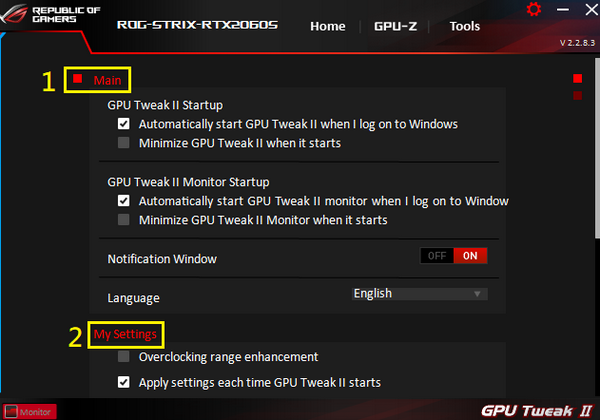
Setting function description:
You can adjust ASUS GPU Tweak II related settings from the Settings page.
1. Setting: You can set whether to allow the program and the monitoring panel to start with Windows startup
2. My settings: You can increase the overclocking range and the setting range of the clock that can be adjusted in the advanced mode (refer to the advanced mode)
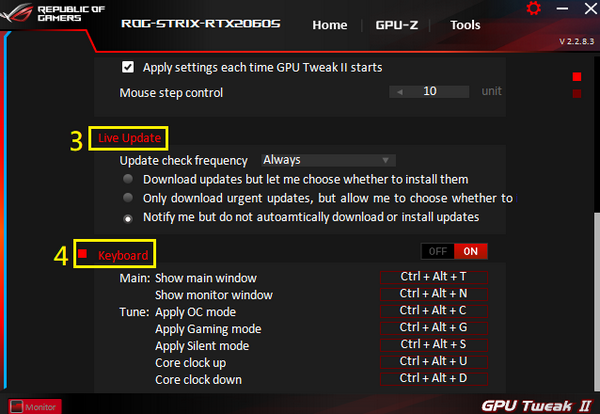
3. Online real-time update: You can choose whether to automatically update the application.
4. Keyboard: To customize keyboard shortcuts for the related functions
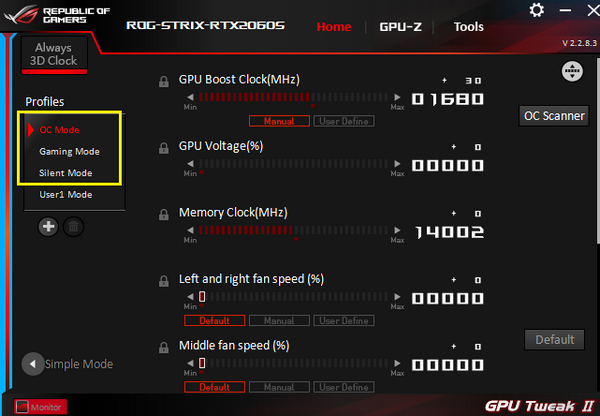
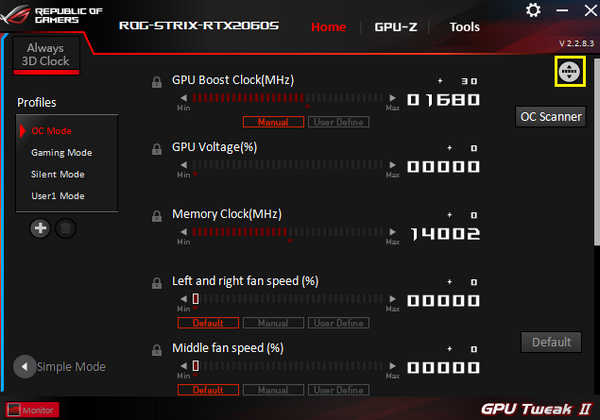
Advanced mode:
In "Easy Mode", click “Advanced Mode” icon to enter.
The reference screen of the home page of the advanced mode panel is as the following:
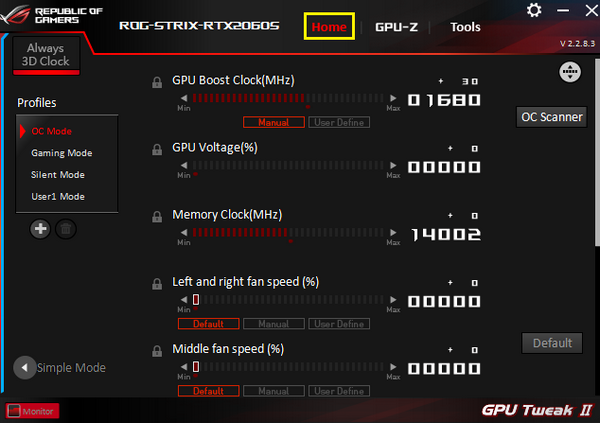
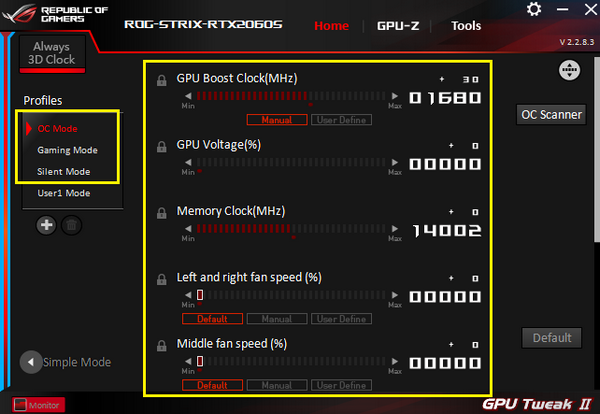
Preset mode selection:
You can choose Overclocking mode, Gaming mode , Silent mode.
After choosing one mode to fine-tune the parameters and apply, you can save a new file.
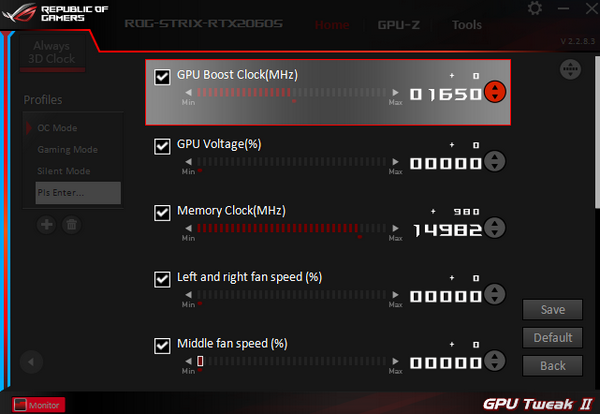
Please enter profile name and press “enter” on the keyboard.
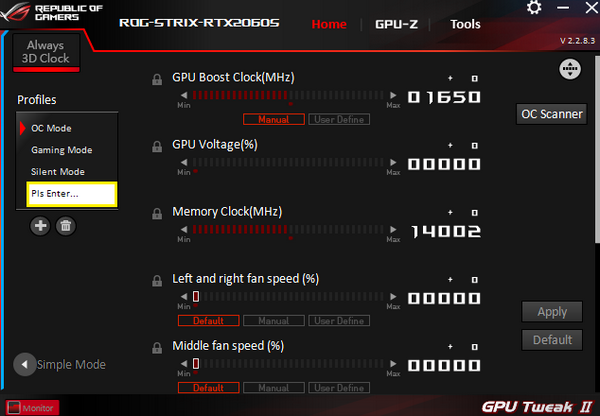
Example: Self-defined name [USER001], then click 
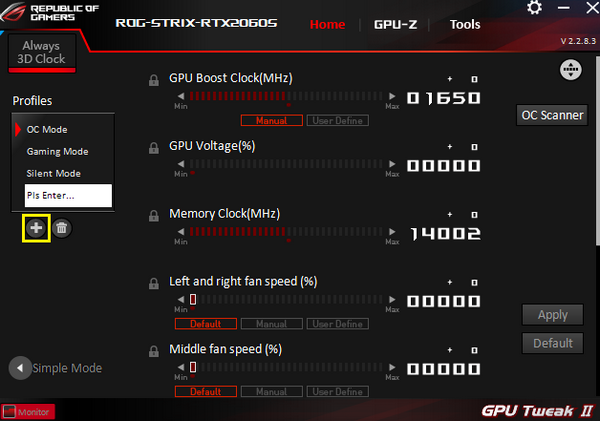
Add or delete custom modes:
You can add or delete multiple user-defined modes, up to 16 groups can be customized (ASUS default modes cannot be deleted) 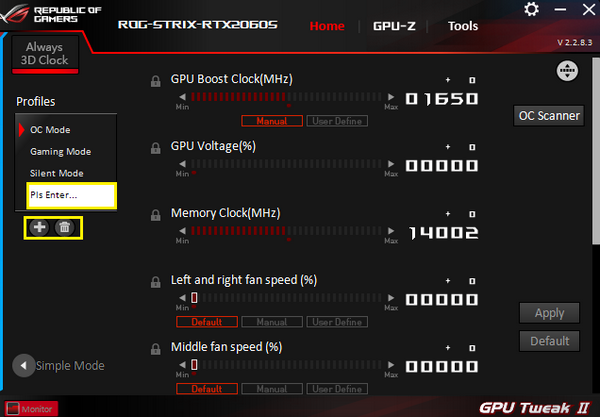
Adjust the operating parameters of the graphics card:
Increase or decrease the operating parameters of the graphics card will be adjusted according to the maximum and minimum values of each graphics card. 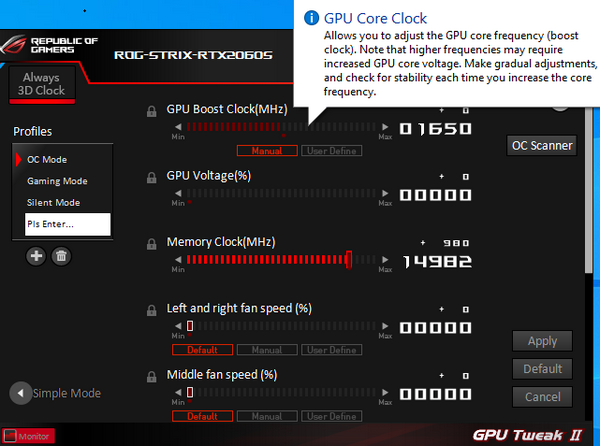
Note: It is not recommended to adjust the graphics card parameters greatly. It is recommended to use the ASUS default mode or slightly adjust the applied settings to ensure stability.
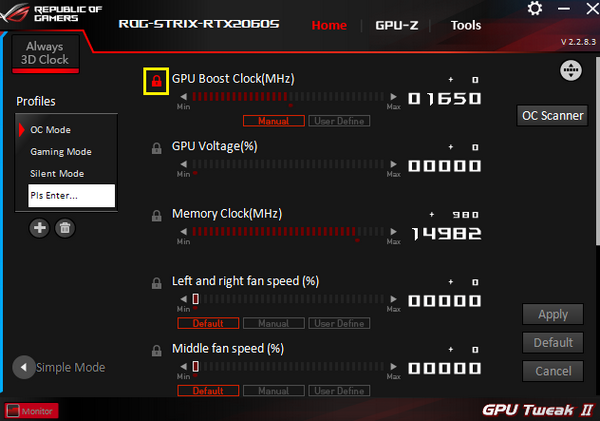
Locked value:
Click the lock icon to lock the value and you can avoid changing the value by accident
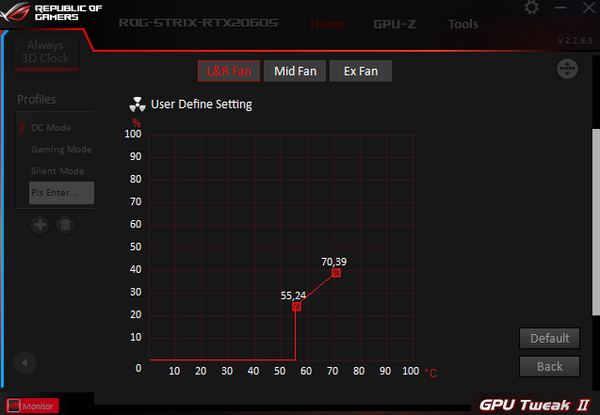
Adjust the fan speed:
There are Default, manual, and User Define options to choose from
Default: Original factory setting value
Manual: Manually adjust the fan speed

User Define: Please refer to the figure below. You can set the corresponding temperature to adjust the fan speed or curve.
Custom sort function:
Please refer to the picture as below
In addition to sorting, you can also select or delete items displayed in the interface.
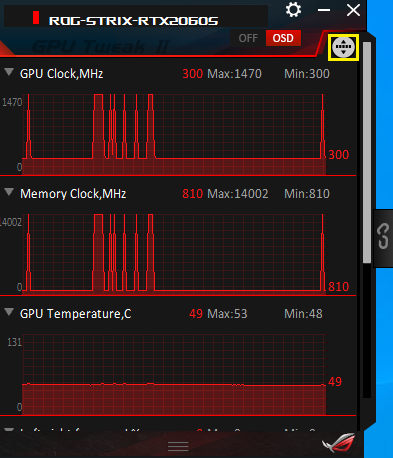
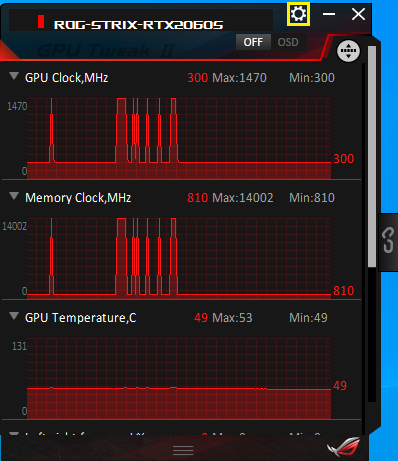
Monitor panel
Refer to the following figure for the monitor panel

Enable or Disable the OSD function:

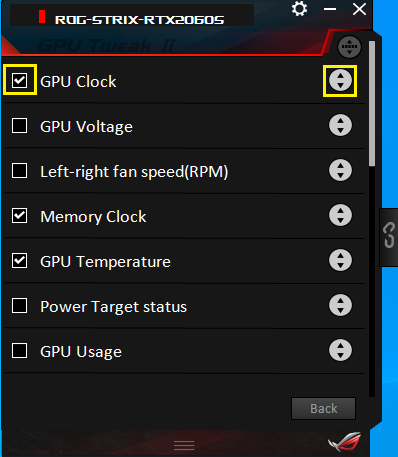
Custom sort function:
Please refer to the figure below:
You can use drag button to adjust the position, or select the parameters you want to display.
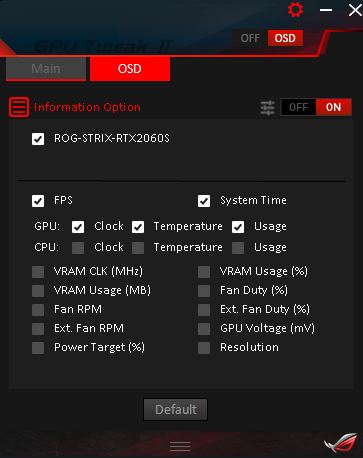
Setting function description
There are MAIN and OSD pages
MAIN page: You can set the monitoring panel to refresh the update information every few seconds, and set whether to save the information.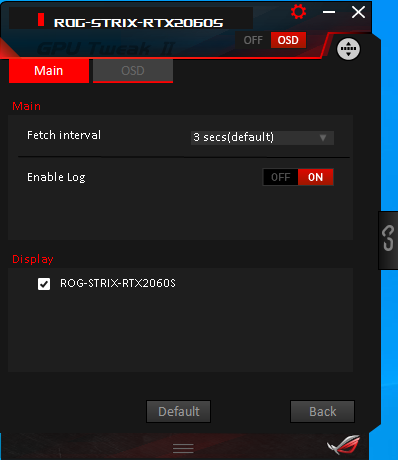
OSD page: You can set the operating parameters of the graphics card to be displayed in the game.
Monitor panel link button:
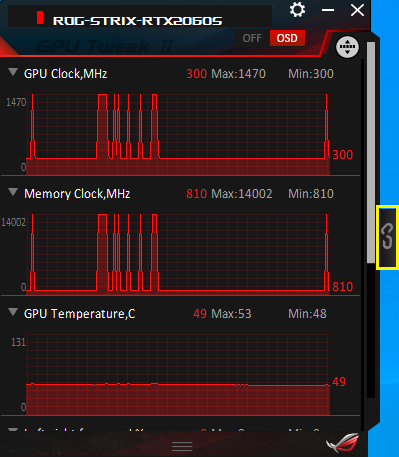
The main program window can be linked via the monitor panel.
FAQ
Q1. How can I confirm whether my graphics card supports GPU Tweak II?
A1:Please go to ASUS official website: https://www.asus.com/
1. Click the magnifying glass icon
2. Enter the display card model in the search bar
3. Click the model in search result

4. 4.Click product Tech specifications

5. Scroll down the page to the Software section to check.

Q2. How to install ASUS GPU Tweak II?
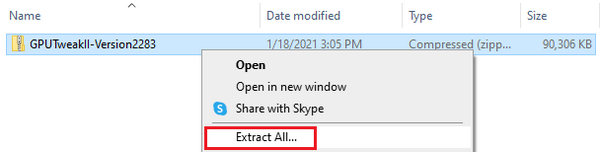
1.Right click the GPUTweakII-Version2171.ZIP file you downloaded and extract the files.
2.After decompression completes, double click setup.exe with the left mouse button to start the setup.

3.Click Next, and follow the program guide to complete the installation.
4. After the installation completes, the first startup will ask you to choose whether to use either the easy mode or the advanced mode. After confirming, click Next.

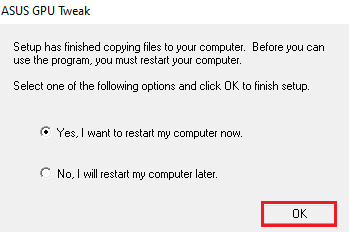
5.Click OK to restart the computer and to complete the installation.
Q3. How can I remove the GPU TWEAK II
A3: Please click on the control panel Icon and click on Programs and features Icon.
Find ASUS GPU Tweak II, click the right mouse, and click Uninstall/Change (U). Follow the program guide and complete the uninstallation.

Q4. How to deal with the black screen when my overclocking fails?
A4: When the overclocking fails and the screen turns black, please completely shut down the computer and restart the computer to restore the normal startup value before the overclocking failed.