Related Topics
[Chromebook] How to connect your Chromebook to an external monitor
Chromebook can be connected to an external monitor or TV with an HDMI, DisplayPort, DVI, or VGA port. Before connecting an external display, make sure to use the correct type of cable to connect it and ensure all accessories are properly connected, and the external display is set to the correct image input source.
Note that not all USB Type-C connectors support display output. If you are using a USB Type-C connector, please refer to relevant articles to confirm if the USB Type-C port you are using supports display output: How to Determine the Function of USB Type-C.
- Displaying Chromebook Screen on an External Monitor
- Arranging Display Positions
- Adjusting Display Settings
- Quickly Moving the Displayed Position of Windows or Applications
Displaying Chromebook Screen on an External Monitor
- When you connect your Chromebook and external monitor, you may need to enable "Mirror Display" first for the external monitor to display the screen. Please follow the steps below to enable it:
Click the [Status Bar]① in the lower-right corner of the screen, then click [Settings] ②.
②.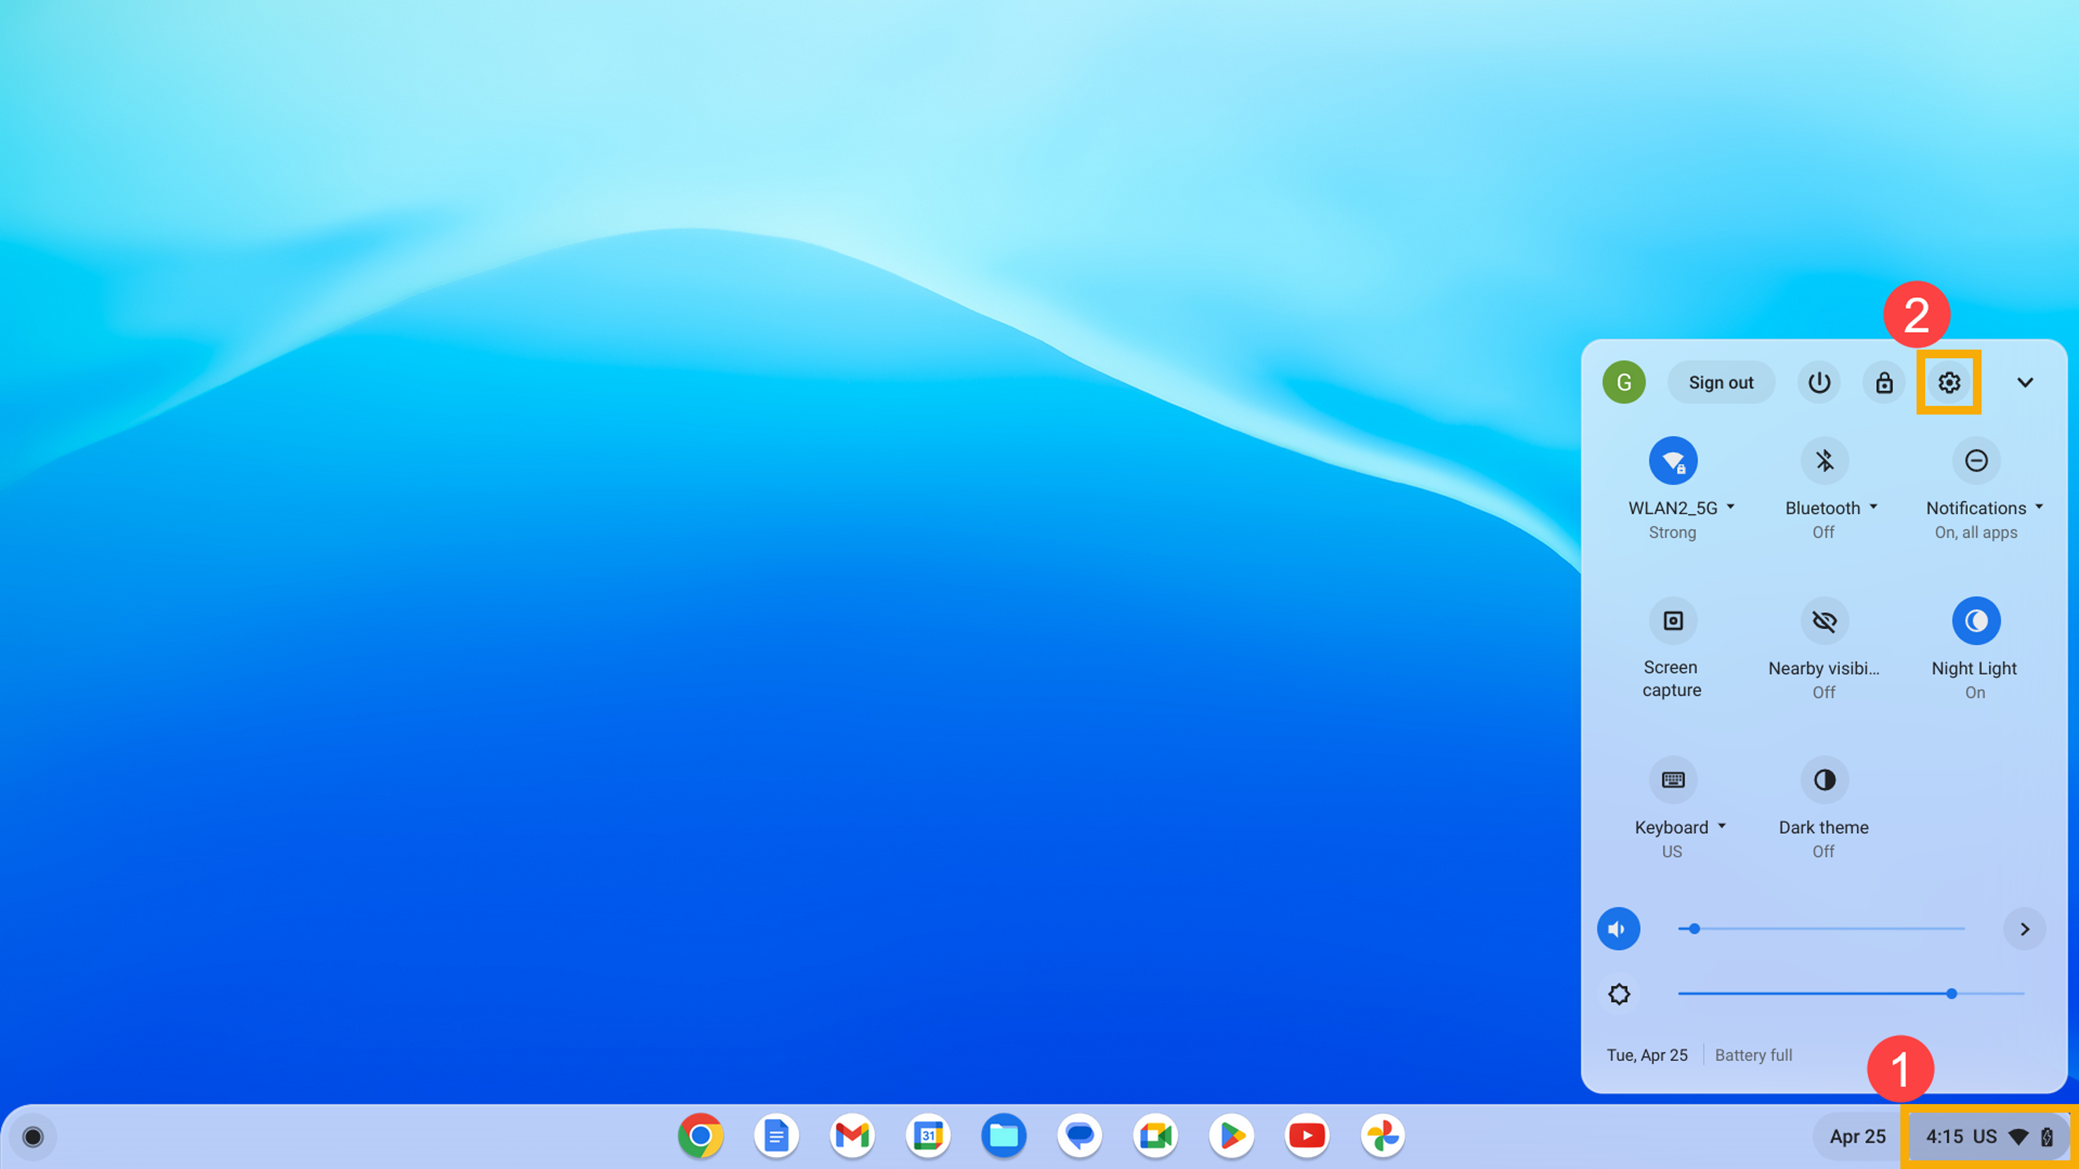
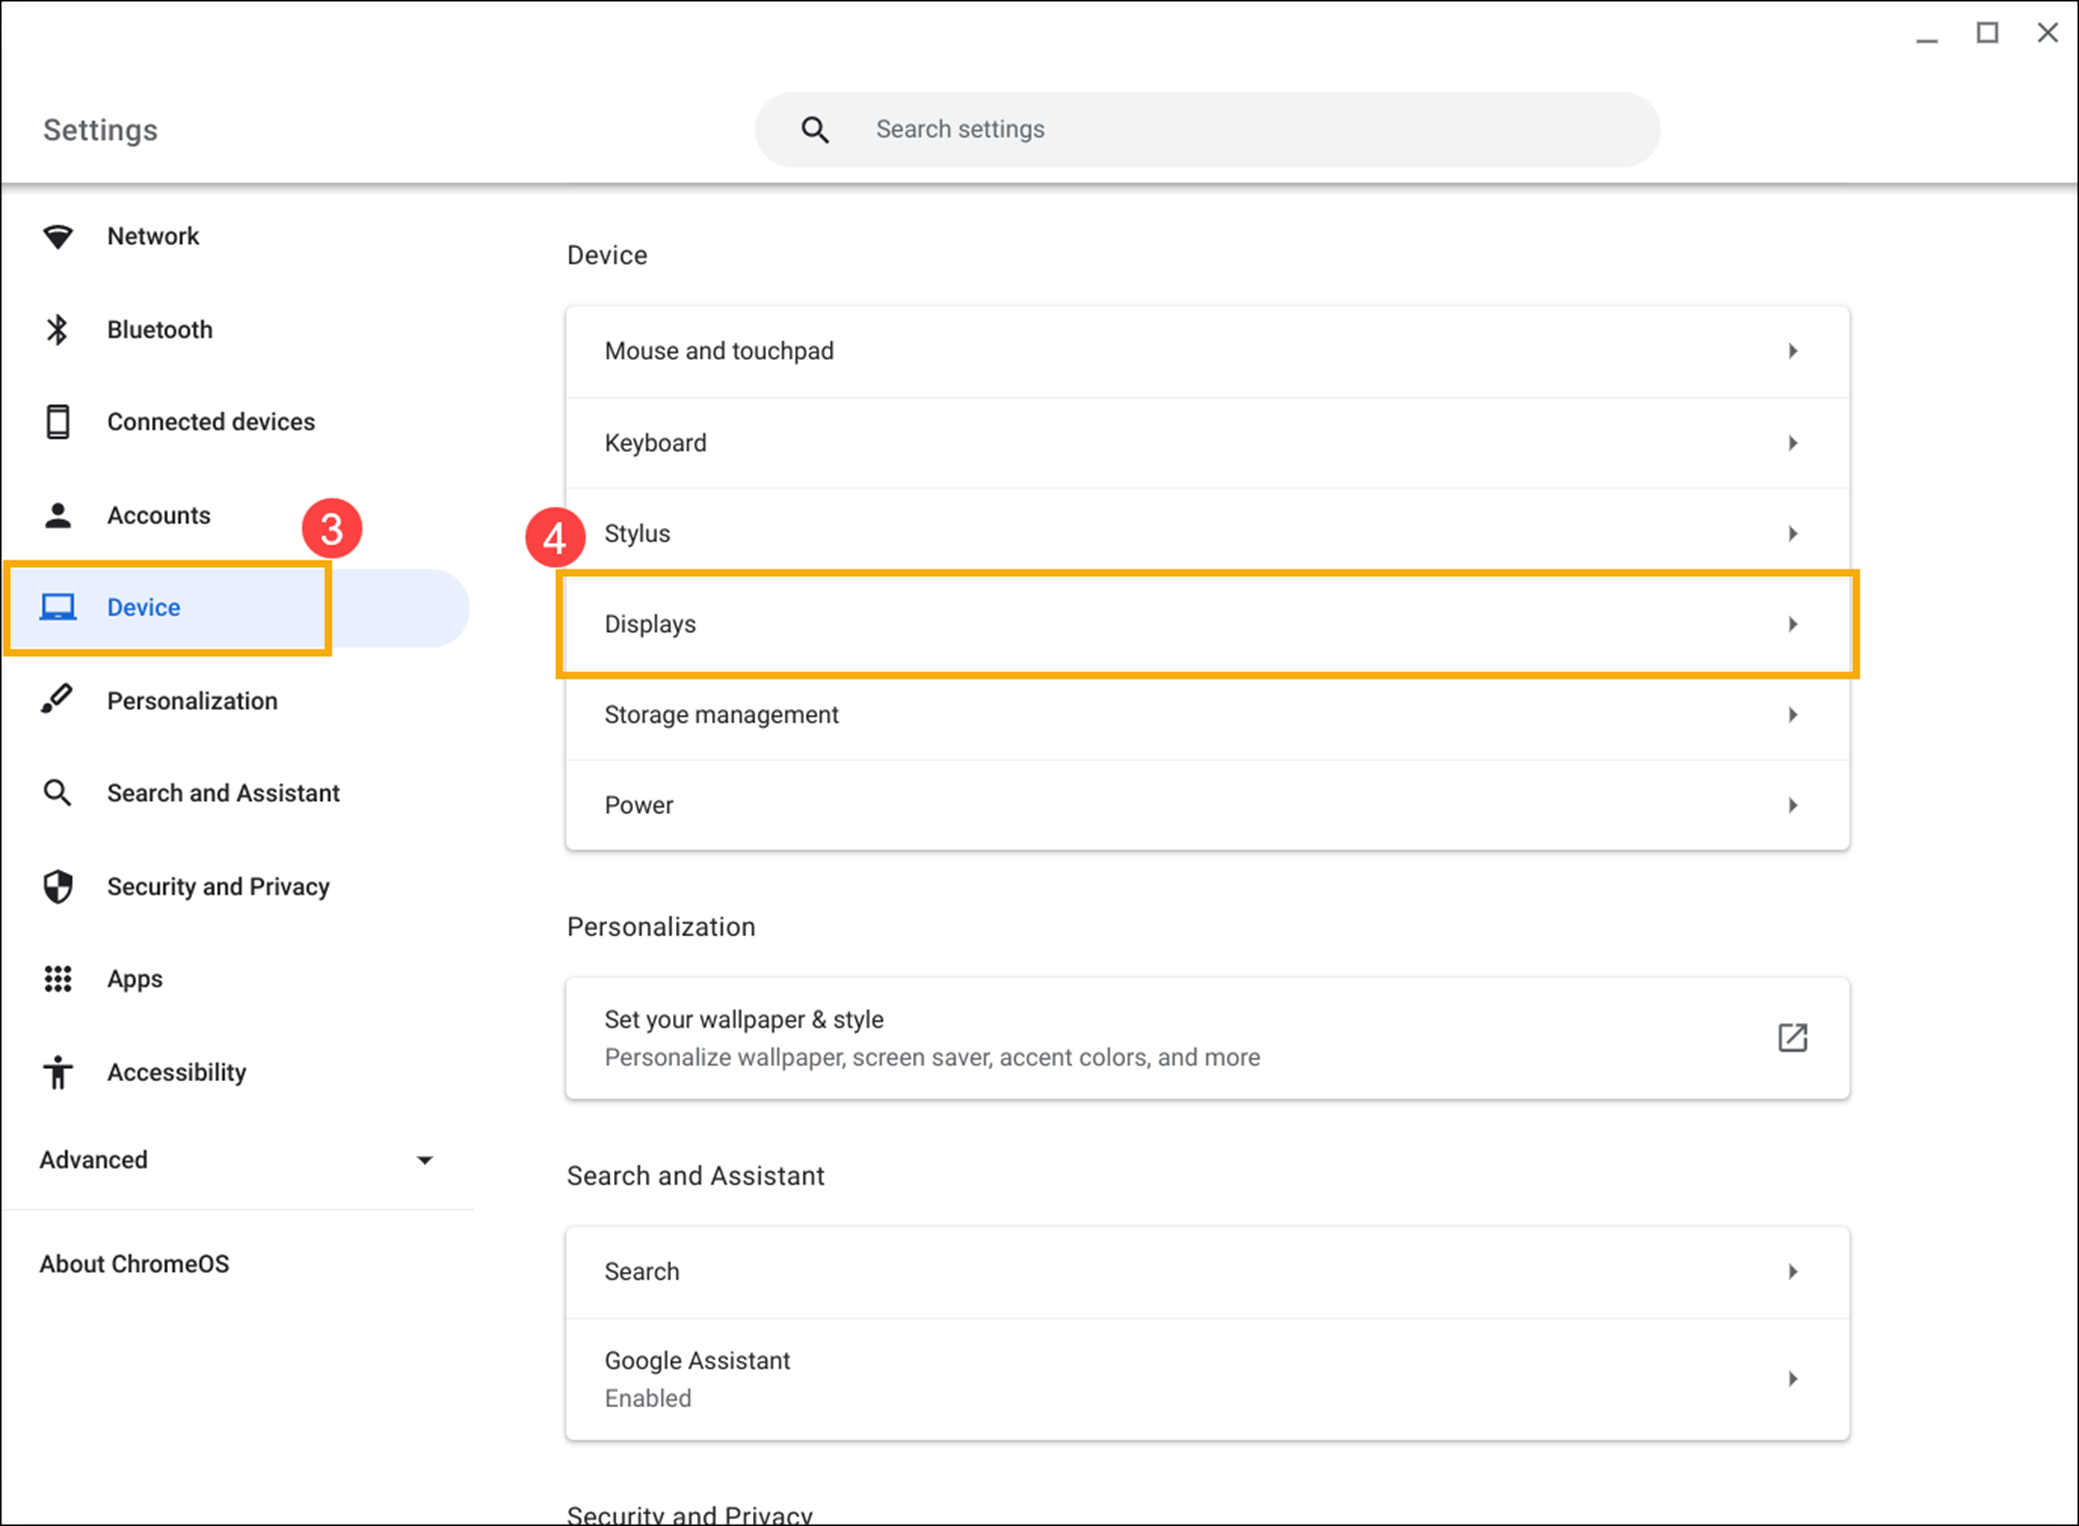
- Click [Device]③, then click [Displays]④.
- Check [Mirror Built-in display]⑤ to display the Chromebook screen on the external monitor.
Note: After the screen appears, you can choose whether to continue using Mirror Display as needed.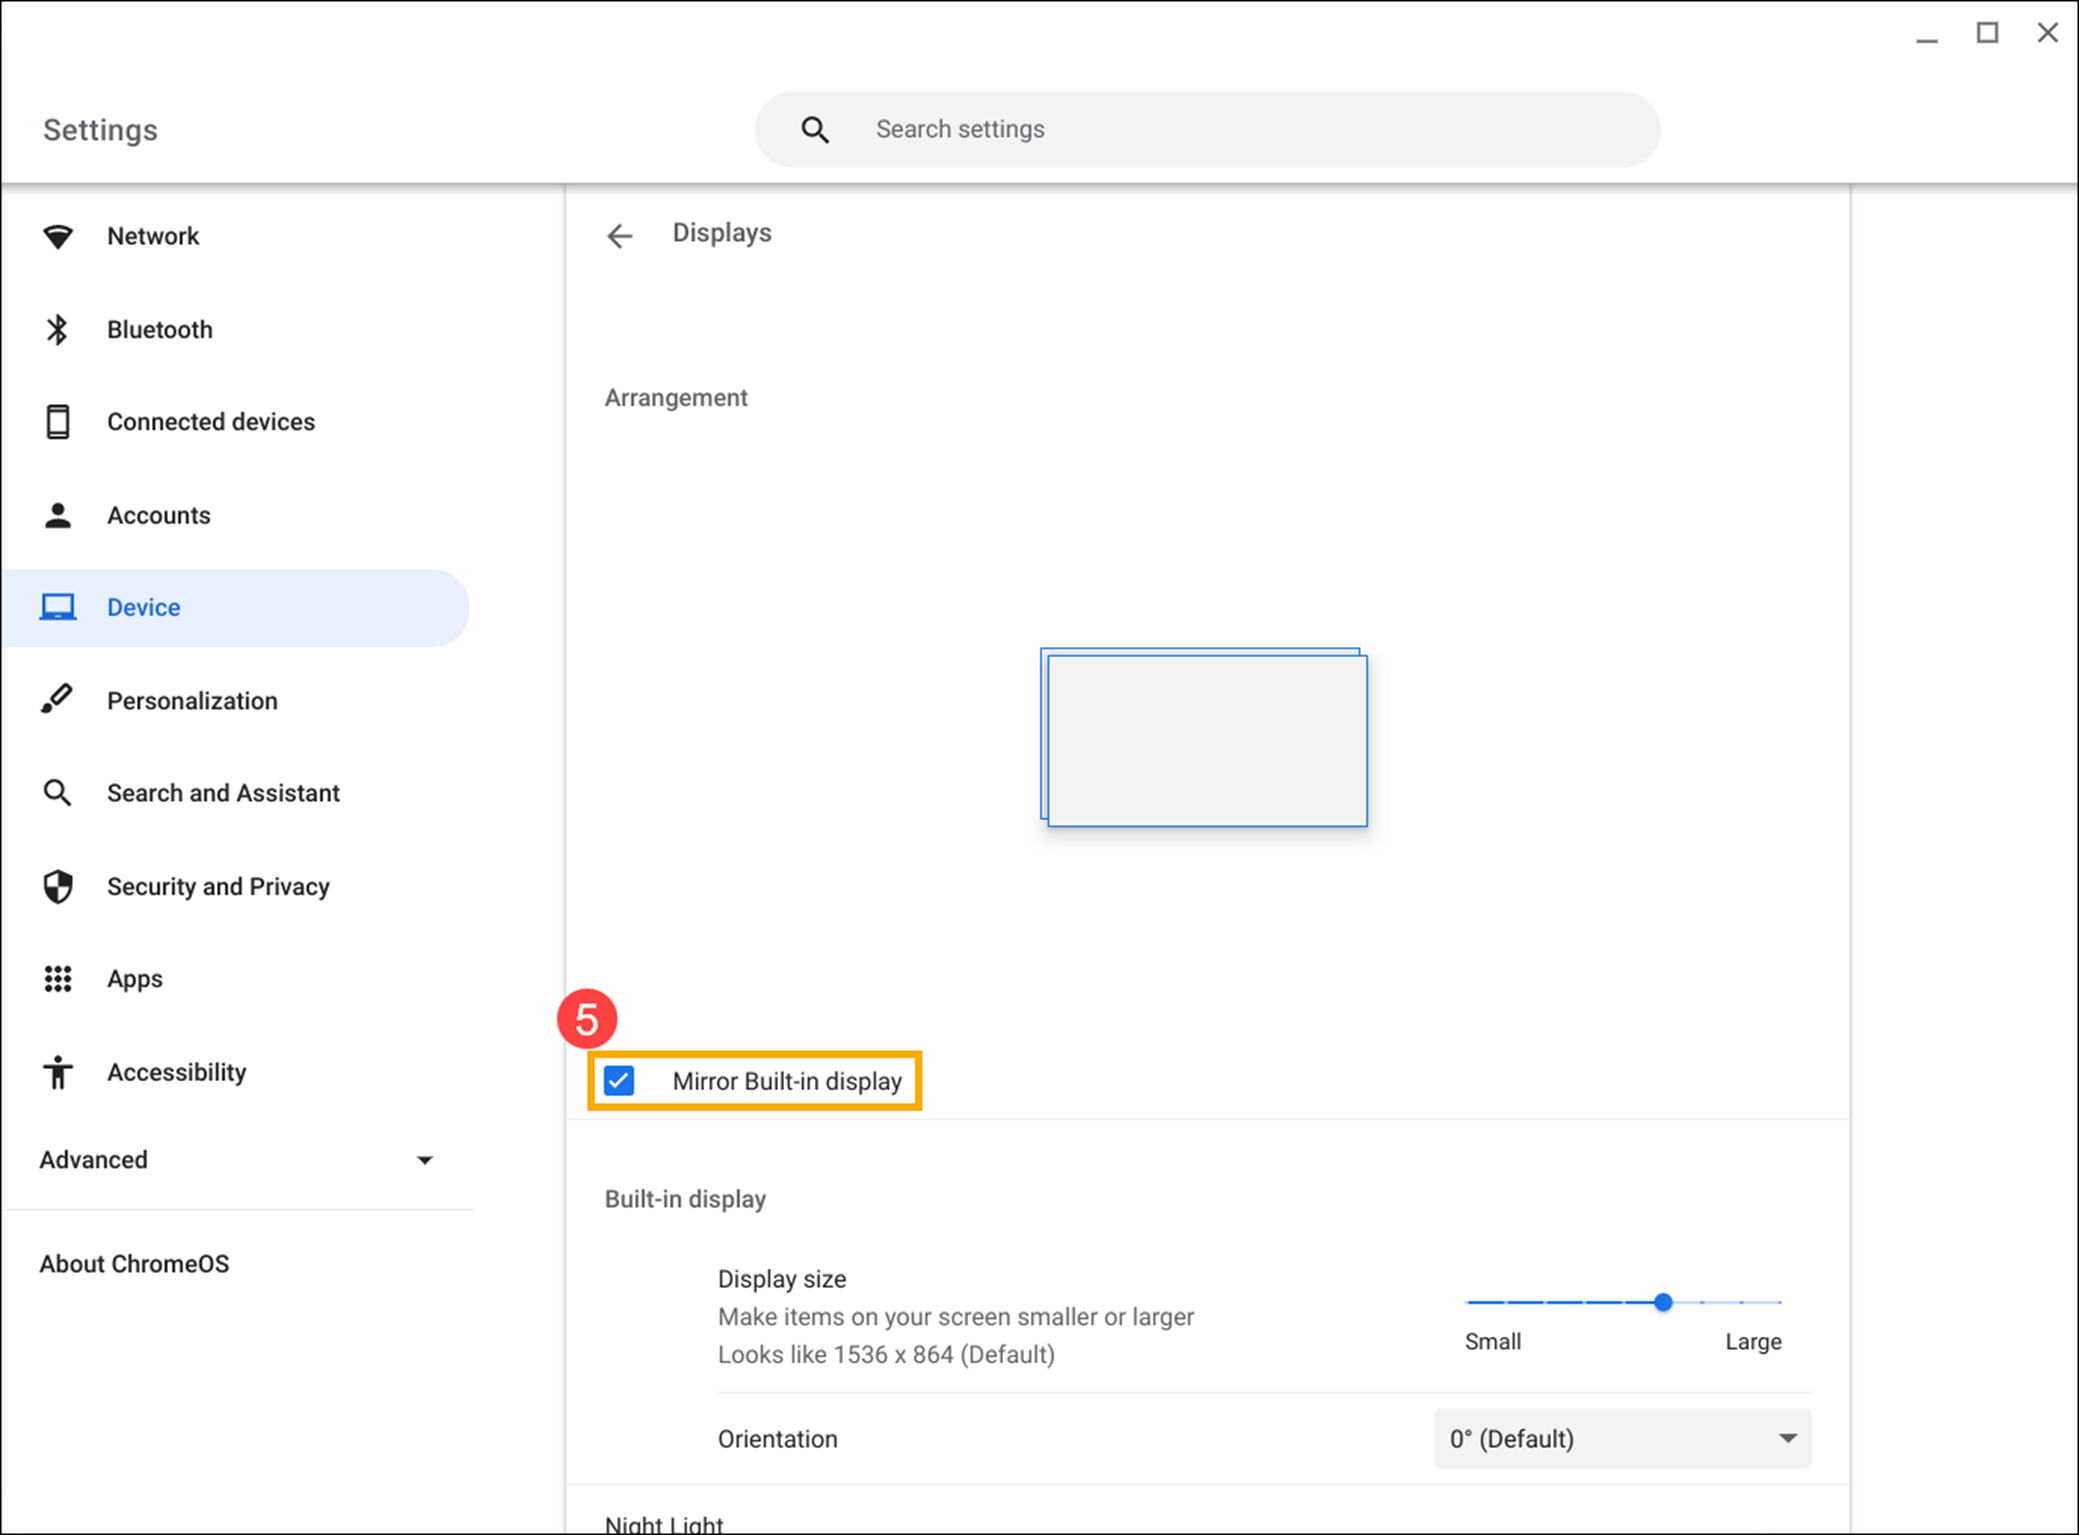
- If you want to only display the Chromebook screen on the external monitor (without displaying on the Chromebook screen), press and hold the [Decrease Brightness] key
 until the Chromebook screen turns off, and then release it.
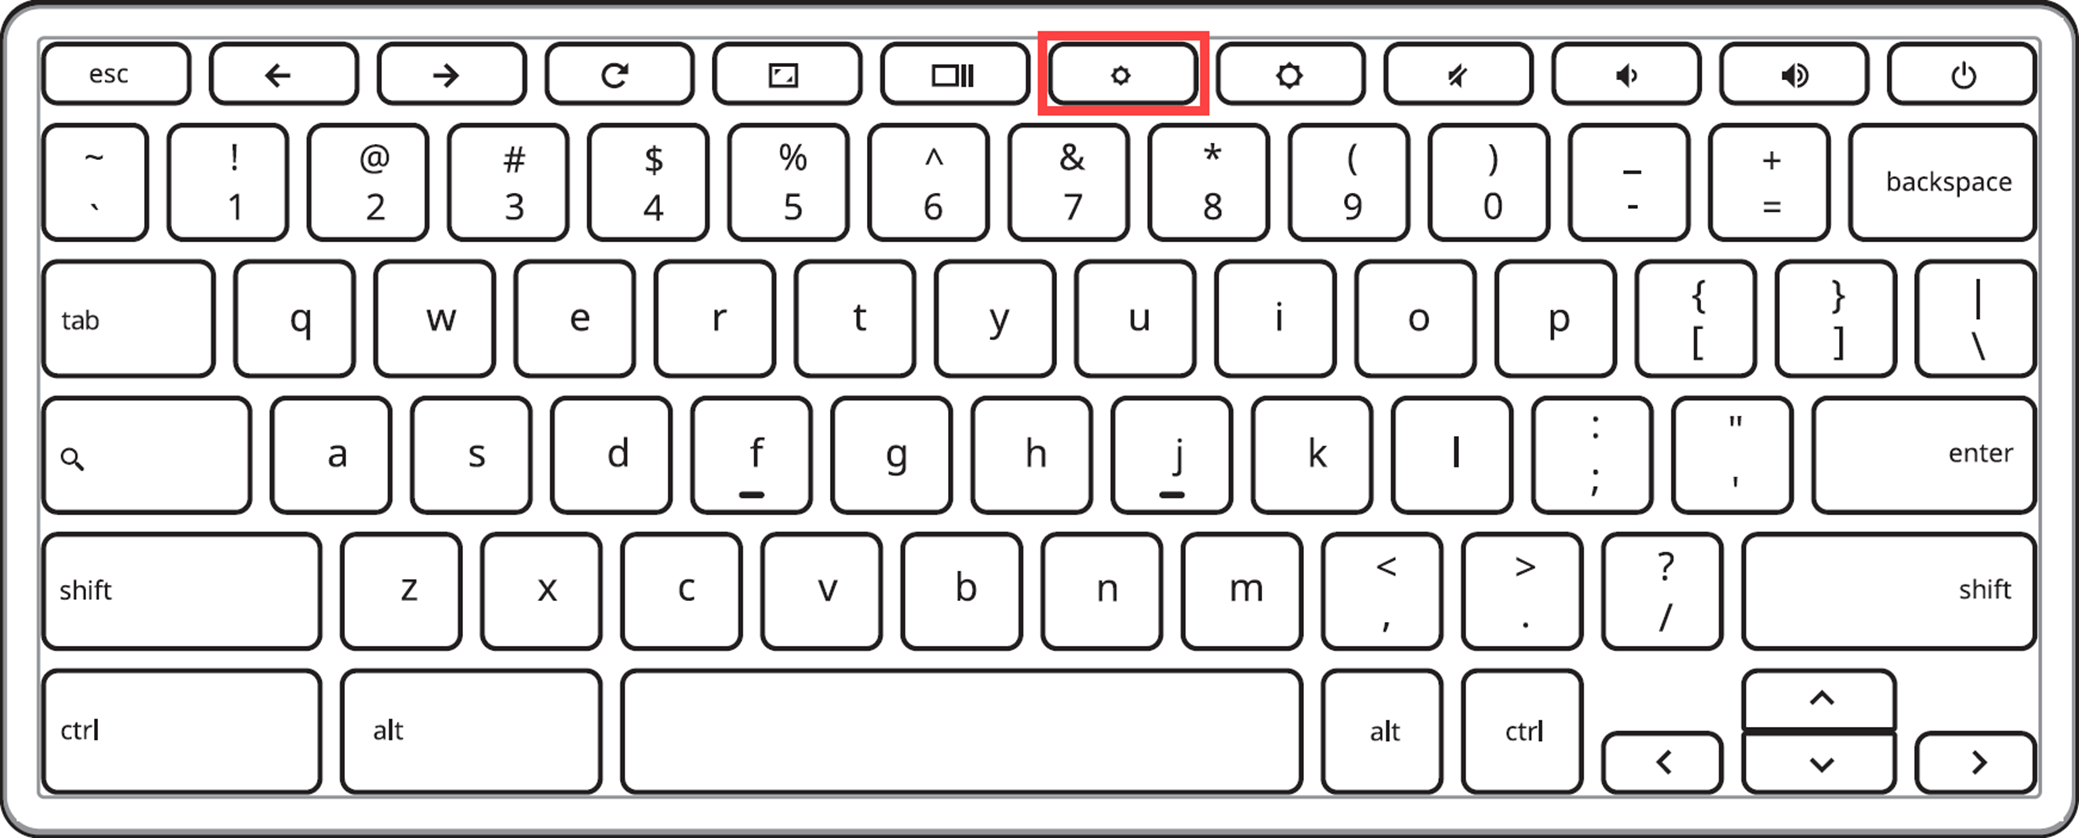
If you want your displays to match the layout of your home or office setup and move the mouse between different displays, you can rearrange the layout of your displays.
In Display Settings, select the display you want to adjust and drag it to the position you want (or use the arrow keys) to change the display arrangement.
After connecting to an external display, you can adjust the settings such as text and window size, or screen resolution to meet your personal needs.
- Click the [Status Bar]① in the lower-right corner of the screen, then click [Settings]②.
- Click [Device]③, then click [Displays]④.
- Select the display you want to adjust⑤.
Note: Only when you uncheck "Mirror Built-in display" can you adjust the display screen of the external monitor separately.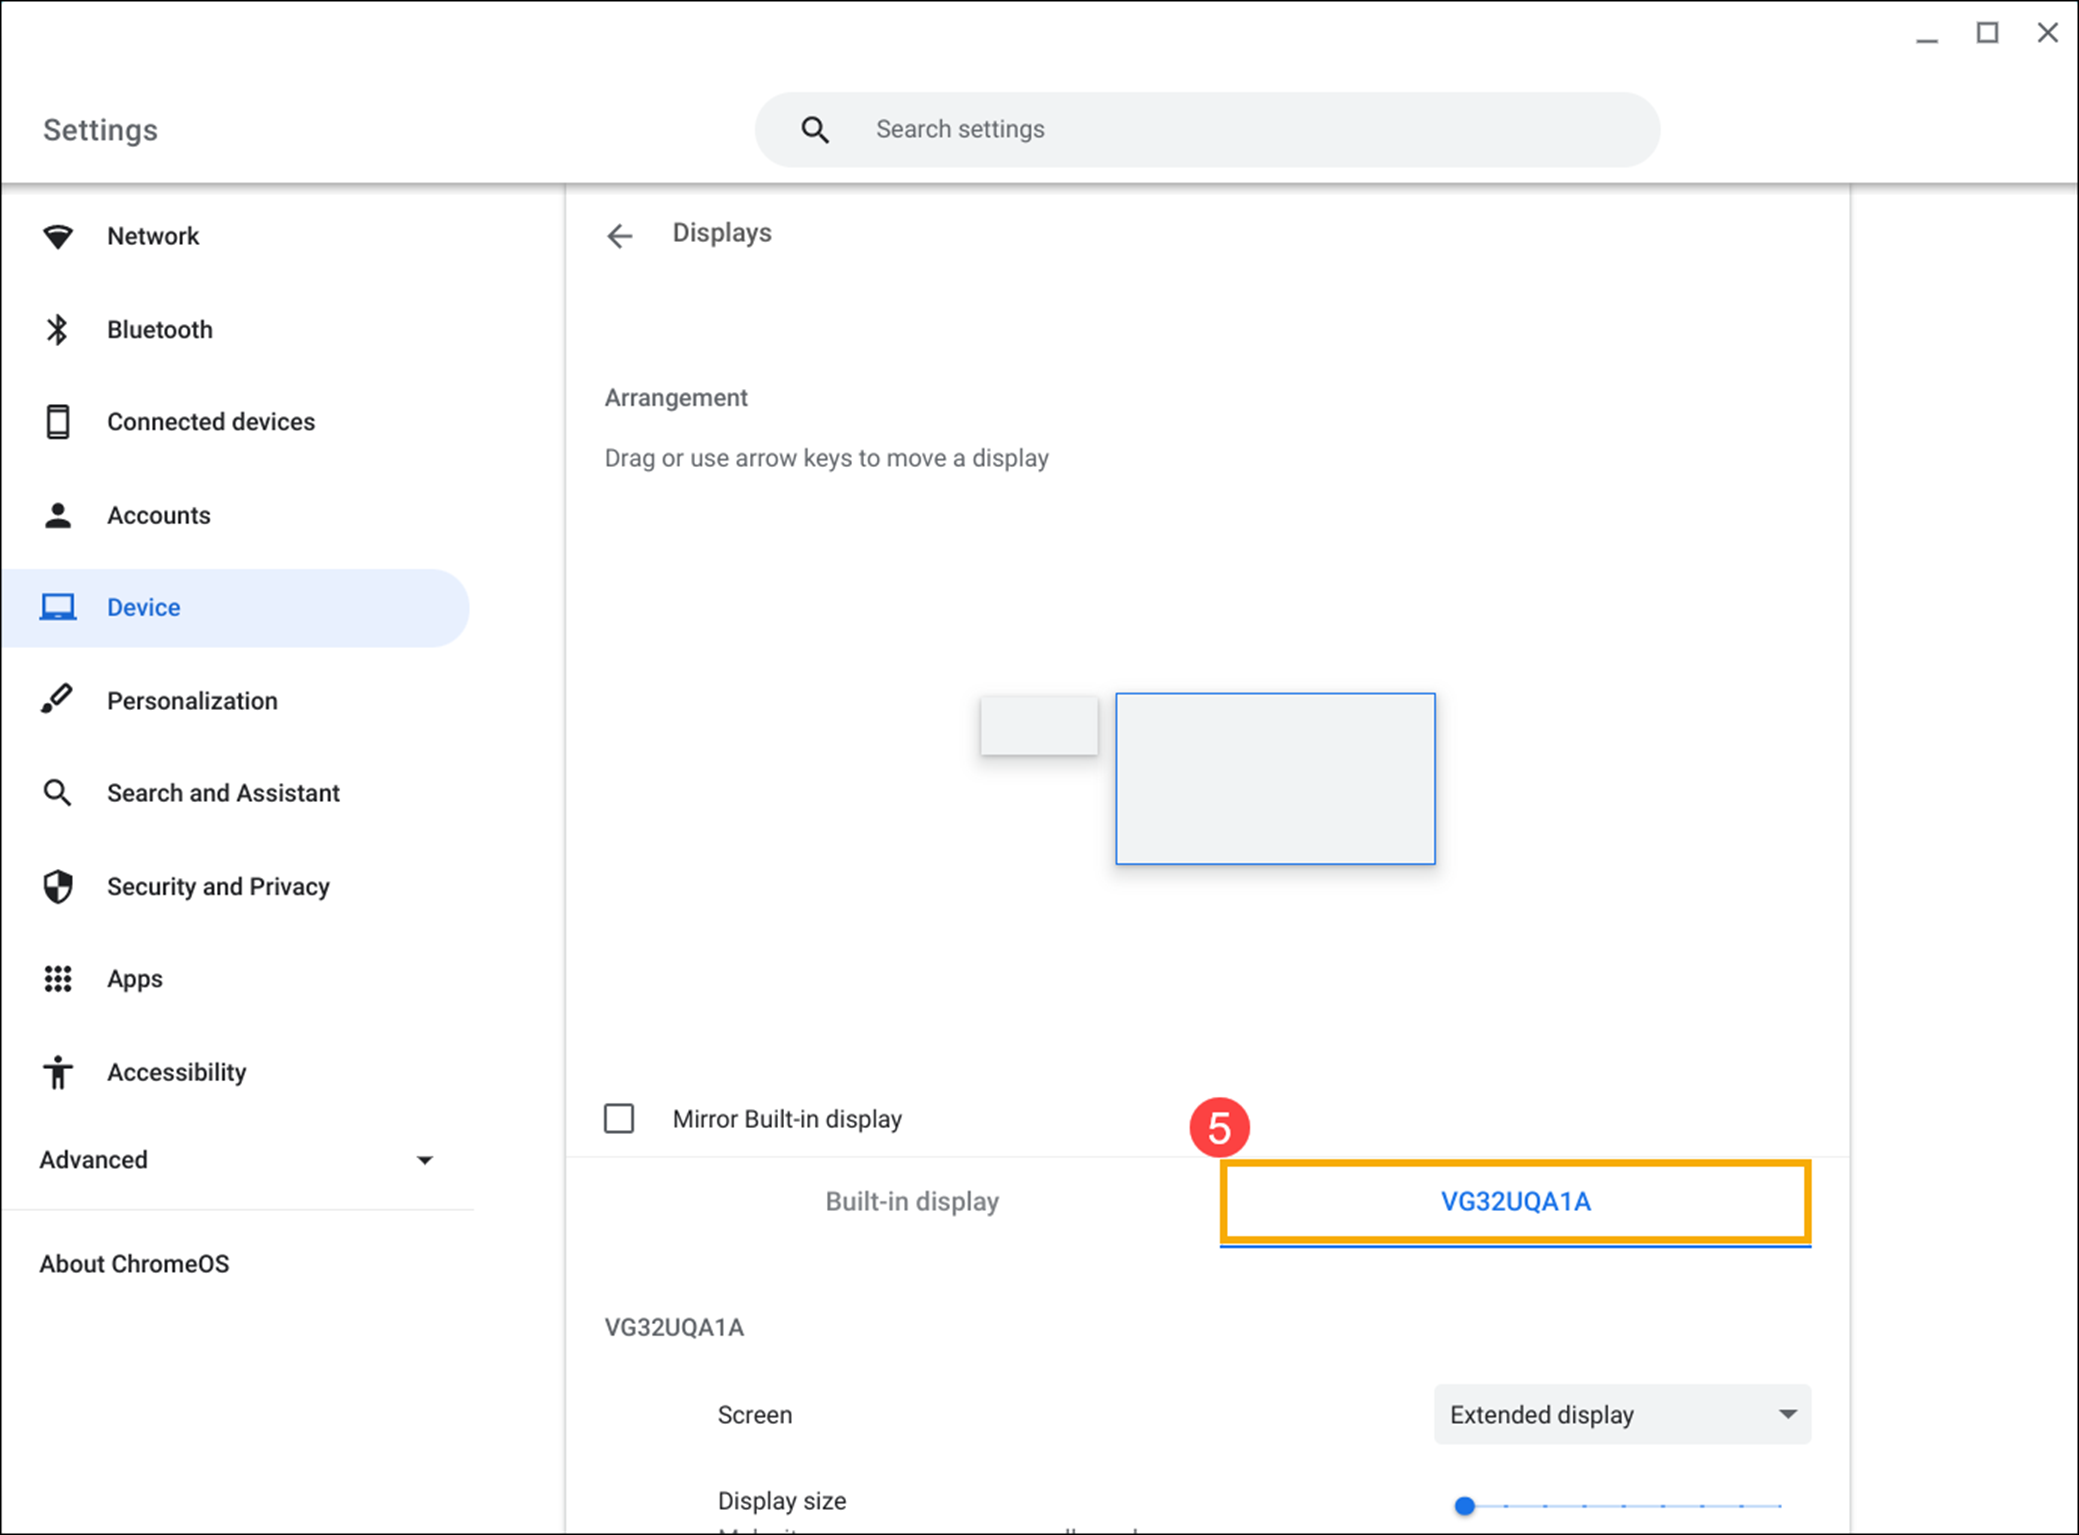
- Scroll down the page, and you can adjust the relevant screen settings according to your needs⑥:
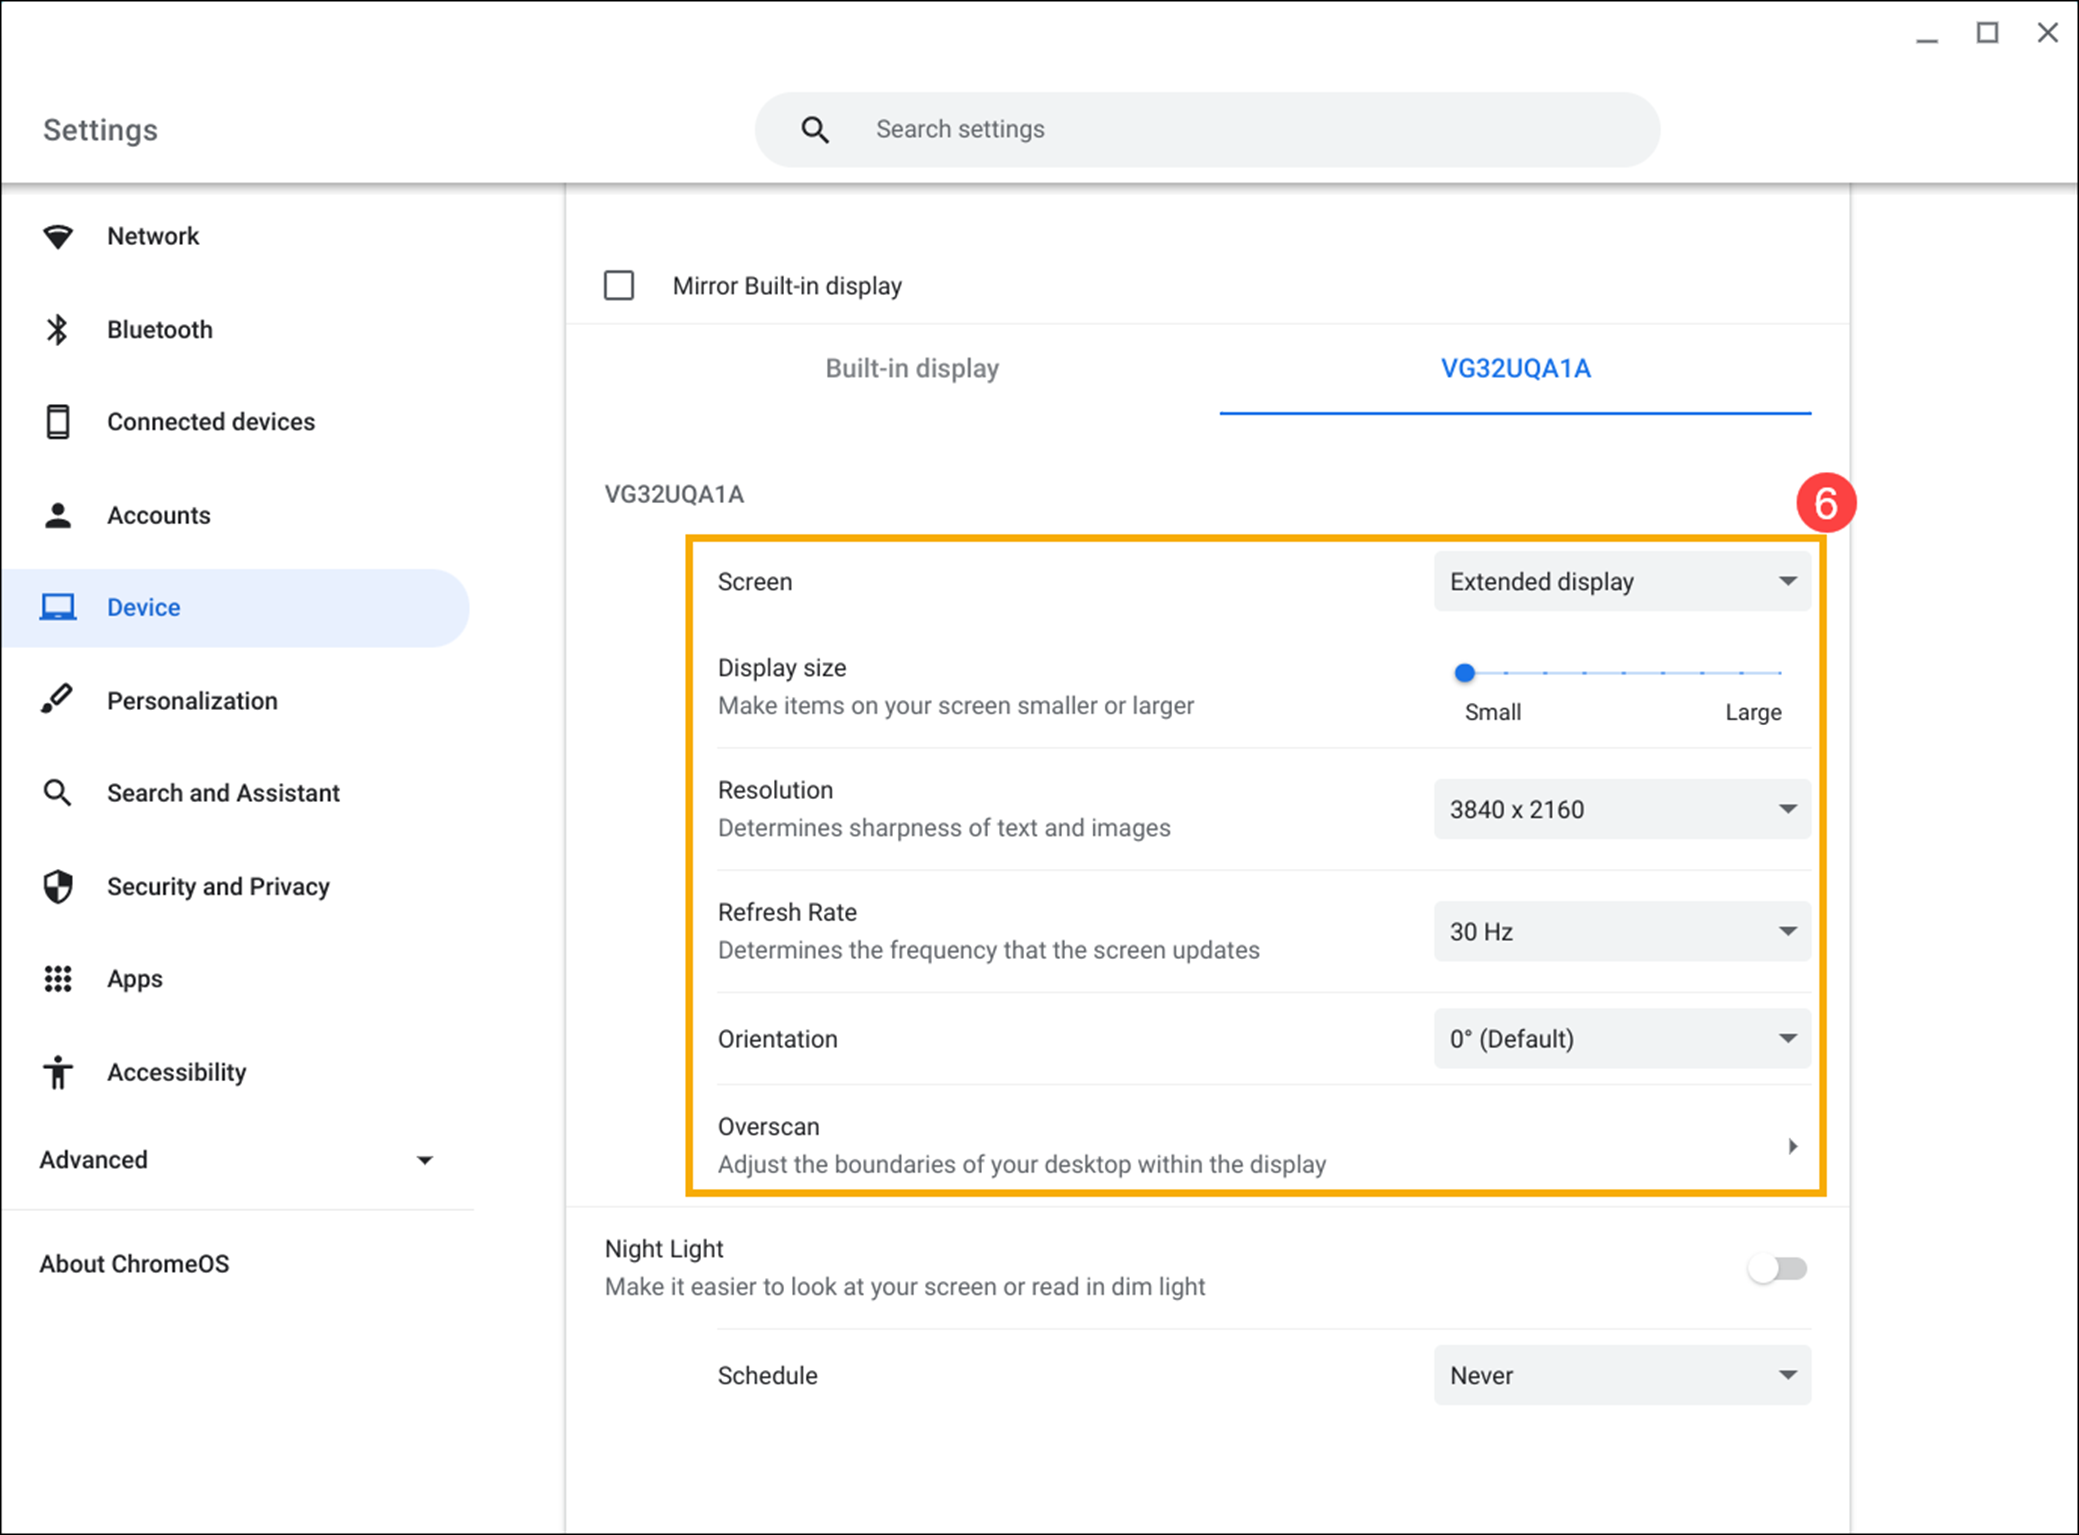
- You can choose to set the external display as an extended display or the primary display in the [Screen] field.
- If you want to change the size of text, apps, and other items, drag the slider of [Display size] to select the scale you want.
- If you want to change the sharpness of the screen, adjust the [Resolution] setting.
- Choosing a higher [Refresh rate] can make the system refresh the content on the screen faster.
- You can also rotate the screen display [Orientation]: 0∘, 90∘, 180∘, 270∘.
- If you want to adjust the desktop boundaries of the display screen, click [Overscan]. Use the arrow keys to shrink/expand the boundaries or move the boundaries with the shift key.
Quickly Moving the Displayed Position of Windows or Applications
You can quickly move the windows or applications in the main screen to display on the external screen and vice versa by using a combination of keys. If you want to use this feature, press the Search![]() + Alt + M key or the Launcher
+ Alt + M key or the Launcher![]() + Alt + M key.
+ Alt + M key.
Note: The shortcut keys for some models may be different, please refer to the user manual for each model. If you are not sure how to find the user manual for your Chromebook, please refer to this article: How to search for and download user manuals.![]()
![]()
You can also refer to the Google Chromebook Help on the official website for more detailed information: