Warranty & Process
Last Update : 2026/02/11
Warranty
Please consult the table below for warranty information.
|
Part Group
|
Warranty Period
(From Delivery Date)
|
|
ADAPTER
|
12 months
|
|
ADAPTER MODULE
|
12 months
|
|
BATTERY
|
12 months
|
|
CABLE
|
12 months
|
|
CAMERA
|
12 months
|
|
CARD
|
12 months
|
|
COMMUNICATION
|
12 months
|
|
DONGLE
|
12 months
|
|
FAN
|
12 months
|
|
FINGERPRINT MODULE
|
12 months
|
|
FPC
|
12 months
|
|
HDD
|
12 months
|
|
HEADSET
|
12 months
|
|
IO BOARD
|
12 months
|
|
KB DOCKING
|
12 months
|
|
KEY
|
12 months
|
|
KEYBOARD
|
12 months
|
|
KEYBOARD + MOUSE SET
|
12 months
|
|
KEYBOARD MODULE
|
12 months
|
|
LCD MODULE
|
12 months
|
|
LCD MODULE BKT
|
12 months
|
|
LCD PANEL
|
12 months
|
|
MAIN BOARD
|
12 months
|
|
MEMORY
|
12 months
|
|
MICROPHONE
|
12 months
|
|
MINI DOCK
|
12 months
|
|
MOUSE
|
12 months
|
|
NFC ANTENNA
|
12 months
|
|
ODD
|
12 months
|
|
OLED MODULE
|
12 months
|
|
OLED PANEL
|
12 months
|
|
POWER
|
12 months
|
|
POWER BOARD
|
12 months
|
|
POWER CORD
|
12 months
|
|
RECEIVER
|
12 months
|
|
REMOTE CONTROL
|
12 months
|
|
SMALL BOARD
|
12 months
|
|
SPEAKER
|
12 months
|
|
SSD
|
12 months
|
|
SUB BOARD
|
12 months
|
|
SYS. MODULE
|
12 months
|
|
THERMAL
|
12 months
|
|
TOUCHPAD MODULE
|
12 months
|
|
USB BOARD
|
12 months
|
|
VGA BOARD
|
12 months
|
|
WLAN
|
12 months
|
|
ABSORBER
|
12 months
|
|
ADHESIVE
|
12 months
|
|
BEZEL
|
12 months
|
|
BOTTOM CASE
|
12 months
|
|
BRACKET
|
12 months
|
|
BUMPER
|
12 months
|
|
BUTTON
|
12 months
|
|
CHASSIS
|
12 months
|
|
COVER
|
12 months
|
|
DOOR
|
12 months
|
|
FILM
|
12 months
|
|
FOIL
|
12 months
|
|
FRAME
|
12 months
|
|
GASKET
|
12 months
|
|
GRAPHITE
|
12 months
|
|
HINGE
|
12 months
|
|
HINGE COVER
|
12 months
|
|
HOLDER
|
12 months
|
|
IO SHIELD
|
12 months
|
|
LCD BEZEL
|
12 months
|
|
LCD COVER
|
12 months
|
|
MAGNET
|
12 months
|
|
MECHANICAL
|
12 months
|
|
MIDDLE CASE
|
12 months
|
|
MYLAR
|
12 months
|
|
ODD BEZEL
|
12 months
|
|
PACKING
|
12 months
|
|
PAD
|
12 months
|
|
PEN
|
12 months
|
|
PLATE
|
12 months
|
|
PLUG
|
12 months
|
|
RUBBER
|
12 months
|
|
SCREW
|
12 months
|
|
SHIELDING
|
12 months
|
|
SPONGE
|
12 months
|
|
STAND
|
12 months
|
|
TAPE
|
12 months
|
|
TOP CASE
|
12 months
|
|
TRAY
|
12 months
|
|
WASHER
|
12 months
|
|
WATCH BAND
|
12 months
|
ASUS Part Shop Processes
Sign Up for an ASUS Parts Shop Member (for B2C Customers)
1. Click “Login”

2. Click “Sign Up Now”

3. Sign up with an email.

4. Agree to Privacy Policy and other information, then, click Sign Up

5. A message requesting you to confirm email will pop up after clicking Sign Up. If you can’t find one, try “Resend account verification email”.

6. Check your mailbox again, you will see another email from ASUS to confirm your registration. Click on “click here”.

7. You will see this message indicating you have successfully created an account.

8. Check your mailbox, you will receive a confirmation email from ASUS Part Shop as well.
9. Log in to ASUS Part Shop
Create a Company ASUS Parts Shop Admin Account (for B2B Customers)
1. Check your company’s email, you will see an email welcoming you to register.
Title: [ASUS Part Shop] Invitation to Register Our Exclusive ASUS Part Shop Membership
2. Click “click here” to be directed to registration page.

3. Enter your company email and set password to your preference. You may skip the date of birth if you wish.
Please do not select the options to sign up with Facebook, Google account, Apple ID, or Microsoft account since this is a business account.

4. Agree to Privacy Policy and other information, then, click Sign Up

5. A message requesting you to confirm email will pop up after clicking Sign Up. If you can’t find one, try “Resend account verification email”.

6. Check your mailbox again, you will see another email from ASUS to confirm your registration. Click on “click here”.

7. You will see this message, indicating you have successfully created an account.

8. Check your mailbox, you will receive a confirmation email from ASUS Part Shop as well.

9. Go to ASUS Part Shop
10. Select Login

11. Enter the account and password you set to sign in.

12. You have successfully signed in, you may check your company information in “My Company”.

Add a Company ASUS Parts Shop User Account (for B2B Customers)
1. Admin should sign in to your account, go to “My Company”.

2. Select “Add User”.

3. Enter the user’s information. Fist name, last name, email, phone number are required fields. Once confirmed, click “Save”.

4. You will see a message showing that the invitation has been sent.

5. The user’s mailbox will receive an invitation email. Click on “click here” to direct to registration page.
Title: [ASUS Part Shop] Invitation to Register Our Exclusive ASUS Part Shop Membership

6. Sign up for an account. Please use the email your Company Admin used to invite you. Do not sign up using Facebook account, Google account, Apple ID, or Microsoft account.

7. Agree to Privacy Policy and other information, then, click Sign Up

8. Check your mailbox again, you should see another email from ASUS to confirm your registration. Click on “click here”.

9. You will see this message, indicating you have successfully created an account.

10. Check your mailbox, you will receive a confirmation email from ASUS Part Shop as well.

11. Return to ASUS Part Shop
12. Select Login

13. Enter the account and password you set to sign in.

14 You have successfully signed in, you may check your company information in “My Company”.

Order Process with ASUS Membership
1. Log in to (or sign up for) ASUS membership.
2. Input 90PN or Serial Number (S/N) of your product to start looking for compatible components. You can also search by selecting products and a model.
3. Add the components you would like to purchase to the cart.
4. Proceed to checkout.
5. Fill out shipping information.
6. Select preferred delivery option.
7. Fill out payment information and confirm all information provided was correct.
8. Click place order to complete.
Order Process Using Guest Checkout
1. Input 90PN or Serial Number (S/N) of your product to start looking for compatible components. You can also search by selecting products and a model.
2. Add the components you would like to purchase to the cart.
3. Proceed to check out.
4. Select “Continue as Guest”
5. Provide a valid email address to receive order information and shipping status update.
6. Fill out shipping information.
7. Select preferable delivery option.
8. Fill out payment information and confirm all information provided was correct.
9. Click place order to complete the order.
Find Compatible Parts Using General Search
1. At Home Page, select a product you want to begin with.

2. You may add more products to your search conditions here, and then select “Done”.

3. Select one or more product series to add to your query conditions, and then select “Done”.

4. Select a model.

5. Select a Part Group (optional) and Inventory Status (optional.)

*Please note that due to Chromebook’s unique design, General Search cannot search for Chromebooks’ spare parts. If you would like to purchase parts for Chromebooks, please utilize Advanced Search functionality.

Find Compatible Parts Using Advanced Search
1. On Home Page, select “Go to Advanced Search”.

2. Enter 90PN or S/N, and then click “Go” to search.


When Inventory is Temporarily Out of Stock
1. Select “Request for Item” to fill out the requirement form.
2. Fill out the requested amount.
3. Agree to terms and conditions.
4. Click submit to let ASUS know your demand for the item.
Order Process Using Batch Order
1. Log in to (or sign up for) ASUS Account
2. Go to “Batch Order” page.
3. “Download Sample” if you don’t have one with you yet.
4. Fill out the sample form and then upload it to the website.
5. If fail, check for error messages and revise the excel spreadsheet.
6. Proceed to checkout and place an order to complete the process.
Apply for Refund
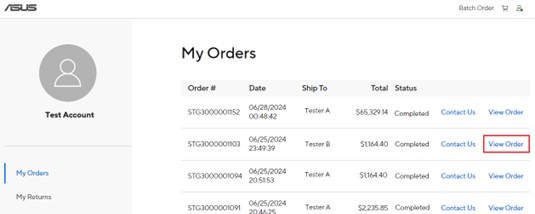
1. Select “Check My Order” from upper right corner.

2. Find the order you want to apply for a refund, click “View Order”.

3. Click “Apply Refund”.

4. Fill out your contact details to continue.

5. Select the SKU you want to apply for a refund in drop down.

6. Select the quantity you want to apply for a refund in drop down.

7. Tell us about the return reason.

8. Read and agree to Terms & Conditions and ASUS Privacy Policy. And then click “Submit”.

9. You will be directed to this page; all of your returns will be shown here.

10. Click “View Return” to see details. Select “Print Shipping Label” to print out and stick to your return package.
11. Bring your package to your nearest FedEx drop-off point.
12. After receiving your returned package, it takes ASUS 5 working days to process. The real refund time depends on the bank of your credit card.
Apply for RMA SWAP
1. Select “Check My Order” from upper right corner.

2. Find the order you want to apply for Exchange, click “View Order”.
3. Click “Apply RMA SWAP”.

4. Fill out your contact details.

5. Select the SKU you want to apply for RMA in drop down.

6. Select the quantity you want to apply for RMA in drop down.

7. Tell us about the return reason.

8. Read and agree to Terms & Conditions and ASUS Privacy Policy. And then click “Submit”.

9. You will be directed to this page; all of your returns will be shown here.

10. Click “View Return” to see details. Select “Print Shipping Label” to print out and stick to your return package.

11. Bring your package to your nearest FedEx drop-off point.
12. After ASUS receives your item, it takes 1-5 business days to verify the eligibility of your Exchange. ASUS will ship out another package for you as soon as your Exchange Request has been approved.
How to Upload a Tax Certificate
1. Go to ASUS Part Shop and log in.
2. Go to “My Company”.

3. Find “My Tax Certificates”.

4. Click “+ Add Exemption “

5. Select the state of where your tax certificate is issued. Click “Proceed”.

6. Complete the tax information that is shown in your tax certificate, and then click the blue button pointing right to proceed.

7. Select the reason why you are creating this document.


8. Follow along the website’s instructions to provide information accordingly, requirements vary by state. For some states the website will ask you to upload an PDF of your tax certification, some will ask you to fill out tax information manually.
File upload example:

Fill out information manually:

9. Once you have completed all the required information, the system will start processing your exemption certificates.

10. When done processing, you will see this, which means the certificate has been successfully submitted. Click “Refresh Certificates” to see the latest status in your Part Shop account.

11. You will see your uploaded certificate and results here.
