Related Topics
[Windows 11/10] Troubleshooting - Main (Internal) Display problem
Applicable Products: Notebook, All-in-One PC, Gaming Handheld
If you encounter abnormal display issues on your ASUS device, such as broken image, blurriness, artifacts, flickering issues, or if the main screen does not display any image but the external monitor does, please refer to the following troubleshooting steps.
However, if you experience a black screen on your device after power on, please refer to How to fix Device Boot Failure or No Display After Boot (Black Screen).
To provide you more detailed instruction, you can also click ASUS Youtube video link below to know more about troubleshooting for Main (Internal) Display
https://www.youtube.com/watch?v=hNsQZFwDAyk
While you have display problems with main screen, you can check the display is a hardware or software issue by entering the BIOS configuration. Here you can learn more about How to enter the BIOS configuration.
If the display problem is still existing in the BIOS configuration, which means the screen hardware may be defective, and we recommend you visit the ASUS authorized repair center to test your laptop.
If the display is normal in the BIOS configuration, it may have a software issue on your screen, please refer to the cases below and their solution.
Graphics driver is not installed / detected / version out-of-dated / wrong version
- Do you update the graphics driver before image problems happen? If YES, it's much possible caused by the updated driver.
Note: Although some vendors of graphics issued the latter version but they might not pass its compatibility test. We suggest that you use the same driver as the one on the ASUS support site.
Please uninstall the present graphics driver first, refer to this article: How to uninstall drivers. After the uninstallation is completed, please install the latest driver which is published on the ASUS support site, here you can learn more about How to search and download drivers.
Note: If your device is the AMD platform of graphics, please refer to How to uninstall AMD chipset driver.
- If you haven't updated the graphics driver before dysfunction happens, we suggest that you check if there is any new graphics driver on the ASUS support site.
Note: Some models possess both two graphics (integrated & dedicated graphics, such as Intel & NVIDIA) and can view in Device Manager, please confirm they are updated to the latest version, refer to Appendices: How to check the present version of driver.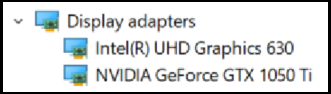
Memory abnormal or compatibility problem
Have you changed / expanded memory before its dysfunction? We suggest that you resume to its previous allocation.
Note: Only some notebook models have the component cover so that you are able to install a RAM (Random Access Memory) module in the memory module compartment, the reference as below.

Application
Do you have display problems when you execute some specific programs / applications, such as the games or image processing software which occupies more system sources when it's running?
Suggested solution:
- Update the graphics driver, here you can learn more about How to search and download drivers.
- Check the hardware requirement whether your device is matching with this application to execute it. (from the official site of software)
Other FAQ and Solution
If the problem you met that doesn’t meet the above scenario, please refer to the following troubleshooting steps in order.
Perform CMOS clear (EC reset)
Try performing an EC (Embedded Controller) reset, RTC (Real-Time Clock) reset, or a hard reset to restore hardware to default settings and resolve battery charging issues.
Refer to this article for detailed steps: How to Reset the Embedded Controller (EC), Real-Time Clock (RTC), and Perform a Hard Reset.
If the issue persists after performing the CMOS clear (EC reset), proceed to the next troubleshooting step.
Reset the display settings
Try using the following Microsoft hotkeys: Windows logo key + Ctrl + Shift + B to reset the display settings.
If the problem persists, please continue the next troubleshooting step.
Restore BIOS settings
- Access the BIOS setup screen on the device.
When the device is not powered on, press and hold the [F2] key on the keyboard, then press the power button to turn on the device. Keep holding the [F2] key until the BIOS setup screen appears, then release the [F2] key. Learn more about How to enter the BIOS setup screen.
Note: Gaming handhelds need to press and hold the volume (-) key, then press the power button to turn on the device. - Once in the BIOS setup screen, please refer to the following articles to understand how to restore BIOS settings: How to restore BIOS settings.
- When reset the BIOS settings is completed, the device will restart and enter Windows. Please check the problem again. If the problem persists, please continue the next troubleshooting step.
Update BIOS, Windows packages, and drivers
Regularly updating BIOS, Windows, and drivers can enhance system stability and performance. Ensure that your device is using the latest versions. Learn more about updating BIOS:
How to update the BIOS version in Windows system
How to use EZ Flash to update the BIOS version
Learn more about updating Windows and drivers:
How to update drivers via System Update in MyASUS
If the problem persists after BIOS and Windows Update both have been updated to date, please continue the next troubleshooting step.
Use System Restore to Restore the System
If the issue started recently and you have previously created a system restore point or if the system has created an automatic restore point, you can try restoring the system to a point in time before the issue occurred. Learn more about How to restore the system from a created system restore point.
Perform a Windows System Restore
If all troubleshooting steps have been completed but the issue persists, back up your personal files and perform a system restore to return your device to its original configuration. Learn more: How to Restore (Reinstall) the System.
If you used an external monitor and No image shown on it
Except for the above steps, you also can try using the hotkey Windows logo key + P to switch the display mode. (select Duplicate or Extend mode)
Or, replace with shorter cable for monitor. Some cables might have problems with signal weakening, especially the VGA (D-SUB) cables with analog signal. Here you can learn more about How to fix Display problem on External monitors.
The display settings of color / color temperature
The screen color temperature might be a little bit different for each panel even if the manufacturing process is the same, so it’s normal. ASUS makes sure the manufactured products to meet the specification, so please feel free to use it.
In addition, you can use Splendid to adjust the display color of your screen, or purchase the PANTONE Validated products to get a more accurate color correction for your experience.
If you experience that the color or color temperature problems on your screen, you are able to adjust the related settings via Splendid. Here you can learn more about The Splendid feature in MyASUS Device Settings.
Q & A
Q1: Why is there white/blue blinking display on my screen after entering the lock screen or resume from sleep mode?
A1: It’s a normal Windows situation. If the color setting is set to the light mode on your system, there is a temporary white blinking display after entering the lock screen or resume from sleep mode. Otherwise, there is a temporary blue blinking display if it is a dark color mode.
If you still cannot resolve your problem, download MyASUS and try the System Diagnosis for troubleshooting. Click below!

Appendices: How to check the present version of driver
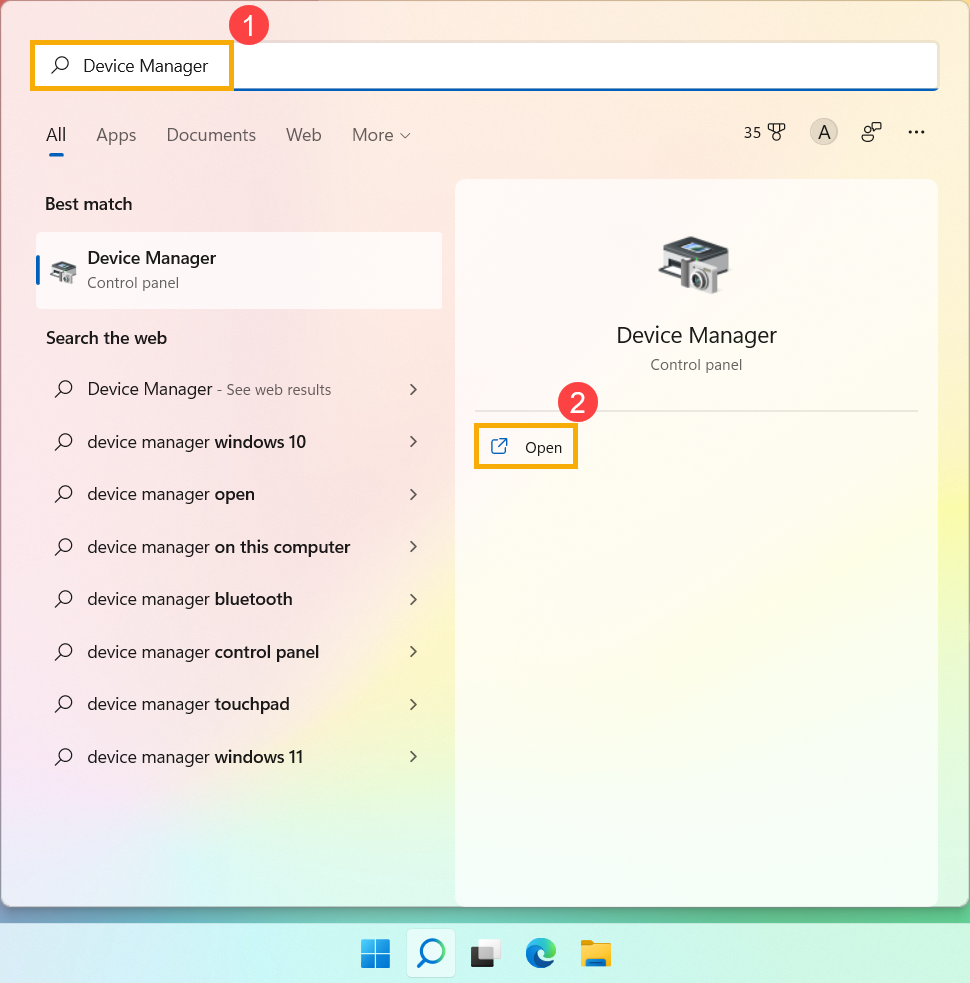
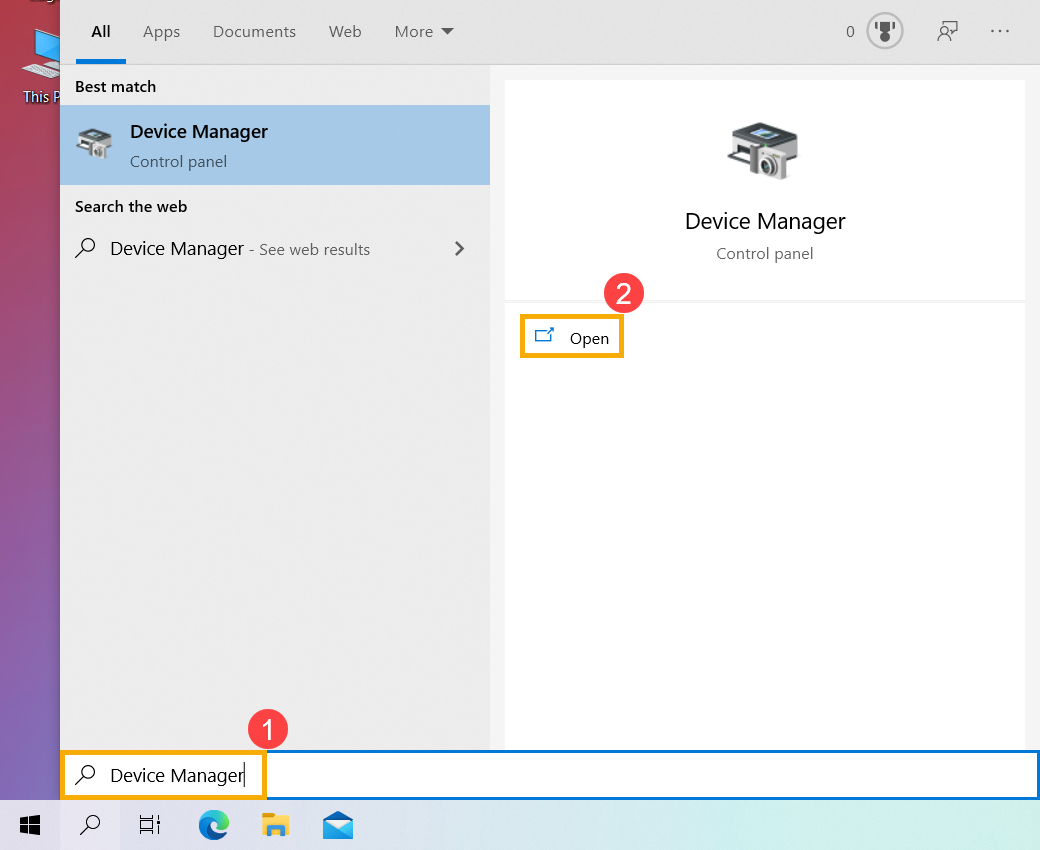
- Type and search [Device Manager] in the Windows search bar①, then click [Open]②. (The left-side search illustration below is in Windows 11, and the right-side is Windows 10.)
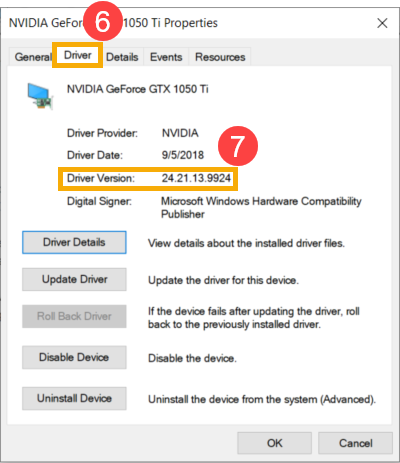
- Click the arrow next to [Display adapters]③, then right-click [NVIDIA GeForce GTX 1050 Ti]④ and select [Properties]⑤.
Note: The device name may be different based on different models.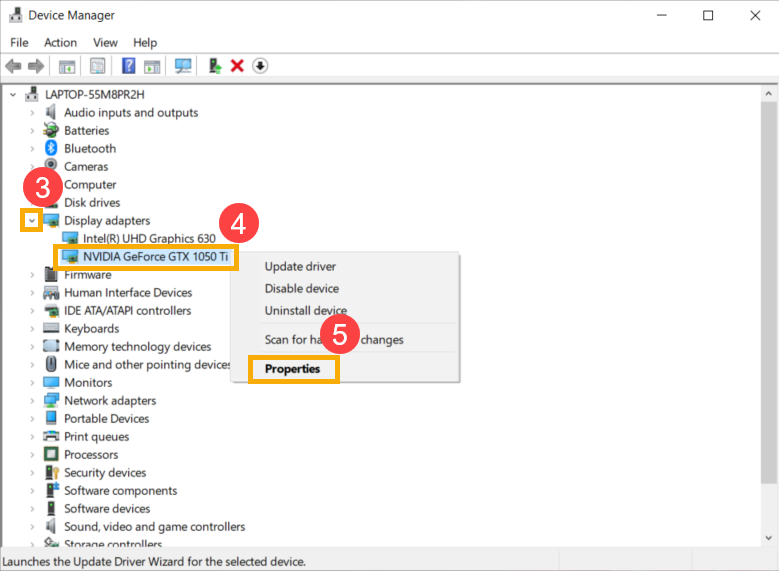
- Click [Driver]⑥, then you can view the [Driver version]⑦.
- Whether the version number is the same driver as the one on the ASUS support site. Here you can learn more about How to search and download drivers.
Note: The above pictures are just for reference, and it may be various depending on the different versions.