[MiniPC] How to Update ASUS Ascent GX10 OS
***This SOP is for reference only. Please refer to and comply with the latest OS version.***
After updating your machine, check if the update is successful, please refer to the Check FW version in BIOS.
Check FW version in BIOS
1. Press and hold [Del] during startup to access the BIOS.
2. Enter Advanced.

3. Enter Firmware Version Information.

4. Check the FW version.

Update OS on the DGX Dashboard (For online user)
1. Log in GX10 system.

2. Enter Ubuntu Start Menu.

3. Find and Enter Nvidia DGX Dashboard.

4. Log in with system user account.

5. Find and enter settings.

6. Click Update button.

7. Click Update Now.

8. Wait for the update to finish.

Attention: If the Dashboard update fails and the SOC/EC/PD/TME firmware remains on the previous version, please try the items in "Update with commands in Terminal".
Update with commands in Terminal (For offline user)
1. Download the FW compressed package from ASUS support site.
2. Unzip the FW compressed package.
3. Open the Terminal in unzipped folder.
SOC Firmware
1. Execute 'sudo su'.
2. Enter the password to the machine.
3. Execute'./capsule_update.sh bsp_v11_socfw302_bios_0101_ec_2.66.3.3_signed.cap'.
4. Wait for the update to finish.

EC Firmware
1. Execute 'sudo su'.
2. Enter the password to the machine.
3. Execute './capsule_update.sh ec_2.66.3.3_signed.cap'.
4. Wait for the update to finish.

PD Firmware
1. Execute 'sudo su'.
2. Enter the password to the machine.
3. Execute './capsule_update.sh usbpd_50.cap'.
4. Wait for the update to finish.
5. Reboot from Ubnuntu manually.
6. Open the Terminal in unzipped folder.
7. Execute 'sudo su'.
8. Enter the password to the machine.
9. Execute './capsule_update.sh usbpd_50.cap'.
10. Wait for the update to finish.

TPM Firmware
1. Execute 'sudo su'.
2. Enter the password to the machine.
3. Execute './capsule_update.sh tpm_7.2.4.1.cap'.
4. Wait for the update to finish.

Update with bootable USB (For cannot access OS user)
Notice: We recommend that you download the appropriate USB Formatting Utility for your OS.
Notice: This process will erase your USB drive. Please back up your files first.
1. Download the USB Formatting Utility.
2. Download the iso file from ASUS support site.
3. Write the downloaded iso to a USB drive to create the installation media.
4. Insert the USB drive into your GX10.
5. Press and hold [Del] during startup to access the BIOS.
6. Select Boot > Boot Option #1 > UEFI: USB USB Hard Drive, Partition 1.

7. Press [F4] to save the changes and exit.

8. Select DGX Spark Installation Options.

9. Select Install DGX OS 7.2.3 for DGX Spark.
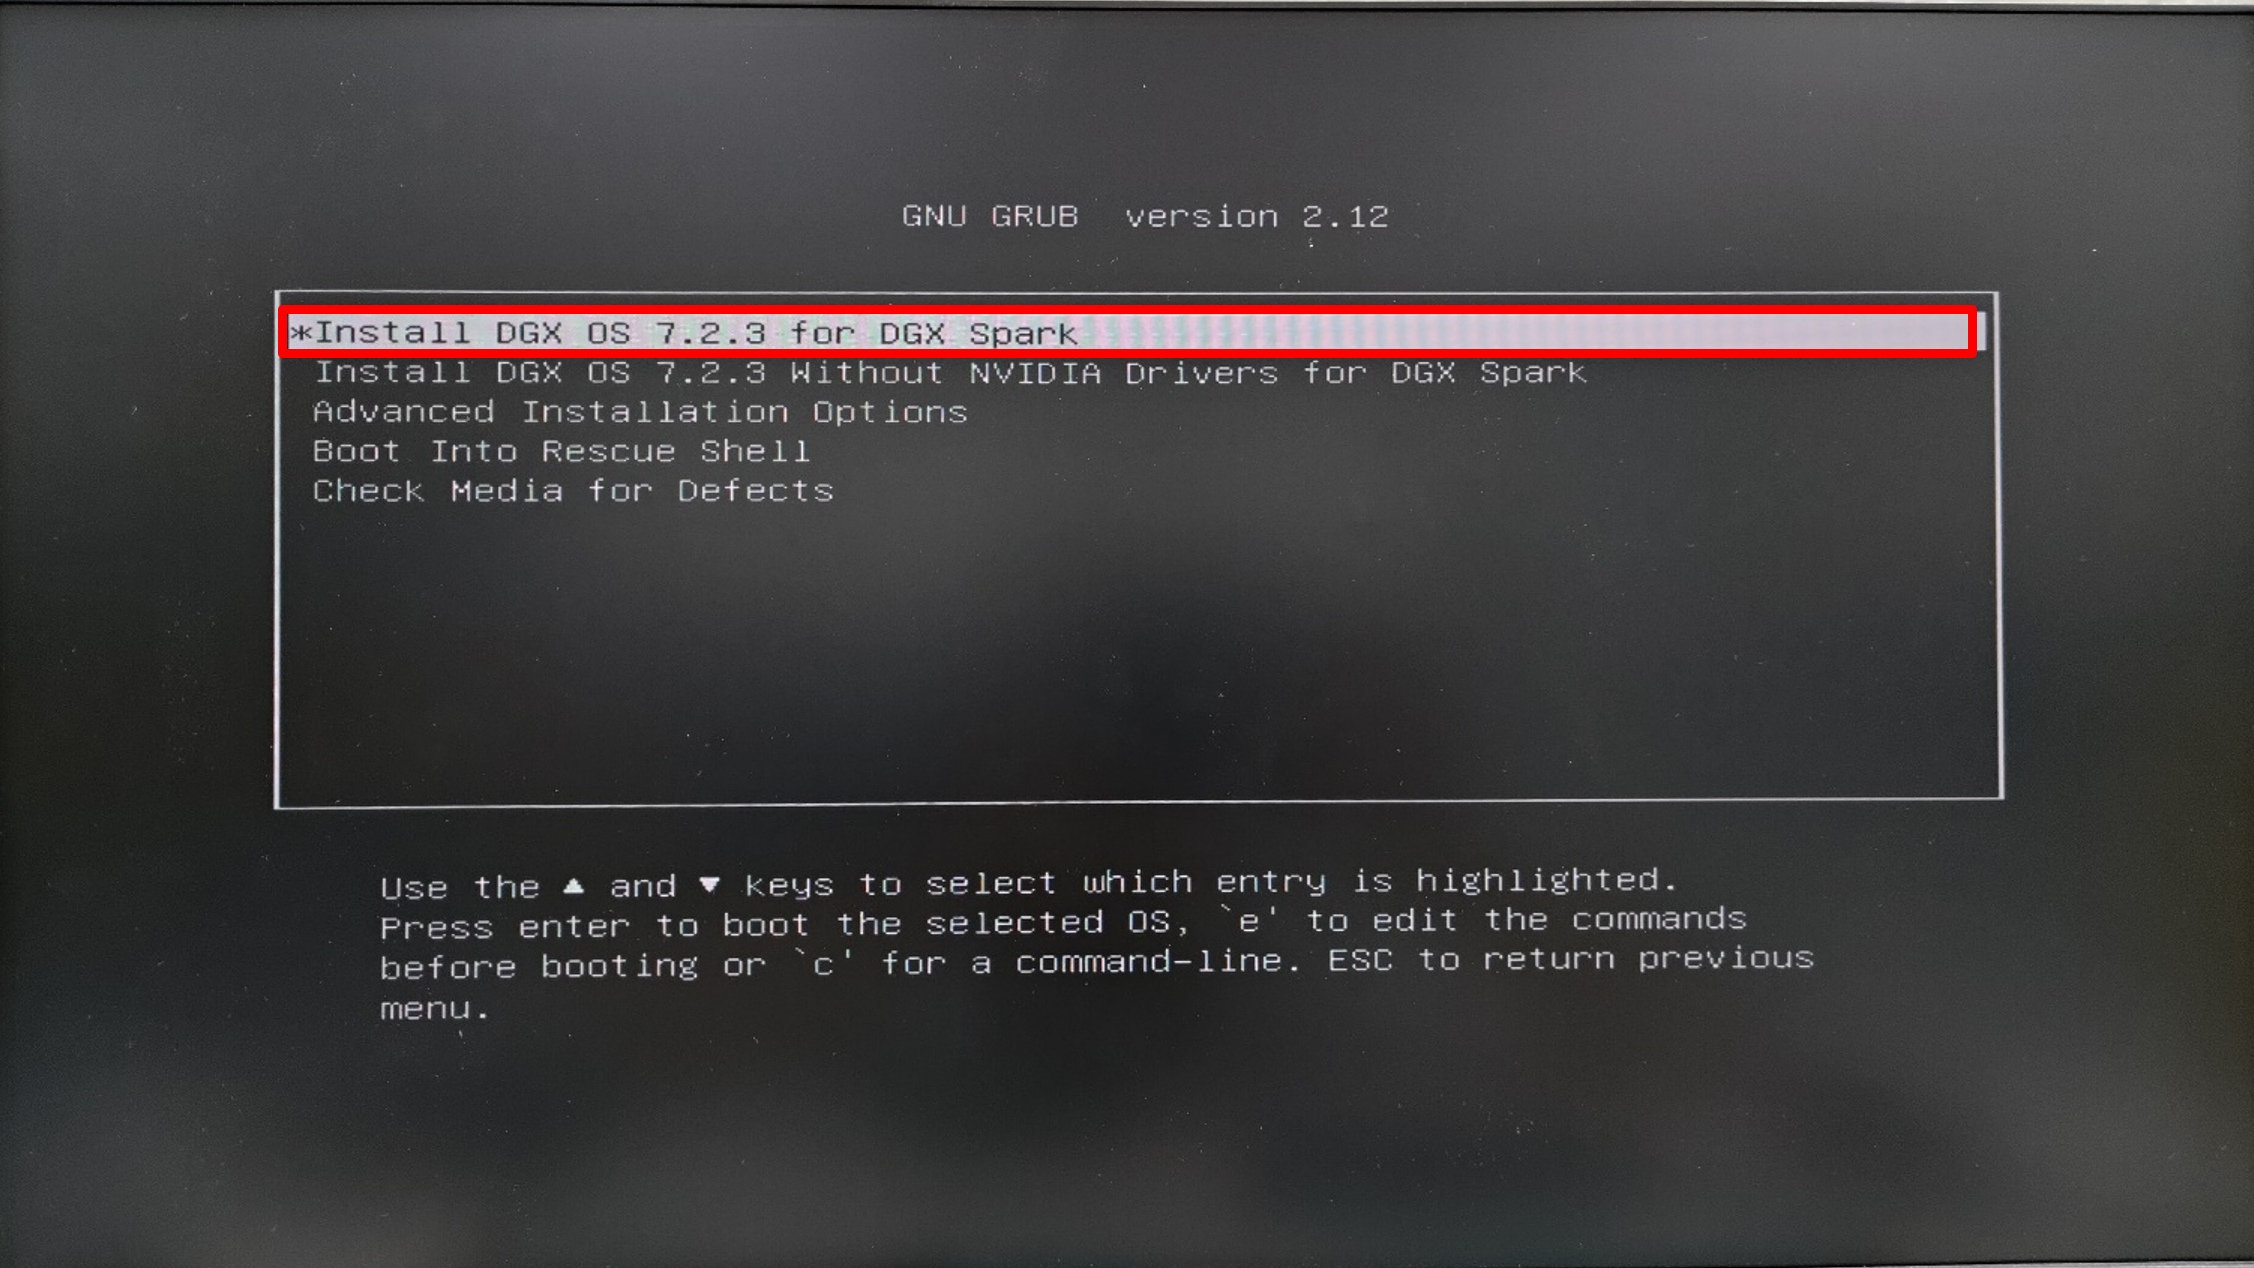
10. Wait for the OS installation to finish.
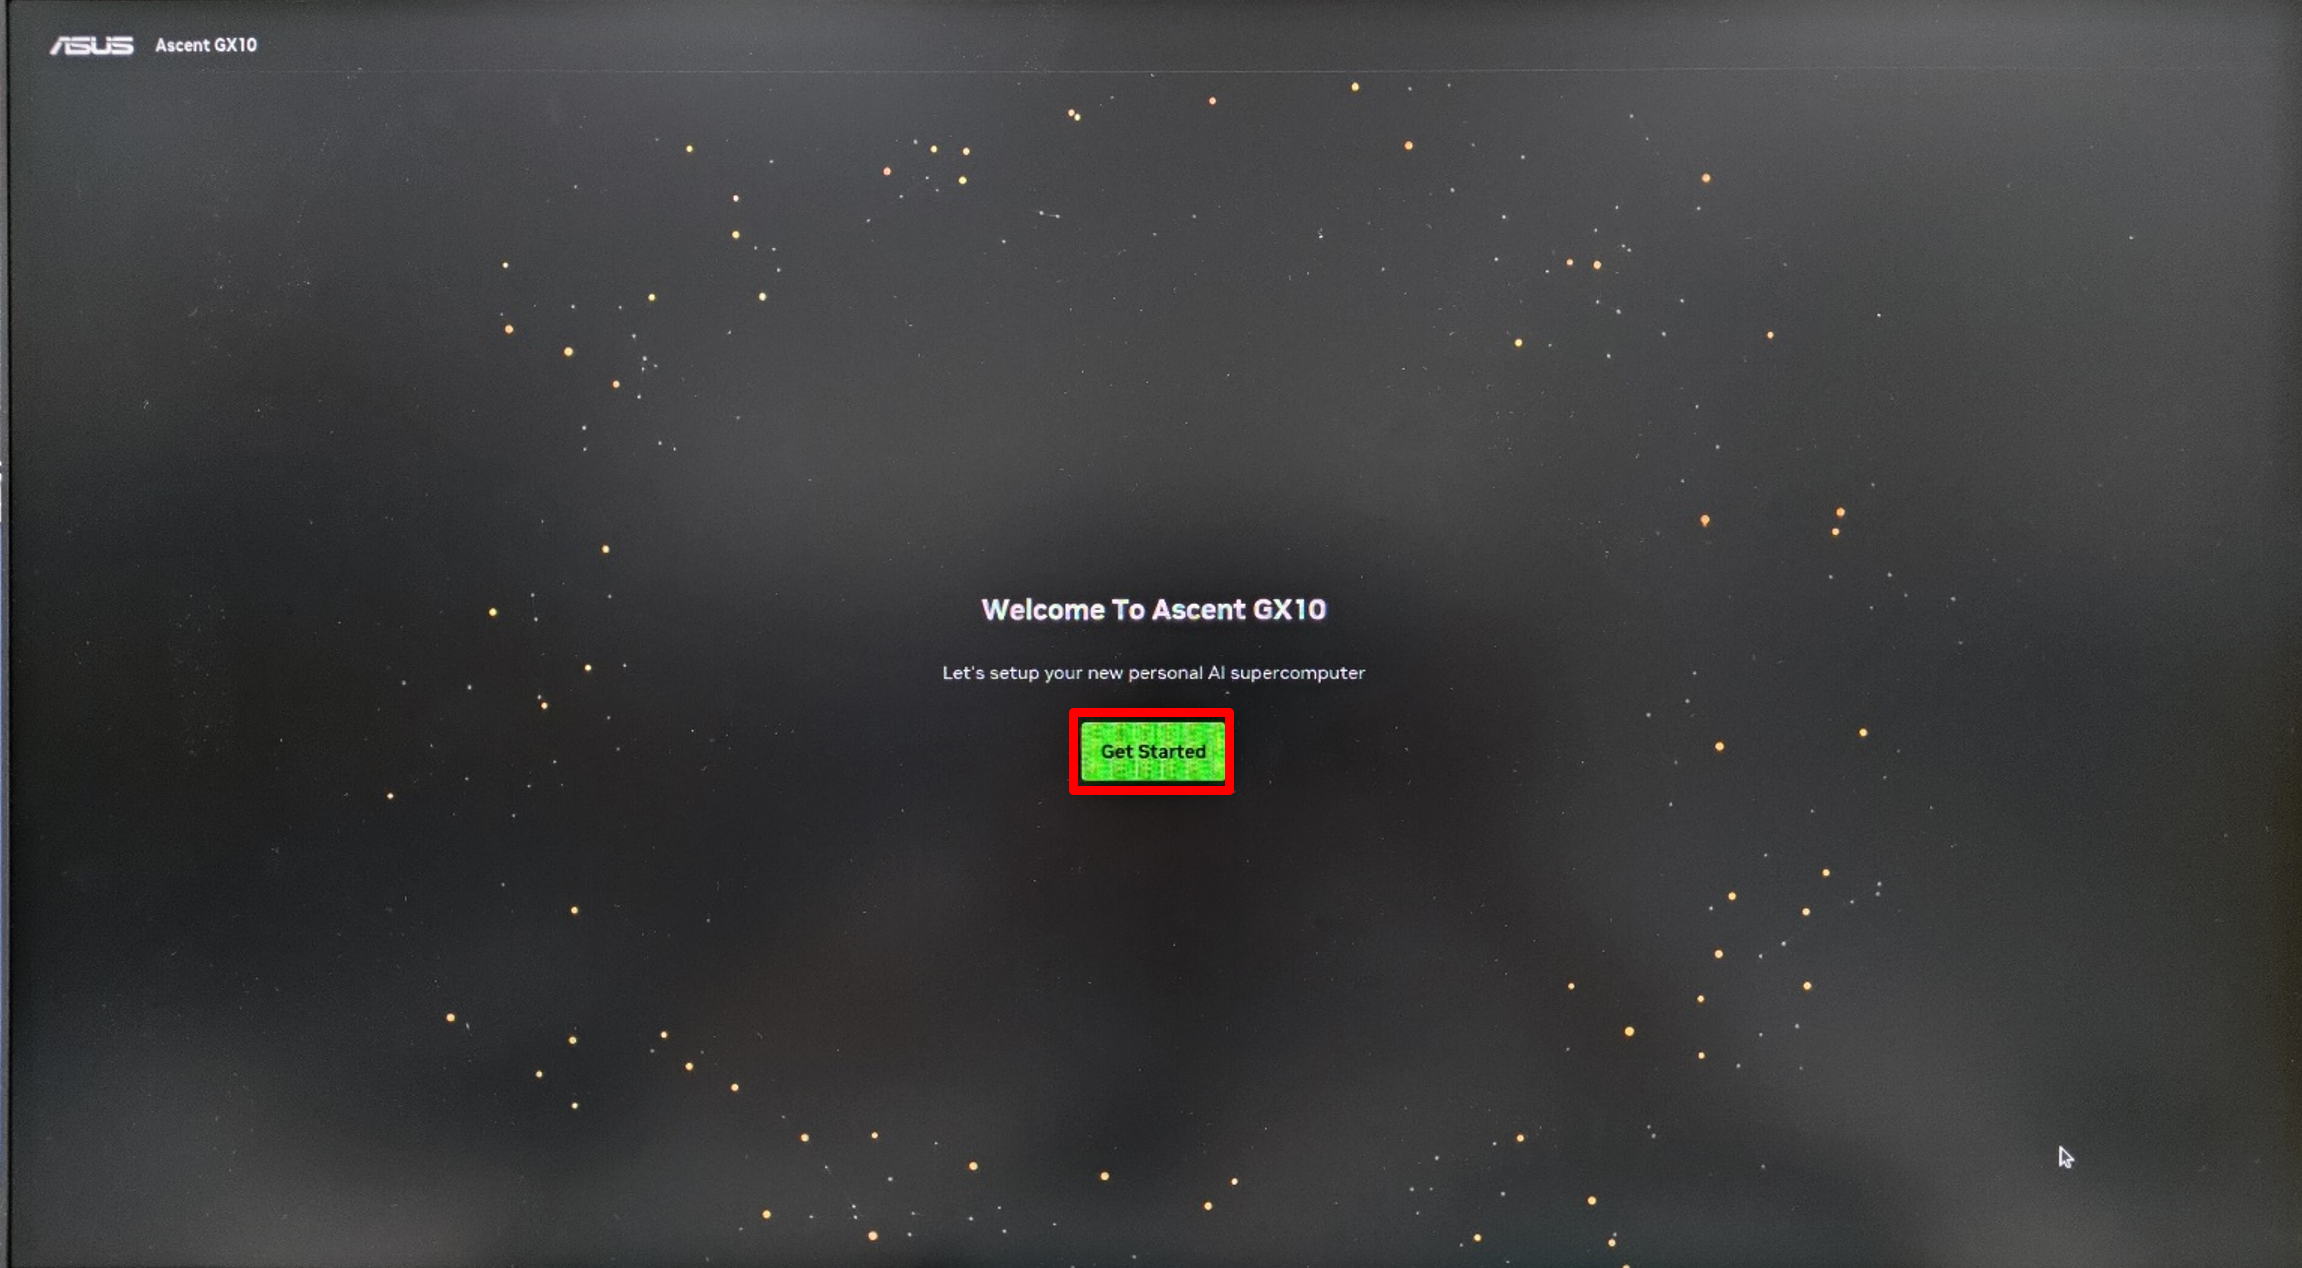
.
11. Click Get Started to start to set the OS.
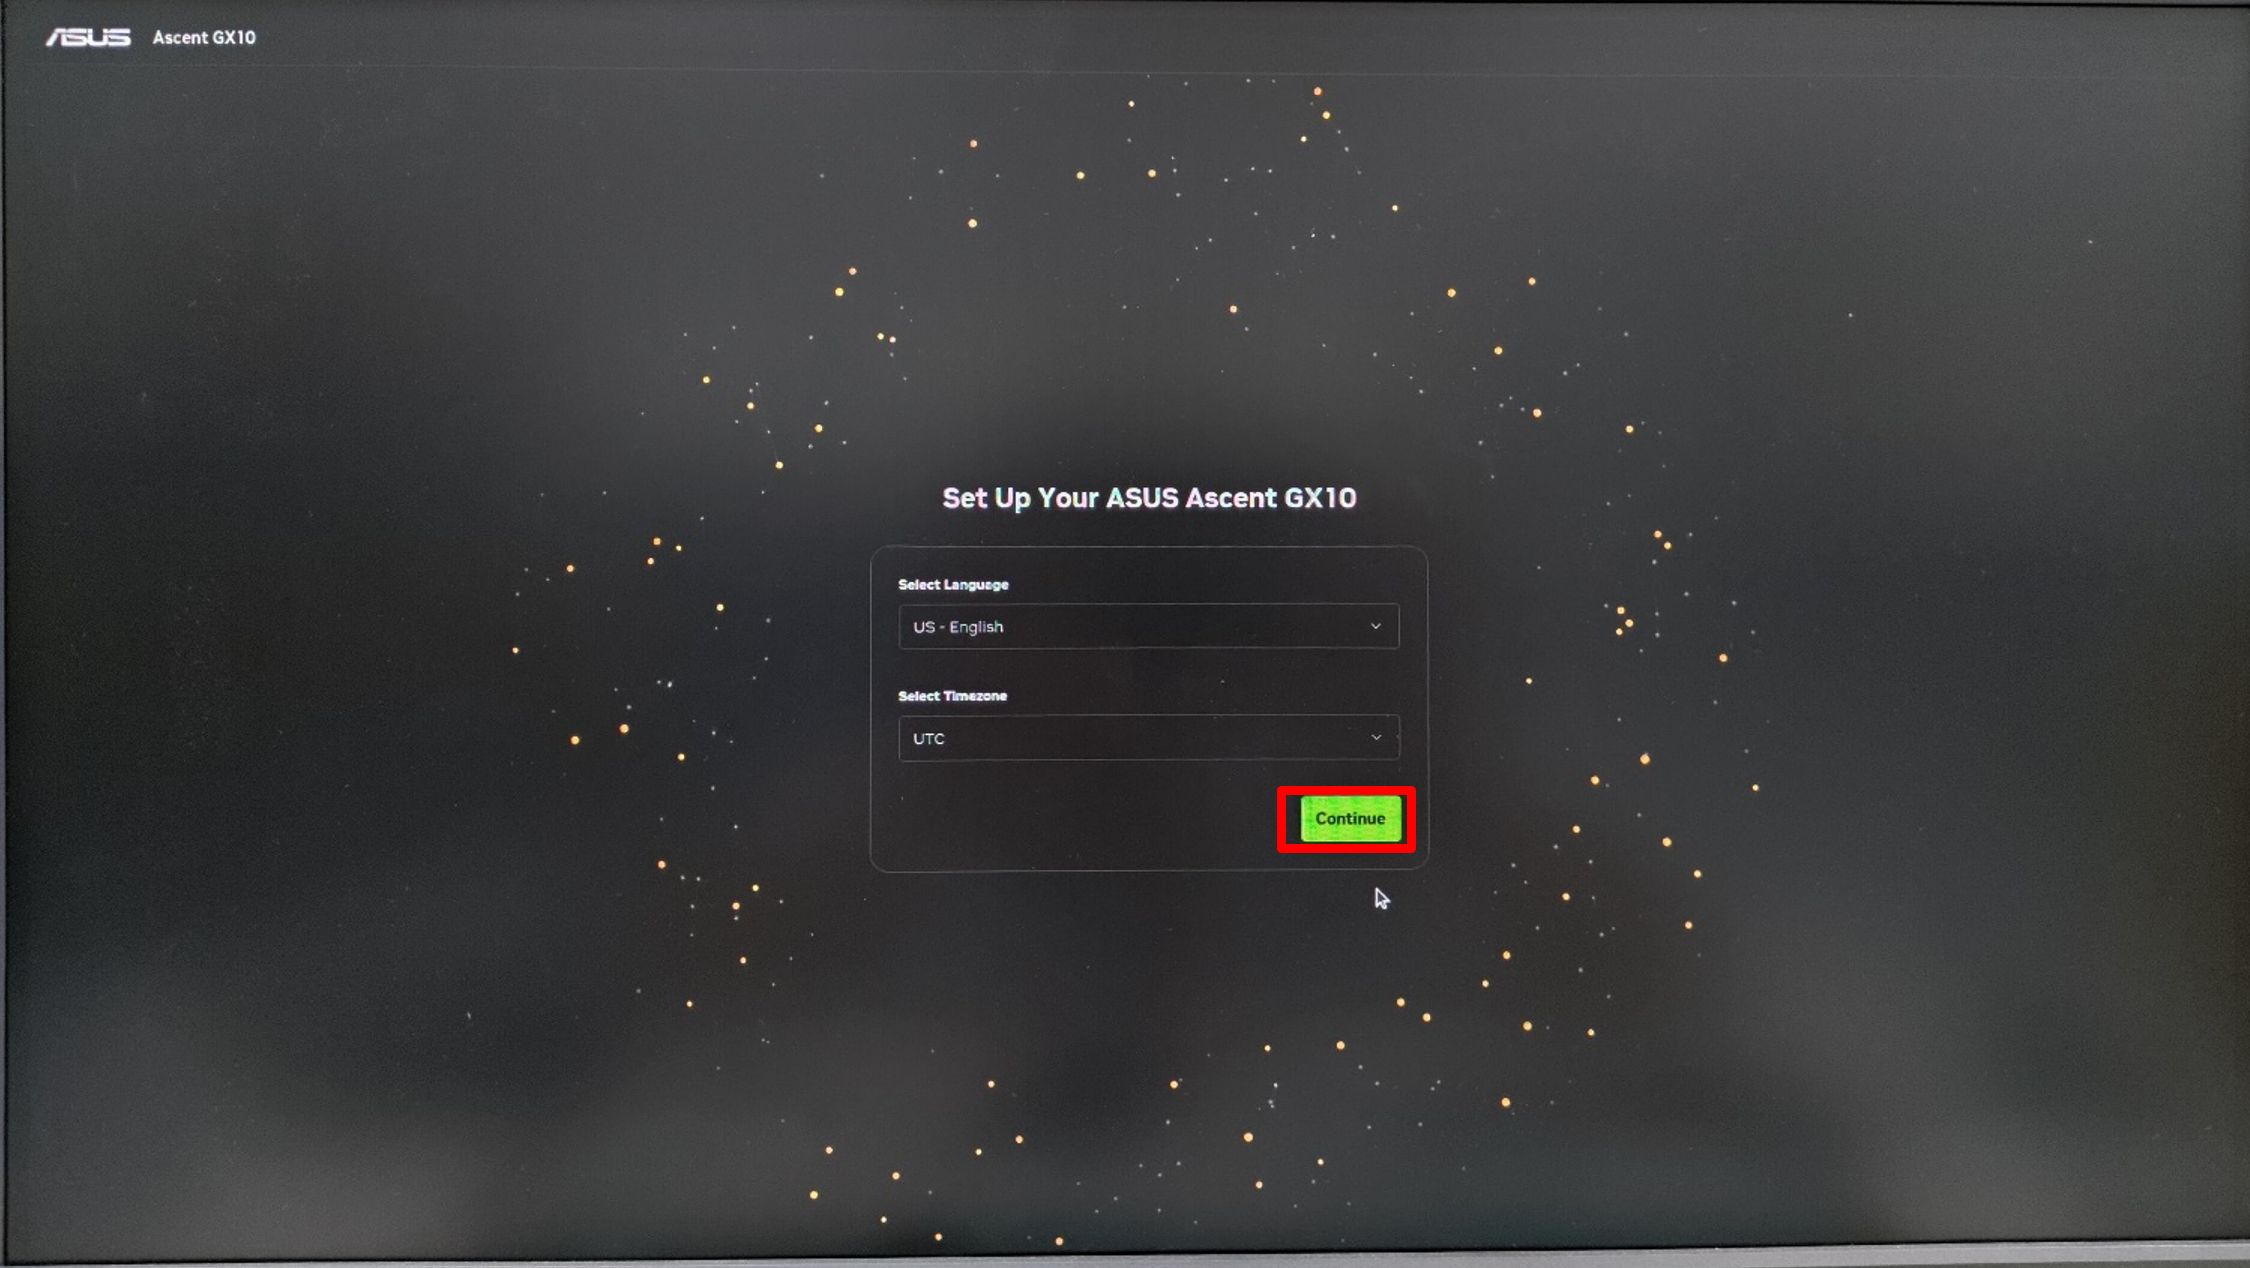
12. Select Language and Timezone and click Continue.
13. Select corresponding Keyboard Layout and click Continue.

14. Click Accept.

15. Create Username & Password and click Continue.

16. Select the terms of NVIDIA improvement and click Continue.

17. Select and connect to Wi-Fi.

18. Wait for Wi-Fi connection to finish.

19. Wait for OS setting to finish.
